


(Good Photos by Dave Nutting – Other Photos: The Author) – Last we left you with Project Cellar Dweller, our budget “big block” father-son go kart build the chassis had been dragged out into the snow and painted. That’s how long ago it was there was snow on the ground. After the painting was done, we ordered parts and then waited for them to show up. Then racing season started and with it my presence at the homestead dropped drastically. The good news is that Tom and I continued to chip away at Cellar Dweller and we’re proud to report that in this installment you’ll not only see how the Cellar Dweller came together but also the results of our first full day out having fun with it. I’m sincerely thankful to ace photographer Dave Nutting who suggested that we shoot the thing like a full car feature. We did and the photos are spectacular.
In review, my son Tom wanted to buy a go-kart and he had saved about $500 to do just that. Before he had the chance to pull the trigger, we got offered a free chassis by my pal Jon Sandahl at Tube Chassis Designz, the awesome chassis shop proprietor. Tom was presented with the choice of spending $500 and buying someone’s used kart of spending about $250 and building a hot rod kart with that chassis as our base and a Robin engine that makes something like 9hp that I had sitting under my work bench for just such an occasion. Wisely, he chose the BangShifty route and the build began with stripping the Pro Kart chassis bare and then painting it a shade of orange Tom picked out. It should be noted that Tom made all the calls on this thing and spent his own money. It was a great lesson for a nine year old and the payoff has me smiling inside and out to this very moment.
Now that you are up to speed, let’s pick up where we left off and see how Project Cellar Dweller came together and has one nine year old boy feeling like a combo of Don Garlits, Ken Block, and Richard Petty…at once.
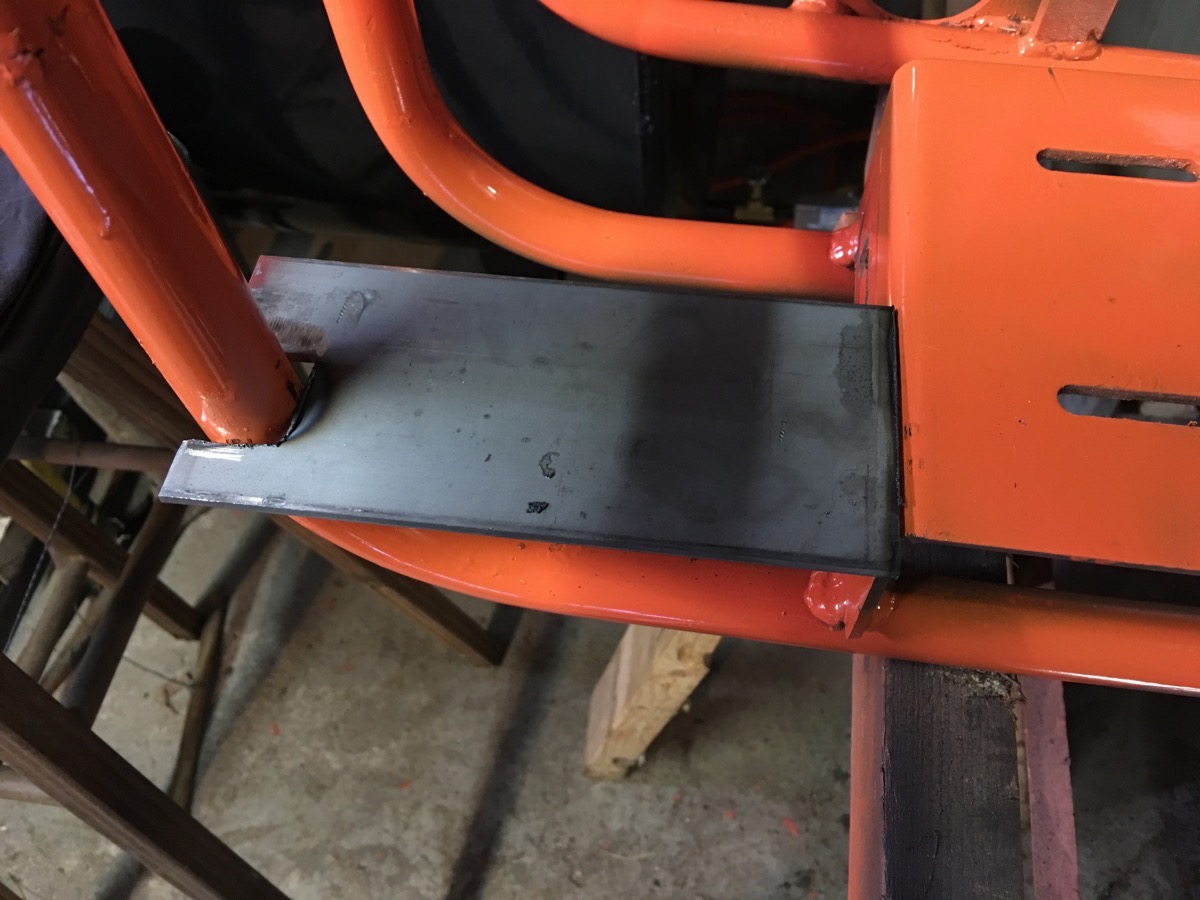
When we last left you we had the chassis painted and saw that our “big block” Robin engine was not going to fit on the factory mounting pad that previously housed a 3.5hp engine. To remedy that, I made some plates that would provide a spot for the rear engine bolts to be anchored to.
Pretty simple stuff because frankly that’s my skill level but it cost zero dollars to make these because I already had the piece of flat stock in my basement from some other bad idea in the past.
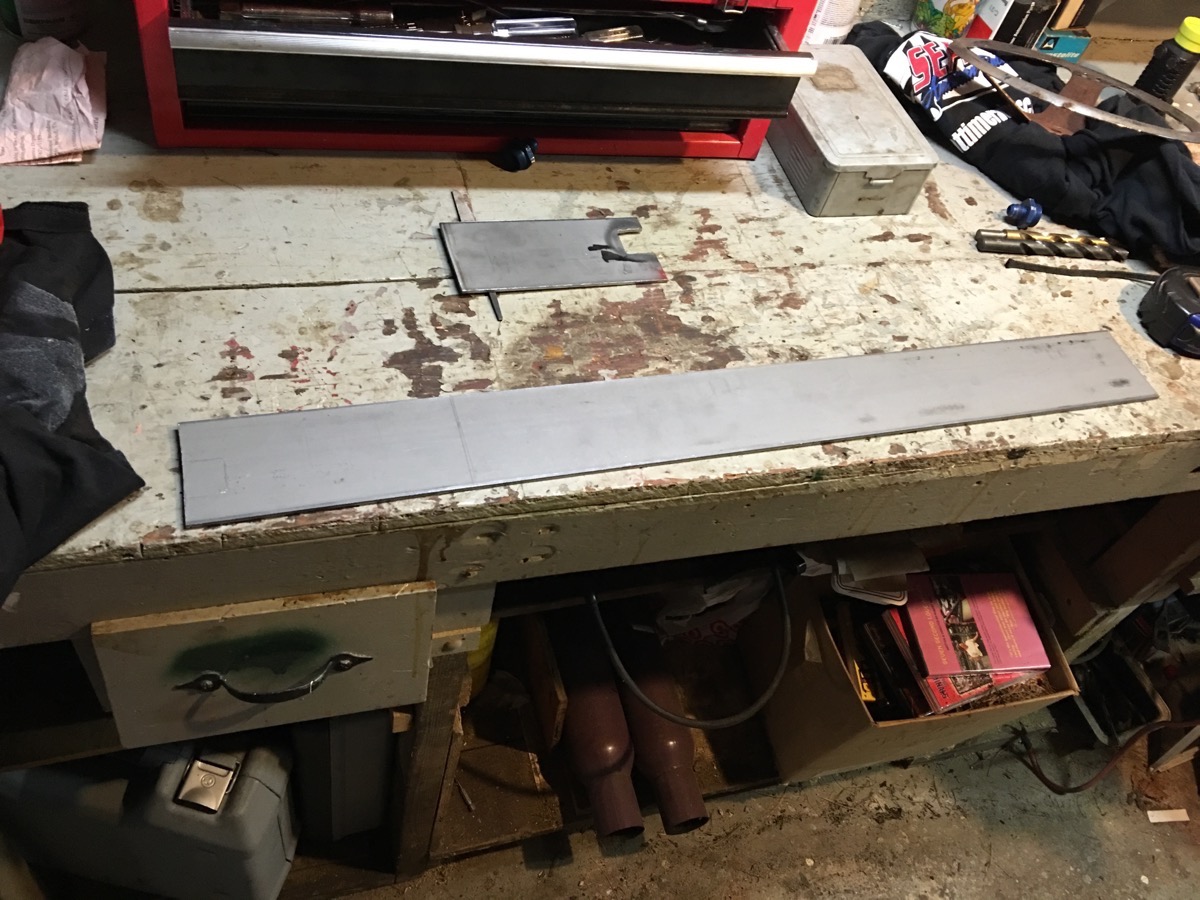
I cut them out of this piece and then just used a cut off wheel and a grinder to make the notches that fit around the rear chassis bars. Crude? Yes it is.
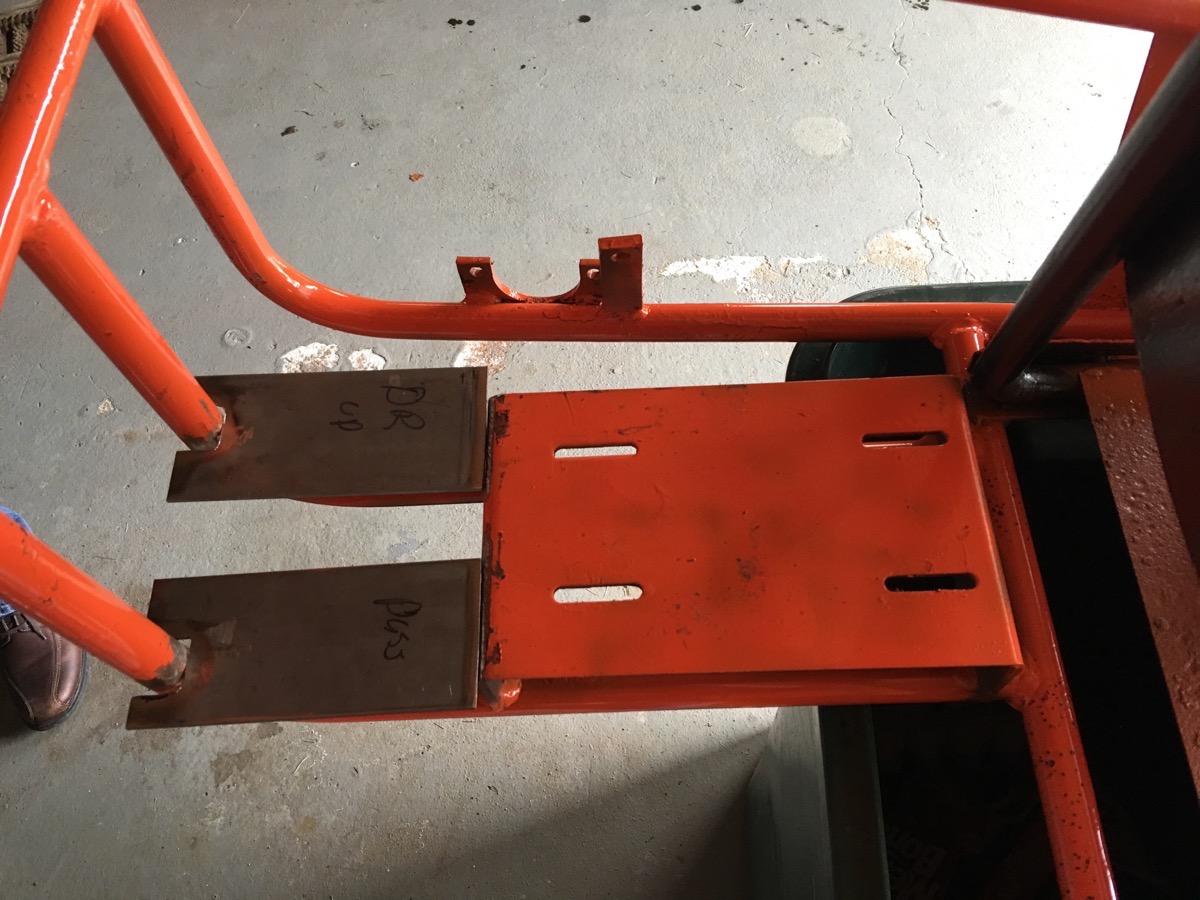
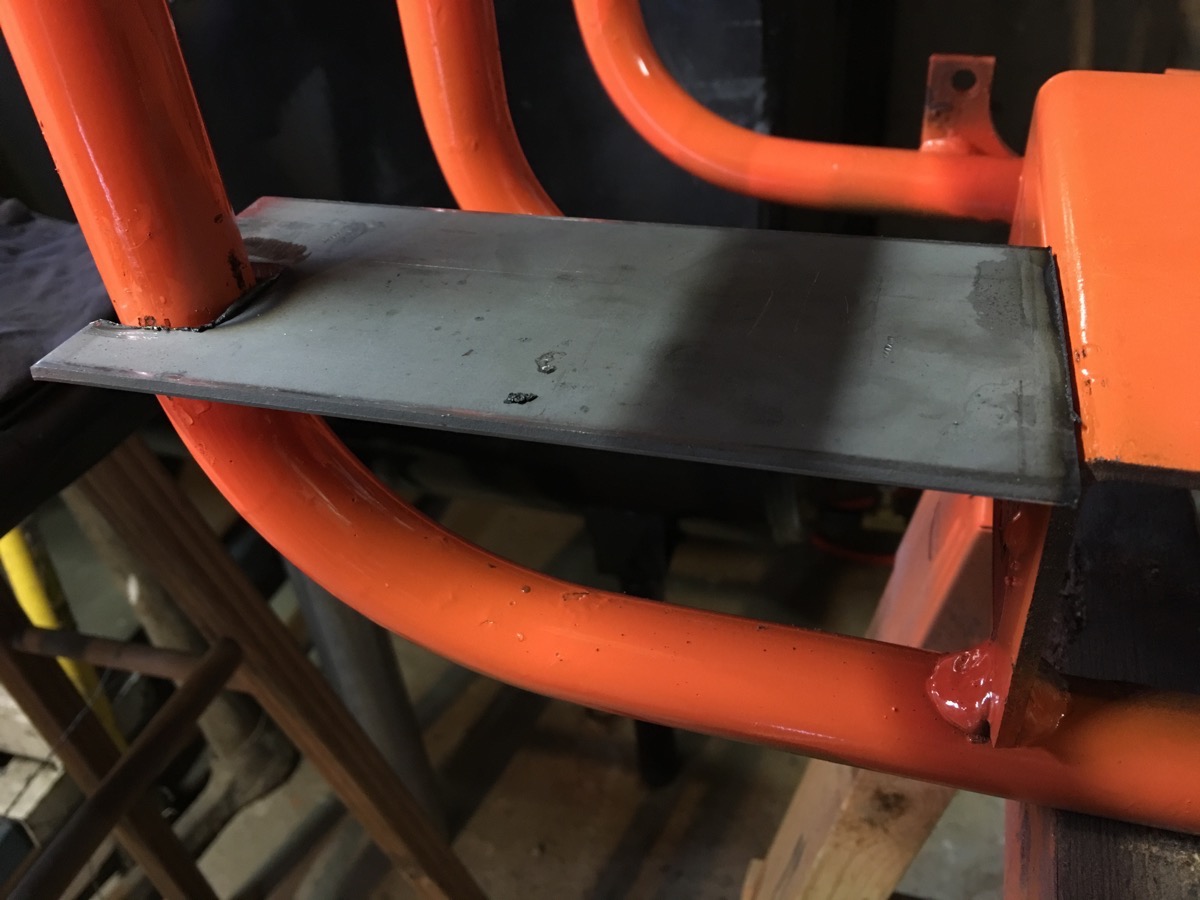
Laid in place before tacking them down. This is racy looking stuff, right?
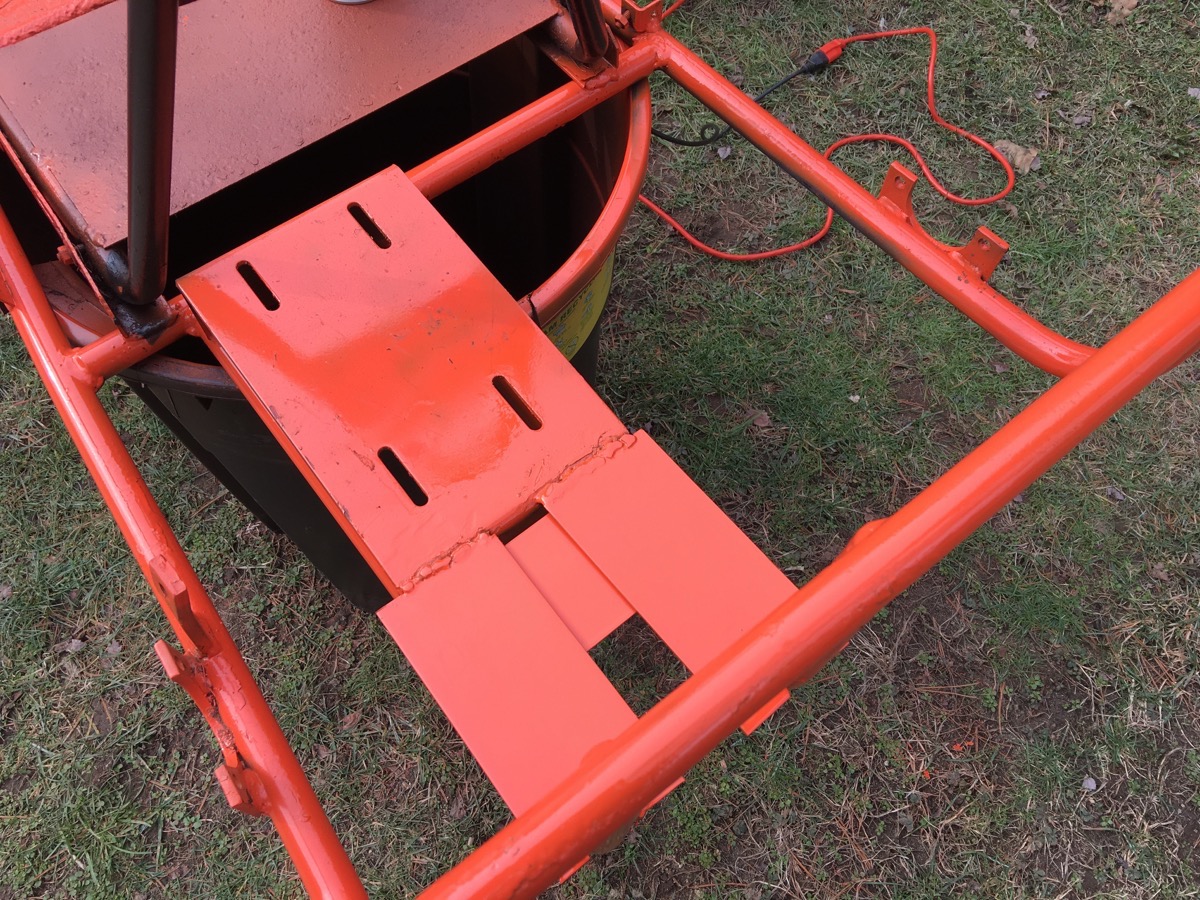
Paint and a grinder make my welds look as though they were not done by an ape…or maybe they still do. Either way, I added a plate on the bottom to tie all of it together.

Here’s the drivetrain as it arrived in the mail. We went with a torque converter as opposed to a standard issue clutch. The bag contains the bearings and the lock collars to locate stuff on the axle. The gear is a racy aluminum piece and the brake is a band style that you can see. The kart uses a 1″ diameter solid steel axle.

Note all the holes in the torque converter. You’ll see why those are important in a few minutes.

As I mentioned earlier, this was a fantastic project to do with my son because he learned a ton. Just seeing him opening the parts HE bought with his own money was a trip. We all feel the same way opening those boxes, 9 or 99 years old.

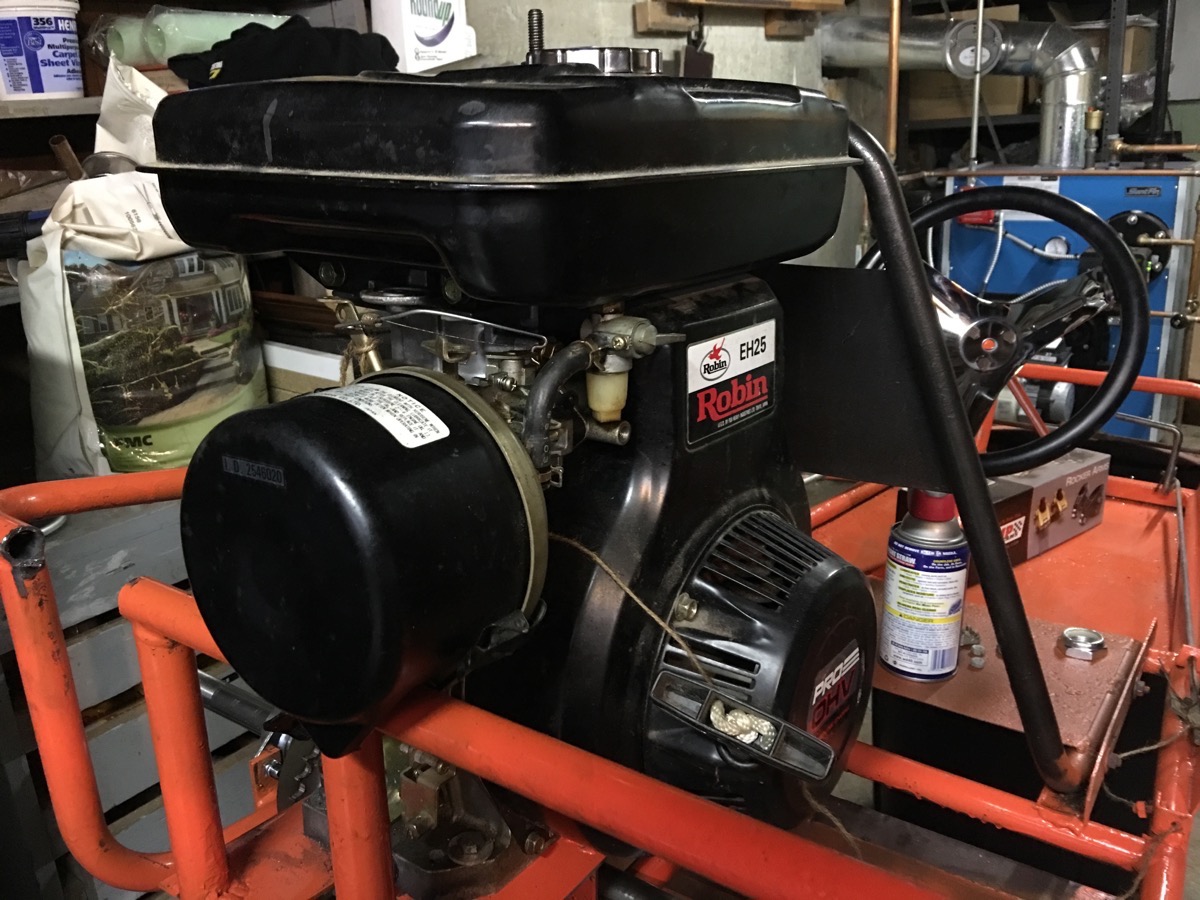
So there’s the Robin engine that will provide the go power for Project Cellar Dweller. It was already a tight fit in the chassis as it were but the addition of the torque converter may make things even worse on that front.

The EH25 isn’t the most common go-kart engine but with all the bolt hole provisions on the converter we thought that we’d be fine. We kind of were.
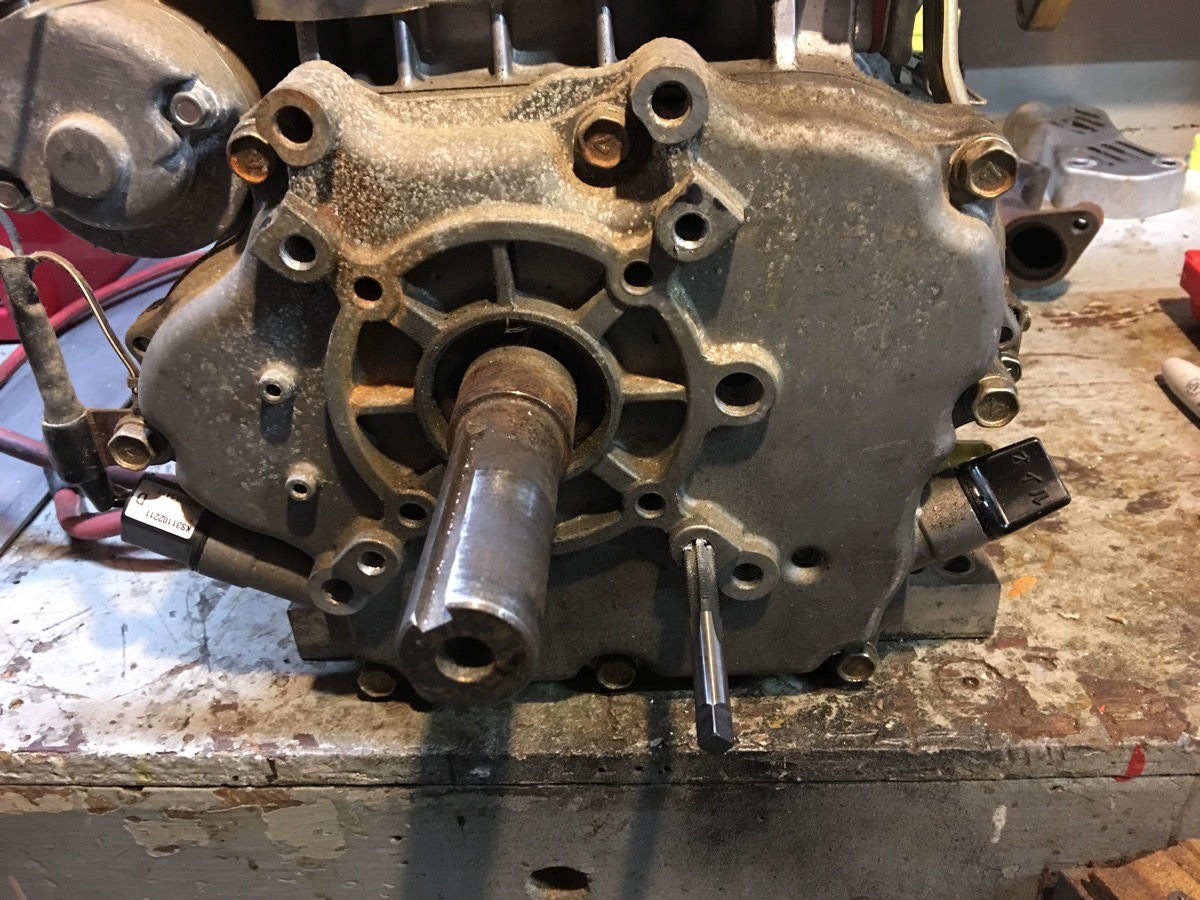
The holes that lined up where we needed them to were actually smooth and untapped. Thankfully my father in law has a killer tap and die set and we put it to use, carefully cutting some threads.

I was feeling smug when I mounted the converter high and tight and everything fit in the chassis. Like most times I am feeling smug, it was a fleeting moment.
I thought I really had it made here and would actually get away with not having to modify the chassis at all. It would have been a major coup but it was not to be. This steep angle resulted in the chain running into stuff and that plan was shot out of the sky.

We had the engine in and out a ton when we were lining stuff up and getting everything right. Here was the last photo I took before pulling it again to work on the converter placement.
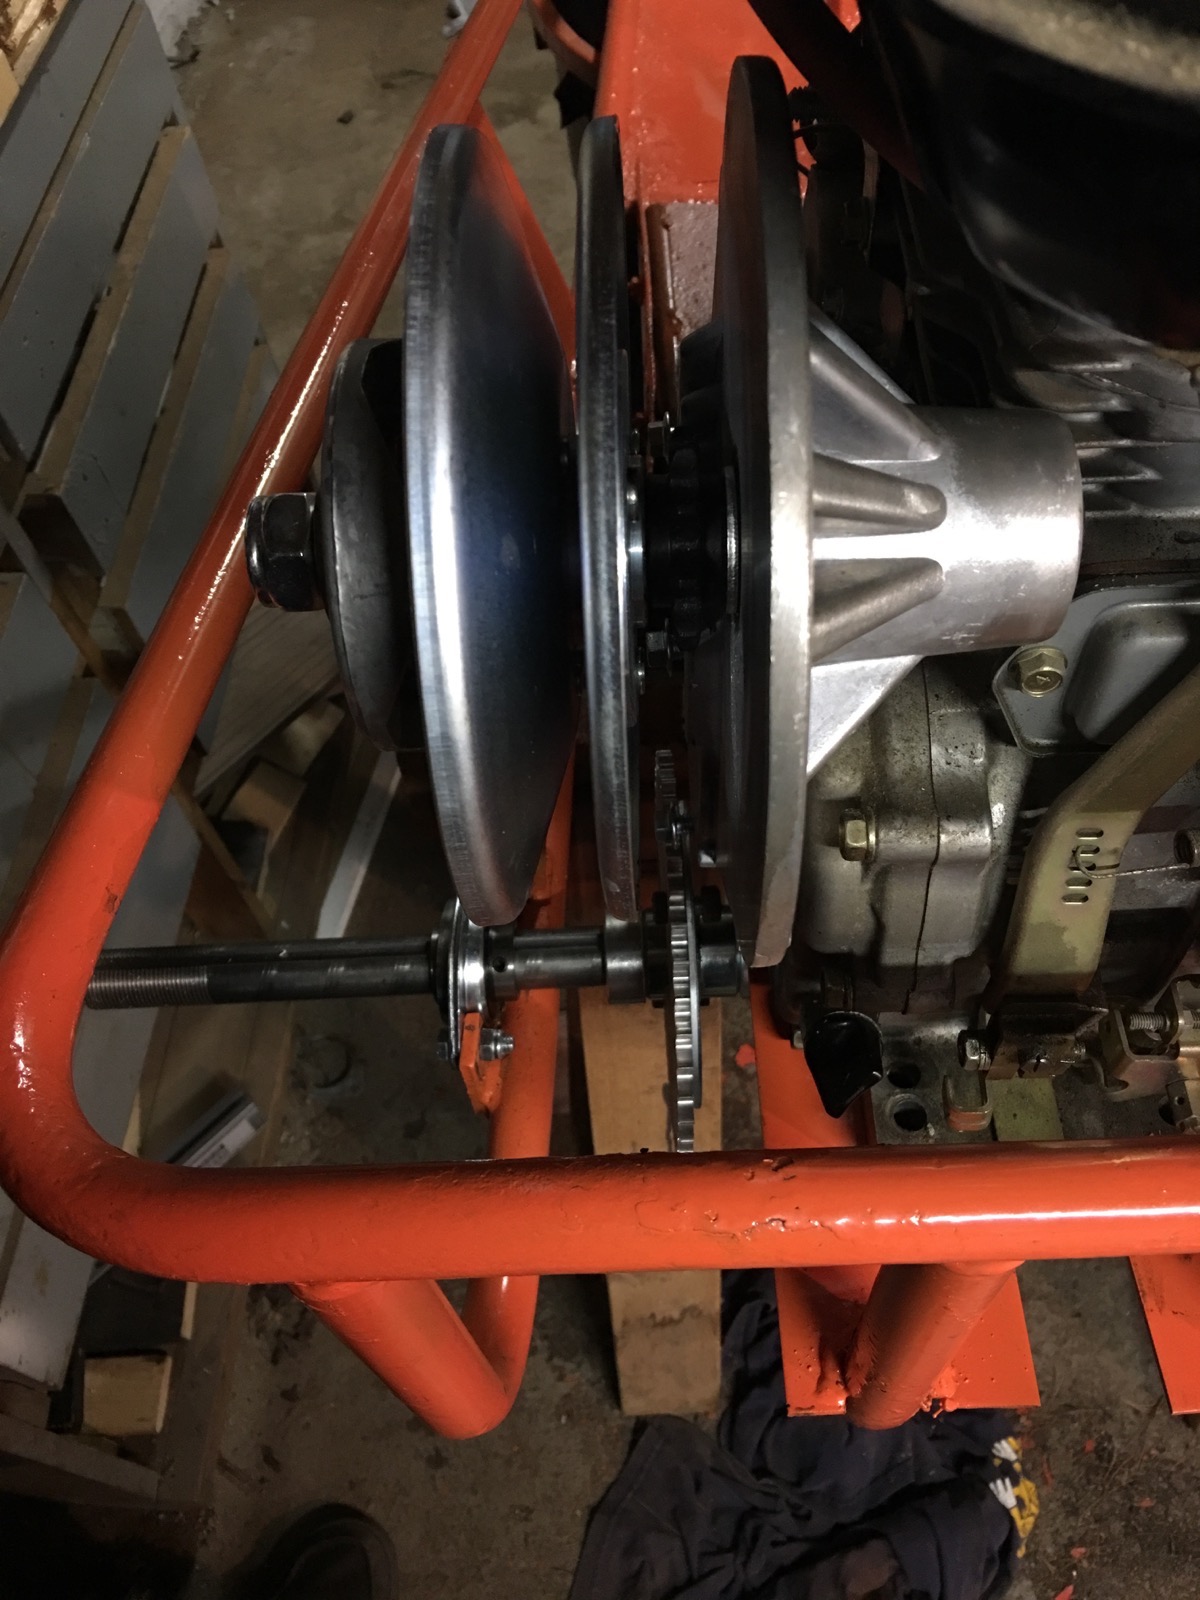
A few minutes with the hack saw and four bolts later, we had the final mounting position for the converter drive. Admittedly it looks kind of cool with stuff “hanging out” of the chassis.
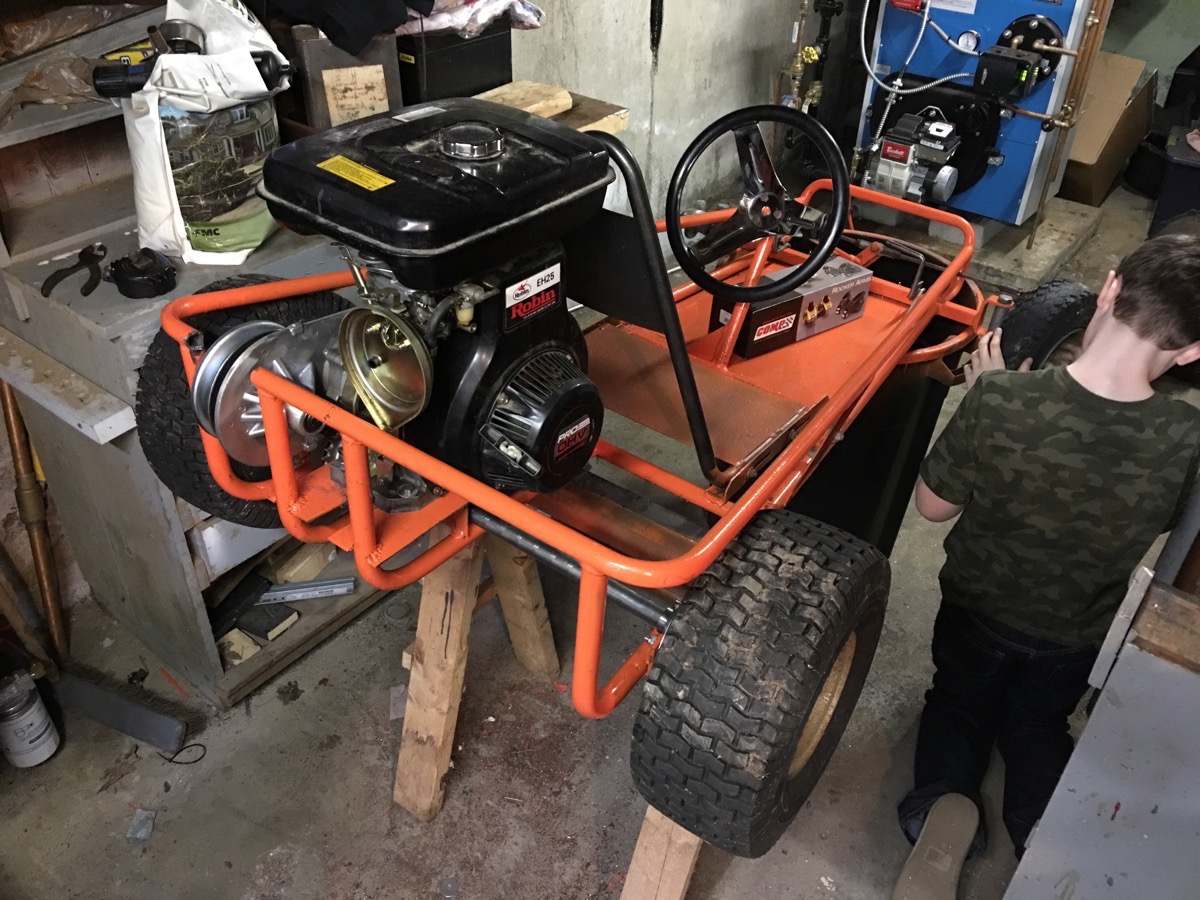
Bolting the engine down in what would be its final resting place was a cool moment. My expert mod on the factory air cleaner allowed it to clear the rear of the chassis and frankly I think it looks cool there.

Once the engine was locked down, we installed the axle, the new bearings, the sprocket, axle, chain, and hubs. The chassis had a ton of flex so it was going to need bracing before anyone rode it. We were able to reuse the entire front end after cleaning up the parts and pieces we well as the tires. The idea was to spend as little as possible and that’s what we got away with here.
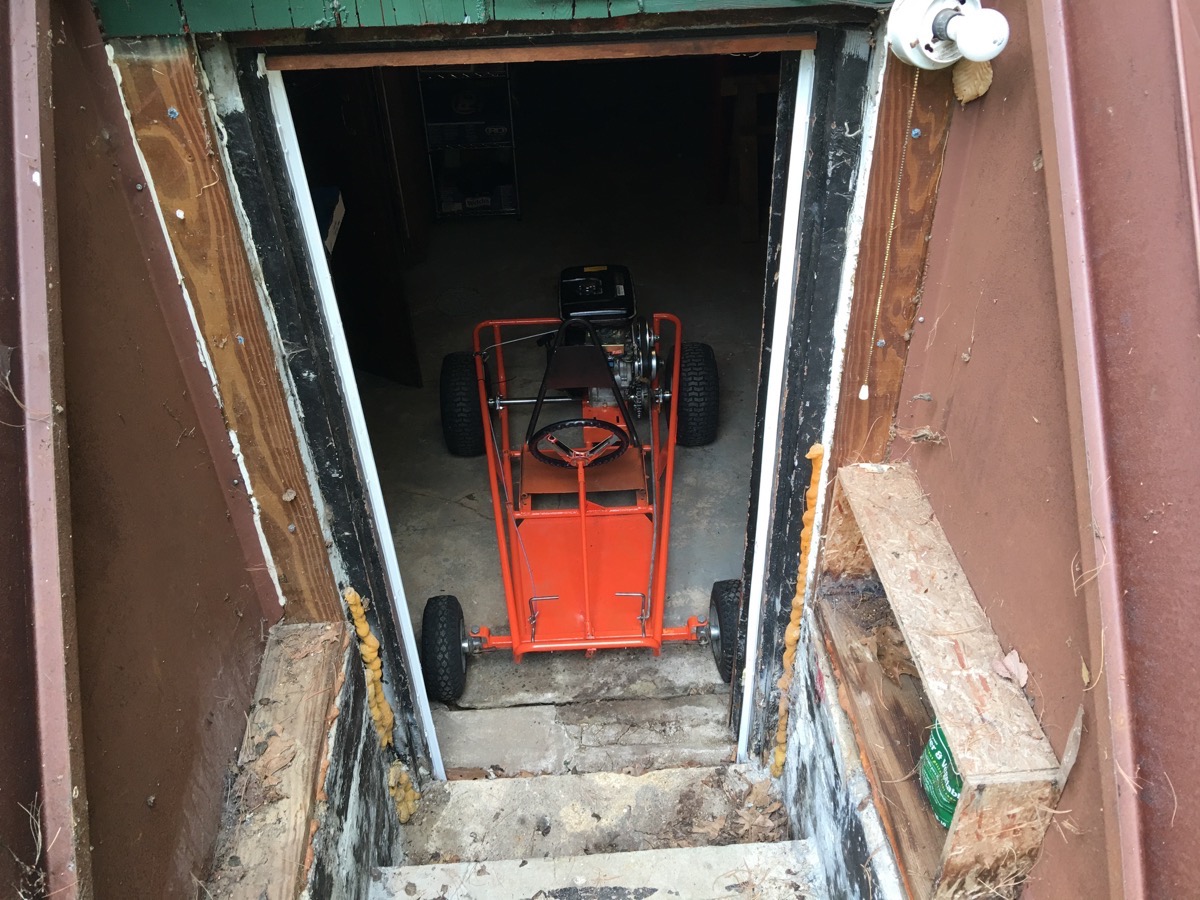
Remember that story about Henry Ford having to knock the wall down to get his first Quadricycle out of his shop? Creative lifting and some swearing freed the Cellar Dweller from it’s subterranean cave.
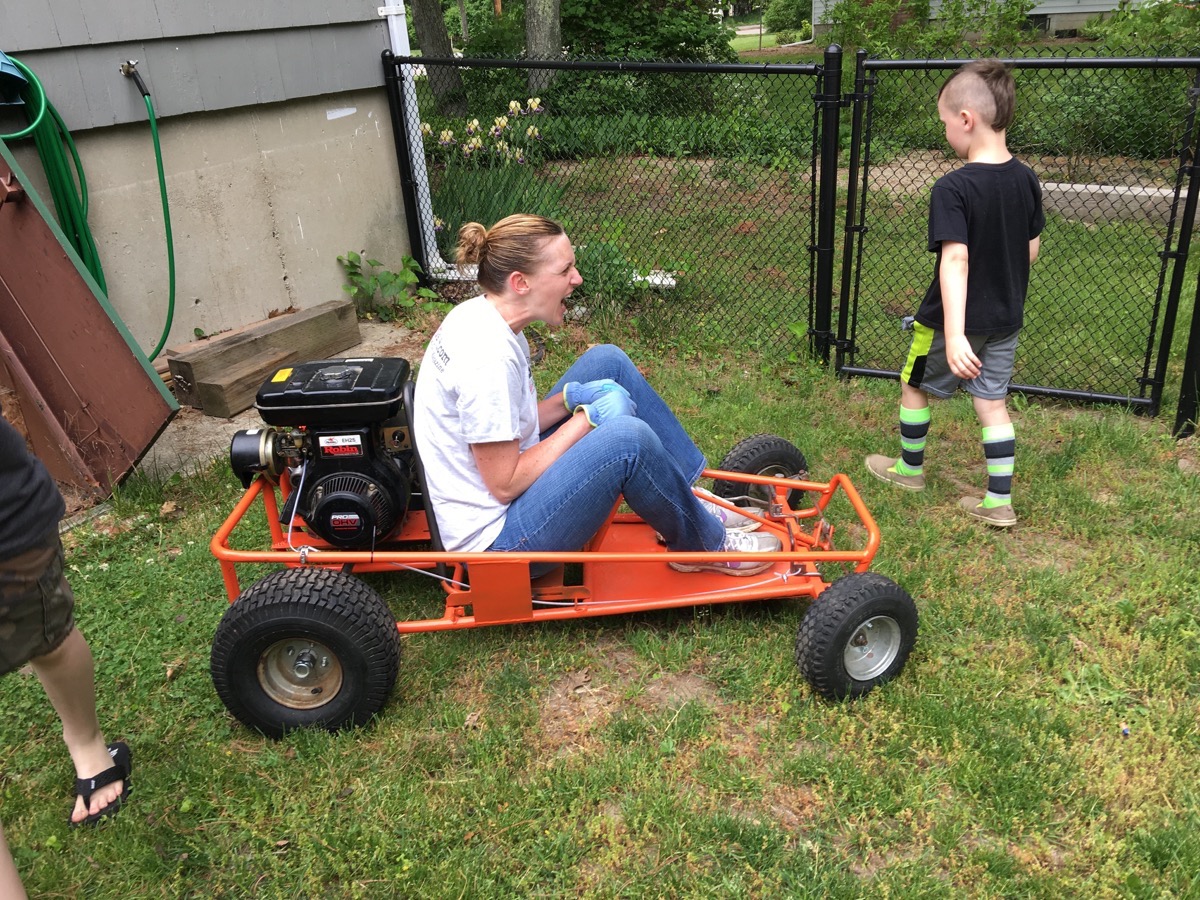
Everyone loves a go kart and my wife tried to steal the first ride. After working on the carb some, I got the engine to fire (remember it has been sitting for about a decade in my basement). Tom rode it about 6-feet before the chassis tweaked and locked up the chain and rear axle. Time to add that brace.
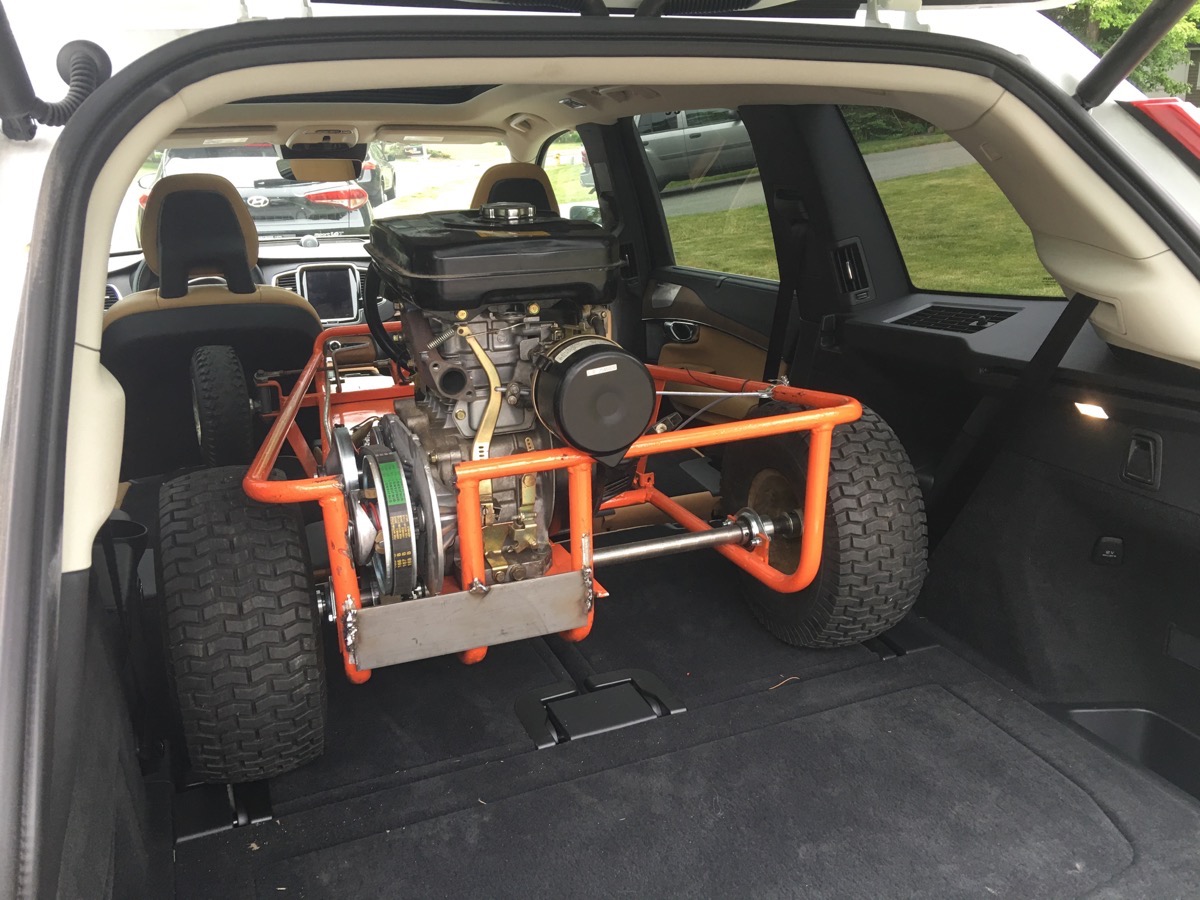
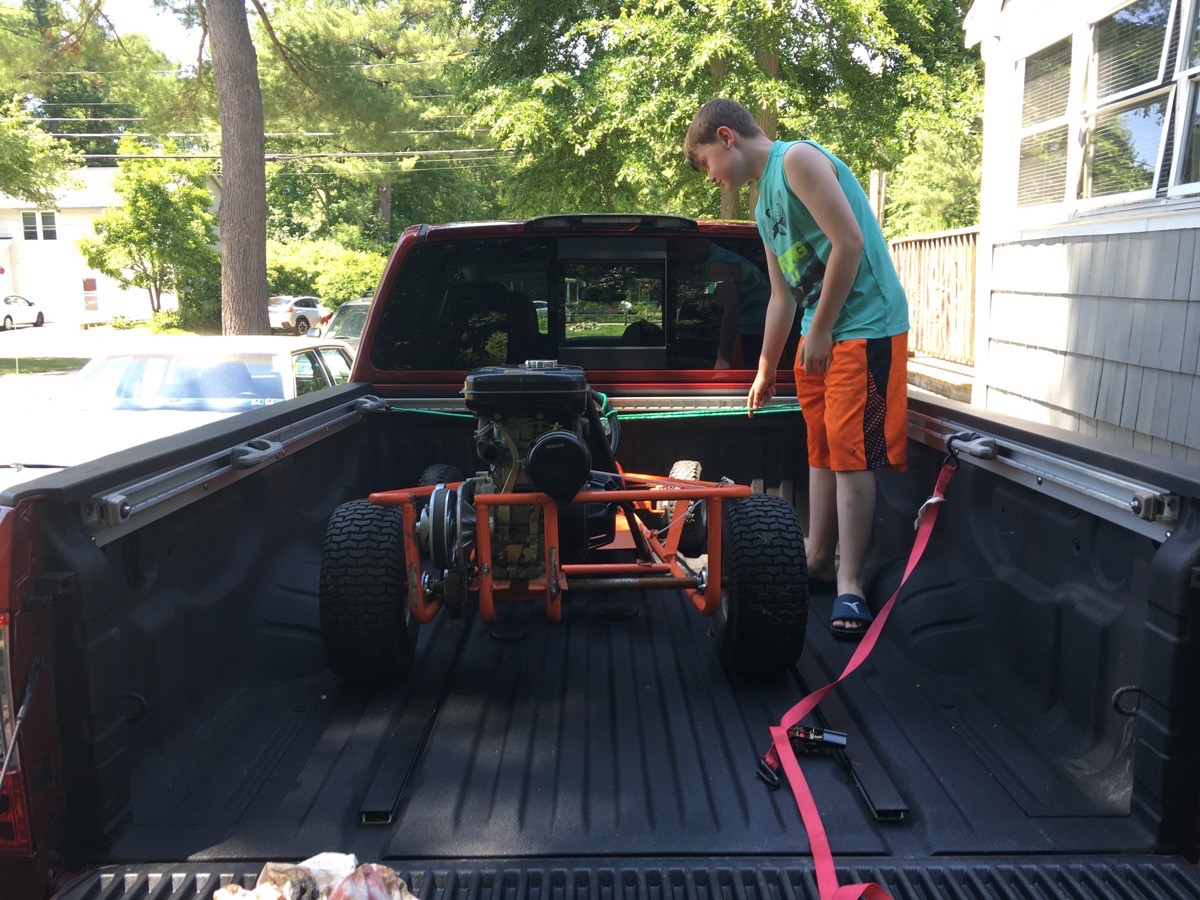
So the week we finished this thing we had a new Volvo XC90. That was cool because this baby fit right in there. (Car review coming next week). You can see my chassis brace which was just a piece of flat stock that I welded to hold the whole thing square. The first ride was short lived because the chain broke the master link. That was crummy but we knew success was close!

Here’s Tom getting his race face on in the driveway…sans chain.
I love this photo because it does kind of show how the thing is all motor.
With the master link repaired, it was go time! Or it wasn’t. About 5 minutes into that ride the rear axle locked up again, another master link bit the dust and as you can see, my crappily welded brace tore off. It was now time to stop messing around. I called in the heavy guns.

We strapped the thing into the back of a new 2016 Nissan Titan with the 5.0L Cummins diesel V8 (review coming soon!) and hauled it to Jon and John at Tube Chassis Designz. My lack of welding skills aside, these guys were the answer.

Jon and John improved my design by shortening up the plate to tie the chassis together and opening up a notch in it as well to allow it to sit higher on the chassis.
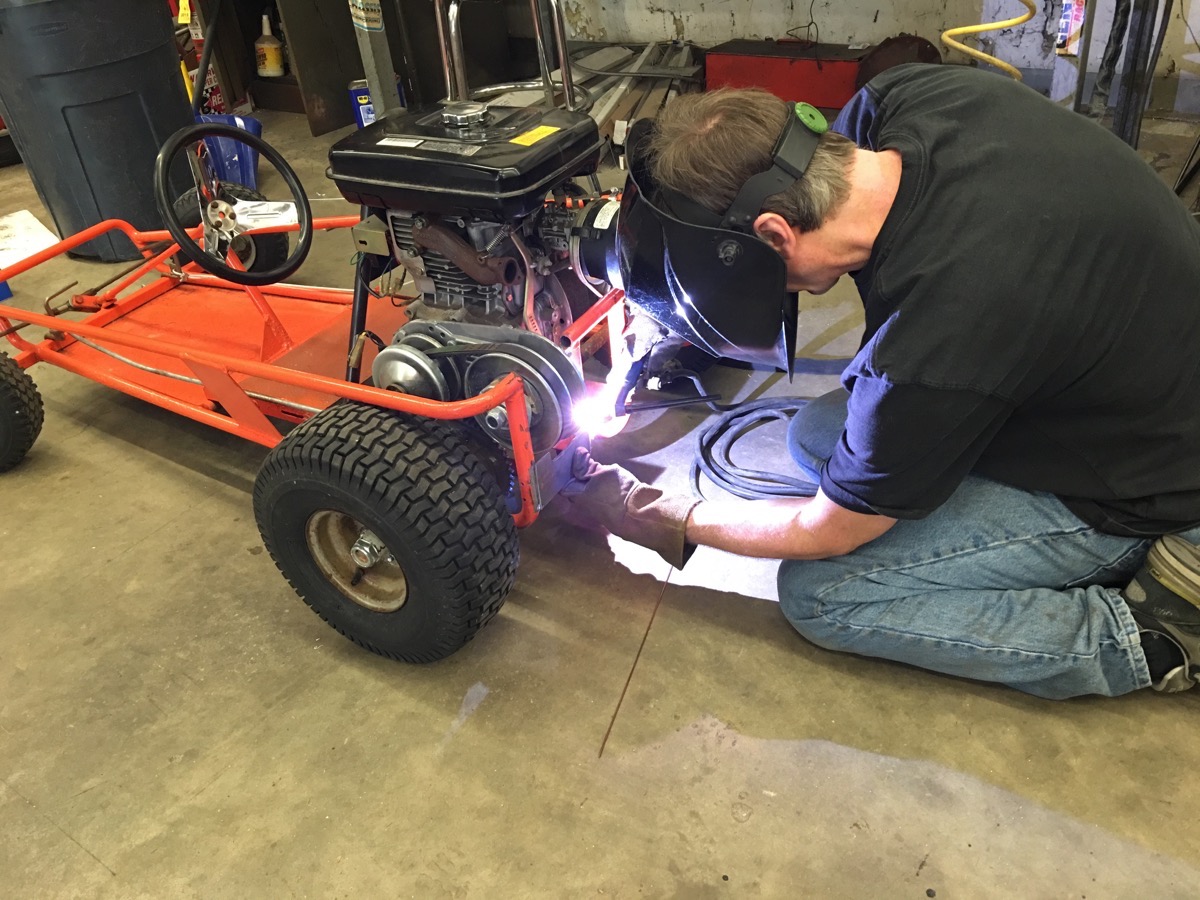
Out came the TIG welder and on went the plate.
Jon’s right hand man John thought that an upper brace would be a good idea as well and he whipped up this little piece of tubing which was then attached as well. Strong as an ox, now!
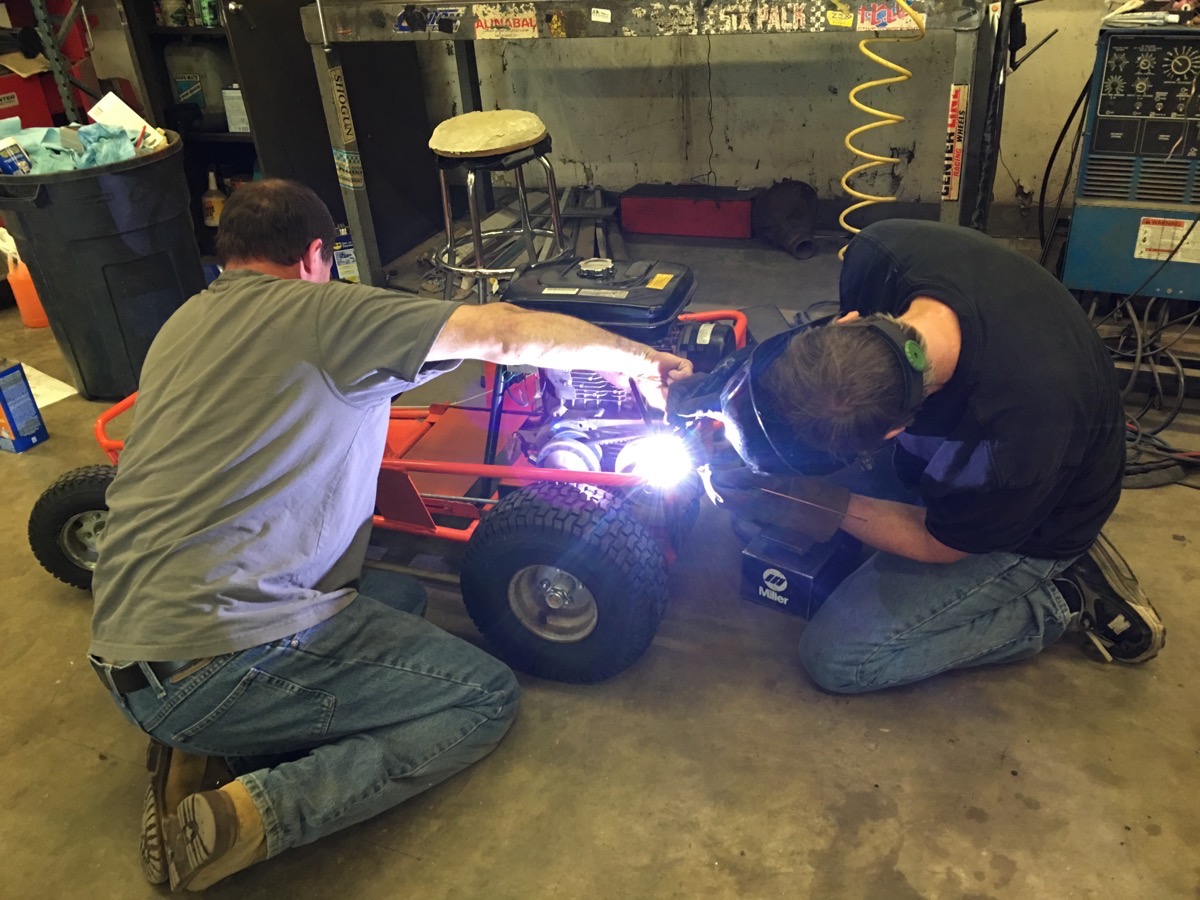
Fusing metal with electricity, baby! These guys rule and really saved the day.

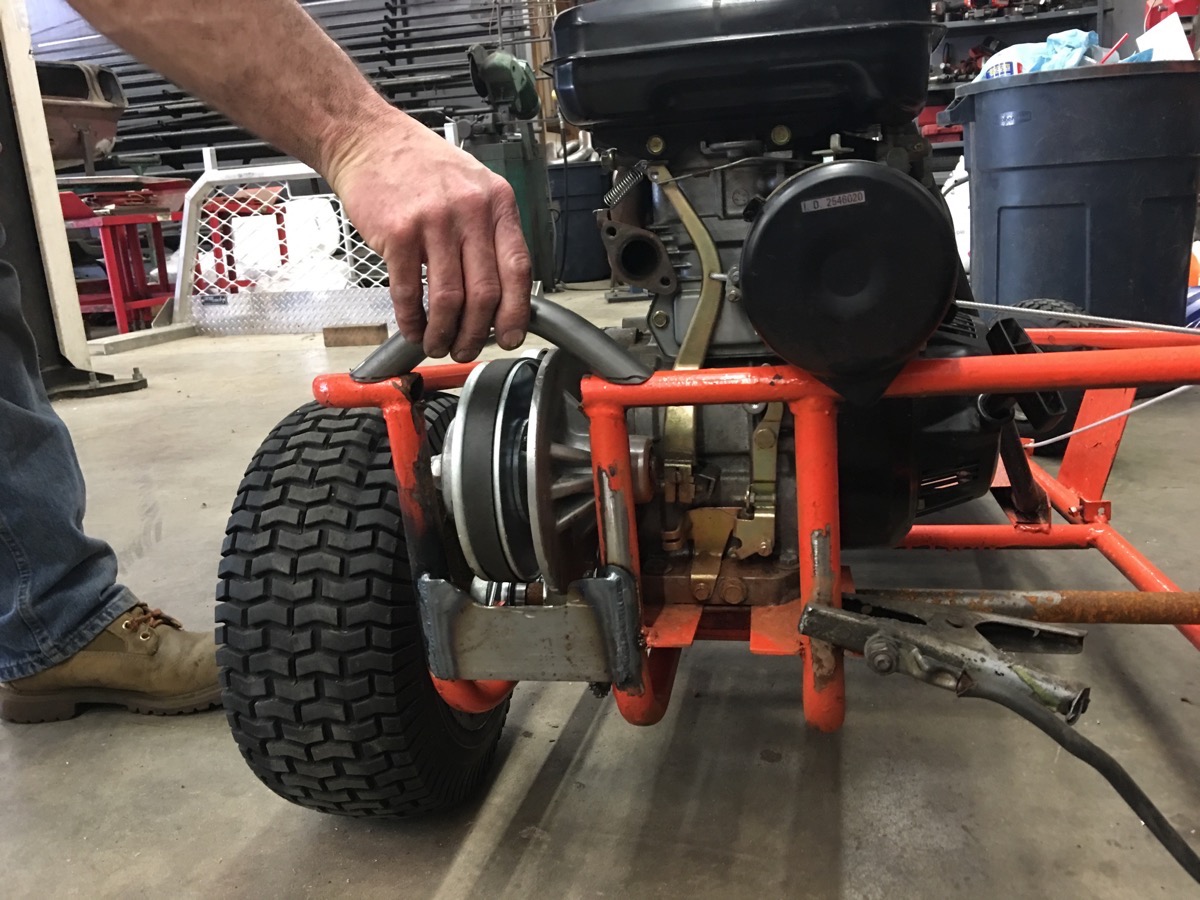
This is the result of their handiwork. It is the baddest ass piece of the whole operation. With that fix made, a new master link added, and our bad luck behind us, Tom was ready to attack the back yard.
With the power getting to the ground and Tom really excited to have a running steed under his backside we decided to bring the go kart with us when we went to shoot a feature on the 2016 Nissan Titan XD truck. We wheeled the truck some and then found some high tension wires and their dirt service roads to have fun on. Nutting ripped out his picture taking machine and the fun began.

Not to sound too much like a mushy dad, but it was really something to see the look on Tom’s face when Dave was shooting the photos and he was chomping at the bit to get going on the kart.
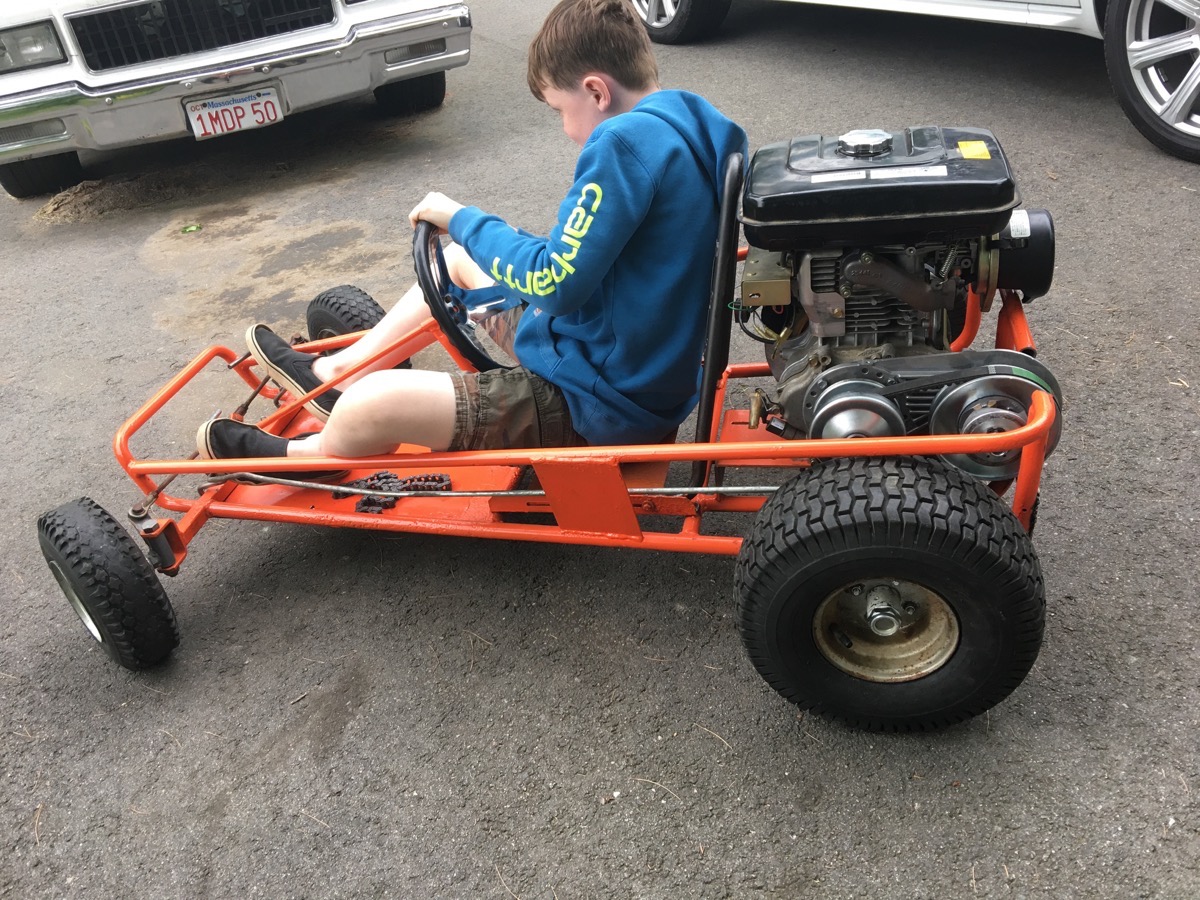
I have to admit that I was jealous of him at this point! I never had this situation when I was a kid. Look at all that road to chew up!

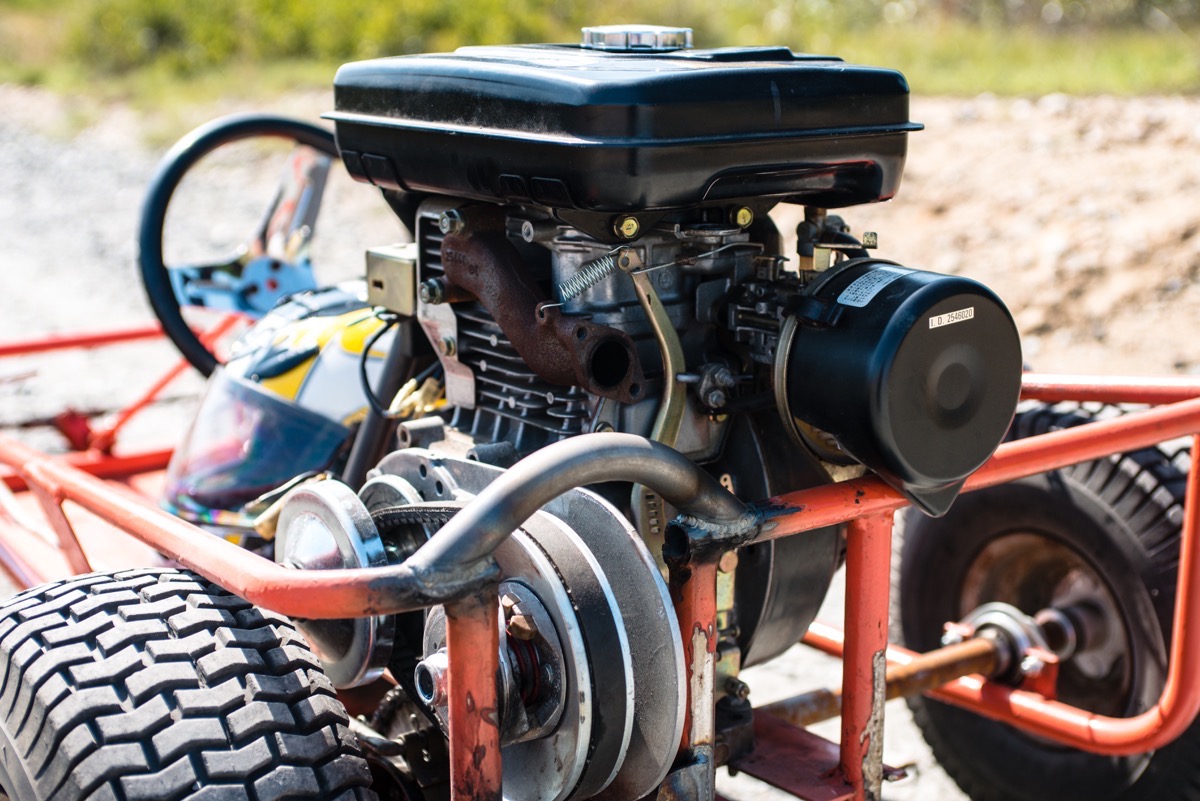
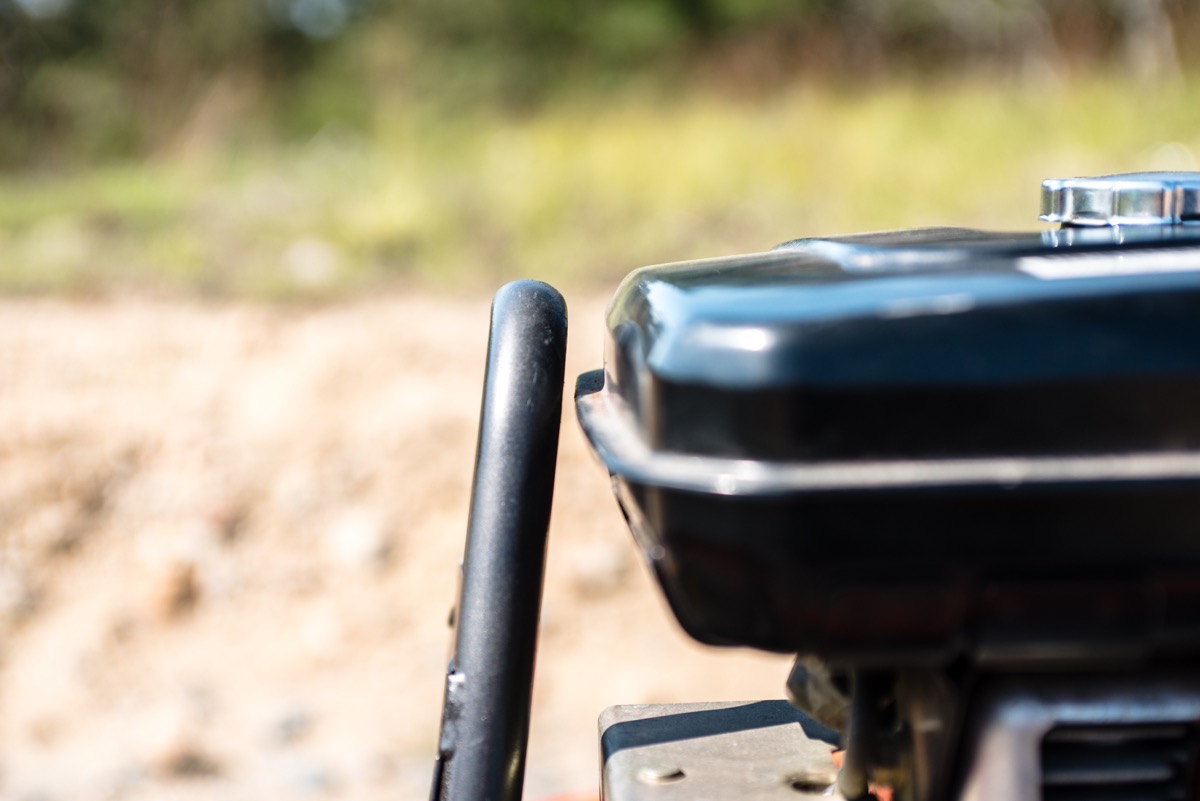
I’m biased but I think the kart looks pretty bad ass. The big gas tank makes the motor look a little larger than it is but the big n’ littles combined with the minimalistic chassis really look neat.
We’ve been going back and forth about painting the work that John and Jon did. It looks so cool we’re thinking that we can wait on the paint.
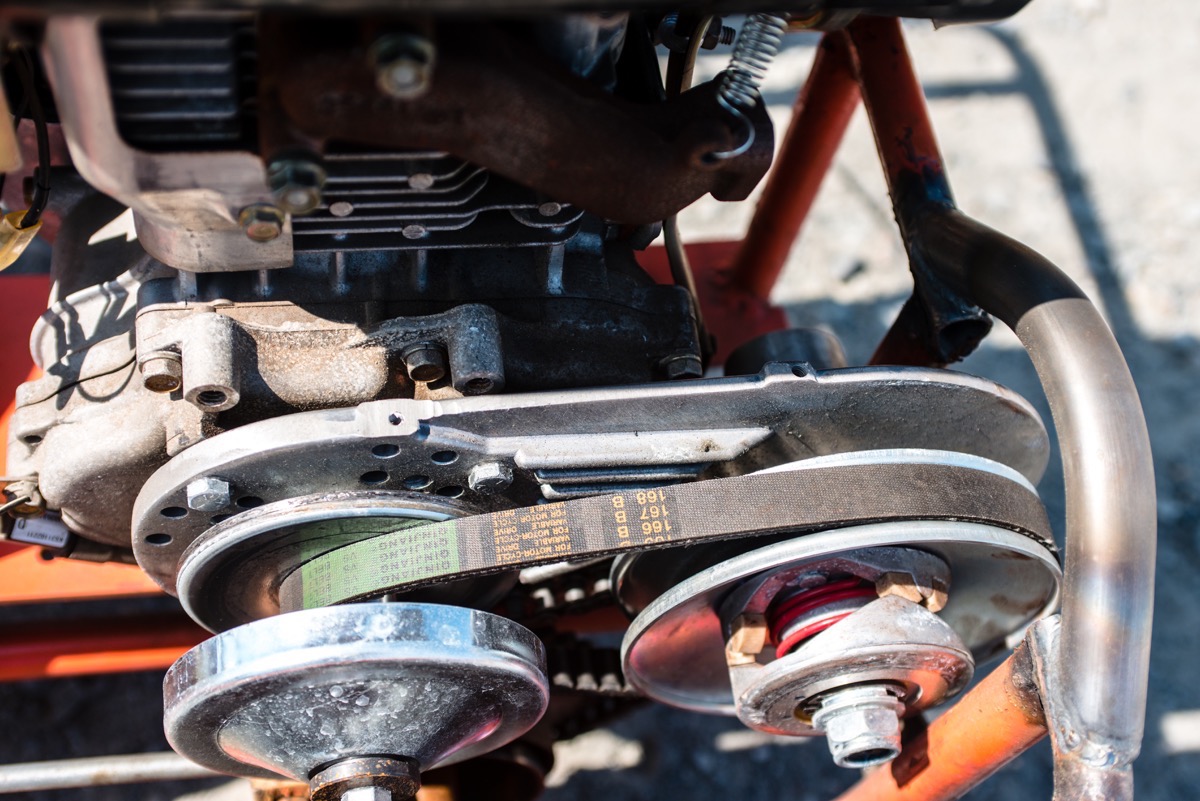
This torque converter setup is really awesome and we’re glad we went with it over a regular clutch.

We’re going to fab up a pipe for the factory muffler to get it out over the frame. It does not fit currently but the one lunger engine sounds pretty good with an open manifold.
Did we mention that there wasn’t a lot of space between the seat and the gas tank?

Factory air cleaner mod allows for free breathing.

The Titan and the Cellar Dweller. Dad had fun in the big one and the kid had fun in the little one!

Mean mugging for the camera. We’re bad asses.
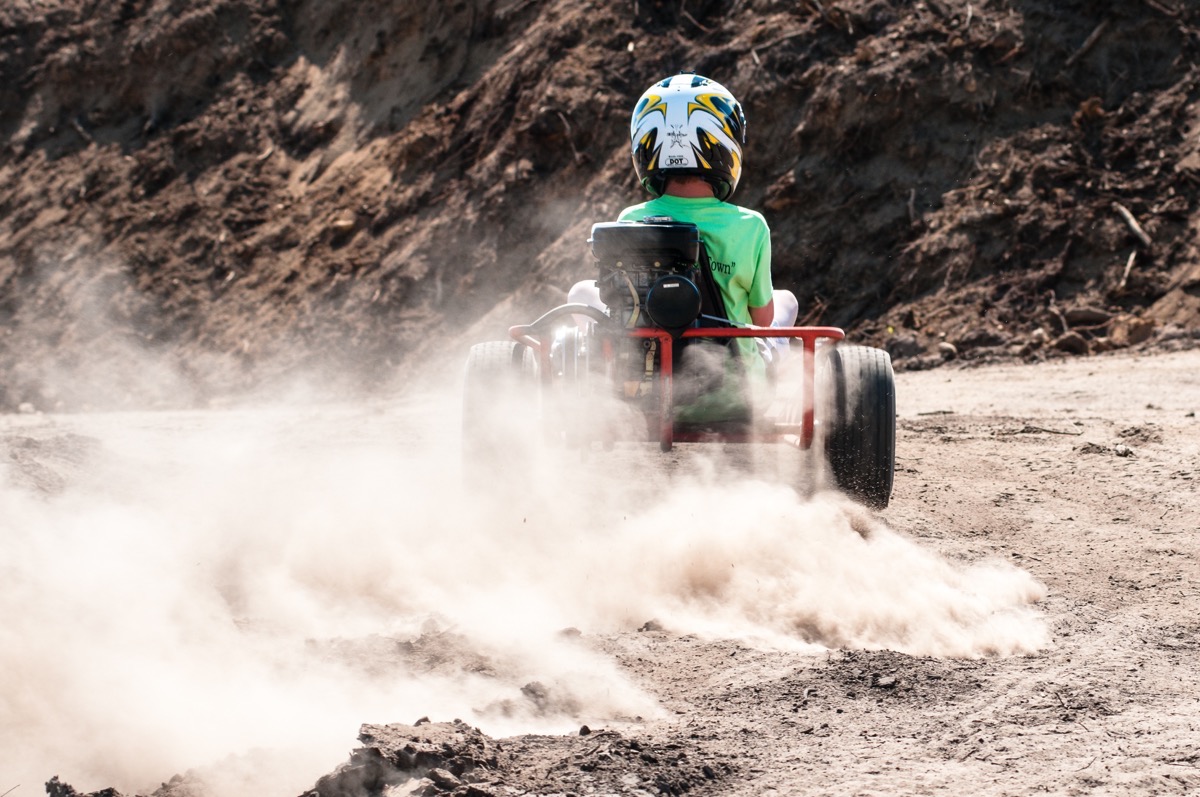
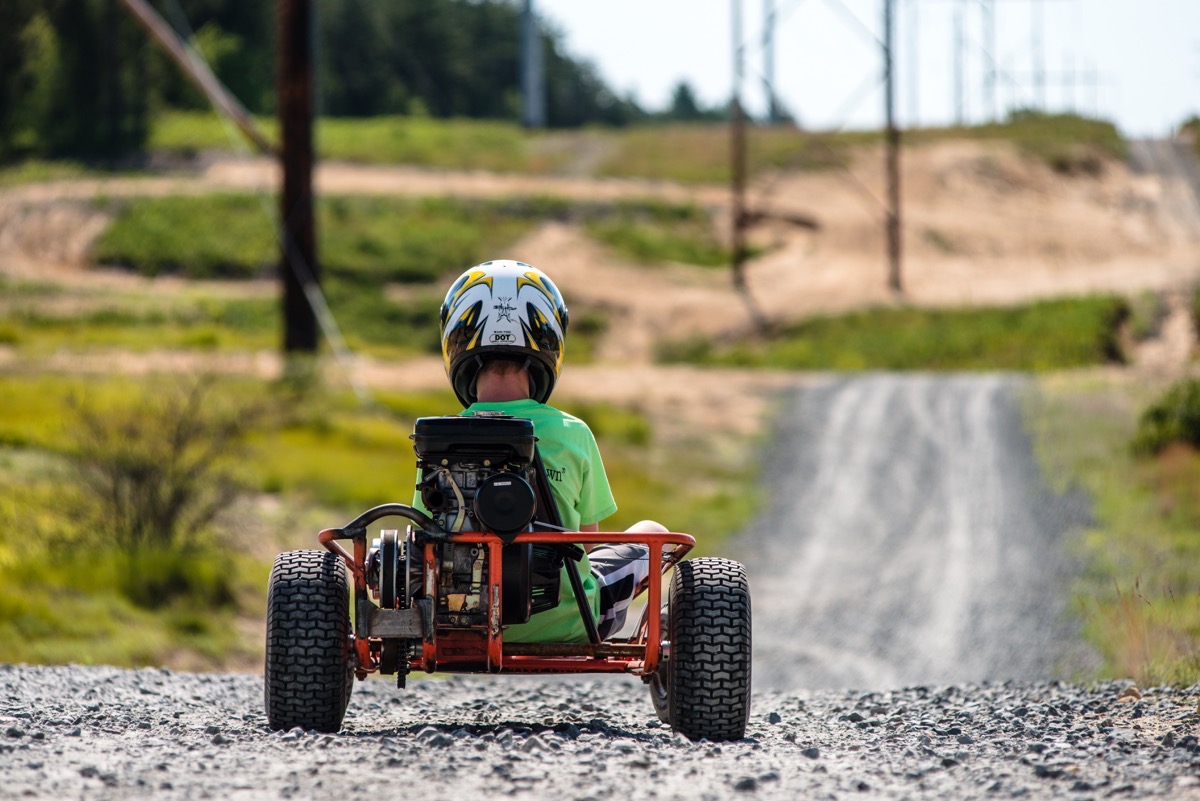
With the chain mended, the chassis braced and the engine running on kill, Tom landed on the gas and he was off!

This is the look of determination. It is also the look of a kid trying to hang onto the wheel. Bumps ahead!

The lack of suspension didn’t make for the softest ride but powering through was Tom’s method of choice.

If this does not signify a win, I don’t know what does. Nutting grabbed this shot as the front end came up and the look on Tom’s face is priceless.

With the solid rear axle Tom learned how to throttle steer the thing in the soft dirt. He was hugely proud of his drifting ability after this ride.
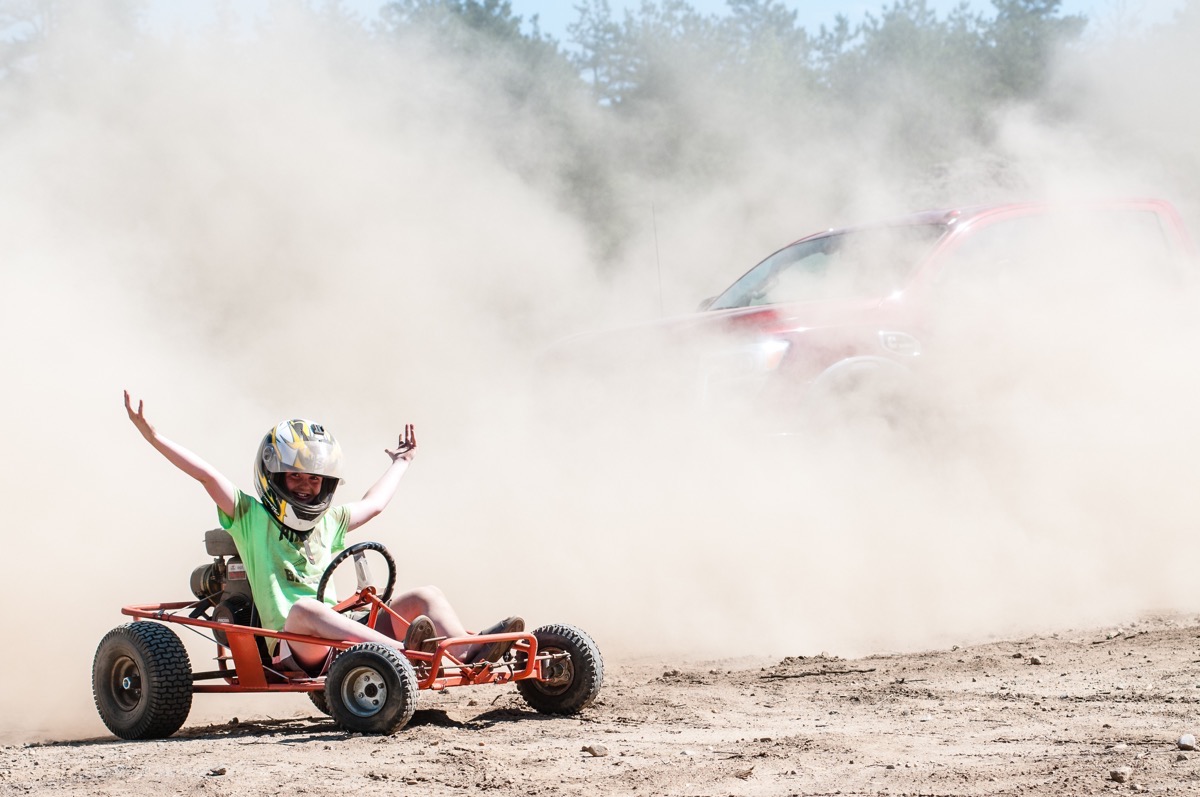
I got jealous of Tom and Nutting doing donuts so I decided to have some fun in the Nissan Titan XD and the result was this photo for the ages (at least in my biased opinion by Nutting). I love Tom’s arms up and his smile here.


Nice job guys..great family project! 🙂
Now that\’s what it\’s all about!! Great job!!
Brings back lots of memories – – Tom’s is faster and steers better and he didn’t have neighbors and cops after him on the city streets to add to the action.
Great project. Buy it Build it Beat the hell out of it!! Great job guys.
This is how to raise kids, spend time together, learn how to work for what you want, start a new generation of gearheads! Congrats to you all!
Awesome
All those good things I’ve said about you…. totally true. Way cool man!
I’m expecting a follow up to include top speed, 1/8 and 1/4 mile times. Put it up against some of Dad’s projects. I bet it beats both to 60′!!!