


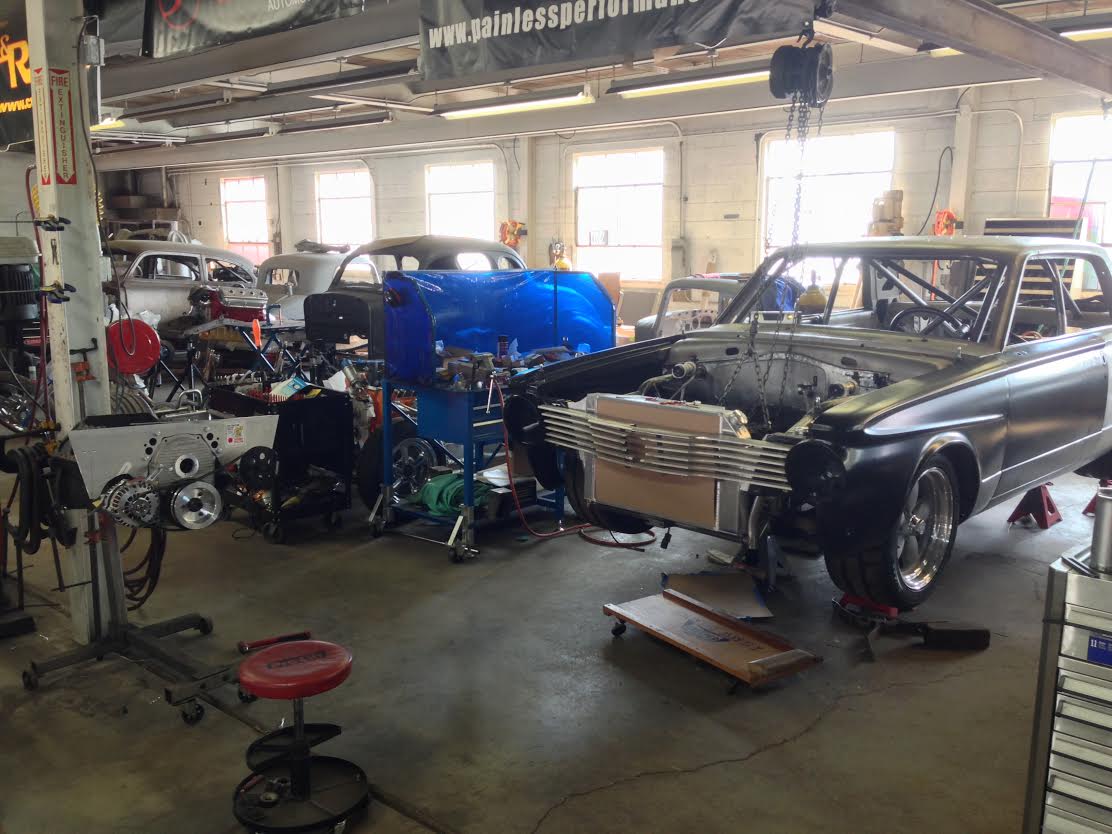
While Chad and I have been traversing the country like maniacs, Kevin Tully and the boys at Hot Rod Chassis and Cycle have been pounding out the work on a multitude of projects that their customers are eagerly waiting for. They also spent time wrenching on the most fearsome Valiant ever, Project Violent Valiant. In this installment we’ll look at the process used to fit the VFN fiberglass hood, the creation of the motor plate that will anchor the engine into the car, and the killer radiator from C&R that will keep this car cool at cruising speeds, idling speeds, and full throttle angry speeds. Having seen this baby start life as a gutted shell of a Valiant with a few steel tubes in it and watching it progress to where it is today has been fun and it will only get more fun from here because the car is getting nearer and nearer to completion. Don’t get us wrong, there is still a bunch of work to do, but you can look at the machine now and just flat out know that it is going to be a really unique killer on the autocross and road course.
Because we have three distinct different things happening in this update, we’re going to bust it into three sections which will be the creatively named: Hood, Motor plate, and Radiator sections. If you cannot follow that logic, please stop eating those lead paint chips. We know they taste good but they really are not helping your situation…at all.
MOTOR PLATE:
The motor plate is an integral piece of the build, both literally and figuratively. In the literal sense, it is what will hold the engine in the car and keep everything straight and true up front. Going with the plate instead of typical motor mounts was a no brainer for Kevin because the plate ties the front end together, providing more rigidity and stiffness as well as freeing up tons of room for headers and stuff that traditional motor mounts would get in the way of and complicate. On the “bonus” level, there’s the fact that it looks kick ass and whenever someone looks under the hood and sees a motor plate they know that you means serious business. Every element of this car so far has been serious business so why should we stop now, right?
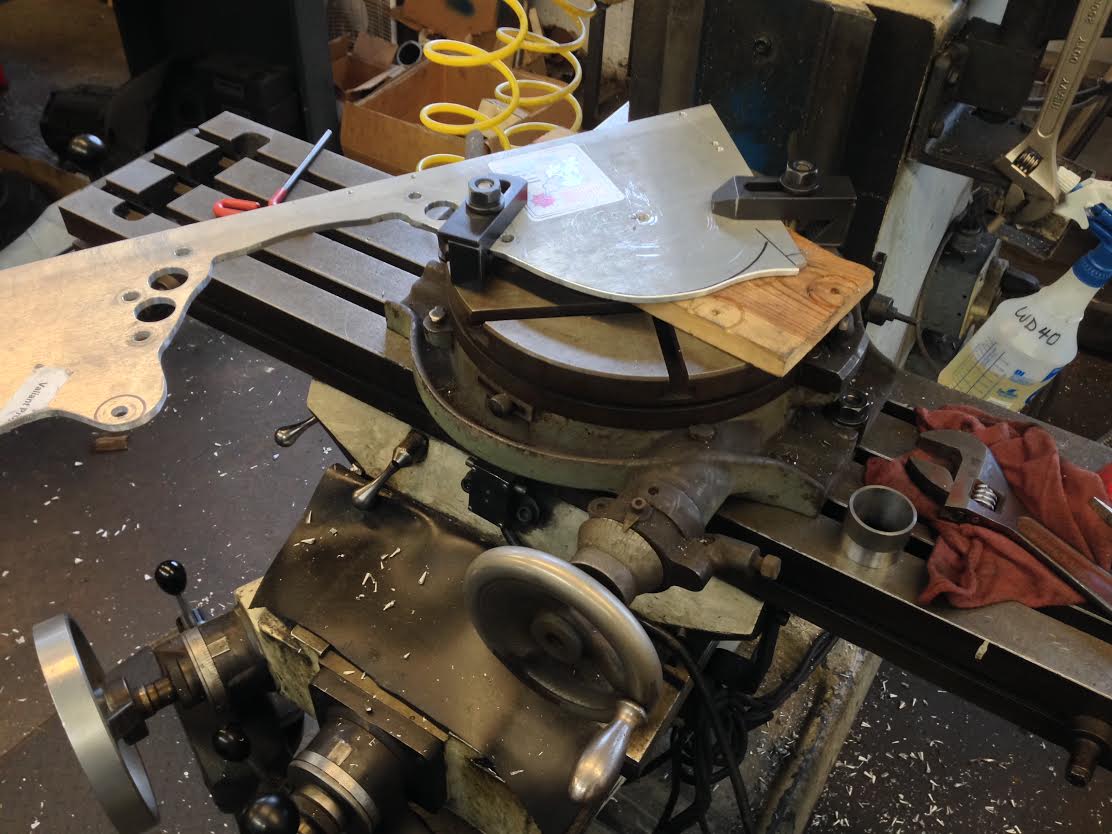
Here’s where it all begins. Like when we showed you his method for laying out the dash, Kevin laid out where various accessories would bolt to the plate and made the proper cuts and holes for everything to fit where it was intended to go. Time, patience, and accuracy are the key elements here.

Because there will be stuff like a vacuum pump used on this application and the crank pulley is in a fixed location (or should be!) an adjustment slot was needed for the Flaming River Corvette power steering pump that wears a Moroso drive pulley and what you see here is the initial cut being made with an awesome old mill.

There’s the finished slot, which will be used to tension the Flaming River power steering pump when the car is ready to hit the streets….is it ready now? Now? Now?

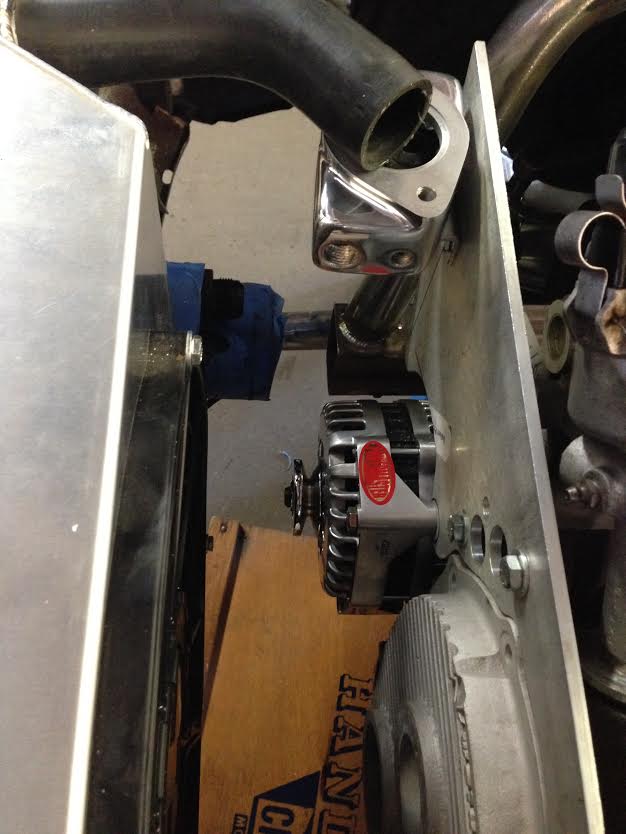
Here’s a look at the plate with the accessories bolted to it while out of the car. A couple things here. The water pump is an electric piece mounted to the radiator so don’t you worry about that. Second is that Kevin specified the harmonic balancer, which is made by ATI to have a big block Chevy style front. This was done because there are literally hundreds of potential pulley combos with a BBC pulley bolt pattern where there are about three with the Chrysler wedge pattern from the early 1960s. Getting the accessory belts to line up an be a mess but not with this setup. It all looks as right as rain.
To the left you can see the engine and plate out of the car. Note how wide the plate is. That’s because it will span across the engine bay and be anchored on the two main chassis tubes up front. This will help to add even more stiffness to the front of the car and prevent the chassis from distorting during heavy cornering loads.
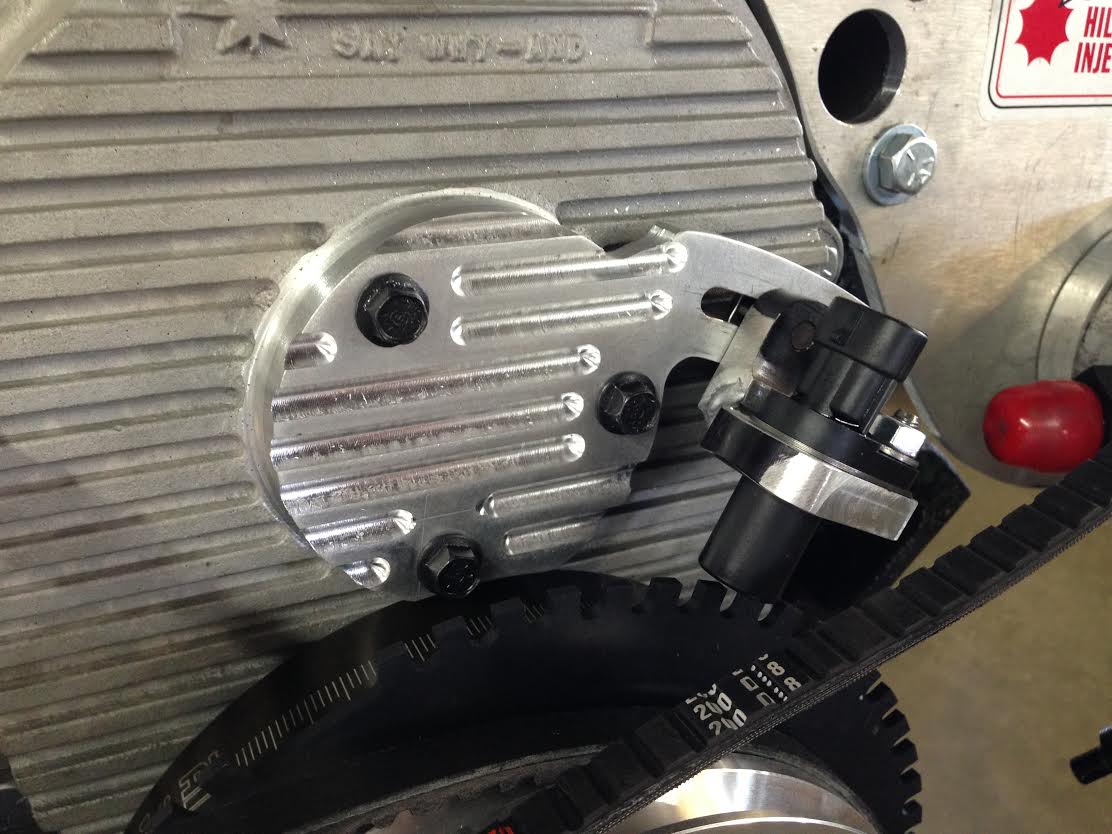
How is this for detail work? Kevin machined the rips into the mount for the crank trigger to match the Hilborn timing cover. In a mechanical injection application, this is where the Hilborn pump would be mounted as it is driven off the cam. As this is EFI, Kevin could use those holes for this setup. Pretty neat!
A look down at the front of the engine as mounted in the car for inspection.
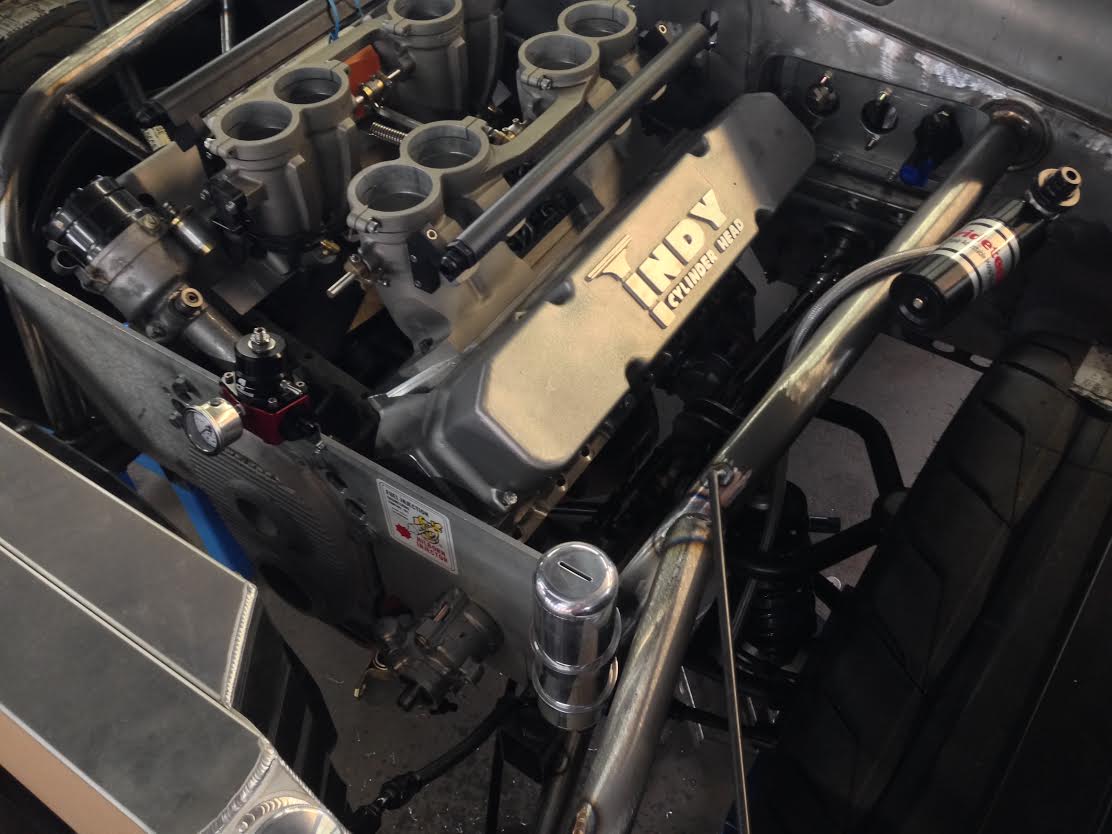
If you look down the side of the block between the valve cover and the chassis tube you will see that there is a bunch of room for headers in there. Kevin said that sawing off the original motor mounting pads can save a few pounds and really open up the bottom of the engine.
Hood fitment, pins, and laying out the hole for the injector stacks:
HRCC called up VFN on this build for a hood. Kevin wanted to do a pinned on, lift-off style piece because it would better fit the whole look. It also eliminated the weight of the hinges and all that other stuff as well but getting it right is not without challenge. Kevin is a measure 7,432x and cut one kind of guy so when you look at his process for making sure the hood fits, pay attention…it works. In this installment you’ll also see the AAR-style scoop that will be added to the hood by VFN. Interesting note here. If you are going to use a VFN hood and add a scoop you have two options. Have a local guy do the work for you OR you can send the whole works back to VFN and they will graft the scoop on right there. We didn’t know that until Kevin told us and we thought it was pretty awesome that they provided such a service.

Here’s the VFN hood that Kevin is starting with. His plan is not to alter it too drastically. Obviously the AAR-style scoop will be a change but that’s the biggest one. This is about properly fitting it to the car.

The basic tools for the job are certainly not fancy or high tech but they are the basics of every job in the world of fabrication. You’ll need some tape, a marker, a tape measure, and a tailor’s tape measure. Why the tailor’s tape? Not all of these surfaces are flat so the tailor’s tape is a Godsend to making sure that accurate measurements are made.

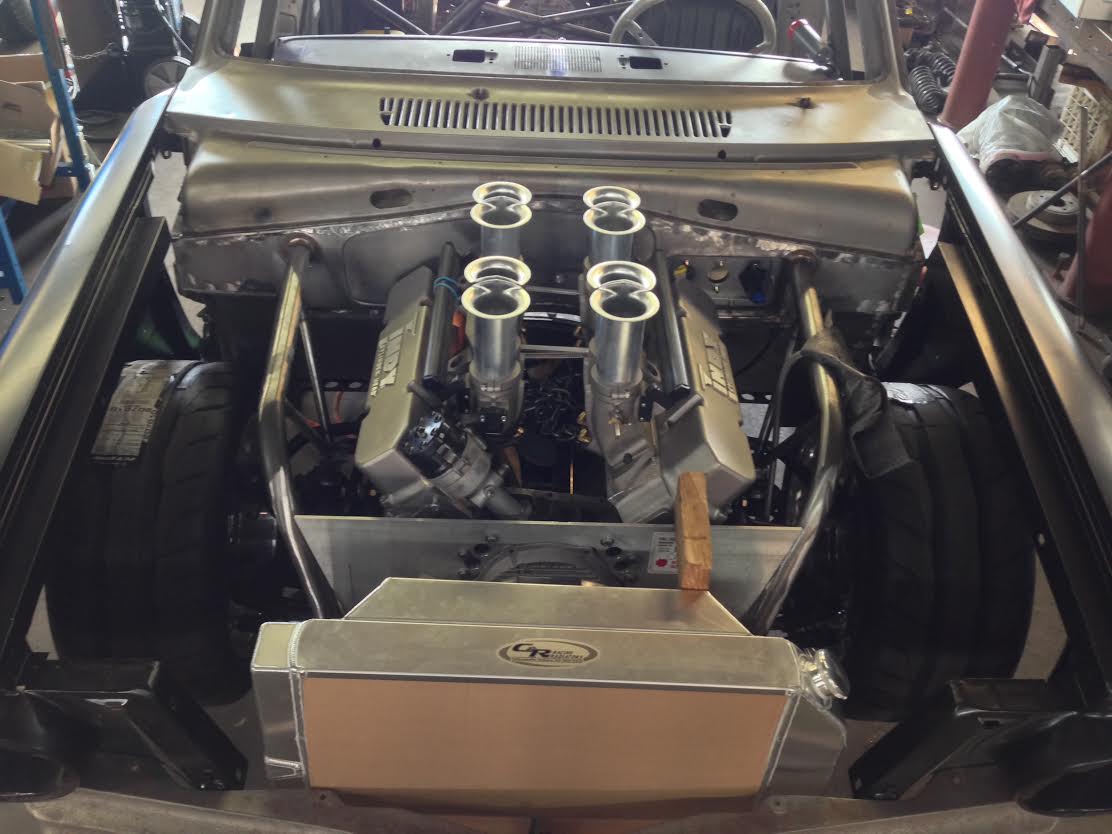
Before he went forward with fitting the hood, Kevin laid it in place and stuck the new scoop on it. We think it looks gnarly and will provide some nice fresh air for the Hilborn stacks which will be hiding under it soon enough.

Note the tape applied to the areas where surgery will take place. As you can see, Kevin has already taken several measurements for where the hood pins will be placed in the corners and the center section is clearly marked for where the holes will be cut for the injector stacks to fit through.

This hood, like millions of others over the years will be anchored with a Mr. Gasket hood pin kit. We honestly wonder how many of them they have sold. It has to be hundreds of thousands anyway.

After measuring from known points, cross checking, and measuring again about 1.3 million times, Kevin took the plunge and added the pins. Again, taking your time and checking your work multiple times is the key to getting this right.

These notes help Tully to both keep the pins in the right place but they can also transfer to the work he’s getting ready to do with the hood. Knowing the center to center distance is critical.

WOOT! It fits! (Hey, we knew it would…the man is a trained professional). Kevin recommends going slightly larger with the hood pin holes than necessary, like going with a 7/8″ hole instead of 3/4″ to give yourself a little bit of wiggle room (literally). Note that he also cut the holes for the injector stacks as well.

Here’s another look from the front with the scoop laid on. As we noted above, VFN will mold the scoop into the hood for you so Kevin is going to take advantage of that and have them handle it.

One thing we like about the AAR style scoop is that it is not going to be sitting too high and won’t be an obstruction to block the view of the driver.

The front valance was pretty gnarled up after years of bashing curbs and basically bearing the brunt of the elements on the front of the car so it required some time in the loving hands of HRCC’s guys to get it fixed up and nice again.

Slowly but surely it is getting straightened out. It’ll be good as new when it gets bolted onto the car.
RADIATOR:
If there is one thing we know about the Violent Valiant it is that the car will see the rigors of the open highway, the autocross, the drag strip, and also road course action. It will be driven (likely hard) in sweltering conditions, and it will all be motorvated by a 500+ci Chrysler Wedge engine that will certainly be capable of throwing off some heat. So what does one do? Just suck it up and expect the thing to pee a little coolant when sitting in hot traffic? Hell no. You build a gnarly cooling system to make sure that the engine will stay in the operating temp range no matter the ambient air temperature outside. How do you do that? You start with a killer radiator from the renowned C&R Racing. These guys supply the radiators for nearly every single NASCAR team and HRCC uses them exclusively in their builds, especially cars like this. The reason is simple and it is because the company has proven out their products and technology on the race track and then made them available for guys on the street. It is also because they have amazing tech people and processes that insure the radiator you get is the one you need.
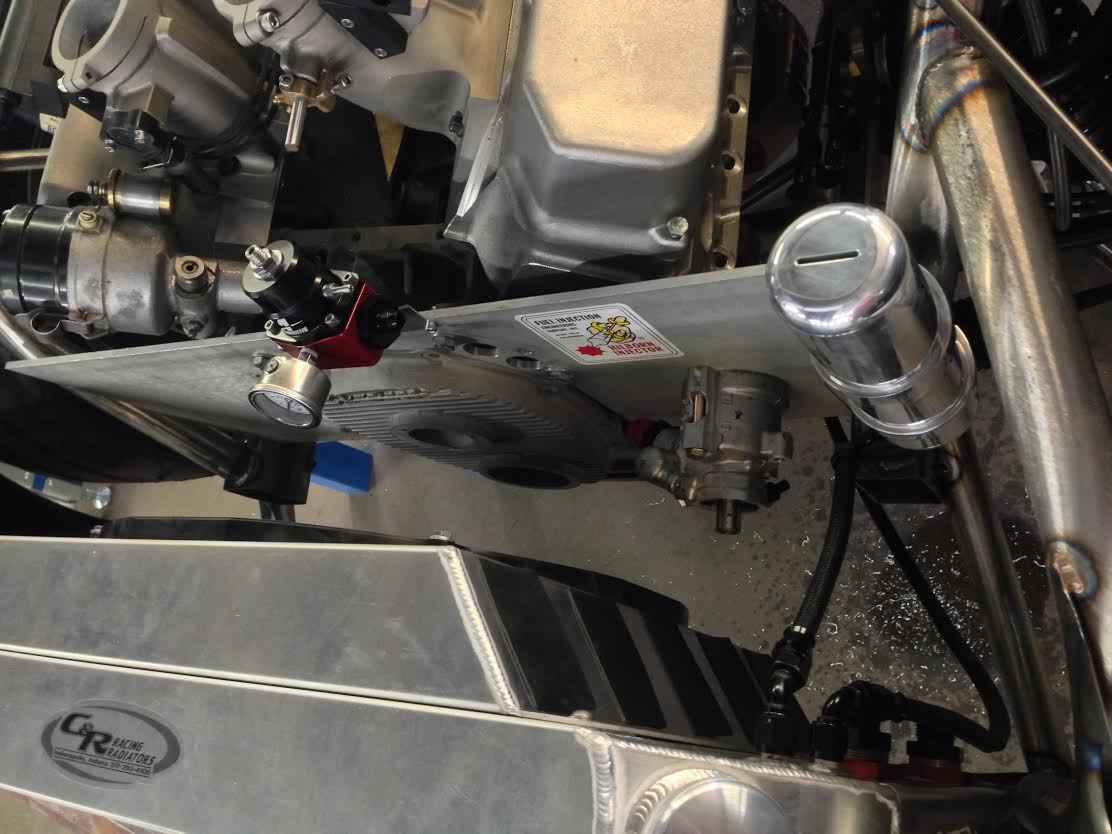
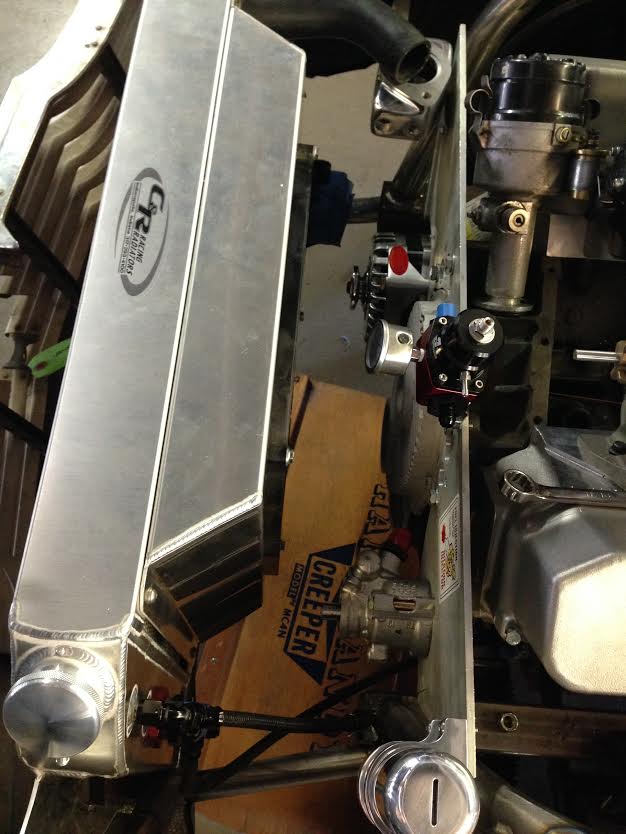
Here’s a look at the beautiful aluminum piece from C&R. According to Tully, the C&R tech department will ask you a bunch of questions about your car, the engine, the application for the car, etc and design you a complete system to keep your stuff cool. We mean radiator, properly sized and constructed shroud, and Spal fan to keep the air moving. All of the pieces are designed to work together so you have nothing to worry about.

You’ll note that the radiator has been moved down somewhat and that is because the C&R piece is far larger than the weenie factory radiator that was keeping a slant six cooled off. Kevin is going to fabricate a subtle scoop in the front of the car to feed air up.
This is one bad ass unit. There is a Meziere 55 GPH tank mounted water pump, an integrated oil cool, and an integrated power steering cooler as well. If you want a full tilt custom piece it will be about six weeks from C&R according to Kevin but the company keeps inventor on commonly ordered models and they ship within days.

Even the catch can is nicer than anything that we have ever owned. The welding on it is so nice we think it should be mounted to the outside of the fender to shot it off!

Speaking of welding, here’s a look at the “wings” that Kevin made to properly mount the radiator in the car. The dude can stack times like a mad man. This big heat exchanger looks great in the car and due to both Kevin’s experience and C&R’s reputation, cooling issues will not be anything we ever talk about with this car.

We were very interested to learn that C&R doesn’t just sell you a radiator, they design the shroud and choose the correct fan as well. Shrouding is so important to keep the thing efficient and to keep the engine cool. We have seen fans with no shrouds and some with homemade pieces that should have been left….at home.

Here’s another look at the cool mounting wings that Kevin made up for the radiator to cling onto for dear life when the car is being flung around a track, onto a highway, or hammering on the brakes to enter a corner.

One final peek at the radiator which will be in and out of the car a bunch of times in the coming weeks as the mock engine will be jumping in and out as well. Built right there in Indiana, this is an American made piece of aluminum sculpture that’ll keep the temp happy on a snarling mountain of an engine during the summer heat. What’s better than that?!


This sure is coming along nicely . I’m liking the AAR hood scoop … a lot … as a visualize what it’ll look like once all molded in . Can’t wait to see the final results as well as how it performs . Keep posting the updates . This one’s a winner
Enjoying watching this build where there is real care about craftsmanship.
Kevin is a friend who I can trust with my life. And with that I know I can trust his engine-uity and creativity if I had him build a beast for me. His American Muscles are backed with is American Patriotism. So proud of this guy.
Ahem – ” Patriotism ” in fact has nothing what so ever to do with ones car of choice . A reminder than John Fitch … a WWII hero as well as German prisoner of war … raced Mercedes Benz almost exclusively right up till the end of his life
Maybe not to euroweenies but patriotism is very important to Americans.
The op said nothing about the car being his patriotism he was talking about the builder.
Shouldn’t you be over on road and track harassing the other euroweeines?
The craftsmanship on this car is incredible, I’m looking forward to seeing this Valiant in person once it’s complete.
Can’t wait to see the finished car, looks amazing so far.