


[“Nut Driver” features updates on Dave Nutting’s attempts to daily drive his 1987 Chevrolet Monte Carlo in Massachusetts 365 days a year]
Before continuing on, if you want to catch up on the other installments click HERE.
Given what it is, namely an old lady’s car that I’ve slapped a few bolt-on parts onto, the Monte has faired better than expected so far at the local SCCA events. Sure, at this point in time I’m still 12 seconds behind the leader in my class, but when the leader is a 2002 Z06 and the other cars in the class are a supercharged ’95 Corvette and an ’07 Shelby, I think Grandma and her 160 horsepower 305 SBC is allowed a little leeway. Alright alright, my being a crappy driver isn’t helping either, but this latest update will show my attempts to shed some bad habits and learn a few new tricks.
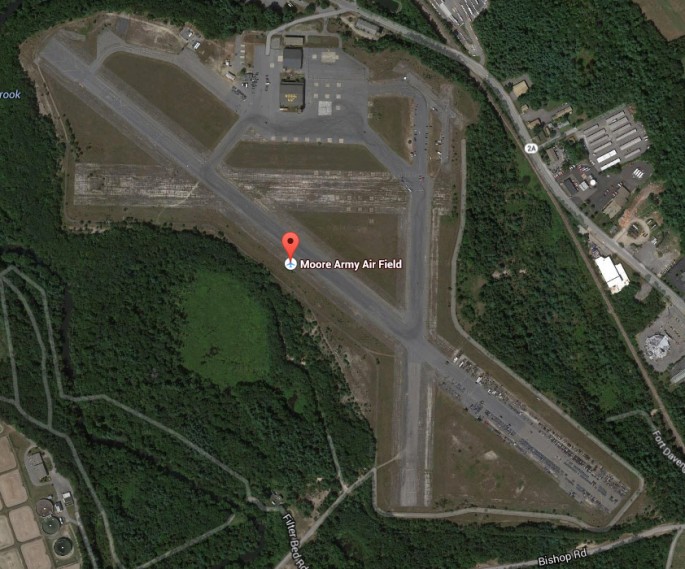
Seeing as I’m committed to sticking with the Regular Joe budget because, well, that’s what I am, adding more power or better tires still isn’t in the cards, but I was able to scrounge up the spare cash for a few performance upgrades, namely a 36mm front sway bar and a day of driving instruction from the guys at the Evolution Driving School. As with the other New England Region SCCA events that I’ve attended so far, the Evo School was held at Devens-Moore Airfield in Ayer, Ma.
The Evo School guys were in the area Saturday, July 12th and Sunday, July 13th, each day hosting three schools: Phase One, Phase Two, and Challenge School. Each school builds on top of the other, with the Challenge school having participants challenging their instructors to beat their lap time in the participants’ vehicle. Seeing as I’m still pretty green, I signed up for Phase One, which gives you time with an instructor to learn your car as well as improving on your driving ability. With 24 laps versus the normal 6 or so that you get at a normal SCCA event, it’s fair to say that there’s more than enough seat time for the money.
Before we get to the school itself, let’s take a brief photo tour, BangShift style, through the 36mm sway bar install.

The sway bar itself is a 36mm hollow unit off of a later model third-gen F-body, which can be picked up for $50-75 online. That coat-hanger thin bar above it is the stock 25mm bar that all non-F41 G-bodies were hindered by.

A quick close-up shot of the stock bar versus the larger bar. Safe to say that the larger bar will do a heck of a lot more to limit the front body roll that the Monte was exhibiting at the last event. As to if this will help or hurt performance is at this point yet to be determined.

Since the F-body sway bar bushings will not fit in the stock Monte sway bar brackets, the solution is this poly sway bar bushing from Top Down Solutions. While it started life as a 34mm Energy Suspension bushing, Top Down Solutions widens it to 36mm before shipping it out to accommodate the larger bar. Shown to the left of it is the stock 25mm Monte bushing. Yeah, it’s a big bar.

Unlike every other “small” project that I take on with this car, the only thing that broke during the install was one of the sway bar end links. Bit of a bummer as I just bought these last fall, but that’s what a winter in New England will do.

A five minute walk to the parts store and $20 later, I had two new Moog end links and the sway bar installed.

With the sway bar installed and tested via my favorite on-ramp, I felt like the car was ready for autocross the following weekend.
Evolution School

Even being an all-day event, each Phase is limited in regards to attendance to give each driver as much seat time as possible. Looking at the list, the Monte is a bit out of place, but what else is new?

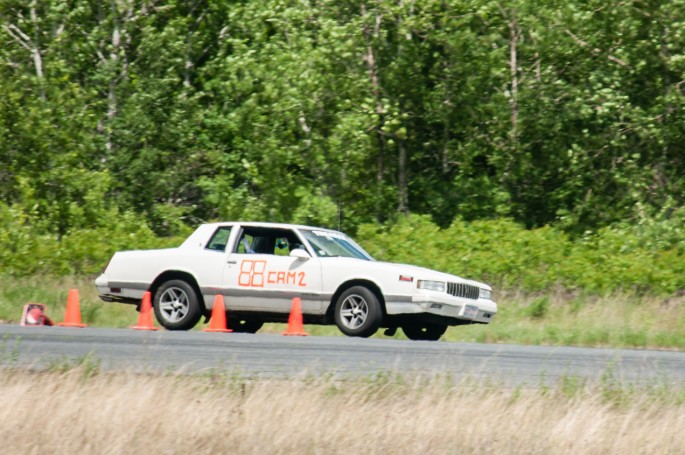
Here’s the Monte all set to go, GoPros and all. Not shown is the massive amount of crap that I brought with me, including a floor jack, stands, socket set, allen keys, and spare front brake pads. Some people keep jumper cables in their trunk, I keep half of my tools. Live and let live.
After a quick tech inspection, I was let loose on the course for three runs to get some baseline times down. As the airfield was divided up between the three schools, the Phase One course was roughly half-sized, running at about 25 seconds for a quick car versus the approximately 50-60 seconds that same car would run a normal-length course. The course was laid out with a slalom, Chicago box, a sweeping turn, and what is quite possibly my least favorite element in the world, a skidpad circle. You know what an understeering, slow, heavy car doesn’t need in its life? A freaking skid pad.
The plan for the day was to set a baseline by yourself, then alternate runs with each of the two instructors for the remainder of the day. We also had a working lunch where we went over what everyone learned as well as some autocross chalk talk with the instructors.
So, how did I do? Let’s start with the video of my first run. While instructed to take it at half speed to learn the course, note the late entry and sloppy slalom work, massive understeer in the skid pad and just generally bad hand positioning and driving technique. Keep in mind that I actually thought I was doing ok at this point…
I managed to knock that 35.058 down to a 32.626, but I knew that it was sloppy and I just generally felt like the car was unstable. This is where the first instructor came in to give me a few pointers on getting the car to do what I wanted. With never having been behind the wheel of the car prior, he was able to rip off a 31.9 second run without breaking a sweat while also giving me some great pointers on weight transfer and using that to my advantage. While watching the video, note how he is calling out where he is transferring the weight during each element of the course.
The first bad habit that I had to learn to break was trying to perform two actions at the same time, such as braking and steering, which was completing overcoming the tires’ ability to grip. This can all be explained by the circle of traction:
This concept simplifies to the idea that only so much traction is available at any moment for a tire, and this must be split between cornering and braking/acceleration. You can have both acceleration/braking and turning at the same time, but the two added together cannot be more than the total available traction. Increase one of the forces (Cornering or braking/acceleration) and you’ll decrease the amount of available traction for the other. Notice that North and South represent acceleration and braking respectively, with East being a right-hand turn and West a left-hand turn. Using more traction for braking will result in less traction for cornering, with hard braking (Think “At the limits of locking up the tires”) resulting in virtually no ability to turn the car simultaneously. The same applies for acceleration. Remember this the next time you’re doing a rolling burnout in a parking lot and there’s a pole up ahead…
I spent the next few runs practicing weight transfer and thinking about the circle of traction, but while I was getting smoother my lap times weren’t decreasing and something just felt “off” with the car. Sure enough, just after finishing my last lap one of the other drivers that was working the course came over to me and said, “Hey, so when the instructor was driving your car, a whole bunch of these little u-shaped metal things flew out from under your car. I hope they weren’t important…”

So, there’s not too many “little, u-shaped pieces of metal” that come standard on a GM, but here’s one of the little guys that went flying. If you correctly guessed that it is an upper control arm alignment shim, then you probably have the same stomach-dropping feeling that I did at that moment…

Popping the hood revealed the extent of the issue. Kids, that’s an entire stack of alignment shims that’s missing from the rear of the passenger side upper control arm. If you don’t know, those are used to set camber and caster for that wheel. Yup, I unknowingly drove at least 5 laps like that. Yikes.

But hey, I brought a floor jack, stands, and tools, so no problem right? Sure, except that I didn’t think to bring alignment shims and the nearest auto parts store was a 20 minute drive away. After having a few more than generous people offer me rides and/or the keys to their car, I decided to call up said big-name parts store and had a conversation that would best be told as part of an “Unknown Parts Guy” blog item. Suffice to say that the parts jockey was more than a little confused when I asked if they had alignment shims in stock and told me that I’d have to drive down to see for myself.

Rather than risking losing the rest of the day, I made a trip to the local hardware store a mile away and bought every 7/16″ washer they had in stock. Total cost? A hair over $2 and I was back on the track without missing a lap.

If pressed to supply a guess as to the actual camber and caster on this wheel post-repair, I’d wager “Good enough”.
With the repair done and lunch over, it was time to get back in the car with the other instructor. His time was spent going over “looking ahead” and setting up for the next element, which are two of the most crucial skills needed to successfully navigate an autocross course given the limited number of looks (Runs) that you get per event. End of the day, if you’re not looking ahead to where the car needs to be next, you’re going to mess it up and slow yourself down. As he put it, “Position First, Speed Later. Speed is of no use if you’re out of control.”
Here’s one of the runs with the second instructor driving the car. His focus was on smoothness and looking ahead to be set up properly for the next element.

While my lap times only improved by a second or two overall, keep in mind that those two seconds translates to roughly double on a full-length course. What isn’t shown is better hand positioning and smoothness that I also picked up.
This last video shows a before and after of my second run, which was my fastest prior to instruction, to my third to last run, which was my fastest “clean” run as I hit a cone on my two fastest runs. To me at least, it’s pretty obvious that by the end I’m doing a much better job of shifting the car’s weight, positioning the car, and looking ahead. Oh, there’s also 100% less F-bombs that needed to be edited out in the After run. Seems that I’m a bit foul-mouthed when I drive. (Somewhere, my mother is shaking her head in disappointment…)
End of the day, it all boils down to this: While adding improvements to your car like I did with the larger front sway bar can’t hurt, the biggest bang for the buck for an inexperienced driver like myself is to get some time with an instructor and cure yourself of any bad habits before they’re set in stone. All said and done, the school was less expensive than a single 200 treadwear tire, and it helped me to smooth out my driving and shave seconds off of my lap time. If your local autocross club doesn’t offer an Evolution School or other Novice school, I’d highly recommend asking for an instructor or other experienced driver to hop into the passenger seat at the next event that you’re at. You’ll be surprised by how much insight you can pick up from the feedback from a single lap.
In the next installment, we’ll see if I actually remember half of what I learned at the July 20th NER points event that I attended.
Curious about the Evolution School? Check out more HERE
Looking for an SCCA region near you? Search for it HERE


I went to EVO School myself and found it a better payoff than any mod I could have put on the car for dropping lap times. I showed up in a 15 year old Ford Probe GT – it was probably 1/10 the purchase price of the next cheapest car there, and over 100 times cheaper than the most expensive one…
Nice to see you keeping it going, Nutting!
I am planning to attend the next Evolution school that comes through the area, but alas, that doesn’t look like its going to happen for a while.
Maybe by then I will have actually done something to the bone stock and worn out suspension on my 69 Satellite Wagon. (featured as the cover photo of the Cars of Summer show gallery and described by Lohnes as “tattered” and “Bangshifty Perfection.” Damn right I’m proud!)
I’m still trying to work up the nuts to head to the next SCCA Autocross at Devens with the ol’ girl. You think they laughed at you or at Lohnes, just wait, especially considering the level of body roll whenever I attempt a basic corner with it.
Keep it up, Nutting, I’m having a blast watching.
Thanks! It’s a lot of fun, even in a slow car.
Just curious if you have a Monte SS steering box in the car? Looking at the video tells me you don’t have one installed.
No sir. I still have the stock non-F41 box installed. I have a 12.7:1 box from a later model Third-gen F-body sitting on a shelf in the garage, waiting to go.