


(Words and Photos by Pete Basica. Photos by Bruce Raymond and Mike Norris)
The Wally’s World GTO has been kicking our collective asses. It looks so damn clean, and it is…sort of. The trouble with the 2004 – 2006 GTO is that the nuts and bolts came with the GTO from Australia. The nuts and bolts don’t like salt and snow because they weren’t every supposed to experience them. Wally has kept his GTO out of the elements, but he is the second owner. We replaced a number of suspension bolts because we planned to, and a few more because we had to. Unfortunately for the next crew that works on Wally’s GTO, they will be up against a different problem. Every suspension bolt is race track ready with LocTite and tightened to the German Department of Weights and Measures Standard — Gudentight!
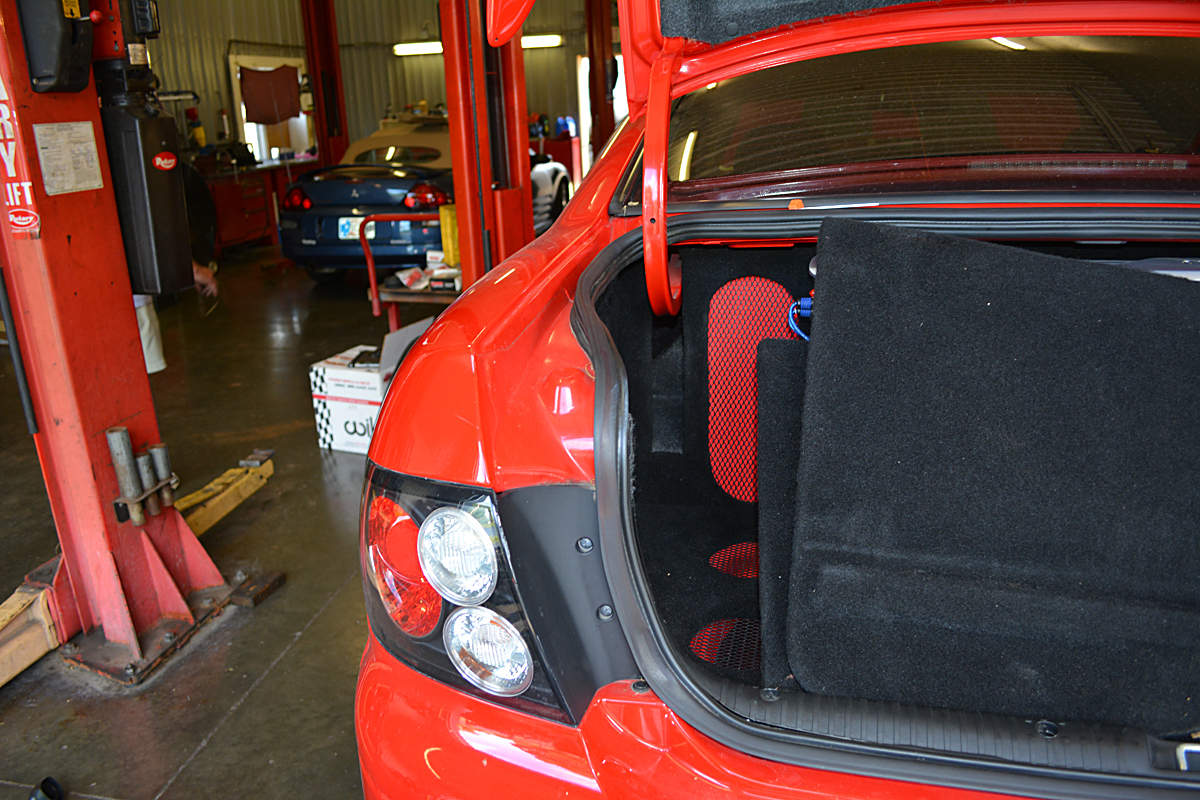
Wally bought this GTO with a built in boom box. Sounds great, adds weight and restricts access to the rear upper shock mounts and nuts. If you slide your arm into the stereo hinge slot while standing on your head in the trunk you may just be able to touch that nut. Dave is demonstrating his ‘can do mentality’ or hopelessly wishful thinking. Passenger side access to the rear shock nut and mount is worse that the driver’s side WITHOUT stereo because it is buried with the fuel fill tube and vent lines. With the stereo it was nearly a Mission Impossible moment.
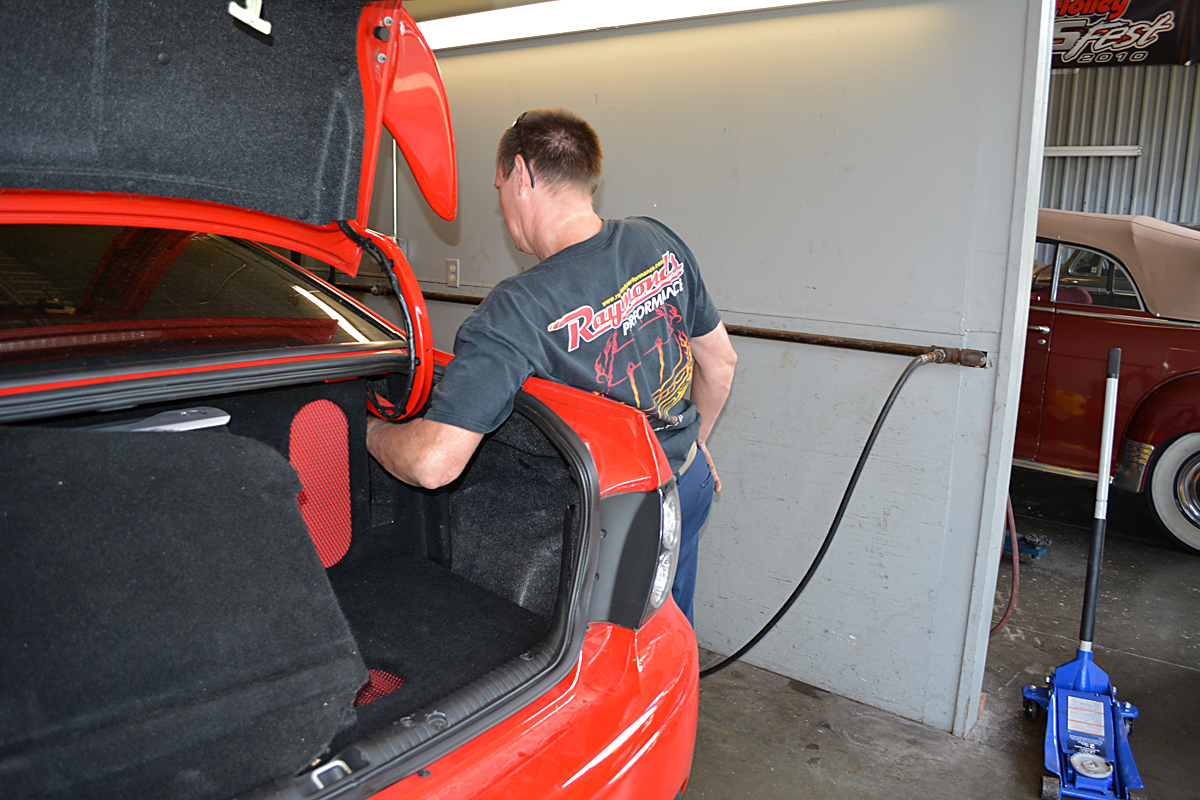
You are probably wondering why we have a stereo in a race car and that is a great question. The OPTIMA Ultimate Street Car events are designed for daily drivers and run of 200 tread wear tires or higher. Wally daily driver this GTO and his kids love the stereo. We are not going to disappoint the kids so we worked around it. With the rear shocks out we are ready to get to work on the GTO.
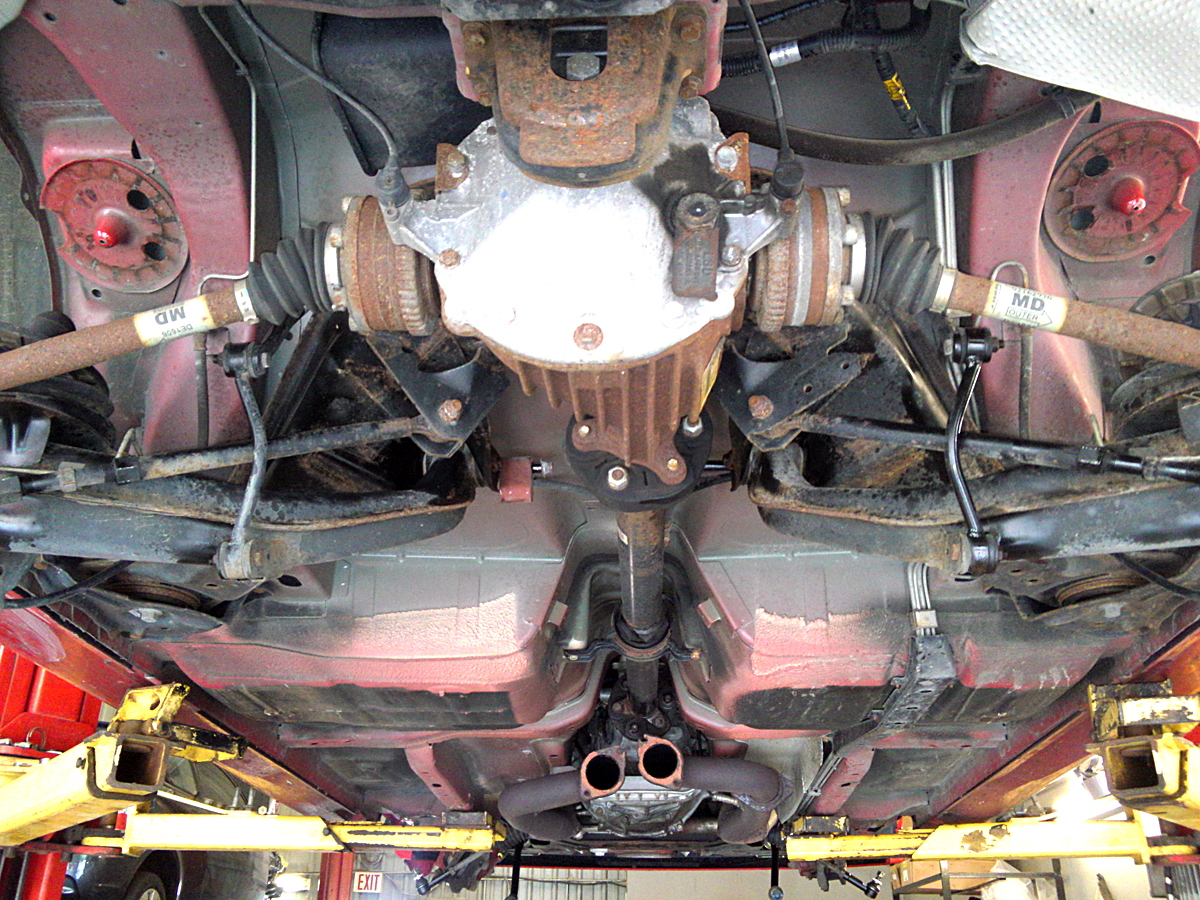
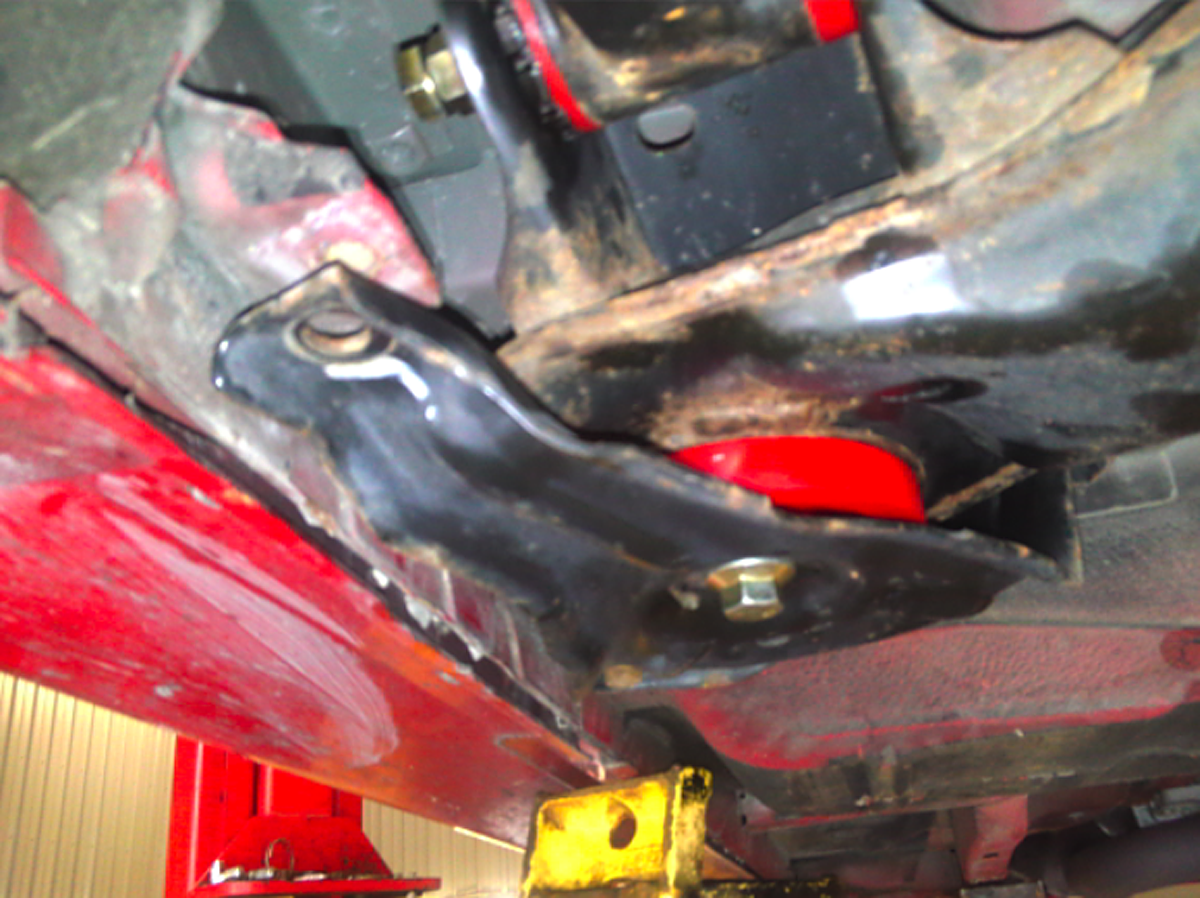
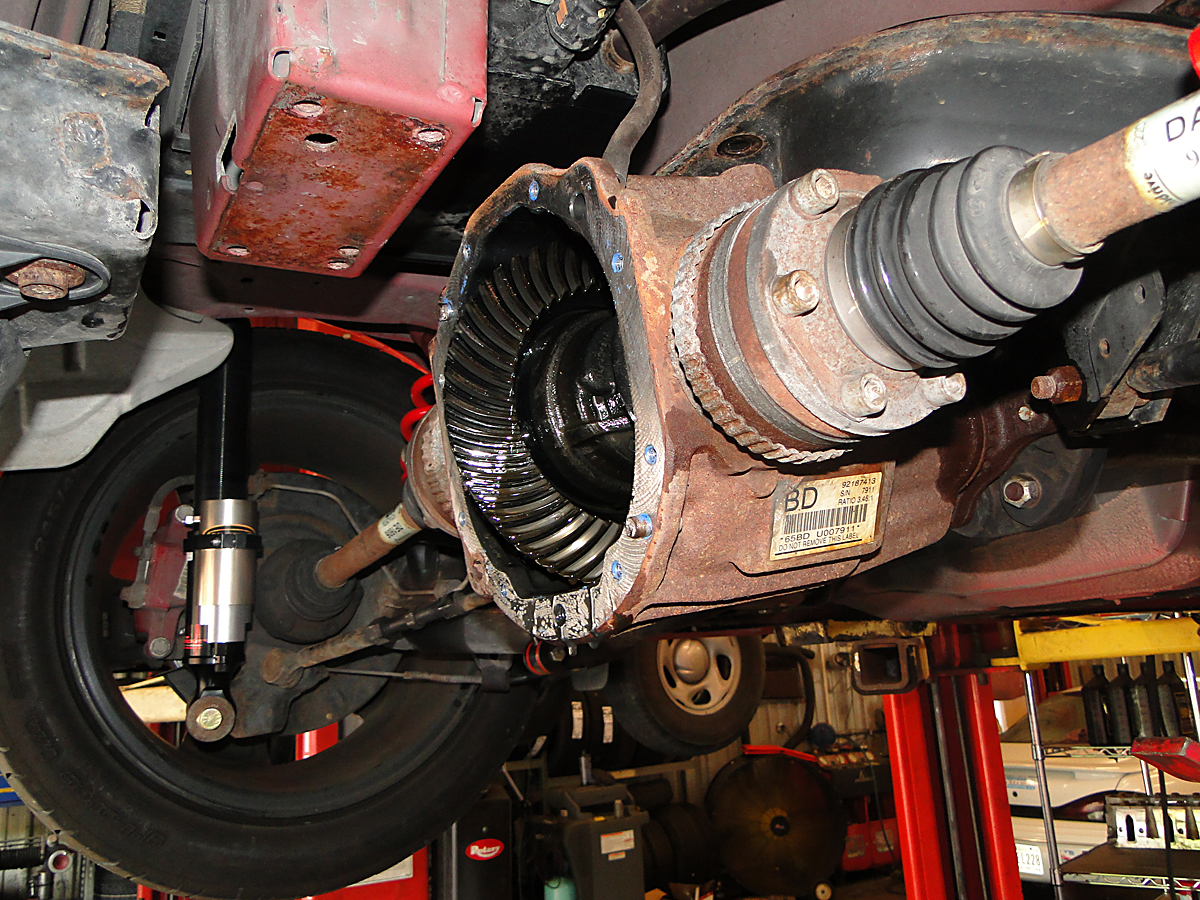
The GTO has a unique IRS. The differential attaches to the monocoque through a loop style bracket. The bracket is held in place by four teeny tiny #10 bolts. The ‘tail’ of the differential bolts into the loop. This configuration in the anchor of the GTO IRS. On either side of the differential is a K-arm. The inner K-arm bushes are deeply voided and have a bad habit of tearing. The outer bushing is a robust solid rubber bush. Two deeply voided rubber sub-frame bushes complete the IRS suspension attachment points. With no upper control arms and a barrel full of soft rubber bushings the GTO did not leave the show room road course ready. Add years and thousands of miles and you have what Wally drove in asking us to fix.
We start my removing the OE sub-frame bushes, but first we have to remove the factory installed sub-frame bolts. They were LocTited from the factory and when brand new creaked and groaned coming out of the car with a four foot long breaker bar and a lot of heat and grunt. Wally’s were worse. Heat and the most powerful impact wrench were barely enough. Three turns down and three turns up. Four turns down and three turns up. We had to work them out one thread at a time. Sort of. This is the good bolt.
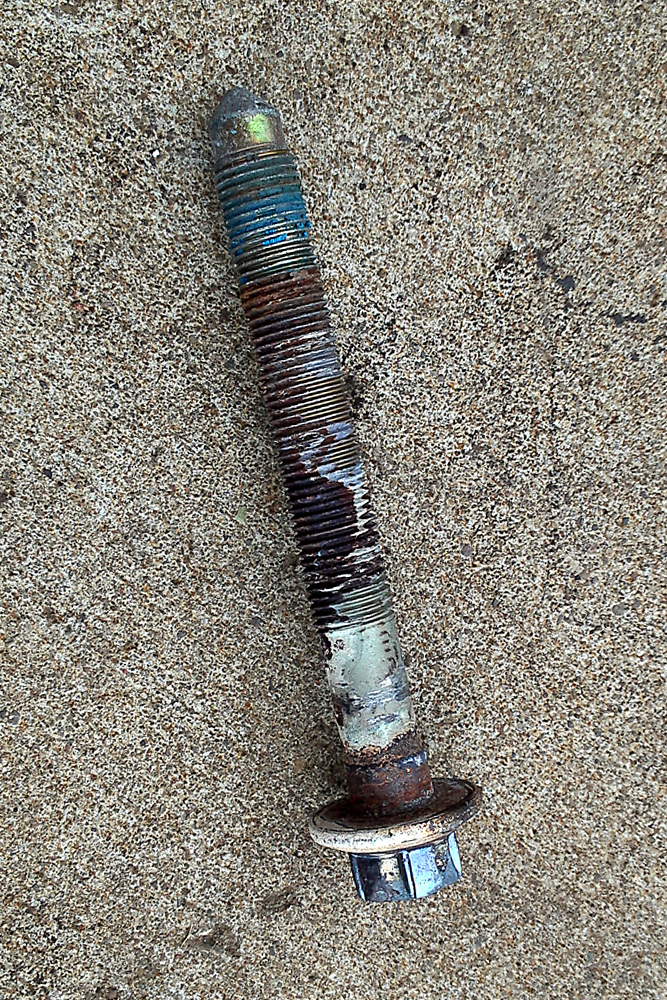

This is the bad bolt. The really bad bolt that broke up in the body mount.
Eric Pitts showed his expertise with salt and made short work of it with a drill and EZ out. Having years of experience with the GTO Pete Basica from Pedders brought new sub-frame bolts with him. The extra time kept adding up.
There is a plate that covers the sub-frame bushing and arm. You can’t see the rust under it until the large sub-frame bolts are removed.

There isn’t enough rubber in this sub-frame bush for a four-banger let alone the Raymonds Performance built and Mike Norris tuned LS motor.

We needed more control and we got it with Pedders EP1145 sub-frame bushes and EP1168 uppers. Mike Norris and Bruce Raymond are going to take credit for a huge increase in RWHP. The truth of the matter is that every Pedders red part installed on a GTO increase RWHP by 5.

The discarded parts kept piling up.
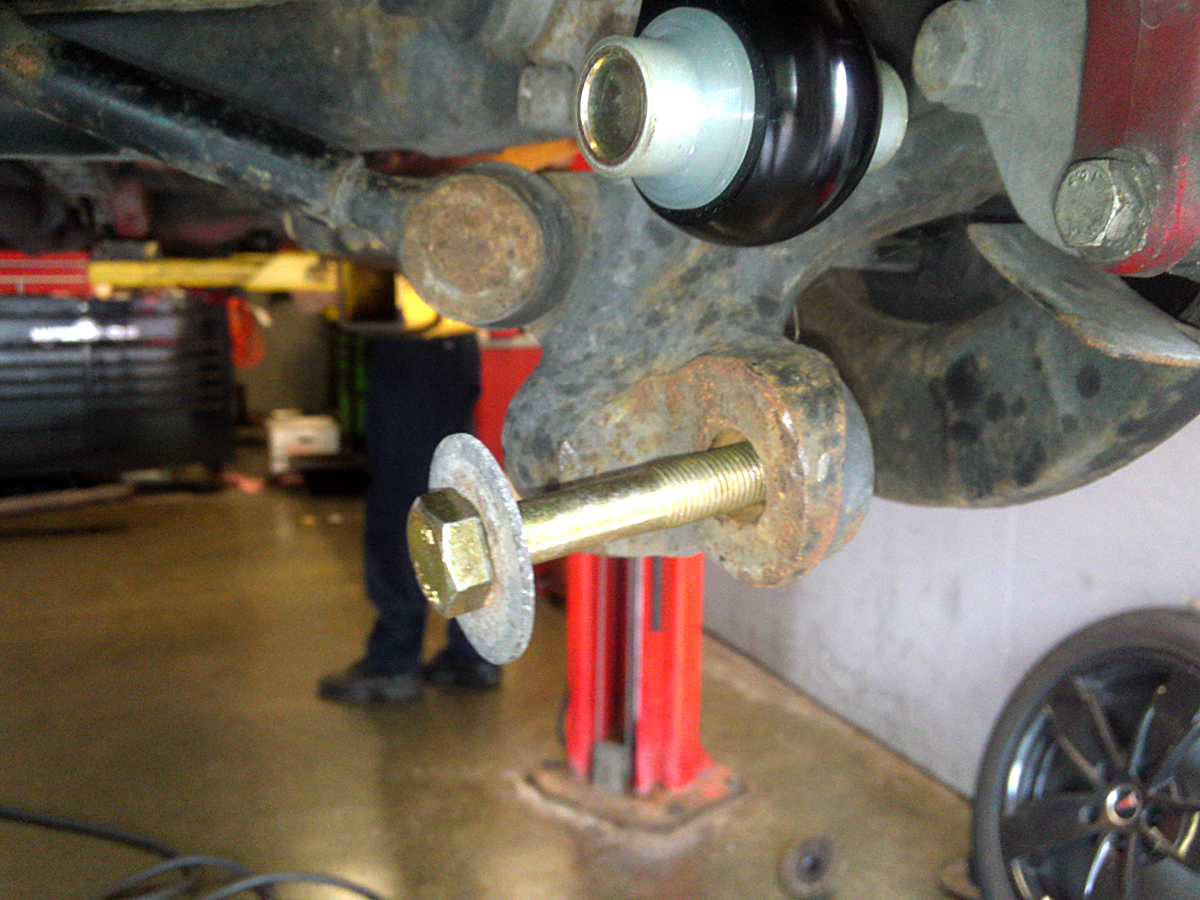
The GTO IRS has only Toe Adjustment. Camber is set by ride height. The lower you go the higher the negative camber value. Wally’s GTO drove in with -1.5 degrees of rear camber sitting still. As the wheel moves up into the wheel well under load rear negative camber increases making it hard to put down power coming out of the turns or a drag strip style launch. We installed Pedders 5403 Rear camber kit in the our position on the K-arms. These eccentric ferule bushes provide a full degree of adjustment. The large steel ferule accepts two bolts. The inside bolt, the bolt facing the differential is the short bolt in the kit and installs with a lock washer. The outer bolt is the long bolt. It installs with a locking nut.
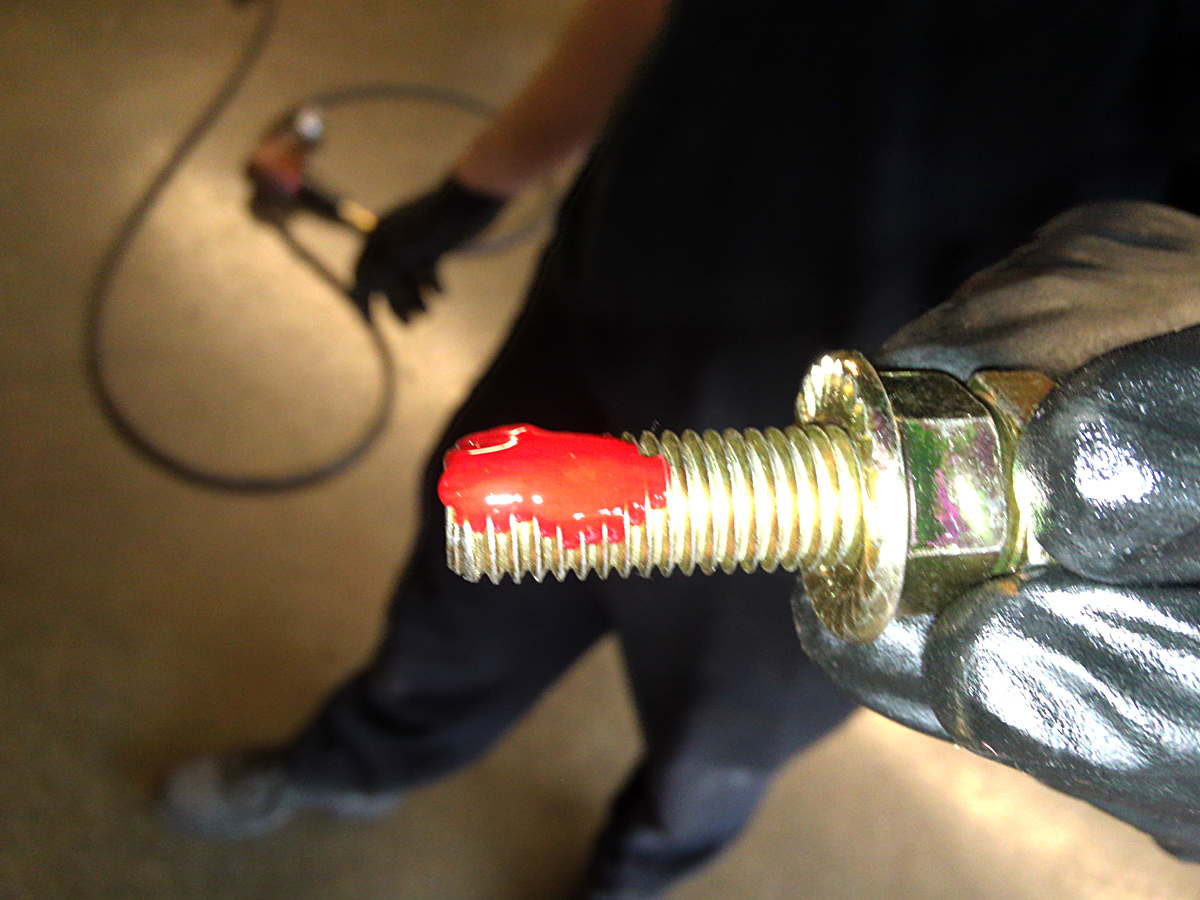
LocTite is your friend when installing the adjusting bolt for the 5403. You can see the locking nut is spun up to the bolt head. We are going to loose fit the bushing assembly in the car. We’ll tighten down the inside bolt to secure the ferule. With the ferule secured we are going to use an impact to drive the adjusting bolt in. Once hammered in place, the adjusting bolt will never be turn counter clockwise. If you miss the sweet spot on the alignment rack keep right on turning. When you hit your number lock down the 5403 with the inner bolt and use a wrench to tighten up the locking nut on the outside bolt.

The 5403 is loose fit on the driver’ side and yes that is Pedders RED LocTite you see.
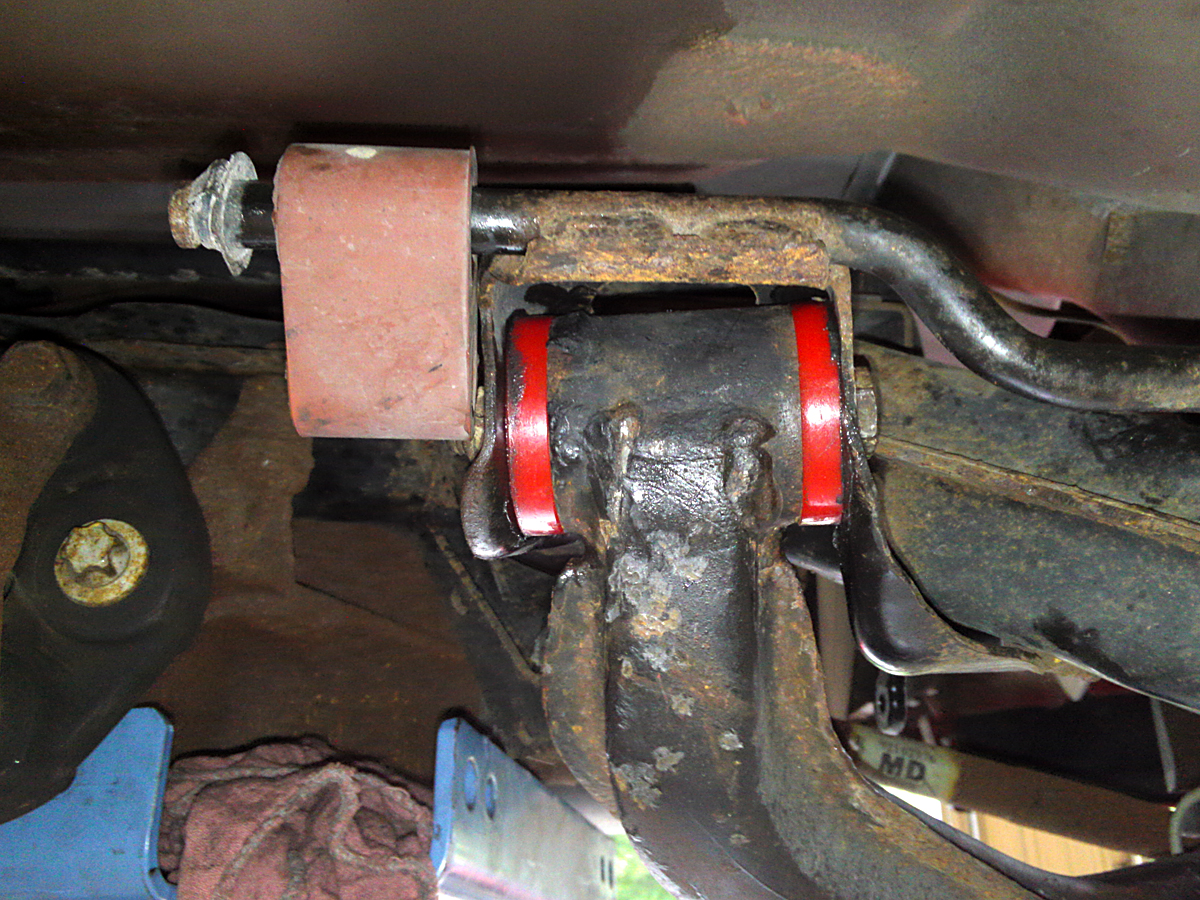
Pedders EP7023 fill the inner K-arm bracket.
We filled the inner K-arm with EP7023 bushes which combined with the 5403 eccentrics and EP1145 sub-frame bushes provides stability in the GTO IRS. We are far from done. We replaced the OEM rear sway bar and worn rubber bushes with a Justice Pete Signature Series 20mm solid adjustable rear bar from Pedders USA. There is very little room where the GTO sway bar mounts. 20mm is the largest bar we can fit. A 20mm solid bar is the strongest bar we can fit. Sway bar balance in mission critical in transforming the GTO from a pushing car to a neutral, stable, predictable corner carver.

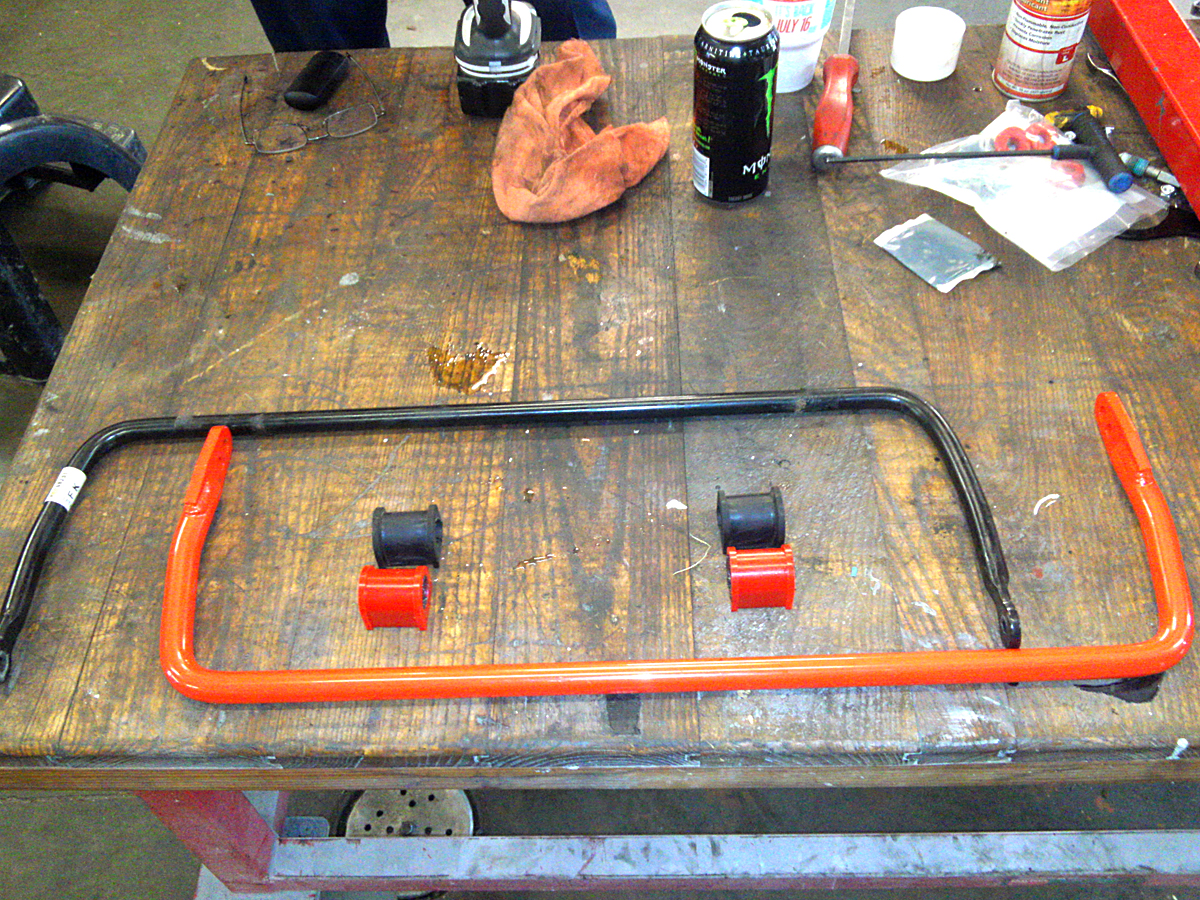

The rear GTO endlink works around the toe link. Based on the shape and strength of the factory links we choose to rebuild them with EP513 bushings and our own 10.9 grade hardware to improve the efficiency of operation. We are in the final stage of the suspension build ready to drop in the springs. We reuse the OEM lower spring insulator and set the NASCAR style aluminum spring jack and motorsport alloy beehive style 8 kg (447 lb) coil in place. To hold the coil in place we adjust the length of the Supercar monotube to match the lower eye to the shock mount bolt.
New Rear Lower Shock Bolts. We planned ahead.

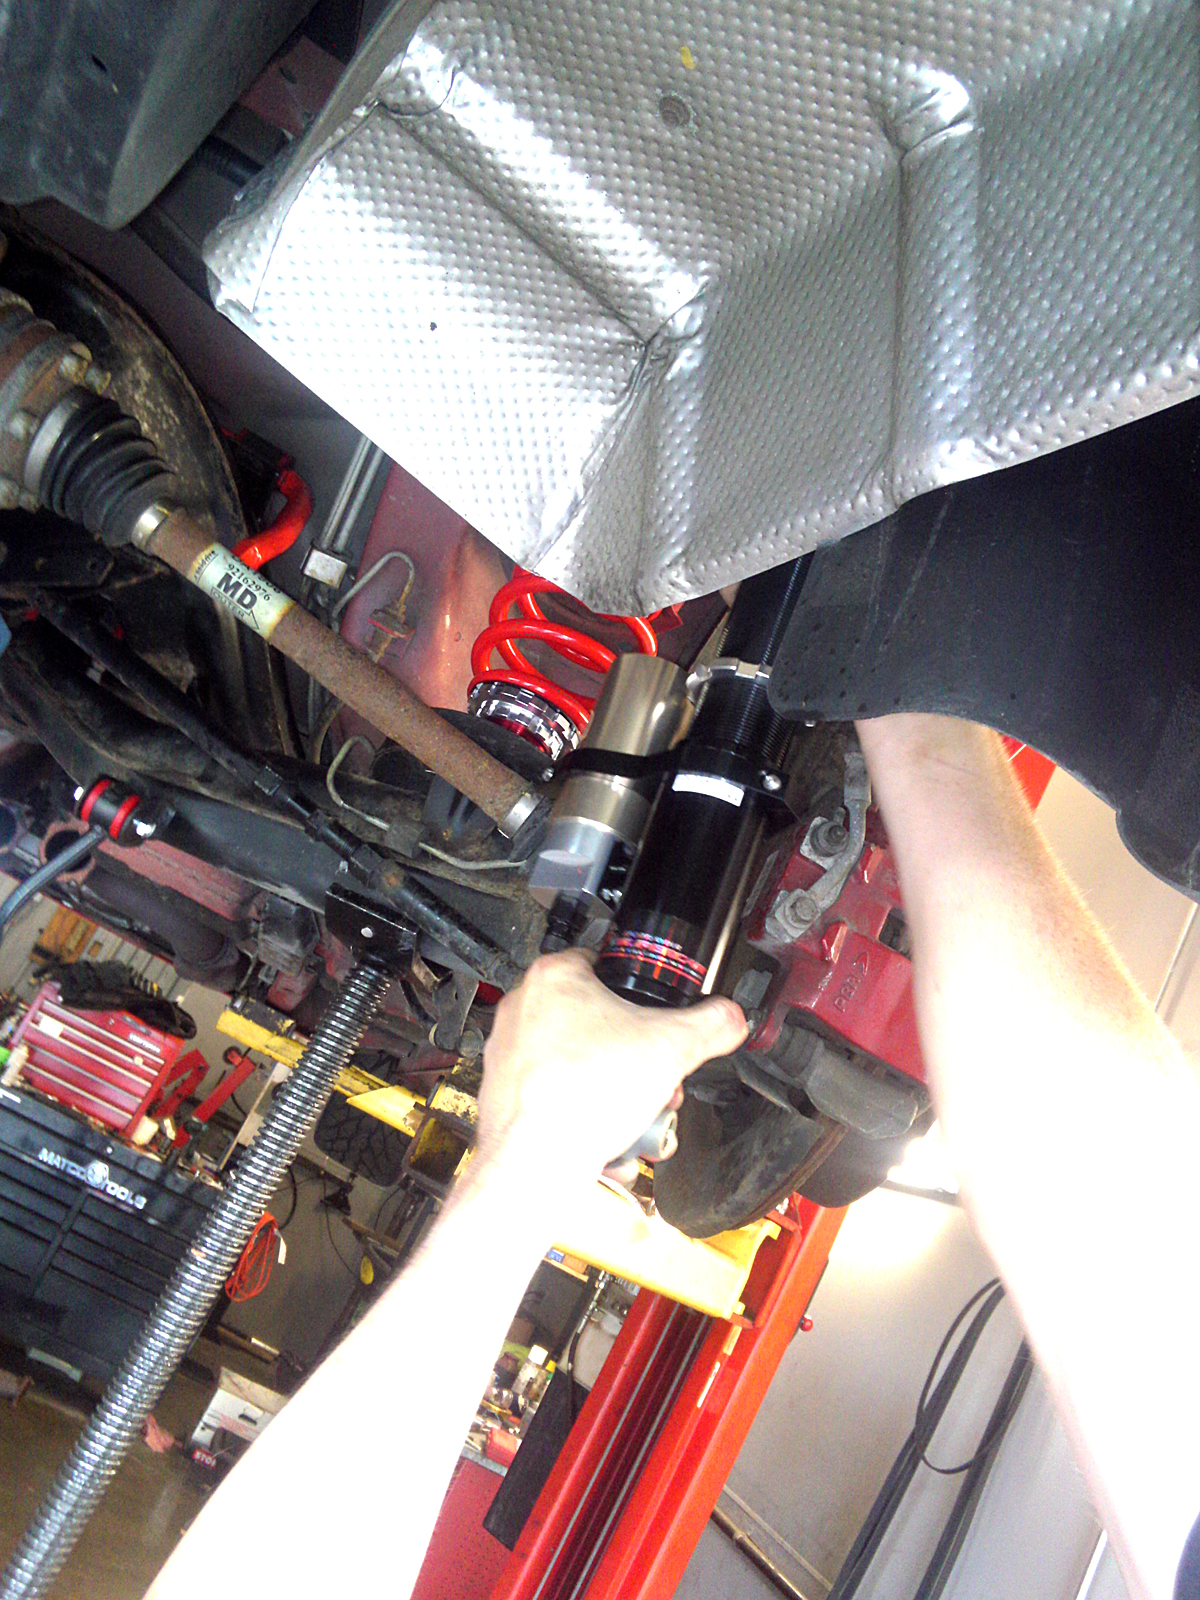
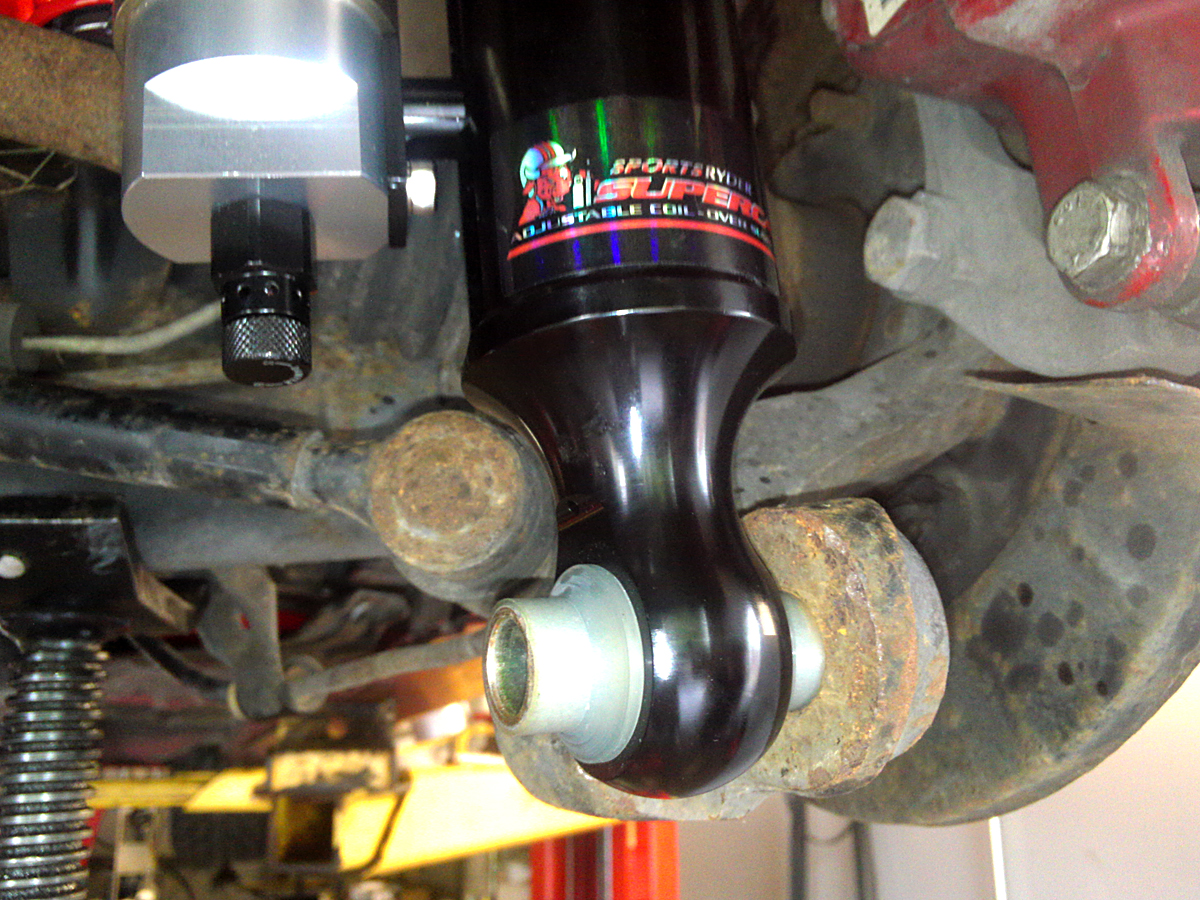
The length of the monotube is perfectly matched, but the best part is to seat the ferule Pete gets to use his Pedders RED HAMMER again.

All we have left to do is tighten down the aluminum locking ring on the monotube and tighten the lower shock bolt.
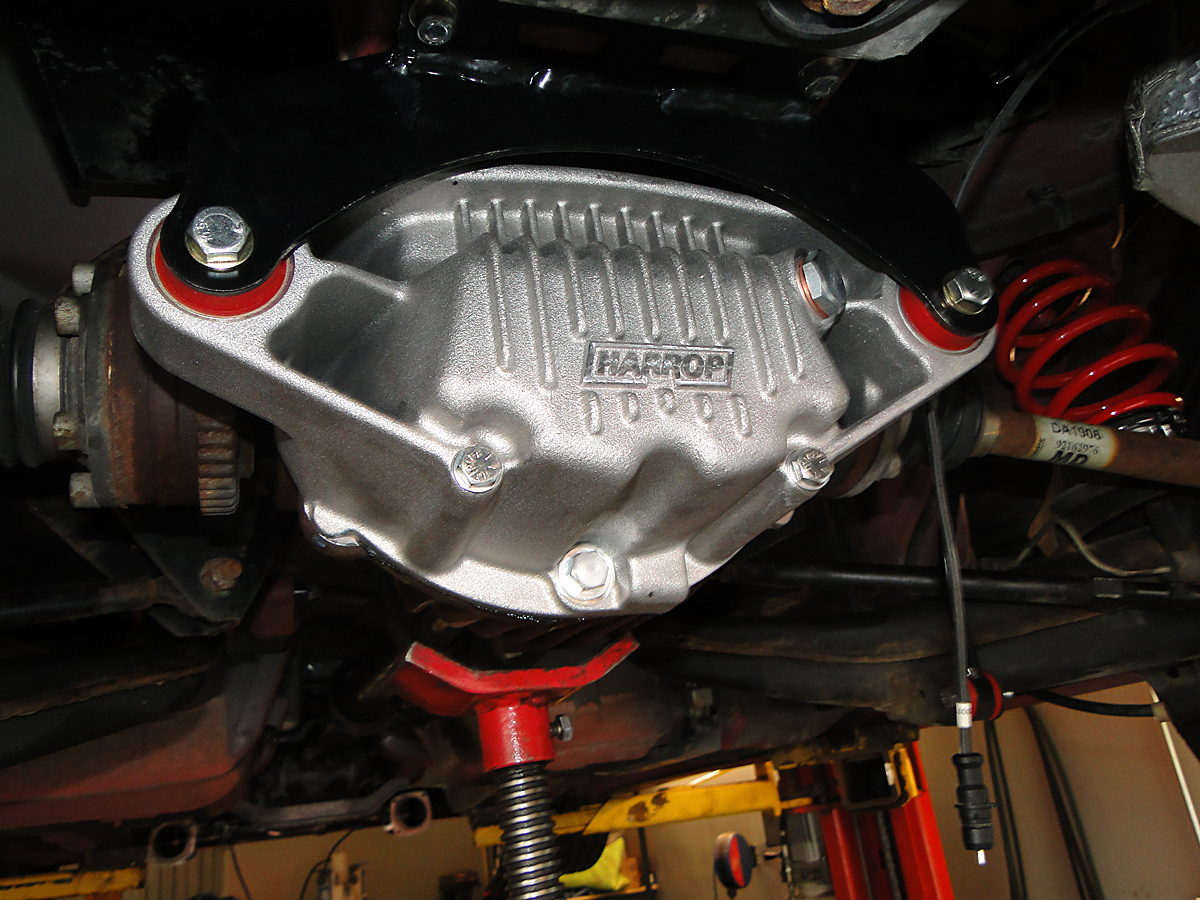
Some would stop here, but not us. Especially not us when it is Wally’s World GTO and we’re competing for a slot at the OPTIMA Ultimate Street Car Invitational that comes with a spot to display the GTO at SEMA! We replaced that dainty OEM differential mount with a Harrop differential cover and mount. The Harrop cover keeps the differential stable and doubles the volume of fluid. The increase in fluid volume and surface area of the larger casting keep the differential cooler on track.
Harrop Cover
The OEM mount and cover are removed.
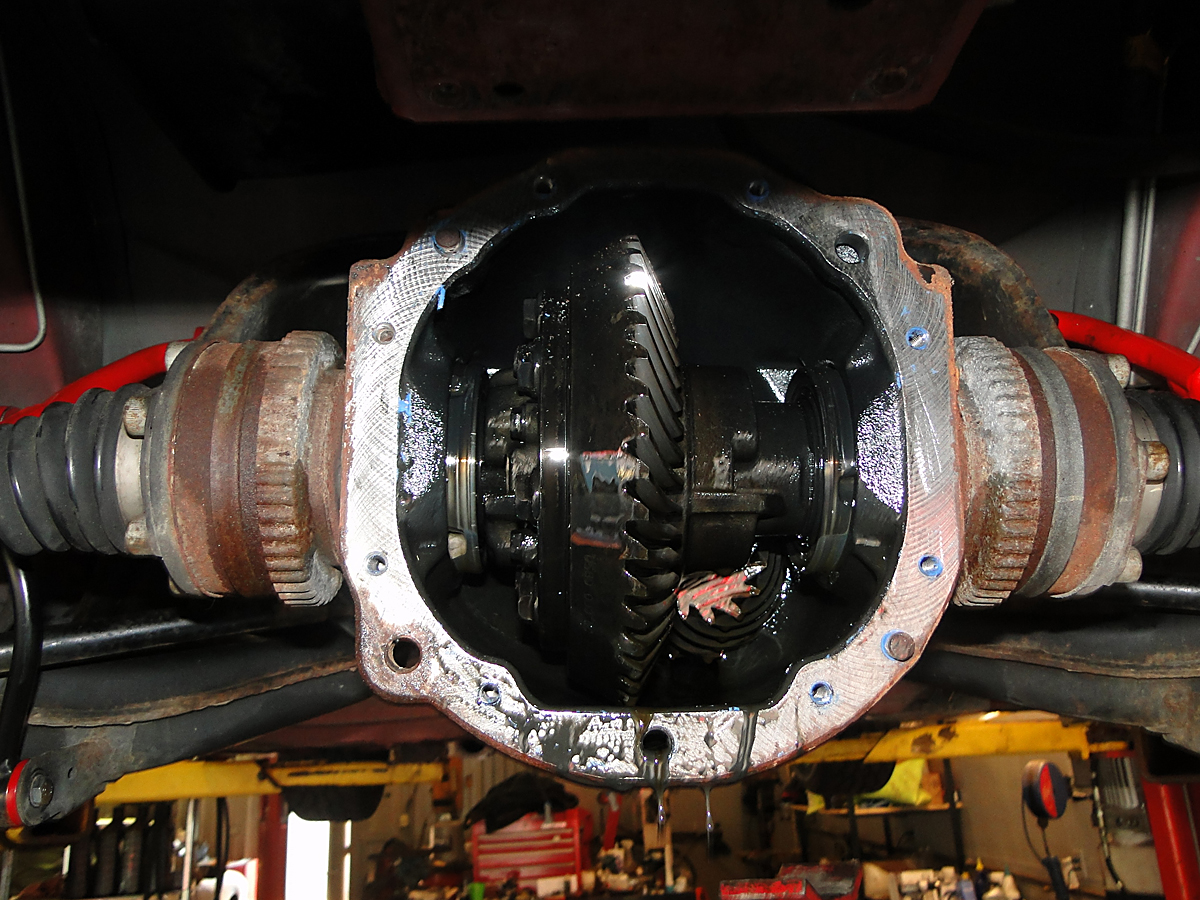
So that’s what I inside a differential.
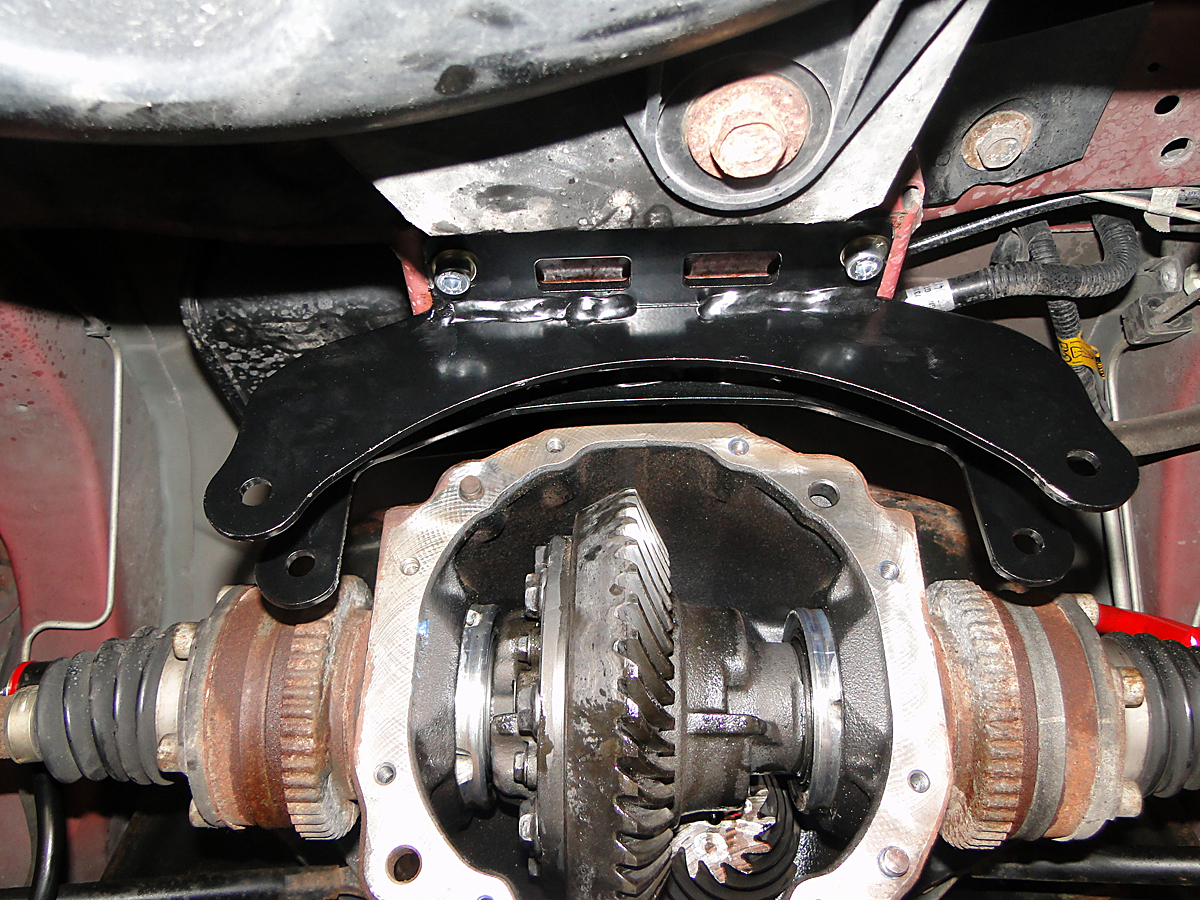
The Harrop bracket moves the support of the differential from the center tail to outer ‘ears’ greatly reducing differential twist and contributing to the overall stability of the IRS.
Damn!
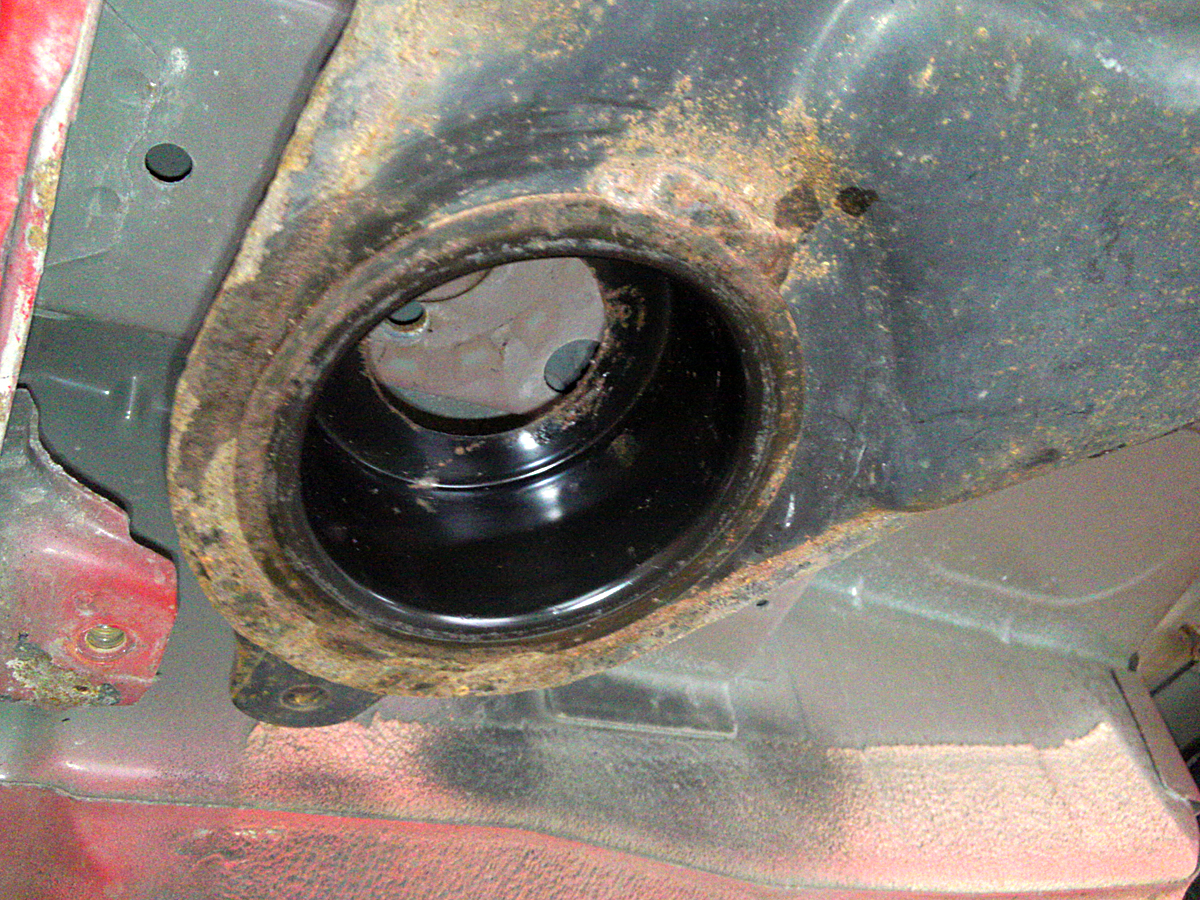
Our suspension assembly work is almost complete thanks to our Undercar Superstars Eric Pitts and Dave. Now we move top side to final tighten the rear upper shock nuts and fine tune the holes for our camber plates. Leaning the strut tops all the way in isn’t all about negative camber. When you lean the strut in you improve Steering Axis Inclination. This reduces scrub radius and returns the wheel to the straight position faster. The car gets easier to drive. On the GTO it also allows us to fit slightly wider rubber up front. The more rubber we stuff up front the less the GTO will understeer. Rather than cutting into the strut tower metal, Eric Pitts massaged the lip rolling it up to create the clearance we needed to take full advantage of the new GTO Camber Dual Bearing Plates.
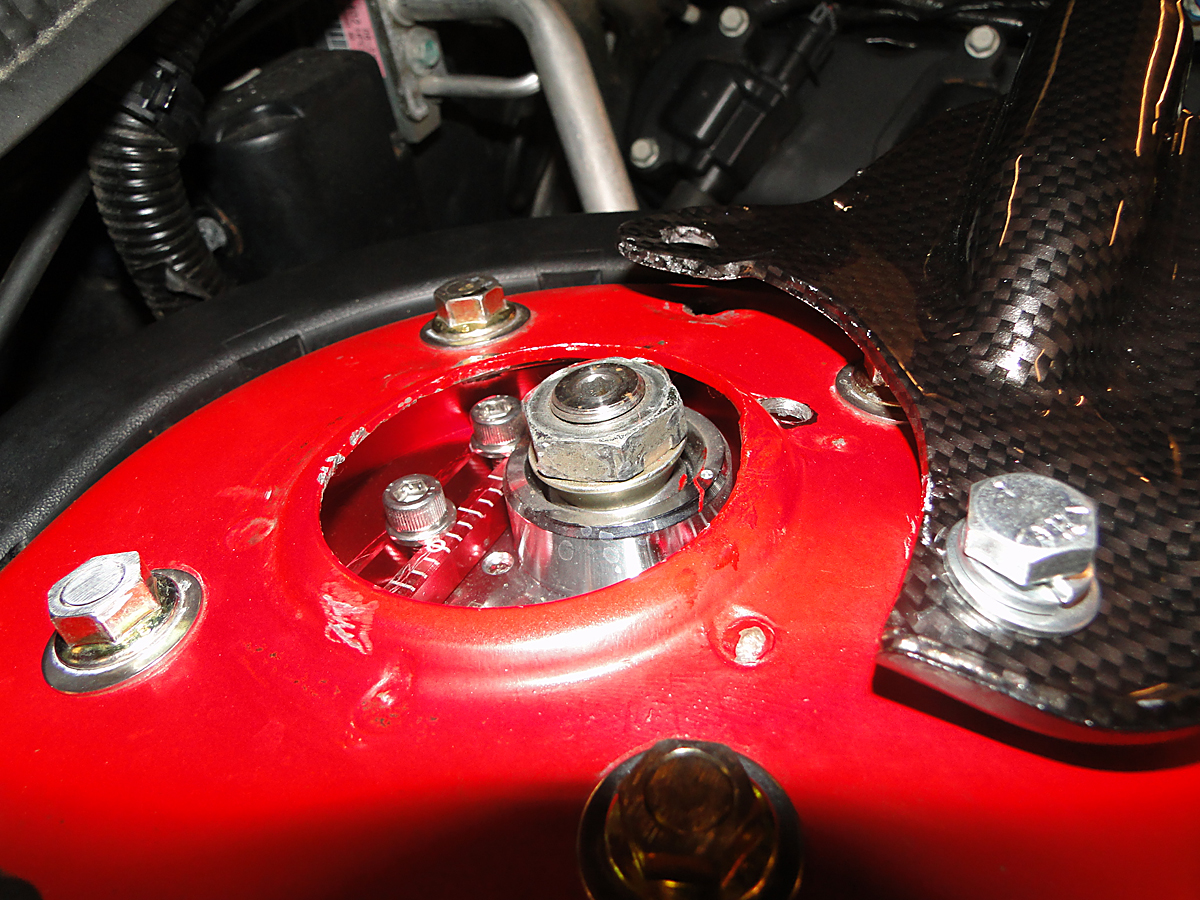
The studs for the camber plates have been trimmed and we can fit the OEM strut tower bar in the original holes with new longer bolts. Bruce Raymond wanted to add another 5 RWHP to Wally’s GTO so he dipped the OEM bar and came out with a carbon fiber bar. The carbon fiber ‘look’ has to be worth at least 5 RWHP! The final strut tower bolt will have a spacer installed beneath it or a stack of washers depending on how much more time we get with Wally’s GTO. In our next installment will cover installation of the Wilwood brakes, corner weighting, front and rear sub-frame alignments and the final alignment.


y Pick-ups with coil I own a 2004 GTO, love it to death. working on rear suspention like the 60-72
GM pick ups with coil springs or like NASCAR. collecting parts now and will share when completed. also affordable for all.