


Let me start by laying out the scenario for you:
There’s pressure to get your project done, whether it be due to the end of the driving season looming (If you’re from a part of the country that doesn’t get snow, just nod your head and pretend to understand), an event to attend, your significant other starting yet another “You never drive that car, you know…” discussion, or just the need to get the darn thing finished. More often than not there’s also a budget constraint, AKA you have four figures worth of parts needed and only three figures worth of budget, plus or minus a kidney.
Given this, what’s a gearhead to do? Assuming that all of your internal organs are required and that novelty-sized Publisher’s Clearing House check is still MIA, either the car stays in garage while you continue to save for the right parts for the job, or, if you’re like me, you start shopping around for parts that are “good enough”. Sometimes you luck out and find some “gently used” speed parts that meet your budget, but when you’re really in a bind those off-brands start to look MIGHTY tempting. Next thing you know, those bargain parts have failed and you find yourself faced with twice the original intended project cost. Uh oh.
Above is the predicament that I found myself in with my well-worn ’87 Chevy Monte Carlo SS.
Remember that car you bought back in high school or college? The one that you tortured and subjected to every harebrained modification, often hacked together on a Saturday morning in time for that race on Saturday night (Mom, that never happened…), just to be torn back apart the following weekend? Remember how you sold that car after you realized that it was a complete money pit and mostly comprised of failed good intentions and zip ties? Well, I still have mine, and years later I’m still sorting through all of the mess than my younger self created.
Today’s blog item is going to feature step one of this process, which is the replacement of some “Made in God-Knows-Where” gauges with a set of American-made Auto Meter Sport Comp IIs. Enough intro, let’s get on with the install.
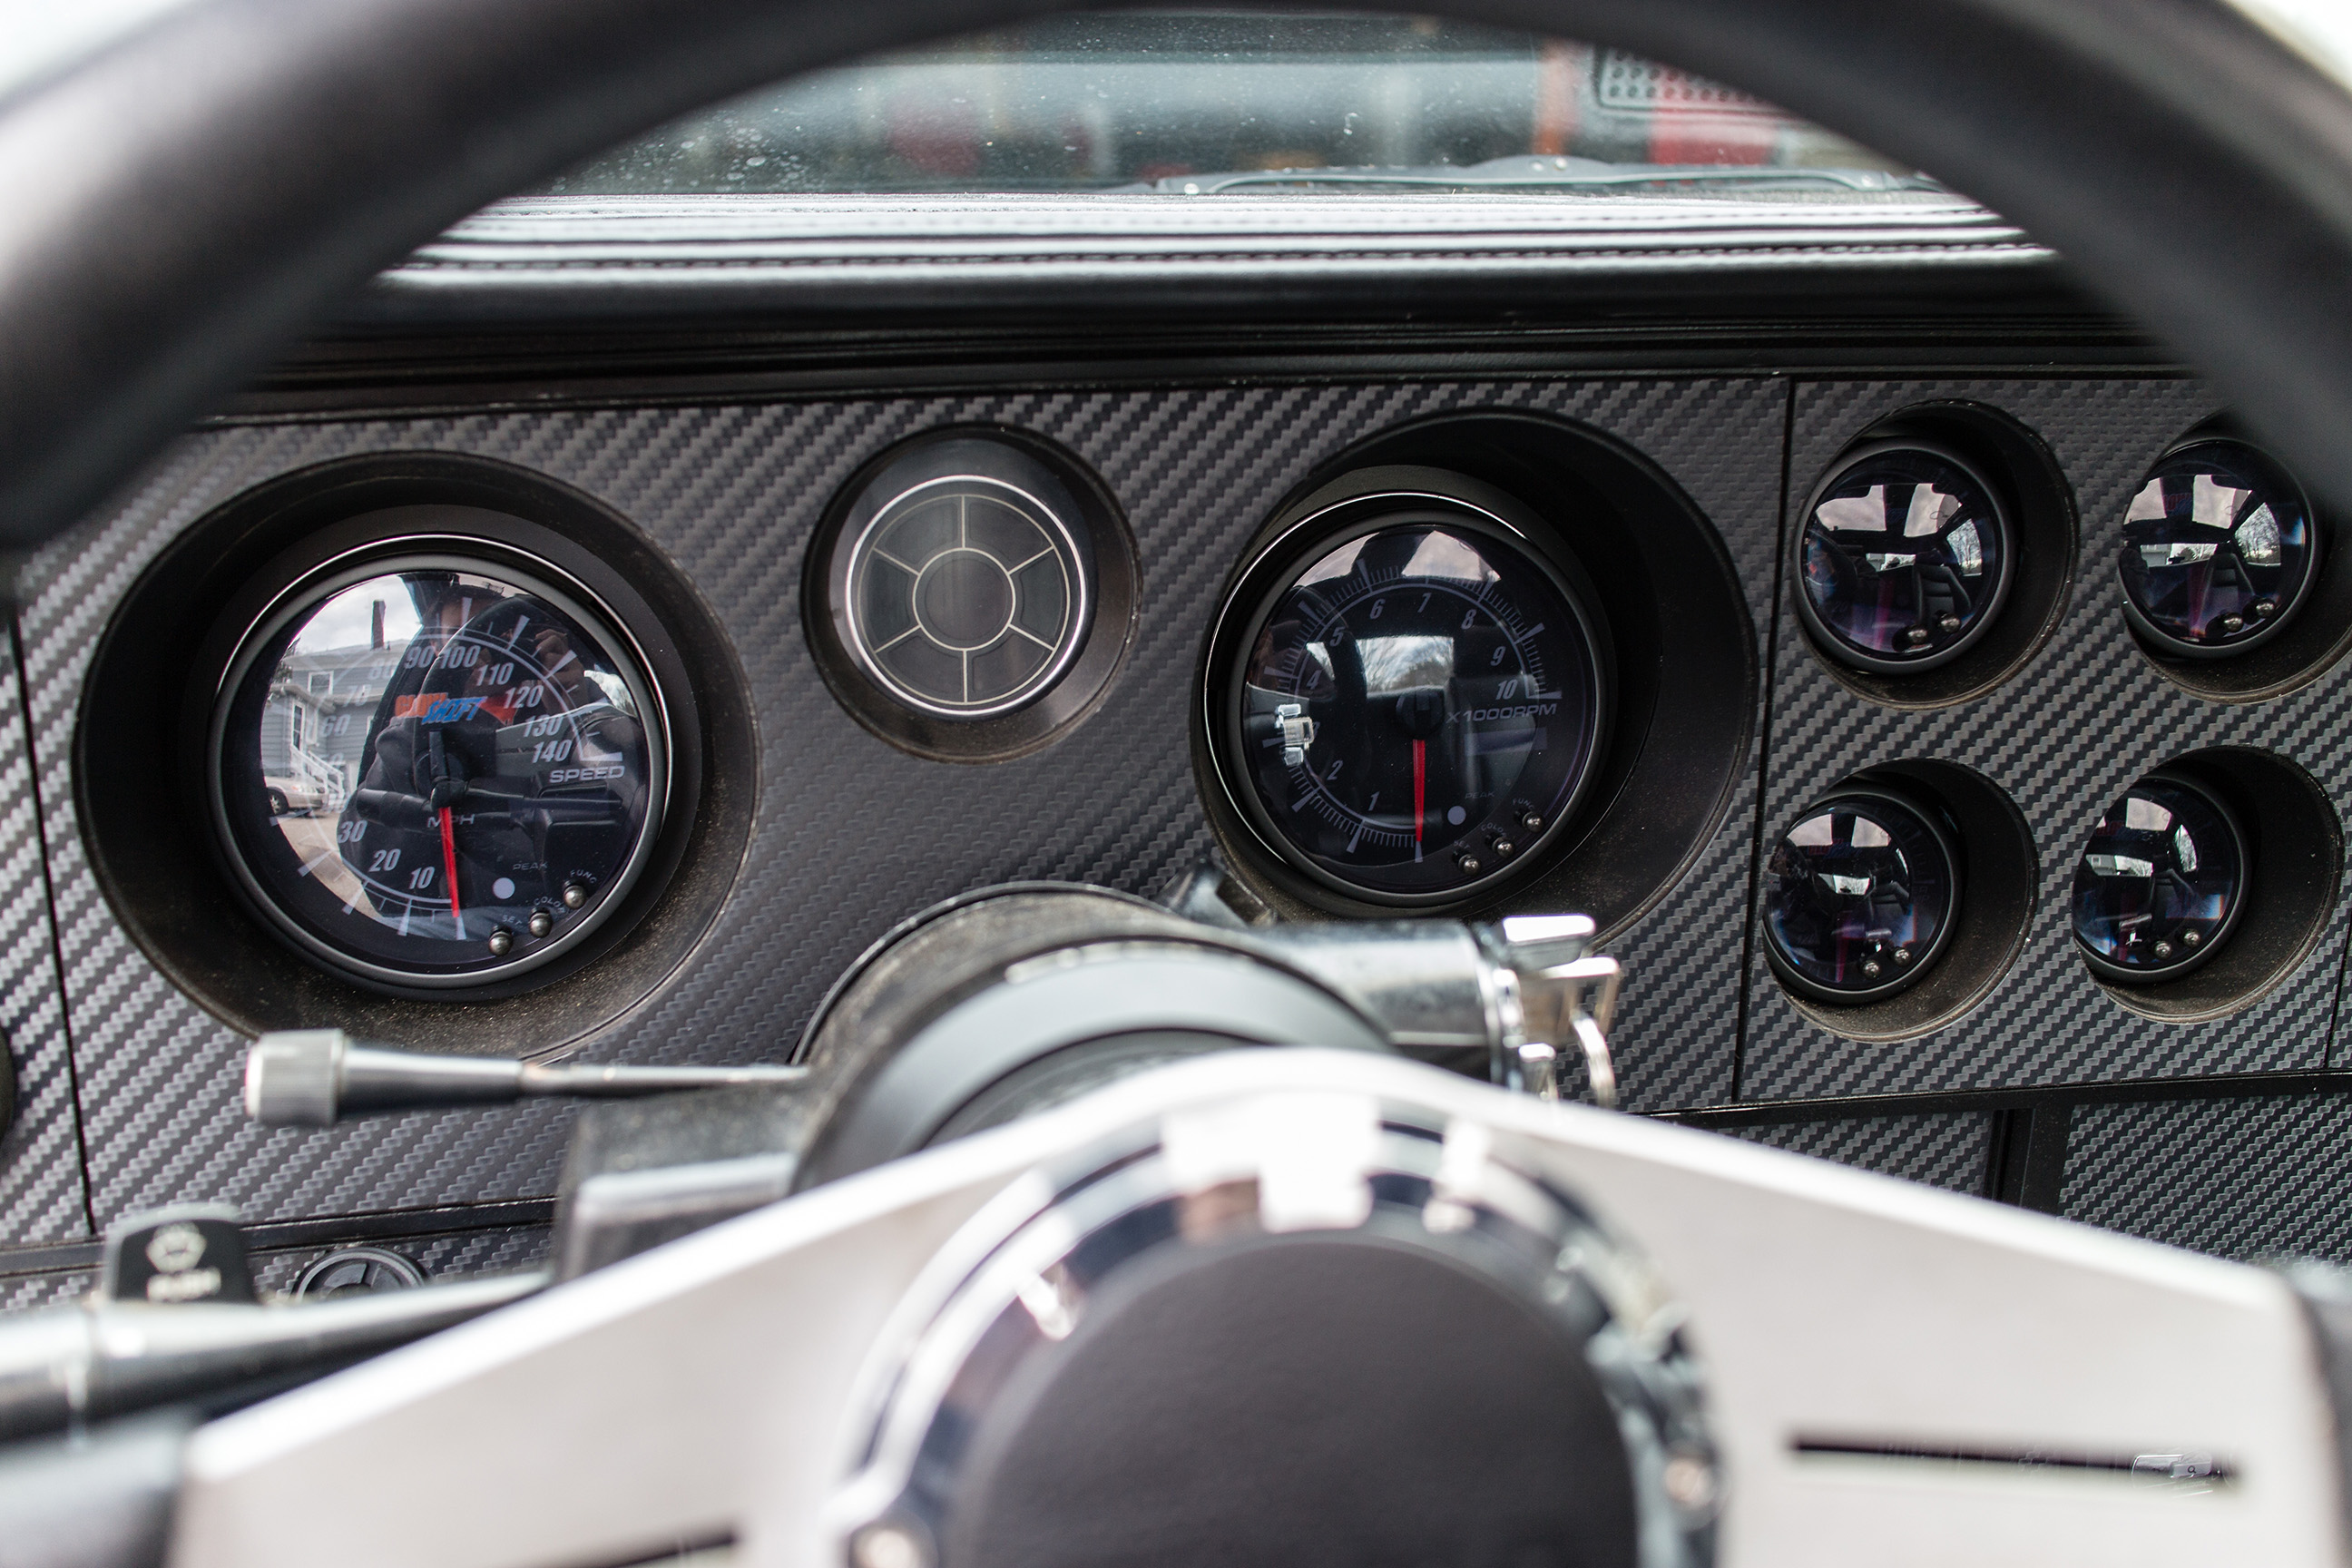
Here’s our starting point, which is a G-body Pontiac Grand Prix dash installed in my ’87 Monte Carlo. The instrumentation is a set of “Brand X” gauges that I picked up new off of eBay around the time that Tiger Woods was having his rear window smashed in by a soon-to-be ex-wife. They ticked all of the right boxes because they were A) cheap and B) the right size for the dash, accuracy be damned. As expected, the electronic speedometer never really worked, the fuel gauge liked to read backwards, and the water temp gauge was about as accurate at measuring temperature as those little pop-up thermometers that come in a turkey. Did I mention that the gauges were cheap?
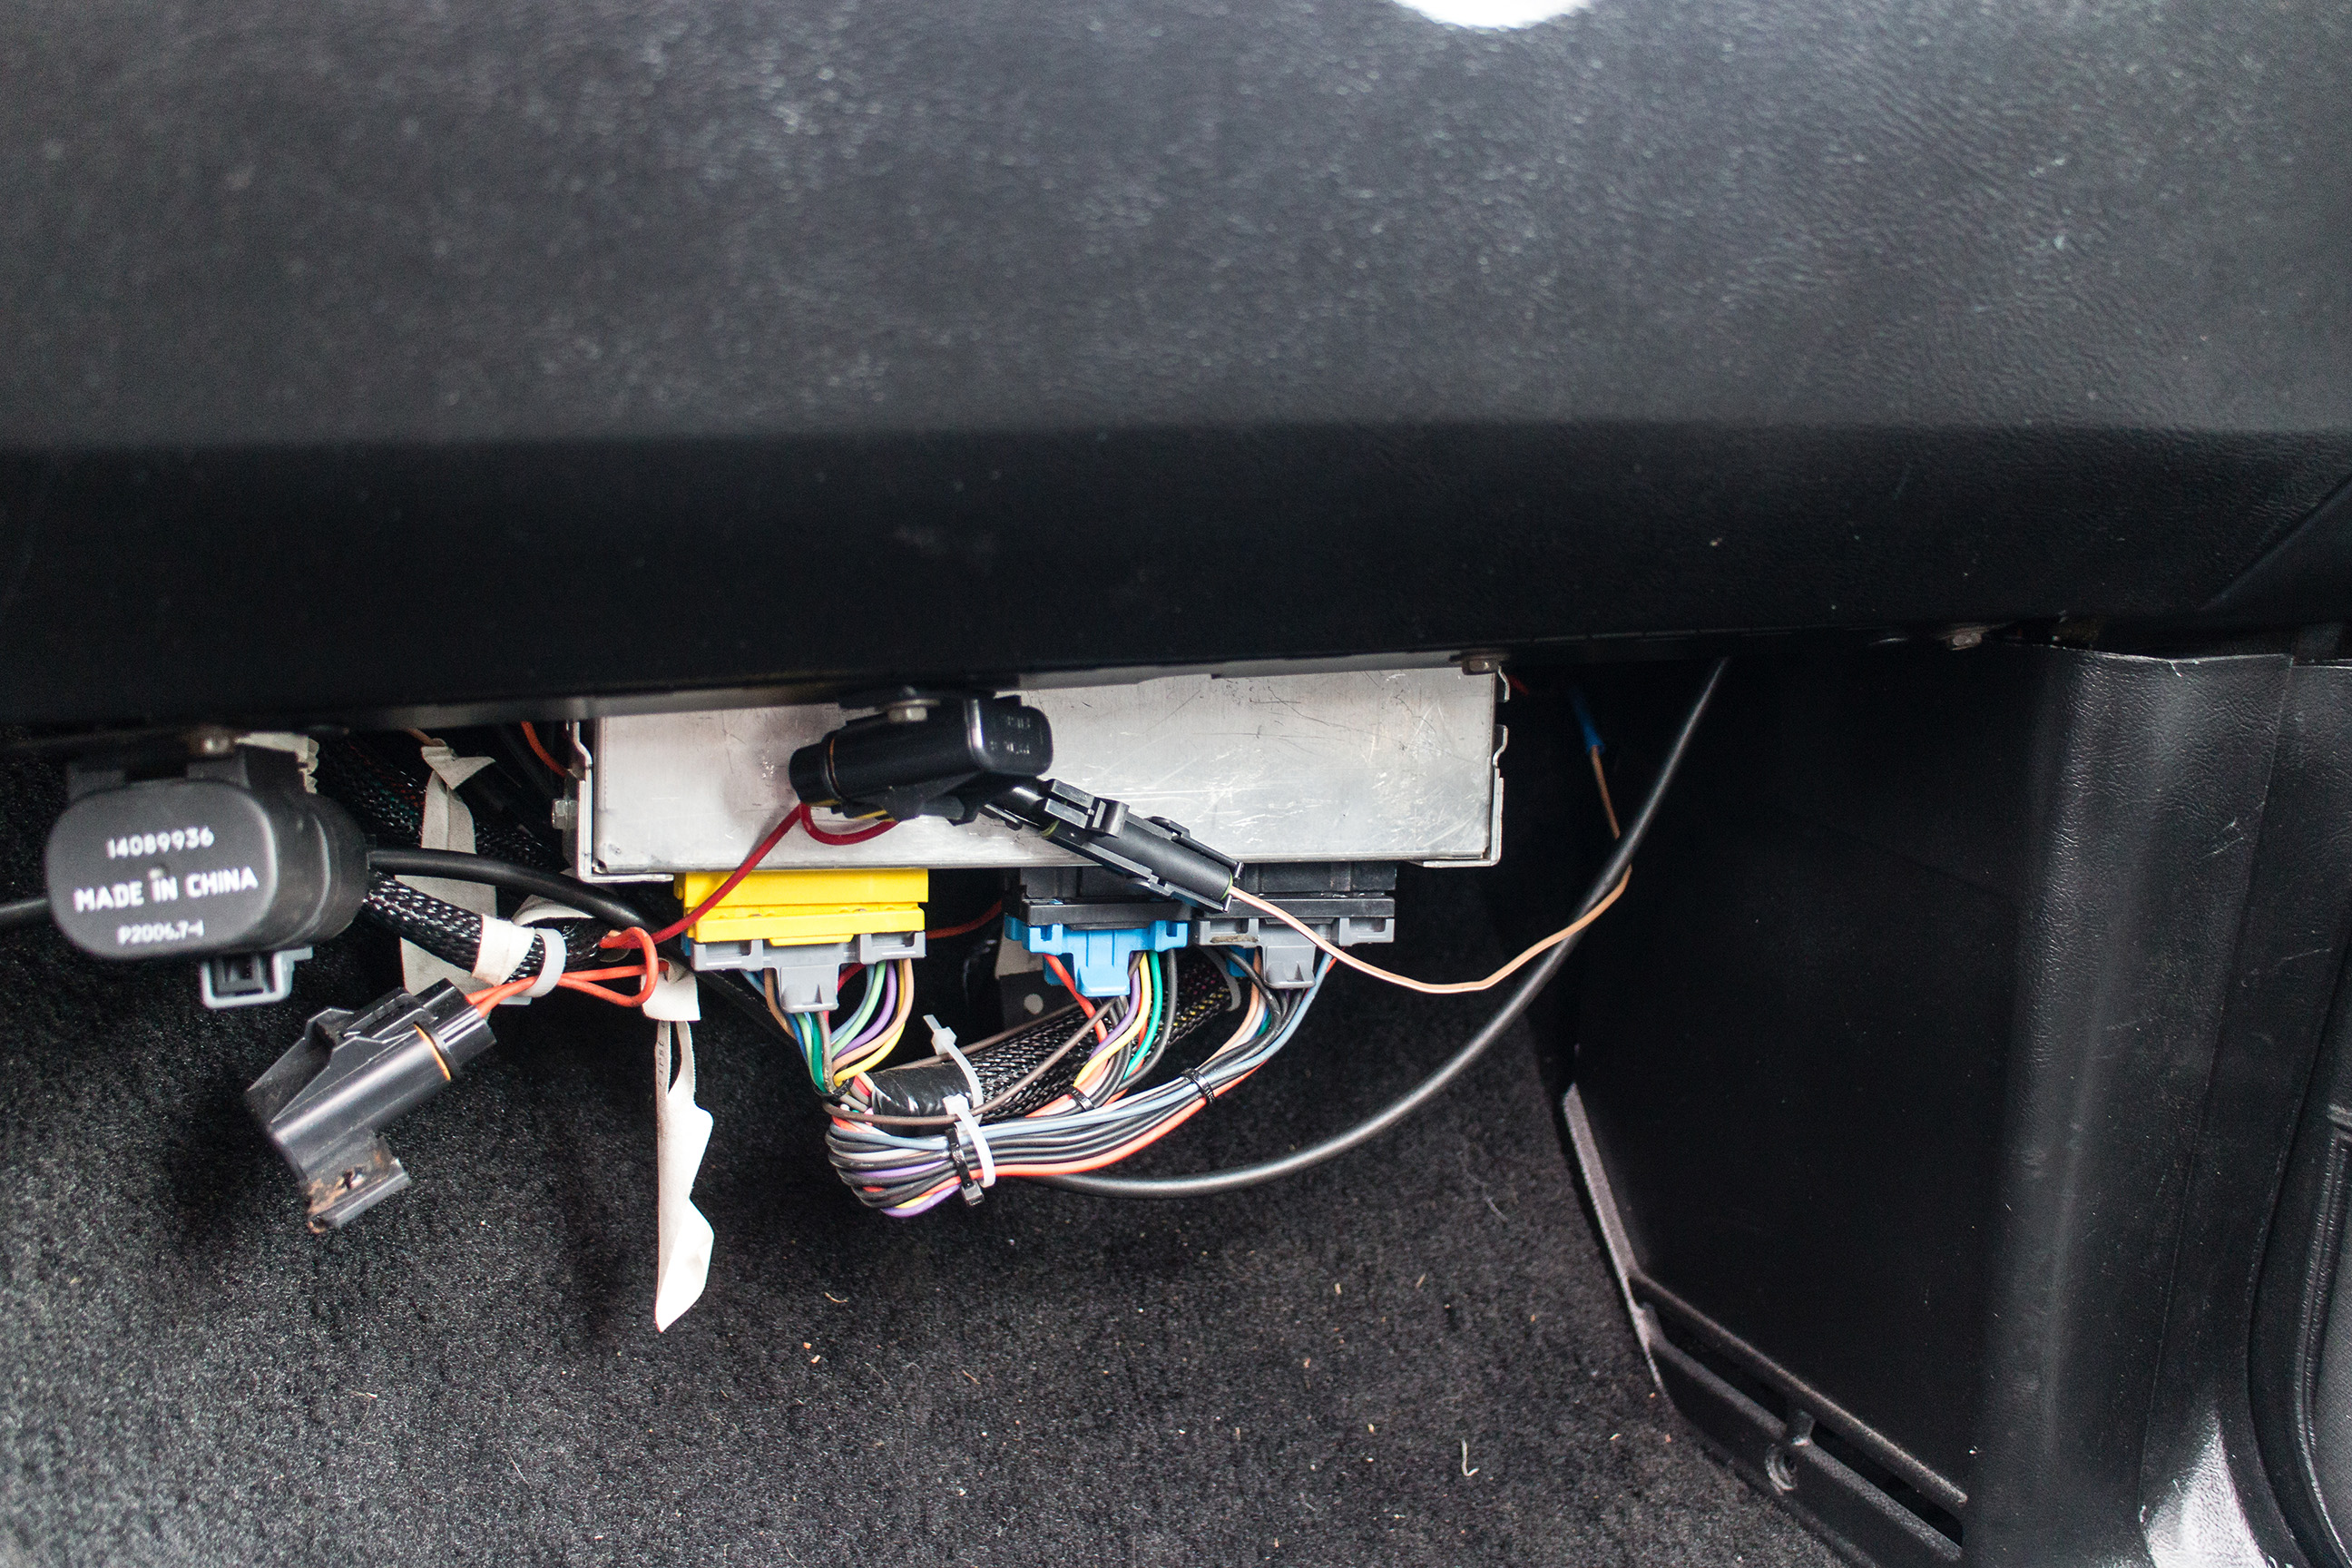
I also wanted to take advantage of this gauge install to clean up the wiring on the other side of the dash under the glove box. What you see there is the “temporary” mounting position for the ECM for my fuel injection swap from when my t-tops leaked and I was constantly removing/installing the computer while burning chips for it. 5+ years is still considered temporary, right?
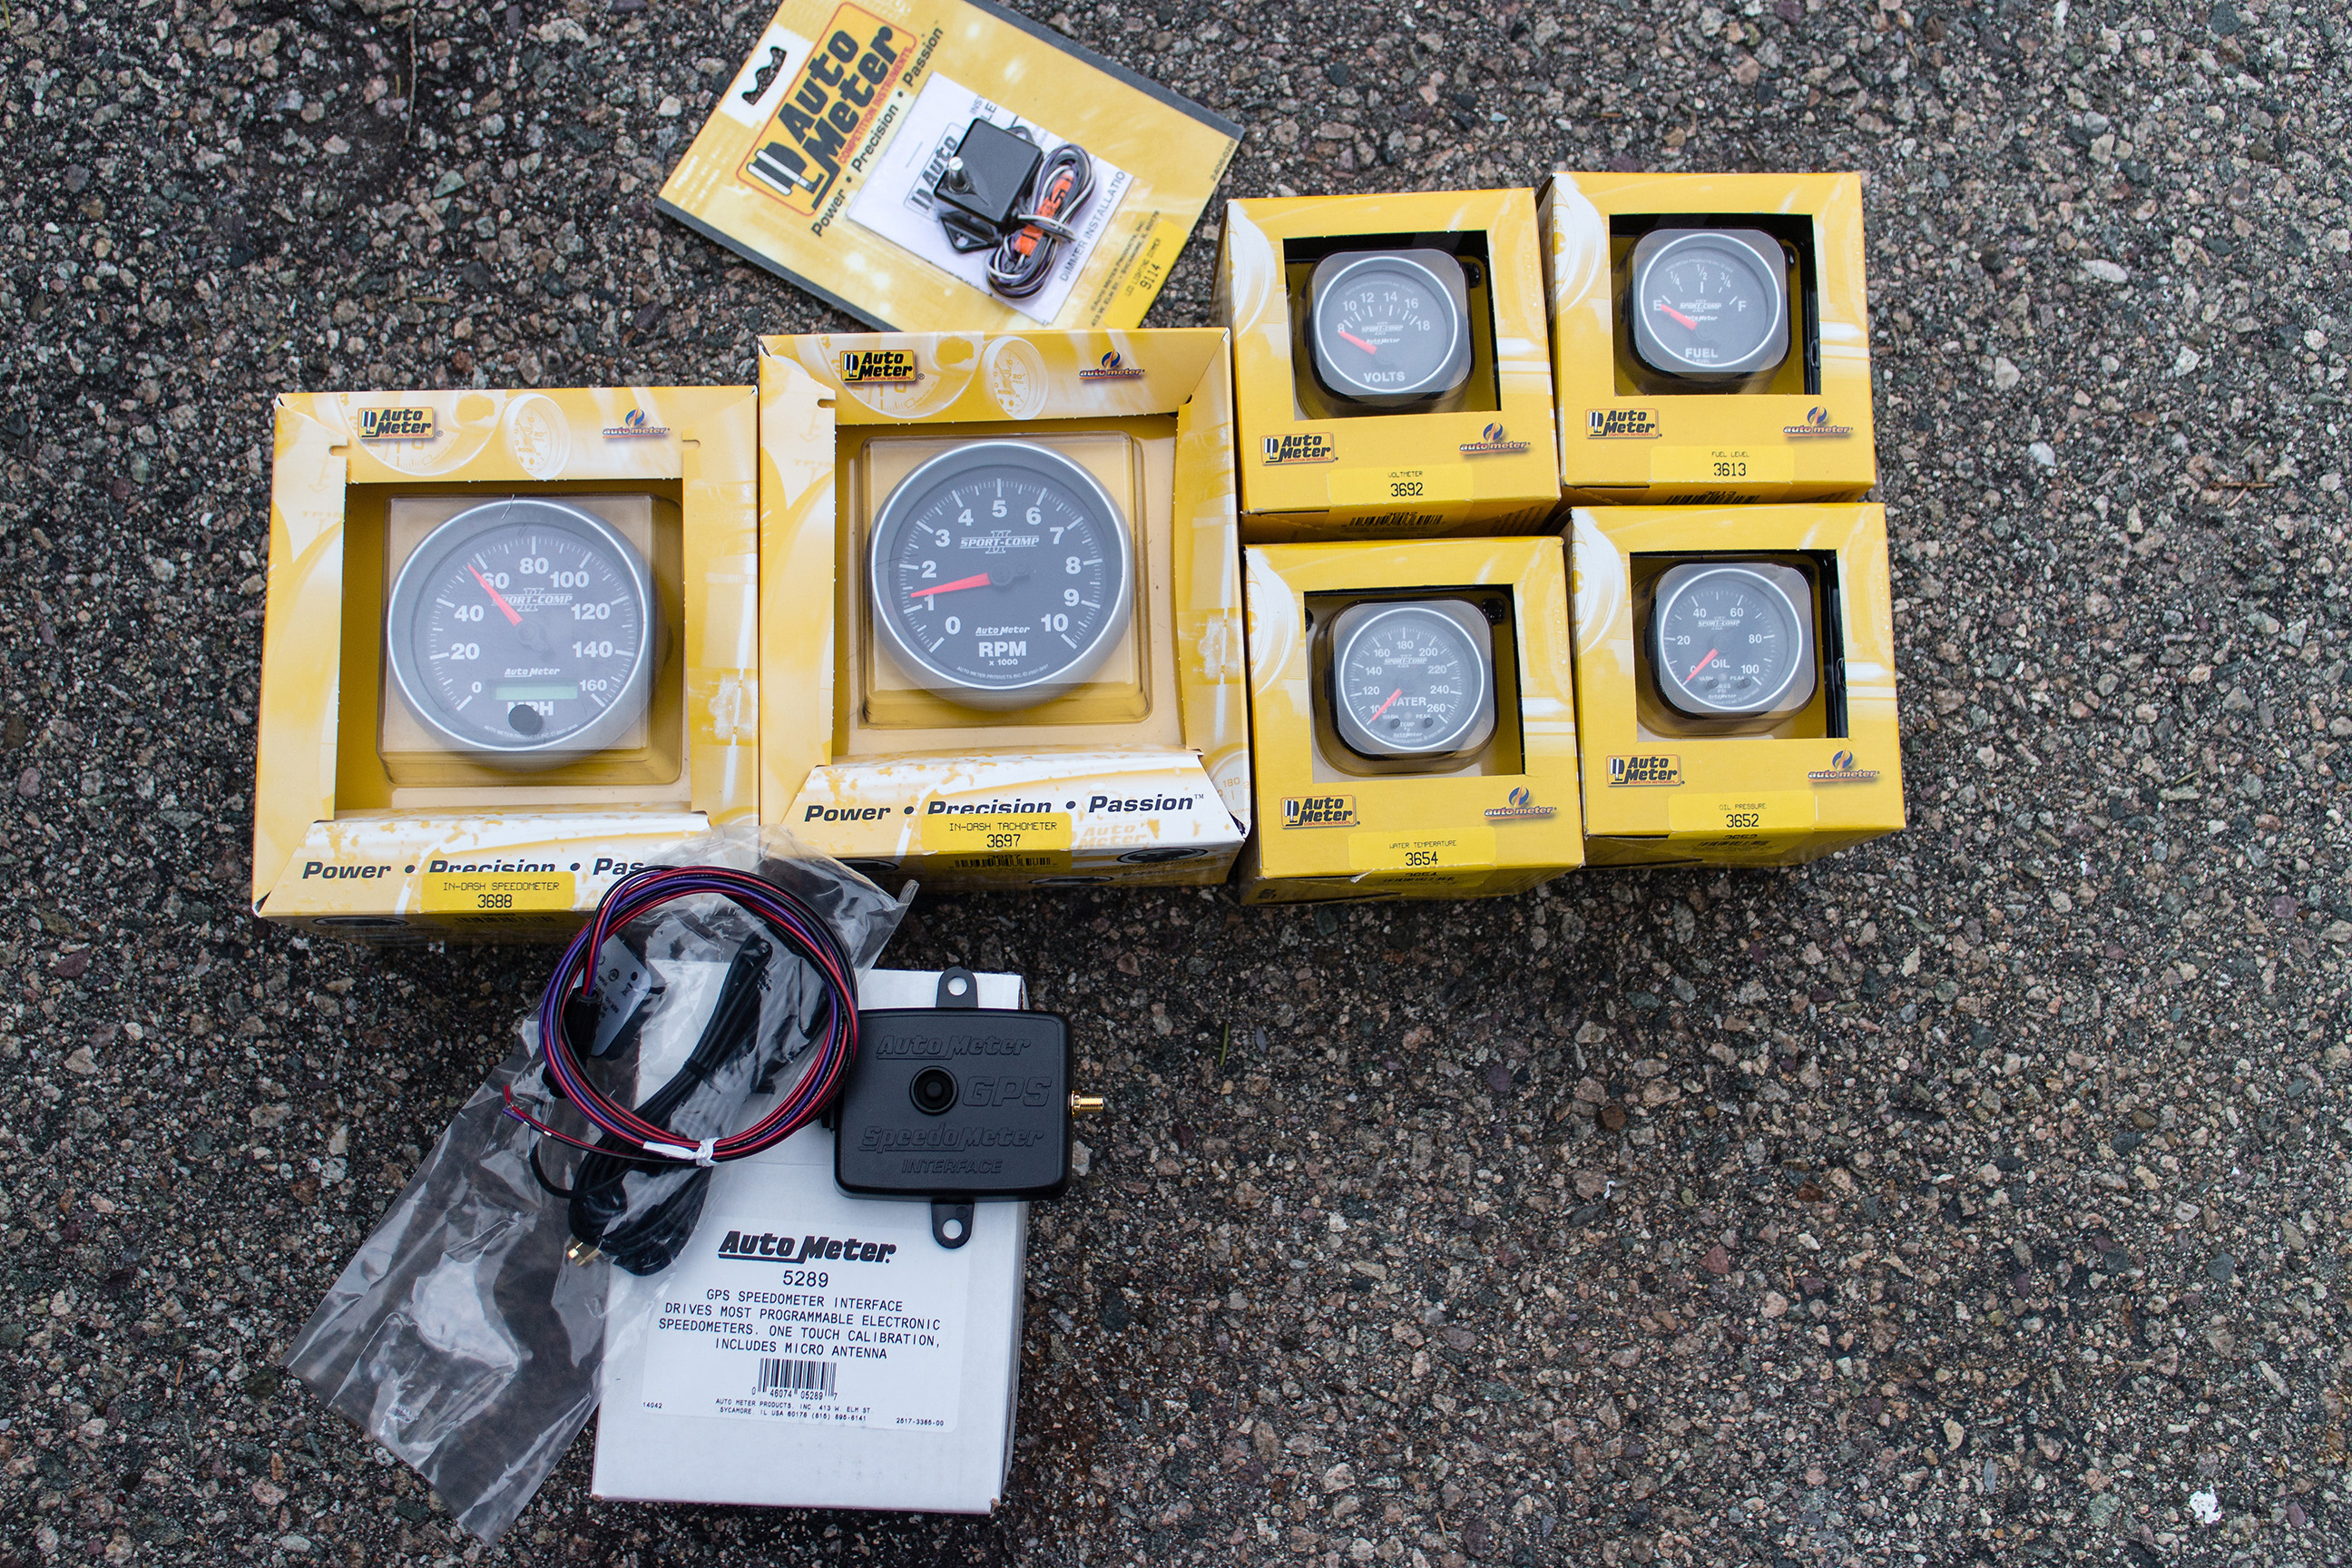
Alright, we’ve identified the problem, but just how are we going to fix this mess? Auto Meter to the rescue with a set of their Sport Comp II gauges. From left to right we have their 3 3/8″ 160 MPH electronic speedo and 10,000 RPM tach, backed up by their 2-1/16″ volts, fuel, oil pressure, and water temp gauges. Last but definitely not least are Auto Meter’s trick GPS speedo interface and LED light dimmer.
We’ll get into more detail on the Auto Meters shortly, but for now let’s get back to trying to fix the self-inflicted damage done during the original gauge install…
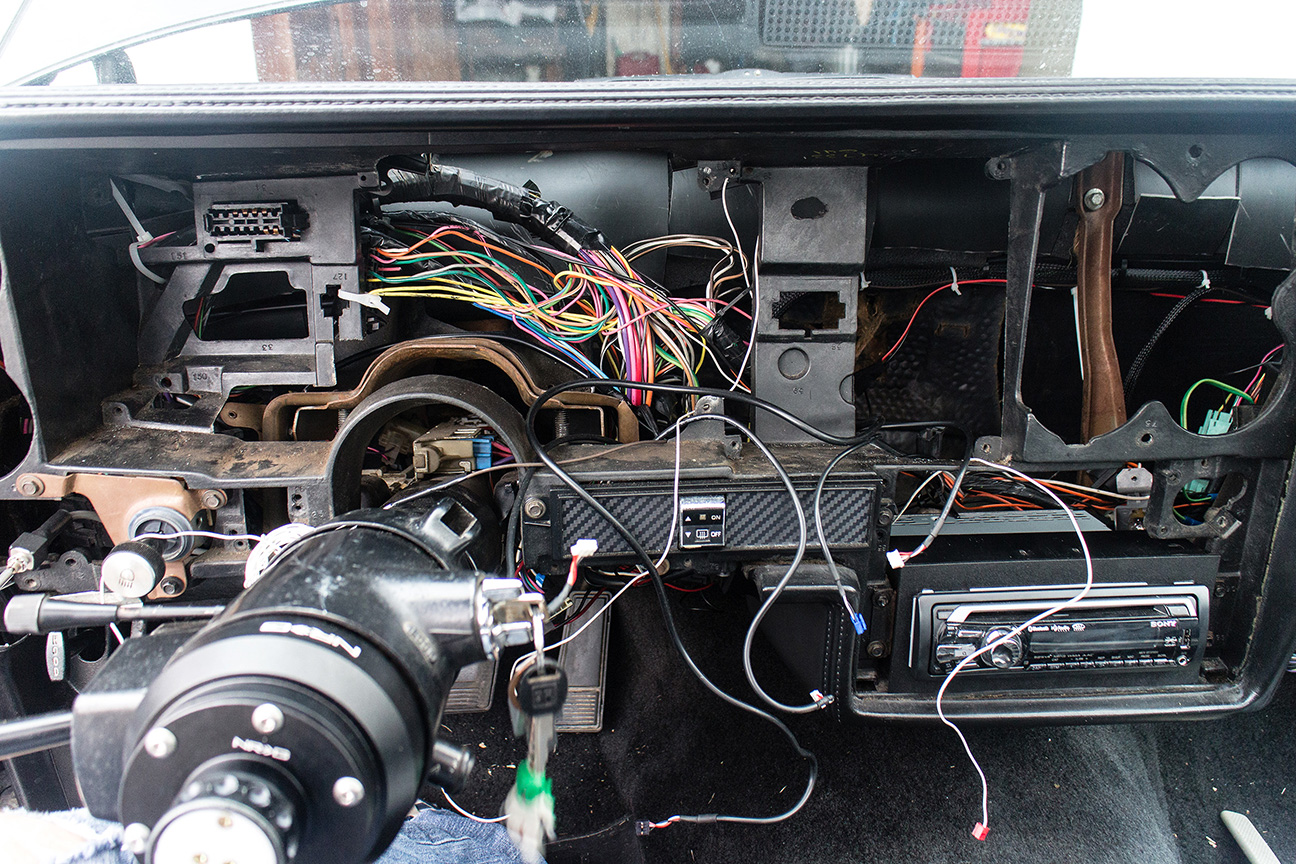
10 minutes into the install and I’m still feeling pretty good: The face plate is off, the steering column is down, and while there’s some loose wires to be seen nothing looks too bad. Time to start removing gauges. (Note: I am the one in the horror movie that would go down into the basement to investigate the strange noises. Just sayin’).

First out comes the smaller gauges, half of which are divas at this point and only make an appearance when they feel like it. Notice the paper-thin gauge of wiring used.
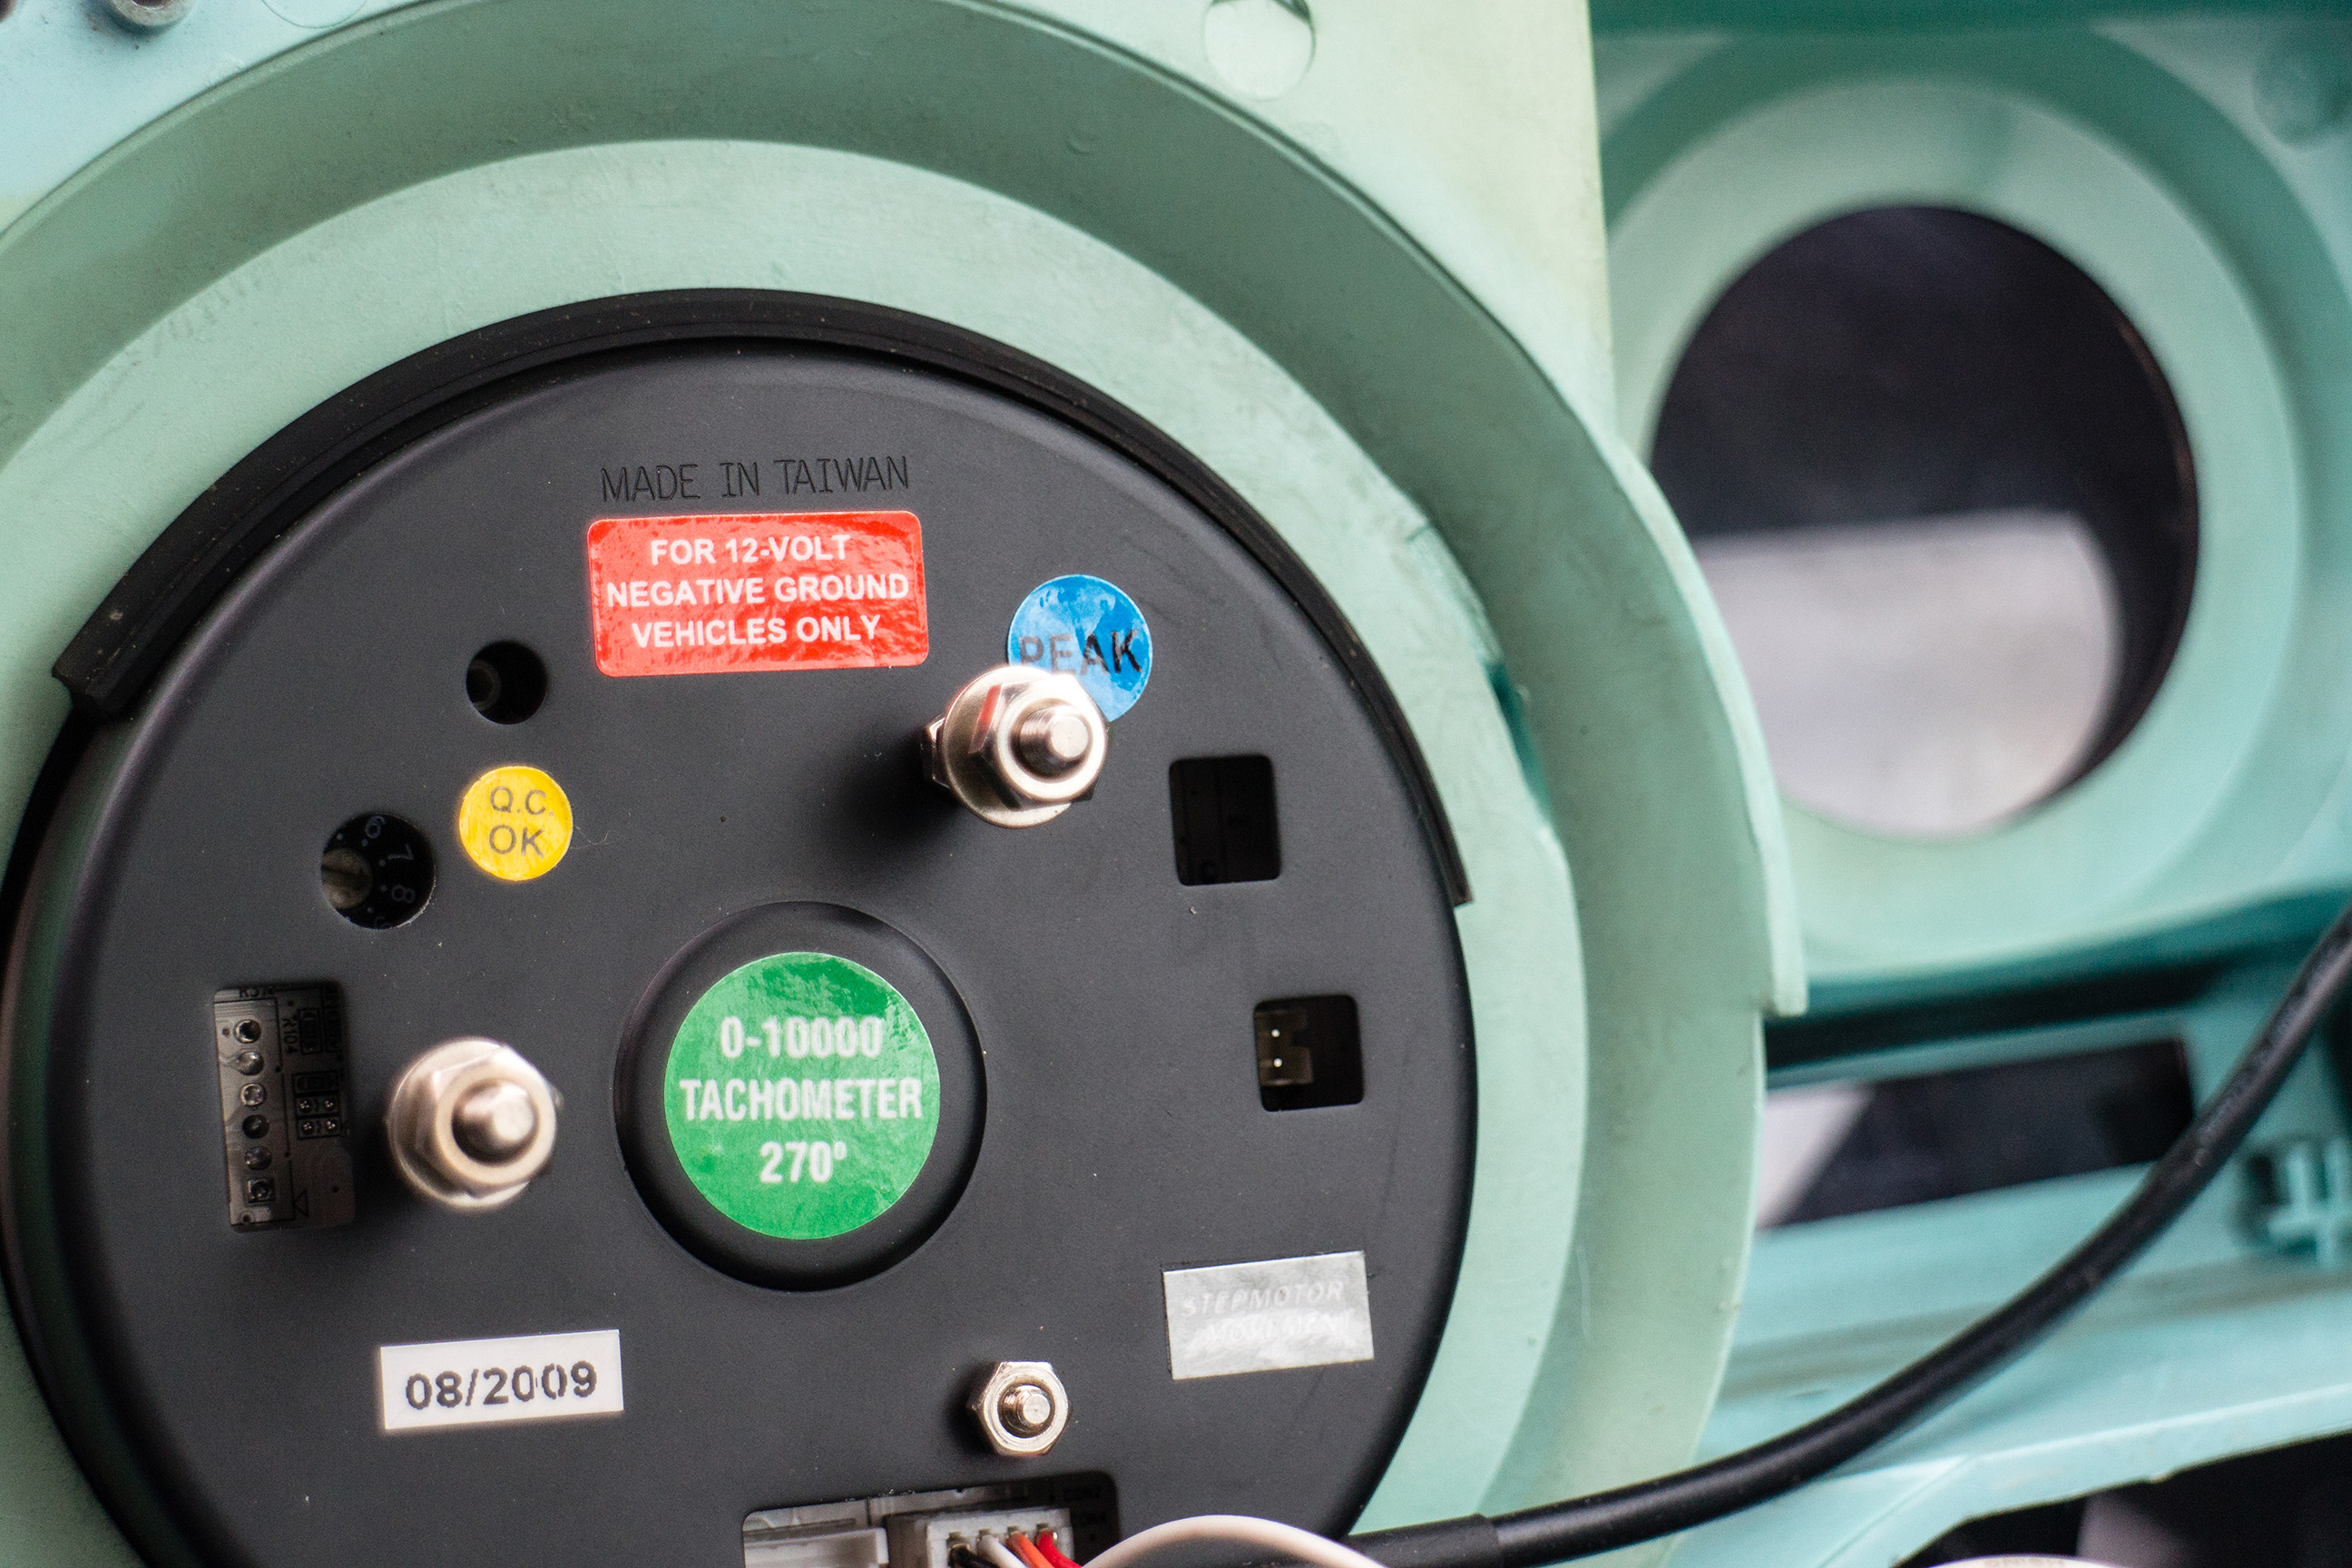
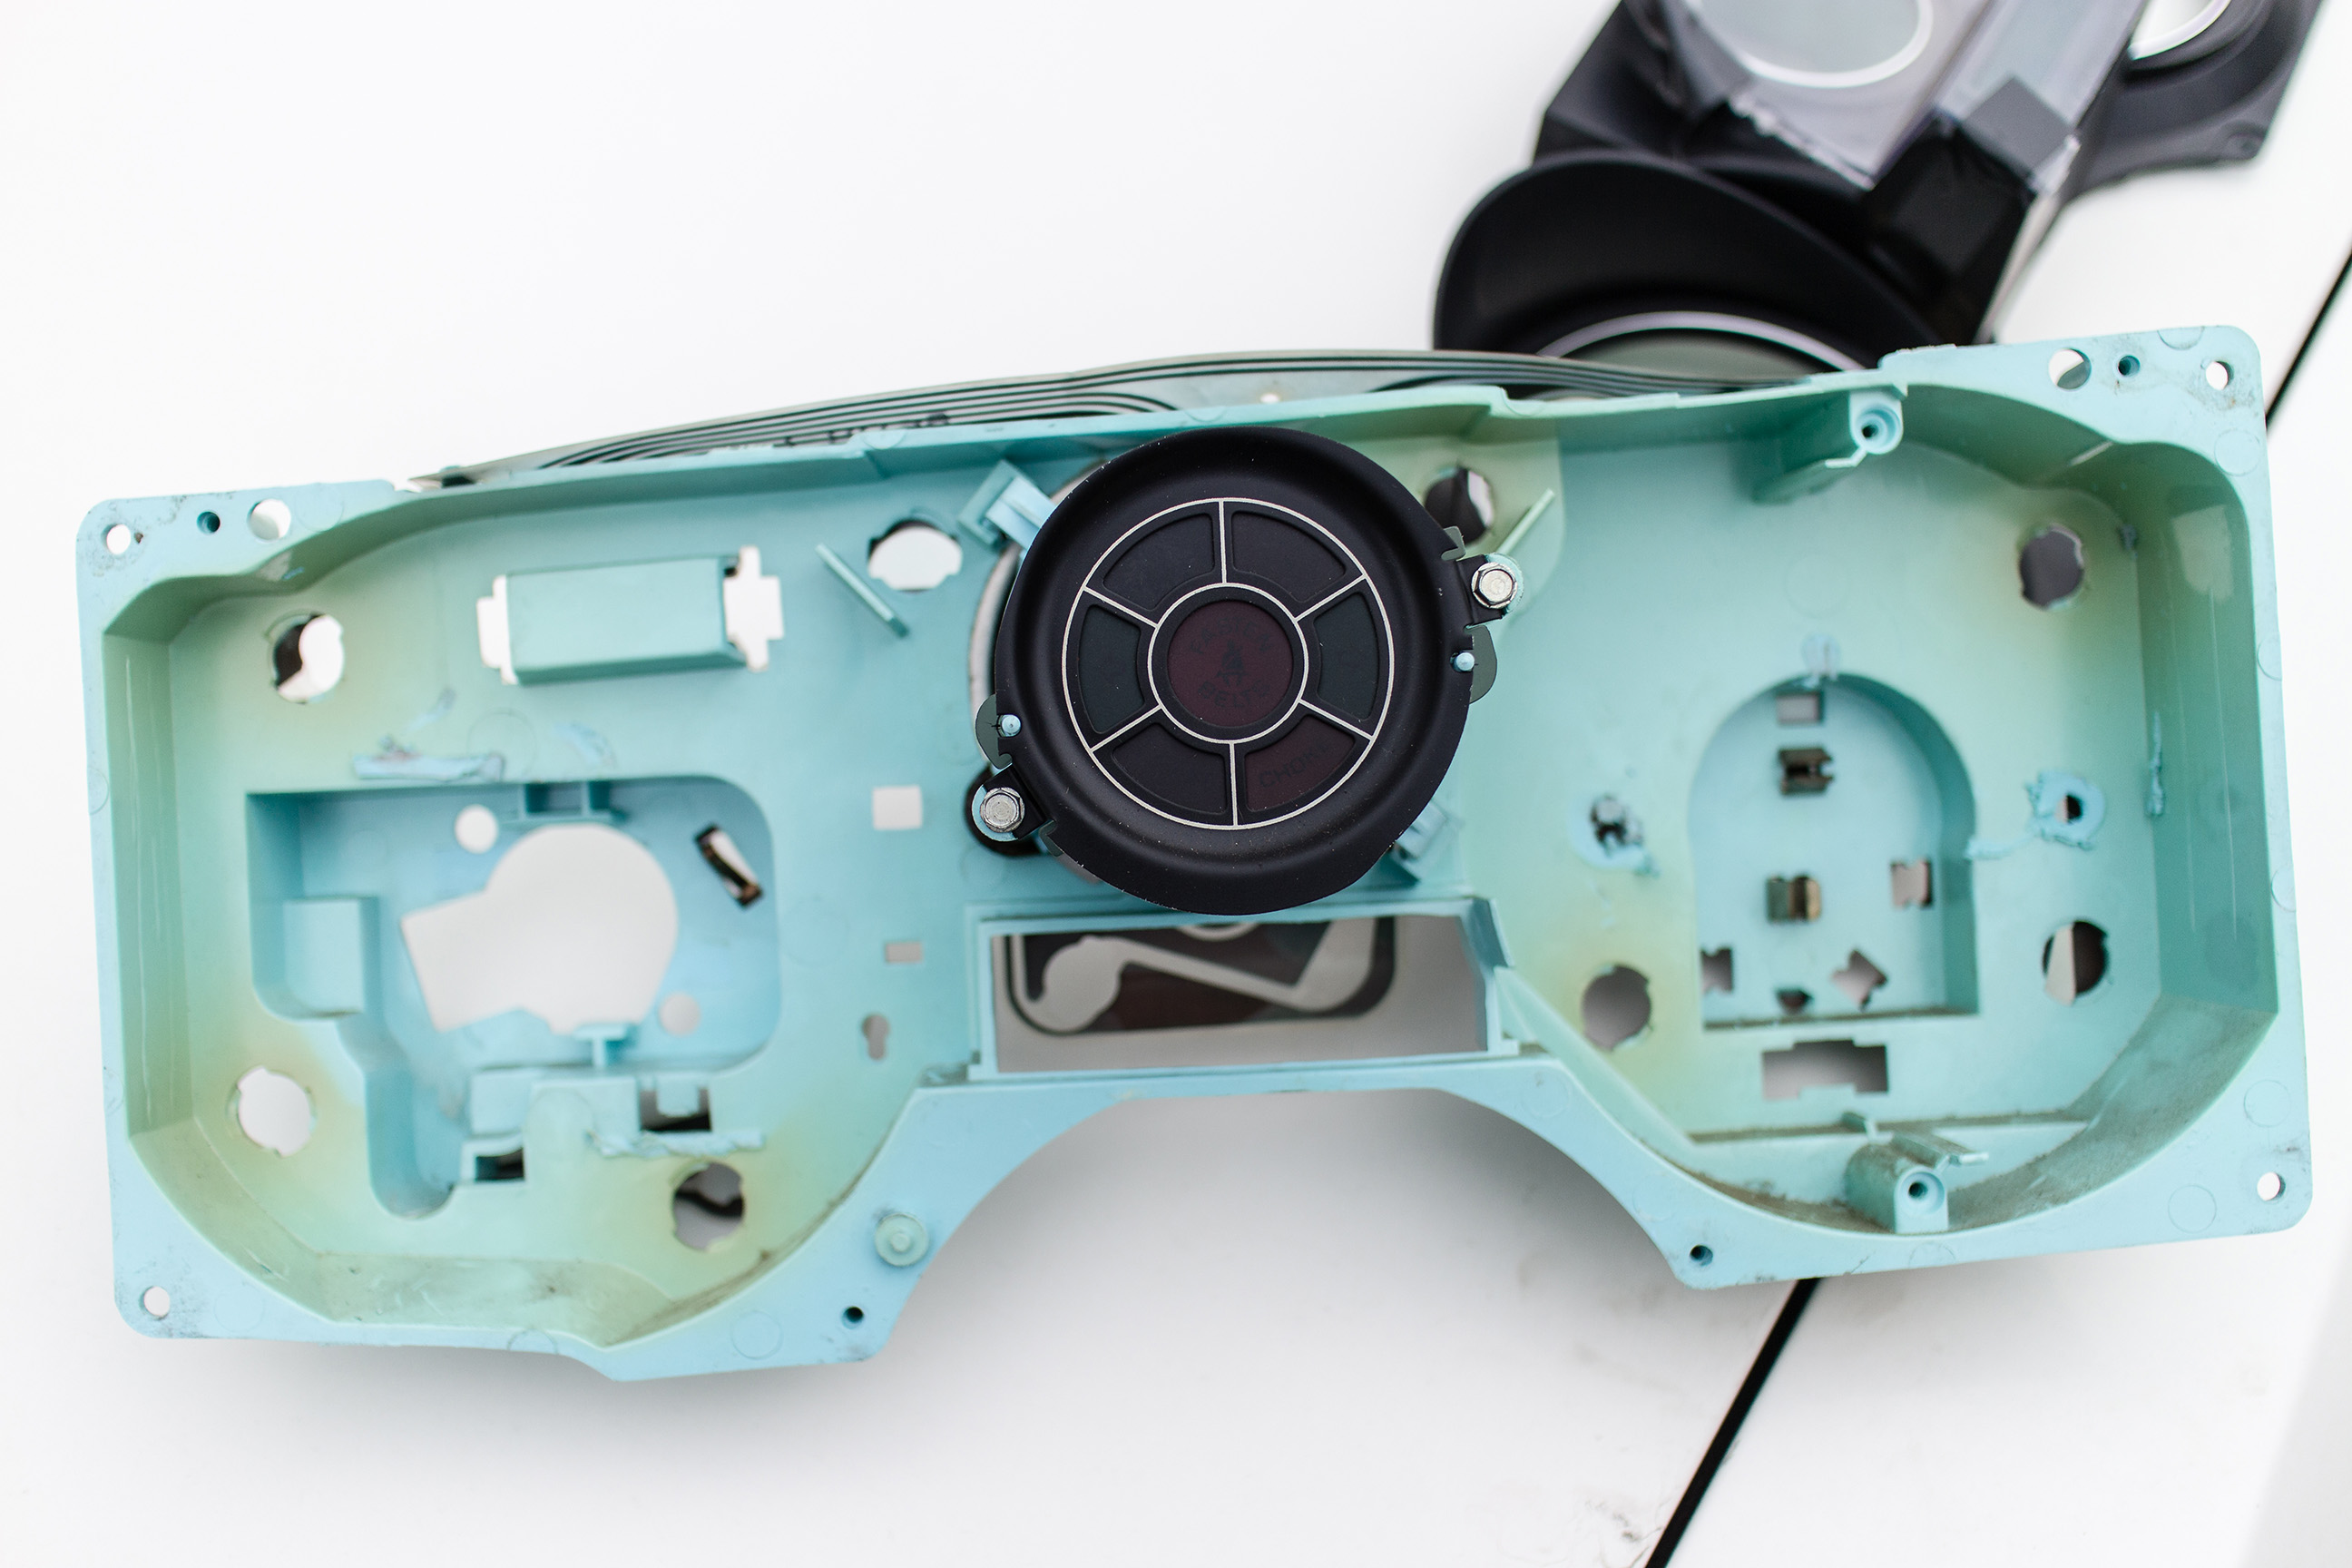
Next up is the speedometer and tach. Think I found the cause of my problems right here. See if you can spot it. Luckily this is not the case with the Auto Meters, as they are made right in their Sycamore, Illinois factory right here in the U.S. of A.
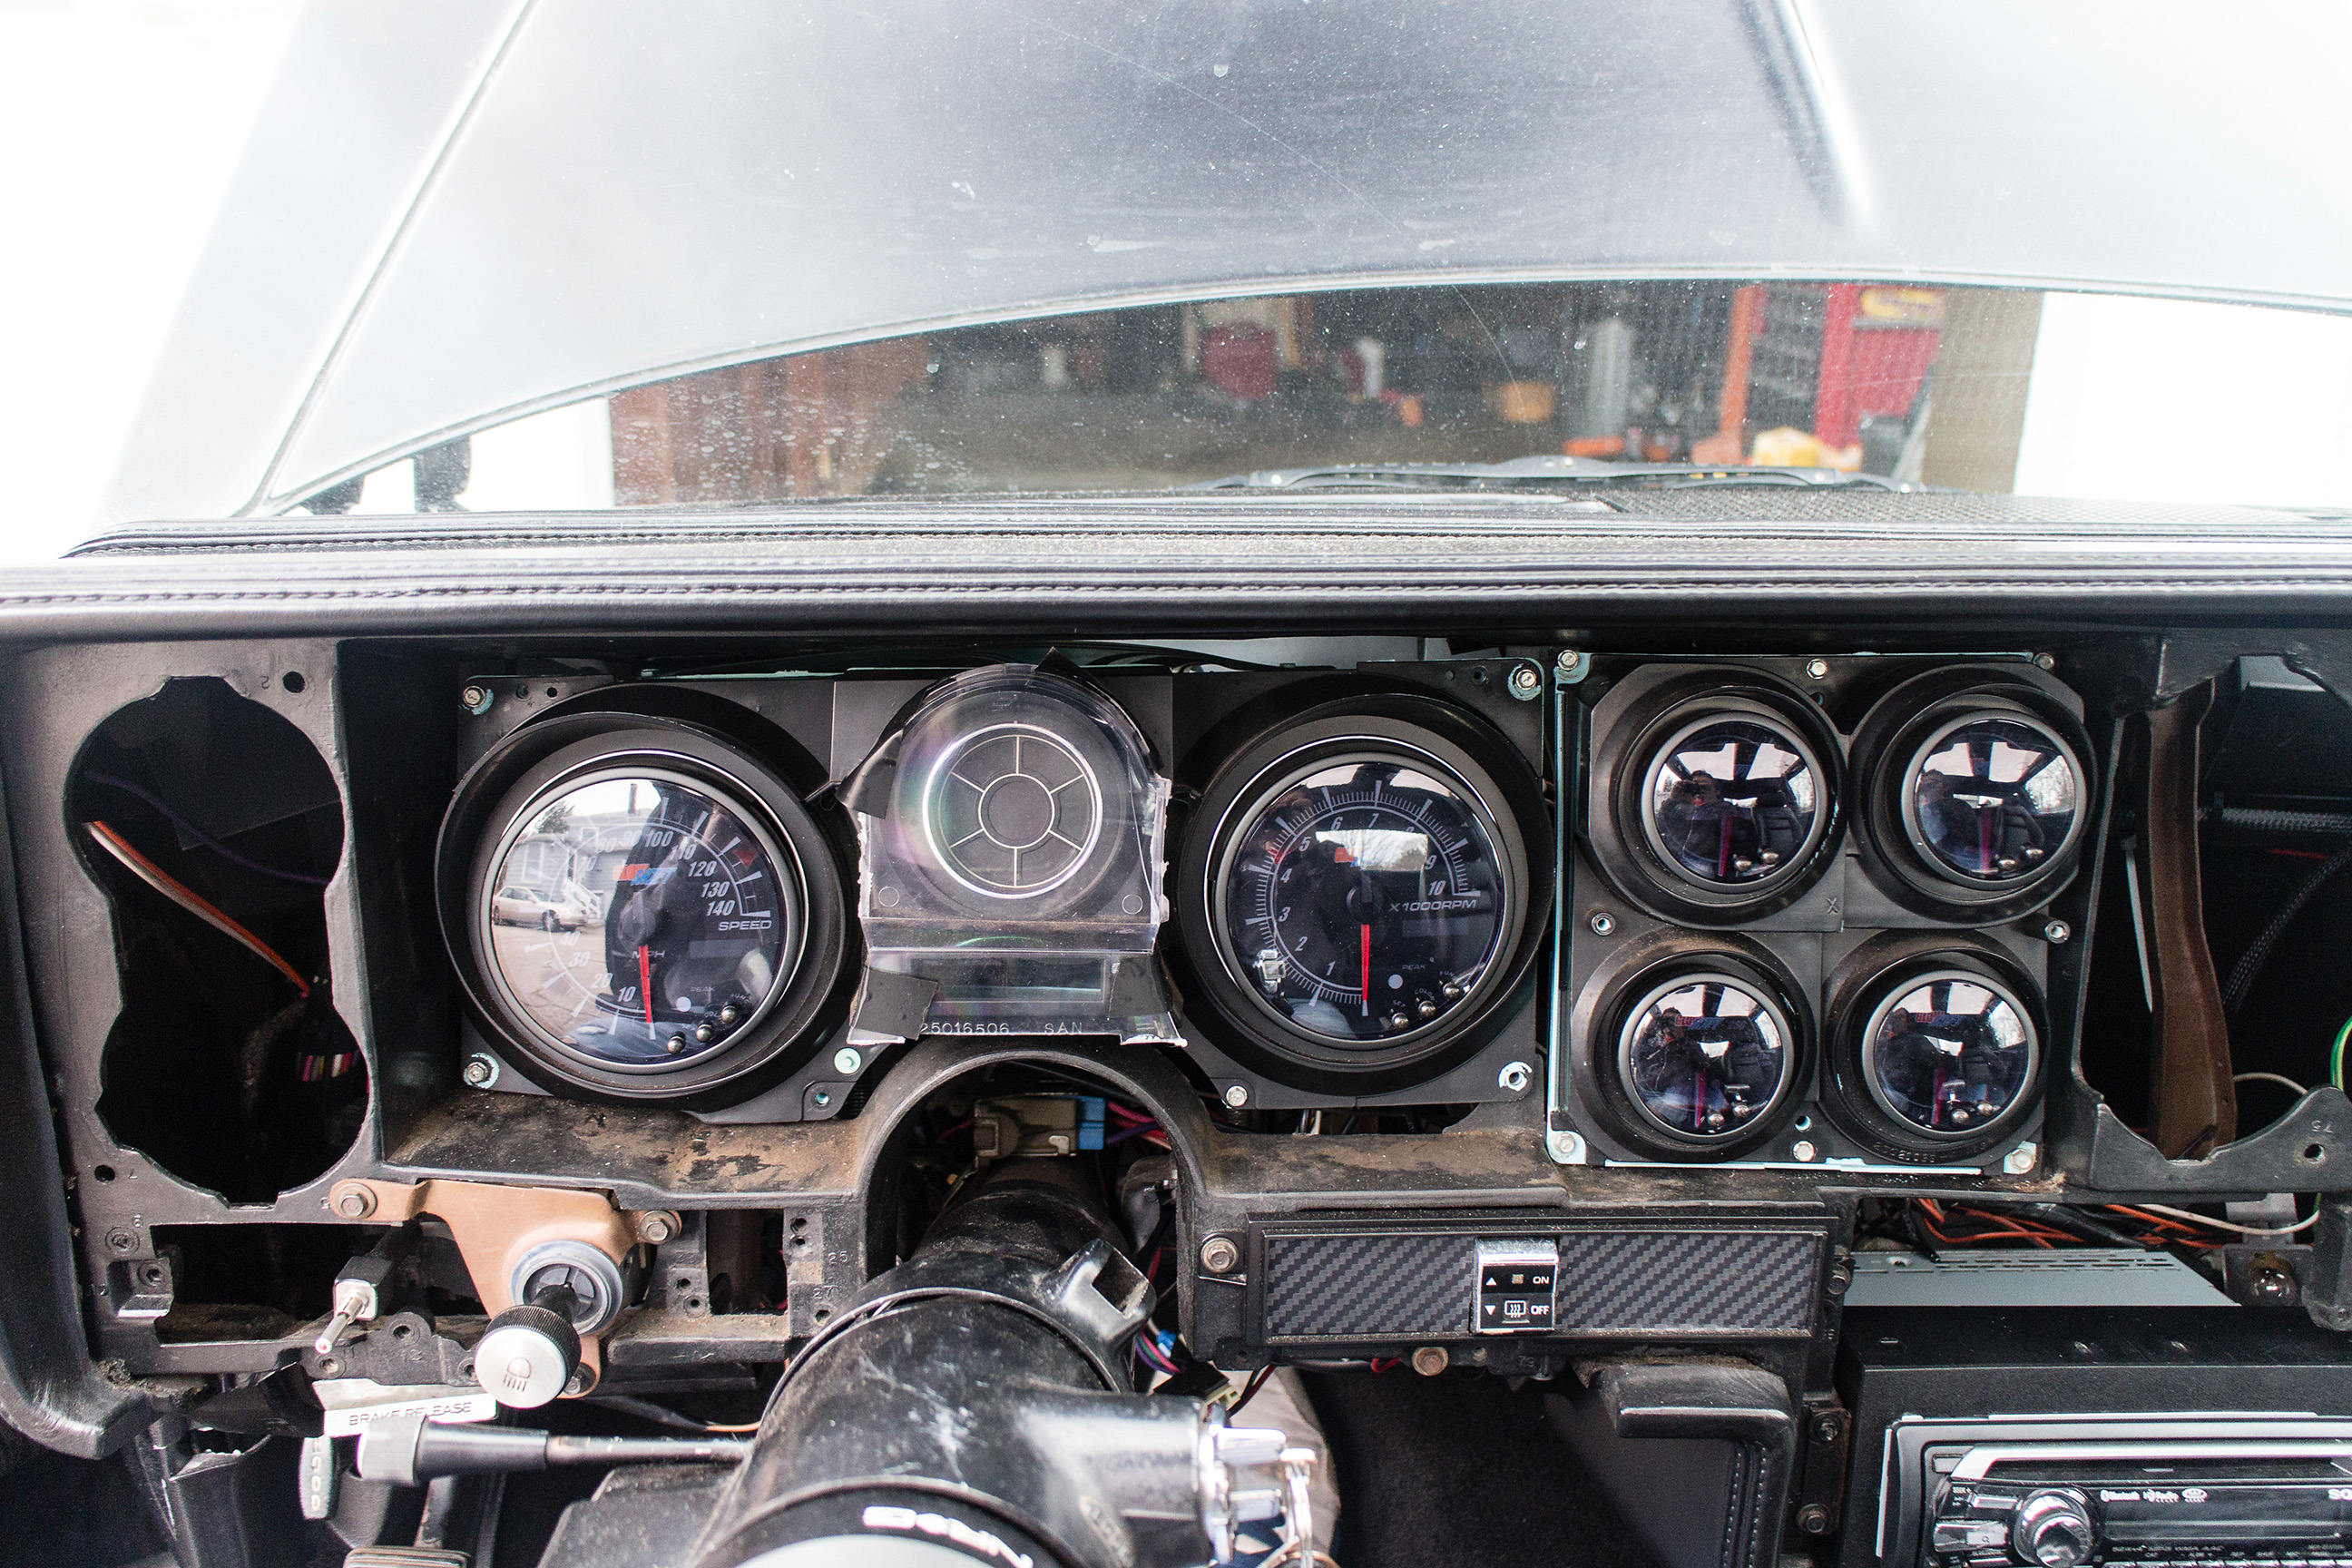
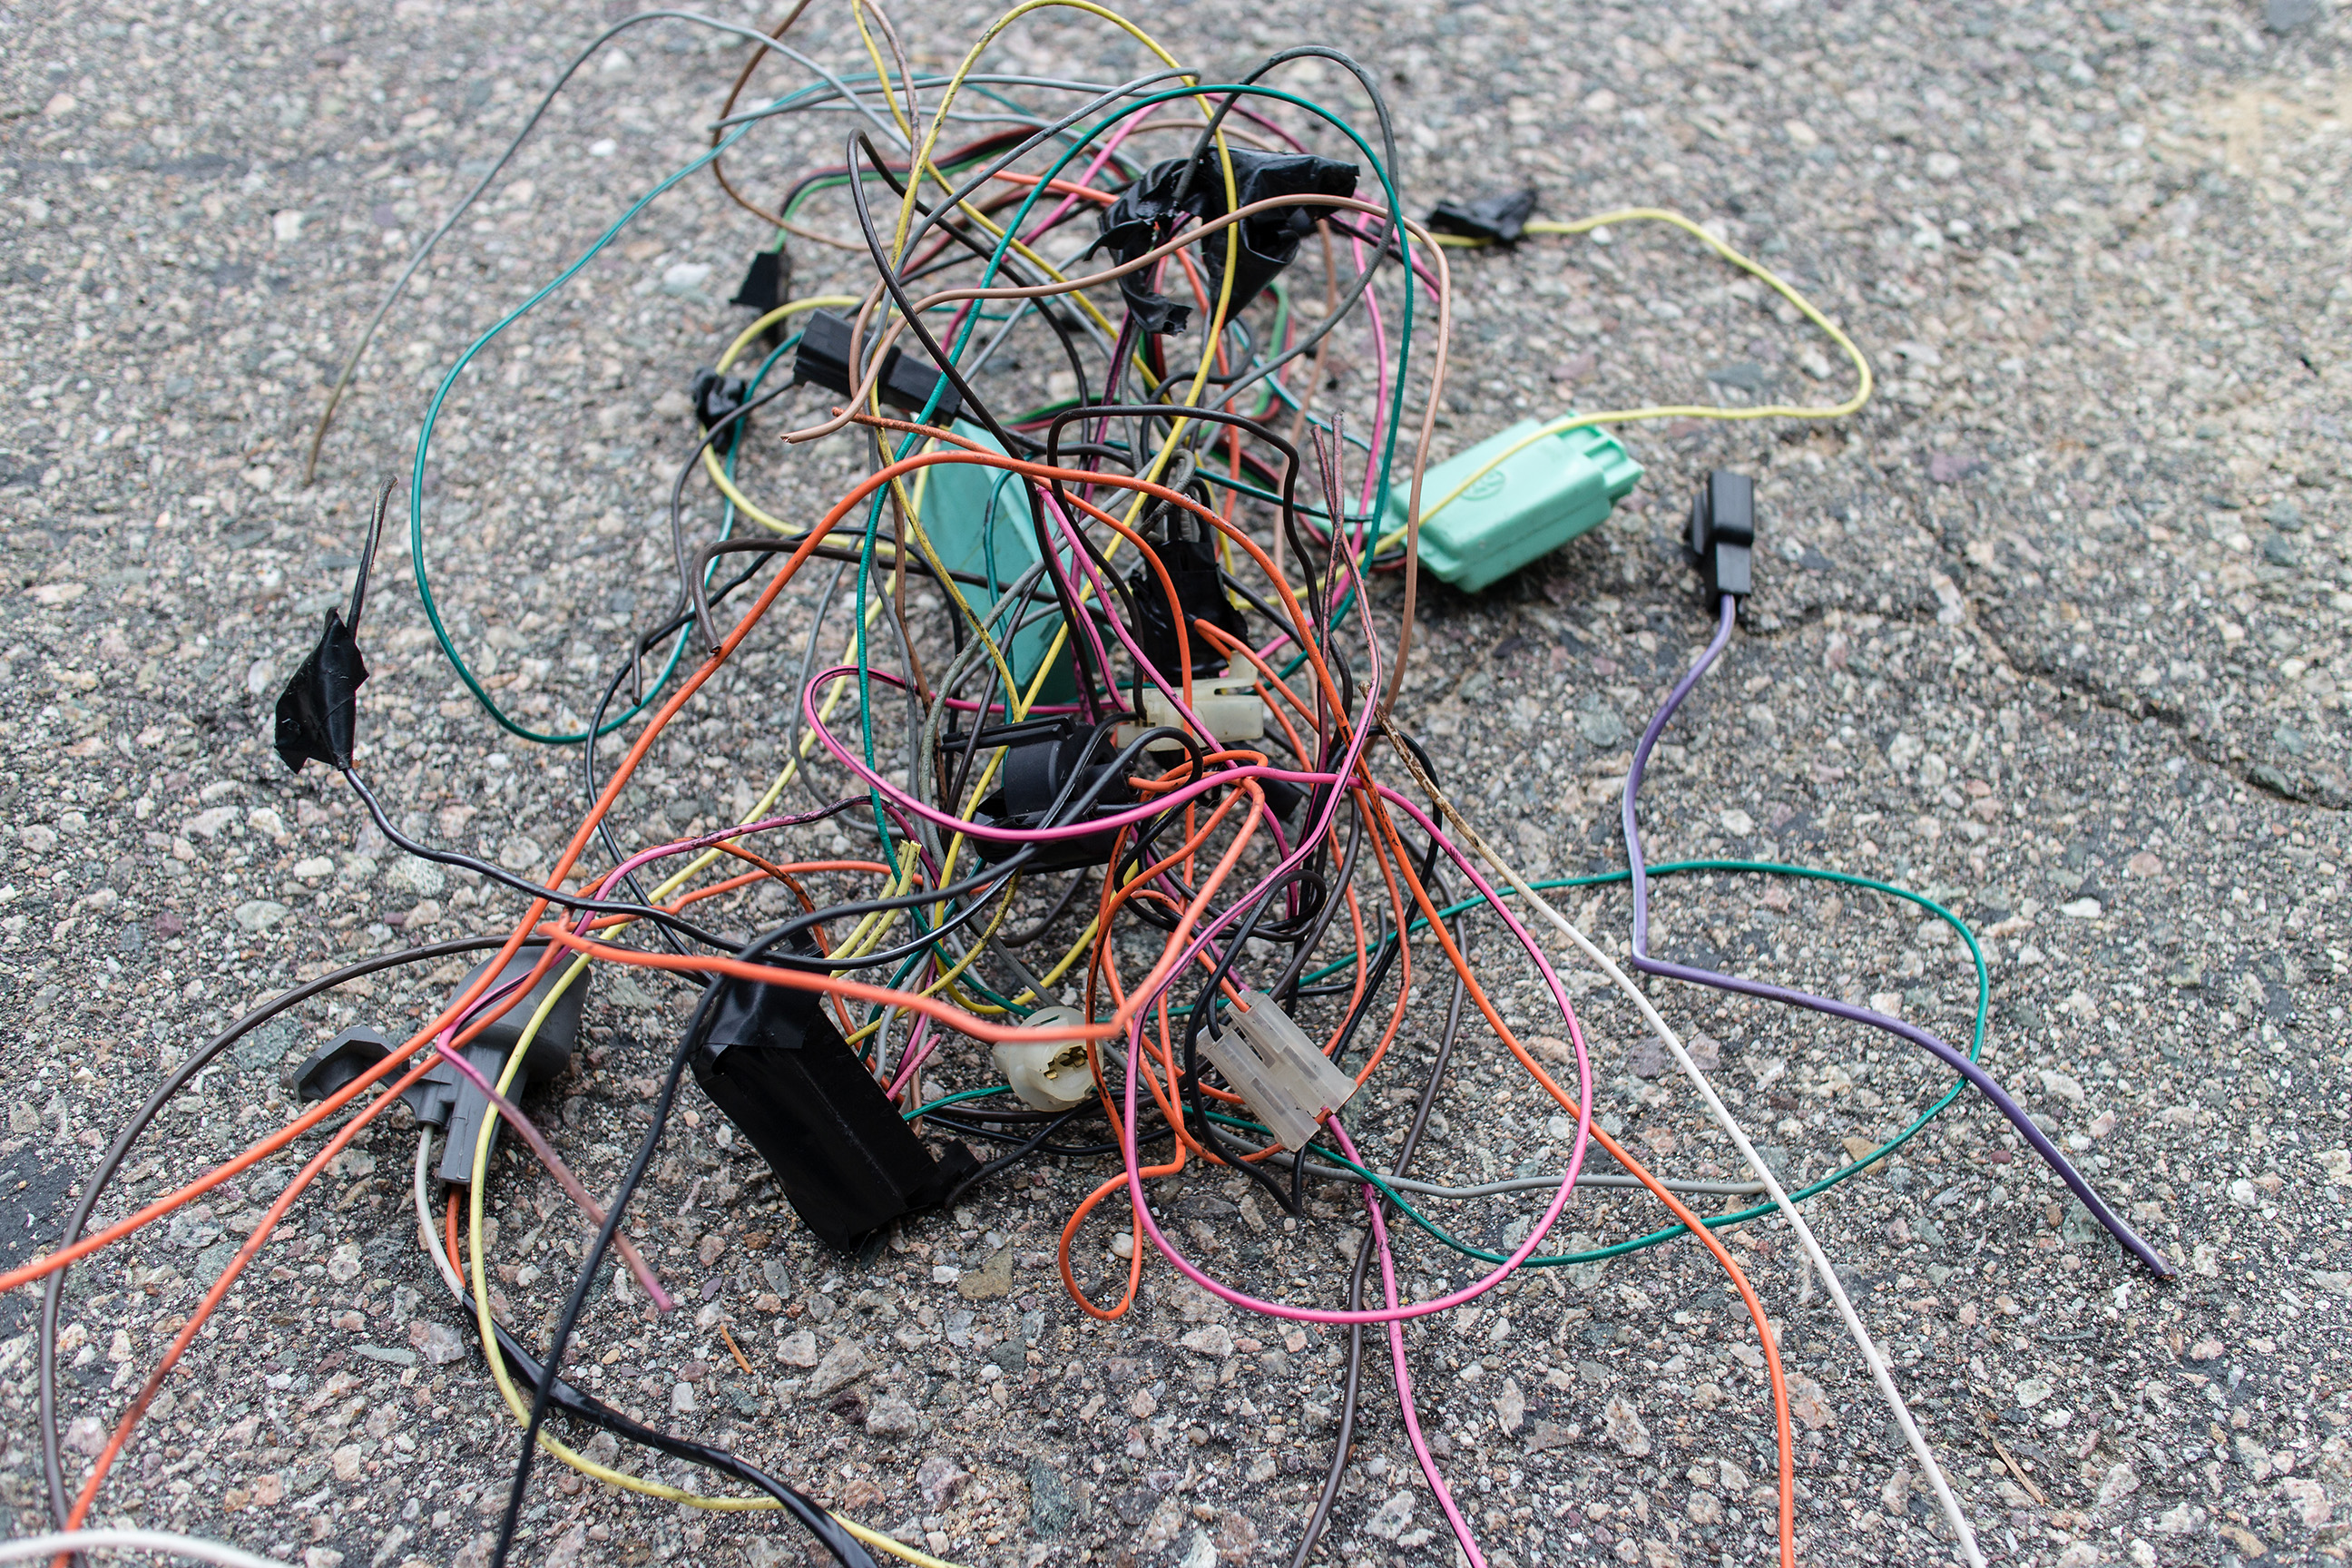
With the gauges removed we can see the full extent of the horror that lurks behind the dash, courtesy of two wiring harnesses being merged and a hastily-finished gauges install from the last time. Seems that the Dave Nutting of years past was too cool to wrap back up the wires after finding the ones he needed. That Dave Nutting is a jerk.
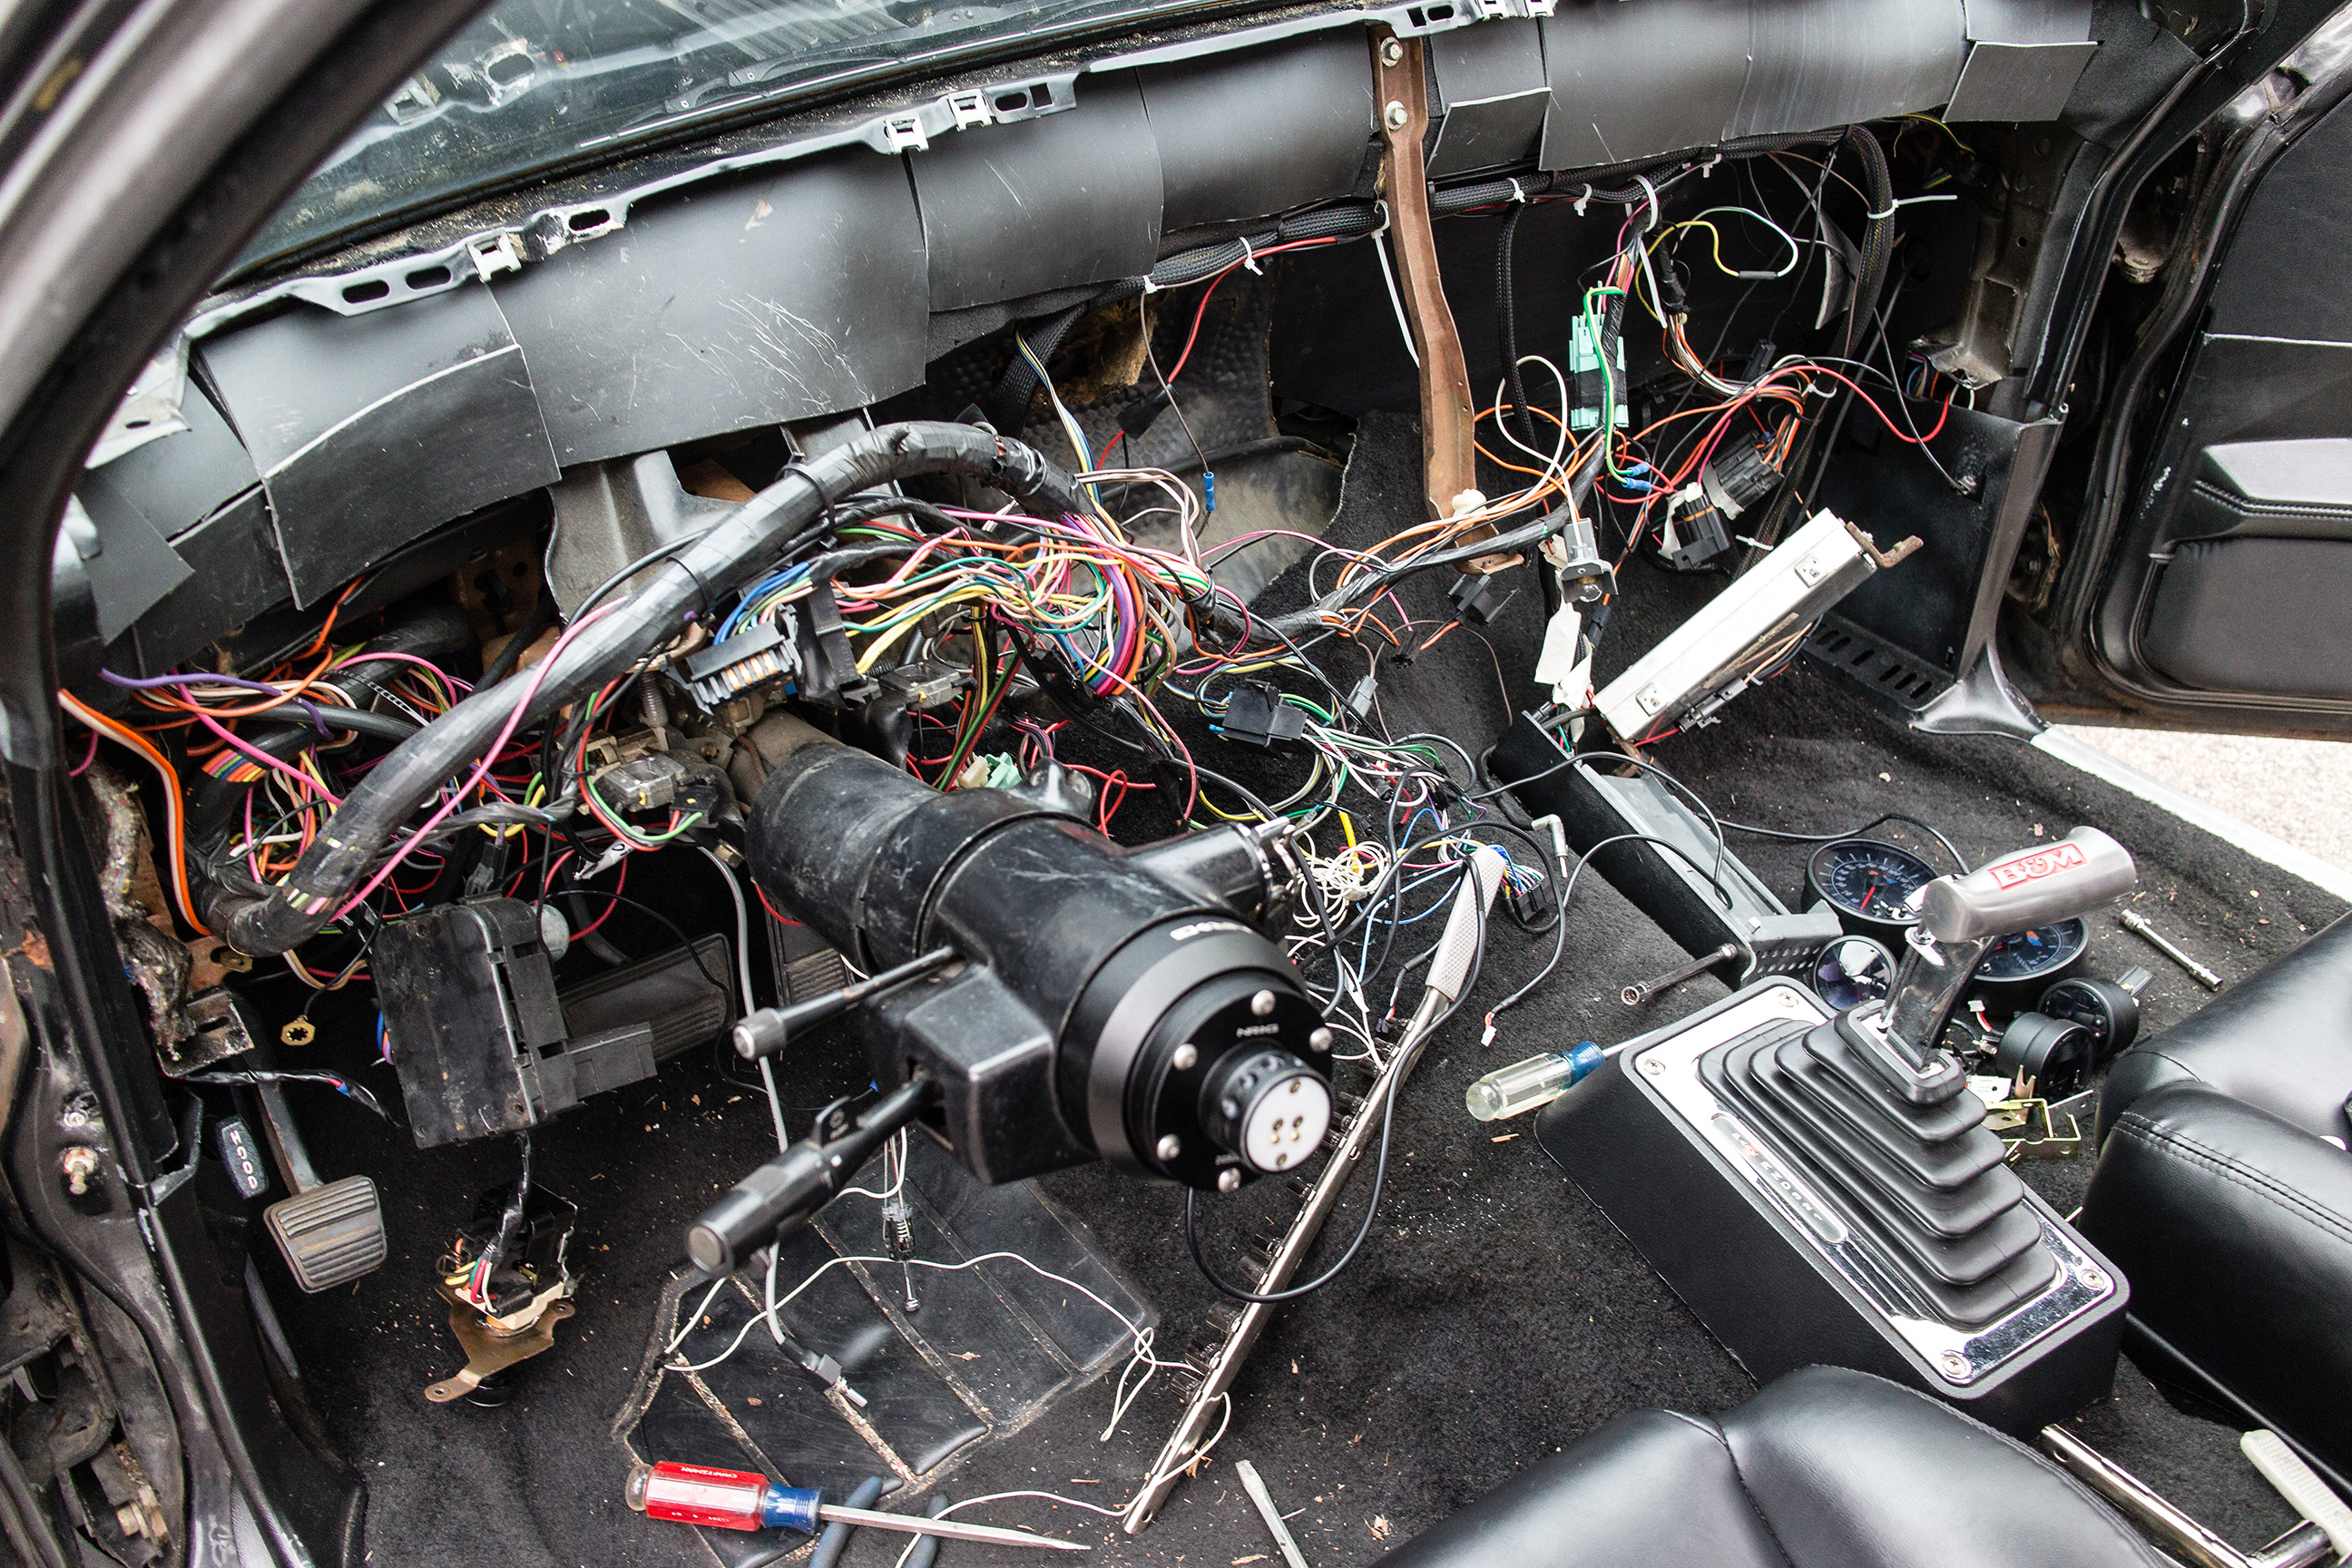
Yup, I’m right there with you with the “Oh my god, what have you done?” reaction you’re having at this moment. Just be glad that you didn’t have to work on it. Right around this point I was wishing that I didn’t have to worry about it either.
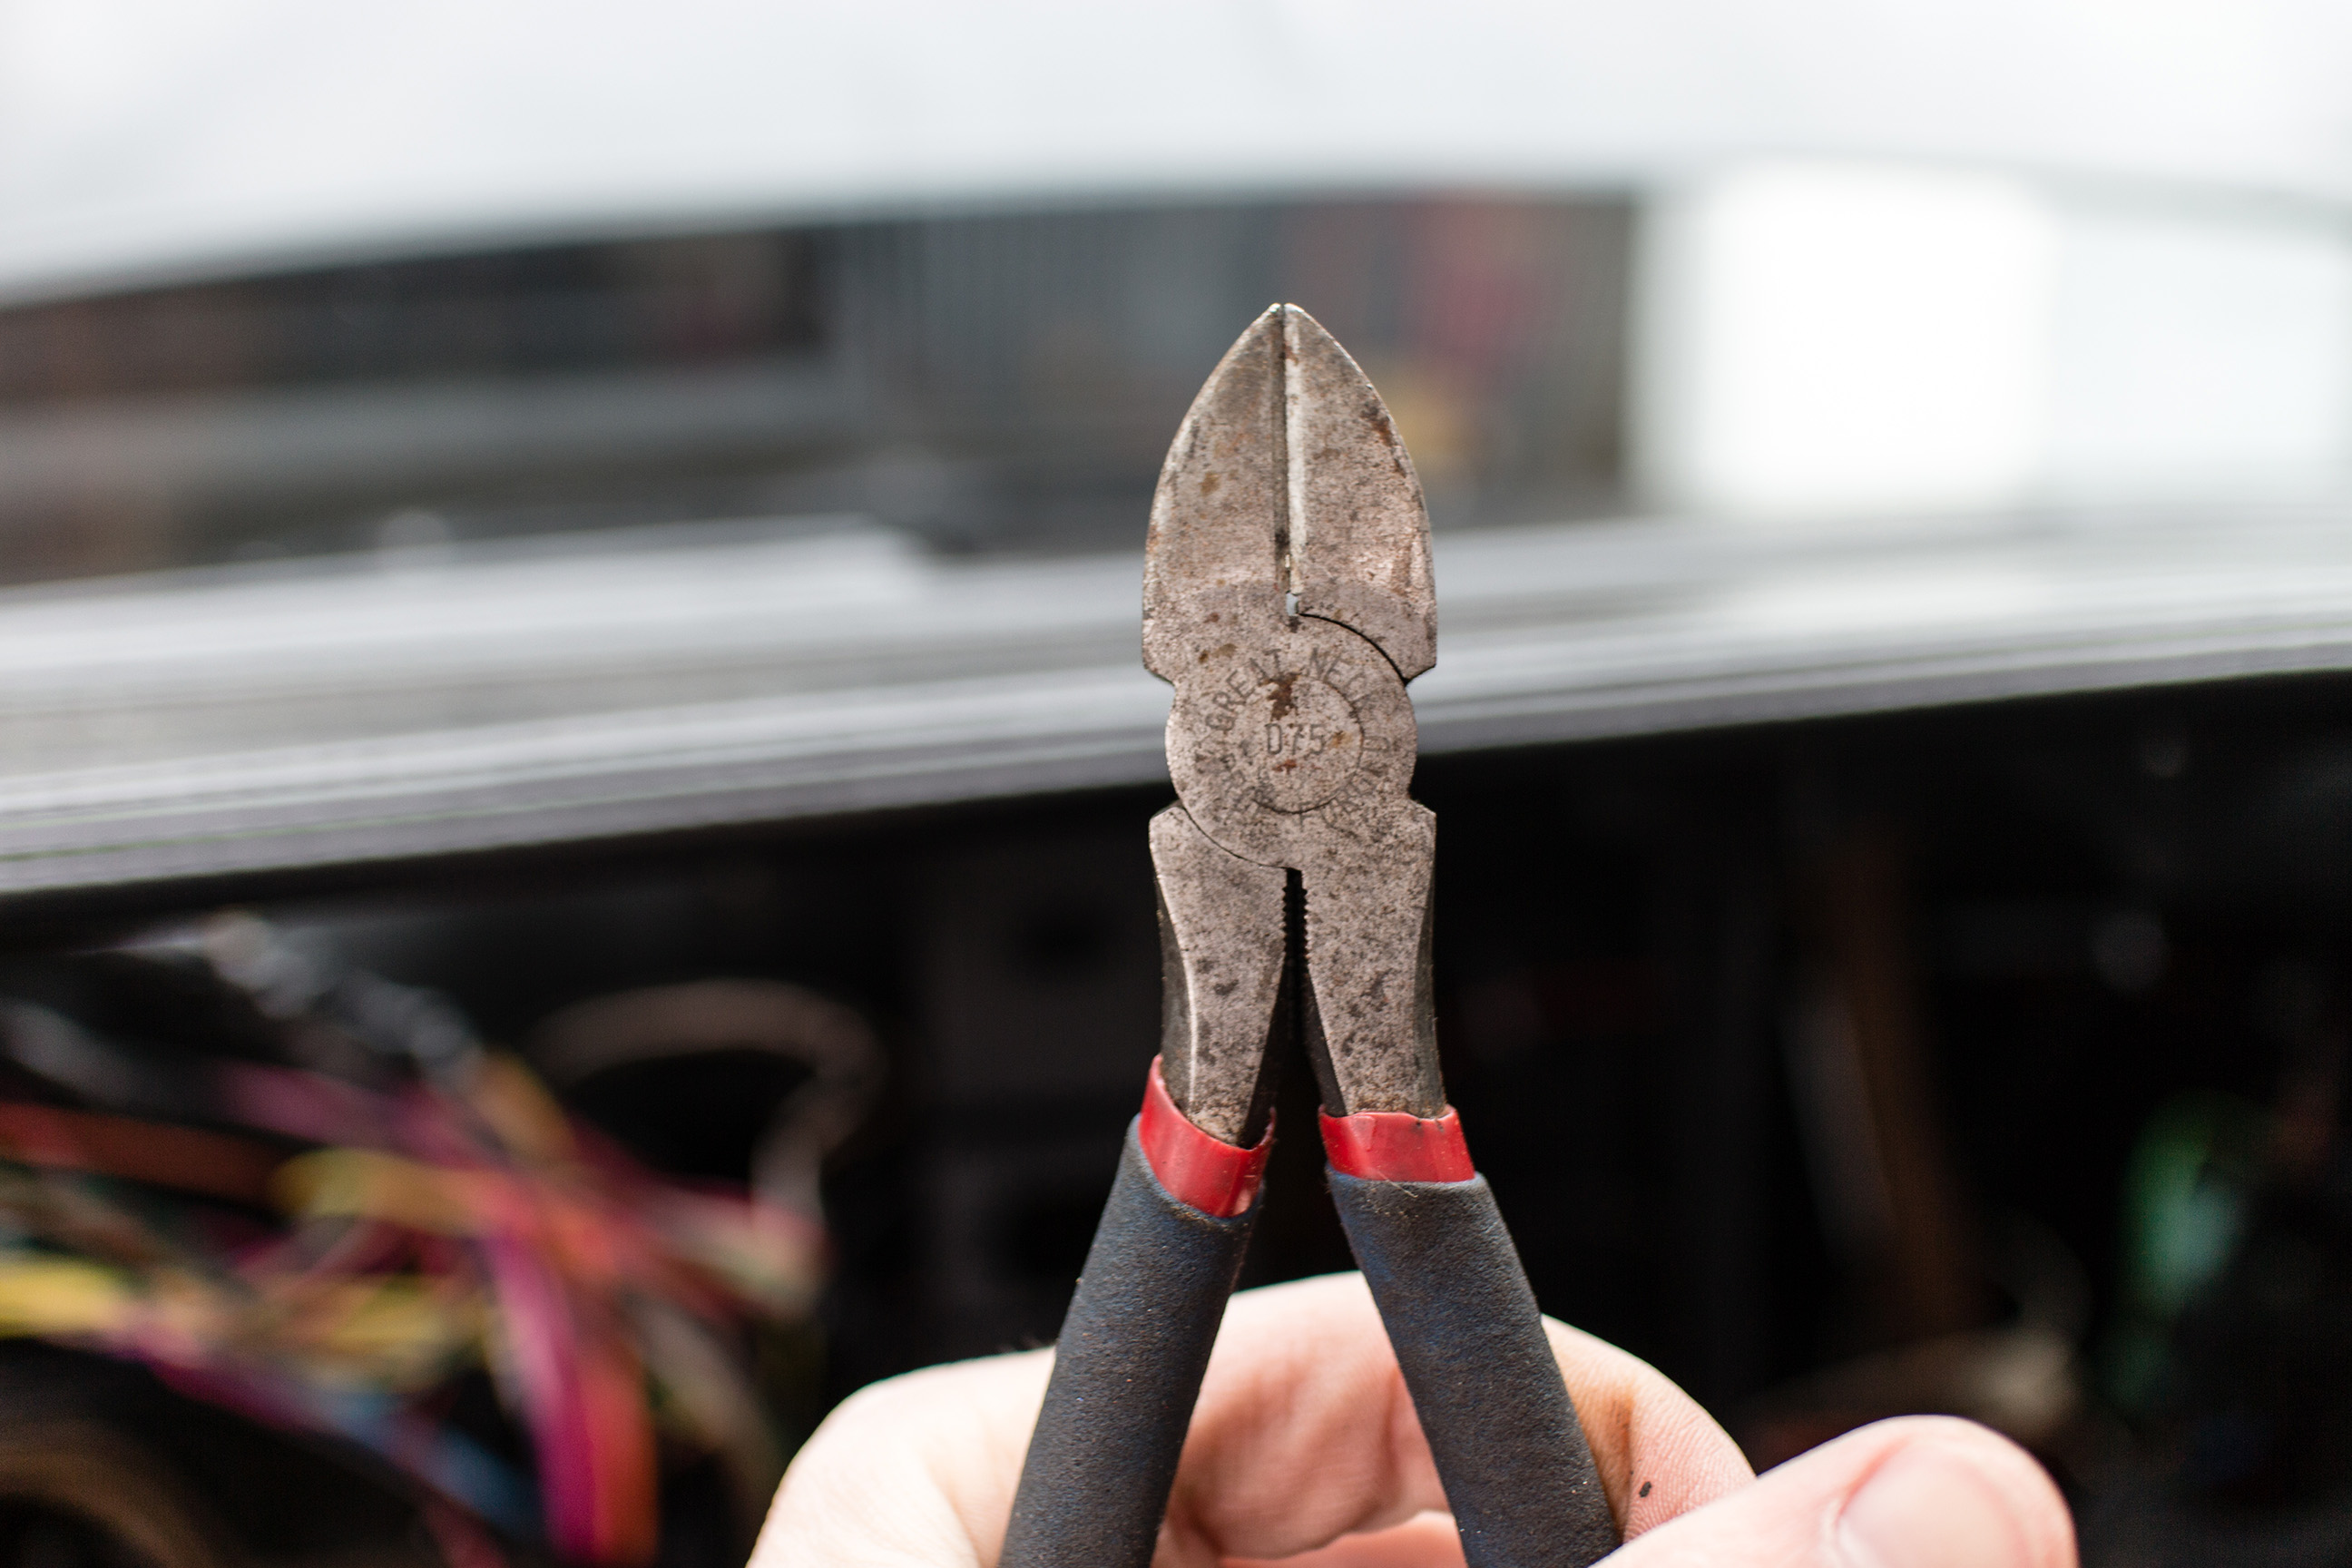
Now was as good a time as any to remove any unneeded circuits from both the G-body and aftermarket harnesses (Remember that I had merged the two for my TPI swap) and in general clean up the wiring. Wire cutters to the rescue! These would be getting used A LOT over the next few hours.
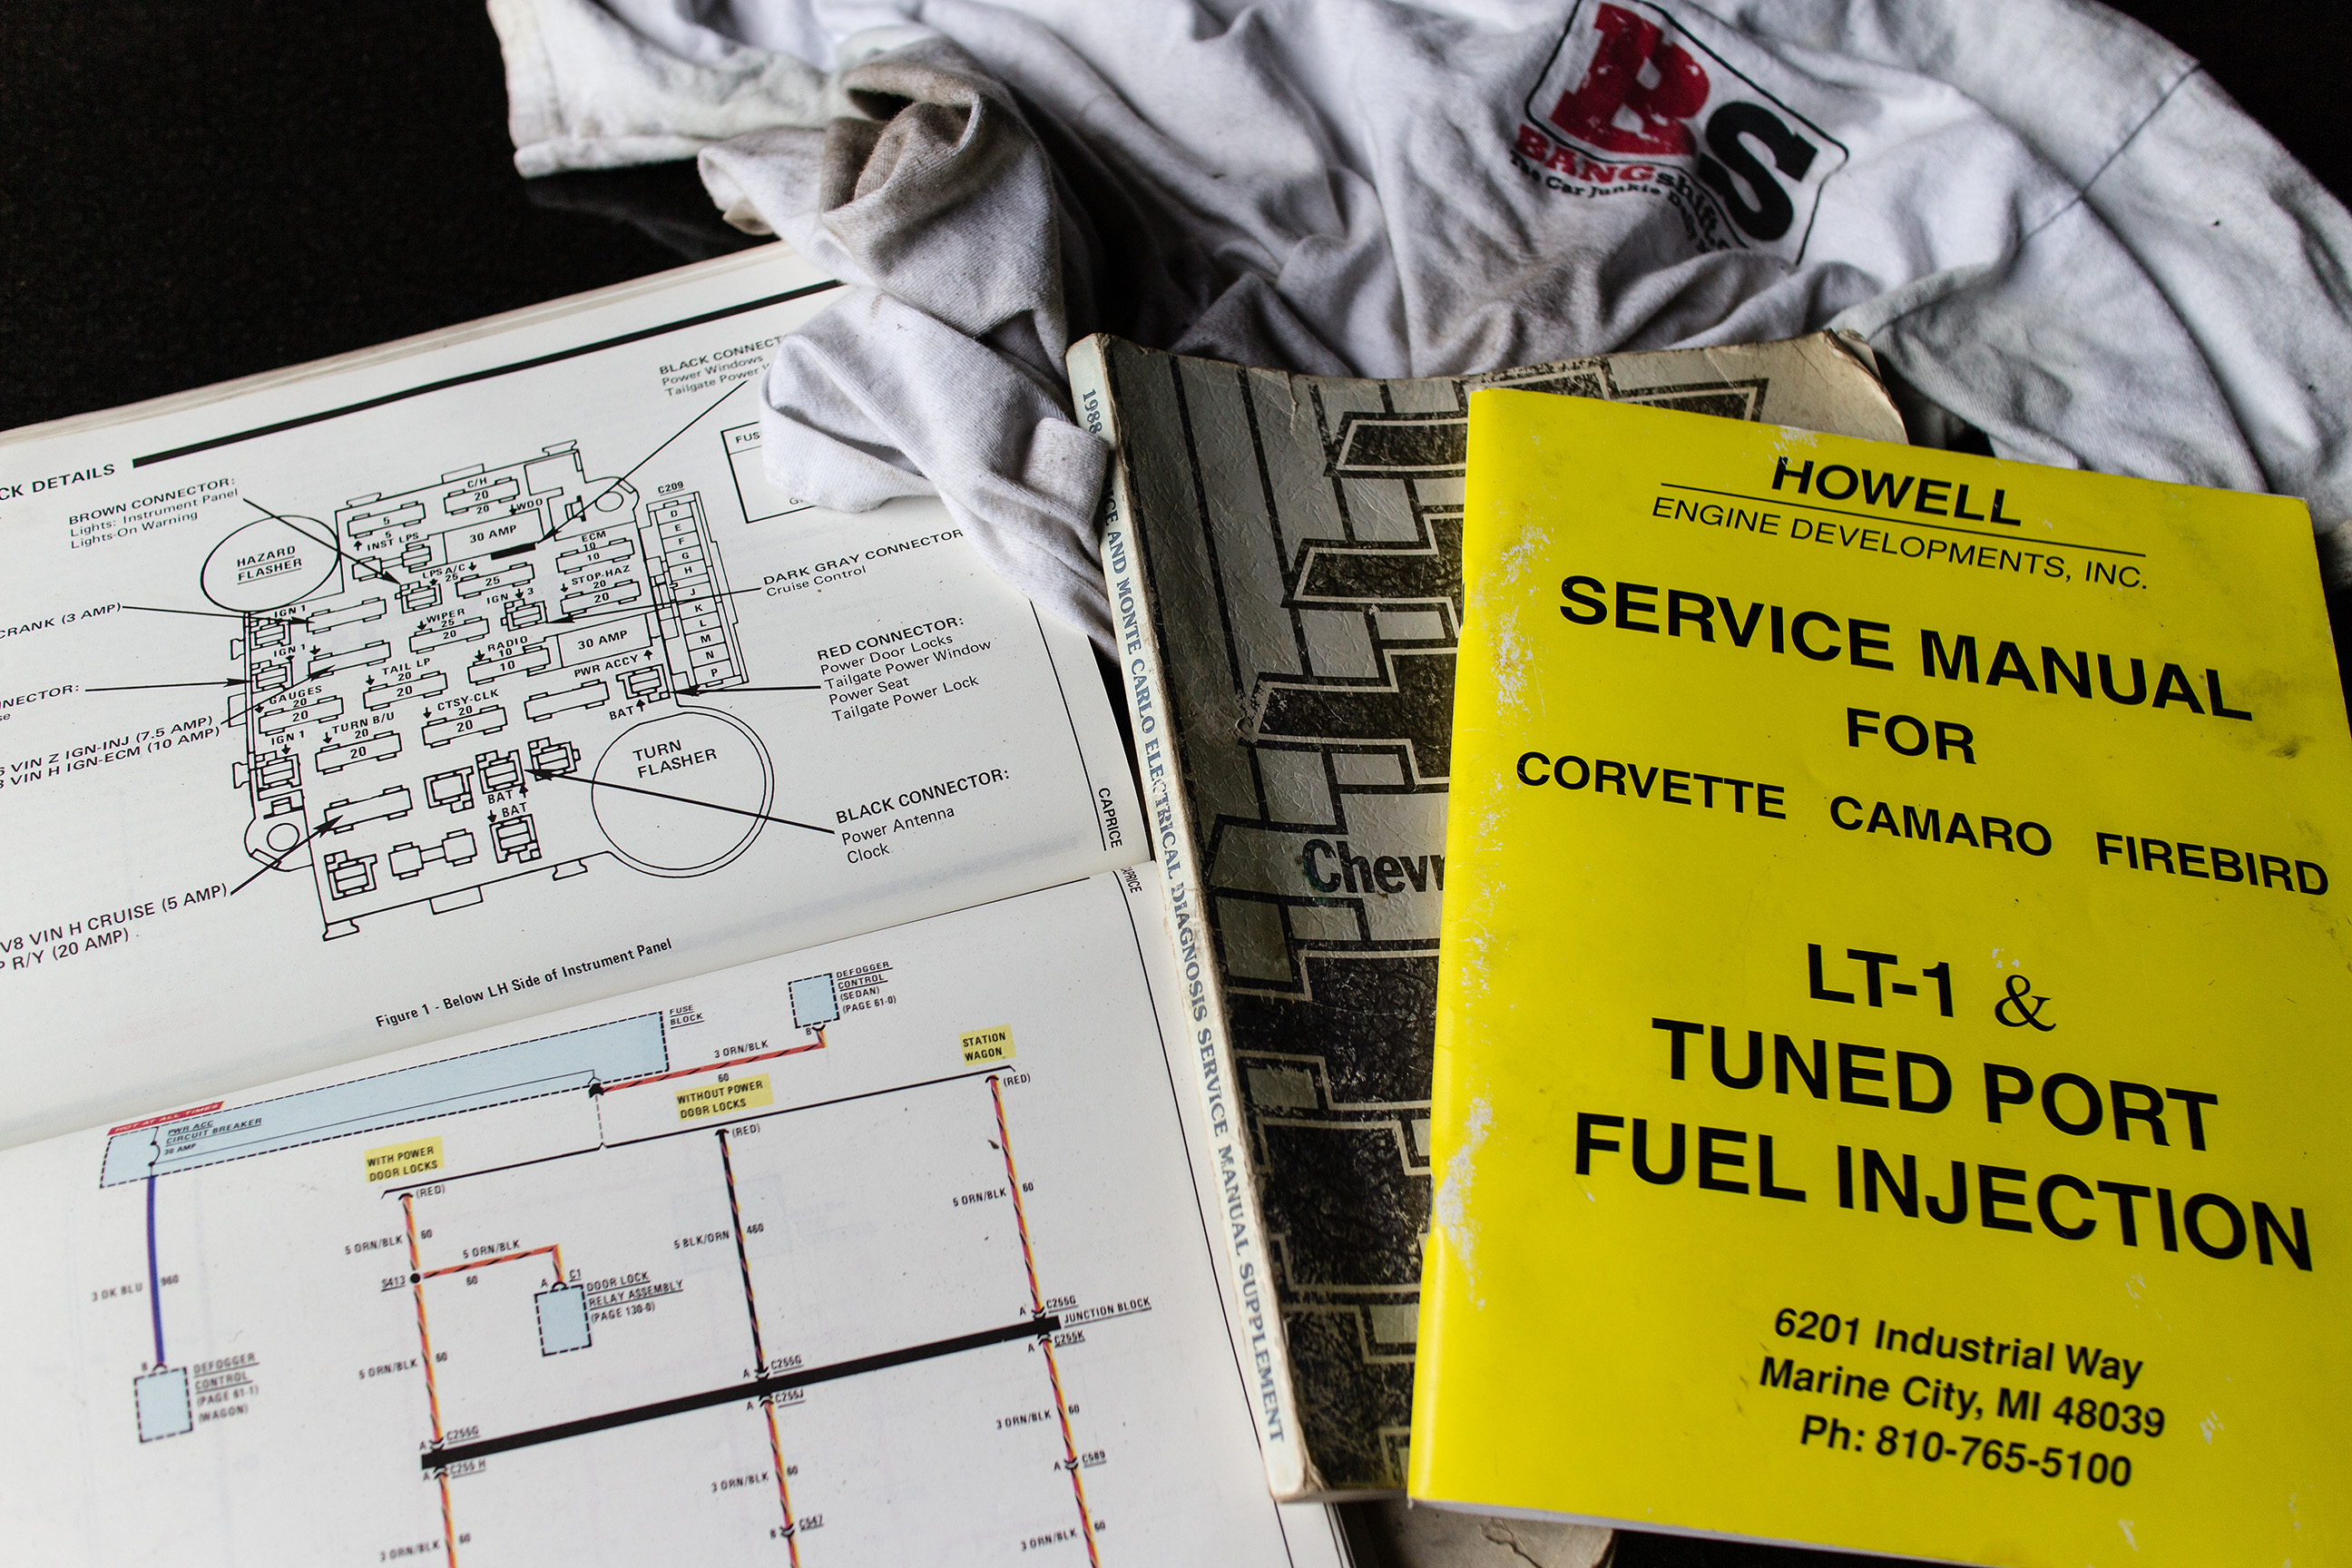
One last note before I get on with the good stuff: If you’re planning on ripping into your dash an OEM service manual is a serious life saver. In my case I also needed the guide for my aftermarket TPI harness as well to make sure I wasn’t cutting into anything I actually needed to make the car run.

Let’s start with the fuel level gauge (Part # 3613), which is a short-sweep electric gauge for most GM vehicles 1965 to 1997. Shown next to it is the “I like to read backwards on odd-numbered days and leave Dave stranded on the side of the road” gauge that the Auto Meter will be replacing.

At 2 1/16″ it fits perfectly within the stock Grand Prix housing.
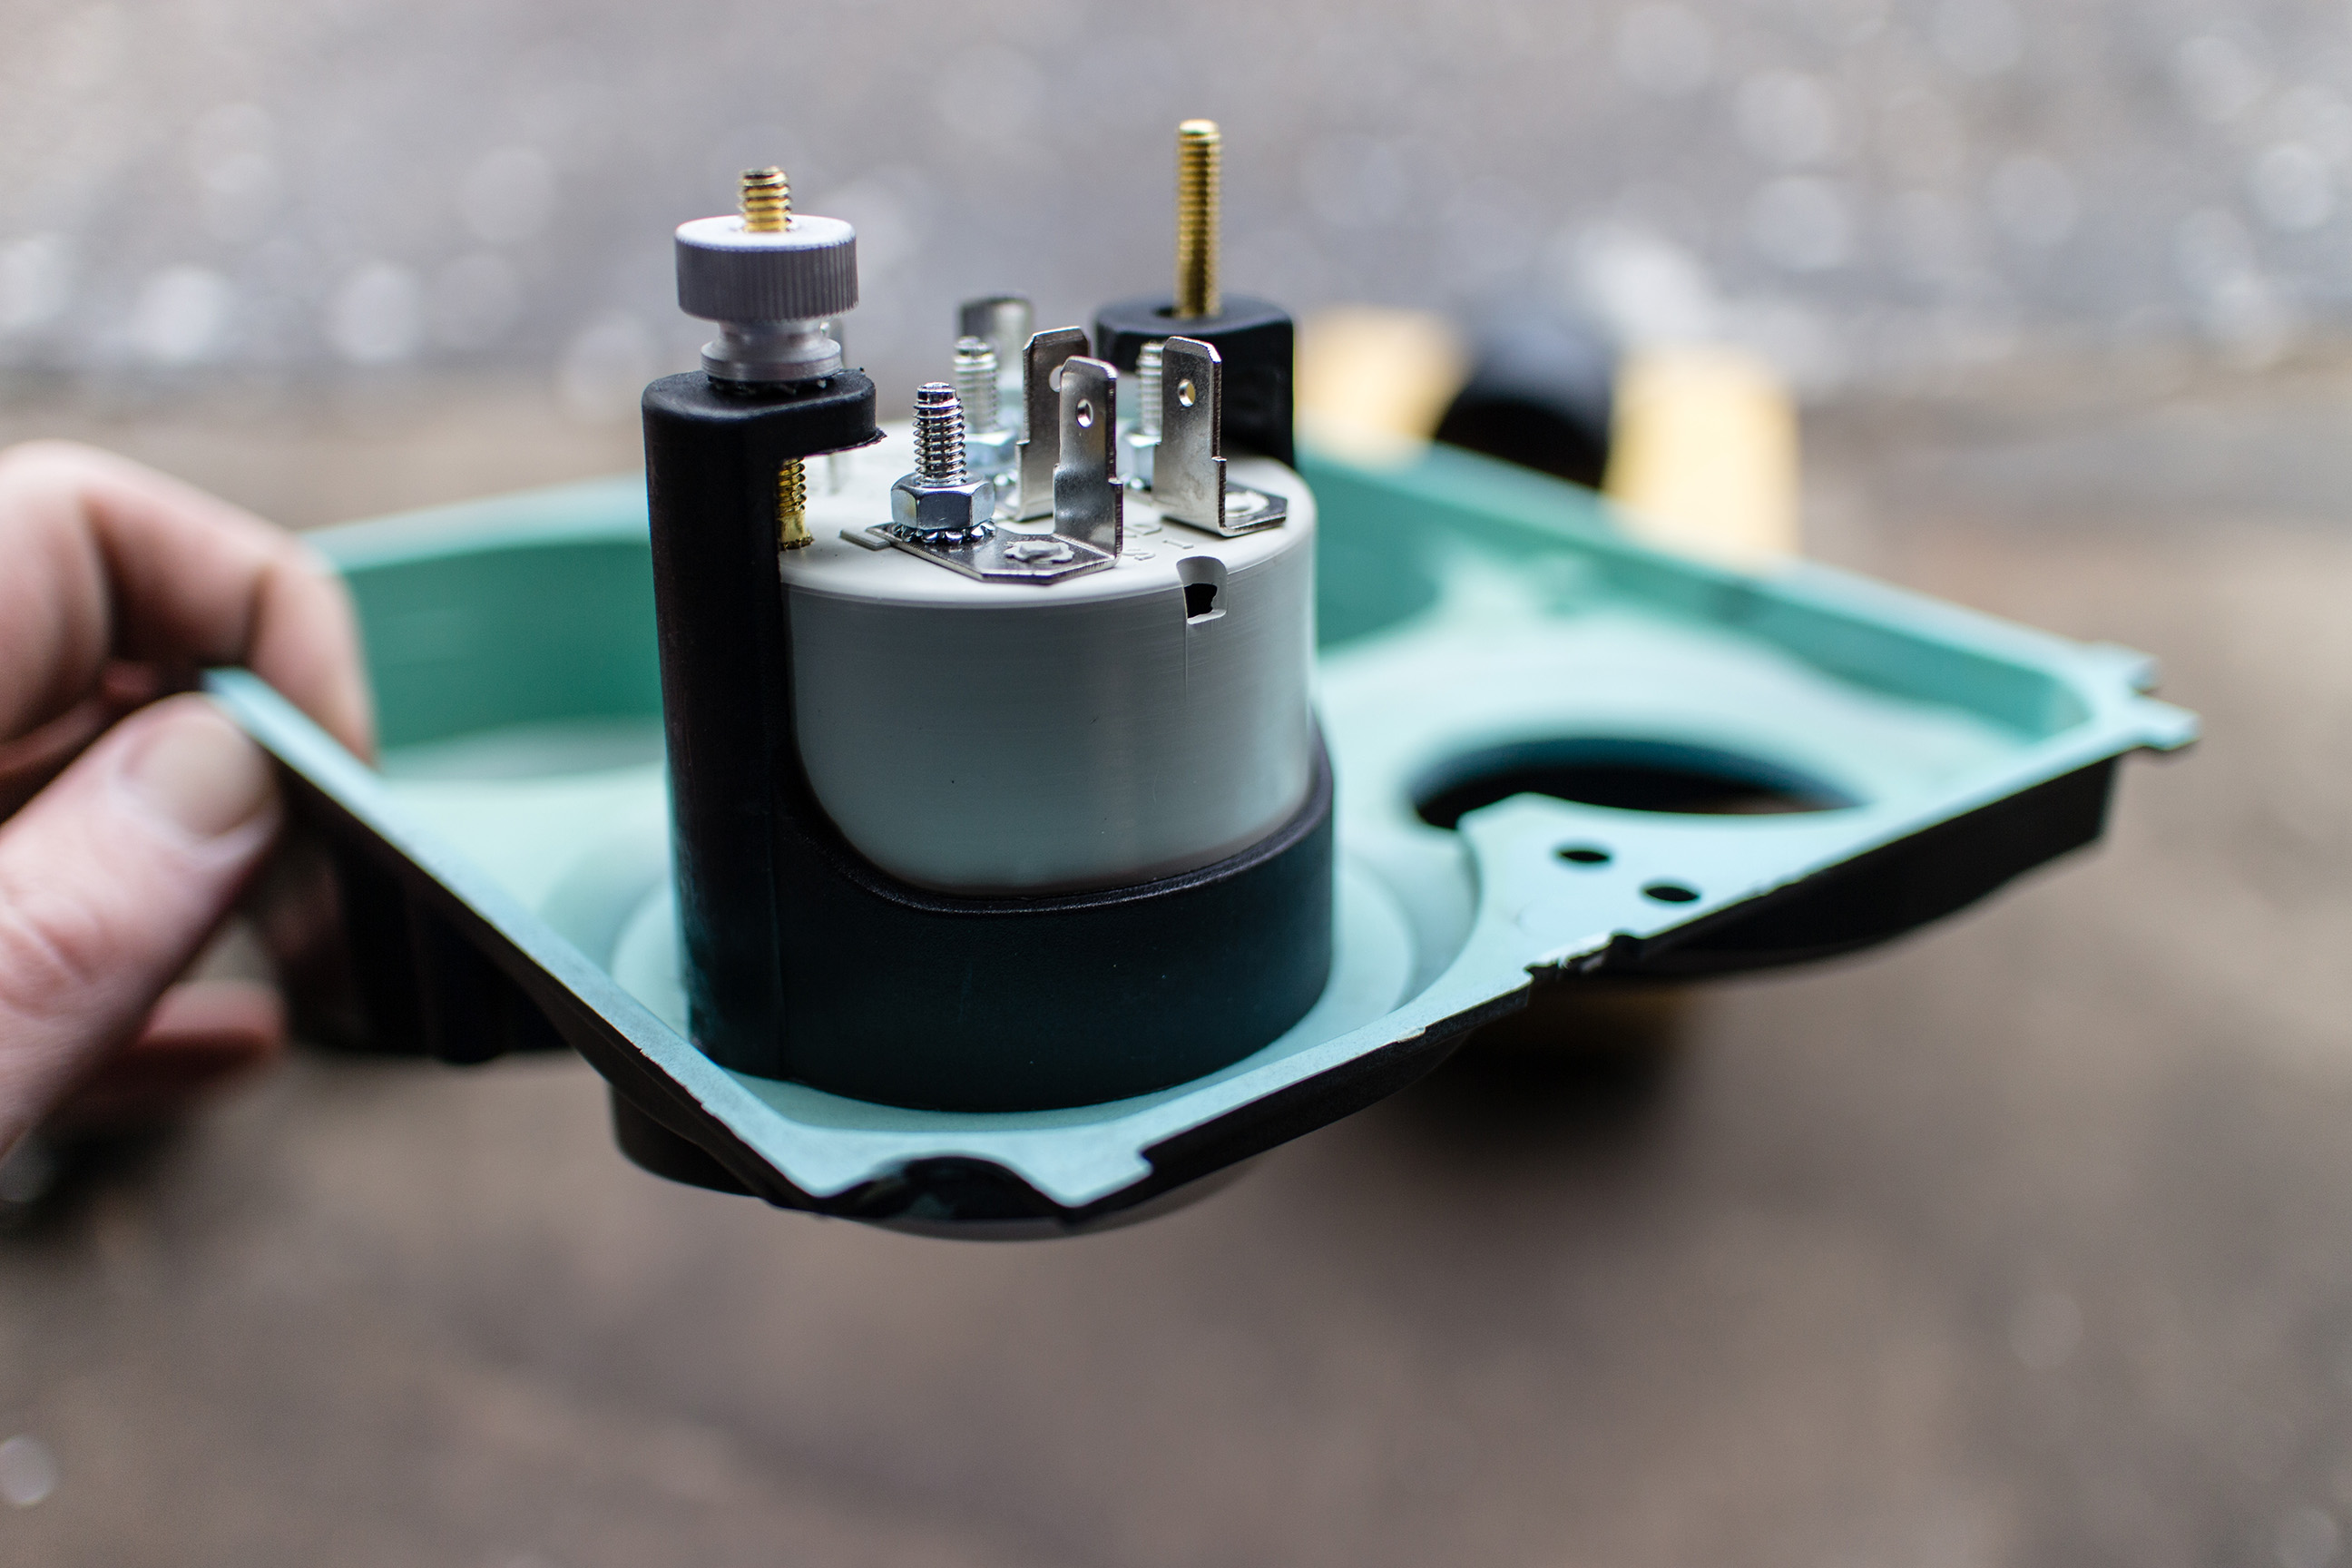
This is a quick shot of the backside of the housing to showcase the mounting solution that all Auto Meter gauges come with.
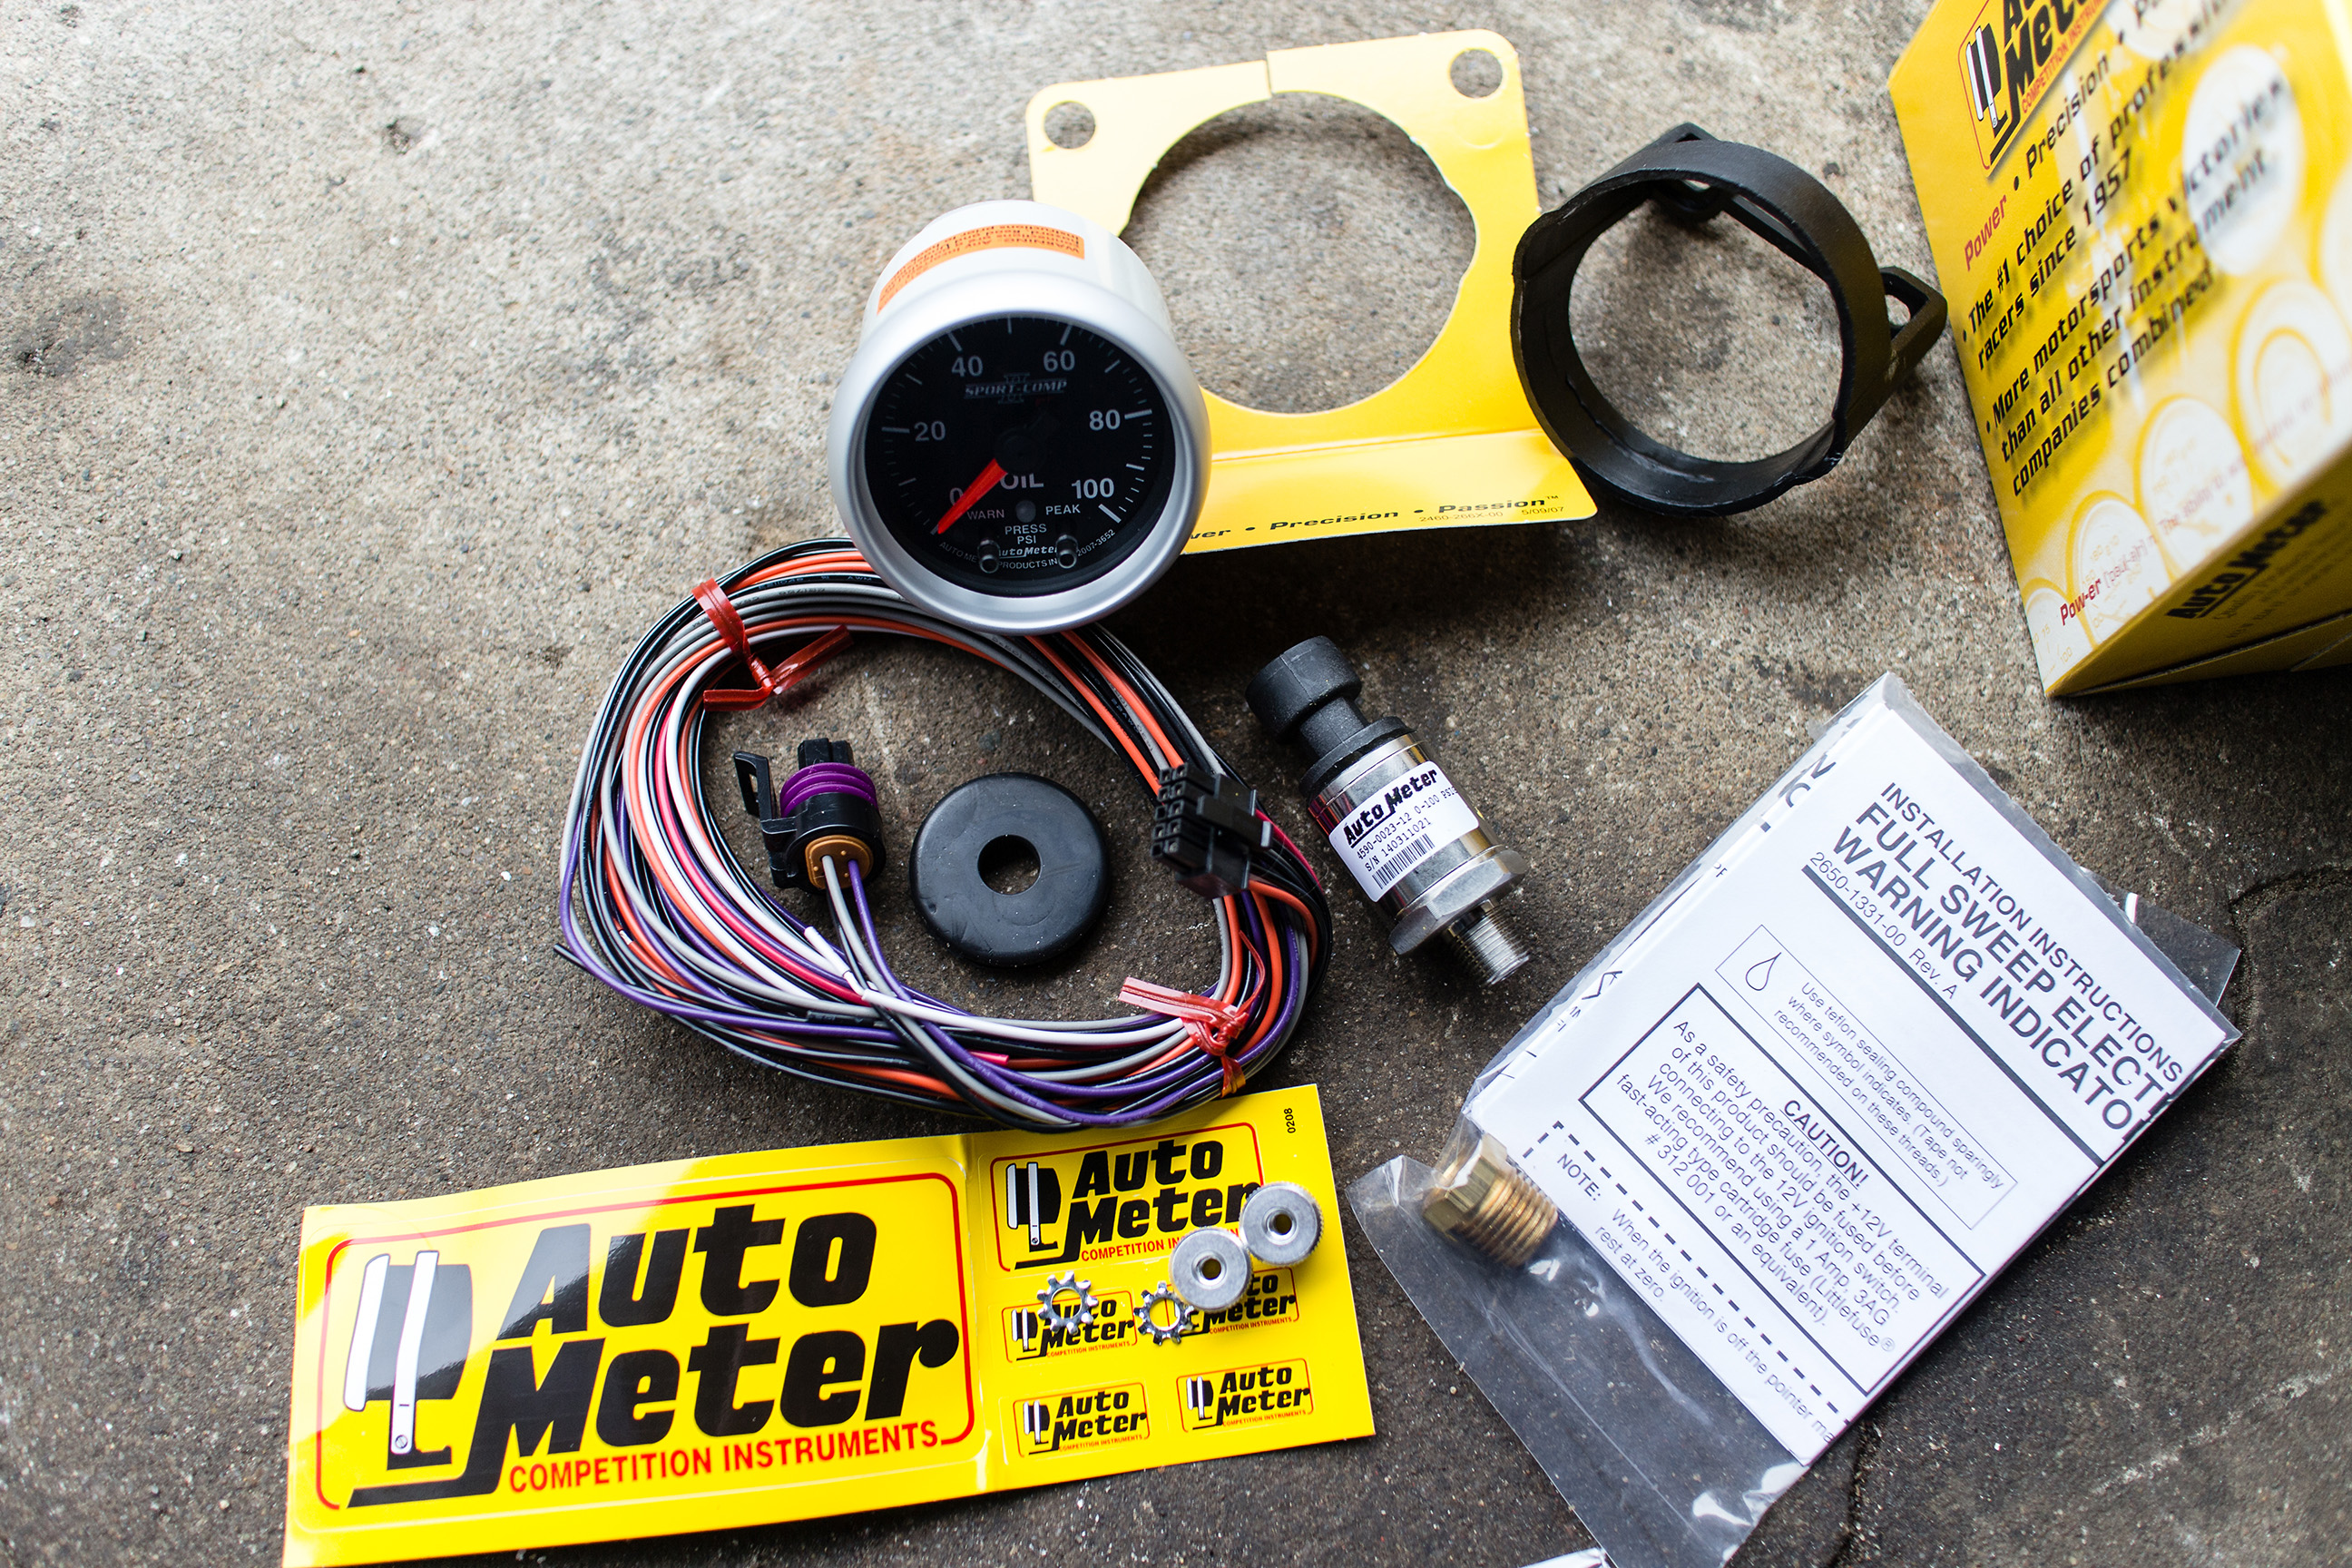
Up next is the full-sweep electric oil pressure gauge (Part # 3652), which comes with its own harness and sending unit, along with several adapters to fit into various engines. More on this gauge later.
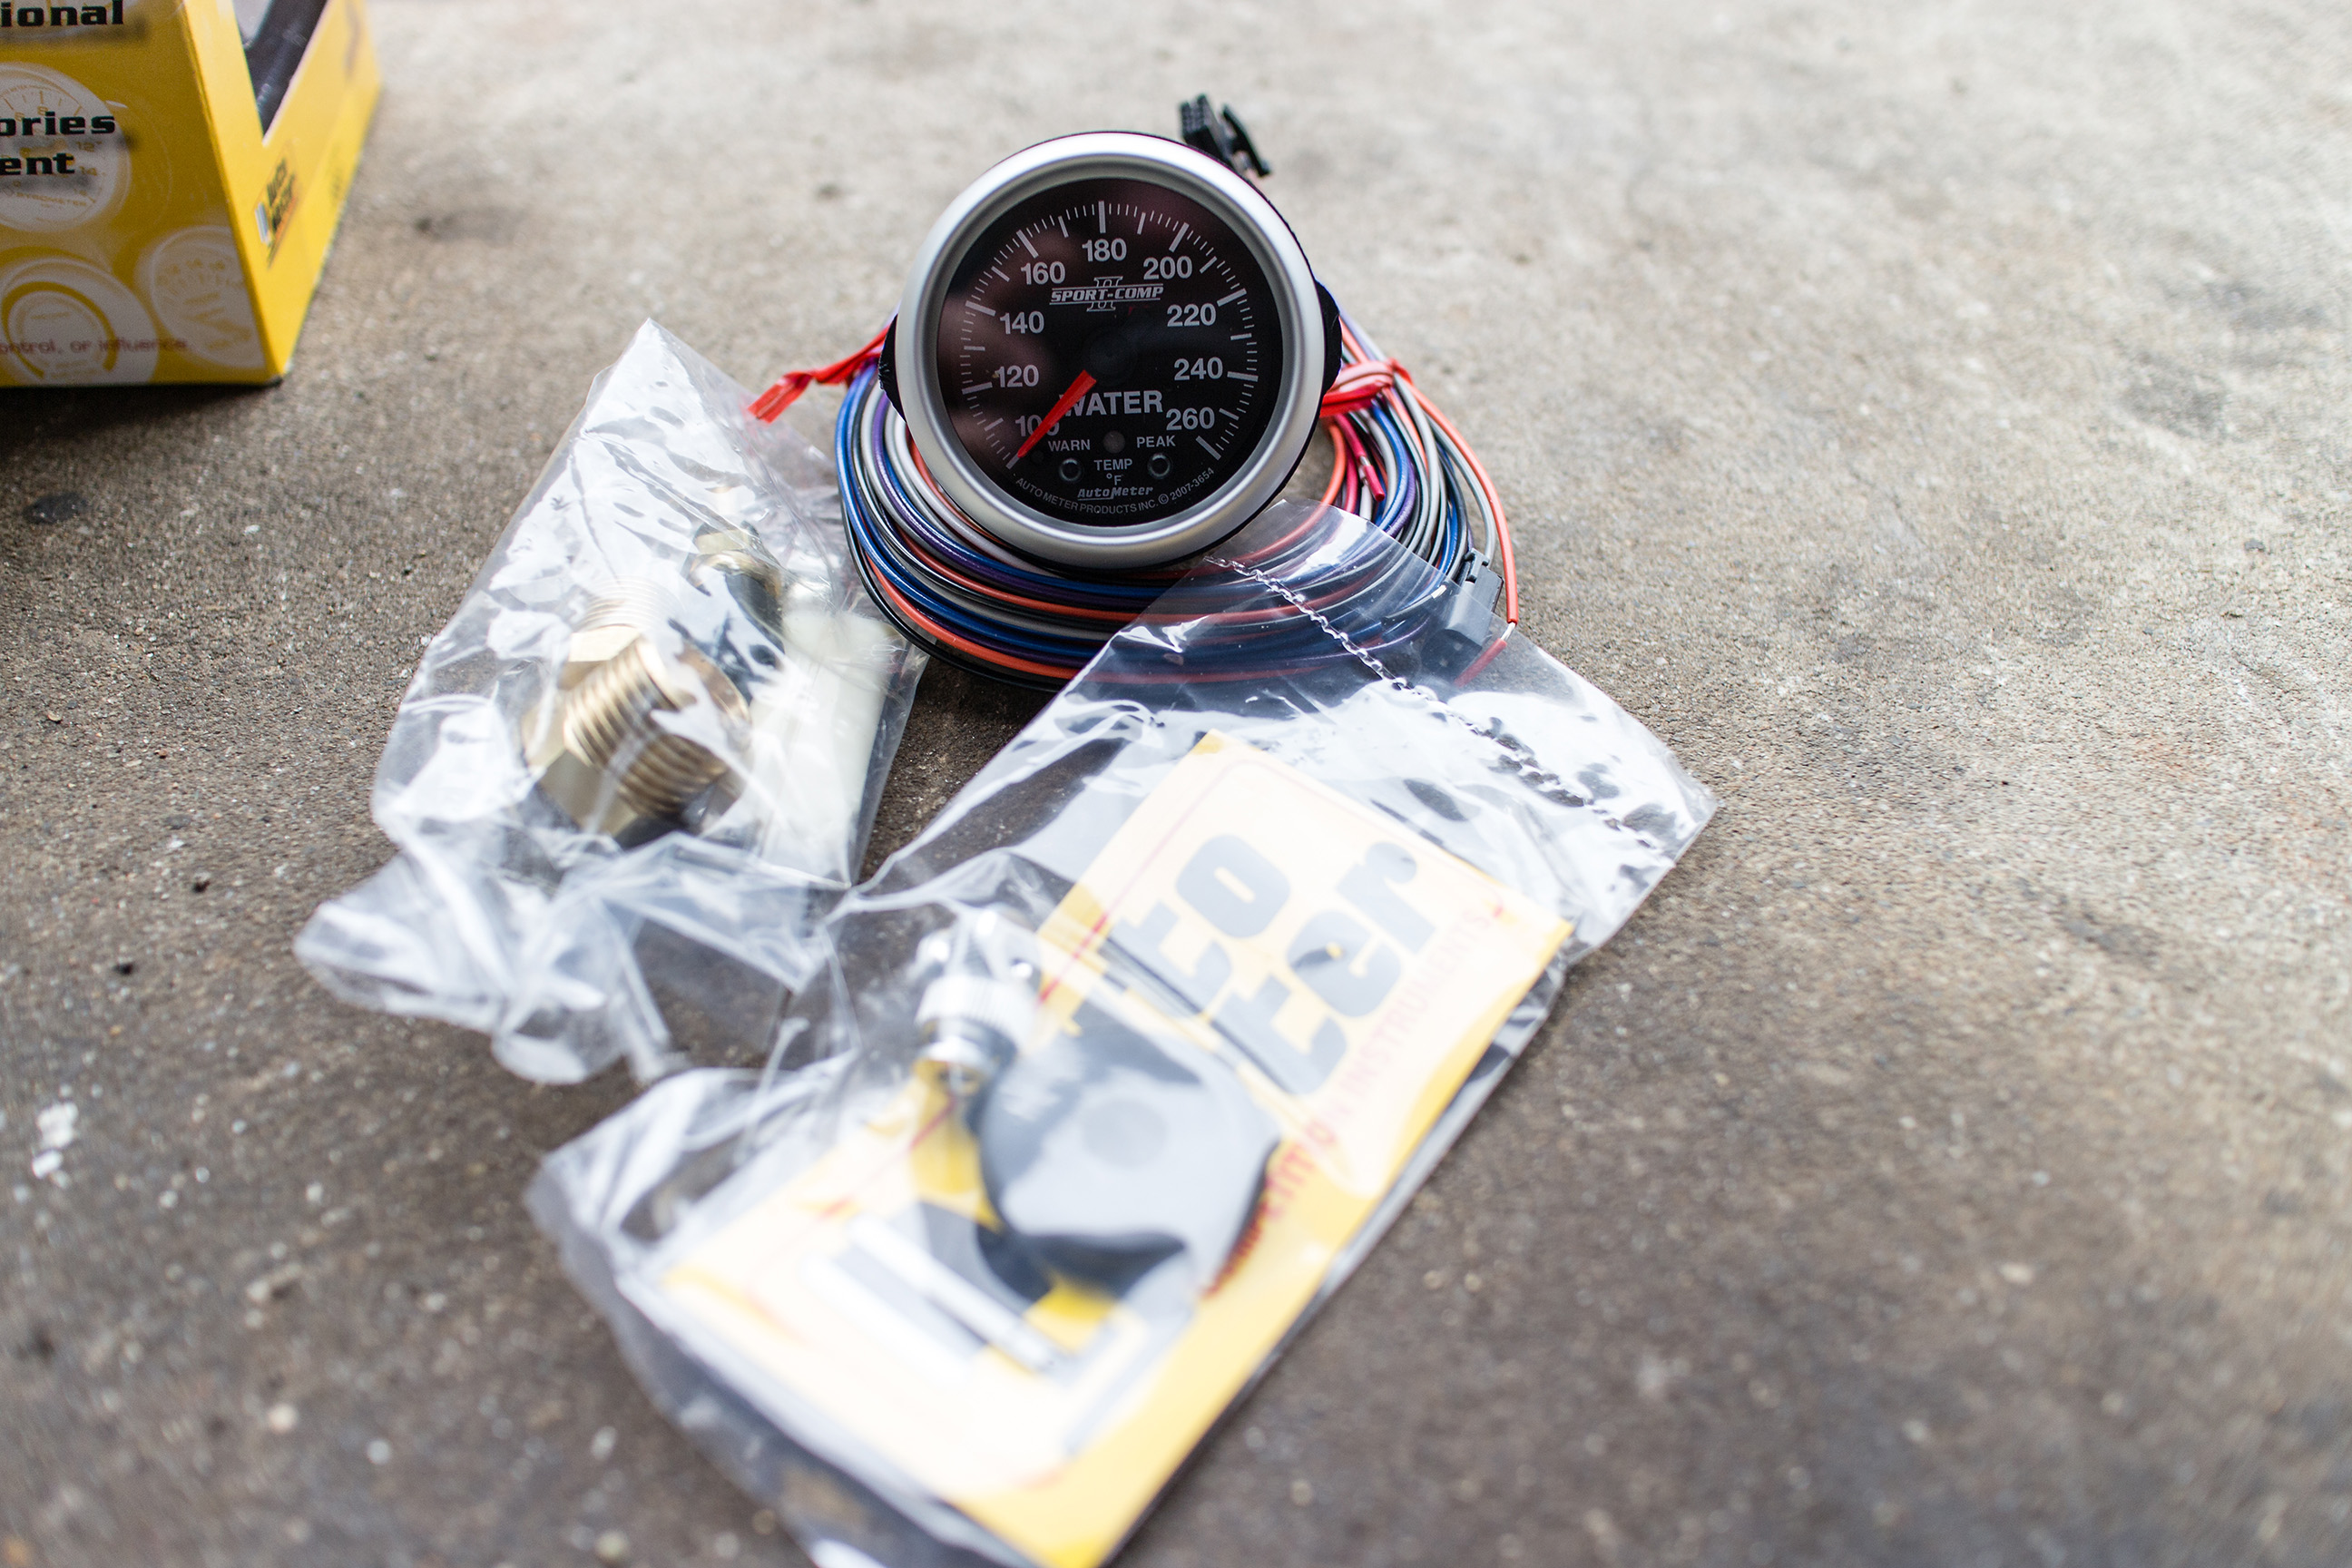
Third to the party is a full-sweep electric water temp gauge (Part # 3654). Same as the oil pressure gauge, it comes with everything needed for a clean install, from the harness to the sending unit and commonly needed adapters.
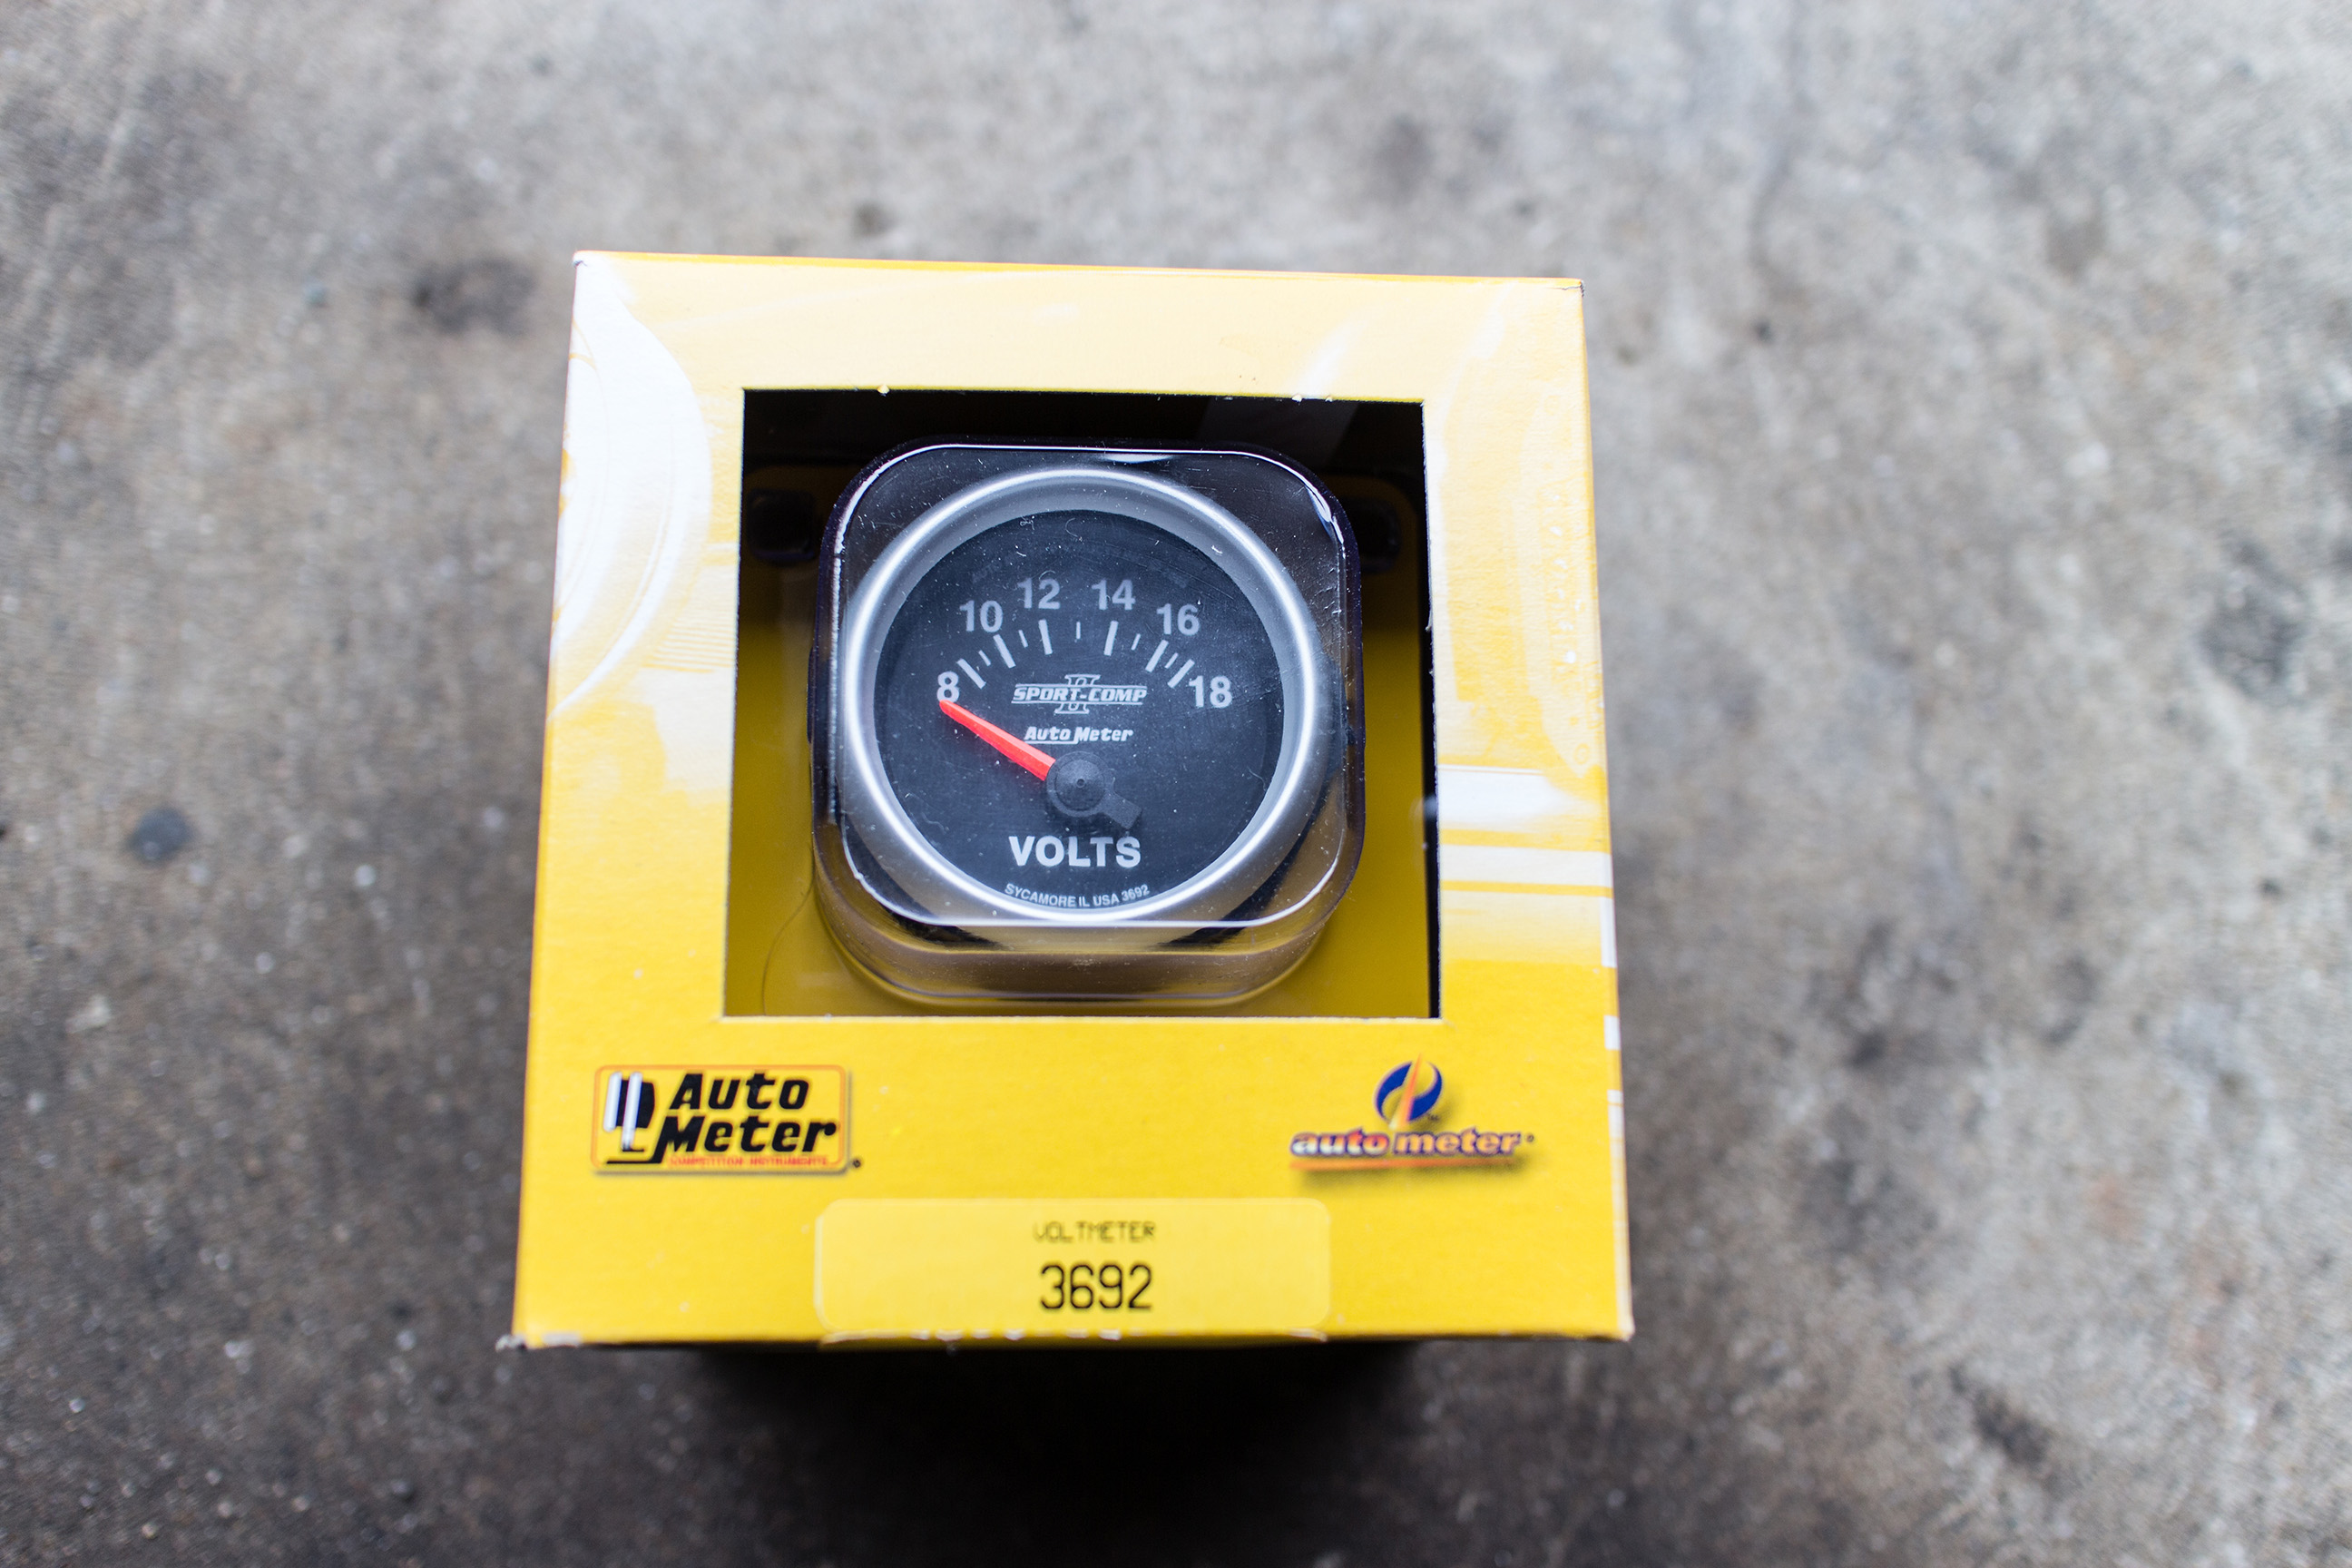
Batting in the cleanup spot for the smaller gauges is the 2 1/16″ Volts gauge (Part # 3692). If you have to ask me if it’s also electric, feel free to slap yourself upside the head for me.
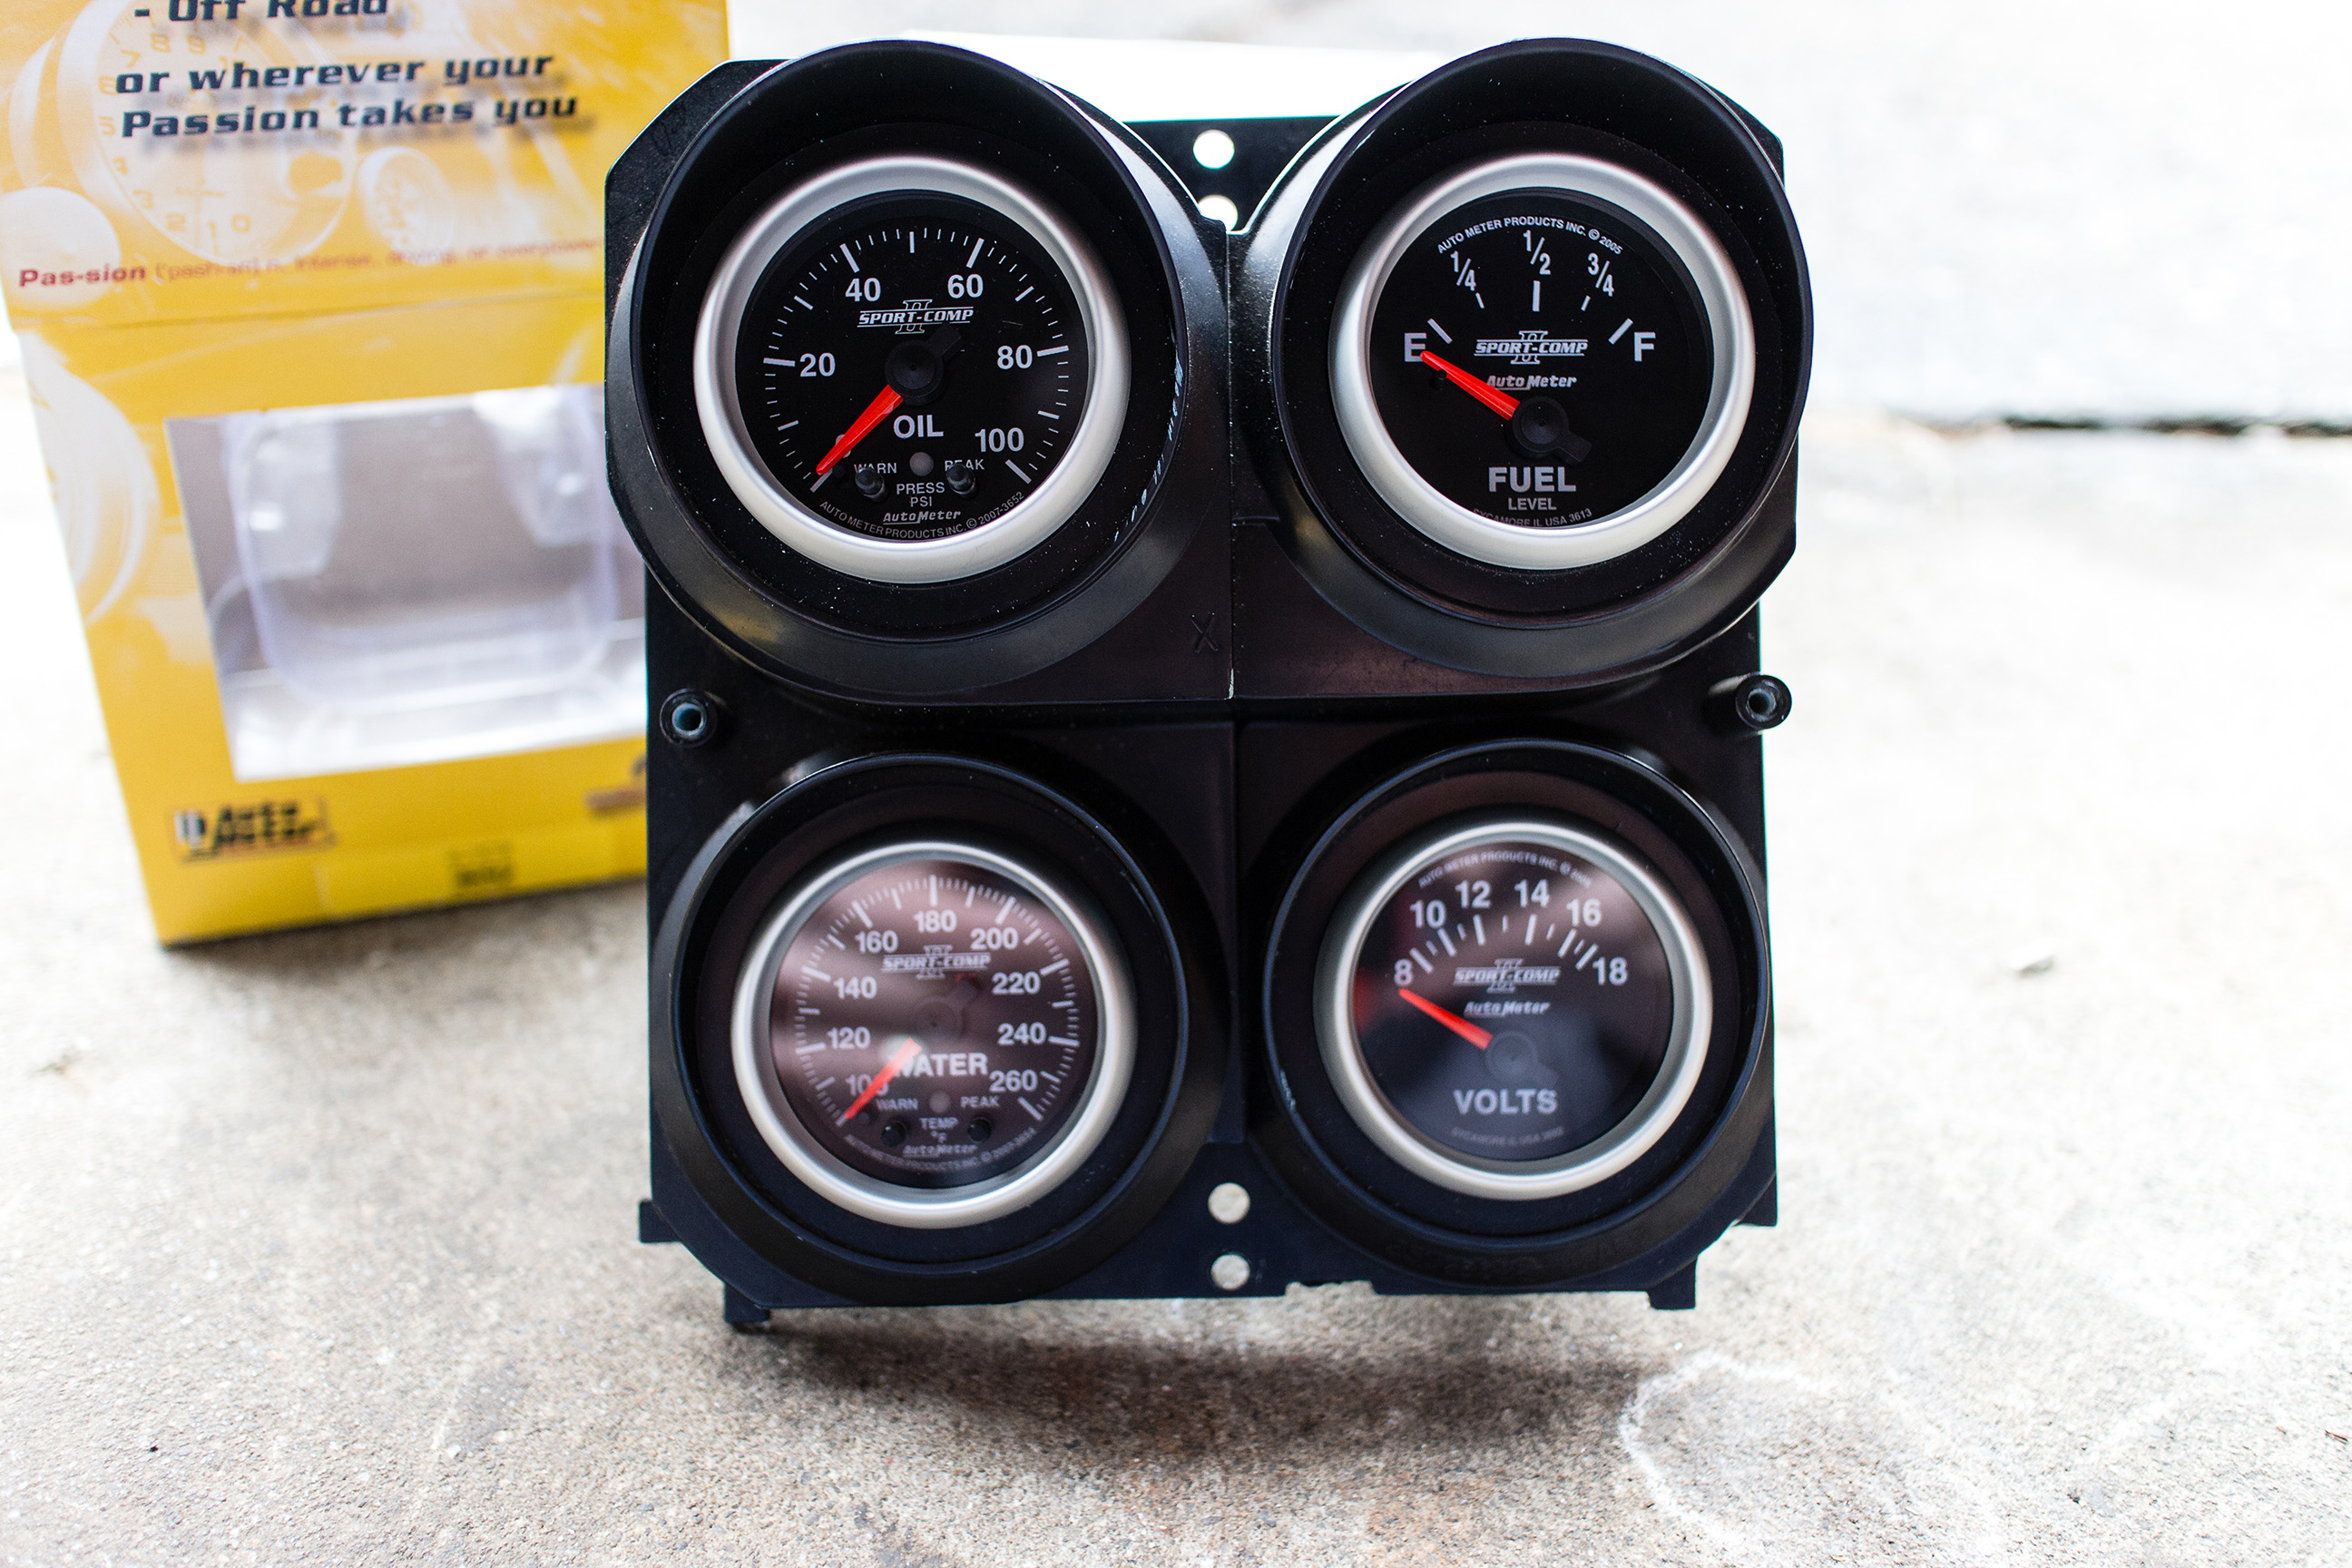
Here’s all four of the little guys installed and ready to get wired up…

…and a view of the backside to give you an idea of how they differ in regards to being wired. The oil pressure and water temp (On the right) come with their own harness while the volts and fuel gauge (On the left) require that you wire them yourself.

With the other gauges mocked up, the big boys are next on the list, starting with the 3 3/8″ tach (Part # 3697).
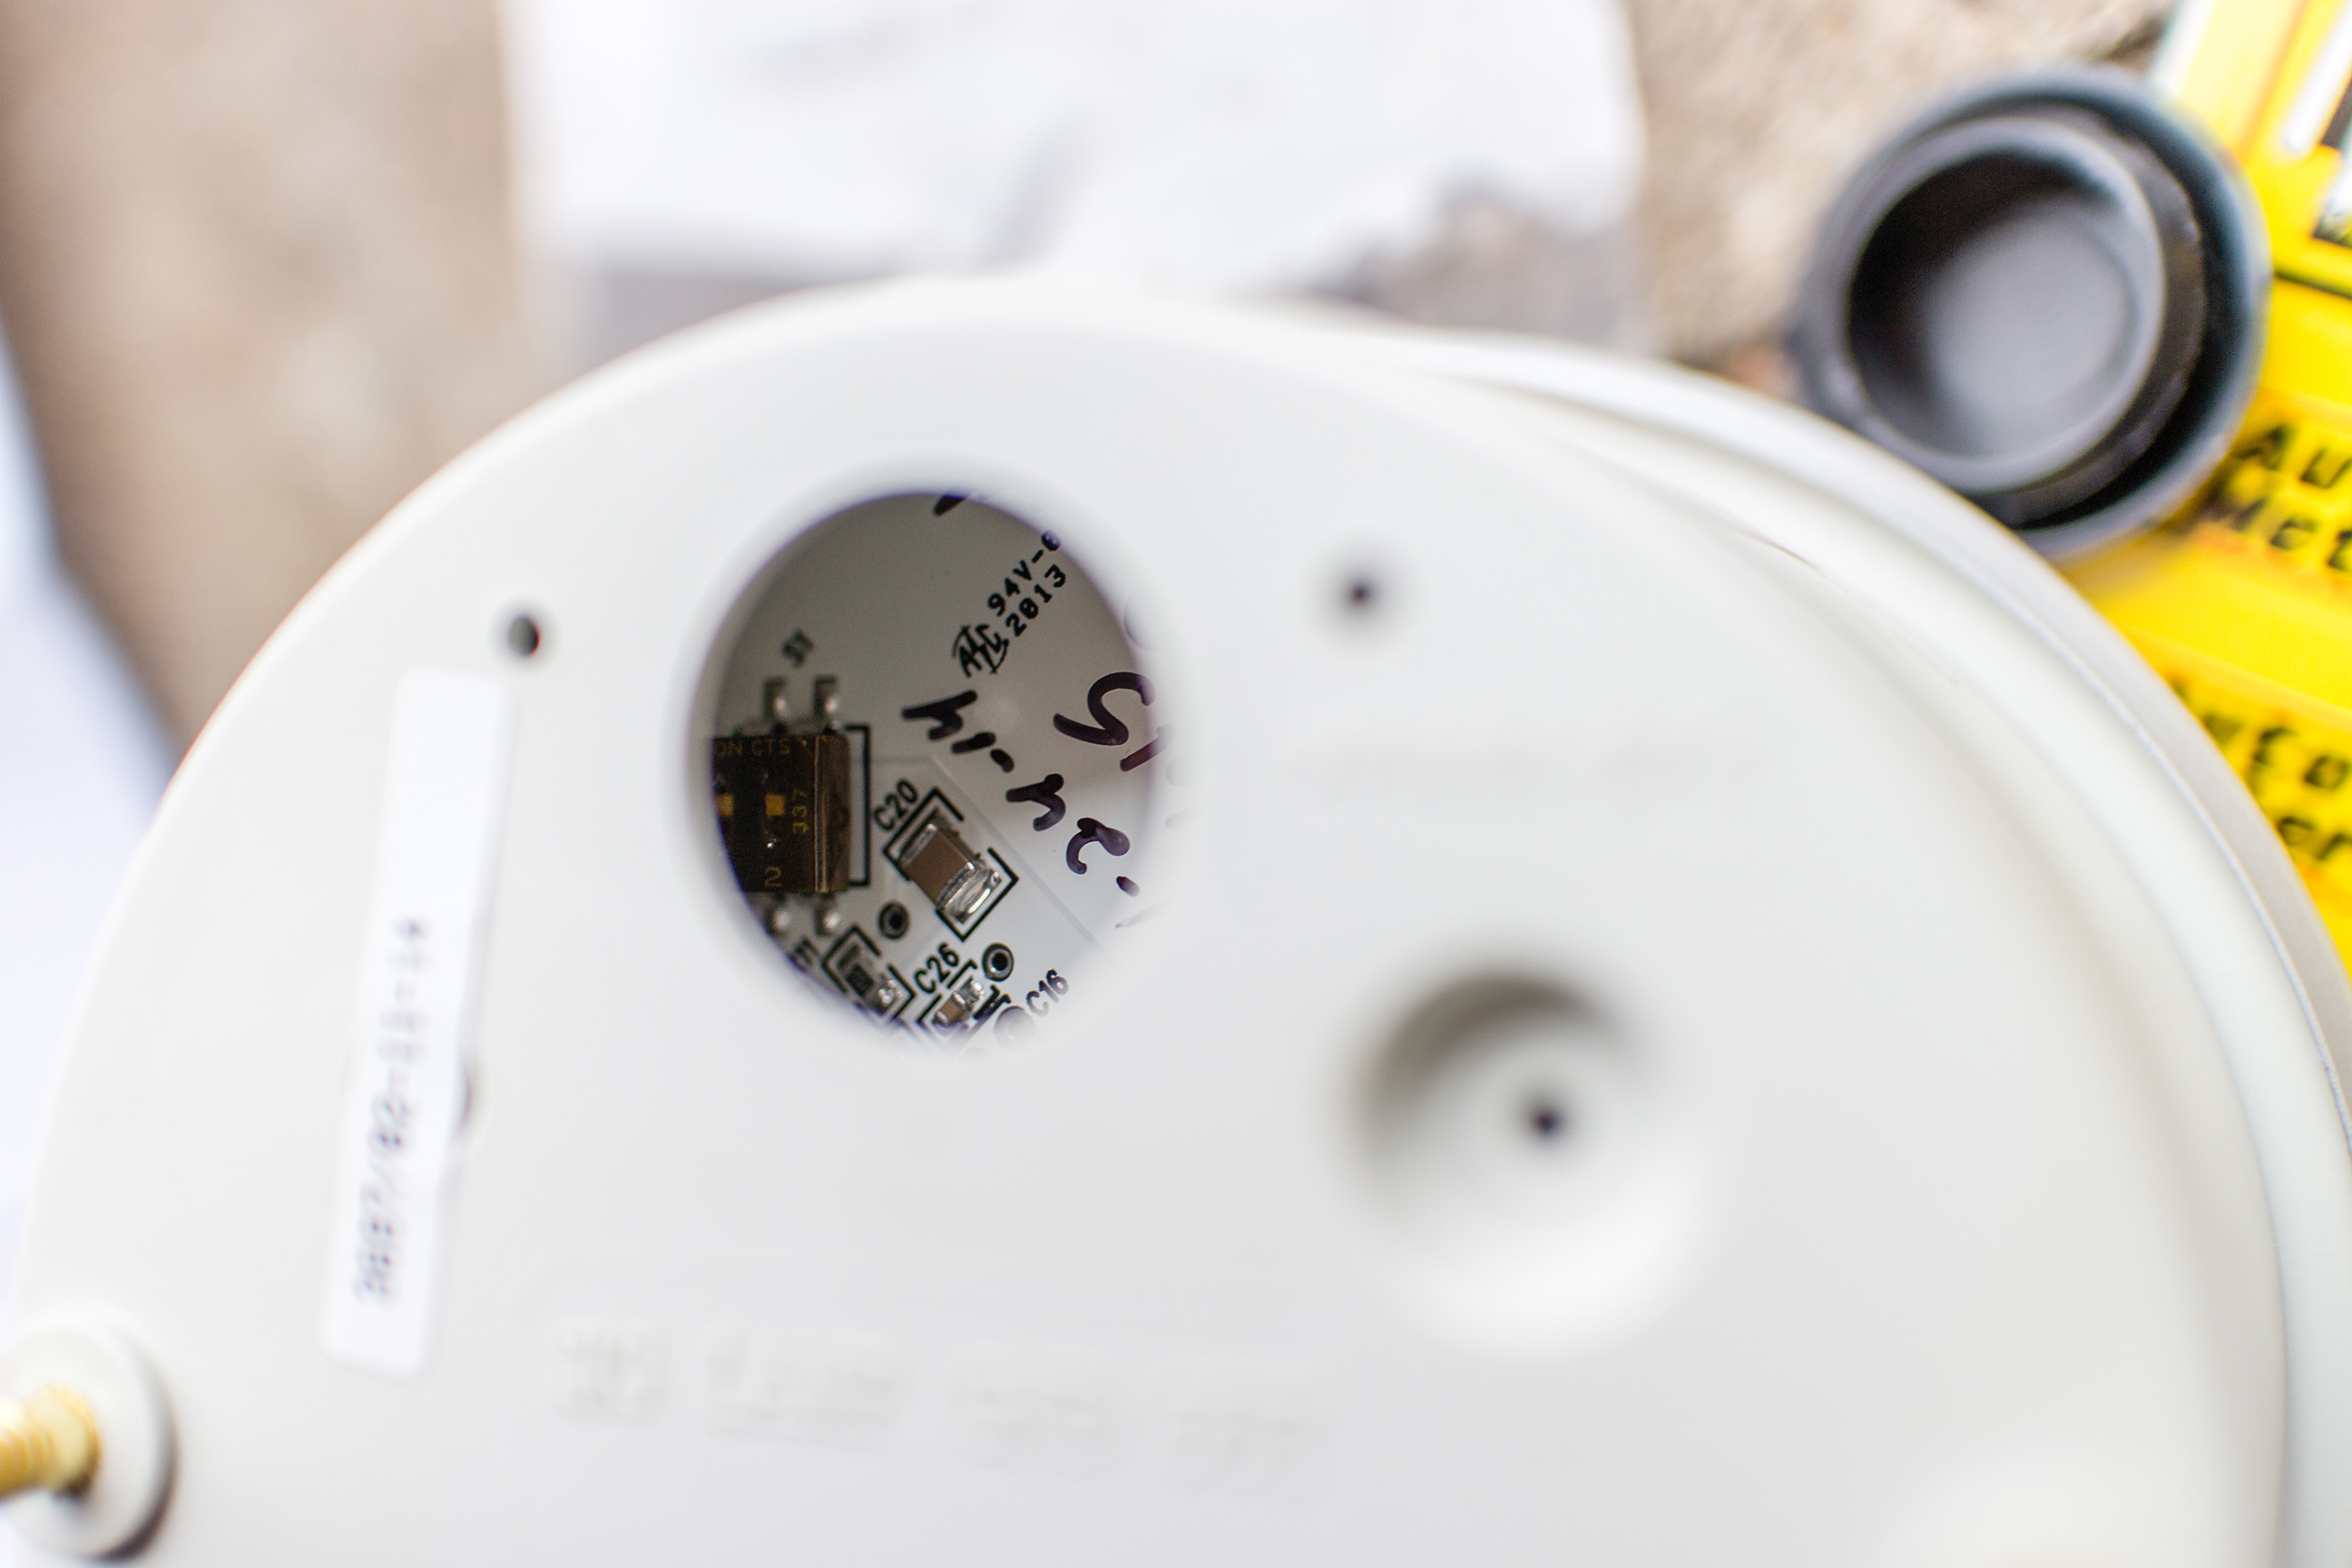
As shown in the instructions, the tach comes preset for a V8. If you need to change this, the switches are accessed via this hole on the back of the gauge. See those little red switches? Those are your guys right there.

Even with the same slick mounting system as the other gauges, I ran into a problem when it came to the speedo and tach: The hole that I wanted to mount them in was too large at about 4″ in diameter. I needed something to take up the gap between the gauge and the hole.
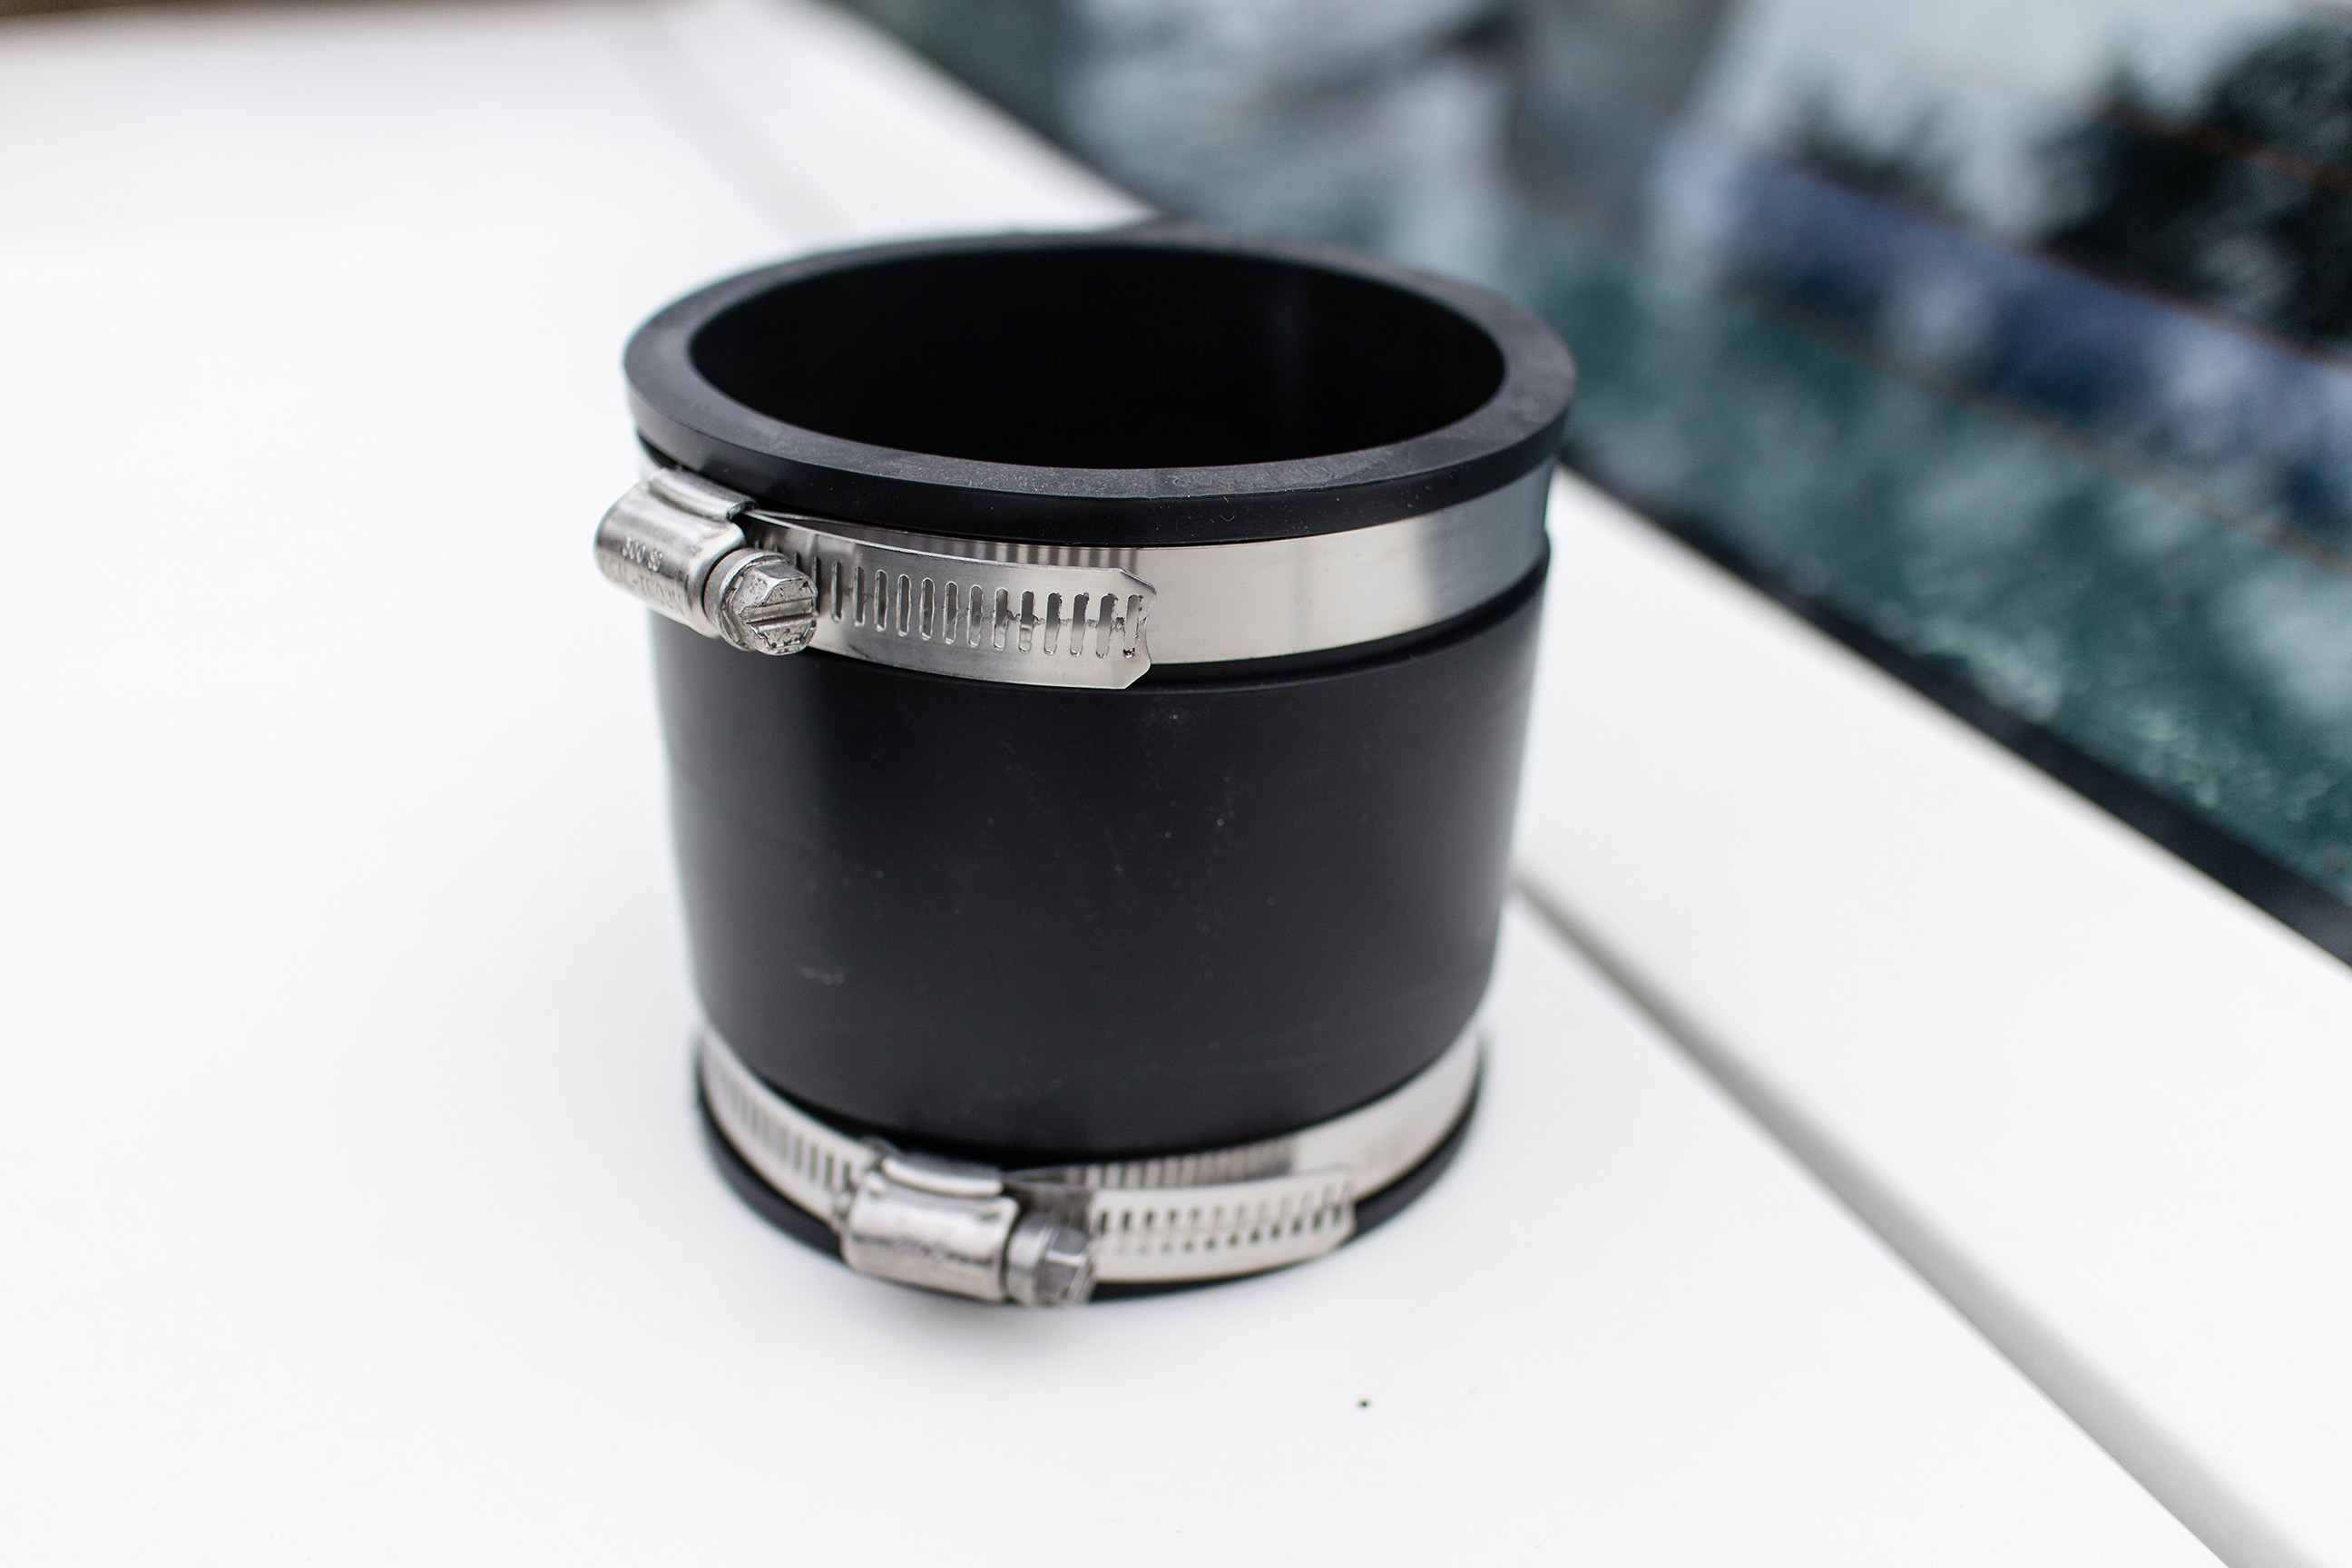
A few hair-scorching minutes of brainstorming and a trip to the local hardware store turned up this, a rubber plumbing coupler. Cutting it in half would give me enough material to work with for both gauges.

Here’s the result, which is a a snug fit between both the gauge and the coupler and the coupler and the hole. Bonus points for it being all but invisible once everything is back together.
In the off chance you’re curious, that face plate attaches to this, which houses the turn signals, high beam indicator, etc. I ended up cutting out a good portion of the back of this to fit the gauges themselves due to their depth, but nothing lost there in regards to functionality.

Here’s the parts that I was most excited to try out, namely the 160 MPH electric speedo (Part # 3688) and the GPS interface (Part # 5289). If a cable-driven speedometer isn’t an option and/or if you don’t have a VSS output available, then the GPS interface is the solution. It natively outputs the needed pulses per mile needed for Auto Meter speedometers (16,000 PPM), but can also be programmed for use with other brands of electric speedometers as well using the supplied instructions
With all of the gauges mocked up it was time to get back to the wiring, starting with finishing my cleaning up of the under dash wiring. Here’s a sample of the wiring(The old, non-functional VSS from the Monte harness and a few courtesy light circuits, mostly) that was removed. Not pictured, but I also rewrapped the main trunk and moved the ECM back to the kickpanel on the passenger side. Believe me when I say that I tripled checked every wire before cutting it.

Luckily, wiring up the Auto Meter gauges themselves was much less stressful and time consuming. In general the wiring for each gauge is A) Power/ground to LED lighting, B) Power/ground to gauge, C) Signal. I wired up each of the gauges to tree into a main wire that would then connect to the needed power/ground, with power coming from an ACC spot on the fuse box. Notice that the oil pressure and water temp sending units have a few extra wires coming out of them. We’ll go over those below.
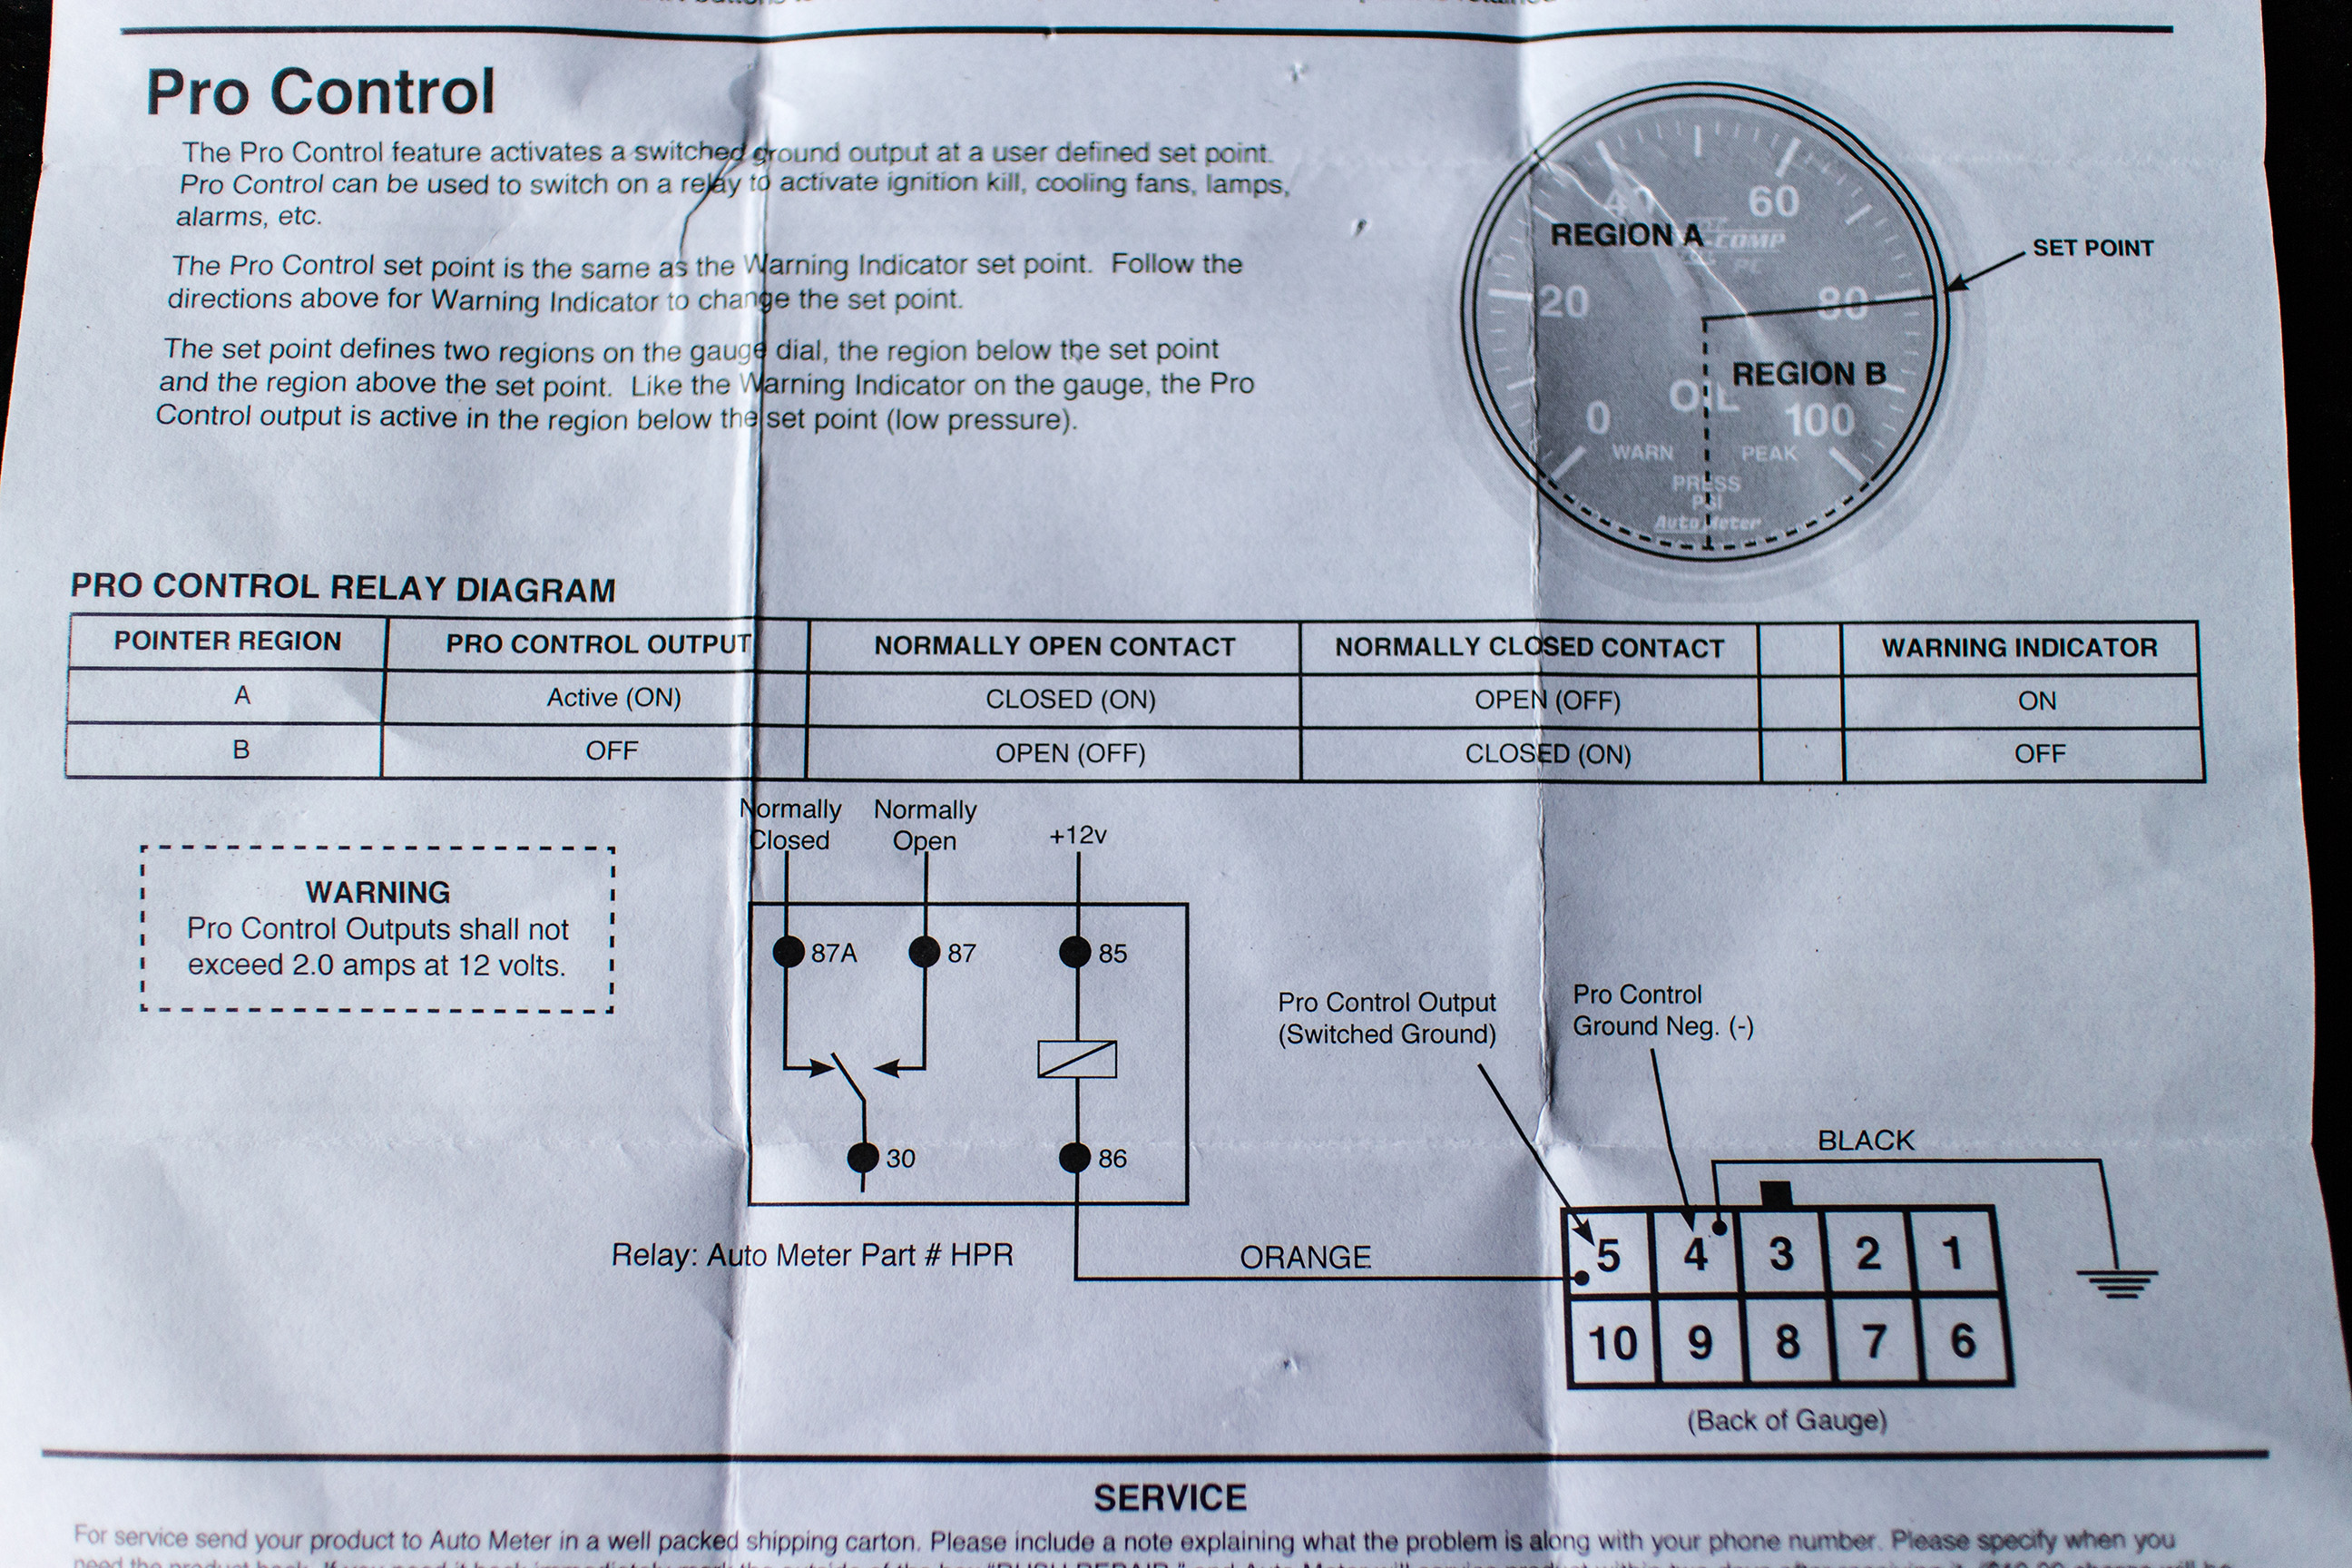
Along with the dedicated sensor wires for the water temp and oil pressure sending units, each of those two gauges also is wired for Pro Control, which allows for the gauge to be programmed to switch on a relay for various functions. Very neat stuff. I don’t currently have a need for this, but it’s a great option to have for future functionality.

The speedo and tach are wired up in a similar fashion with a wiring harness that I made. While the majority of my connections were soldered, I added quick disconnects to the trunk of each “tree” of wires to make it easier to remove the gauges if I needed to pull the dash in the future. While the gauges are pretty snug inside of those rubber couplers, note the L-shaped brackets I also utilized to doubly ensure that the gauges don’t move, also known as taking a “belt and suspenders approach” as my father would say.

The wiring for the GPS interface was equally as simple, tying into the main wiring that I would be adding for the gauges. The GPS antenna is magnetic (As shown in the instructions) and is plenty long to allow for mounting far away from the gauges themselves if needed. Since my dash is flat on the top and has a clear view of the sky, I used the supplied 3M tape to secure it to the dash.
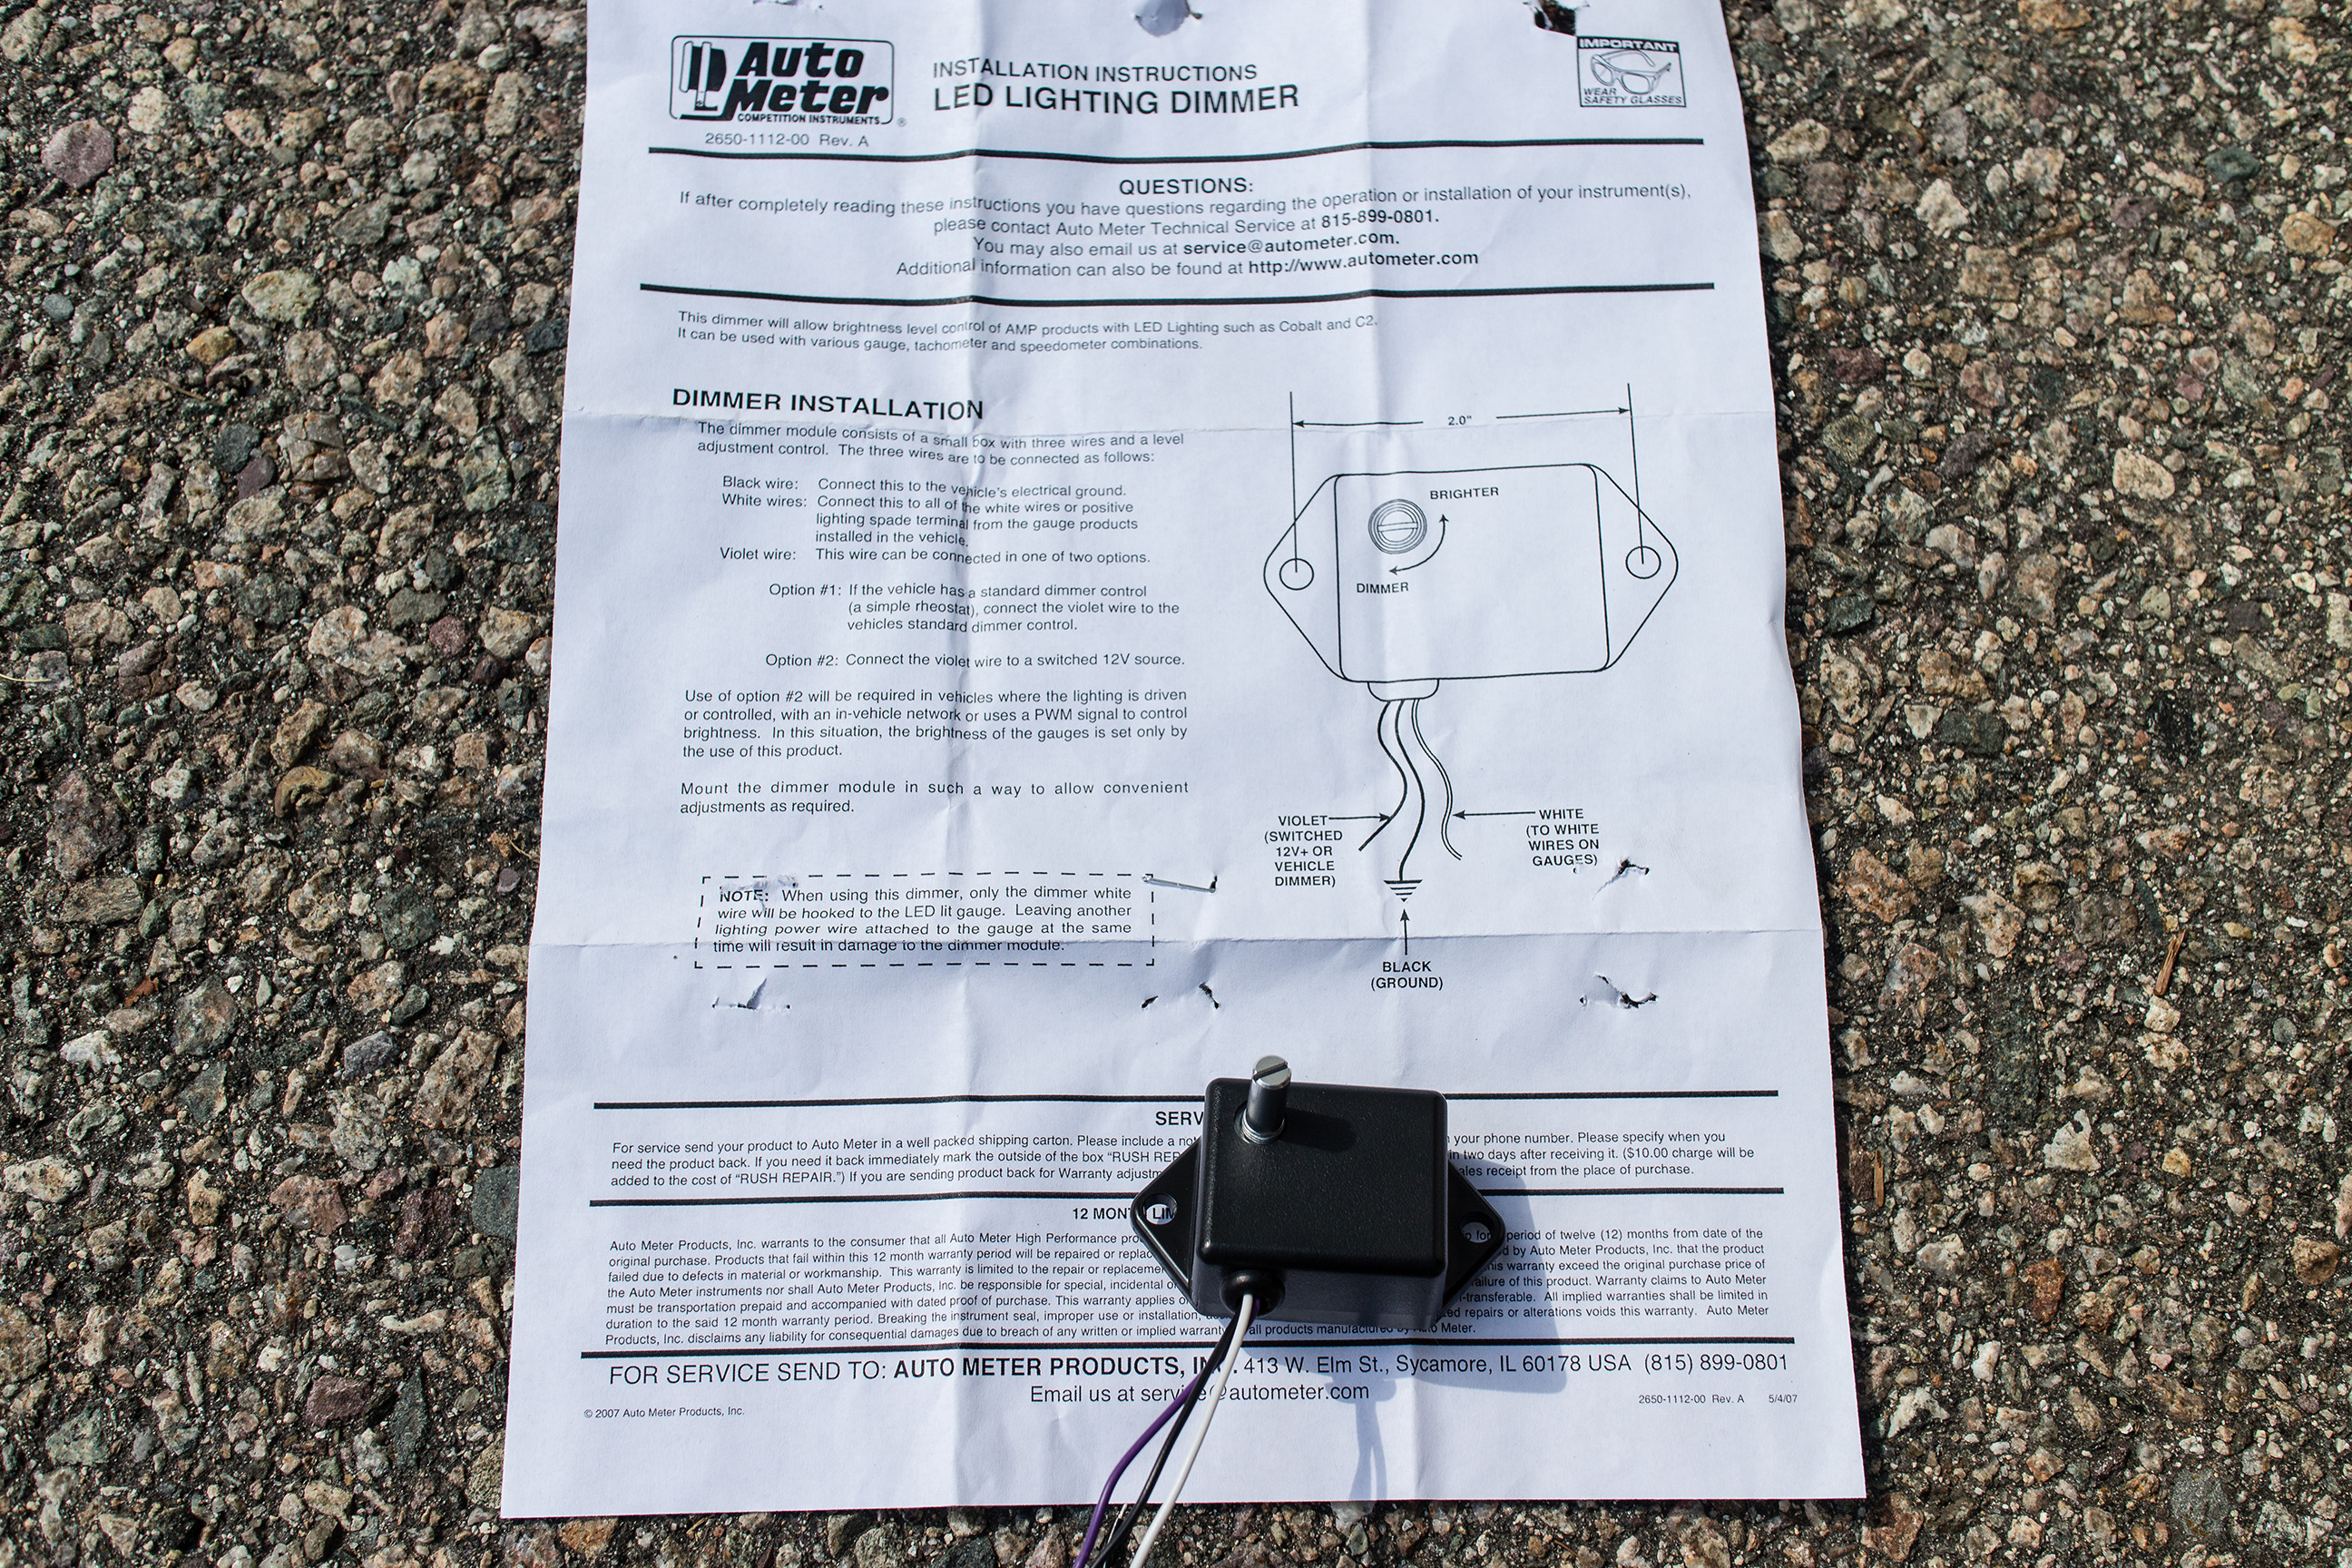
As the LED lighting is much brighter than your more traditional incandescent lighting, having an LED dimmer is a great idea if you don’t want to splice into the wiring of your stock dimmer switch. Auto Meter’s (Part # 9114) is a simple three-wire hookup and can be used to control the brightness of all of your LED-equipped gauges.
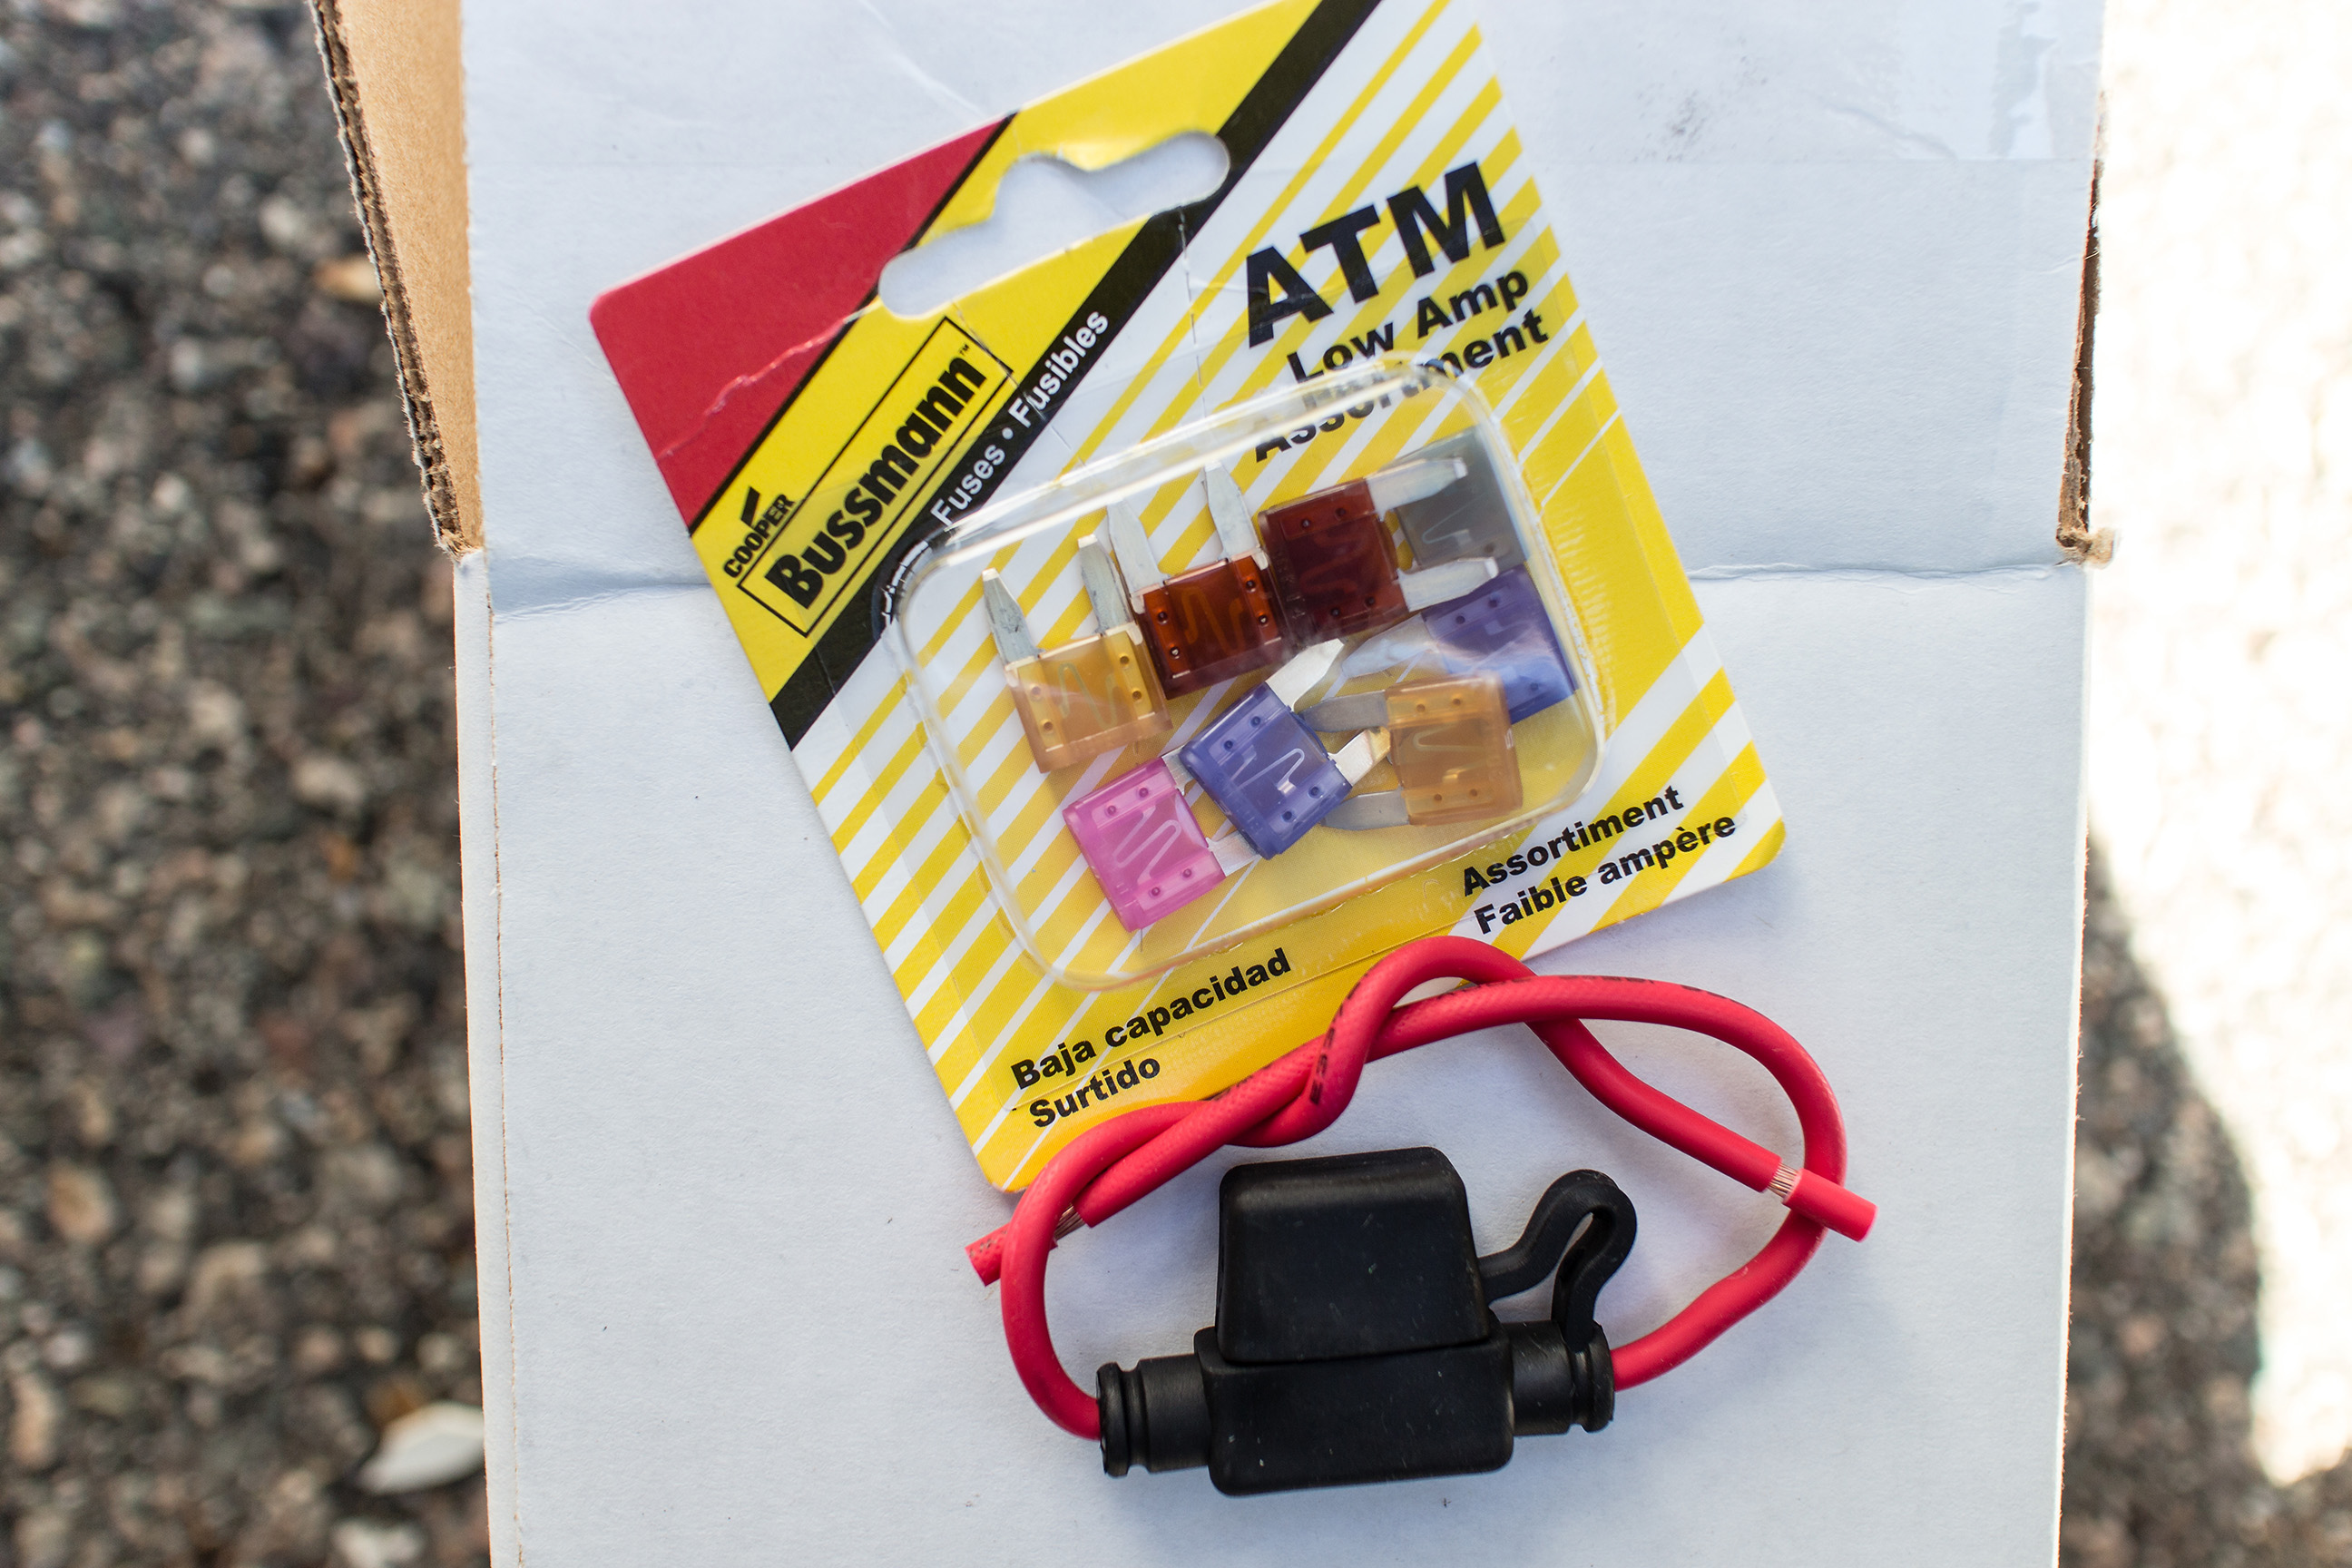
Fires can be fun, but not when the fire is occurring inside of your car due to a short. To help prevent this, I added a fuse inline to my main power for my gauges with a 5 amp fuse. Worth the $8 in parts for the peace of mind.

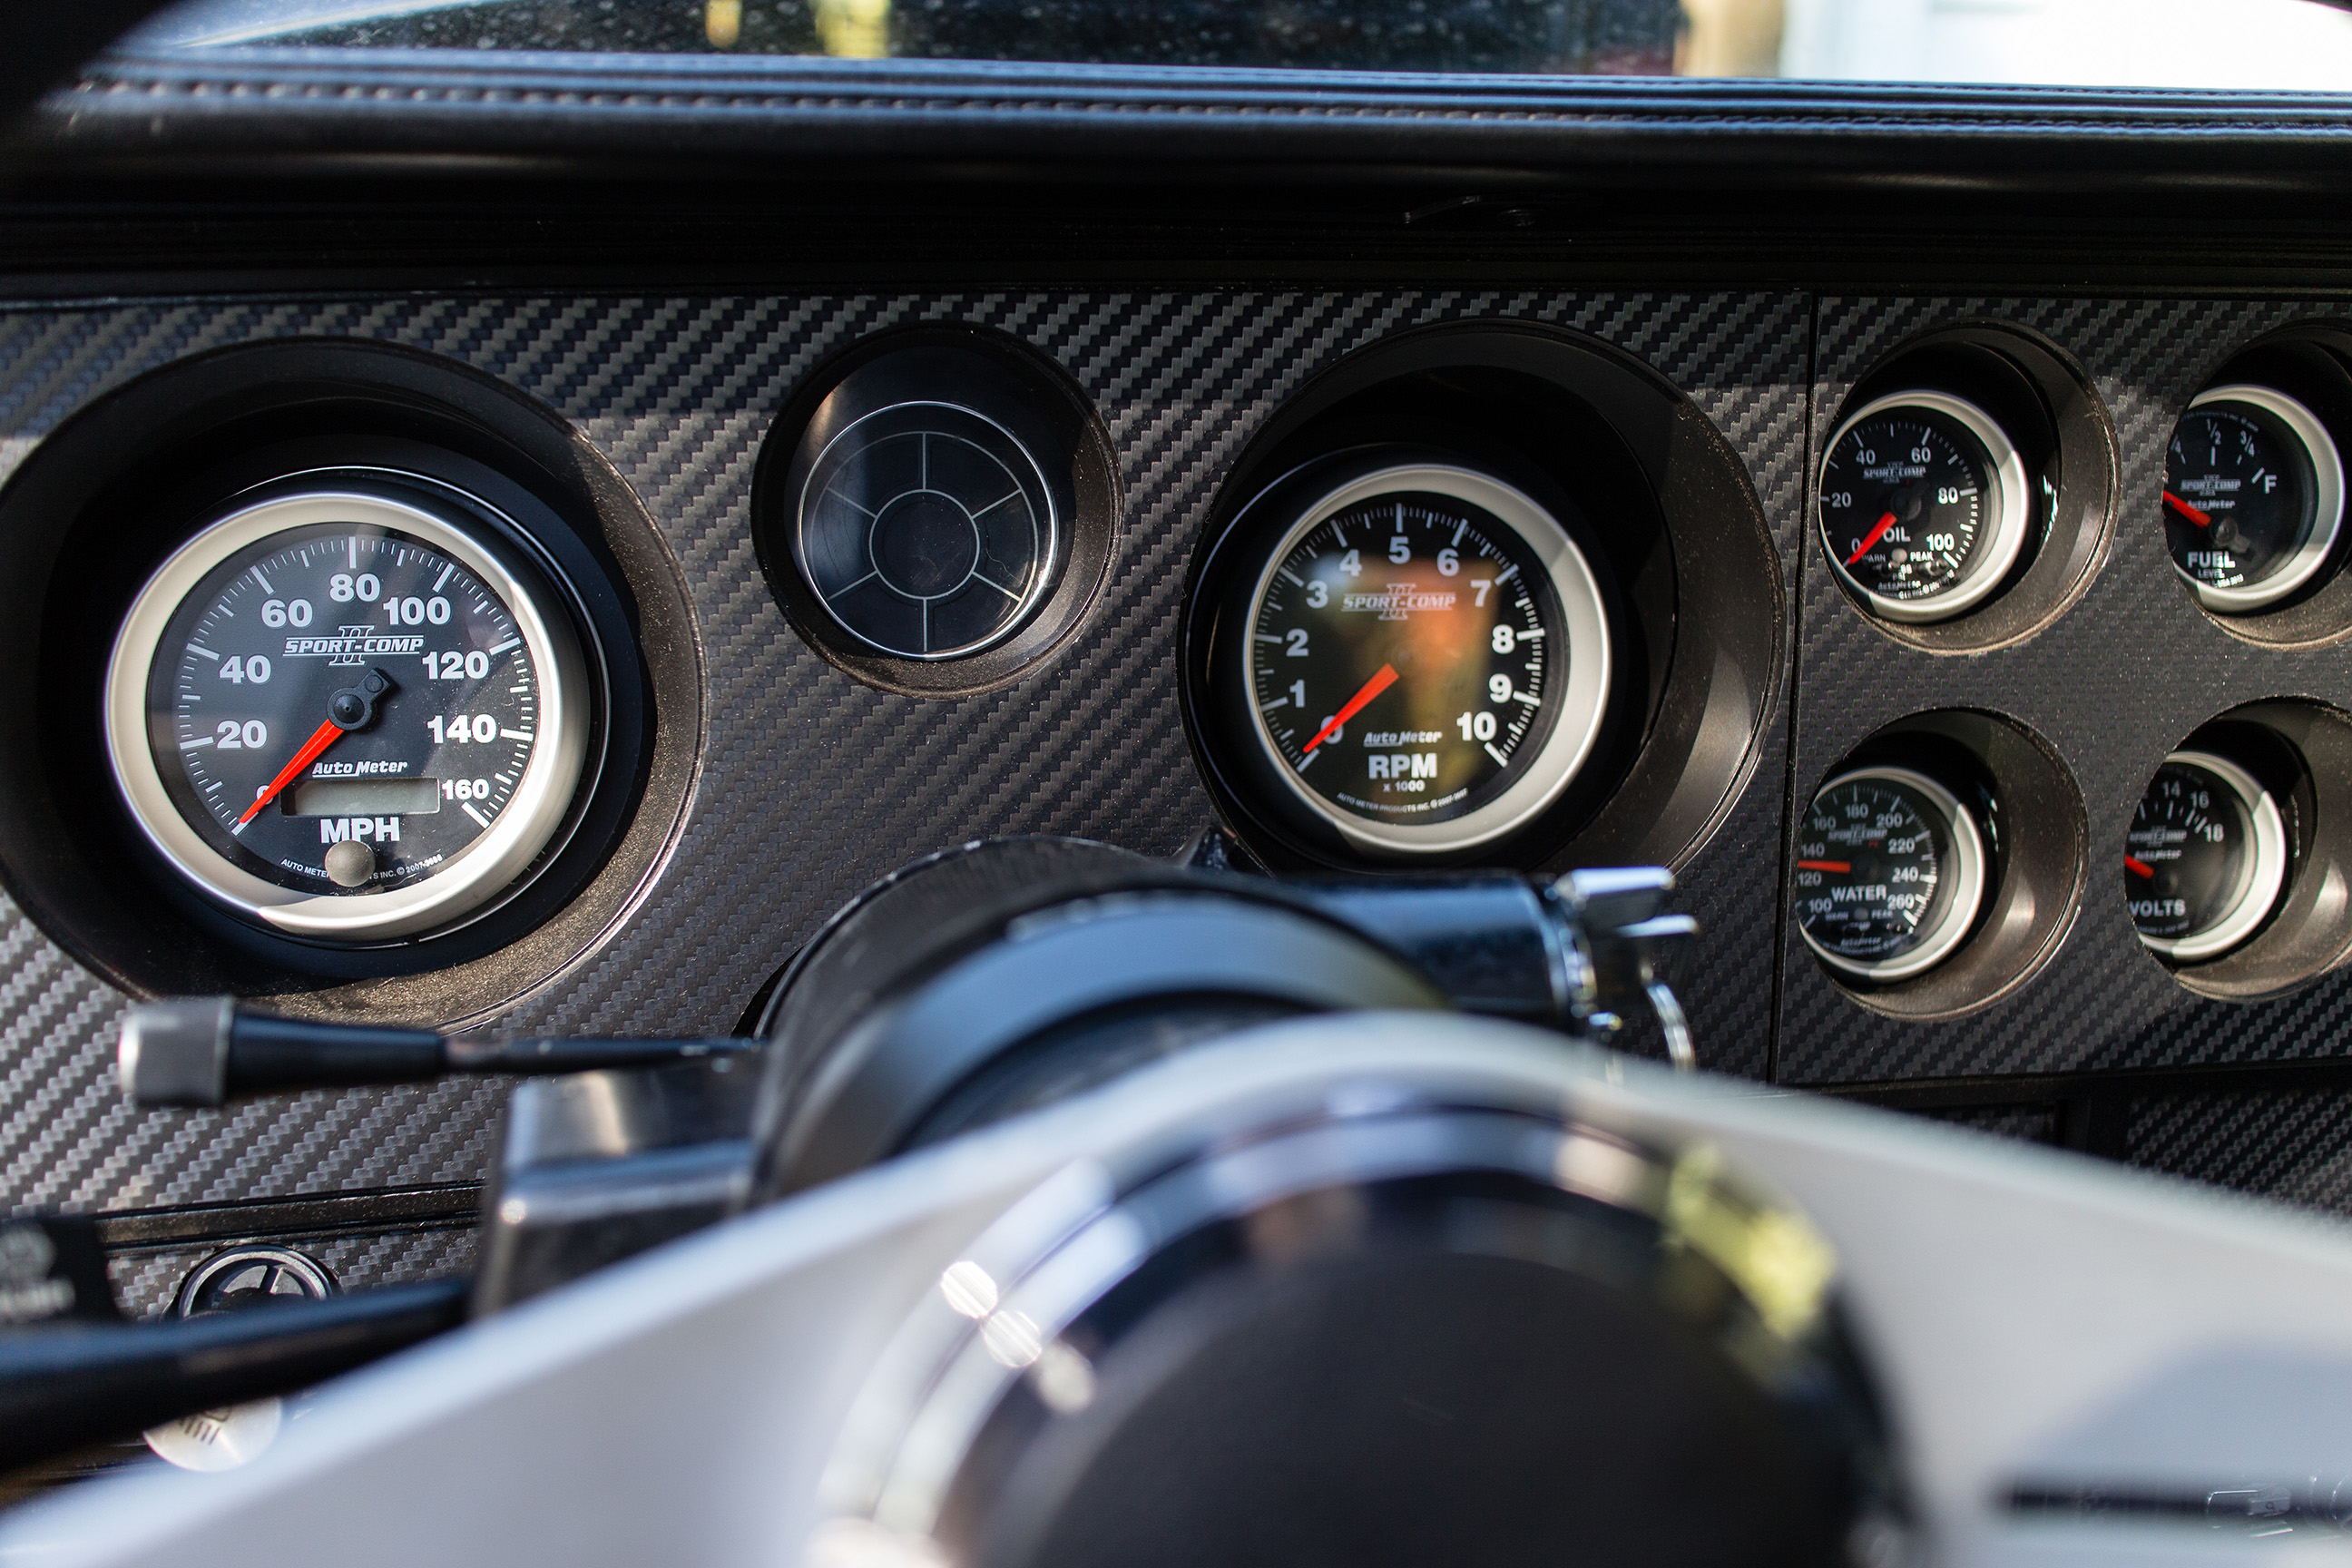
With the majority of the wiring organized, I was ready to reinstall the dash and install the gauges themselves. High improvement in visibility compared to the old gauges, even with a good amount of glare from direct sunlight. With the old gauges being domed I often had a hard time reading them (When they were working, that is…)

A quick shot of the water temperature gauge threaded into the passenger side head. Being so close to the header I decided to wrap the plastic portion in heat-reflective tape. Will it help? I don’t know, but I had it lying around and it makes me feel better. That has to count for something, right?

The oil pressure sensor went into the port on the back of the block near the distributor. There’s a lot going on back there, but take my word that it’s in the photo.
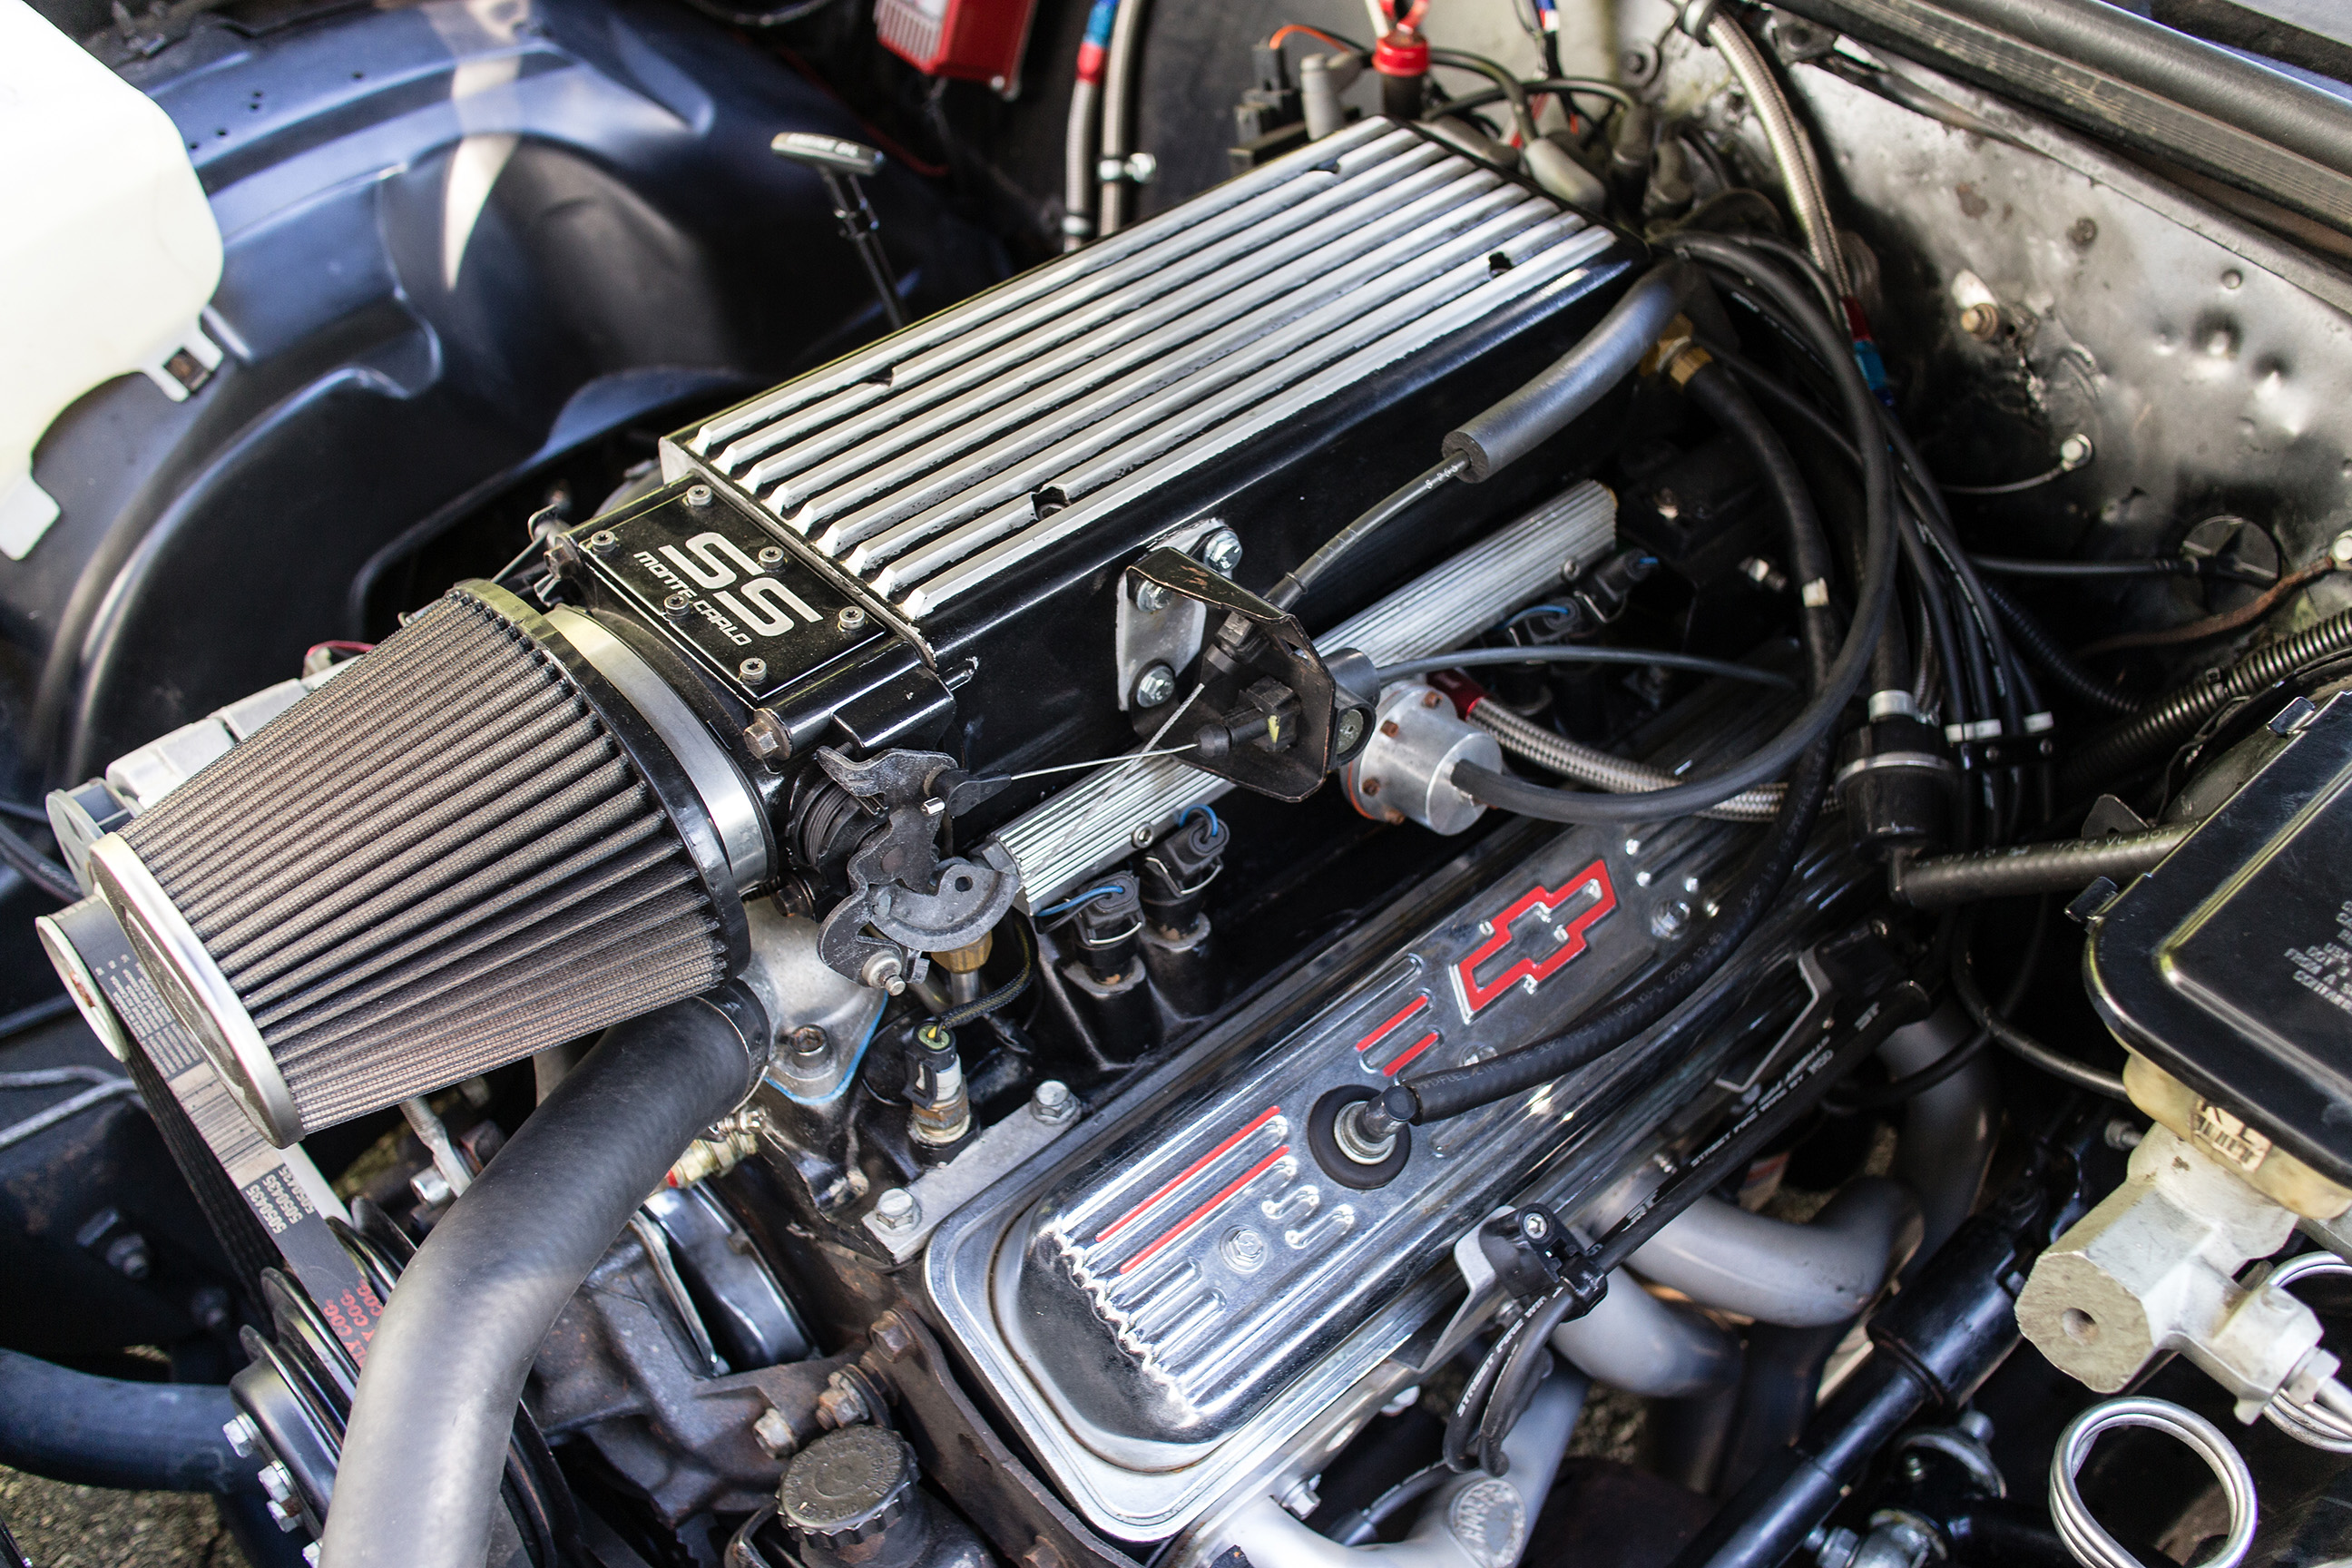
No one can resist an engine shot, so here’s one of the powerplant that these gauges will be monitoring. Pretty basic SBC 350 with a Holley Stealth Ram, but it’s taken all of the abuse I could throw at it for the better part of a decade.
The install was wrapped up by mounting the GPS speedometer under the dash, affixing the antenna to the center of the dash, and finding a good home for the LED dimmer where it can easily be reached. In this case that place was directly above the ALDL port under the steering column.


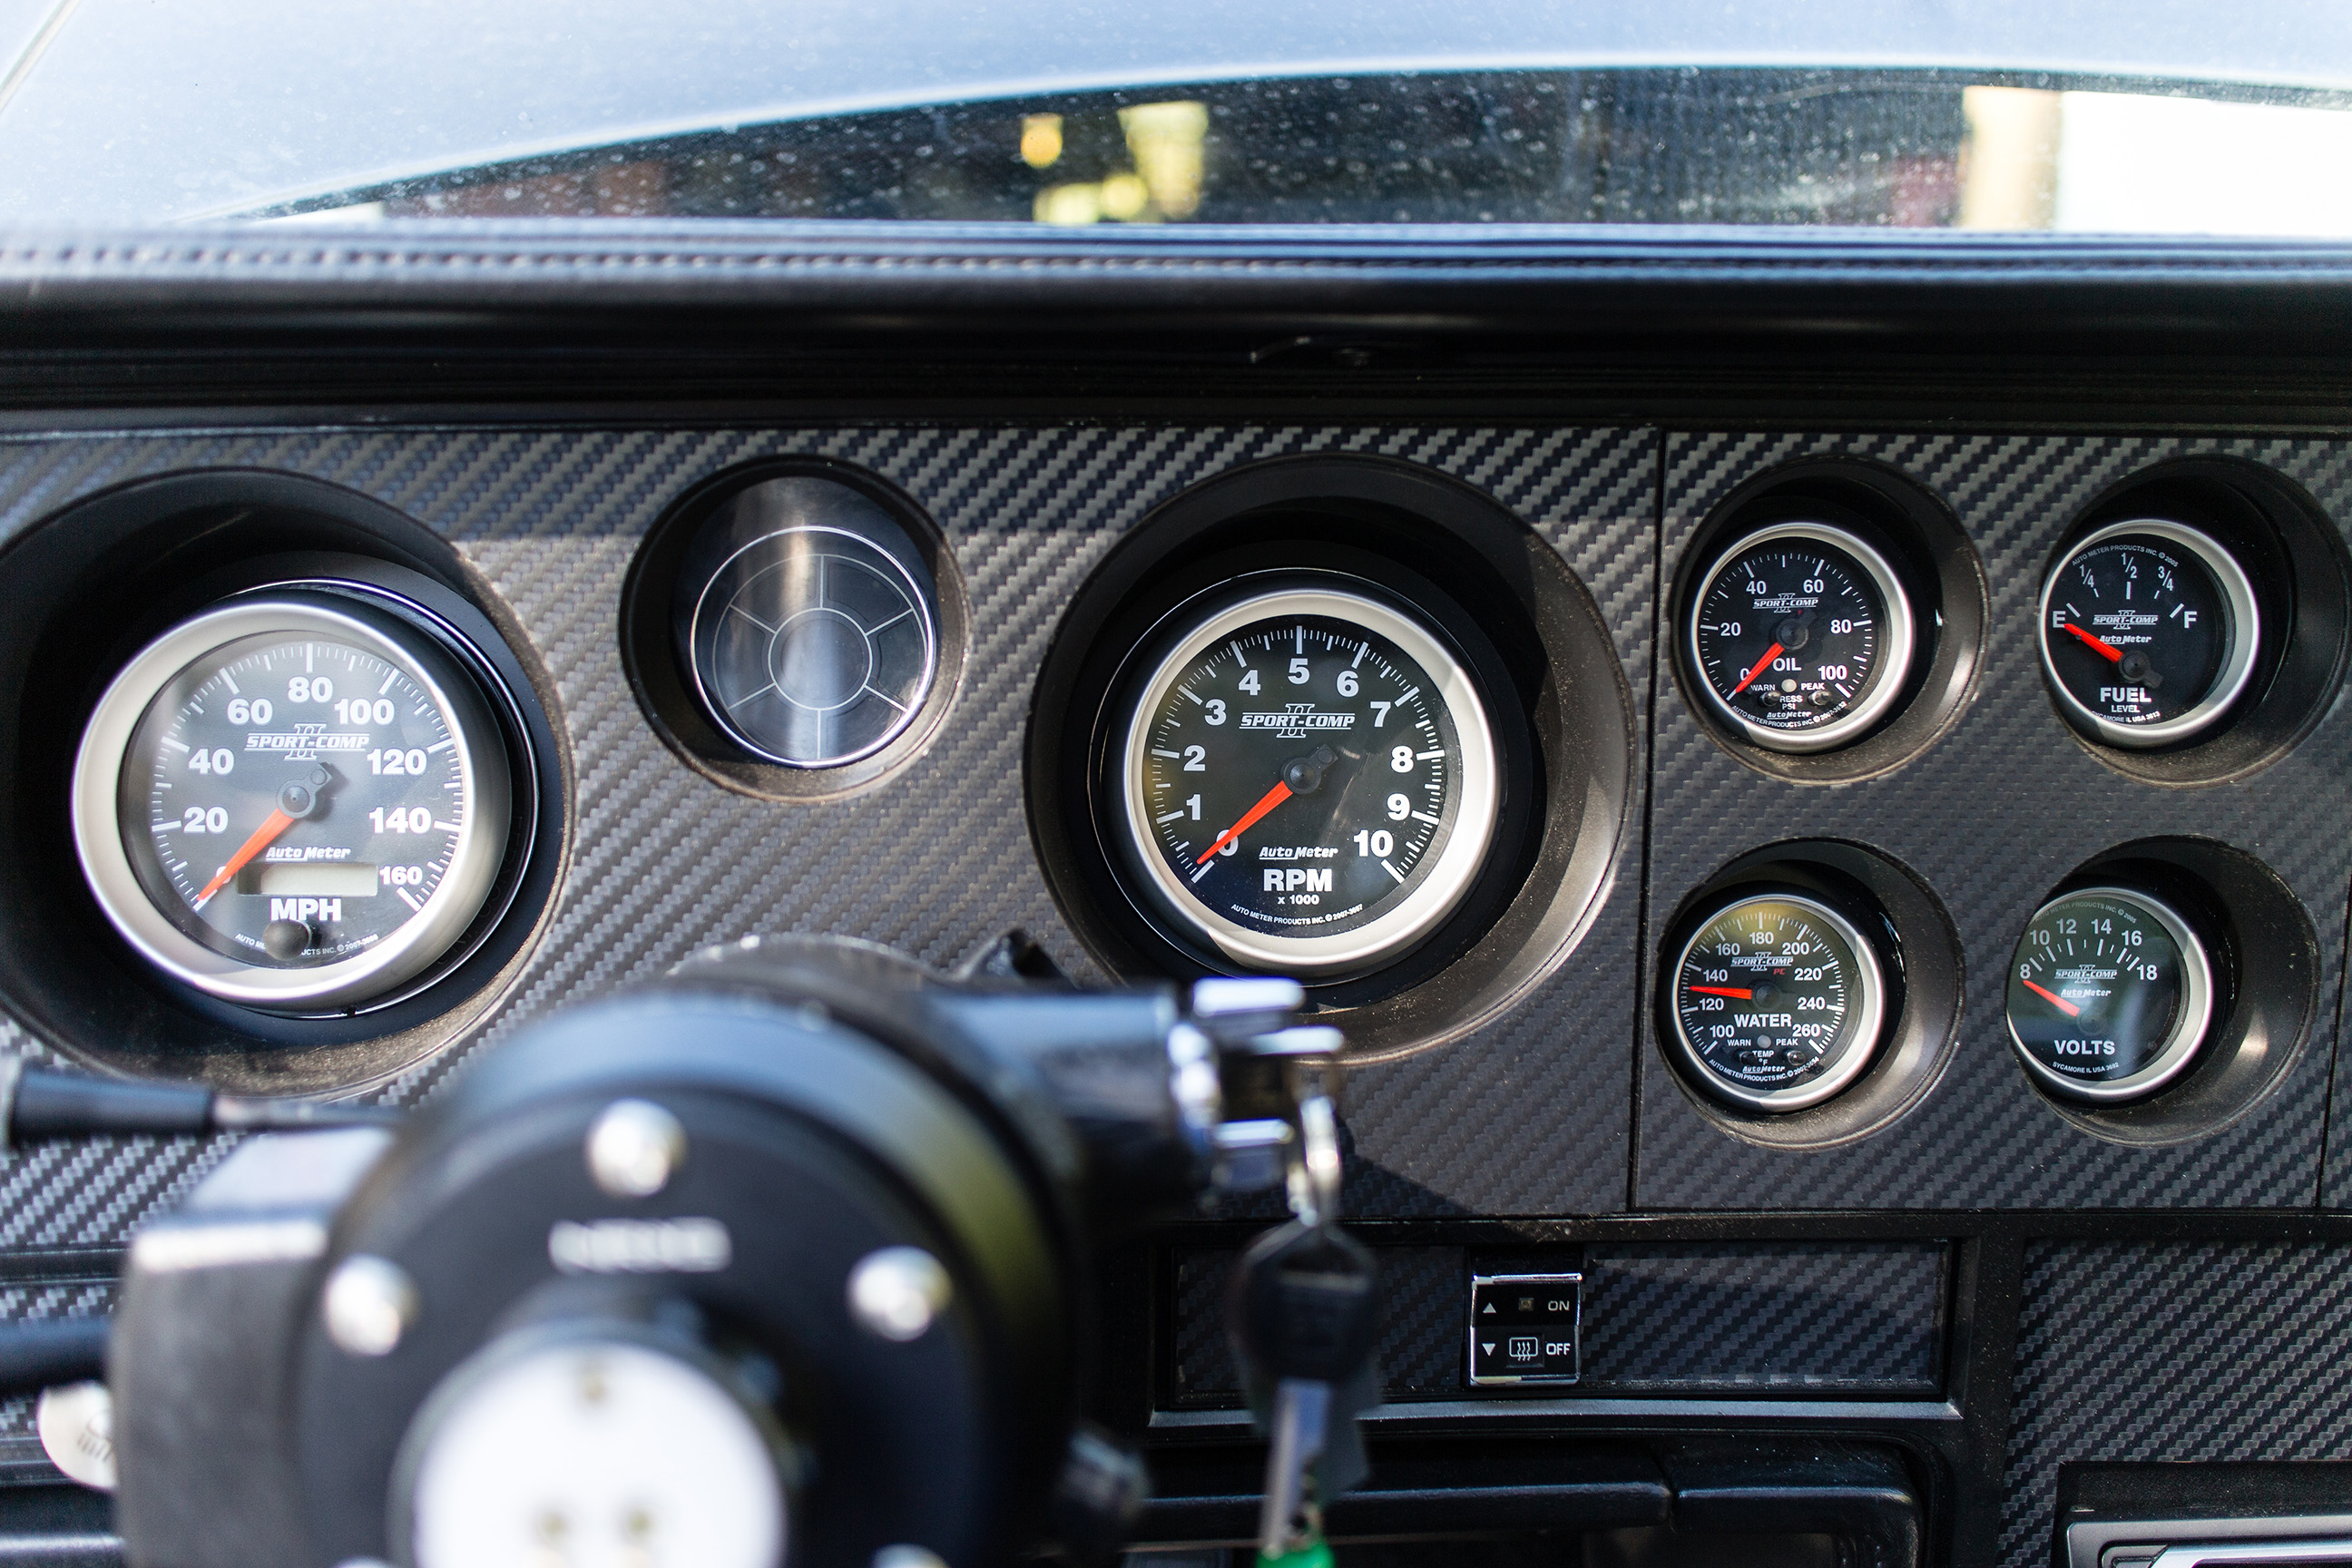
All said and done with the dash faceplace reattached, the gauges look absolutely badass even when off.

No more dangling wires, the ECM is in the correct location, and the gauges actually function. All is right with the world…with the exception of that universal shifter console, and dirty carpet, and…
Now, here’s the question that many of you probably now have in regards to the GPS speedometer: Will it blend? How well does it work? Keeping in mind that I have the GPS interface wired to only turn on when the car is set to ACC or is running, my answer is…”Pretty damn good.” It does take 60-90 seconds to pick up a signal (Again, this is stone cold to On, not constantly running on battery power), but once the speedo is up and running it’s as smooth as an OEM electronic or cable-driven speedo. I haven’t yet driven through any tunnels so no word yet on how well that works, but around town I’m more than happy with it.
So there we have it, Step One in my quest to fix my hacked together project car. If you have any similar stories, feel free to share them in the comments!


first reaction was `oooo’ to the relay function on the temp guage….you could make it turn on thermo fans for you…..pretty bloody good when you think a basic thermo fan controller normally runs around 50 – 70 bucks….
Second one regarding the gps speedo…I use a gps in both my cars that has two screens that act as a dedicated speedo – one is a digital readout, the other a sweep style ( plus you can have the speedo smaller on two other screens) – the kicker? picked then up from a pawn broker for $30 a piece and they are dead nuts accurate. yes, the 60-90 seconds picking up satellites is a very minor annoyance but once you’ve used the car for the first time that day it generally is immediately good to go for the rest of the day. Also tunnels seem fine – stupidly enough it is overpasses that mess with mine, but only for a second or two….(oh, and of course you have all the other gps functions too!)
Great writeup! New gauges look sharp. Is that faux carbon fiber look original or a skin? It looks pretty good.
Personally I like soldering and heatshrink for my connections, but otherwise I wouldn’t have done anything differently.
Thanks!
The original was faux wood grain, so I had no problem wrapping it in 3M Di-Noc carbon fiber.
100% with you on soldering, which the majority of the wiring connections are. I used electrical tape instead of heat shrink, so that was a bit amateurish of me still.
I may end up replacing those cheap connectors with a weatherpack or some other “good” connector, but I don’t want to have to cut any wiring to remove the gauges in order to get behind the dash so soldering everything is a no go.
Soldering and heat shrink connections are know to fatigue and break unless the wires are ridgely tied to something. Old school crimp connectors work like champs.
I am familiar with that train of thought, but crimps need to be tied to something too or they can pull apart. Crimps also take up more space and are kind of ugly looking. Never had a failure of a good solder joint.
Dave, this blog has buckets of win in it!!
I have the same pair of wire cutters! lol.
I have a GPS built into the radio on my Firebird that I use for “accurate” speed (the cluster speedo is 15-20mph off), and it works pretty good and I haven’t noticed a lag after start up as I’m usually backing up or doing other start of drive things before I’m really worried about how fast I’m going. I ran the GPS antenna out the defroster like you did, but over closer to the passenger A-pillar. It also works fine hidden under a dash cover.
“Remember that car you bought back in high school or college? The one that you tortured and subjected to every harebrained modification, often hacked together on a Saturday morning in time for that race on Saturday night (Mom, that never happened…), just to be torn back apart the following weekend? Remember how you sold that car after you realized that it was a complete money pit and mostly comprised of failed good intentions and zip ties? Well, I still have mine, and years later I’m still sorting through all of the mess than my younger self created.”
LMAO! Same here on my Skylark!!
Oh, and hardware store stuff for fixes rule too!
I wonder if I could make that speedo and tach work on my motorcycle…hmmmmm