


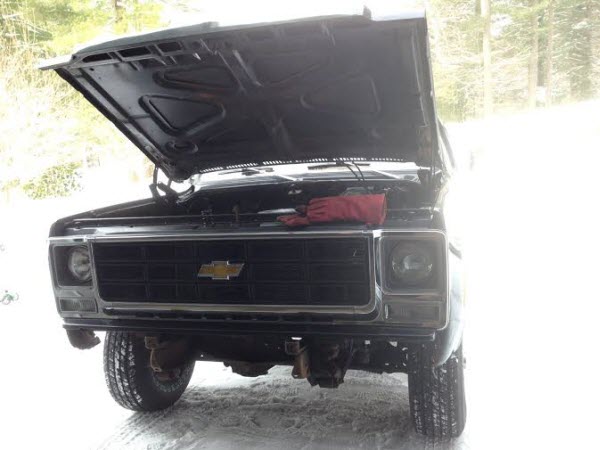
When last I wrote and you read, I had fixed up a bunch of the mechanical issues on the ’79 Blazer, to make sure it ran ok, and could stop safely without killing myself and all those around me. This week, I’m starting up on some bodywork. It’s going to get much more involved over the next few weeks:
My mission here is to complete most of the bodywork and have this pig painted before summer. I’m going to spend most of my time working on the Blazer in another location — more on that next week — but in order to get as much ready as possible, I started tearing stuff apart in my garage this past week.
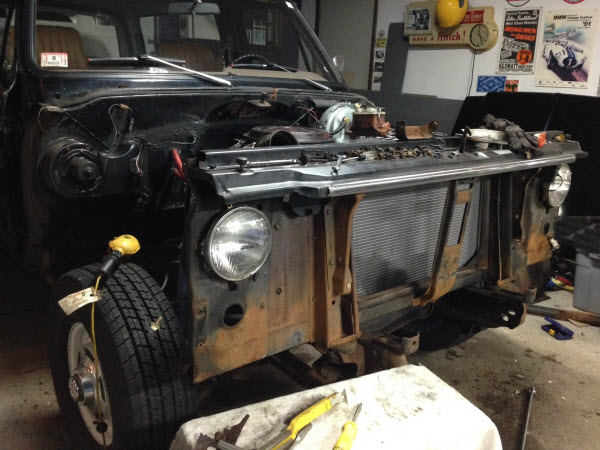
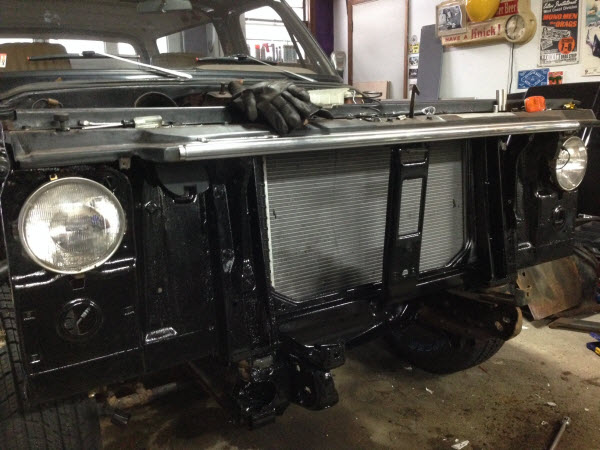
I wanted to take everything off of it that I possibly could, yet still maintain the minimum amount of equipment to keep it street legal. I removed the front and rear bumpers, as well as the hood.
Kinda looks like Yul Brynner.

I also removed the front fenders, for a reason that will become obvious in a moment.
I had inner fenders from LMC Truck, so I took the opportunity to replace the nasty, rusted out inners that were on the Blazer since 1979.
The inner fenders come primed, but I needed to get some kind of paint on them. It’s the dead of a horrible winter here, with temperatures in the teens, so I couldn’t spray them outside. Spraying inside wasn’t an option yet because my garage is directly under my bedroom, and my wife would put a bullet right between my eyes if I subjected her to a couple of nights of Eau De Rattlecan.
So I did something I’ve always wanted to try: Applying automotive paint with a roller. I’ve seen guys paint entire cars with rolled-out Rustoleum with amazing results, but I didn’t want to commit to painting a whole vehicle like that. I figured painting something like an inner fender would be a perfect test of the method.
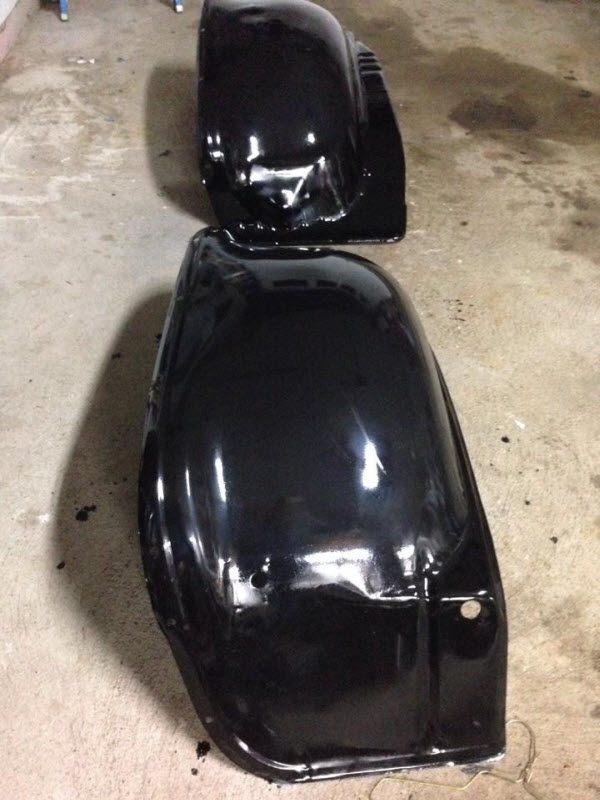
I got a quart of satin black Rustoleum and thinned it 50 percent with acetone. It thins it out to a consistency like milk, which you really need to be aware of when you’re rolling it. I used those foam rollers that look like bargain basement sex toys to apply three coats.
I’m pretty impressed with the results. My buddy Bill LeBeau — who runs a great custom paint shop in Worcester called Airbrush Works — told me he uses Rustoleum quite a bit, but he doesn’t thin it at all. He rolls it out on a flat surface first, and then rolls it on the surface he intends to paint, almost the way you’d use an ink roller. I think I’ll try that method the next time.
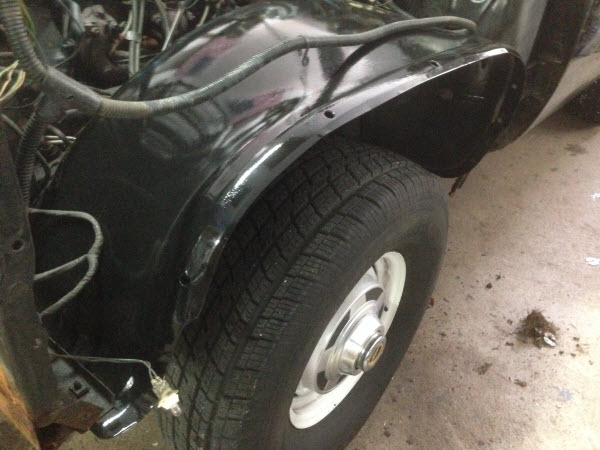
Inner fenders went in like a breeze. Given the deplorable condition of the bolts holding them in, I figured I was going to get up close and personal with my Sawzall, but with a little patience and a lot of PB Blaster, they all came off like buttah, and I only needed the bolt extractor on one.
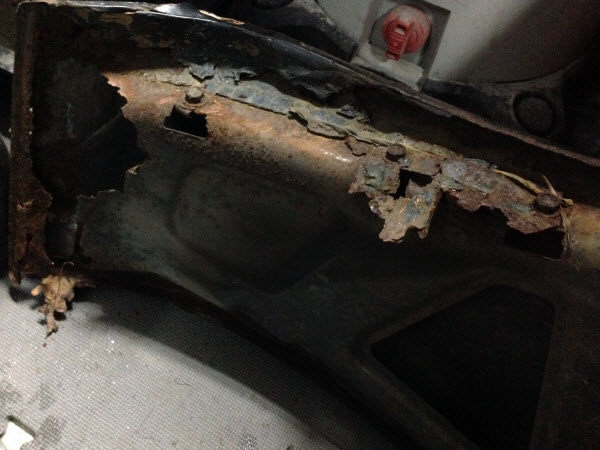
This photo shows exactly why I need to replace the outer fenders as well as the inner. I suppose I could spend the time to fix what’s here, but given the amount of time I’d have to invest in doing it, and the reasonable cost and availability of replacements from LMC Truck, I’m going to go that route.
While I had the opportunity, I also slathered every possible flat surface with a good application of Chassis Saver, the slightly poorer man’s version of POR-15.

I’d have chosen POR-15, but my local parts shop only had this brand. I’m pretty happy with the results and I’m sure I’ll be adding significantly to Chassis Saver’s balance sheet by the time this project is done.
Next Week: On to the body shop
Costs:
Last Episode’s Grand Total: $3283.93
This week’s cost: $57.50
Grand Total So Far: $3341.43


We didn’t need to know you knew what bargain basement sex toys look like.
Hey, I work for you, man. I’m out there pounding the pavement to bring you the news you can use.
Coming along nicely!
Eau de rattlecan ha ha! good…
Are the rollers cheaper then the bargain basement sex toys? Some need to know! OMG yes, I went there.