(Words and photos by Mike Brooks) – The previous two articles in this series (fuel system, efi swap) featured upgrades that improve performance and drivability of my C10 pickup. It was important to me to buy products from companies that have a partnership with Bangshift.com. I’m spending my own money and want to support the people that support my friends. The final bit in the series goes from under the hood, to inside the cab. When I saw the feature here on Bangshift about the “Hot Rod Holiday Rebate” from AutoMeter, I knew it was time to take advantage and save some coin to get the gauges I always wanted. Usually my budget only allows me to buy bits and pieces over time to put an upgrade together, but by splurging on all the gauges at once I was able to maximize the rebate and shave $150 off the total cost and install them in my truck by the time the snow melts and the 2017 cruising season begins. Once again, I’ll give you the rundown of the install and show you how easy it can be done on your ride at home.
When I first got the truck going, I had to monitor the vital signs on the cheap. Most of the factory gauges gave up the ghost long before I acquired the truck. The factory fuel gauge only kinda worked (when it reads 3/4 it was actually empty). I bought a used AutoMeter tach from ebay, the oil, temp and volt gauges were budget units from Summit racing, and the MPH was displayed by a gps app on my phone. I did my best to make it pretty and it got the job done, but it was time to go to the next level.


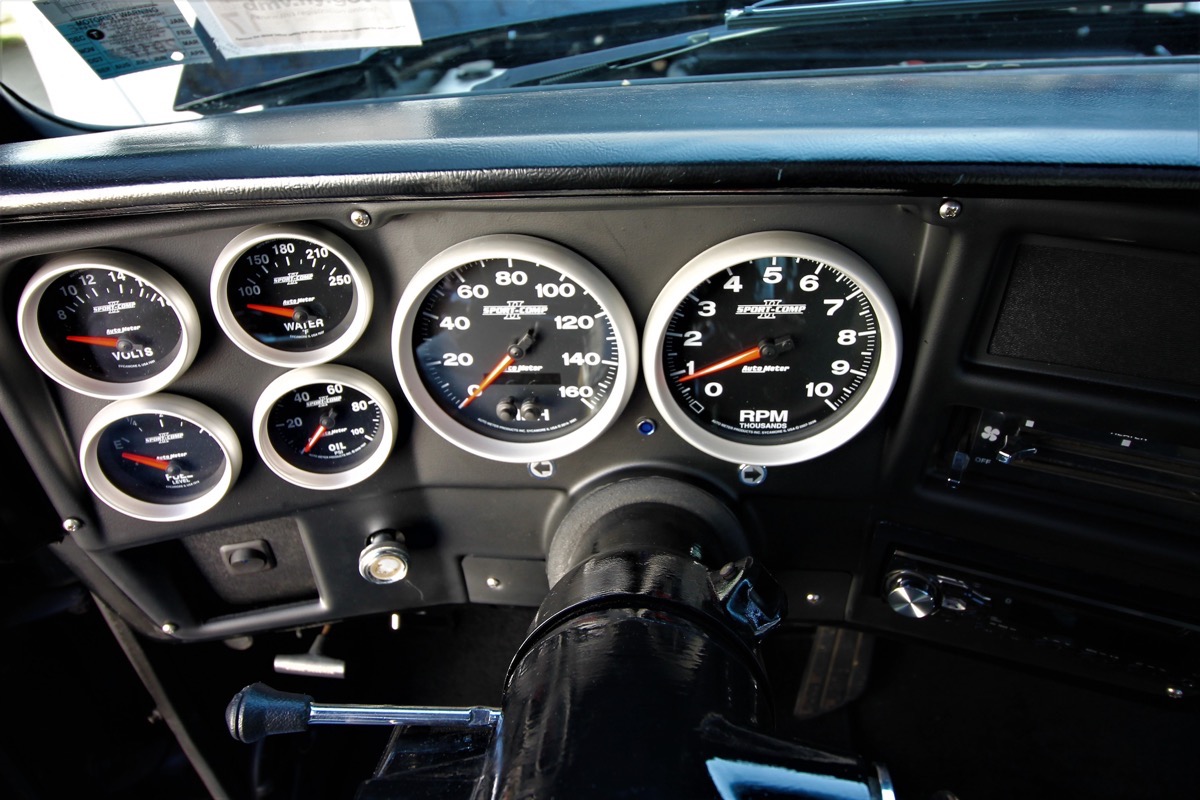
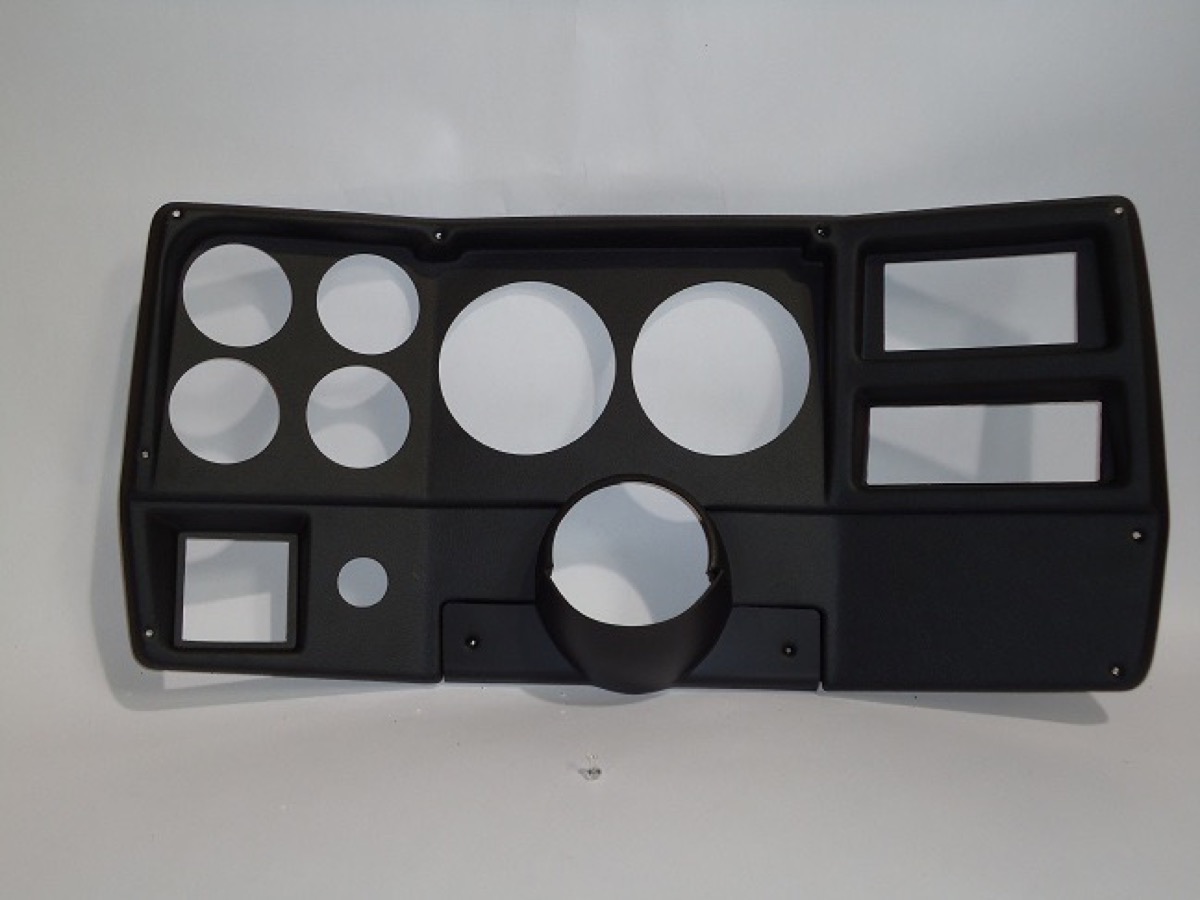
The stock bezel on the truck was in good condition for it’s age, but the angle of the face would limit the view if I installed new gauges in the existing holes. So I picked up a new bezel from Classic Dash. The new bezel was made specifically for 81-87 GM fullsize trucks and SUV’s and is a bolt in replacement. It already has the holes cut out for the 5″ and 2-5/8″ gauges I planned to install. The only mods I had to make to it were cutting holes for my stereo and hi-beam/turn indicators I scored from ebay. Since my truck doesn’t have A/C, I made void panels to cover the vent locations.

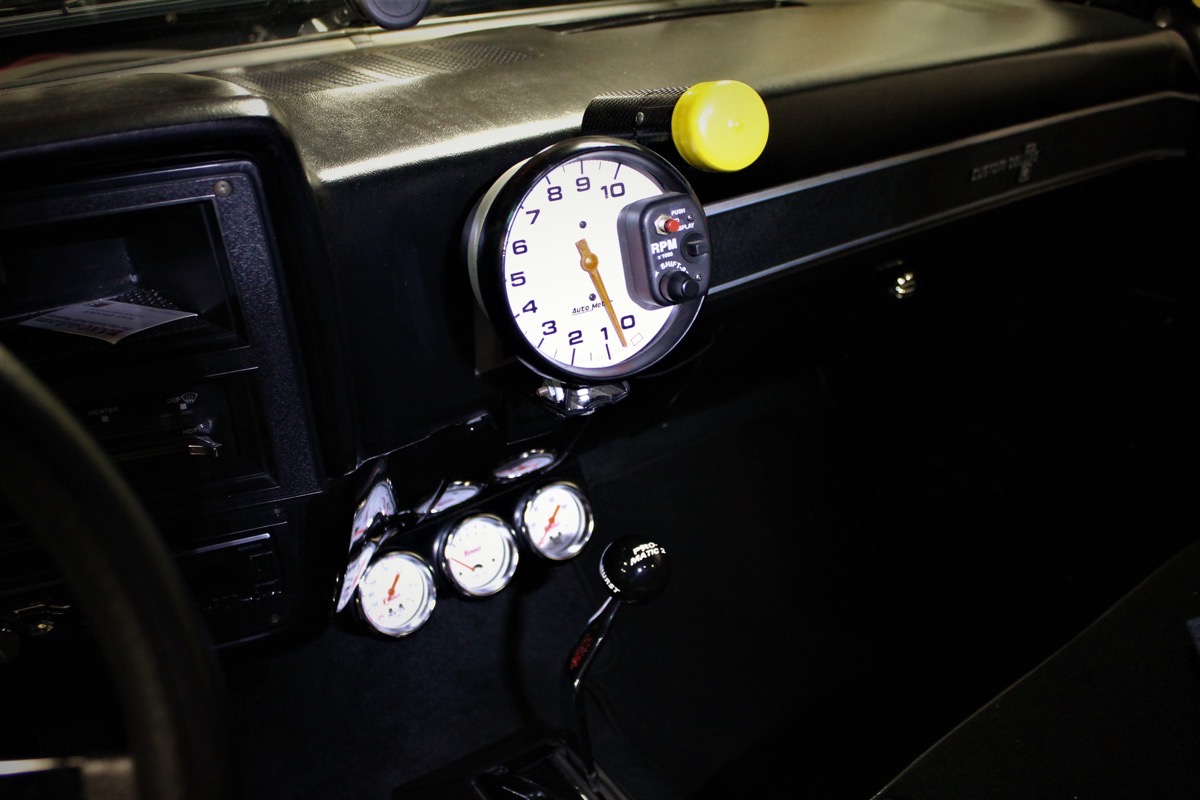
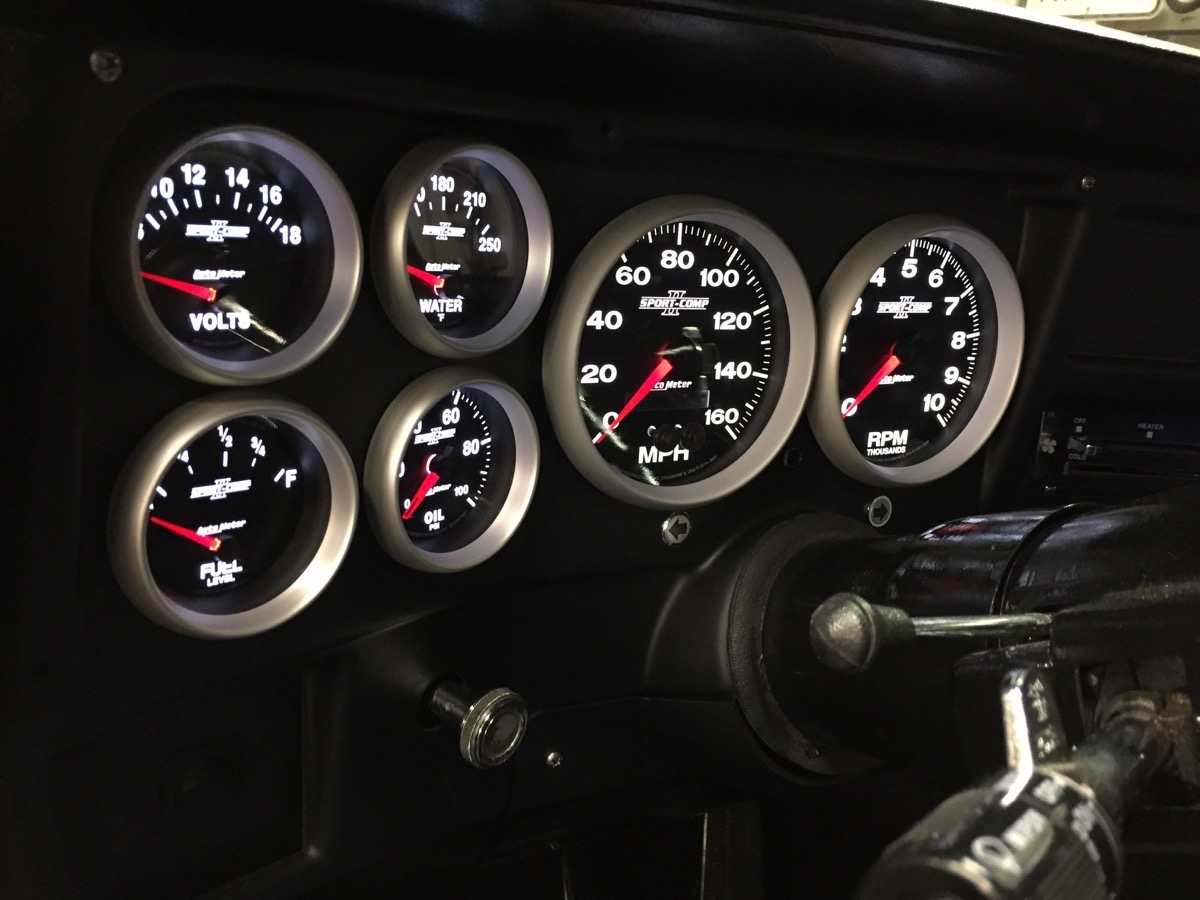
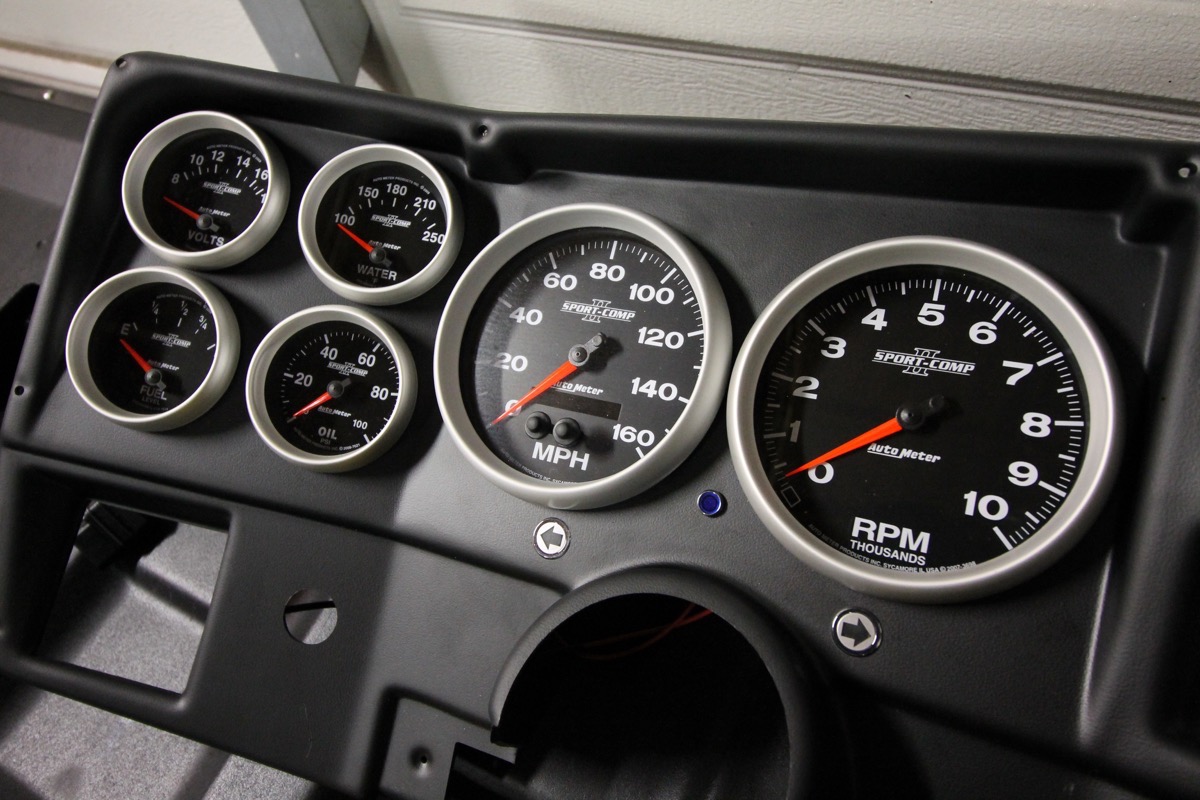
When it comes to the actual gauges, I decided on the Sport Comp II series from AutoMeter. I really like the classic look of the gauges combined with modern “through the dial” led lighting. I also wanted my speedometer to be accurate no matter what rear end gear or wheel/tire combo I’m running now or in the future, so I sprung for one of their GPS units. (part 3681) The rest of the lineup included a 5″ tach (3698), and complimenting 2-5/8″ voltmeter (7691), oil pressure (7621), water temperature (7637), and fuel level (7614) gauges. I also picked up a dimmer controller for the led lighting (part 9114) as well as the braided steel line for the oil pressure gauge (part 3228) to replace the plastic line the gauge comes with.

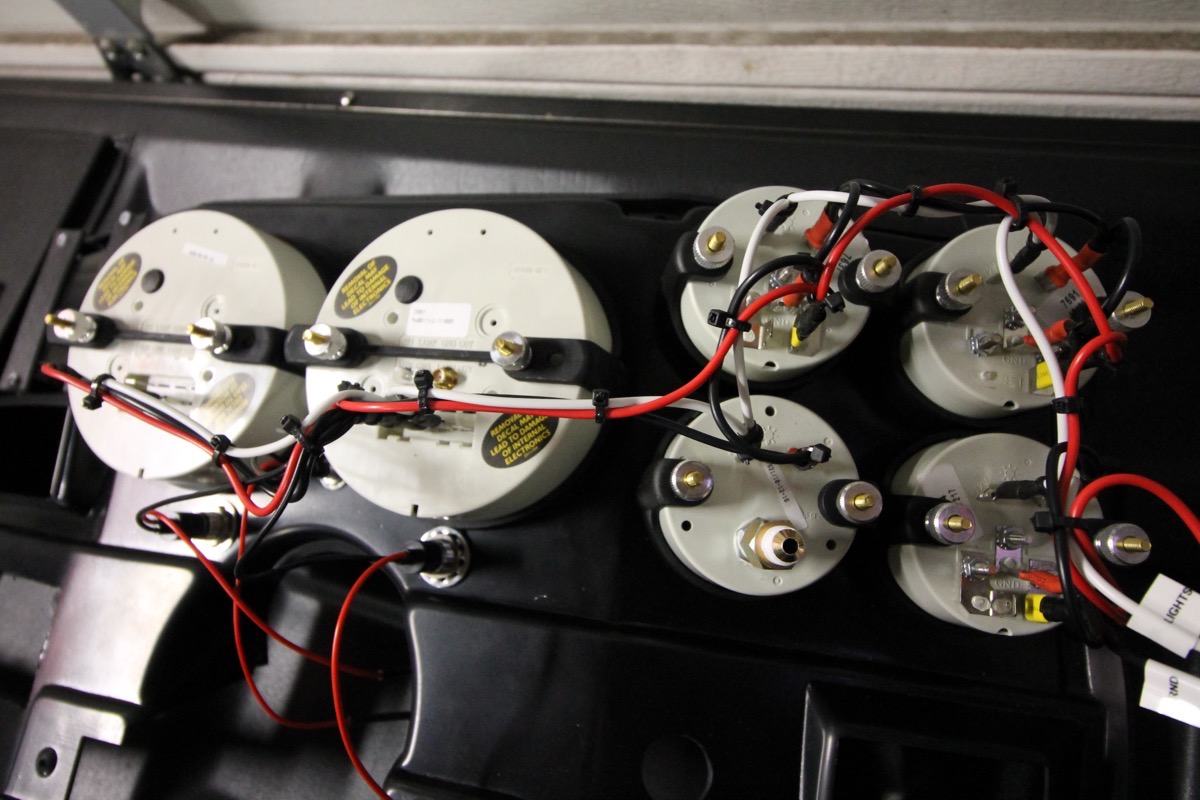
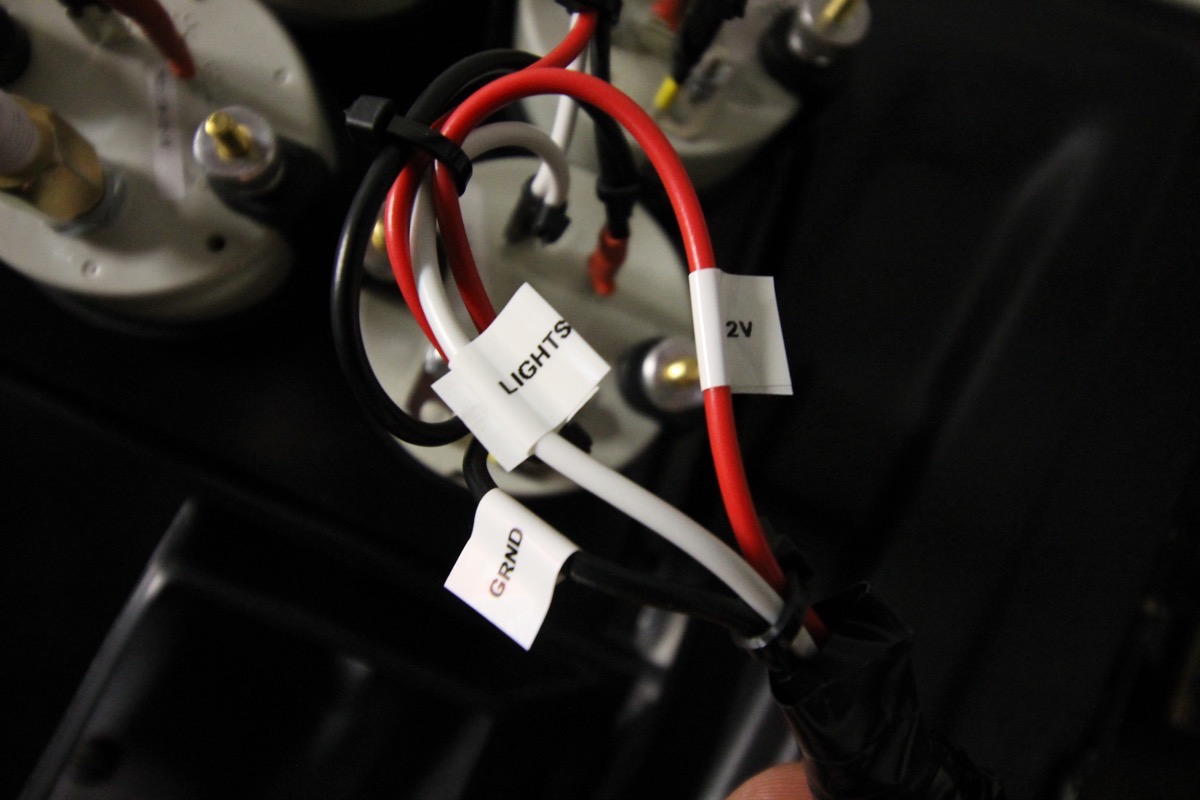
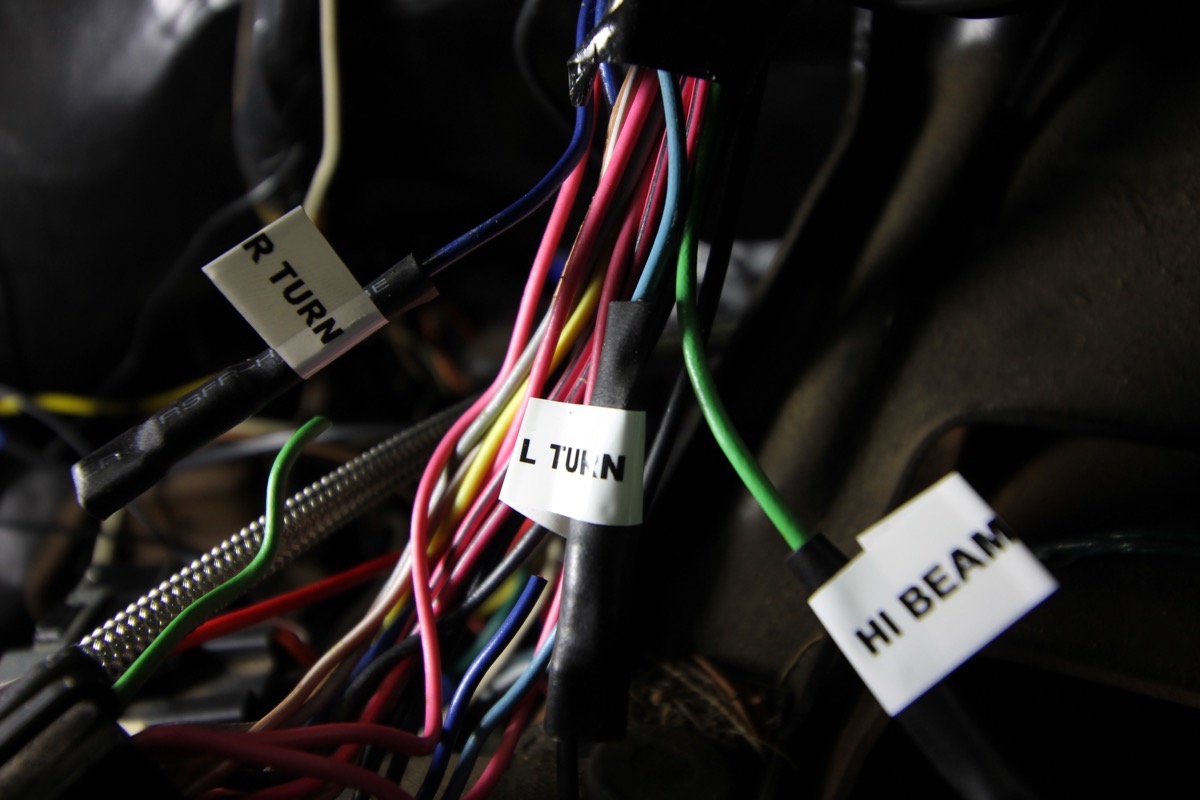
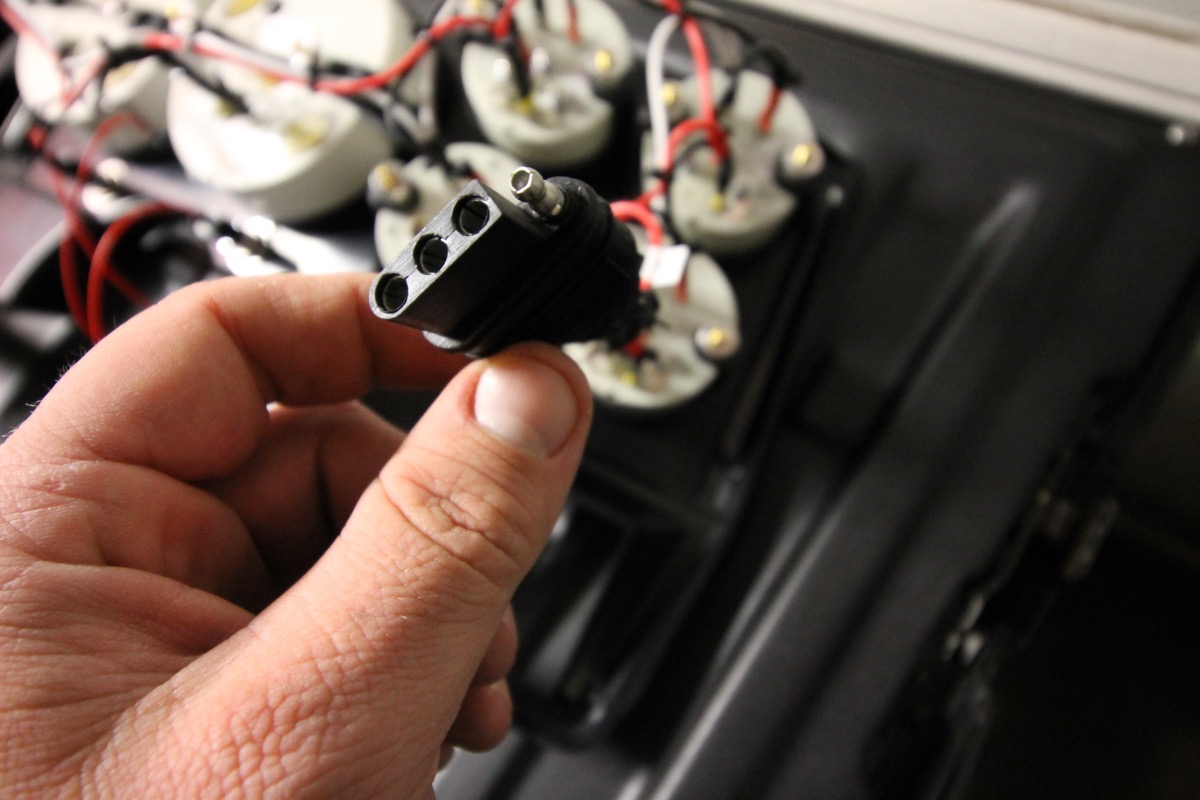
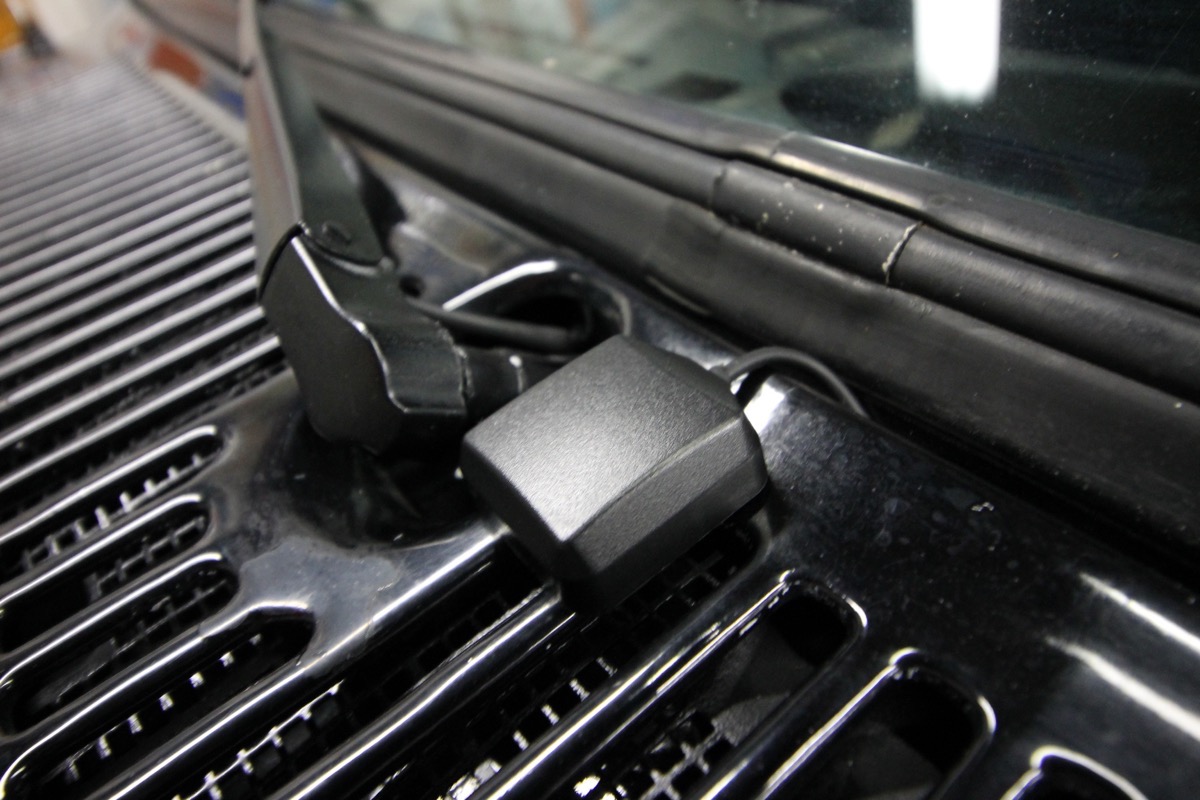
The gauges came with all the mounting brackets and hardware I need to install them in the new bezel. Now the fun part begins.At first the wiring seems complicated, but once you break it down piece by piece it becomes more simple. Patience is the key. It’s important to take your time, think it out, and plan ahead. The wires for power, ground, and the lighting can all be jumped from gauge to gauge. Just start at one end and connect from each lead to the other. I used simple crimp style spade connectors and heat shrink tubing to secure all the connections. Zip ties kept it all nice and tidy. I also used a label maker to keep me from losing my way. Another trick (or hack if you will) I developed was running the wires through a trailer style 4-pin connector. This way if I ever have to pull the panel out in the future I can unplug it in a cinch. The next step is to run the wires from the water temp sensor, tach wire, and the oil pressure sending unit pressure line from under the hood. Hook those up as well as the fuel sending unit signal and a keyed-on 12v signal for the voltmeter. The final connection is to run the antenna for the GPS speedometer. It’s small, discrete, paintable and magnetic. It just has to be mounted somewhere in or on the vehicle that has a clear view of the sky and free from electrical noise and interference. the photo shows mine mounted on the wiper cowl, I later moved it behind the cab to keep it away from interference from my HEI distributor.
The entire bezel and setup is now at home in the dash. I couldn’t be happier with the results. The bezel fits well in the dash and the gauges are angled right were I can see them. I finally have a set functioning and matching gauges and the led lighting looks awesome when lit. It’s good to have a set of accurate instruments instead of the yard sale I was using before.
For more info and the latest promotions from AutoMeter visit:


Great looking steering wheel. Class.