Announcement

Collapse
No announcement yet.

Shop Gatherings, Northern Virginia

Collapse
X
 
  • Filter
  • Time
  • Show
Clear All
new posts

  • Shop Gatherings, Northern Virginia

    We're doing seminars at my shop again this winter, there will be 1 each in Jan, Feb & March typically on a Sunday - i haven't picked the dates as yet.
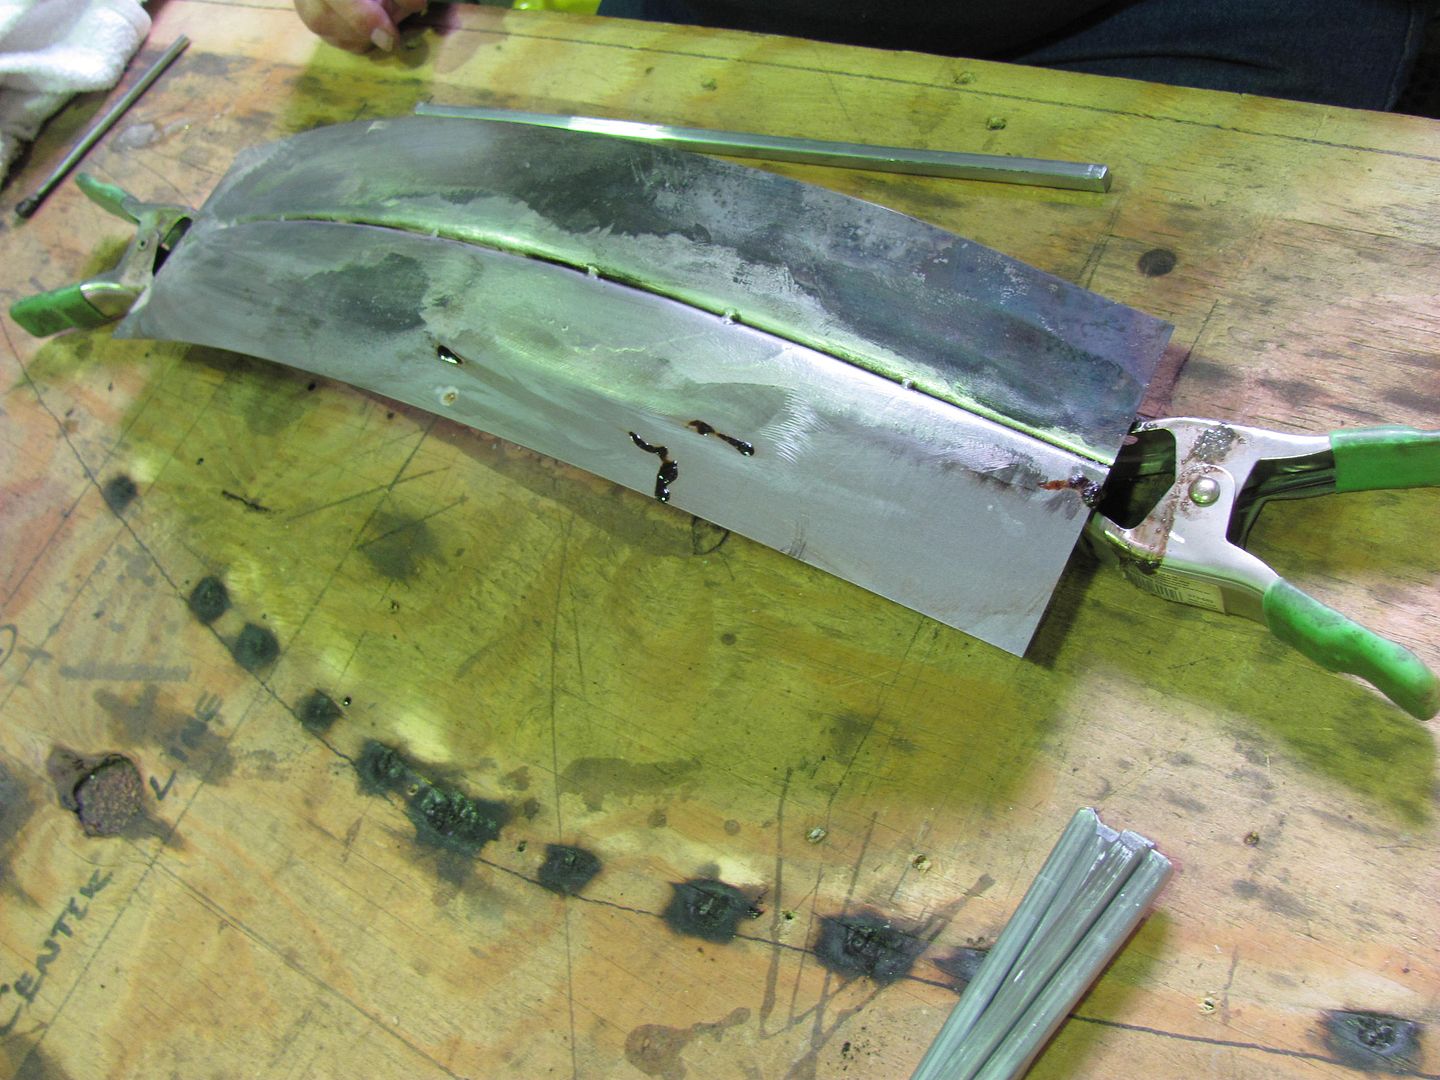
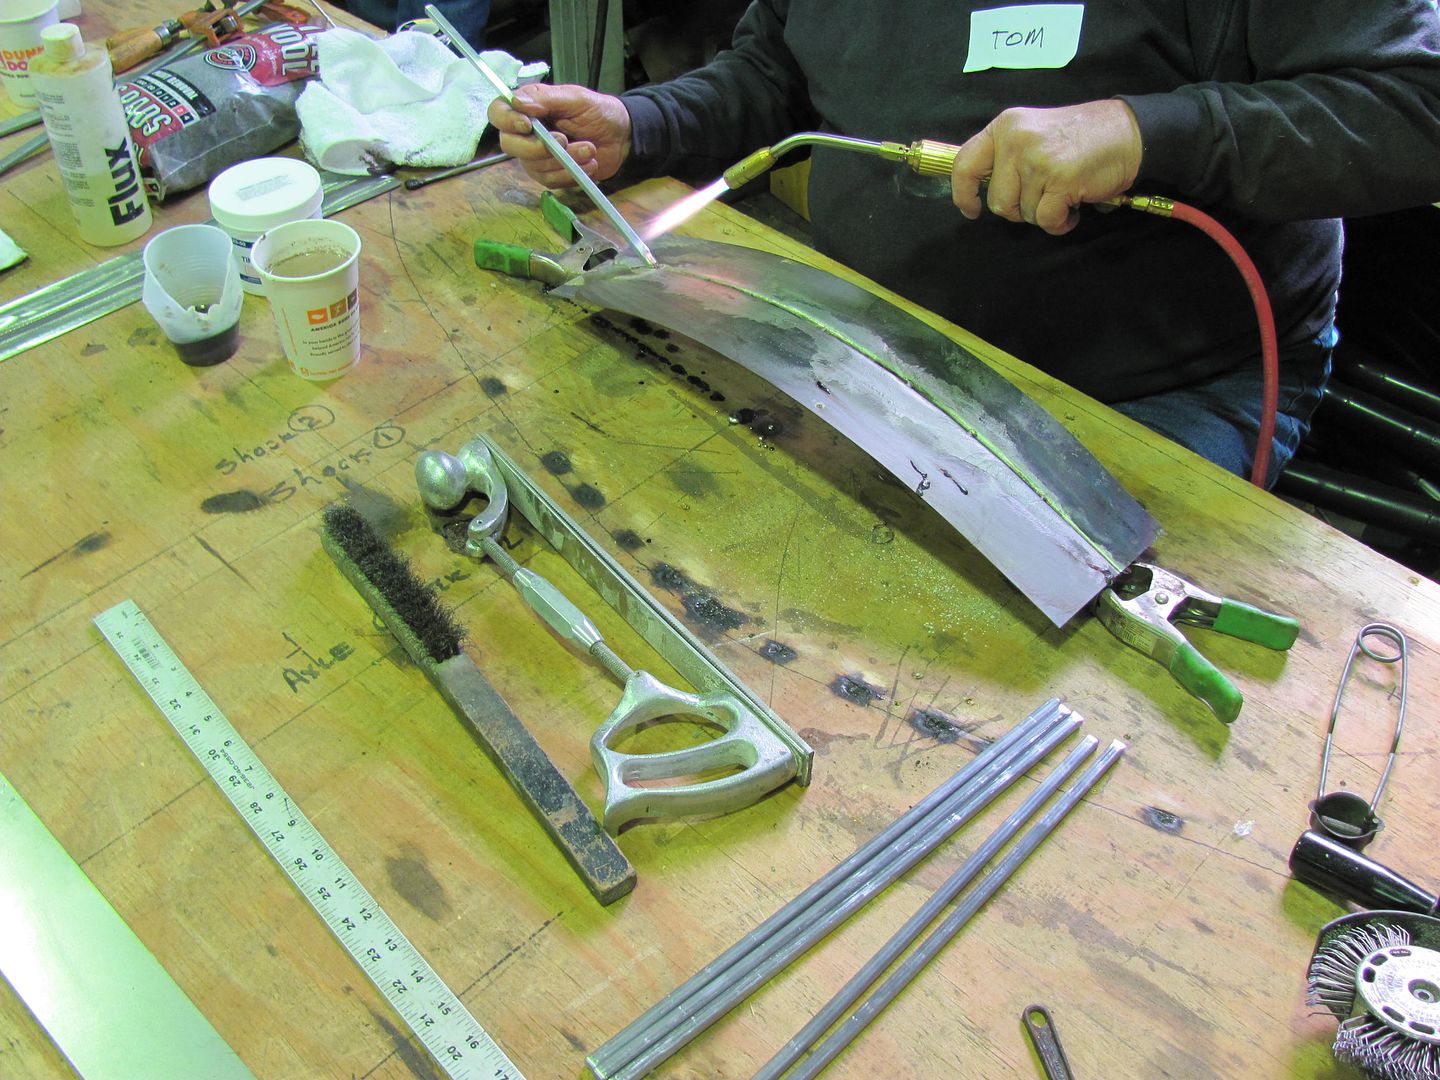
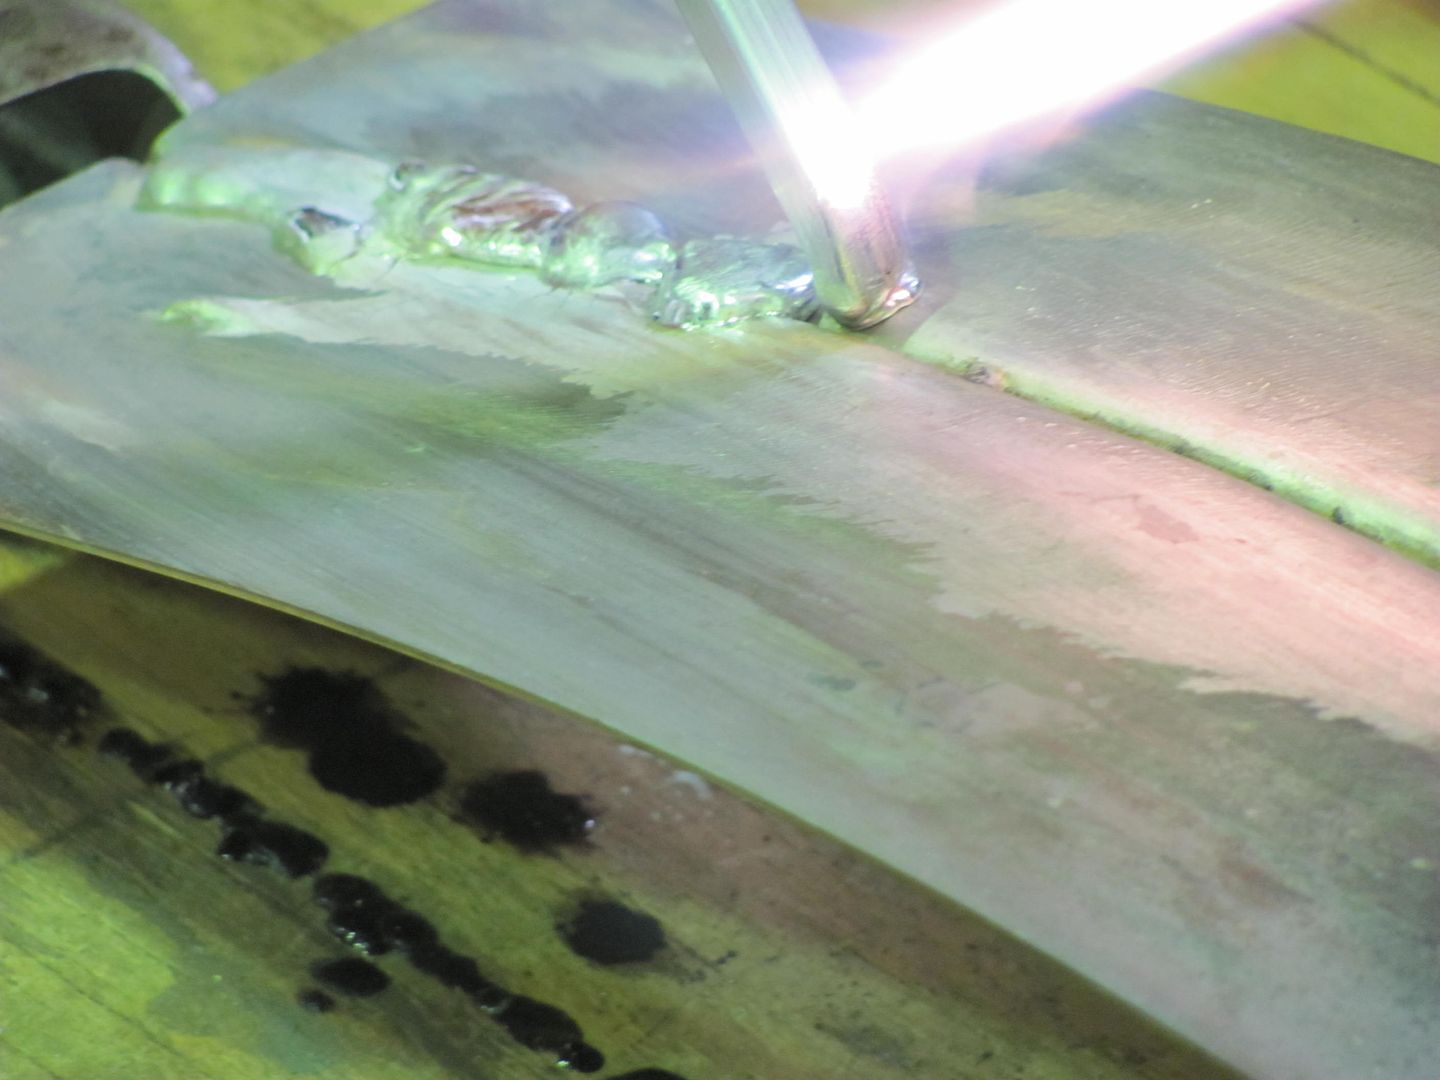
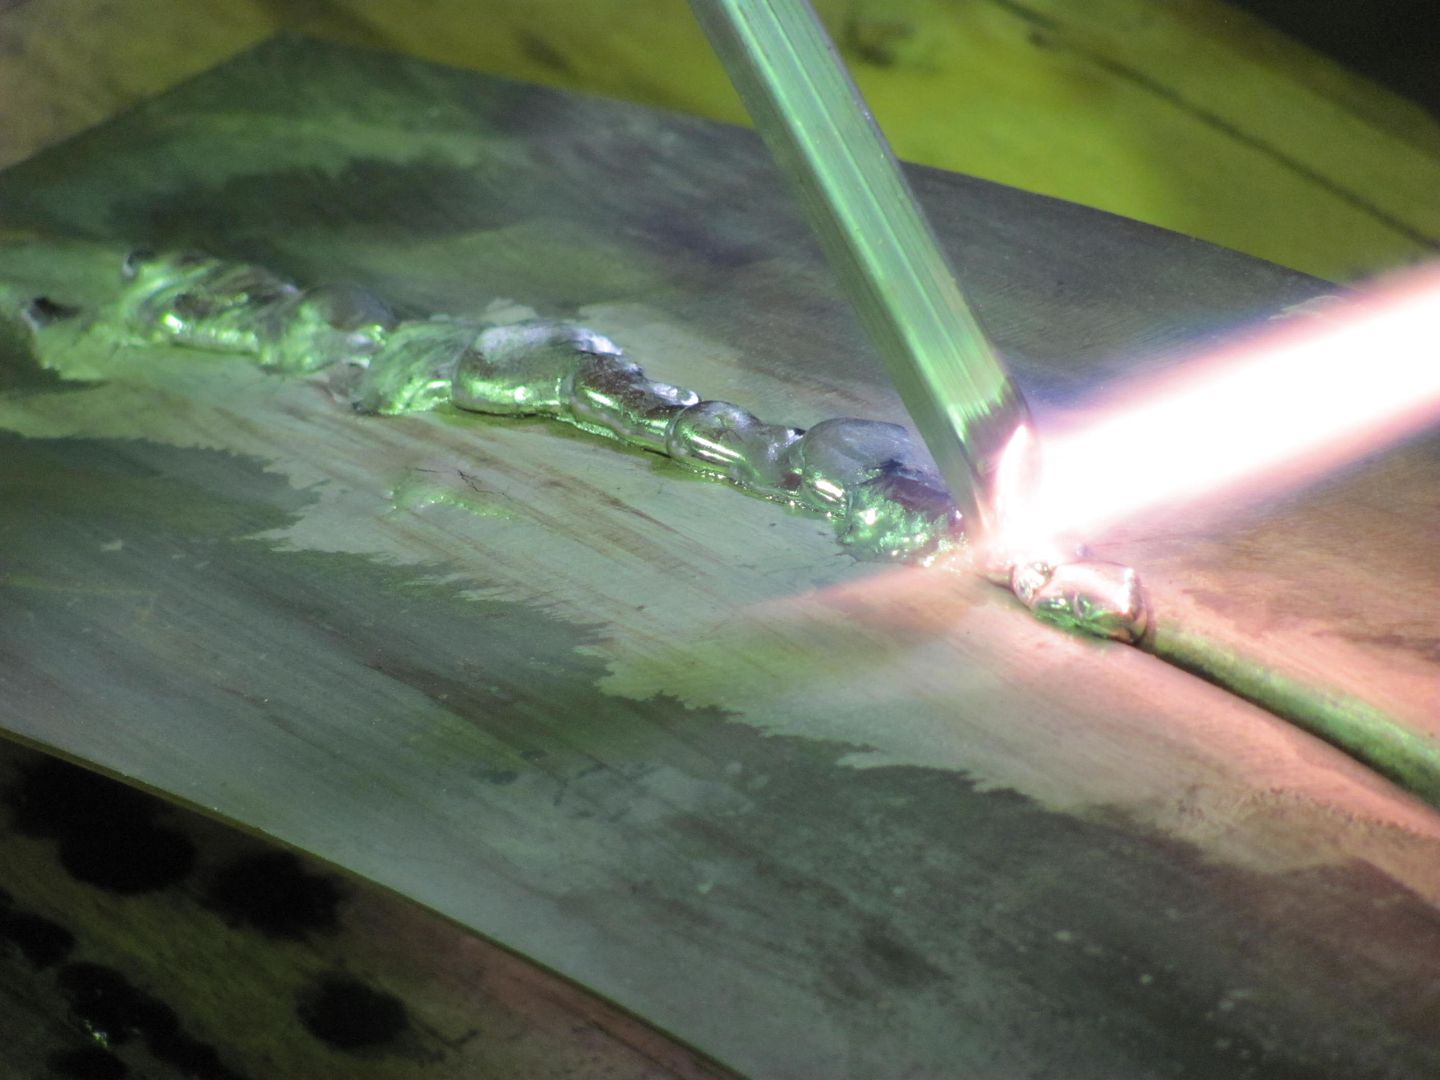
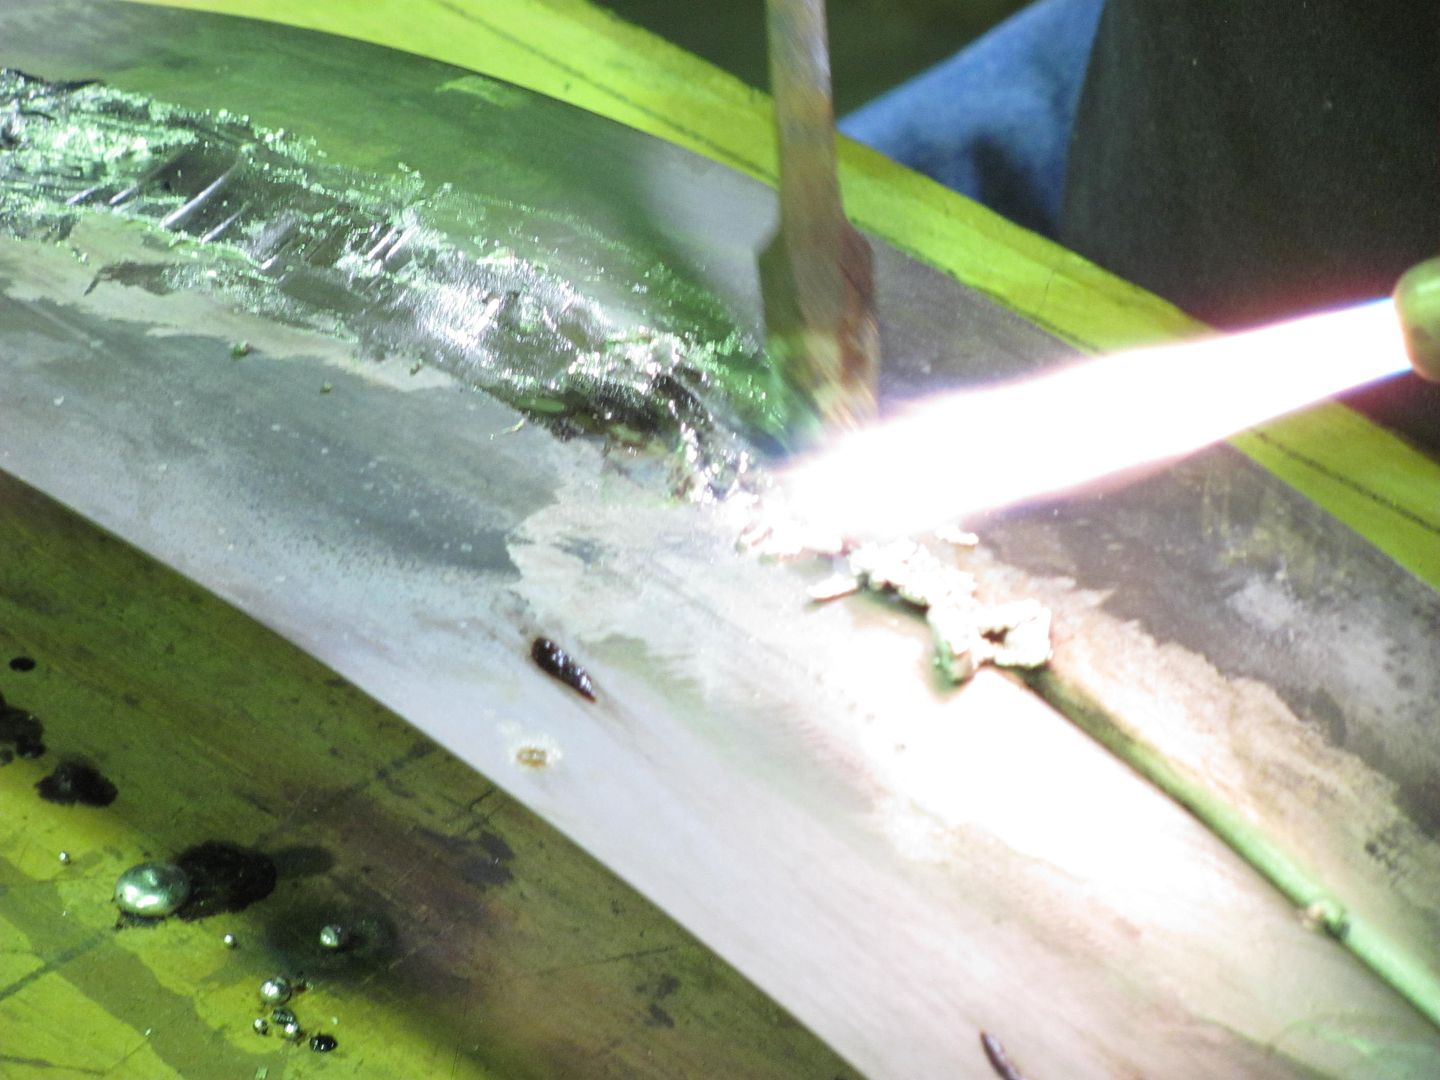
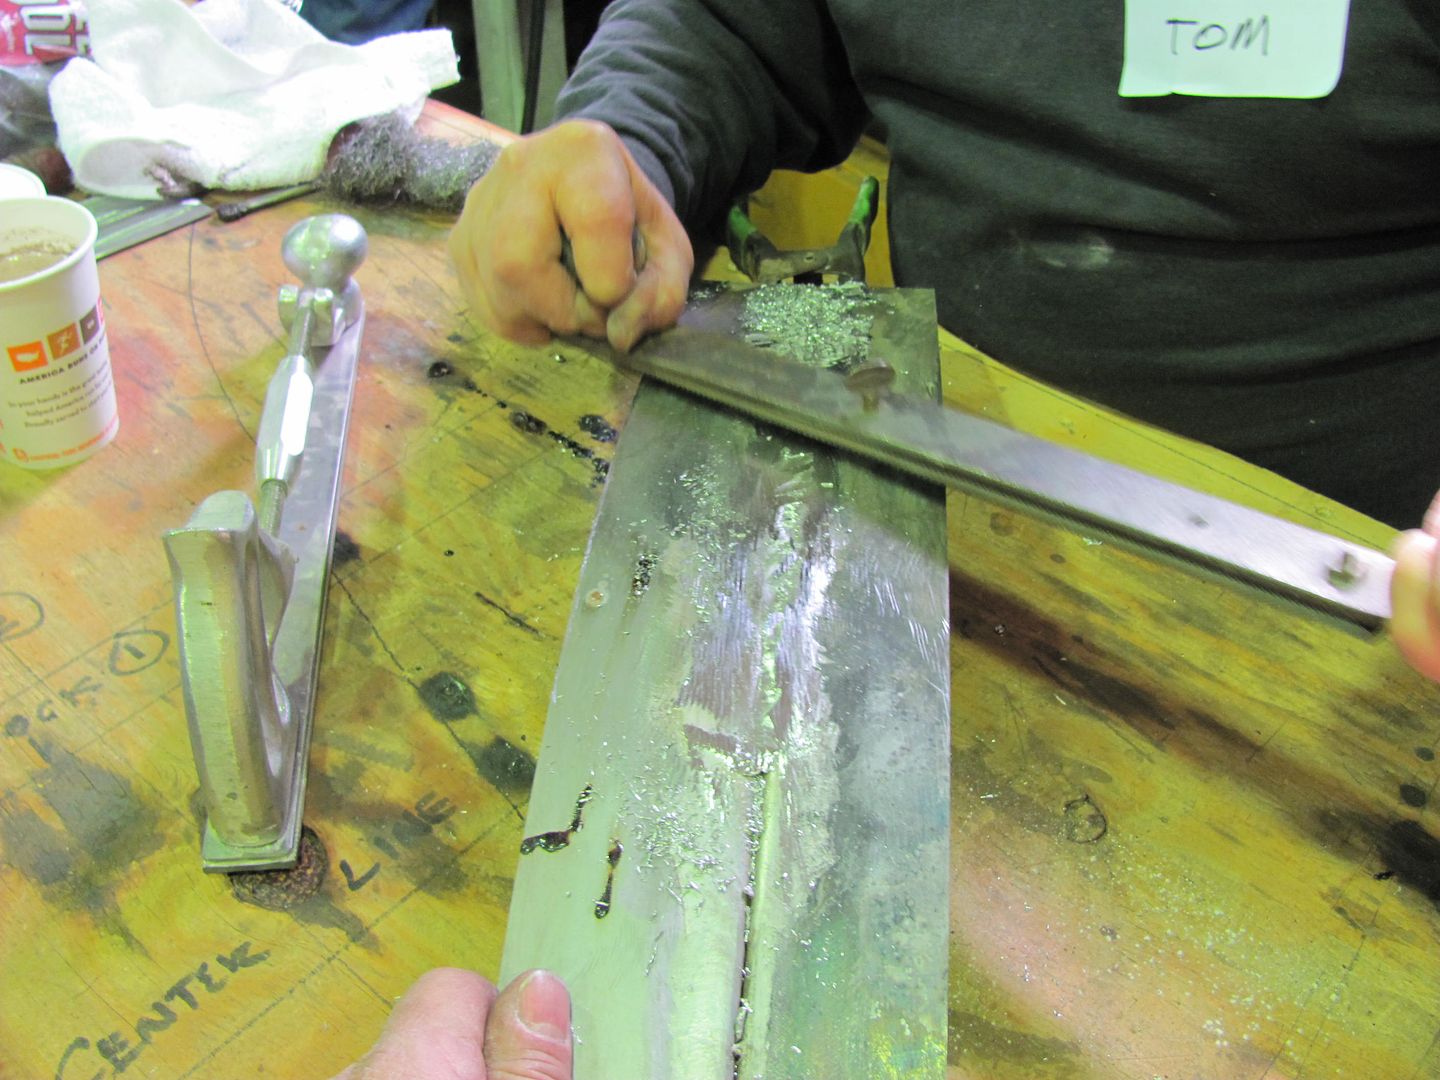
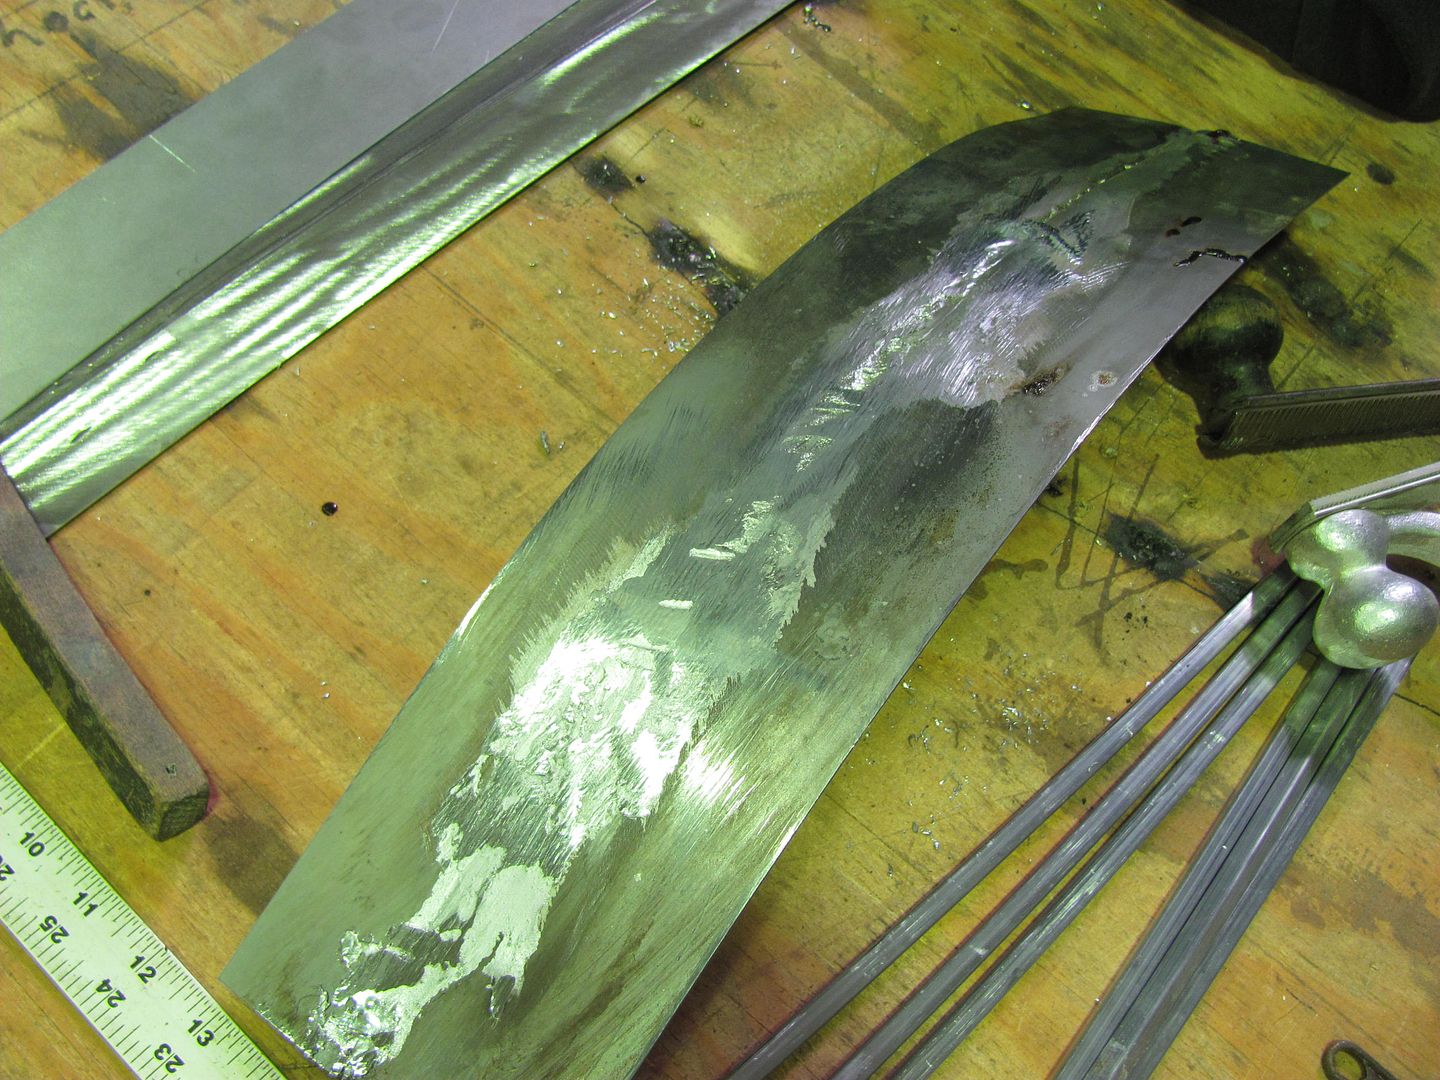
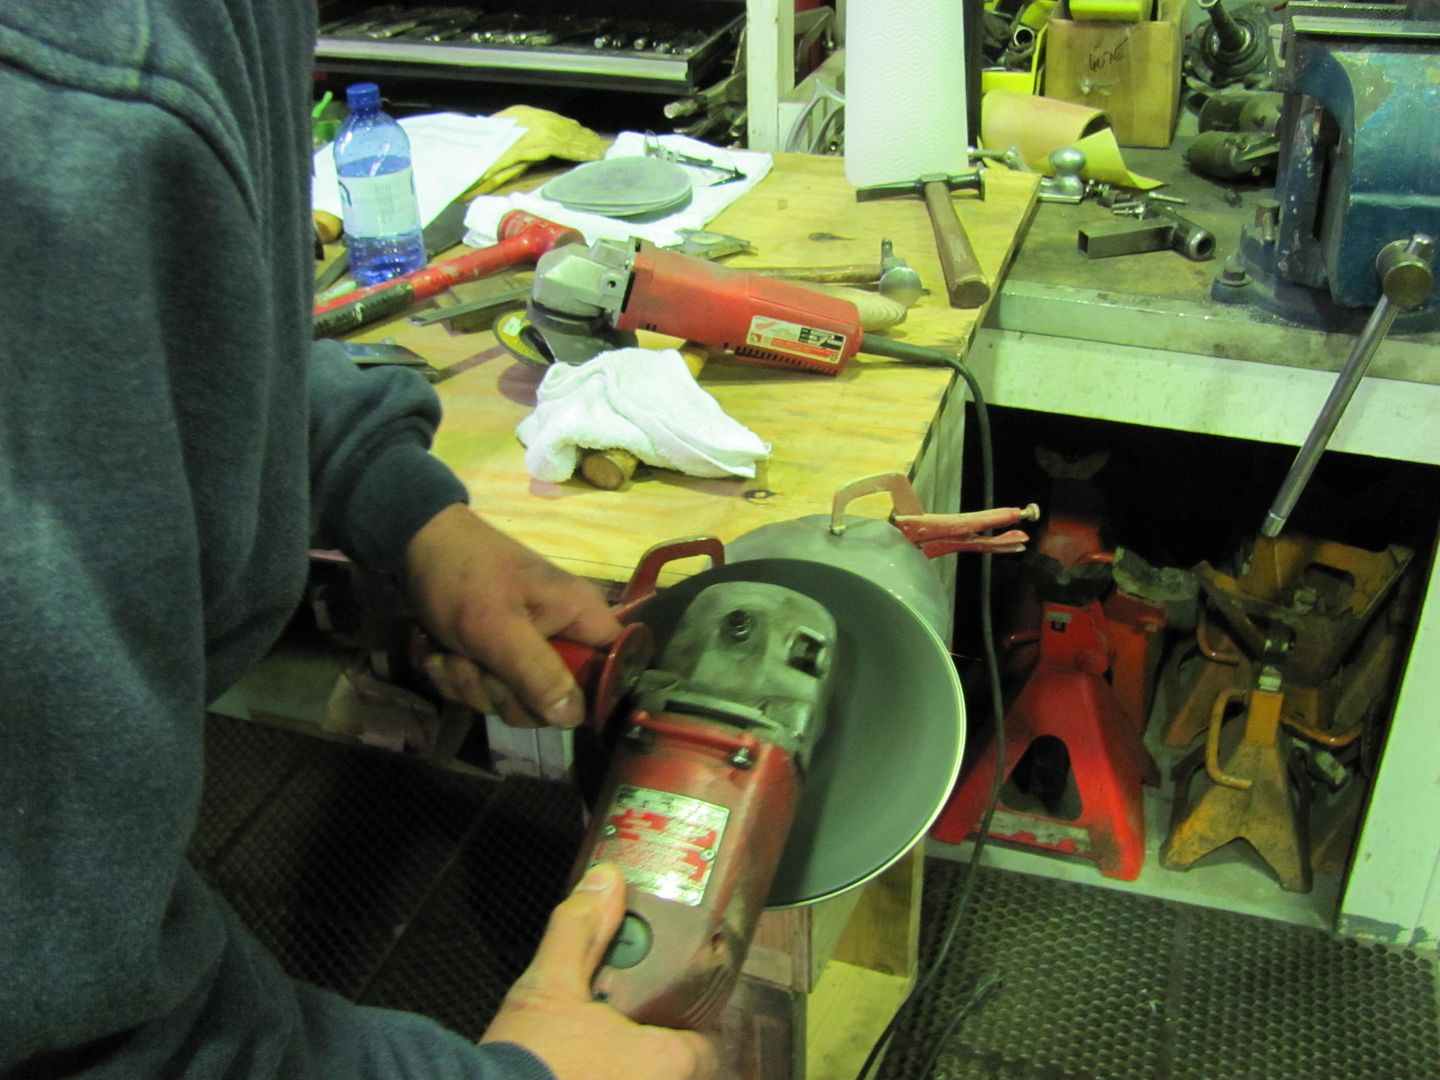
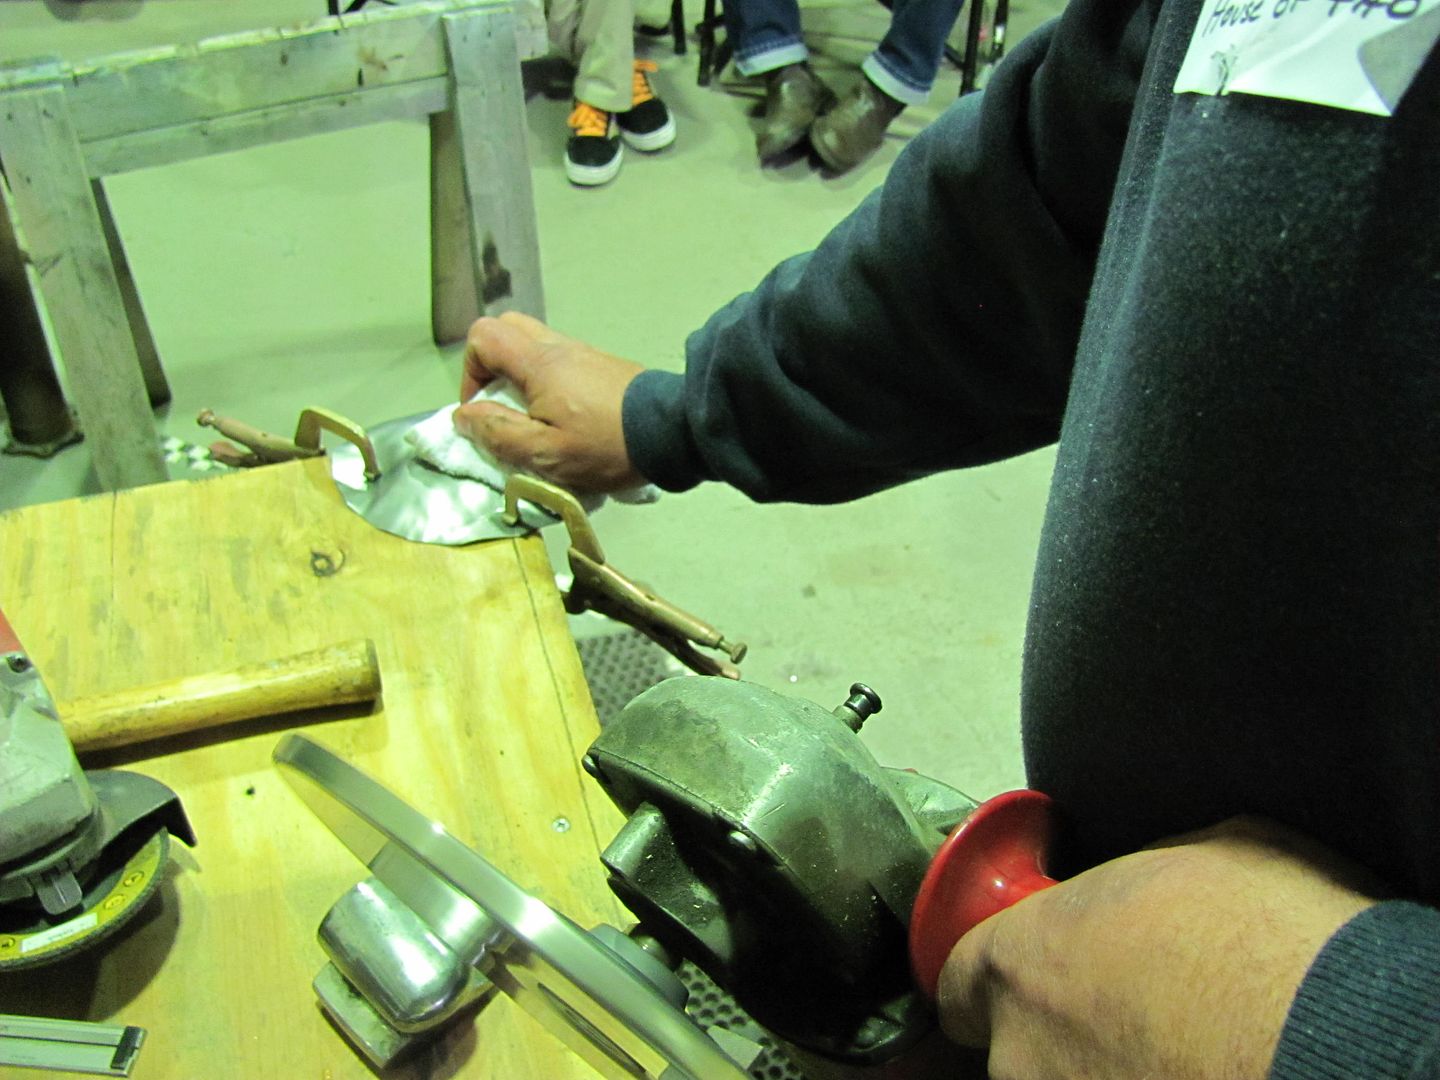
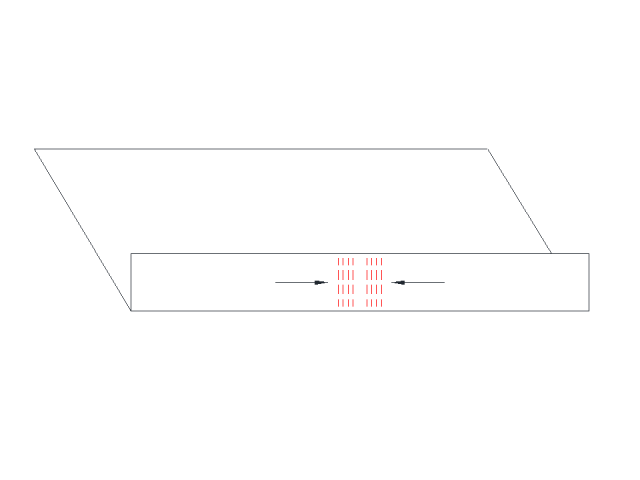
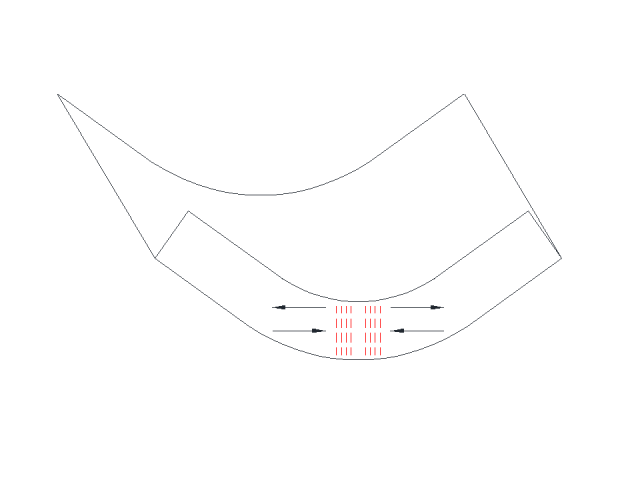
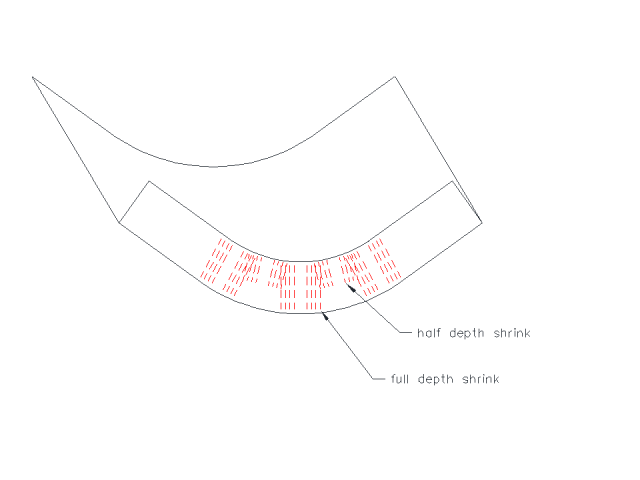
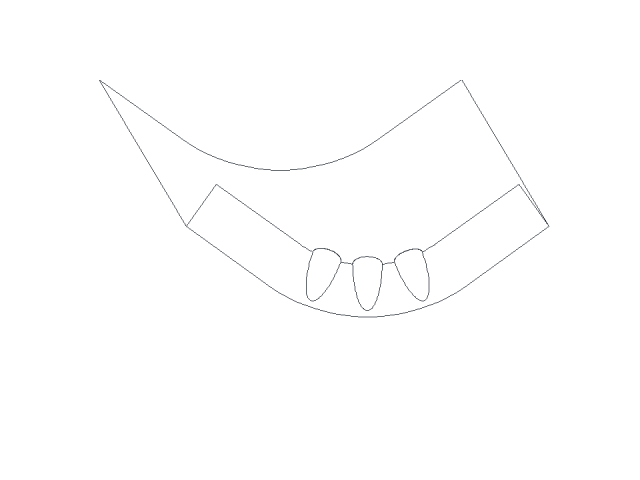
    We have guest experts come in and do indepth discussions on a particular subject to do with hotrodding, these subjects will include: brake theory and design; carb principles and rebuilding; ignition theory and distributor rebuilding; we'll simulate a cam change in a sbc and show how to degree a cam & we'll do the valve train stuff on a flattie; leading a sheetmetal seam; sheetmetal basics, shrinking and stretching; how to wire your hot rod.
    Other subjects we want tp present are banjo rear ends and how to narrow them; how to get professional results with rattlecan painting.
    There is no cost for the attendees and food is provided. None of the instructors are soliciting work...this is not an advertisement that is thinly disguised as an 'infomercial'.
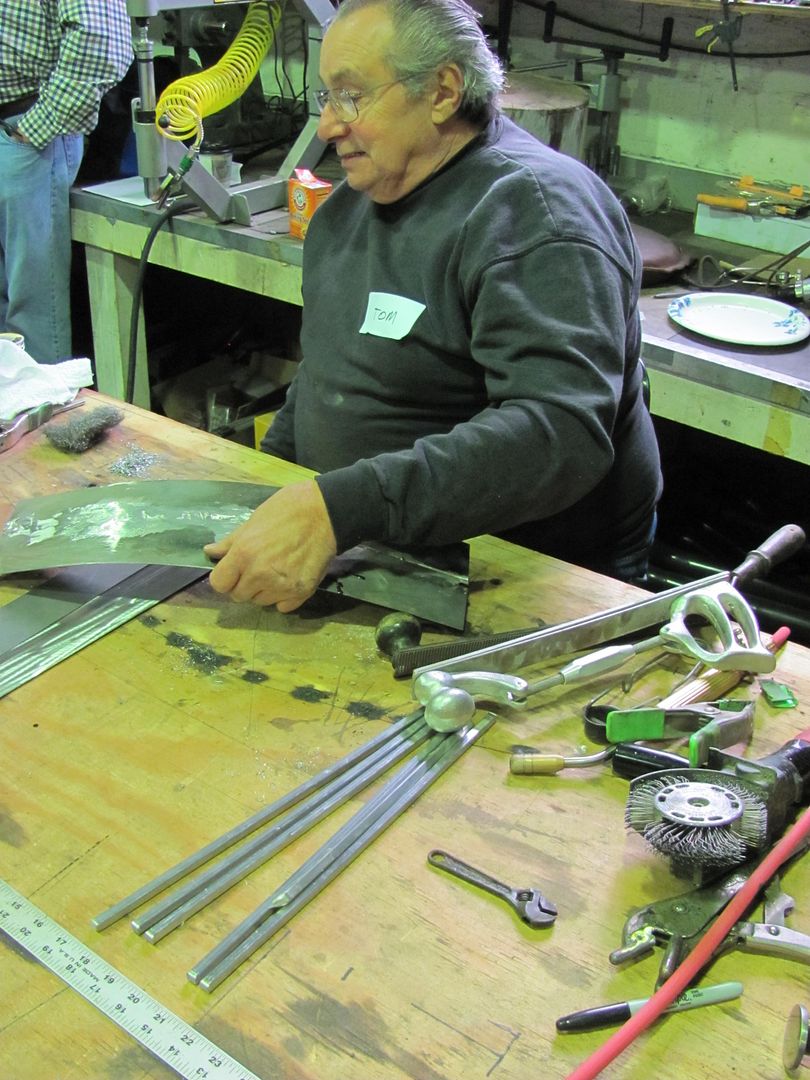
    The Gatherings are as much a social event as informative, they start around 10am and can continue until i kick everybody out. We try to cover a couple topics before lunch and then do a major topic, as in depth and hands-on as we feel we need to go - there are no restraints and everybody is encouraged to participate.
    Depending on the subjects we there can be 30-40 people, so it is a good time.
    I am looking for a guy that is willing to share knowledge on distributors, esp early point distributors and how vacuum works etcetc demo on my Sun 504 and be able to do indepth modern MSD style ignitions.
    If you have comments, suggestion etc my email is...
    [email protected] my shop phone is 540-955-0479

    Thanks, oj i will be doing updates, incl which days, the subject and the guest instructors
    A Carter Carb Shop, sales and service

  • #2
    For those who may be on the fence about attending OJ's workshops, here's a sampling of what we did two years ago in the metalshaping and body lead demo. I did the metalshaping demos, but didn't get pics of that. Supposed to get some pictures emailed/cd mailed from another guy there, so I'll add some of those later.

    First pics here are of Tom Mancuso, who used to have a body shop in Long Island and learned leading from some of the masters back in the day..

    Two flanged panels were tuck shrinked to form a radius. This was to simulate the leading edge of hood halves being welded together and leaded.


    Tom using tinning butter on one half and plumbers flux (liquid) with solder on the other, to demonstrate the differences.... The liquid flux tends to get down into cracks better, for a better flow of the body lead.

    Adding the lead, pushing it into the joint...


    Rather than use a wooden paddle and tallow, Tom prefers a vintage soldering iron that uses external heat (the torch in his other hand) It seems to do a better job of managing the heat and "puddle". Even though he claimed he hasn't leaded anything in ten years, it was like old hat to him.


    After our "hood" had a chance to cool, he demonstrated leveling the area with the vixen file.


    Our completed sample


    I think Tom enjoyed another crack at flowing some lead....


    Got some pictures during the break of some of the vintage tin outside....


    Back inside for more work on metal, Dave gives a demo using the shrinking disc.


    Robert


    Instagram @ mccartney_paint_and_custom


    MP&C Youtube Channel

    Comment


    • #3
      To expand on the pictures from OJ's event, here is an online friendly tech thread on shrinking that should have prefaced the lead demo.


      I didn't get as many pictures as I normally do (too many hammers in my hands) so this will be supplemented with some diagrams and previous pictures so we can make a good tech thread.


      Prior to Tom showing the body lead demo, I needed to make some panels for him to work from. We decided that a curved surface, similar to the front end of a 38 Chevy and its hood halves, would be a better fixture for showing the need for flowing lead up a slight incline. I started with two equal sized panels, and bent a flange on the long edge. Then discussed some of the issues faced when shrinking a flange. For demonstration purposes, in the following example we have a 12" long panel with a 1-1/2" wide flange.


      If we were to look at the same panel with a radius, formed by shrinking the flange, we would note dimensions similar to as follows:


      ....where the 90 degree bend at the flange still retains its 12" length, the centerline of the flange in this case is shortened by almost an inch, and the outer edge of the flange shortened by almost another inch.

      In working with the Lancaster/Eastwood style shrinker-stretcher machines, it is important to note that they are a linear device, the movement they introduce into the metal is in a straight line.


      So that once a radius starts to form, and with the shrinking device still moving in a linear fashion, the outer edge of the flange will be put into tension as the centerline shrinks. Anyone who has used these devices will have seen this as the machine starts to lose its effectiveness.


      To counter this effect, we need to shrink the outer edge of the flange more than the inner. By simply alternating the depth of the shrink as shown, you can provide more shrink to the outer edge and the device will become more effective.


      Another method of shrinking is with the use of tucks. Looking at their shape, the tuck has a wider "gather" at the edge of the flange as compared to the inside bend of the flange, so this eliminates some of the tension issues seen in the mechanical shrinker.


      Where the demos this past weekend were supposed to concentrate on using only hand tools so that the participants could readily duplicate the results without the need for a major purchase, we did find the use of the Shrinker a good comparison, and by chance the tuck shrinking did prove to be faster and more effective.

      For the tuck shrinking, one can use tucking forks, rounded jaw pliers (by design or modification) or special designed devices. As an example, here is a set of tucking forks I made out of some scrap metal and 5/8 bolts turned down.


      And a pair made from needle nose pliers..


      Probably the biggest challenge with their use is producing consistent tucks. To produce a flowing, consistent radius, we should start with consistent tucks, both in size and the spacing between them.

      I decided to make a pair of tucking pliers out of Vice Grips, as the jaw adjustment on them would prove to give repeatable sized tucks.

      We'll start off by finding a pair of vise grips suitable for the job, which in this case means the jaw serrations are starting to wear and round off and won't grip much of anything else. Finish what has started by removing the serrations to produce a nice flat jaw on the bottom, and cut the top one off at about 30 degrees from its original position.


      I had some extra long shouldered 3/8 bolts, perfect round stock for the job. Three of them were cut off to 1-1/2" length.


      Here's my economy model lathe made by Dewalt...


      To set the spacing for the "fingers" the first is clamped in the vise grip jaw, centered.


      The outer is placed next to it and then welded down the outside, center finger removed, and then welded down inside. Here we should leave a slight gap of your sheet metal thickness to prevent any binding, which will allow a deeper tuck.


      Repeat for opposite side, then weld center finger.


      Note in the above picture the 30 degree cut of the upper jaw positions the center finger at an angle compared to the bottom fingers. It is this angle that will help to form the tuck in the proper tapered shape.


      Of course I took my favorite anvil along to the meet, here clamped in the vise..


      Again our object in this case is consistency, so equally spaced marks are placed on the flange, identical tucks made at each mark, and you can see the consistent radius along the panel.


      I use a O/A torch to heat the tucks prior to hammering them flat. Others prefer to not use heat, and can capture the tuck and flatten it very effectively without it. I am still working on this proficiency, so in the meantime, I use heat. We're looking for something like this, prior to hammering.


      Here OJ assists with torch duties...


      Another point to mention is that the hammering action tends to also spread the tuck back apart if not captured effectively. Where the picture above doesn't show it well, a good means of overcoming this would be to clamp a strap of metal across the ends of the newly formed radius prior to hammering, similar to this:


      Then the hammering force will be more effective in flattening the tuck back into itself.


      Once each piece was completed separately, the flanges were aligned back to back and the two pieces tacked together. Each had an identical radius, for a good fit. Consistency pays off!

      Last edited by MP&C; December 2, 2012, 06:28 PM.
      Robert


      Instagram @ mccartney_paint_and_custom


      MP&C Youtube Channel

      Comment


      • #4
        Wish I weren't across the country...
        Escaped on a technicality.

        Comment


        • #5
          Hey OJ I am in.... I will have to figure out which fun car is running enough to bring and how to top brownies. I an psyched for this I have already been couped up to long.

          Thanks

          Steve
          Well I have stopped buying stuff for cars I don't own. Is that a step in the right or wrong direction?

          Comment


          • #6
            If scheduleing allows I would love to attend! Let us know when the dates are set!
            http://www.bangshift.com/forum/forum...-consolidation
            1.54, 7.31 @ 94.14, 11.43 @ 118.95

            PB 60' 1.49
            ​​​​​​

            Comment


            • #7
              Originally posted by rightpedal View Post
              Hey OJ I am in.... I will have to figure out which fun car is running enough to bring and how to top brownies. I an psyched for this I have already been couped up to long.

              Thanks

              Steve
              Bownies! If you feel need to improve on something that can't be improved on how about Turtles!
              A Carter Carb Shop, sales and service

              Comment


              • #8
                Did I miss last year or was the gathering on hiatus?

                Steve
                Well I have stopped buying stuff for cars I don't own. Is that a step in the right or wrong direction?

                Comment


                • #9
                  Originally posted by rightpedal View Post
                  Did I miss last year or was the gathering on hiatus?

                  Steve
                  I didn't have them last year - i had a bad attitude.
                  A Carter Carb Shop, sales and service

                  Comment


                  • #10
                    Don't feel bad Steve, he didn't invite me last year either...
                    Last edited by MP&C; December 6, 2012, 03:36 PM.
                    Robert


                    Instagram @ mccartney_paint_and_custom


                    MP&C Youtube Channel

                    Comment


                    • #11
                      There are years that I have a bad attitude. It typically starts with a piece of sushi and things spiral out of control till i'v bought an early 80s bmw with a bad wiring harness cause "this will be some thing different". Oh the shame....

                      Steve
                      Well I have stopped buying stuff for cars I don't own. Is that a step in the right or wrong direction?

                      Comment


                      • #12
                        The 1st session will be based on the driveline. We have Dave Krolak doing brake systems from basic design thru application of early drum brakes thru disc brakes. We will also spend time on the Banjo rears and the Ford 9"; we'll have a look at the houdaille shock and rebuildiung as well as the Delco-lovejoy shock.
                        That session is on Jan 13th
                        Last edited by oj; December 12, 2012, 02:30 PM.
                        A Carter Carb Shop, sales and service

                        Comment


                        • #13
                          Things are looking better all the time, I just got off the phone with John Wesson and he wants to take the evolution of the carburator from before 1910 and bring it right up to the modern double pumper. John Mullen is going to take us into the flathead engine, we'll have an 8ba doing the valve train and an earlier 21 stud flattie and maybe a 59a so we can trace the evolution of the flattie.
                          These seminars and more will be on Feb 10th
                          A Carter Carb Shop, sales and service

                          Comment


                          • #14
                            The gathering planned for this Sunday, the 13th has been backed up by 1 week to the 20th. I had planned that gathering to be dedicated to drivelines and that ain't gonna happen. Dave Krolak will be able to do his presentation on brakes, i ahve talked myself into doing electrical wireing and the main topic will be ignition systems with as yet an un-named team to do the presentation. I am excited about it, this is gonna be good.
                            John Mullens has had a change in his schedule and he emailed me this morning that he will be in Florida and will be unable to do the flattie presentation, hopefully we can get him next next year. He'll be missed.
                            A Carter Carb Shop, sales and service

                            Comment


                            • #15
                              I am still getting confirmations for the ignition demo, it is hard finding qualified guys that can explain. Anyway, as of now we'll have Ted Bennett explaining how a coil actually works (Ted is wicked smart and it is an honor that he would participate); after Ted, Carl Anderson (of Early American Auto Restoration) will start with an early ignition system (maybe a 59a type) and take us on thru to HEI. He'll show what needs rebuilding and how to do it. He might get into the sinewave of the ignition and coil, he will get into the points dwell, vacuum and relationship to the carb etc and demo it all on a Sun 504 machine. We might hook up a rack of sparkplugs and hook a Sun Scope to it - we are talking about taht part.

                              I am also speaking with a 3rd person to take from HEI and bring us into the modern race ignitions and capacitive discharge.

                              The session will start with Dave Krolak and brake systems; I'll follow with electrical wireing basics with emphasis on the tooling, how to organize, how to make harnesses etc.

                              And there will be a ton of food!
                              A Carter Carb Shop, sales and service

                              Comment

                              Working...
                              X