Unfortunately we also need this to install it:
-
The day after I took the front end apart it occurred to me that something was missing. Apparently they built at least some of these trucks without sway bars. So I'm adding this to the list:
Unfortunately we also need this to install it:
-
With those apart and needing new ball joints and everything in the steering linkage looking sketchy, I quickly went down the new parts rabbit hole and ordered the following from Rock Auto:
Rotors - old ones looked ok but were close on thickness
Rear Brake Hose
Brake Pads
Wheel Seals
Wheel Bearings - Inner & Outer - less than $6 each for Timken brand - too cheap not to do
Ball Joints (4)
Idler Arm
Tie Rod Ends (4)
Tie Rod End Adjusting Sleeves (2) only $7.17 each
Rubber Bumpers for A-arms (4)
Windshield Washer Fluid Reservoir Cap - $2.22!
Motor Mounts $2.47 each!
Heater Core - only $17.31 - cheap insurance while I'm in there
A/C Evaporator Core
AC belt
Front end parts are all Moog. All of that came in under $500.
I got the heat and AC cores now so that I can swap them out before the motor goes in.Leave a comment:
-
I had put off ordering new ball joints, tie rods etc.. in the hope that some of it might have been replaced or good. The lower ball joints were smoked and the boots on the uppers were torn so I spent the rest of the afternoon stripping the a-arms.
Last edited by 74NovaMan; January 24, 2019, 11:32 AM.Leave a comment:
-
The spindles and springs are 2.5" drop each and the flip kit/c-notch should get me a 6" drop in the rear. These are all Western Chassis parts from Summit. The polyurethane bushing kit is from Amazon. I had Monday off work this week so I decided to tear into the front suspension.
The one non original looking part in the whole steering and suspension system was the pitman arm. If you look closely, you can make out the nail they used instead of a cotter pin.
Attached FilesLeave a comment:
-
-
I clearly now have way too much tire clearance. Time to fix that!
Leave a comment:
-
Hoverconversion in progress:
Tires on the truck. Rear suspension is loaded front is at full dangle:
Leave a comment:
-
After discussing it with novadriver, I decided that white letters might not be right for this particular application. Here is the old tire and a new rear side by side:
Tires coming home:
Leave a comment:
-
Christmas also got us new Tires. The Hot Rod article (http://www.hotrod.com/how-to/chassis...body-chevy-c10) I have been using for my guide on lowering the truck, called out 235/60 R15 fronts and 275/60 R15 rears. These tires are 26.11 and 28.06 inches tall respectively. A 295/50 R15 (rear) is 26.8 inches tall and 1.5 inches wider (section width) so we decided to use that for the rears. Armed with $625 in gift cards/certificates, I went to Discount Tire to get the new tires. I had ordered them over the phone so that they would be in stock when I arrived. Unfortunately, the guy that took my order set it up as a trailer because I was going to bring the rims in off the truck. After messing around for a while and inputting the truck information they told me that they could not sell me the 235/60 R15s for the front as the load rating was not sufficient. The closest they could get me to that tire was a 255/60/15 (.89 inches taller and 1 inch wider). I was worried that these might not clear, but 1badmonkey says they fit on his Suburban so I am hopeful.
Originally posted by 1badmonkey View PostLeave a comment:
-
New threads in place:
Here we can see that I should have drilled a little deeper as well as how far off my original attempt was:
Leave a comment:
-
I also finally got a Helicoil in the head for the broken exhaust manifold bolt. One of the issues I was concerned about was getting the hole square to the head as my initial attempts were clearly off. I have headers so the factory manifolds were disposable. Here is what I built as a guide:
Bolted to the motor to drill:
Leave a comment:
-
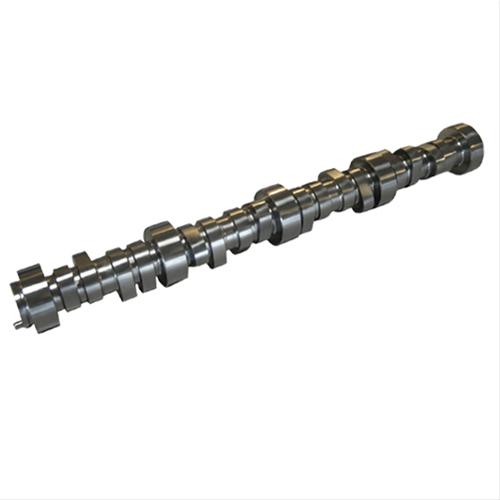
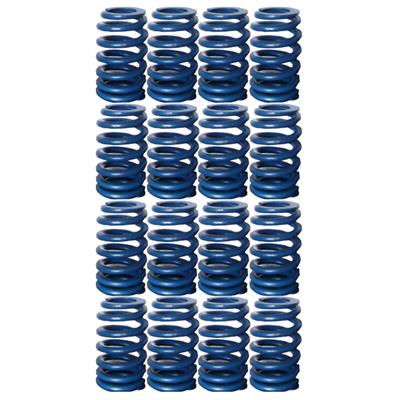
Christmas got us a new cam and springs:
Leave a comment:
-
2018 progress was dismal as we finished the house project (which is actually not quite finished). We managed to score a couple of tilt columns for $60. One is decent and should work with minimal effort, the other is ok for parts. Both have cruise control though which I am hoping to have functional with the LS drive by wire.
Leave a comment:
-
You guys seem to work best with a tight deadline hanging over yourselves... Y'alla getter dun!
Leave a comment:
Leave a comment: