 Tweet
Tweet
Some of the build pictures that others have posted have inspired me! So I figured it's winter, and the end of the year, so that's a good opportunity for me to spend some time and post some pics of my F.A.S.T. GTX build from '05-'06. I never did post too much about it back when it happened, I was too busy. So better late than never. For any of you who aren't familiar with F.A.S.T. Racing, it is Factory Appearing Stock Tire. www.fastraces.org
This was a marathon, starting in September of '05 with a goal of being ready for the Spring '06 Musclepalooza. I ended up missing that date, and barely making it to the FAST spring Nationals at Martin in June of '06.
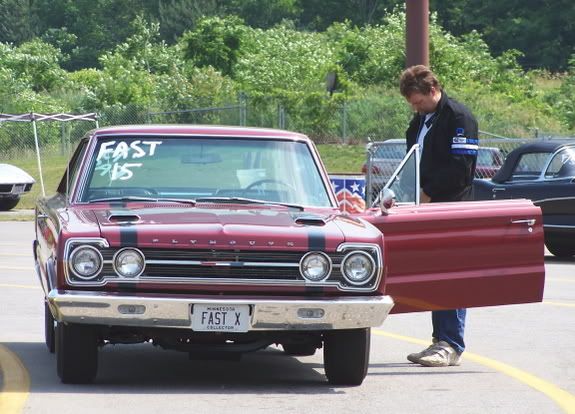
After 5 seasons of pounding on my original 67 Hemi GTX, and running .2 under the roll bar limit of 11.50, it was time to build a clone and do it right with a roll bar. Since the original car is a pretty rare survivor, I was never willing to lighten it by scraping off the undercoating, or drill any holes or make any changes that were more than bolt-ons.
Here is a couple articles about the old green car that needed replacing: http://www.popularhotrodding.com/fea...gtx/index.html

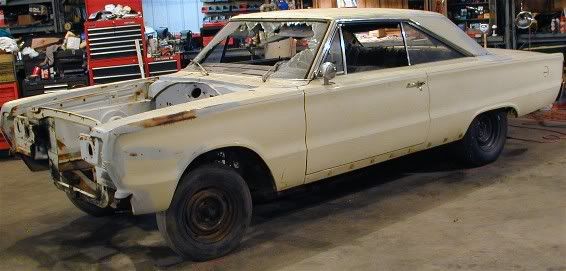
To start the project, I needed to find a rust free body. I don't like to deal with rust. After an extensive search, I found nice body from the south that someone had already shipped to Minnesota. The driveline was gone, the interior was trashed, and the windshield was smashed. Perfect!

The next step was to get it into my shop and clean all the junk out of it, remove the broken glass, and strip it down to the bare shell.
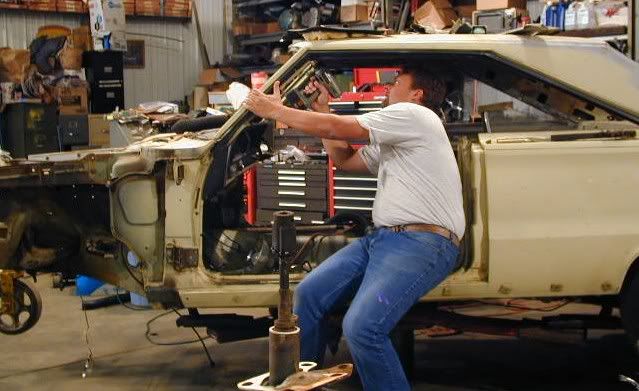
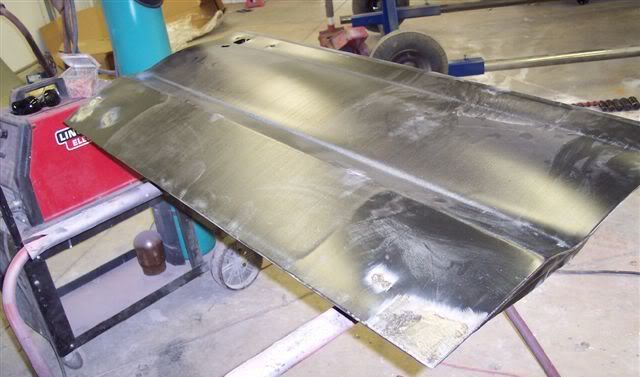
Then I test fitted the Hemi, and since it was a column automatic car, I cut the floor and fabricated a home made "hump" for the 4 speed shifter.
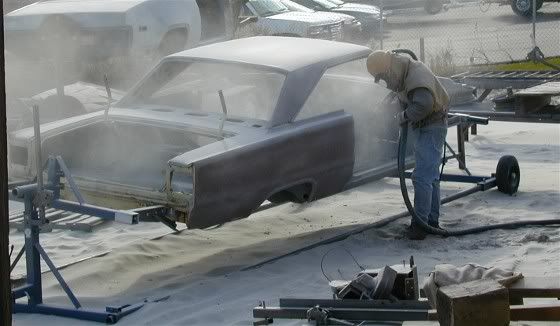
I did some homework regarding rotisserie's, and ended up buying a Whirly-Jig. The body shell was mounted onto the rotisserie and it was trailered to LNE blasting, along with all the other body parts.
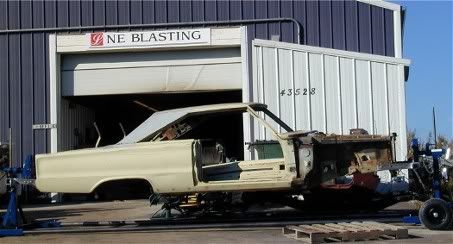
LNE used plastic media on all the body panels, and sand on the structural areas. I cut out the inner door panels and the inner quarter panels, and sawed a hole in the end of each rocker panel so he could get his nozzle in and do a complete job everywhere.
After I got the car back home, I spent a day cleaning sand out of it. Every time I rotated the car, more sand would come out of somewhere. All of the removable body parts were E-coated. This is a process where the part is electrically charged and dipped into a tank of epoxy primer. The electric charge sucks the primer into all the seams. Then they are baked dry.
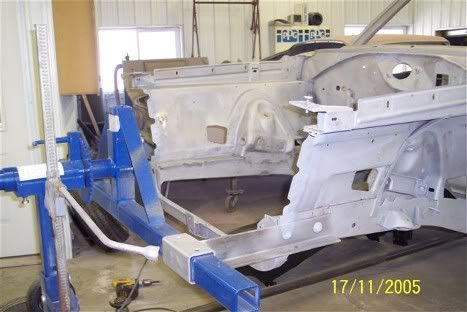
Then I hauled it out Riverside Auto Body in Benson, MN. The small block core support had to come out so that one from a big block car with the opening for the large radiator could be installed.
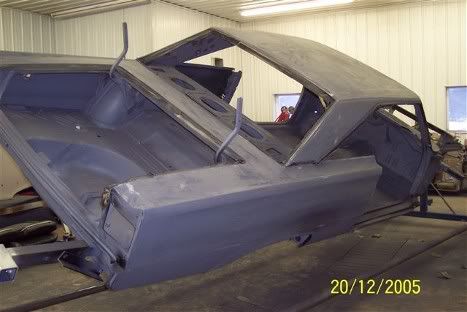
Then the body was primed, straightened as needed and prepped for paint.
Even southern cars don?t always escape the rust worm, and this car needed a little work on the drivers door.
I fabricated all the various gussets and braces that are unique to Hemi cars, and purchased a set of torque boxes from Harms Garage, and Wade at Riverside welded them all in place.
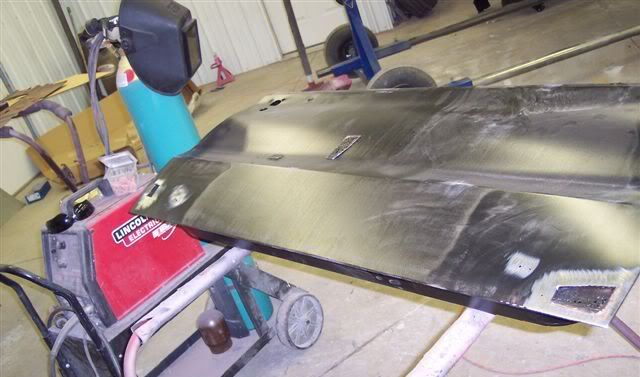
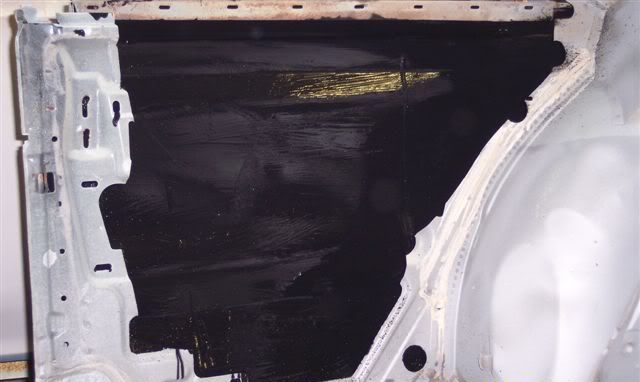
The inside of the quarter panels and rocker panels were coated with Pore 15, and the pieces that had been cut out of the doors and quarters for access were welded back in place. (After cutting lots of lightening holes in them, of course)
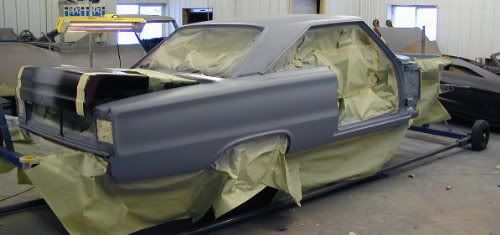
A glossy black primer was used to help show any imperfections, and it was all block sanded.
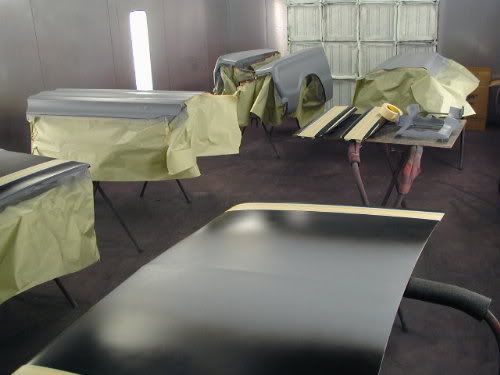
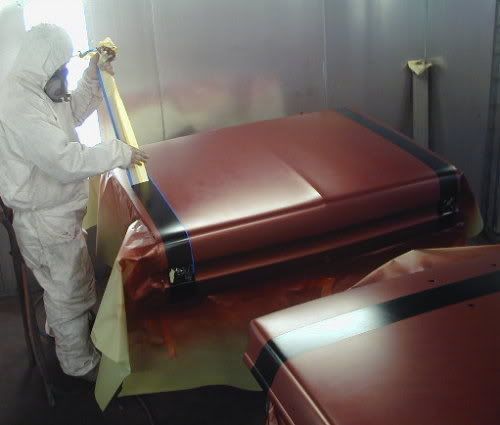
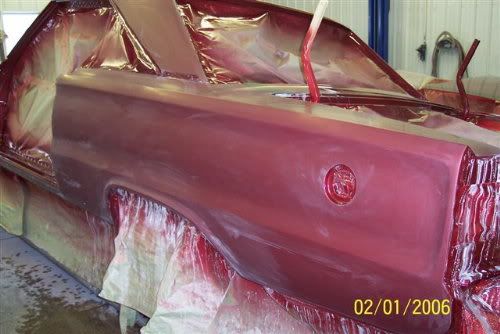
We chose to paint the car in pieces, then assemble it later so that everything would accessible with the spray gun. The GTX racing stripes were laid out. First the black paint was laid down, then with careful measurements from my original car, the stripes were masked off.
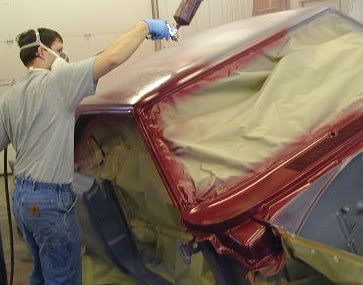
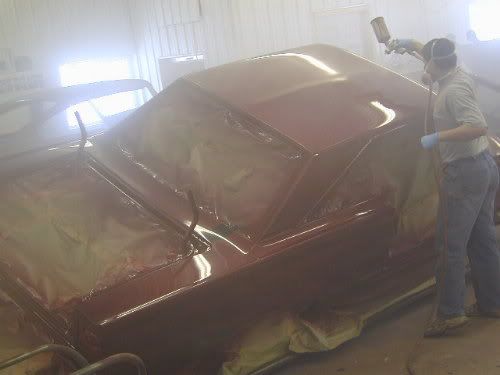
It?s really exiting when the color starts to go on!
Un-masking the stripes:
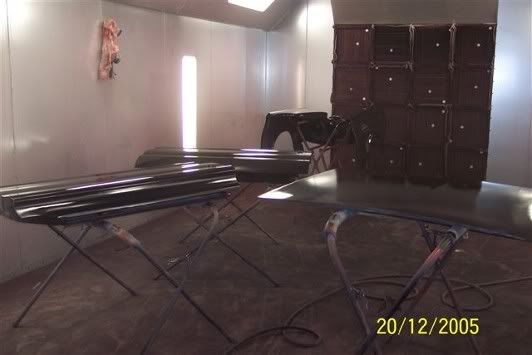
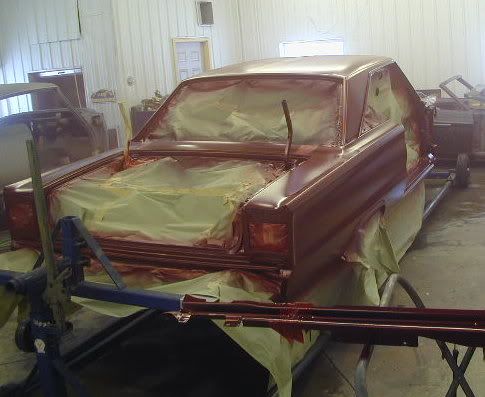
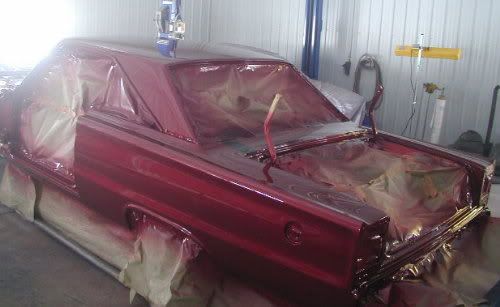
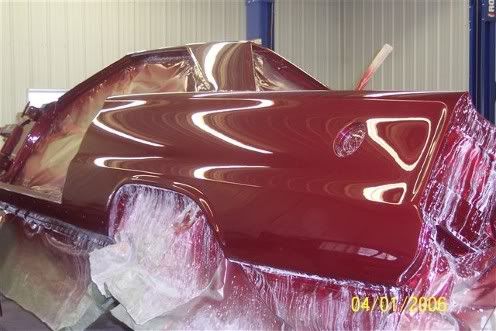
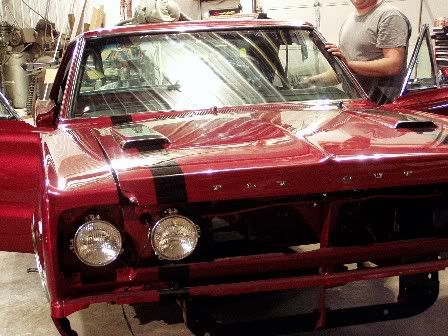
And then the clear coat makes it really shine!
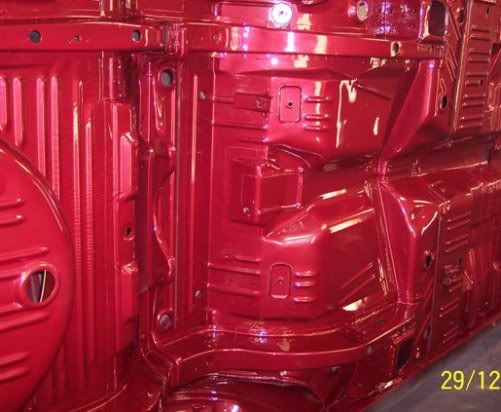
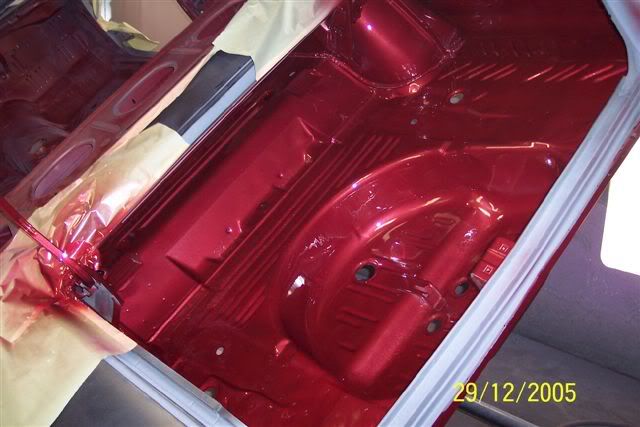
The bottom and the trunk and everywhere were painted body color to make it easy to clean and to give it a shiny, over-restored look.
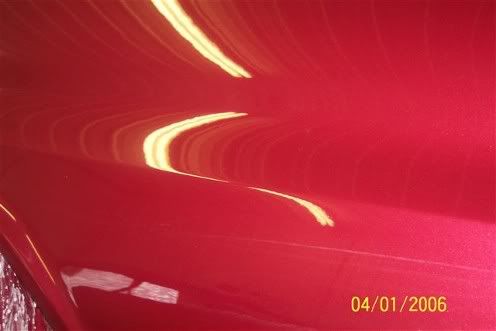
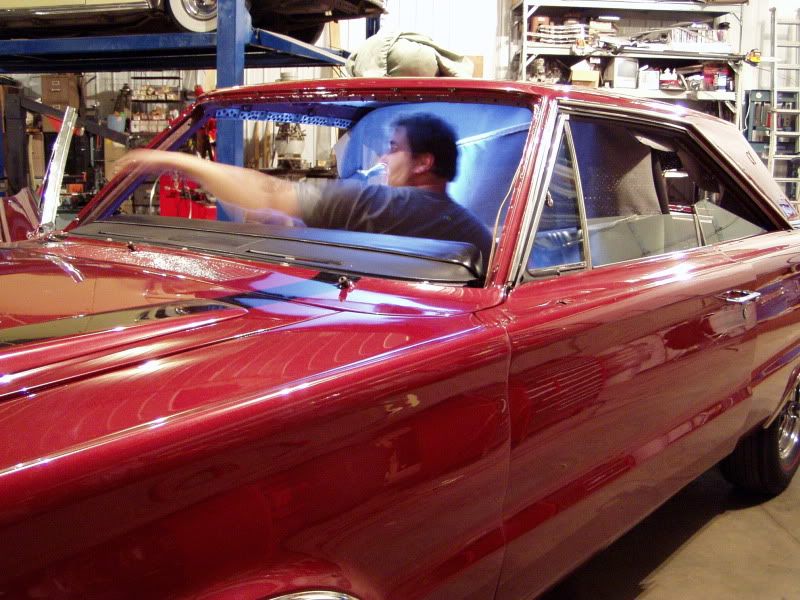
Then it was all wet sanded.
Then buffed out nice and shiny!
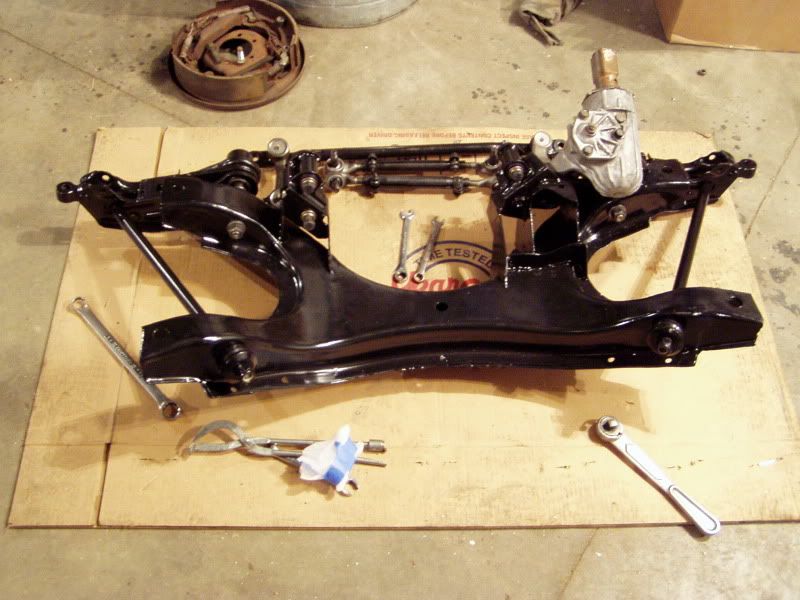
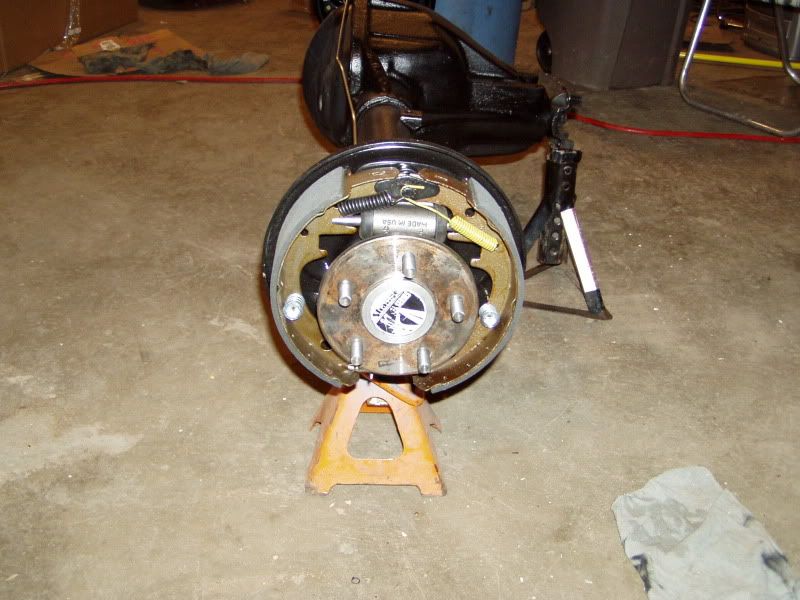
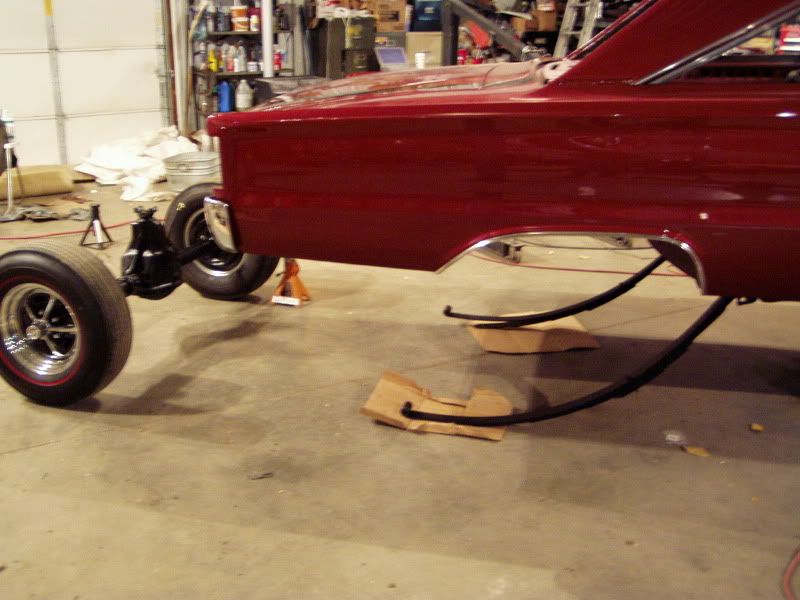
While Wade was busy with the body work, I was busy getting the sub-assemblies done. The front end was rebuilt, my buddy John Hoppe made me up some aluminum strut rods, and my other buddy, Jeff Danielson brought the K-frame and all the suspension parts into the factory where he works and got them powder coated for free!
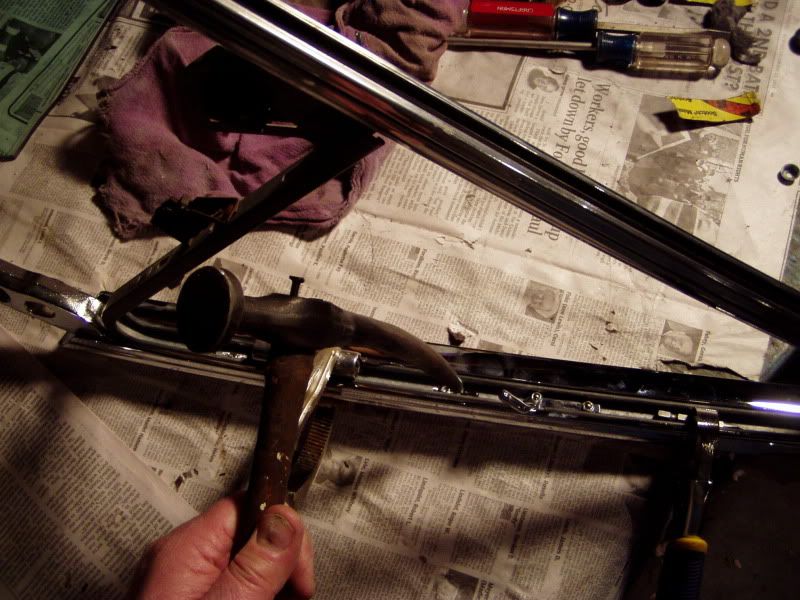
The vent window frames were disassembled by drilling out the rivets that hold the stainless part to the chromed pot metal part. The pot metal parts were re-chromed by J&D Plating, as well as the interior garnish moldings, the air cleaner lid, and anything else that needed re-chroming. All the stainless was polished, then the vent windows were re-assembled.
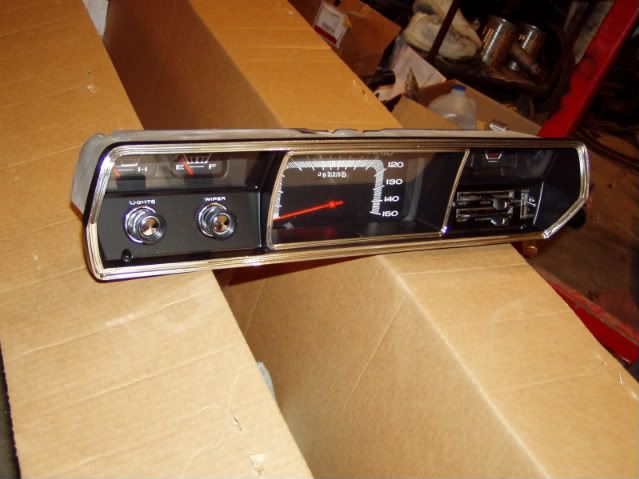
The instrument cluster and glove box door was re-chromed and detailed by CV Vacuum Platers. Turned out nice!
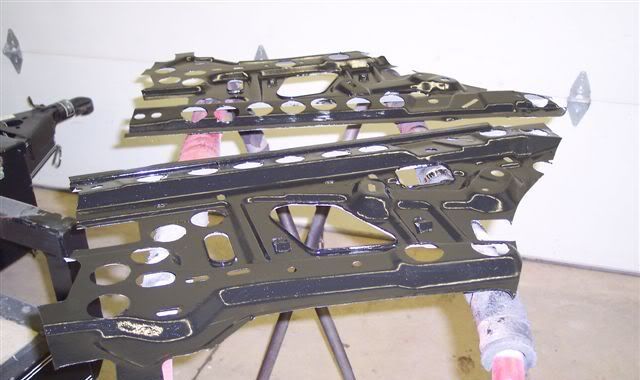
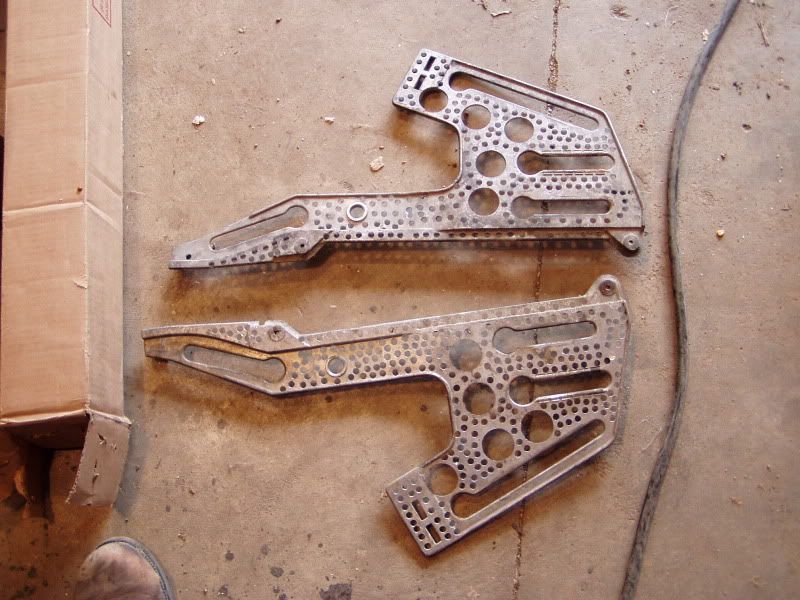
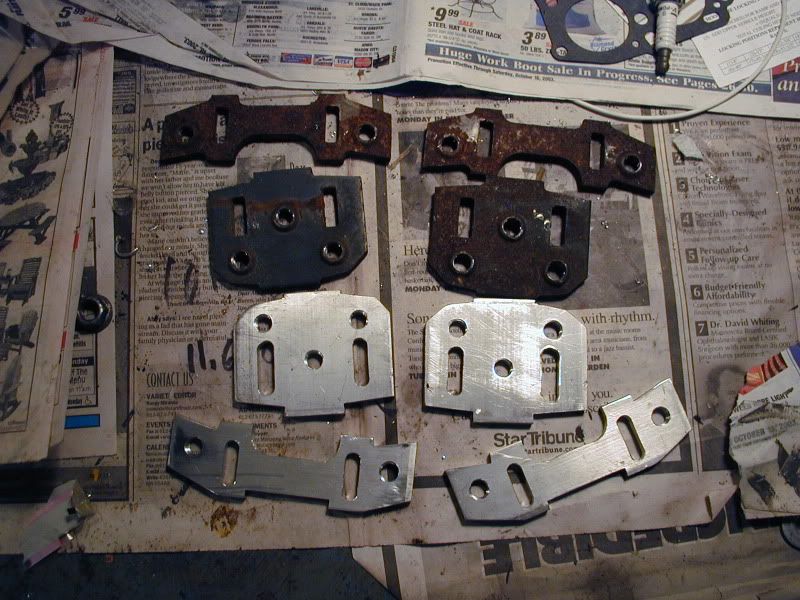
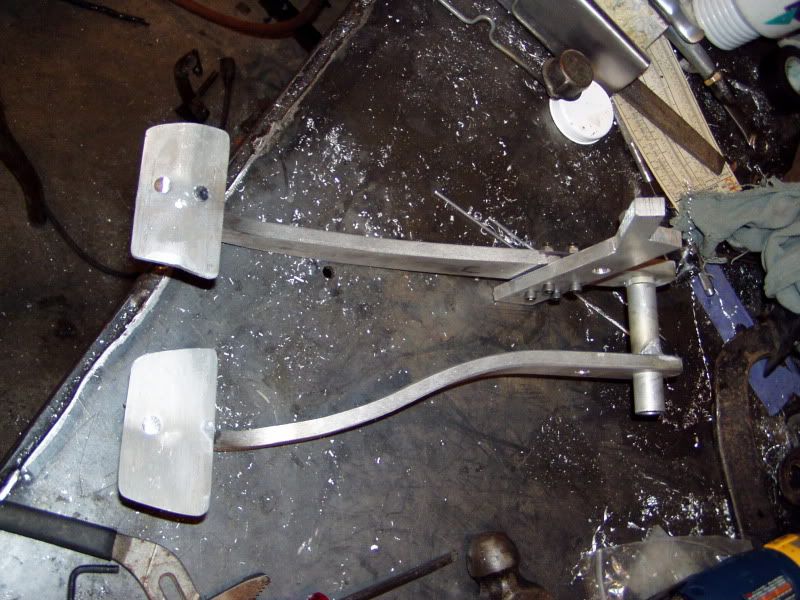
Wanting to get the car as light as possible, I lightened the factory parts where possible, and fabbed up some parts out of aluminum.
After I got the car back home, I got it back on wheels so I could send it to Tin Man fabricators to have a chrome-moly roll bar put in.
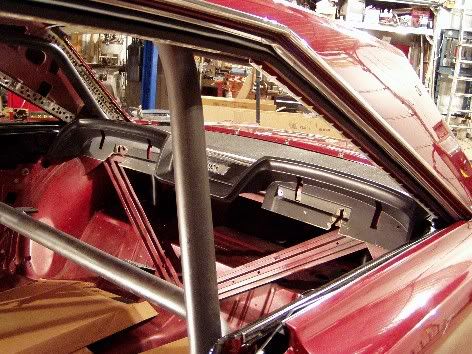
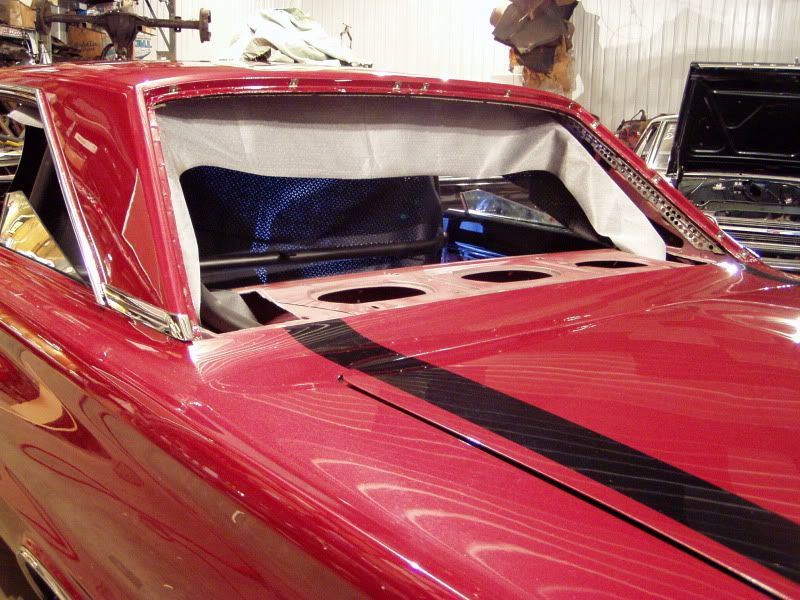
My goal for the roll bar was to be legal, light and as discreet as possible. I asked Jim Crews at Tin Man to line up the main hoop with the chrome strips between the front and rear windows, to put the bars as tight to the roof as possible, and to run the rear down bars tight to the C-pillars, so it would all be as invisible as possible. He did a great job!
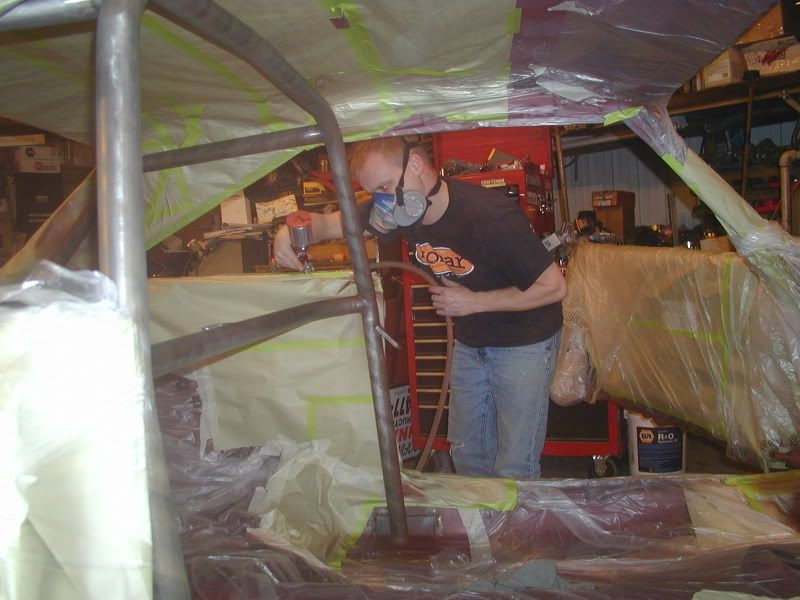
Once the safety bar was in, I masked off the car and my buddy Jeff helped paint the roll bar. We used the same paint as the dashboard, which was a duplicate of the factory textured flat black. (thanks to Tom Cannon for the paint!)
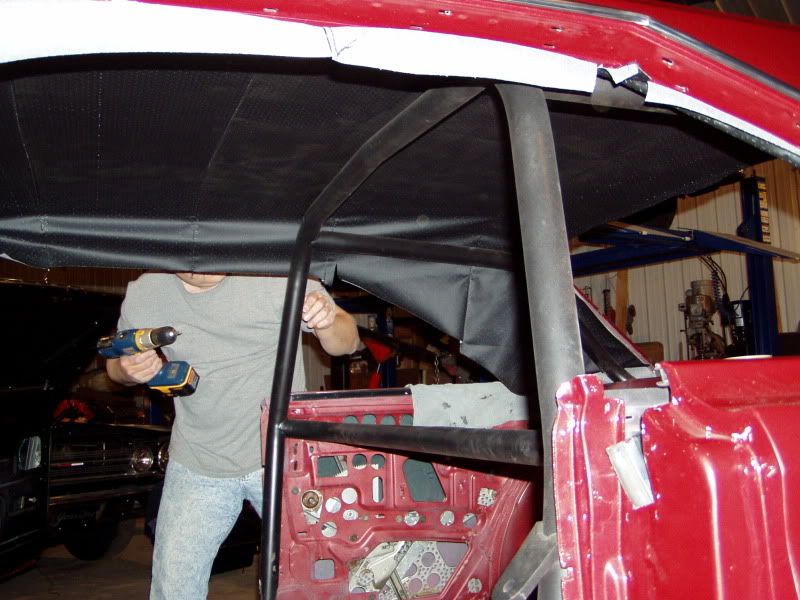
Next the new headliner from Year One went in, along with the glass. I used the old green tinted side and back glass from a donor car, and sourced a new matching green windshield from PPG.
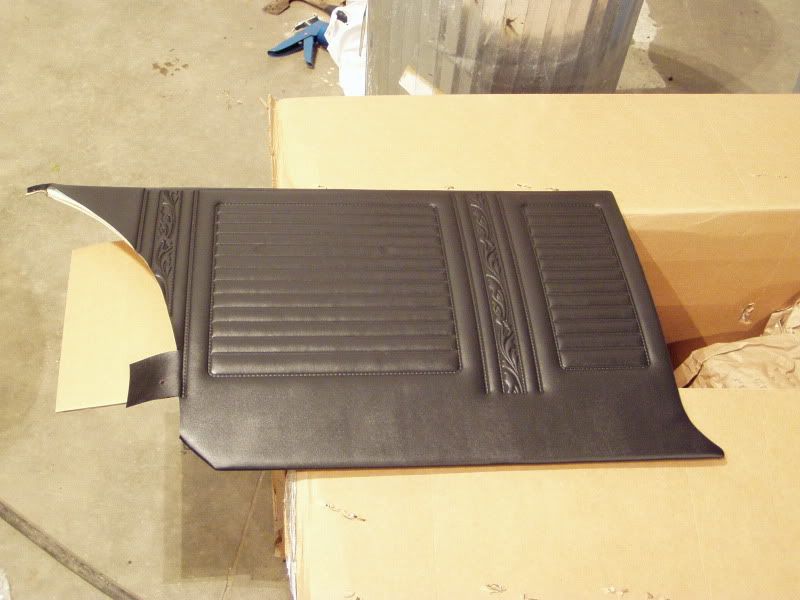
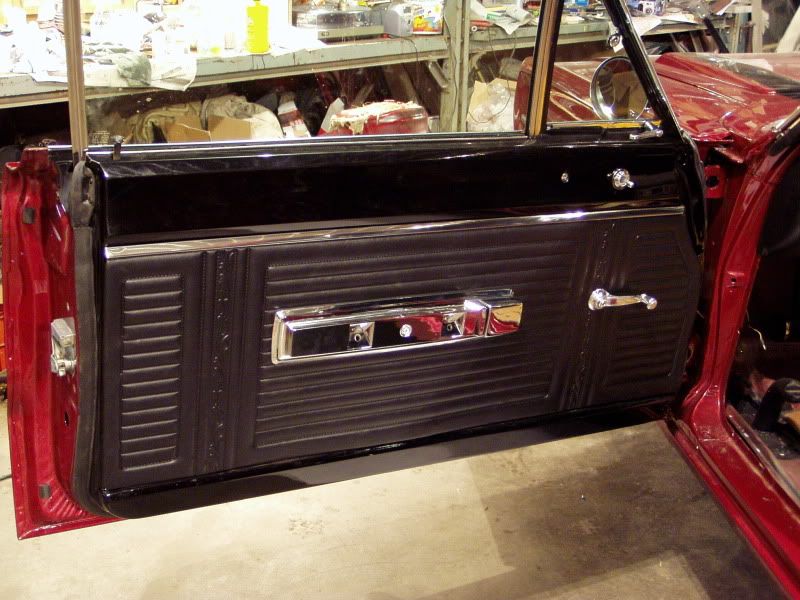
All new interior and a very correct Hemi-specific wiring harness was also sourced from Year One.
The Hemi is based on a .060 over 1966 block, with a set of '68 iron heads ported by Glenn Knowlton. The crank is an Eagle 4.25 stroker with BBC sized rod journals, Eagle H beam rods and Ross custom pistons. 496 cubes.
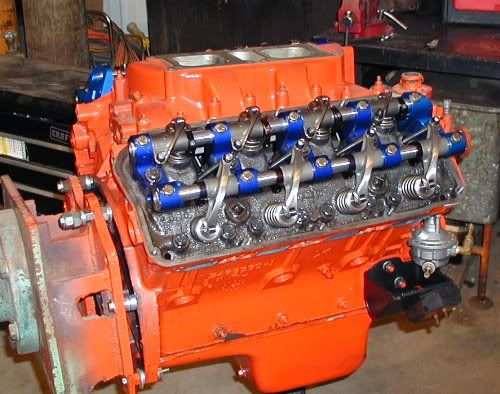
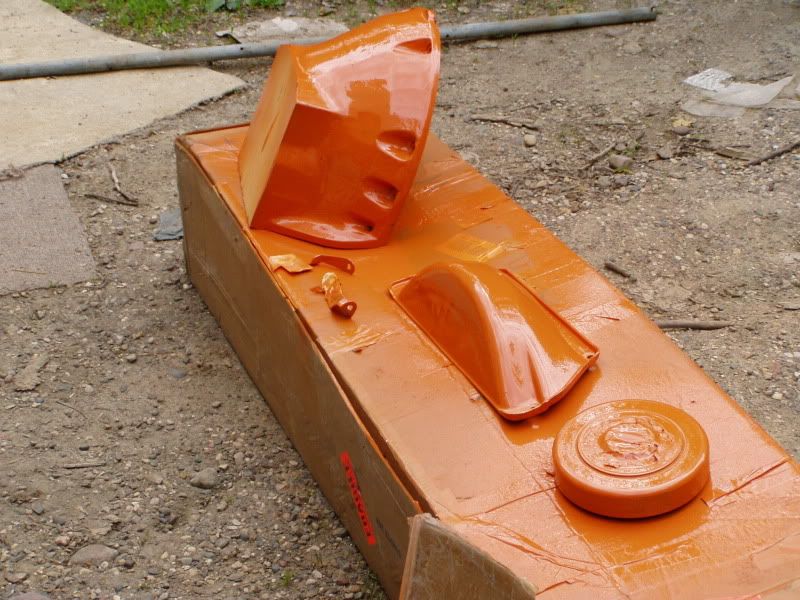
I sourced the correct 66-67 Hemi orange paint from Roger Gibson.
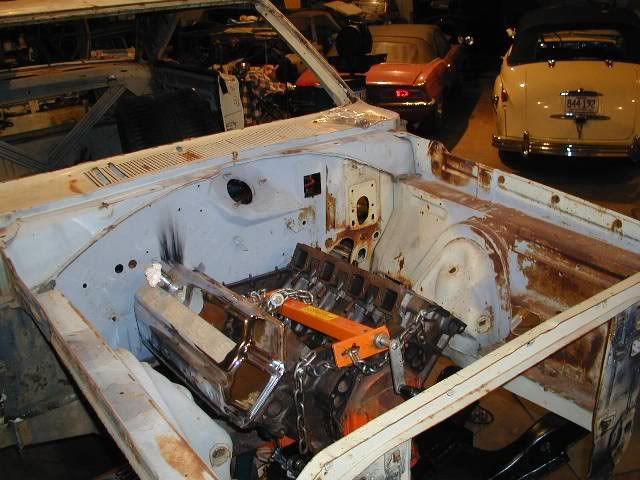
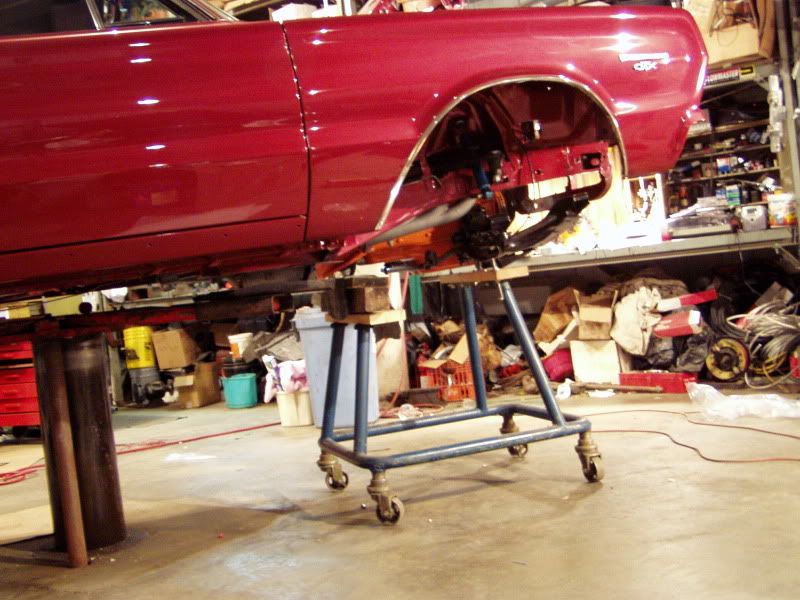
I used my hoist to lower the body over the engine/trans/K-frame assembly. I like doing it that way better than dropping it in from the top, it's easier and less likely to scratch the paint.
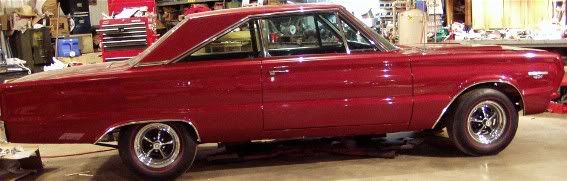
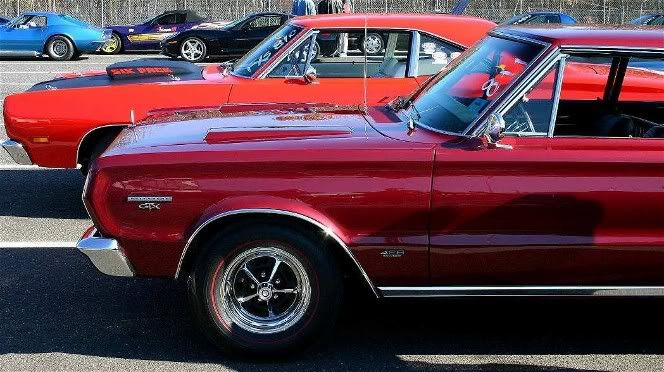
With the stock G70-14 tires and the chrome Mopar Magnum 500 wheels on, it's finally starting to look like a car!
Final assembly continued, (with about 100 new parts from Year One) and I finally fired the motor and test drove the car 2 days before the big race at Martin. Of course there were problems to fix, like using the wrong ignition wire to the MSD box and other stupid stuff. Finally at 6:00 pm the day before the race, I loaded the almost complete car onto the trailer and drove all night from Minnesota to Michigan to make the event.
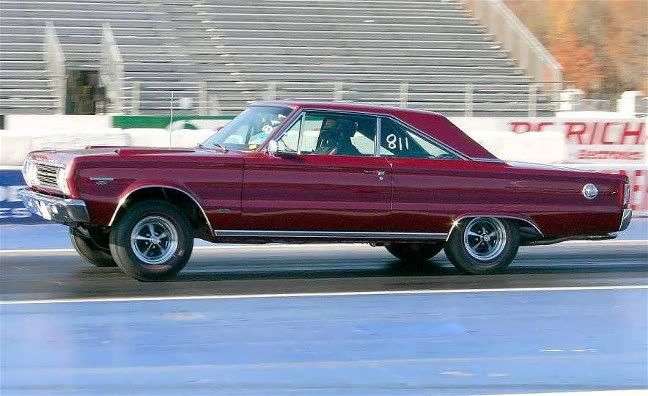
Here is the car at Martin, still missing the hood lip molding and not sitting level yet.

It ended up running 11.30 at 130 in the 100 degree heat it?s first time out, so I was happy with that as a starting point.
Here is a video of the first couple passes down the strip. http://video.google.com/videoplay?do...4160768893941#
The next time out for the car was the Mopar Nats in August of '06, where I continued trying to get the bugs worked out and worked to get the engine and suspension dialed in.
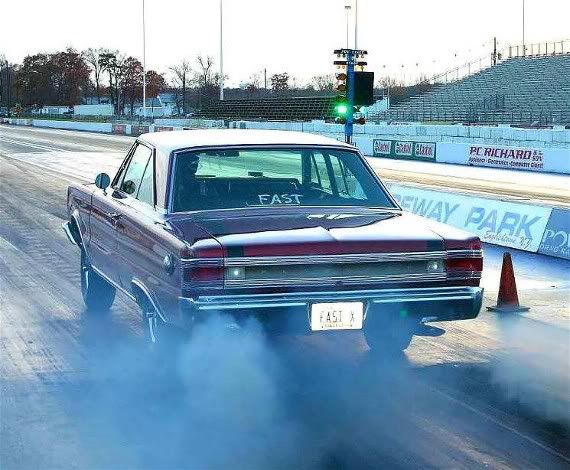
Then the next time was at the F.A.S.T. race at Englishtown in November.
The car earned the "Best Appearing Mopar" award from the staff at E-town. It also ended up running a 10.92 at 130, making it the first F.A.S.T. Mopar in the 10?s and the first 4 speed Mopar in the 10?s! All the hard work was starting to pay off.
Pics from E-town:
Here is a video that Mike Kamm did of the 10 second pass: http://www.youtube.com/watch?v=p-5VHzepqPA
After that I had to put the car away for a couple years to focus on my business, but for 2010 I hope to spend a lot more time hangin' with my F.A.S.T. racing buddys and get the car to run consistent 10's.
Bye for now, Joel
This was a marathon, starting in September of '05 with a goal of being ready for the Spring '06 Musclepalooza. I ended up missing that date, and barely making it to the FAST spring Nationals at Martin in June of '06.
After 5 seasons of pounding on my original 67 Hemi GTX, and running .2 under the roll bar limit of 11.50, it was time to build a clone and do it right with a roll bar. Since the original car is a pretty rare survivor, I was never willing to lighten it by scraping off the undercoating, or drill any holes or make any changes that were more than bolt-ons.
Here is a couple articles about the old green car that needed replacing: http://www.popularhotrodding.com/fea...gtx/index.html
To start the project, I needed to find a rust free body. I don't like to deal with rust. After an extensive search, I found nice body from the south that someone had already shipped to Minnesota. The driveline was gone, the interior was trashed, and the windshield was smashed. Perfect!
The next step was to get it into my shop and clean all the junk out of it, remove the broken glass, and strip it down to the bare shell.
Then I test fitted the Hemi, and since it was a column automatic car, I cut the floor and fabricated a home made "hump" for the 4 speed shifter.
I did some homework regarding rotisserie's, and ended up buying a Whirly-Jig. The body shell was mounted onto the rotisserie and it was trailered to LNE blasting, along with all the other body parts.
LNE used plastic media on all the body panels, and sand on the structural areas. I cut out the inner door panels and the inner quarter panels, and sawed a hole in the end of each rocker panel so he could get his nozzle in and do a complete job everywhere.
After I got the car back home, I spent a day cleaning sand out of it. Every time I rotated the car, more sand would come out of somewhere. All of the removable body parts were E-coated. This is a process where the part is electrically charged and dipped into a tank of epoxy primer. The electric charge sucks the primer into all the seams. Then they are baked dry.
Then I hauled it out Riverside Auto Body in Benson, MN. The small block core support had to come out so that one from a big block car with the opening for the large radiator could be installed.
Then the body was primed, straightened as needed and prepped for paint.
Even southern cars don?t always escape the rust worm, and this car needed a little work on the drivers door.
I fabricated all the various gussets and braces that are unique to Hemi cars, and purchased a set of torque boxes from Harms Garage, and Wade at Riverside welded them all in place.
The inside of the quarter panels and rocker panels were coated with Pore 15, and the pieces that had been cut out of the doors and quarters for access were welded back in place. (After cutting lots of lightening holes in them, of course)
A glossy black primer was used to help show any imperfections, and it was all block sanded.
We chose to paint the car in pieces, then assemble it later so that everything would accessible with the spray gun. The GTX racing stripes were laid out. First the black paint was laid down, then with careful measurements from my original car, the stripes were masked off.
It?s really exiting when the color starts to go on!
Un-masking the stripes:
And then the clear coat makes it really shine!
The bottom and the trunk and everywhere were painted body color to make it easy to clean and to give it a shiny, over-restored look.
Then it was all wet sanded.
Then buffed out nice and shiny!
While Wade was busy with the body work, I was busy getting the sub-assemblies done. The front end was rebuilt, my buddy John Hoppe made me up some aluminum strut rods, and my other buddy, Jeff Danielson brought the K-frame and all the suspension parts into the factory where he works and got them powder coated for free!
The vent window frames were disassembled by drilling out the rivets that hold the stainless part to the chromed pot metal part. The pot metal parts were re-chromed by J&D Plating, as well as the interior garnish moldings, the air cleaner lid, and anything else that needed re-chroming. All the stainless was polished, then the vent windows were re-assembled.
The instrument cluster and glove box door was re-chromed and detailed by CV Vacuum Platers. Turned out nice!
Wanting to get the car as light as possible, I lightened the factory parts where possible, and fabbed up some parts out of aluminum.
After I got the car back home, I got it back on wheels so I could send it to Tin Man fabricators to have a chrome-moly roll bar put in.
My goal for the roll bar was to be legal, light and as discreet as possible. I asked Jim Crews at Tin Man to line up the main hoop with the chrome strips between the front and rear windows, to put the bars as tight to the roof as possible, and to run the rear down bars tight to the C-pillars, so it would all be as invisible as possible. He did a great job!
Once the safety bar was in, I masked off the car and my buddy Jeff helped paint the roll bar. We used the same paint as the dashboard, which was a duplicate of the factory textured flat black. (thanks to Tom Cannon for the paint!)
Next the new headliner from Year One went in, along with the glass. I used the old green tinted side and back glass from a donor car, and sourced a new matching green windshield from PPG.
All new interior and a very correct Hemi-specific wiring harness was also sourced from Year One.
The Hemi is based on a .060 over 1966 block, with a set of '68 iron heads ported by Glenn Knowlton. The crank is an Eagle 4.25 stroker with BBC sized rod journals, Eagle H beam rods and Ross custom pistons. 496 cubes.
I sourced the correct 66-67 Hemi orange paint from Roger Gibson.
I used my hoist to lower the body over the engine/trans/K-frame assembly. I like doing it that way better than dropping it in from the top, it's easier and less likely to scratch the paint.
With the stock G70-14 tires and the chrome Mopar Magnum 500 wheels on, it's finally starting to look like a car!
Final assembly continued, (with about 100 new parts from Year One) and I finally fired the motor and test drove the car 2 days before the big race at Martin. Of course there were problems to fix, like using the wrong ignition wire to the MSD box and other stupid stuff. Finally at 6:00 pm the day before the race, I loaded the almost complete car onto the trailer and drove all night from Minnesota to Michigan to make the event.
Here is the car at Martin, still missing the hood lip molding and not sitting level yet.
It ended up running 11.30 at 130 in the 100 degree heat it?s first time out, so I was happy with that as a starting point.
Here is a video of the first couple passes down the strip. http://video.google.com/videoplay?do...4160768893941#
The next time out for the car was the Mopar Nats in August of '06, where I continued trying to get the bugs worked out and worked to get the engine and suspension dialed in.
Then the next time was at the F.A.S.T. race at Englishtown in November.
The car earned the "Best Appearing Mopar" award from the staff at E-town. It also ended up running a 10.92 at 130, making it the first F.A.S.T. Mopar in the 10?s and the first 4 speed Mopar in the 10?s! All the hard work was starting to pay off.
Pics from E-town:
Here is a video that Mike Kamm did of the 10 second pass: http://www.youtube.com/watch?v=p-5VHzepqPA
After that I had to put the car away for a couple years to focus on my business, but for 2010 I hope to spend a lot more time hangin' with my F.A.S.T. racing buddys and get the car to run consistent 10's.
Bye for now, Joel

Comment