Too busy wrenching but I did take pictures so at some point I'll get them uploaded to a photo hosting that actually works.
28 Jun-2 Jul Update:
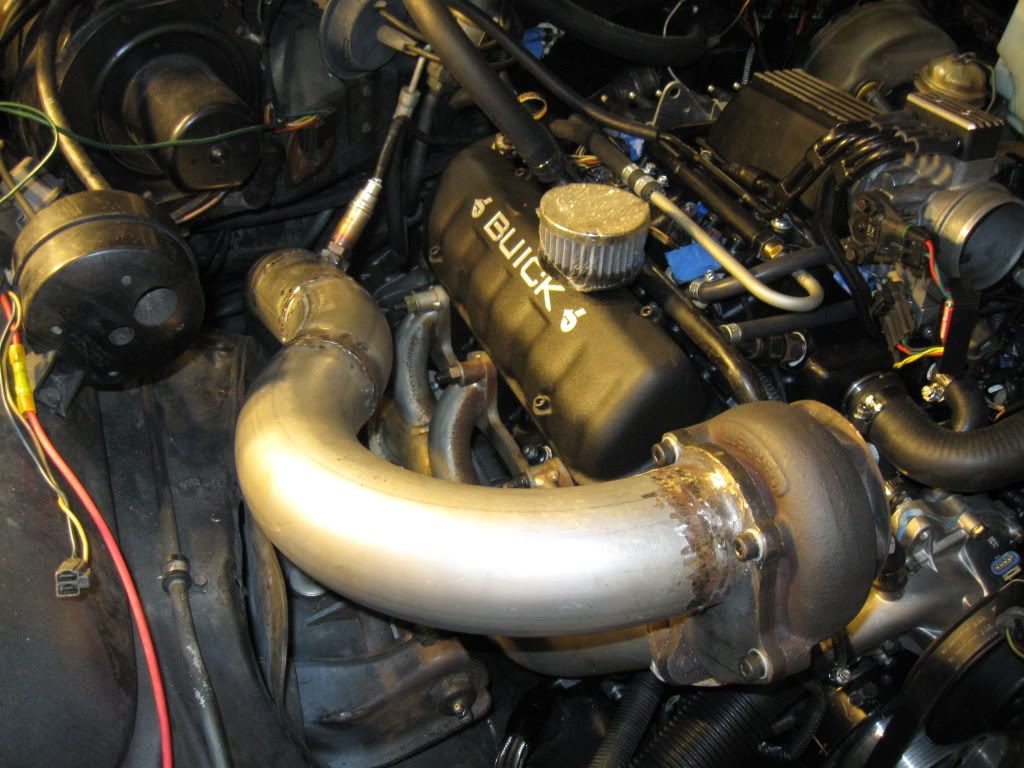
The Turbo6 is test fit and in. The game I'm playing right now is to get the engine low enough in the bay to keep the plenum and vacuum block out of the hood insulation. The 300 V8 frame stands I have are about 1/2in too tall and the parts store motor mounts are way loose on the frame stands so I'm going to need to probably get a set of real GM mounts or more likely go straight to poly mounts. Dropping the engine that 1/2in should get the TB out of the hood insulation and I'm debating on putting the vacuum block on the back of the plenum instead of on top of the TB. Do they make PCV sized 90� hose ends that will work with silicon rubber line?
The clearance issues are the accessory bracket to the front bushing on the upper control arm on the drivers side. The solution is to eliminate that ear on the bracket and run the compressor on 3 attach bolts rather than 4. Unfortunately for me my broken bracket with that ear already gone has a bolt stuck in it and I mangled it trying to get it out. Next tuesday I'll go get the right helicoil for the hole and then drill, tap, and install it then clean up the broken end of the bracket and take it to the car wash and power blast it clean so I can paint it. With a 300 V8 oil pan that I will later cut down to fit the V6 it fits perfectly in the gap between the crossmember and the centerlink.
The Kenne-Bell/ATR headers didn't fit, the external crossover tube hit the crossbar on the passengers side upper control arm so I reverted back to my back up set of Poston's which fit great. Even the supplied crossover clears everything.
Interesting fact, the Nailhead case TH400 is right around 3in longer than the BOP-C case unit so I need a longer front drive shaft section and either a new trans crossmember or fabricate one that moves the mount to match the engines current location.
Things going well I think I can start plumbing the engine next weekend and start looking into the exhaust routing. I bet I'm going to be delayed on installing it for good by the lack of engine mounts though.
You know how much of a shaker a V6 is even with a split pin crank. Solid mounting these motors destroys them and I am not driving a solid mount motor on the street. I'm working with HRPartsNStuff to get me hooked up with a set of mounts I can modify to fit the Riviera. Probably going to be a semi custom job wedging the frame stand piece off of thier TTA kit inbetween the poly tubes of thier G-body kit.
I'm not going to date this because I've been working on all the before mentioned problems for quite sometime, just slowly so I'm going to categorize them rather than date them.
Solution to the motor mount issue:
I took some 3/16in steel plate and welding some 3/16in wall thickness tube that was supplied by HRPartsnstuff as part of a custom poly motor mount set to make the basic frame stands. My 120V Lincoln MIG didn't have the juice to properly weld them so I did about 50% of the work with it then switched to my commander's 220V Miller MIG that handled the stuff no problem. I then welded the frame stands to the frame, again tacking them in with the 120V then fully welding them with the 220V. This puts the engine as low as I can get it without the backside of the compressor hitting the upper A-arm on the drivers side and still leaving enough room for the engine to torque over on the passengers side. Nailheads are narrow engines because it fit with plenty of side clearance.
Oil pan and pickup:
I took a stock 300 V8 Buick pan and cut about 4.25in out of the middle of it then cut the nose off of the pan and welded them together. Well it actually wasn't that simple, not in the least. What it turns out is that the V6 does not have the same nose pattern as the V8 though the rest of the pan is the same. Looking back I should have left the mounting boltholes for the front 2 on the block in place and then trimed and cut the nose piece with the timing cover area on it down to fit around it but instead I cut the nose off of the V8 pan then hammered the rails flat then redrilled the holes and bent the rail flange back where I didn't need it for the washer. I also welded the inside of the pan with a cover plate that overlaped the 2 sections giving me what I hoped was less chance at leaks. When I tested the pan for leaks though it did have 3 or 4 tiny pinholes that soaked through and I couldn't get all the transmission fluid out of the leak passages so that lit on fire while I was welding the holes shut but it did show me where the other holes where. I finally skimed the outside of the pan with oil resistant epoxy to seal it up and to make it look better when I painted it.
The pickup tube was another challenge. The 300 pan fits in the narrow space between the centerlink and the crossmember so its narrower front to back than the V6 pan so the pickup tube was 3/4in too long and I had to cut that out of the tube then reweld the tube back together then bend it gently till with no gasket a carb stud taped to the bottom of the pickup made it just barely hover off of bolting down. I then welded in a modified V6 oil control baffle and painted it
Oiling system filter adapter relocation plate:
This was one I thought I had done. I took a piece of 1/4in aluminum and drilled the 5 holes for the mounting bolts and the outlet fitting in it and polished the backside so it would seal however I baddly butchered the 3/8in NPT threads tapping it so I epoxied the fitting in place with an oil pan drain plug plastic washer as a vibration seal. I then found out I need to machine a passage to let the oil to the top of the bypass piston and.... I drilled the dome over the piston on the wrong side of the plate. So I made a new one with the dome and transfer slot on the right side, no mangled threads, and the fitting clocked exactly where I want it when tight.
Tonight I was trying to put the crank bolt in and it stripped a bit bit so even though I thought I had enough thread engagement on the ARP bolt its too short, I'm going to call them and see how much for a 3/4in longer one and if its a whole lot I'll just go for a grade 8 from the hardware store. The factory only put grade 5's in it but I'm stepping up the power and have more that need to be controled with that bolt on my hybrid oil pump setup.
Wheww.... thats a lot of stuff but its been quite awhile since I updated anything.
22 Sept Progress:
Oil pan is on and knuckle torqued down. The torque on it is rated in in-lbs so I grabbed the rachet by the head and just used that as the "tight" spec they recommended. I also got the oil filter adapter blockoff plate rough polished with sandpaper and scotchbrite (amazing how well that works when you know what you're doing) and installed. Had to clearance it a bit to get it to sit right against the block and cover but its on. I also replaced the intake manifold and retorqued it and put gaskets under the valve covers and got the engine pretty much ready to pull off of the stand tomorrow and put the back freeze plugs in then mate with the transmission and dunk it for the transmission mount mockup later.
ARP had a 1in longer crank bolt that I ordered and should be arriving in time for me to put it together on Sunday afternoon and that will allow me crank the engine over by hand and finish mounting the accessory drive. Its going along well here but I'm about to take about 1.5 months off with my best friend's and my weddings coming up in the next 3 weeks.
Thanks for the update. Maybe you should be focusing on the weddin', but maybe it's good to get away to the shop and unwind doing something you actually KNOW how to do. No (straight) man knows what to do at wedding time, except to do what she tells you to. Don't forget to have fun at the wedding and reception - lots of folks forget that part. Remember, I've had more experience at this than most, so you can trust my input.
Likely to be near the last before my wedding as what I have the stuff to do elsewise is small piddly stuff that I'm not likely to report.
The engine is in the car and I hope the manufacturers of these poly motor mounts are right about less than 1/4in deflection because I'm really close to putting the alternator into the hood bracing and I'm going to have to trim a hood trim stud down so it won't hit the vacuum block. I might get the transmission crossmember done before the wedding but that's my last milestone I'm after before then. After that it comes back out and the wife and I get to enjoy putting it back in for good.
Remember the flying solo thread? I have been taking them off and on but the wife doesn't want me to use photobucket and I'm too busy to get Picasa setup right. I have pictures, just wait for daylight so I can take some good ones without the flash messing them up too. Probably next week's project is getting the pictures uploaded.
Been working but not so much documenting as I go. We're snowed in this weekend so here's what's been going on.
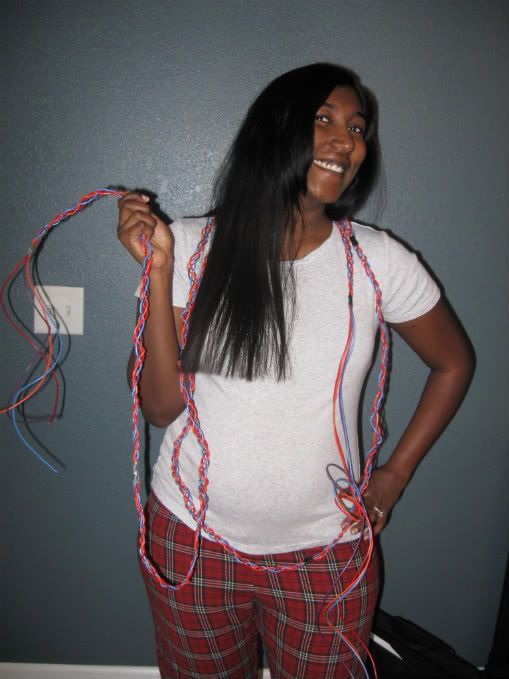
Auxillery wiring harness for rear mounted accessories:
Wife and I braided 12ft of 16Ga wire in a 4 cord flat braid. Red is switched 12V for the rear fuse box, Blue is a spare, Orange is starter command for the rear mounted solenoid, and Purple is fuel pump command.
She's almost in her third trimester so this is how she stays involved with working on the car. She braided, I kept the spools from getting tangled.
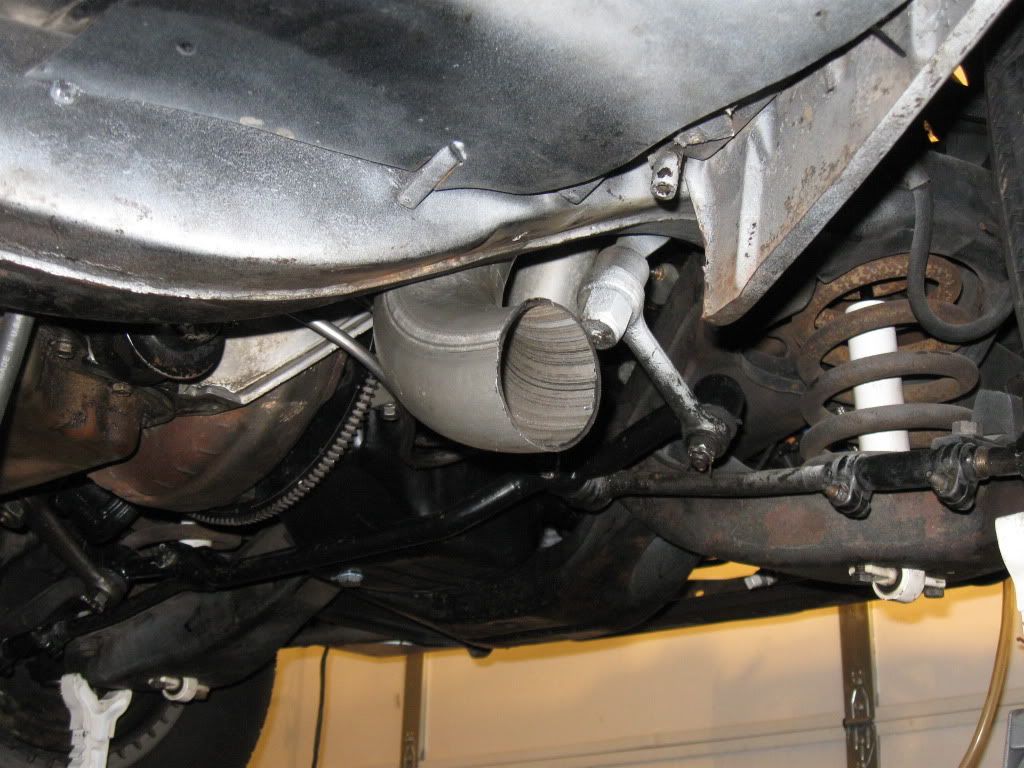
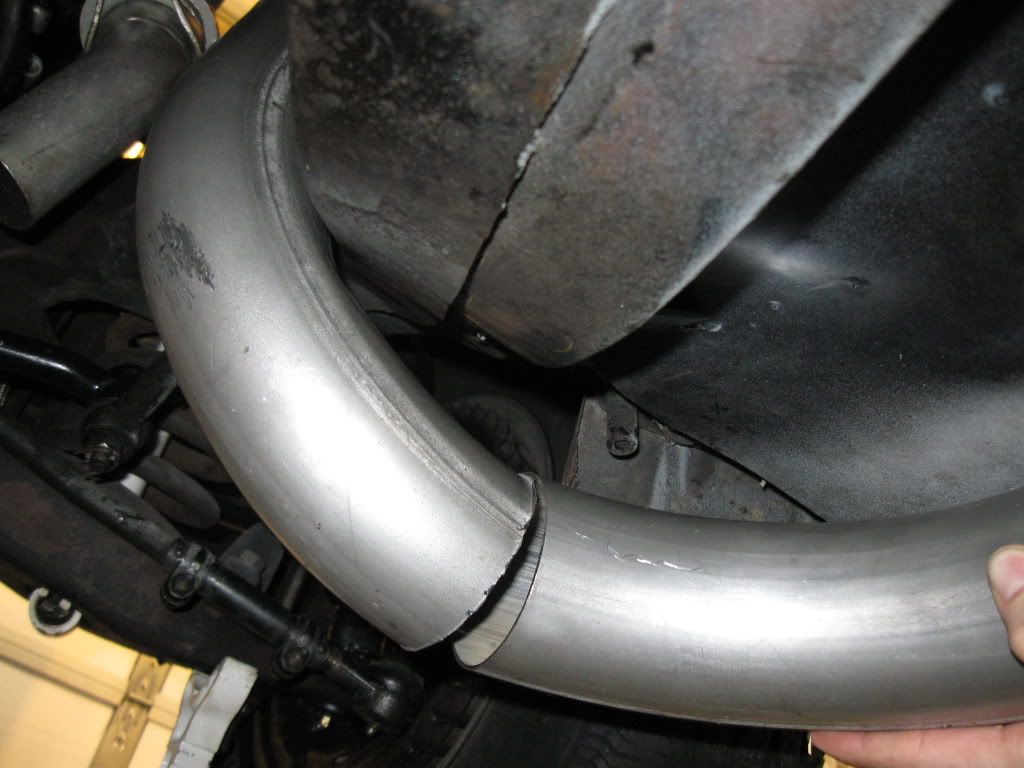
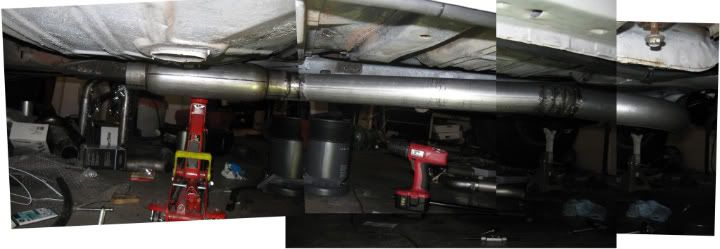
Exhaust pipe mounting and hangers. If you remember this stuff:
For messing around with making the second bit of the downpipe, well I've continued on and its now past the middle of the 'X' with the resonator bullet mounted.
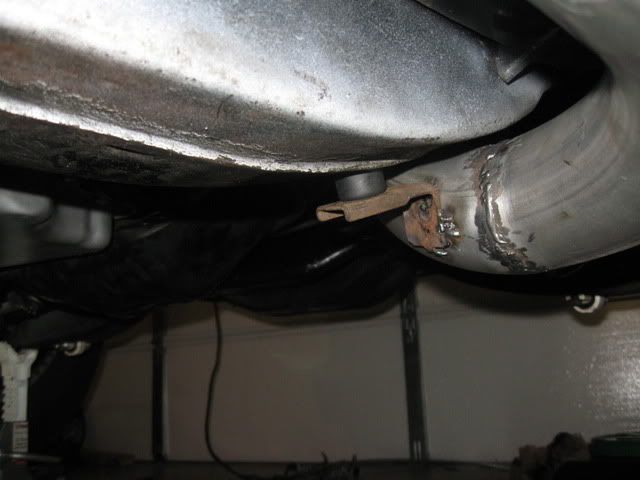
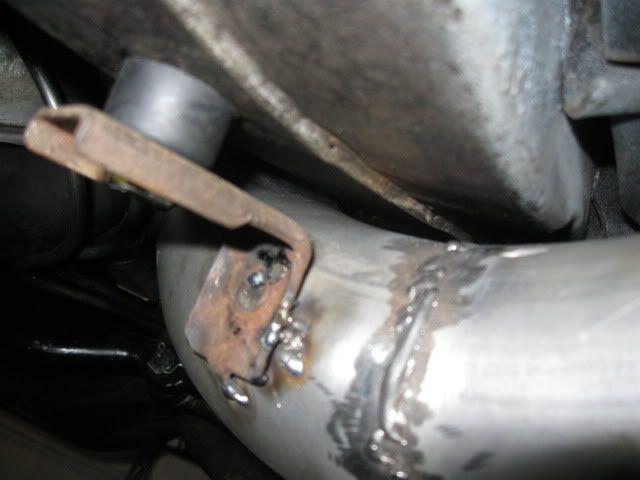
held up in the front by this mount:
Yes, that is a swaybar endlink bushing, and the mount actually has play in it because I enlarged the hole in the bracket to match the size of the shoulders on the bushing. I've also cleaned up the welding quit a bit. that was just the prelim stuff for mockup.
It's heldup by a standard hanger just in front of the muffler.
 Tweet
Tweet


Comment