-
Very Nice Indeed!Last edited by silver_bullet; August 20, 2018, 06:34 PM.Leave a comment:
-
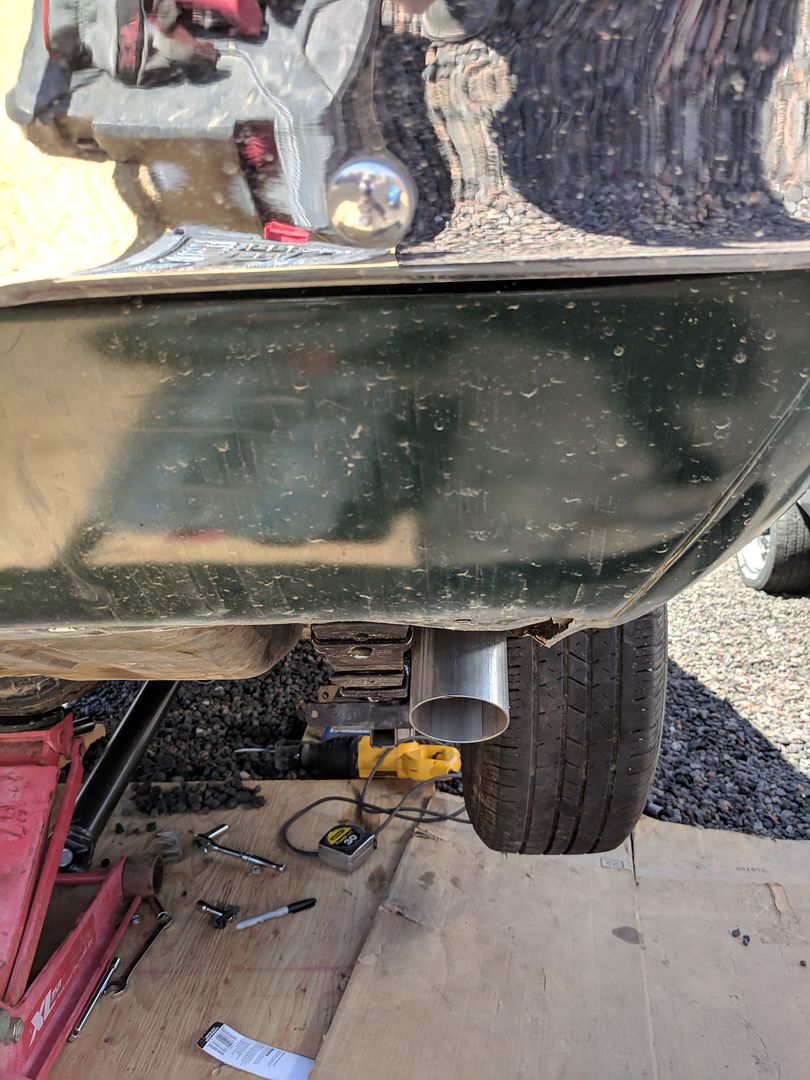
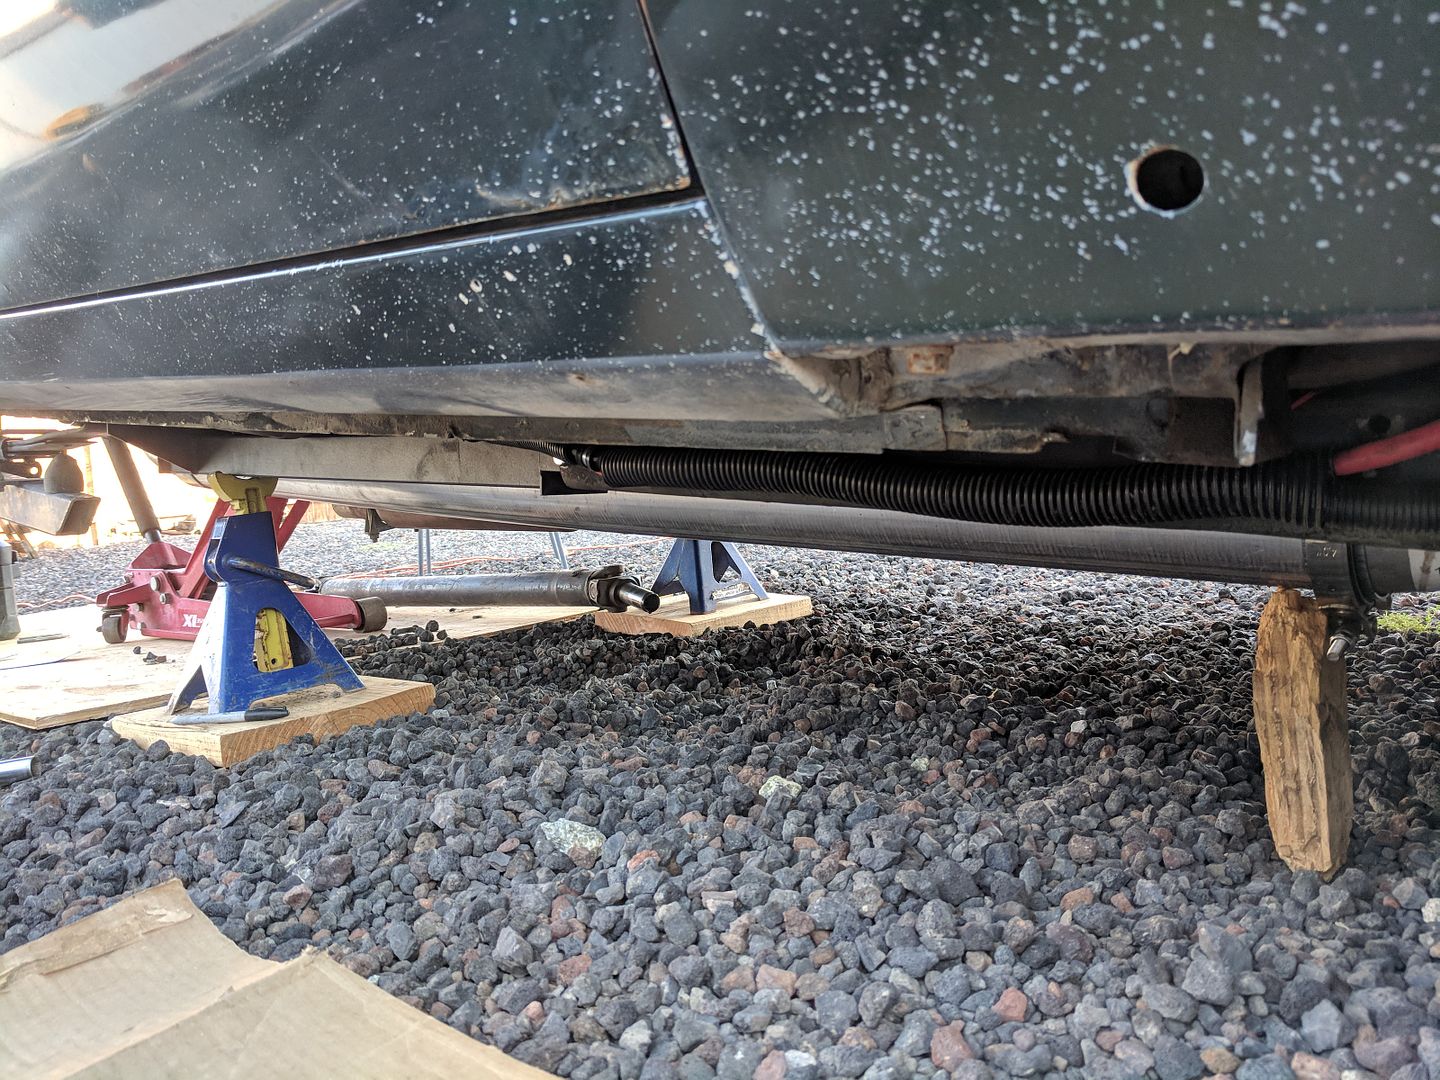
Finished the rear axle swap. Ended up being a bigger pain than I anticipated because I forgot that the axles had to be pulled to change the brake backing plate. Then the backing plate of the drum brakes had a smaller diameter hole than the disc brake with the 9". I tried purchasing new backing plates but the plates I bought ended up having a smaller hole than the description online stated. So I ended up getting a hole saw out and opening it up. I would have just stuck with the disc brakes except they are on a 5x5" bolt spacing and my Firebird rims wouldn't fit. Then scope creep happened, I put new leaf springs and bushings in too.
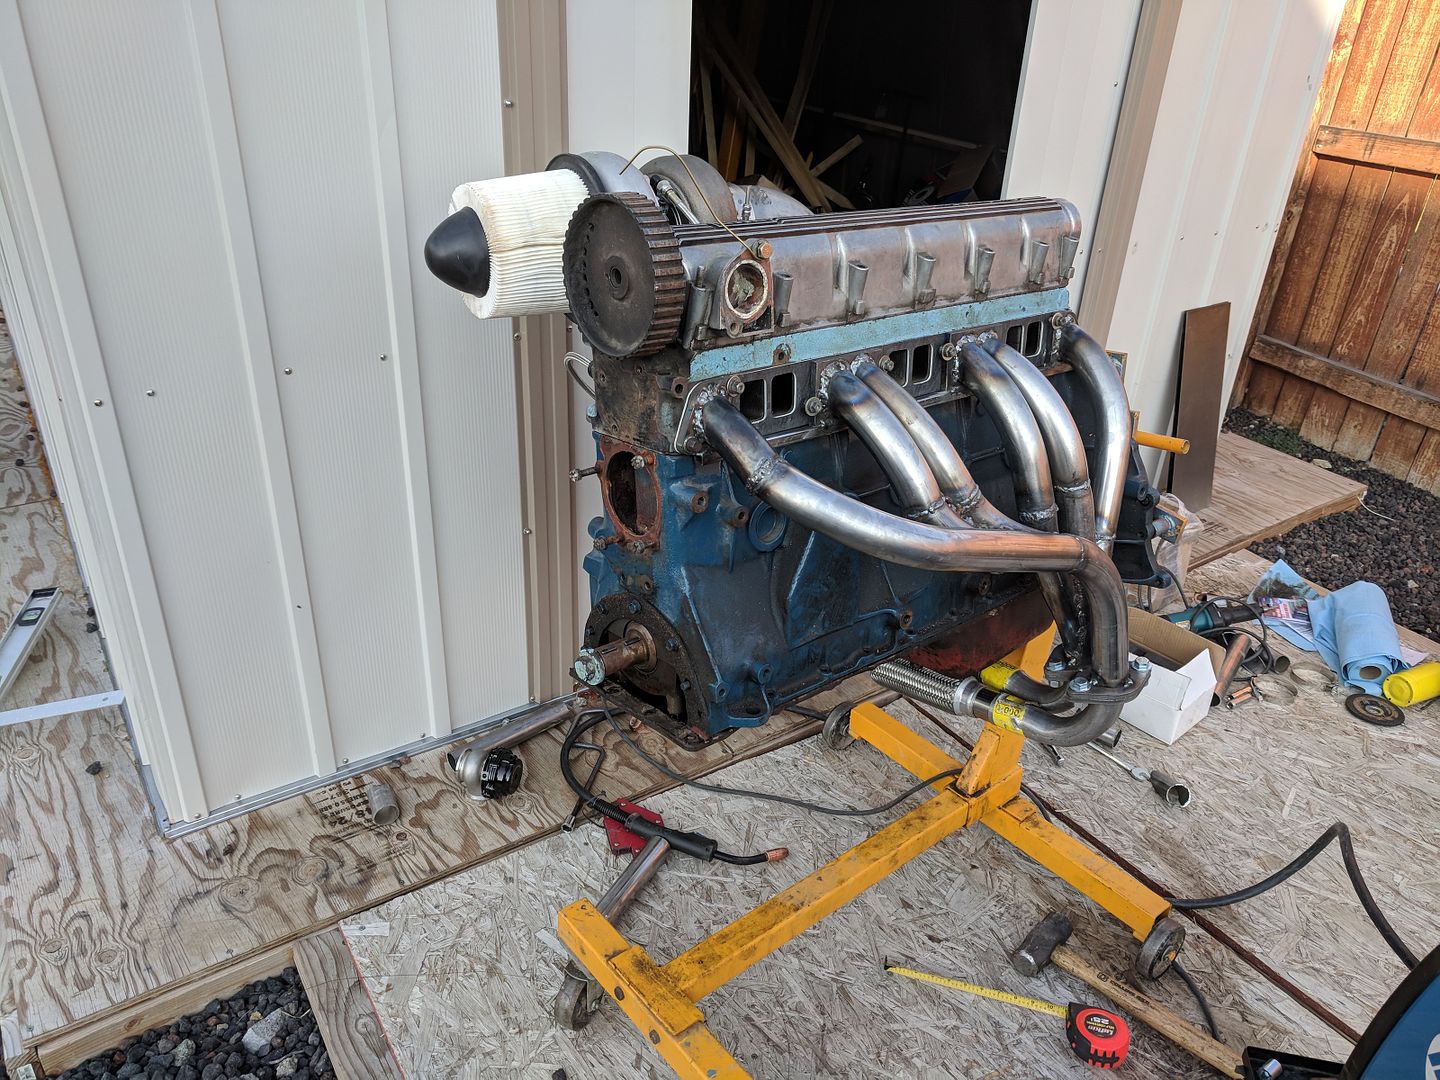
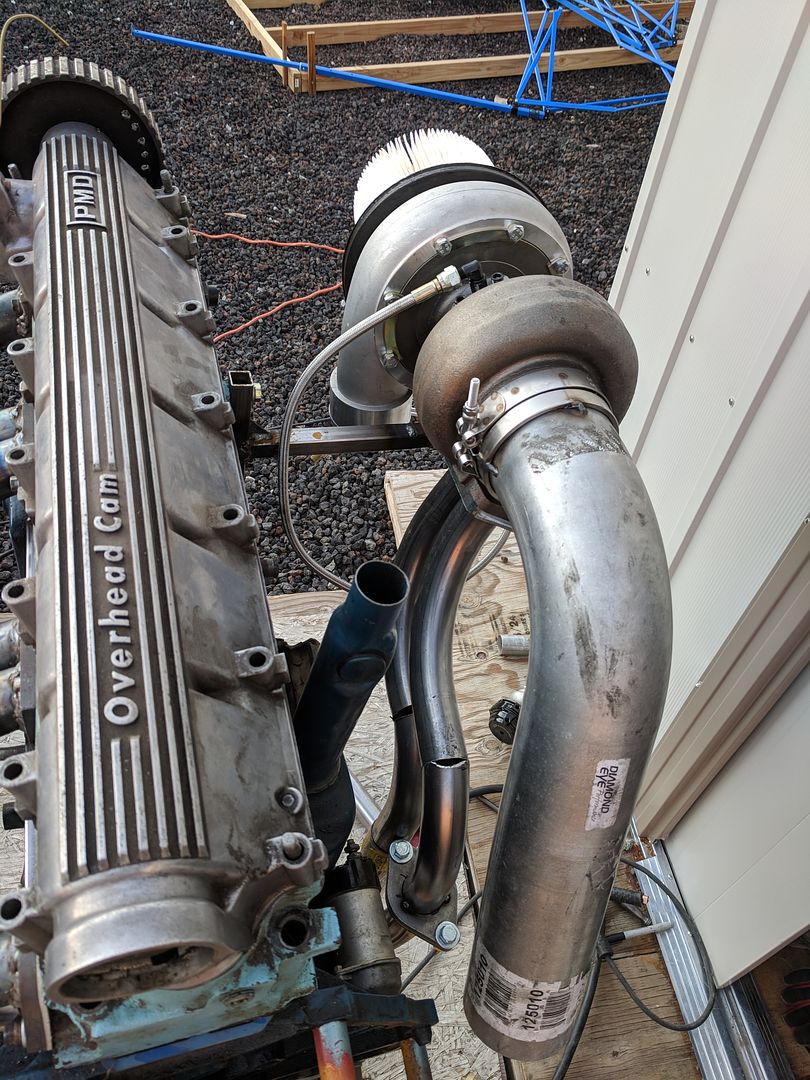
Then I started on the exhaust. Finished tack welding the turbo header pipes together and did about half of the finishing welding before the wind picked up. So I switched gears to the main exhaust. 4" from the turbo to the rear axle then 3" over the rear.
3" over axle pipe fit as advertised. I aspire to some day have fireballs popping out of this on the 2-step.
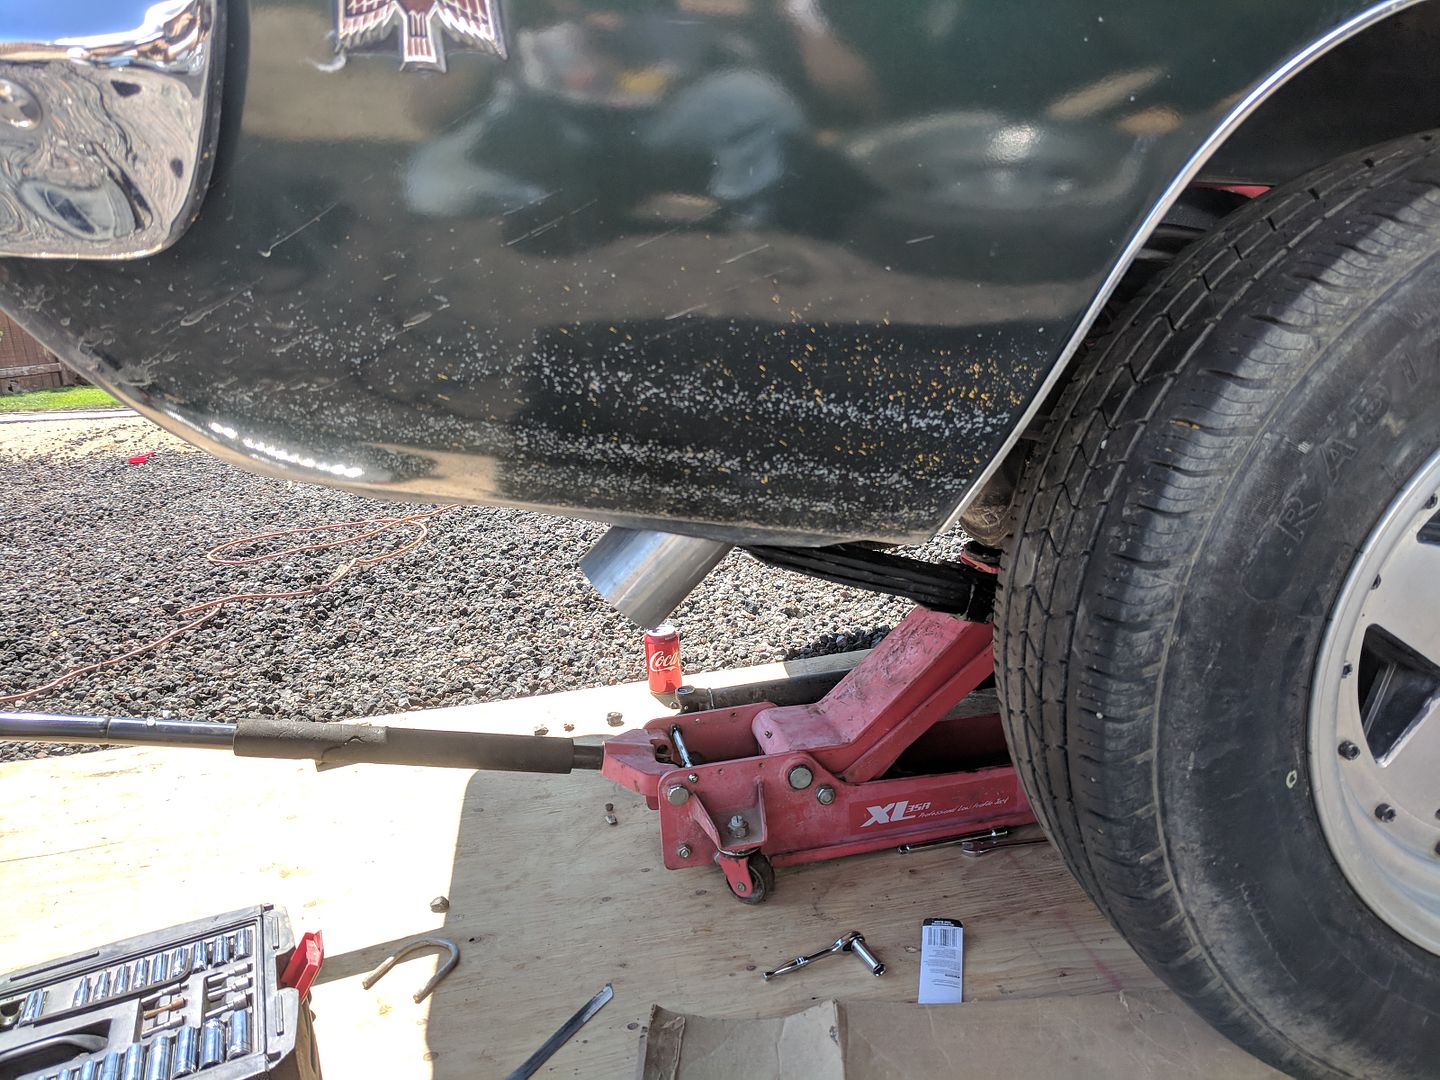
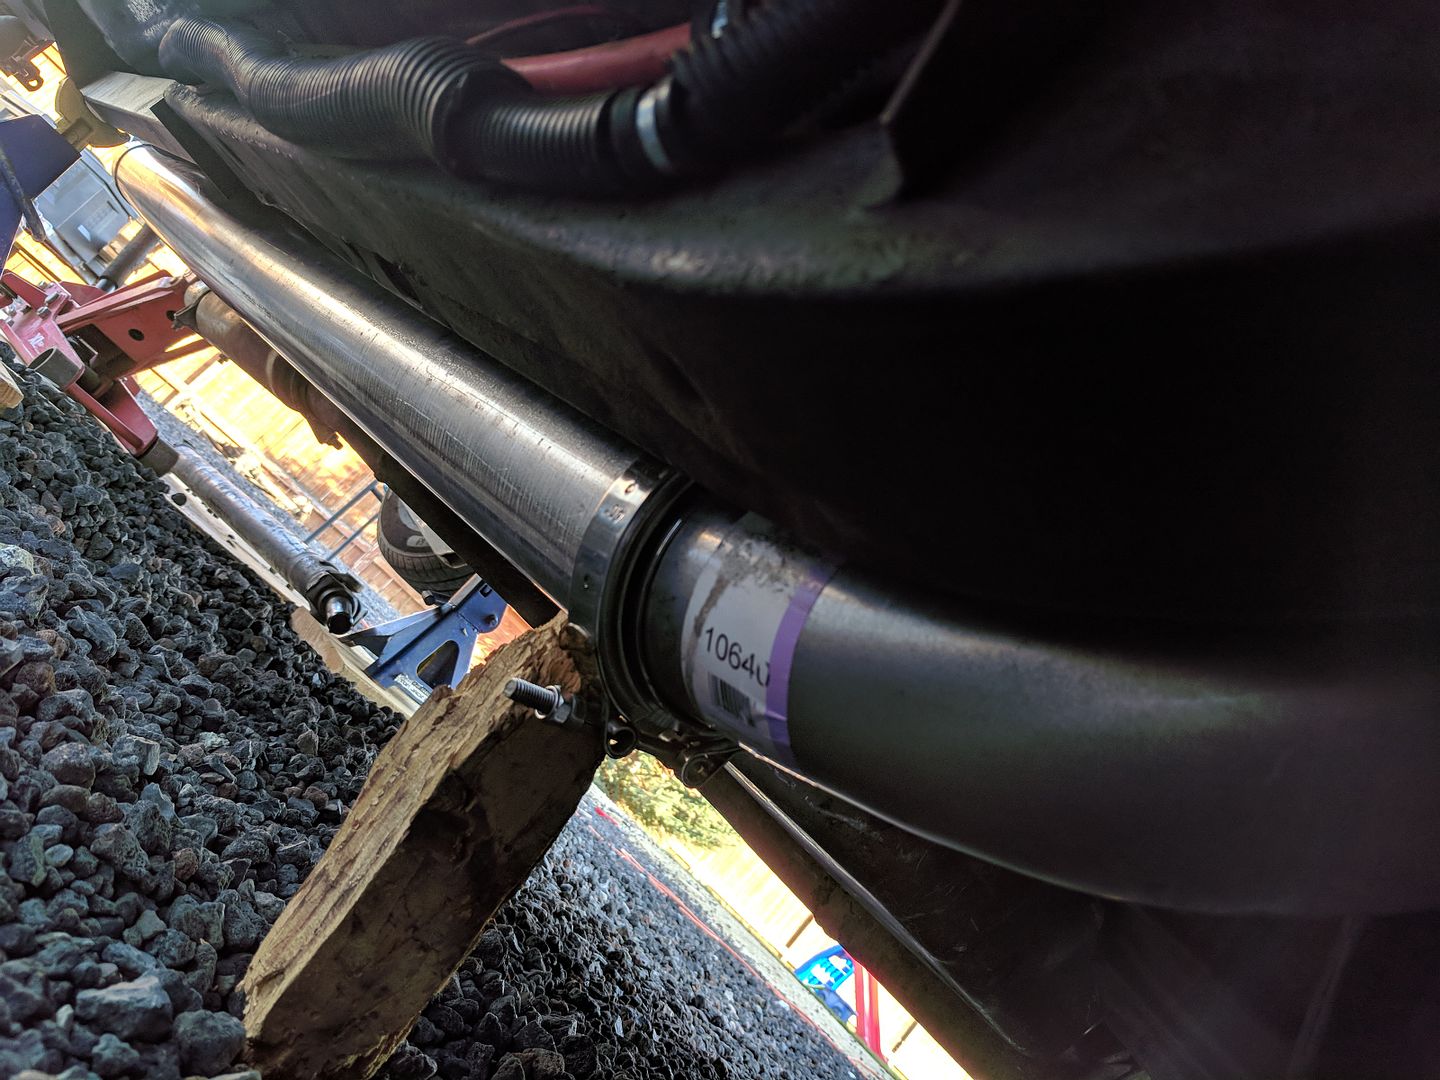
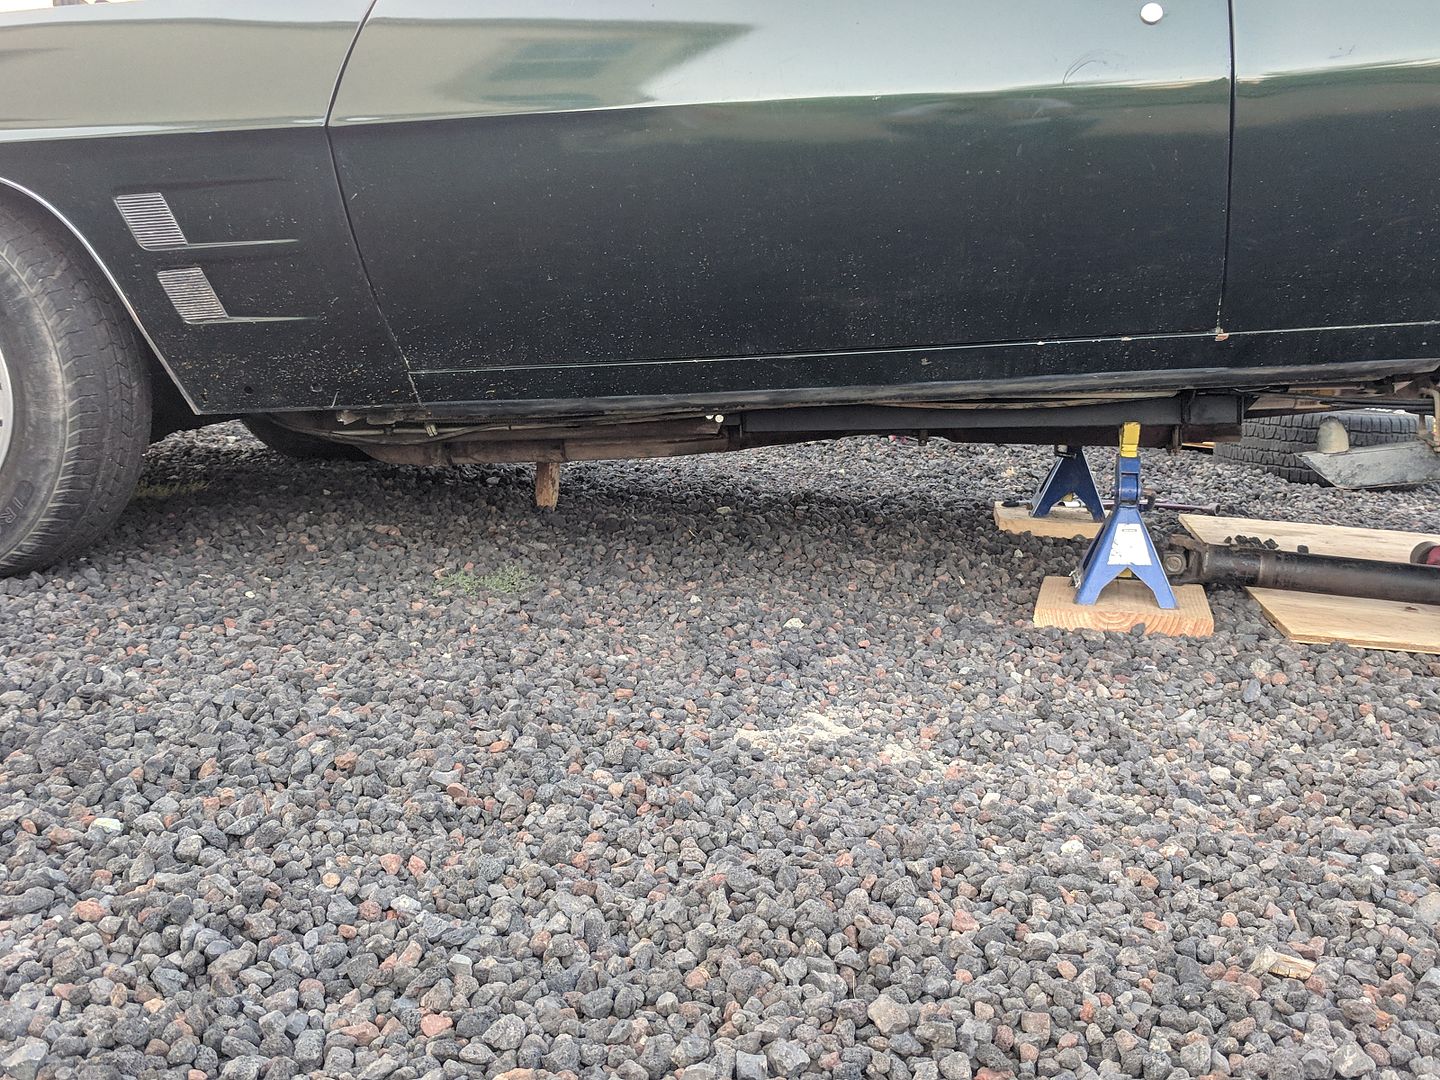
The 4" pipe fit surprisingly well. It does not even hang as low as the 2.5" system I have on the car. I did end up flattening a 12" stretch by about 3/4" to clear the floor board of the rear seat. I need to add two exhaust hangers for the long stretch of pipe. I have a piece of wood holding up the front of the exhaust system because I do not have the v-band flanges welded on yet. If you look close I installed a driveshaft loop as well.
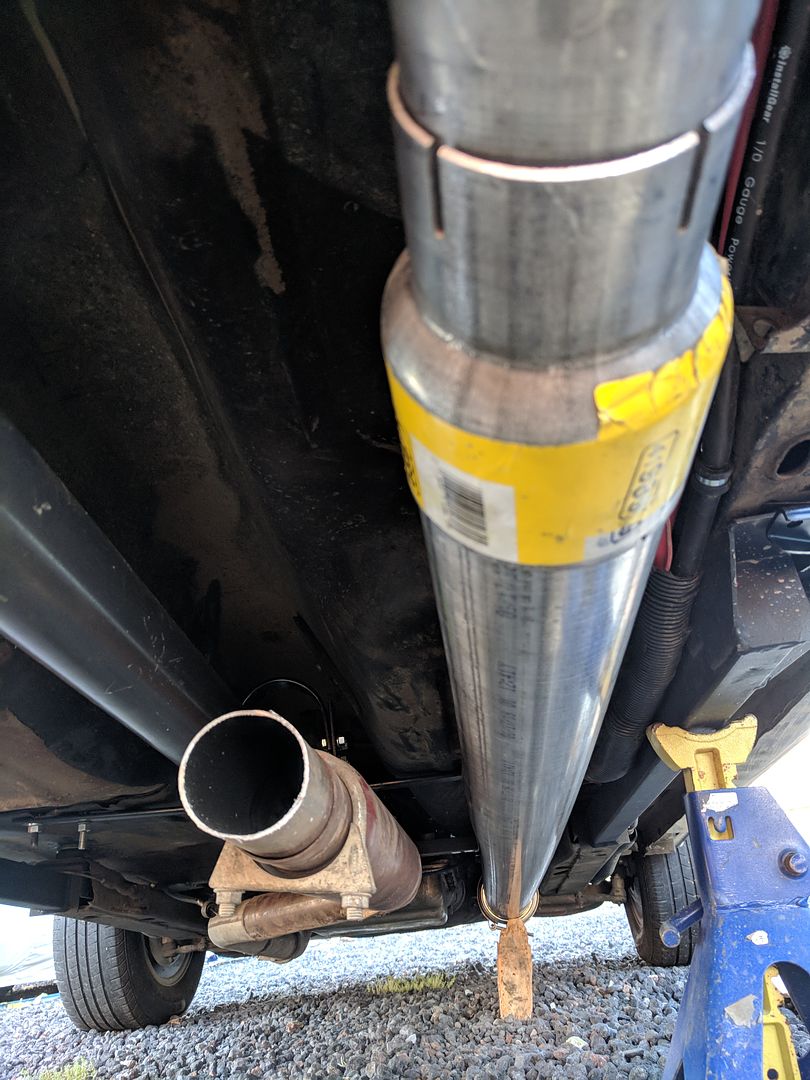
From the other side. Cannot even see it past the 2.5" exhaust.
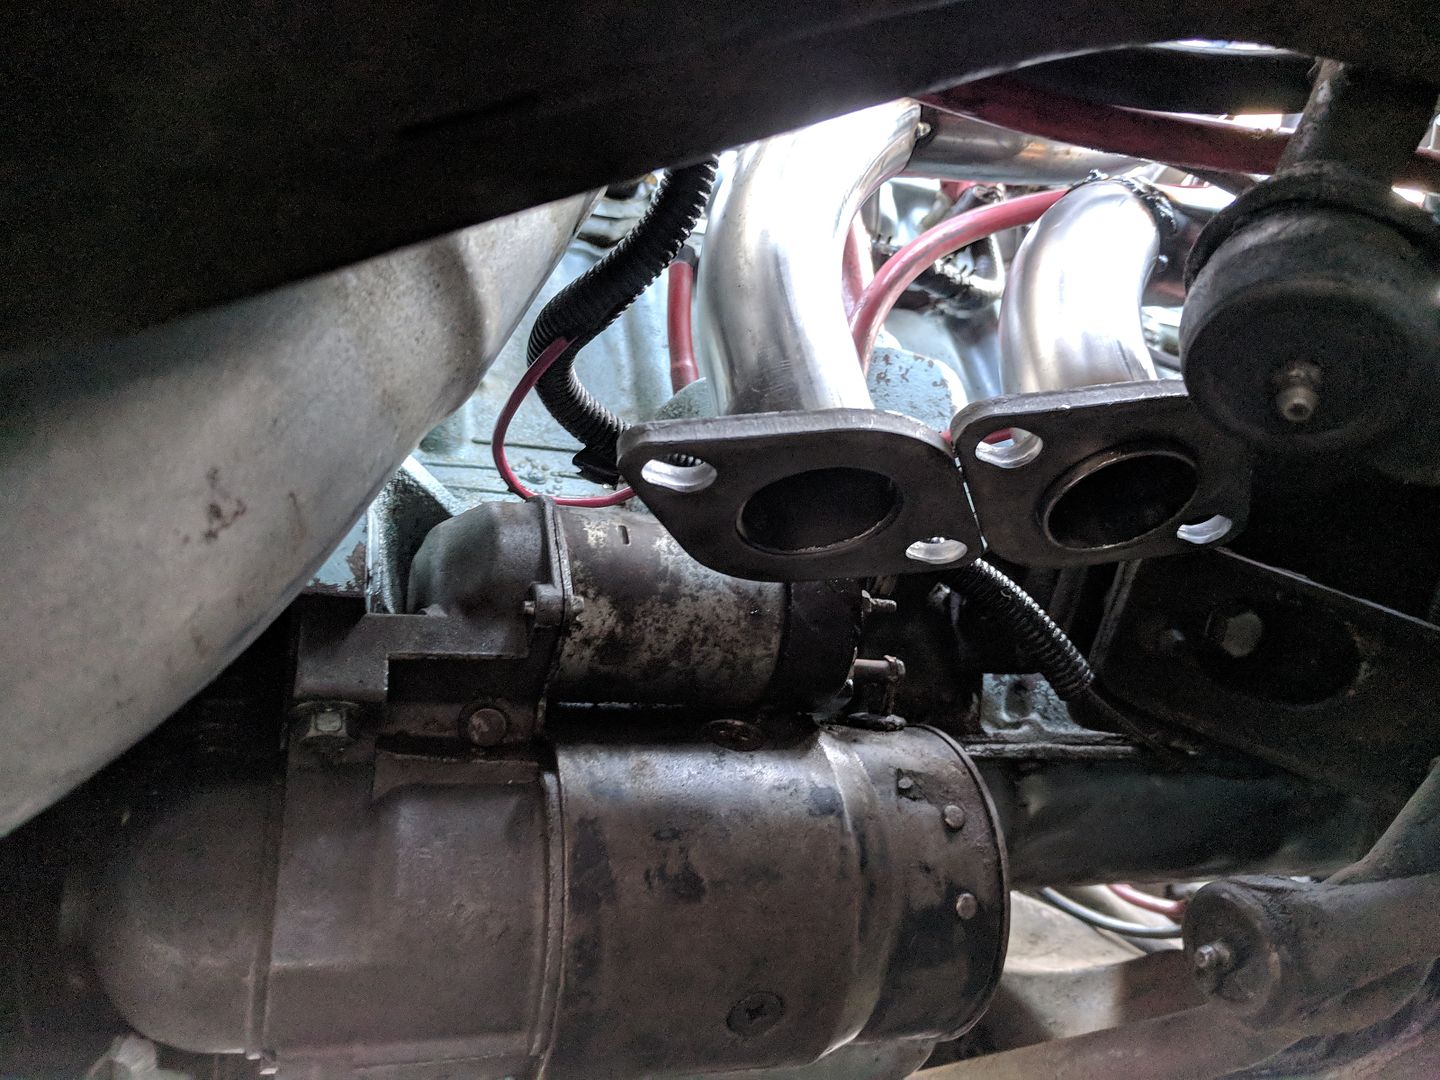
I am going to need to re-route a handful of wires and fluid lines to clear the exhaust pipes, but nothing too bad, mostly needs good underhood housekeeping. The exhaust cross under is definitely going to be the low point of the car, and I'm sure I'll need to re-visit it sooner rather than later.
Next up is finish welding the whole system up, checking the best I can for air leaks and addressing accordingly, run a large pipe cleaner or such through the system to knock all the crap out of the tubes.
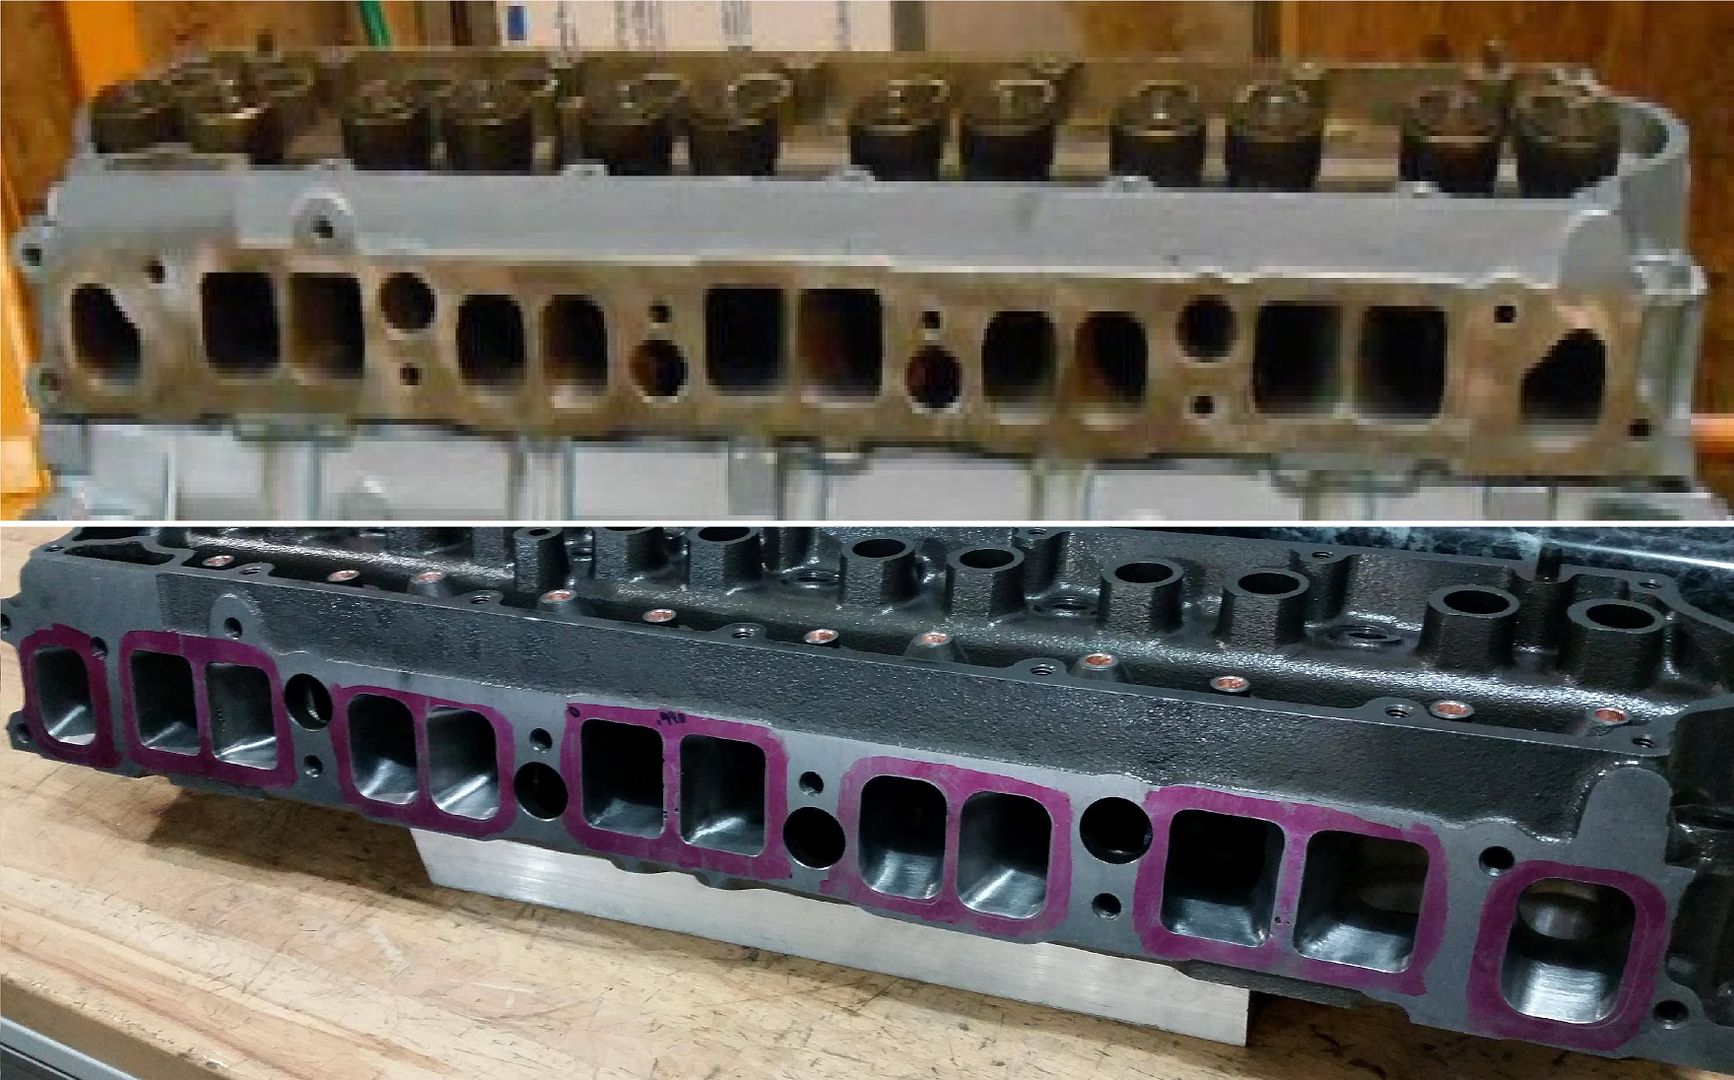
Due to time constraints, and going to the drag strip, I'm not going to put my good short block and head in it until after Drag Week. I do not even have the short block back yet. I have another 250 in the shed I'm going to open up and take a look at the rings and bearings and it may end up being my turbo test mule. If I put that short block in, I may put new NOS valves in my current cylinder head and clean up the ports a bit more than I have to match the intake and header port sizes. I wouldn't worry too much about the exhaust port being smaller than the header, but would want to gasket match the intake port with the intake runners.
Leave a comment:
-
Those anti ageing pill are working well. Hope Drag week goes well for you TSB.Leave a comment:
-
I'm going to put exhaust wrap on most the pipe. I put the flex joint under the oil pan hoping it disappates heat better than the straight pipe. I also intend (time allowing..) to put a heat shield around the exhaust pipe in places like the oil pan, starter and intake manifold. Still waiting for the exhaust flange to work on it.
Started the rear axle swap. Pulling out the 8.5" with 3.42 gears for the 9" with 3.89 gear. I need to move the wheel studs from the 5" to 4.75" holes and swap the brakes. Hope to finish tomorrow.

Leave a comment:
-
If you really want to get fancy, once the header is assembled, you could ceramic coat it. Does a shockingly good job at keeping heat inside the pipe and away from nearby things that don't want the extra heat.
Leave a comment:
-
With the pipes running under the pan like that have you considered external oil filter/cooler to keep its temps down?Leave a comment:
-
Air with soap and water will do. I bought a stopper, just need to test it. May do that today. I have exhaust putty on hand!
Finally got the transmission in and driving. Had some electrical issues when my ground wire pulled out of a connector unbeknownst to me, but got that sorted. I didn't initially believe the line pressure being read by the sensor because it was so high, excess of 250psi, but put a mechanical gauge on it and it confirmed.
The way it works is the Microsquirt transmission computer commands the pressure relief valve to open or close a certain amount, but does not directly command a pressure. So a sensor is needed to see how much pressure it's making at a given opening. Fortunately there is plenty of control on it and I am easily able to bring it down to 90psi in neutral, 150psi under normal driving conditions and 200psi at WOT. This is good for the transmission, transmission pump and for the engine thrust bearing surface.
I have not foot braked the converter, but locking it in high gear and hitting the throttle puts the rpm right at 2,700rpm while the car continues to accelerate. It really does not start moving the car until about 1,500rpm, which is a new experience to me. Fortunately it's a lockup style converter so shouldn't have any issues slipping in the long run. I can lock it up in 2nd gear at low loads. I have a terrible video of going for a test drive at 10:00pm, but photobucket is taking its sweet time loading it up.
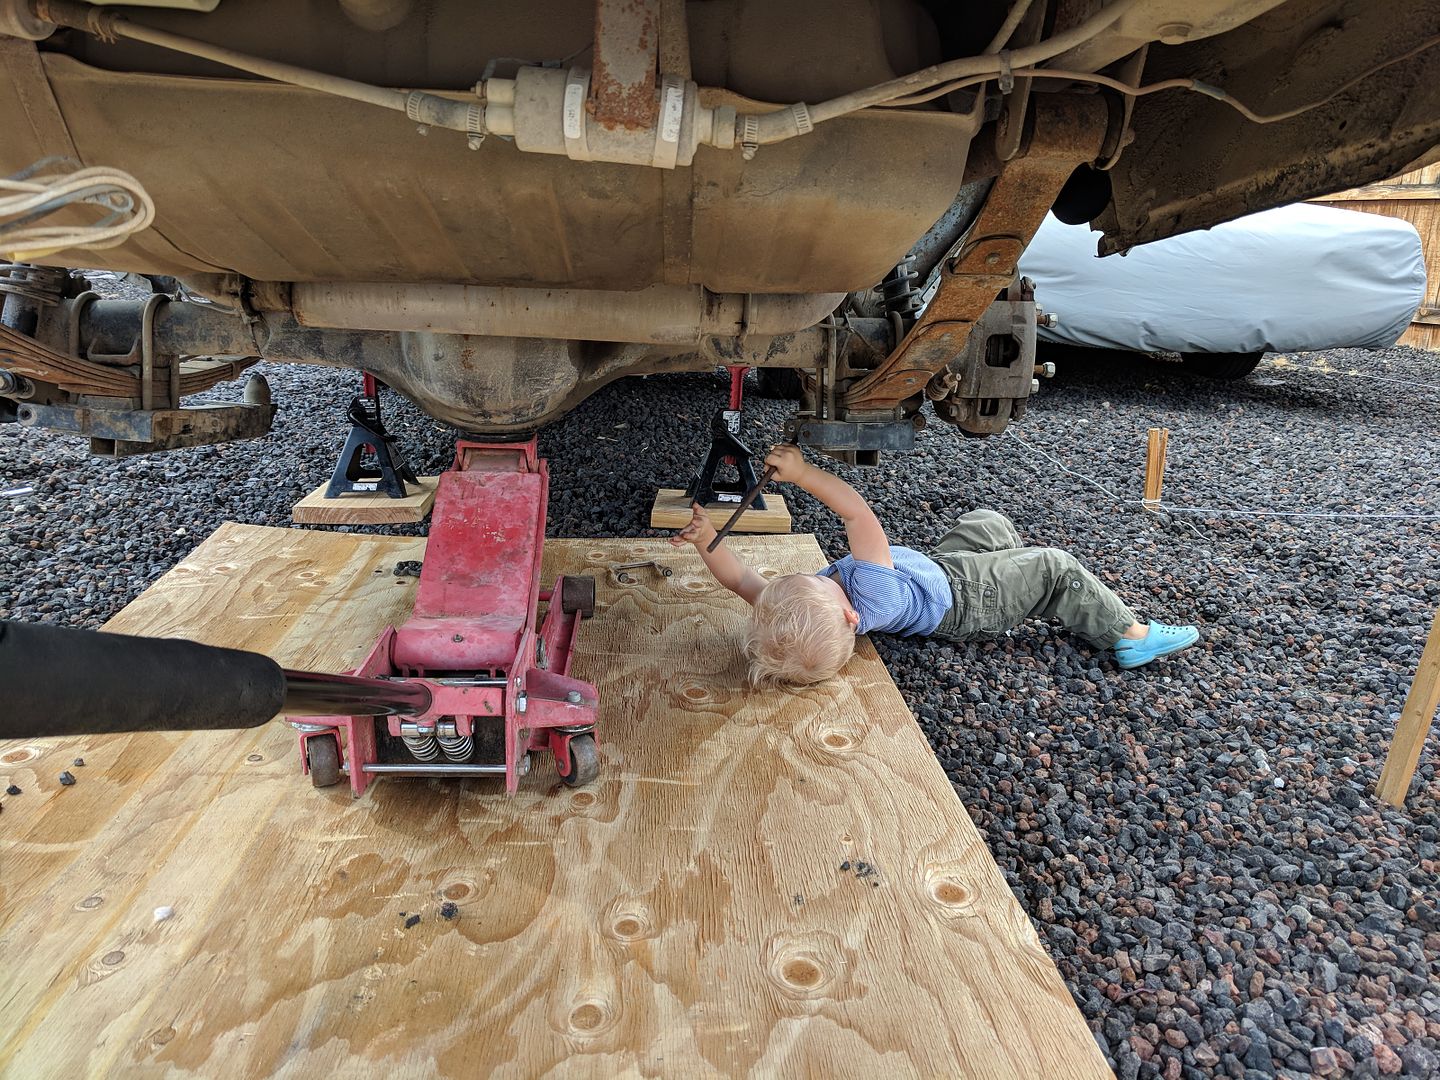
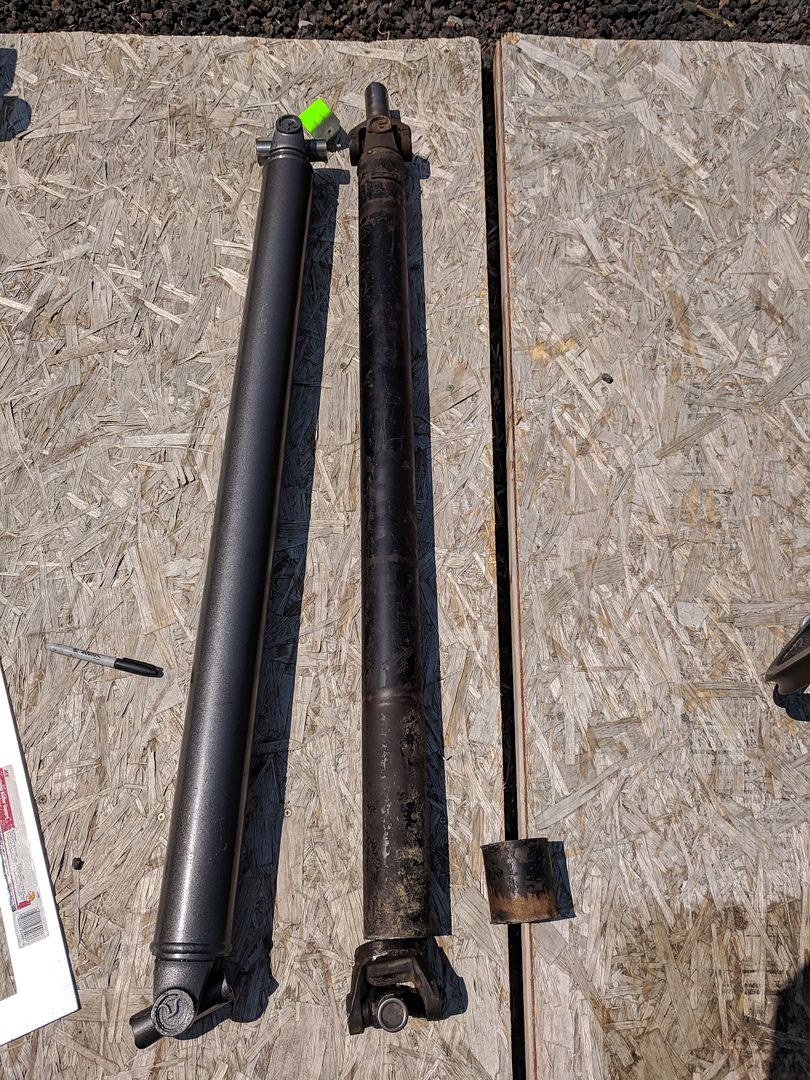
I'm using a ~2005 4L60e and its longer than the 200-4r I removed by about 3". This is the second time I've cut the driveshaft and welded it back together, lol. However this time, the shortened driveshaft just has to get me by until I put a 9" rear axle in then the new driveshaft on the left will go in.
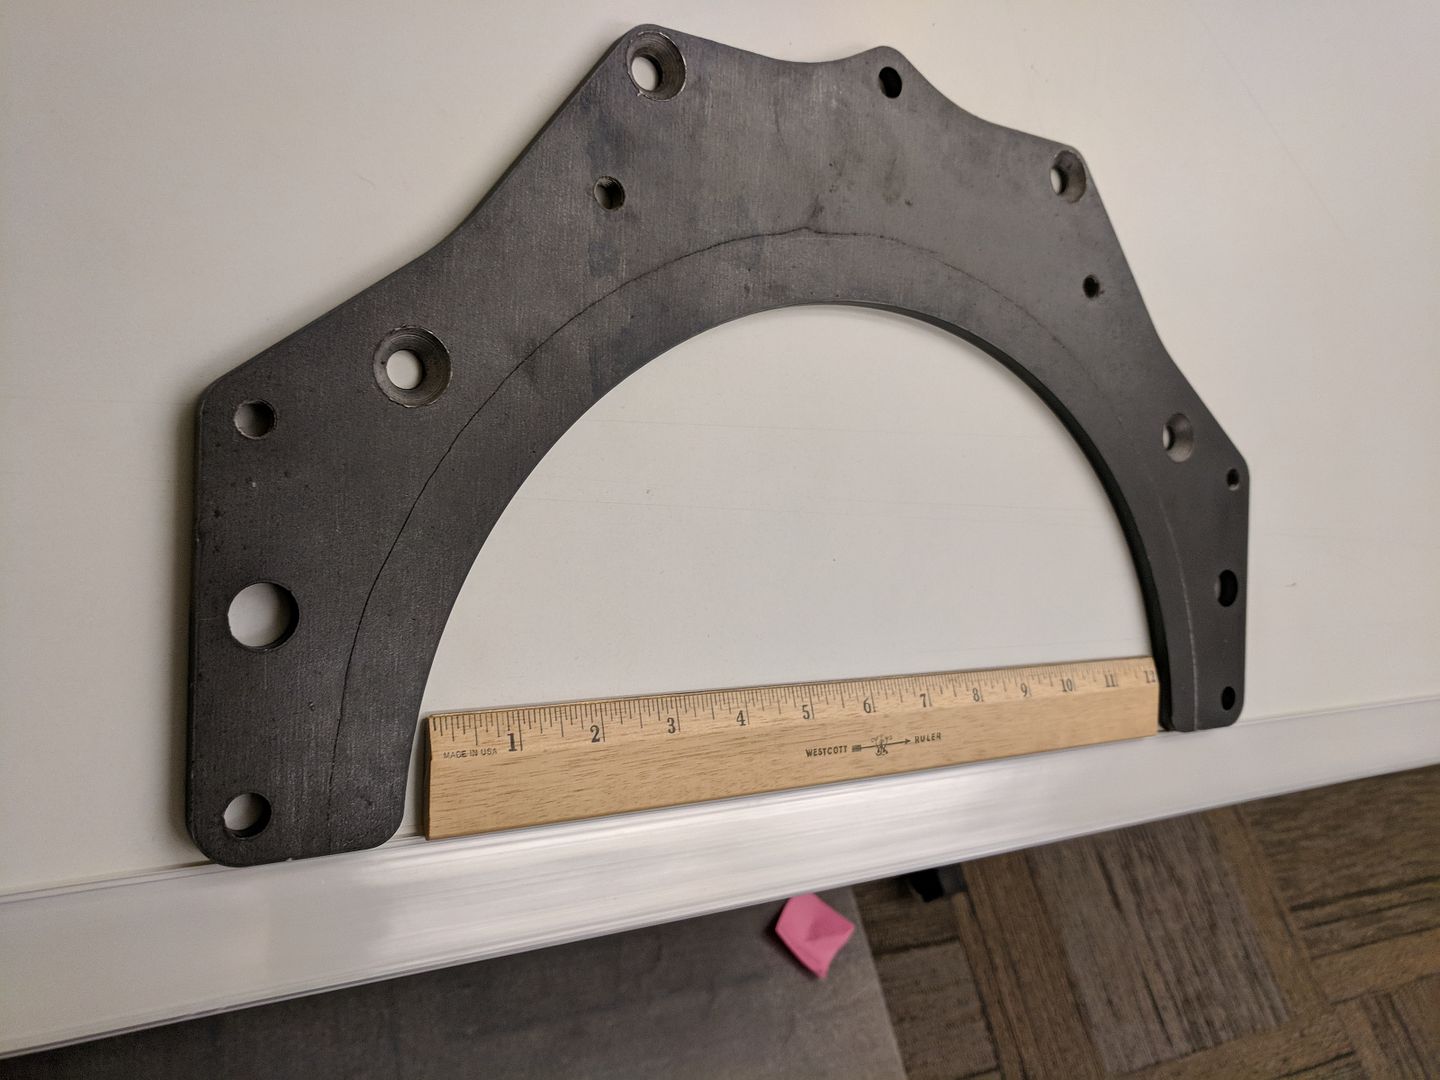
Using LS transmissions on old engines is tricky. I read in a few places that I needed a .400" thick spacer, but when I put it together the torque converter was bottomed in the transmission and buried in the crankshaft. I determined I needed a ~.625" (5/8") spacer to pull the torque converter off the transmission by about 1/8". Fortunately Summit sells BOP adapter plates that are 5/16" thick, so I bought two and had one water jetted to clear the flywheel.Then every thing lined up.
I used the same dipstick and tube as I had on the 200-4r, but moved the mounting tab down to account for the different location of the dipstick hole, as well as marked the dipstick for the proper "full" level.
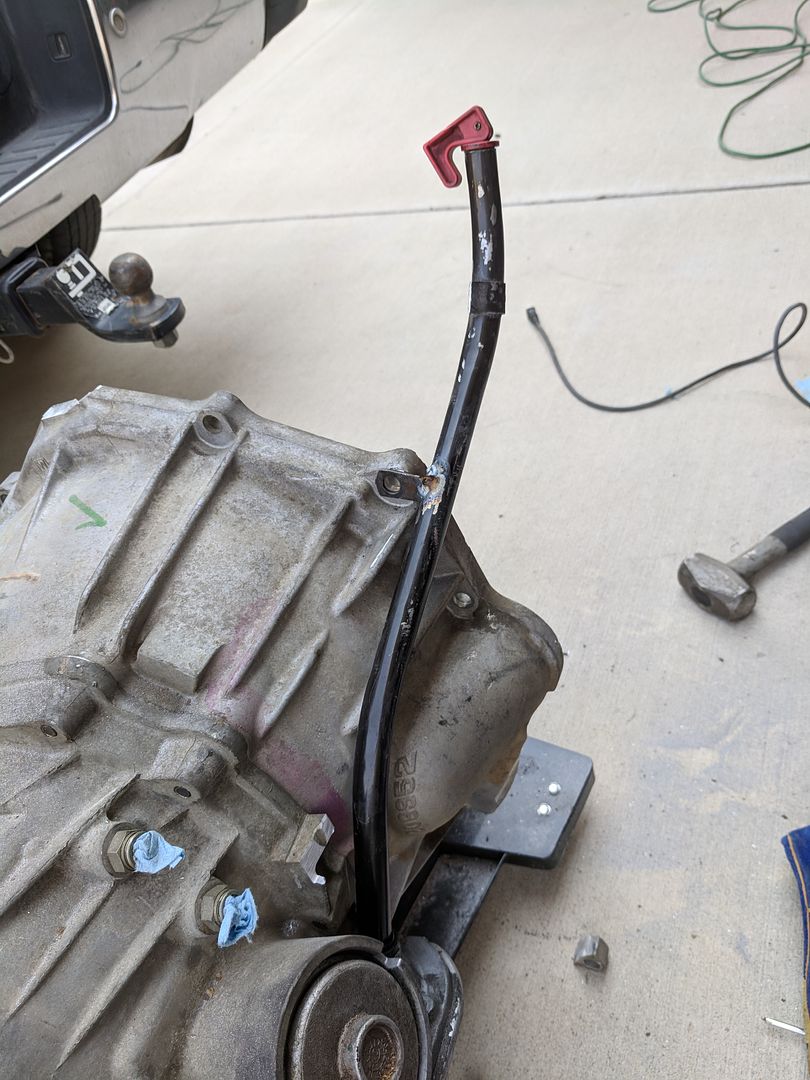
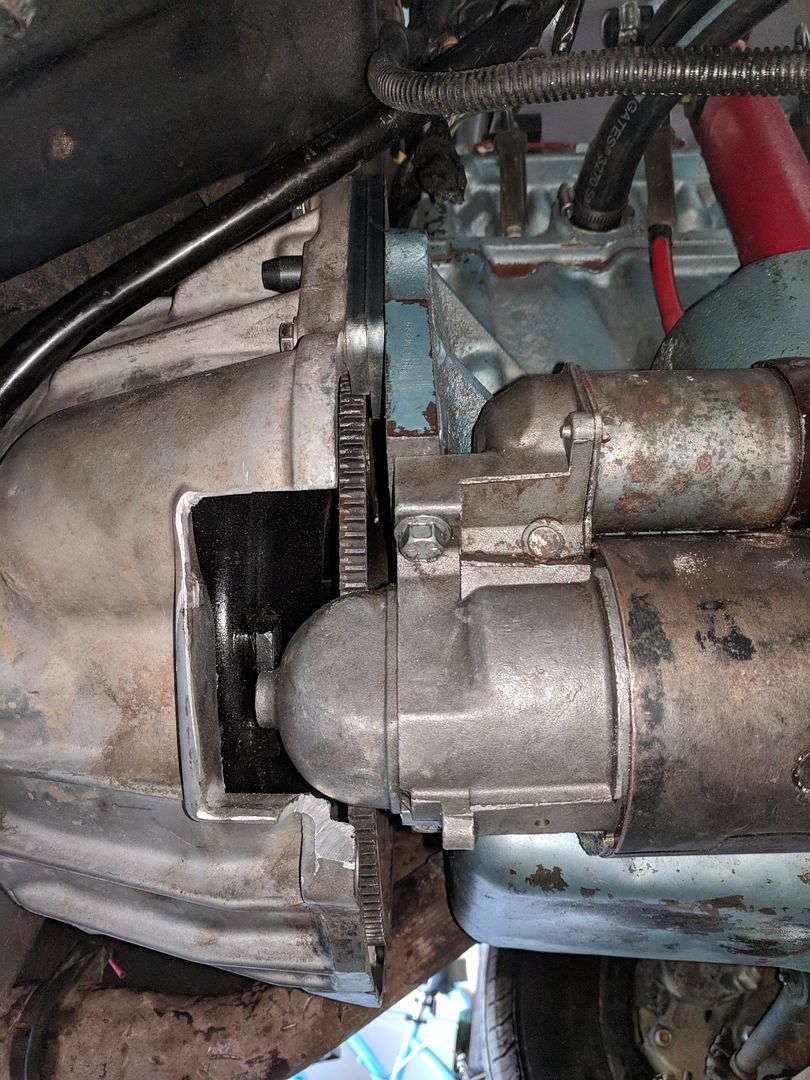
Bought the longest dowels I could too. The deep skirt nature of the OHC L6 puts the starter in a lower position than most GM engines, so I had to trim the bellhousing to clear the starter nose cone.

Started back on the exhaust plumbing. Short of going all the way back past the transmission then front again the cross over pipes were going to hang low. So I went under the oil pan for the time being. I bought a few sets of flanges so I can unbolt the cross over, but summit was one flange short for how many I needed so I am waiting for the last flange to come in to finish up the pipes and welding. Then I'll have to plumb in the wastegate. Going to put it on the passenger side and will likely dump right into the down pipe.
Leave a comment:
-
Haha, I actually plan on pressure testing it. Looking to pickup a 1.5" rubber stopper next time I'm at Ace Hardware. Drill a hole in the stopper, soap it down, and add a shot of air. I may not get all the leaks sealed, but I should be able to make sure there aren't any big ones. Then there is of course always exhaust manifold paste!Originally posted by squirrel View PostLeave a comment:
-
No it didn't, and to make it worse, I completely forgot I left a small generator and window A/C in in itOriginally posted by Beagle View Post
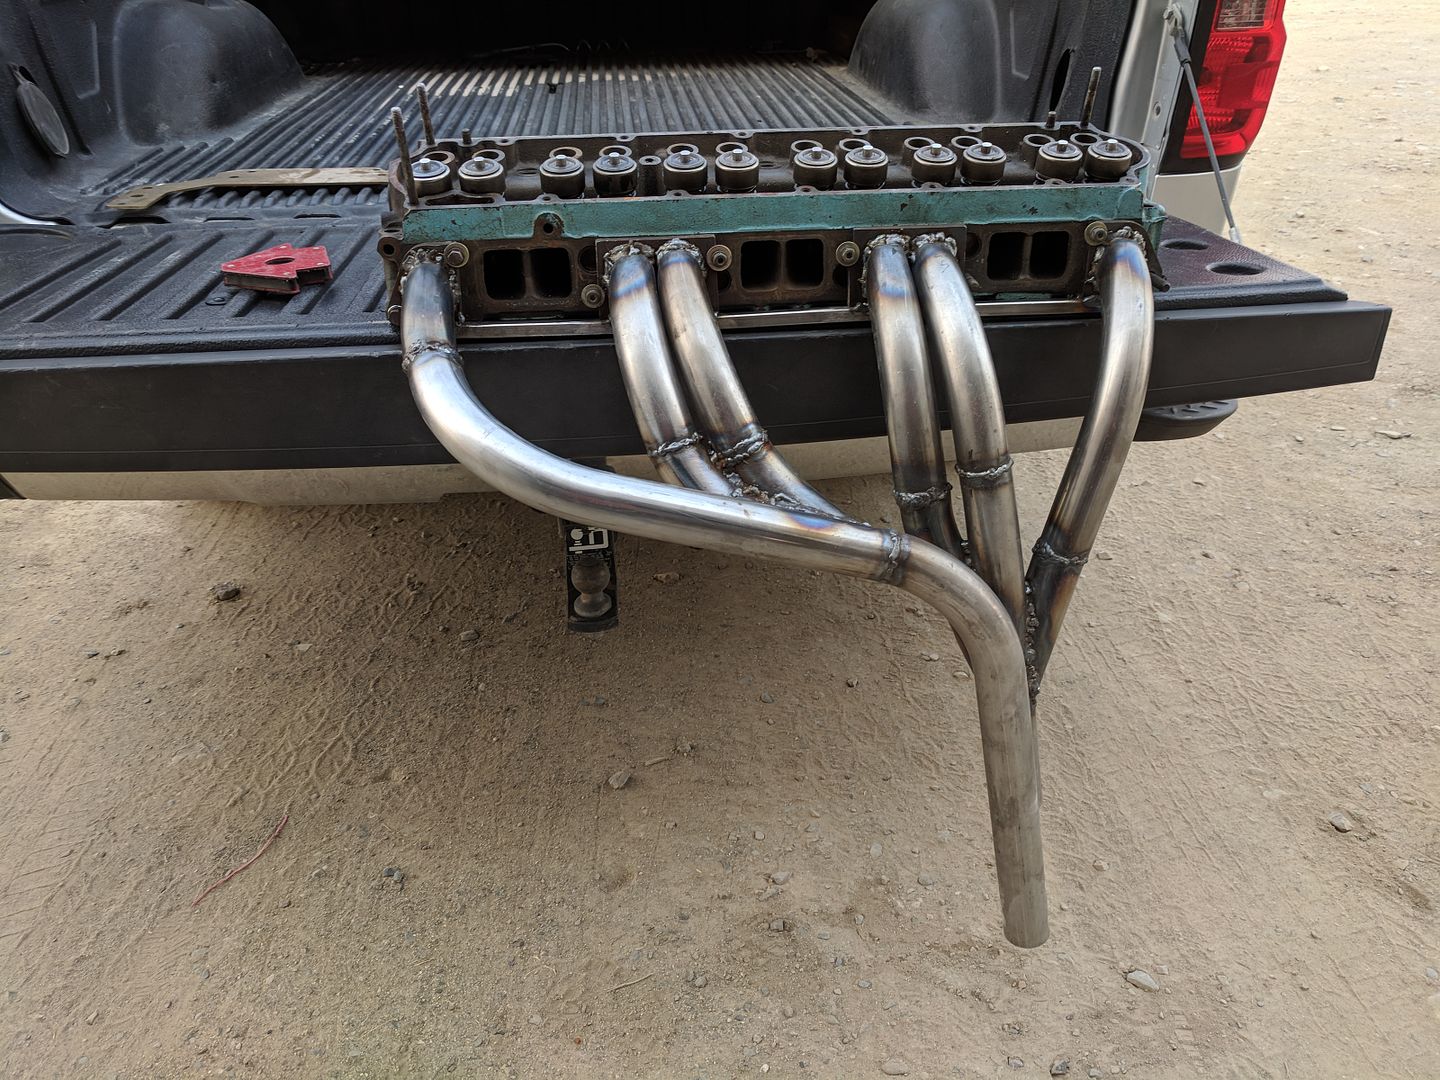
Mostly finished the header the other night. I had to go work out of town for the weekend, so I dragged my welder and stuff with me to work on after hours. I am going to cut the collectors down for 90� bends when I have it mocked back up on the engine. I'm going to paint, then wrap it. That ought to hide my welds!
Leave a comment:


Leave a comment: