Announcement

Collapse
No announcement yet.

The Silver Buick's 1969 Firebird OHC six project.

Collapse
X
 
  • Filter
  • Time
  • Show
Clear All
new posts

  • Ha!

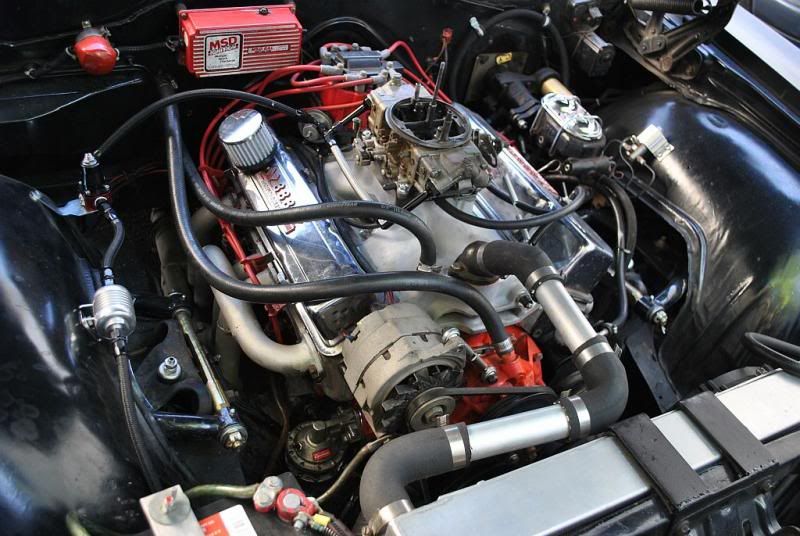
    The problem with making the engine harness outside the car is sometimes it comes up short =/ It'll work for now, but ideally another 8" or so would be better to bring the connectors all the way to the passenger side. Where they are now should be fine, but I think when I swap in the turbo motor down the road I may lengthen it.

    I still need to add the grommets, but one of the connectors connects right behind the head and the other is just under the wiper motor. Both connectors wouldn't fit behind the head at the same time, who'd a thunk? =P


    I think I'll mount the megasquirt on the heater box like in the Skylark. The only thing holding it in place right here is the drop light, so there is some room for movement. I may move it to the trans hump in front of the console.


    Small area to run the wires through the firewall on the passenger side. I used the stock hole the blower motor wire ran out for one of the harnesses and drilled a second hole right next to it.


    Then started mocking up the cooling system. I still don't know what I'm going to do with the heater hoses. I may use my engine stand radiator, but it'll require making brackets to hold it up, but it has a port for a heater hose.... I have a bolt holding the electric water pump in place on the frame that should keep it from flopping around when attached to the hoses. The two plastic (PVC?) hose connectors I used on the engine stand show deformation, from what I am guessing is from heat. They are not cracked or even appear cooked, but the tee isn't 90º and the straight reducer fitting now has a bend in it. Both look like they were cast that way, no discoloration, etc, but certainly weren't.
    Escaped on a technicality.

    Comment


    • Do what I did when my new radiator had it's upper hose on the other side.

      BS'er formally known as Rebeldryver

      Resident Instigator

      sigpic

      Comment


      • Huh? It's a heater hose problem. I only have one coolant port on the engine as the other one was on the water pump.
        Escaped on a technicality.

        Comment


        • Originally posted by TheSilverBuick View Post
          Huh? It's a heater hose problem. I only have one coolant port on the engine as the other one was on the water pump.
          Oops. I was looking at the missing radiator hose and I guess my mind read that.
          BS'er formally known as Rebeldryver

          Resident Instigator

          sigpic

          Comment


          • Buy a new radiator for a 70s truck that has the heater hose fitting on it.

            Or build a T to fit into the lower radiator hose.

            (I'm assuming you are looking for a "return" place for the heater, not a hot water source place)
            My fabulous web page

            "If it don't go, chrome it!" --Stroker McGurk

            Comment


            • Originally posted by squirrel View Post
              Buy a new radiator for a 70s truck that has the heater hose fitting on it.

              Or build a T to fit into the lower radiator hose.

              (I'm assuming you are looking for a "return" place for the heater, not a hot water source place)
              Or a 70's caddy radiator..

              Comment


              • Hoping to make real progress on this starting tomorrow. Last weekend felt like such a dud in the progress department. I stocked the wood stove up with wood tonight so tomorrow morning I just have to go out there and light it off in an effort to get me to start earlier on it.

                Game plan is to work on the fuel system tomorrow and the electrical system on Saturday. While I was out in barn I started topping off the transmission to make sure it doesn't have a dry start (I did fill the torque converter the best I could before installing it) and I keep the box of ATF right next to the car and in the way to make sure I don't forget to add some as soon as the engine fires up.
                Escaped on a technicality.

                Comment


                • Messed with the hood tach tonight.

                  I installed a new capacitor that should convert it to a 6 cylinder tach and a new resistor to replace one that was out of specification. And as expected, Squirrel was right about needing an inductor to make it work properly. I found a Mega Squirt diagram that with a transistor and modified relay should make this work with the Mega Squirt's tach out signal. I've got the transistor and have modified a relay already, but want to get the assembly installed internally to the hood tach, so it will require some extra wiring to the hood tach, namely a 12v and ground wire, which I might be able to get from the light circuit if I want the lights on all the time.


                  And because I'm not a purist, and may even end up drilling holes in the face for Mega Squirt indicators and shift light I made my own face to cover the real rough one. Basically took a picture of the face, loaded it into power point and digitized in the lines and texts. Couldn't seem to match the Pontiac font very well, but again I'm not much of a purist.


                  The new and old side by side. I covered the print out with clear packing tape on both sides to protect it. Similar to what I did for the wheel center caps on the Skylark.


                  Somewhat put together. I gave myself a 7,000rpm redline
                  Last edited by TheSilverBuick; January 23, 2014, 10:59 PM.
                  Escaped on a technicality.

                  Comment


                  • that's nifty!
                    My fabulous web page

                    "If it don't go, chrome it!" --Stroker McGurk

                    Comment


                    • Originally posted by squirrel View Post
                      that's nifty!
                      Beyond nifty!!! Way to be creative, Randal!!
                      BS'er formally known as Rebeldryver

                      Resident Instigator

                      sigpic

                      Comment


                      • You ARE a clever rascal! Nice adapting!

                        Dan

                        Comment


                        • NICE WORK

                          you continue to inspire with your megasquirt cretivity - I'm just about ready to finally drink the koolaid.
                          There's always something new to learn.

                          Comment


                          • Thanks guys.

                            This has nothing to do with Megasquirt The resistor and capacitor change was to simply make it work and work with being a 6-cylinder.

                            I started doing the drawing by bringing the image into MSPaint, but I really needed to be able to remove the background image and insert a black background at the end and having each line it's own clickable geometry allowed me to do some minor fine tuning of the lines and text at the end. Like the "Pontiac" label, originally I was pretty close to size and shape of the OE one, but after moving the red line it had awkward empty space next to it so I moved it.

                            The size thing was the same way I did the center caps. Group linked all the geometries, then print screened it and pasted it into MSPaint and re-cropped it in paint, copied it and pasted it back into a new slide and used the picture format/size option in Power Point to specify the scale. I start with two sizes 75% and 50% (I label them for easy reference) and print it out. Then eyeball adjust from there. If I was smart I could of taken the initial picture with a ruler in it and do math, but as you can see in the picture once I saw it was closer to 50% than 75% I reprinted another sheet with 3 sizes on it, 55%, 58% and 60%. 58% is the one I used. Trimmed it to fit the face then got the clear packing tape out and taped it on both sides (effectively laminating it) and trimmed the tape down.

                            I'm trying to decide if I want to do the heater box mod to it. Basically drill a little hole in the bottom of the case and install a small nipple and run a vacuum line from the hot side of the heater box to drive moisture out of the housing and keep it defrosted and clear in cold weather.
                            Last edited by TheSilverBuick; January 24, 2014, 09:01 AM.
                            Escaped on a technicality.

                            Comment


                            • in your area Randal - if it's a proven fix for cold weather operation - I'd do it now while it's easy to get to!

                              So that's printed out on regular paper and laminated with packing tape? Interesting - I hope it doesn't fade in the sun - but if it does - you can just print out another!
                              There's always something new to learn.

                              Comment


                              • Originally posted by TheSilverBuick View Post
                                Thanks guys.

                                I'm trying to decide if I want to do the heater box mod to it. Basically drill a little hole in the bottom of the case and install a small nipple and run a vacuum line from the hot side of the heater box to drive moisture out of the housing and keep it defrosted and clear in cold weather.

                                You definitely want to do that,

                                Comment

                                Working...
                                X