 Tweet
Tweet
This is why blacksmithing was next to witchcraft in the medieval times... pure artistry!
-
Patrick & Tammy
- Long Haulin' 2008, 2009, 2010, 2011, 2012, 2014...Addicting isn't it...?? -
I'm going to have to read through this thread....looks interesting!Comment
-
-
Thanks for the comments fellas. Sorry for my short hiatus from the shop, after 226K miles my trusty 16 year old truck has been giving me fits with transmission issues. After spending about 3 weeks on and off looking for good used trucks, the year end deals and rebates made a brand new one only slightly higher in price than a three year old model. So.....
Out with the old...

In with the new....

And with the truck shopping headaches behind us, we can get back in the shop ...
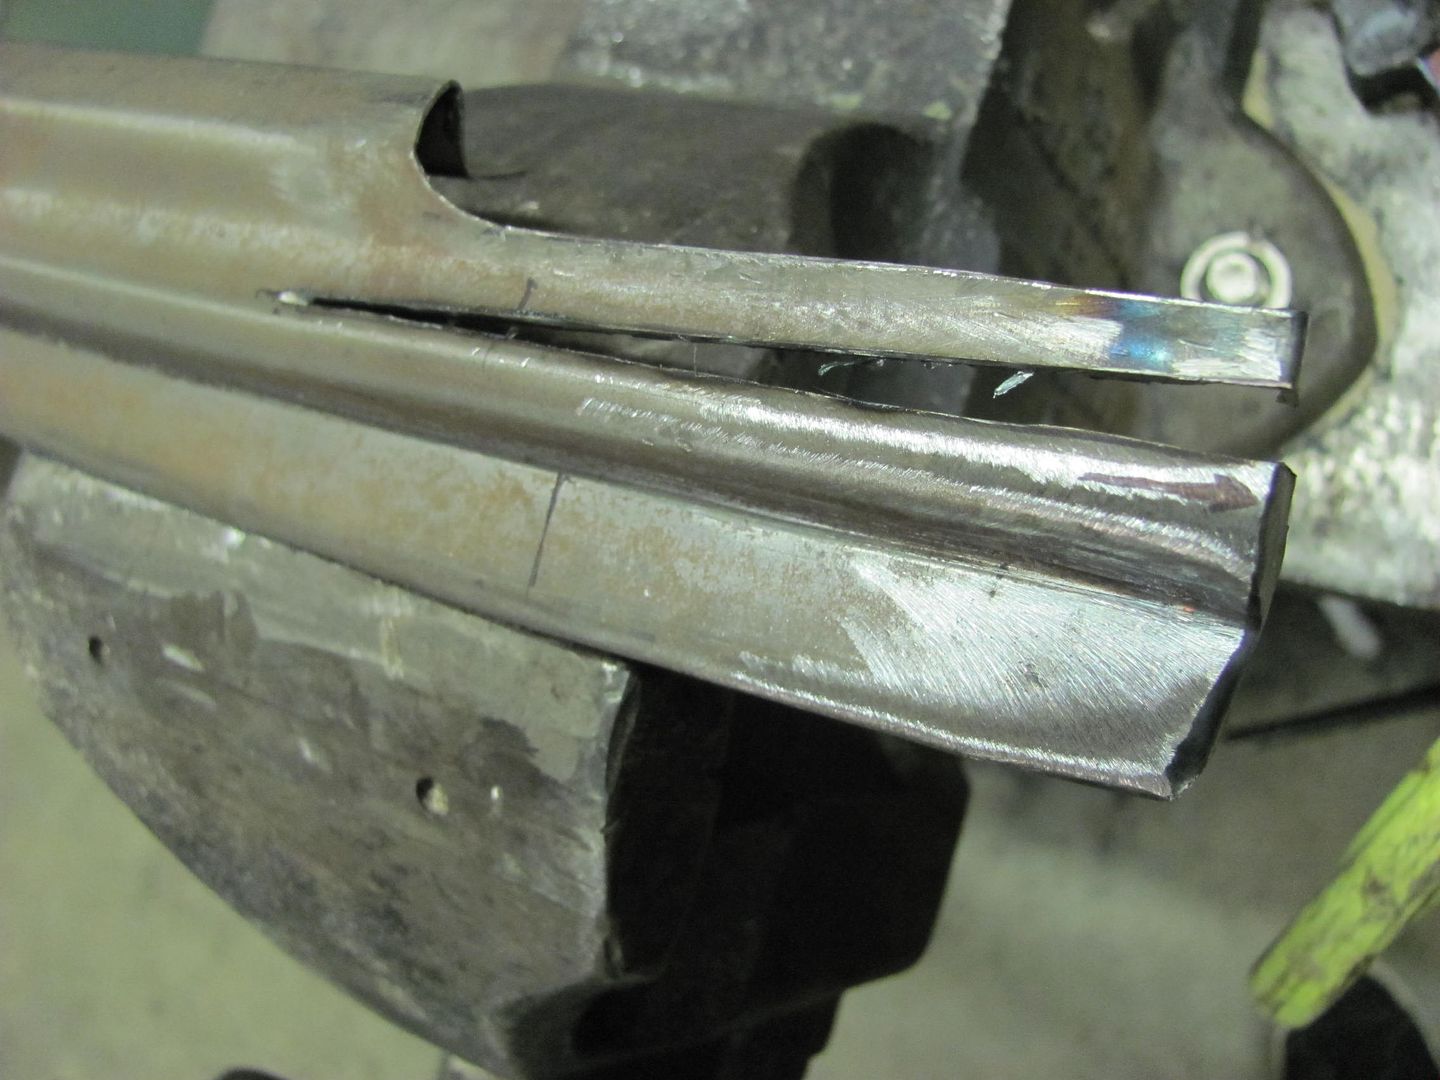
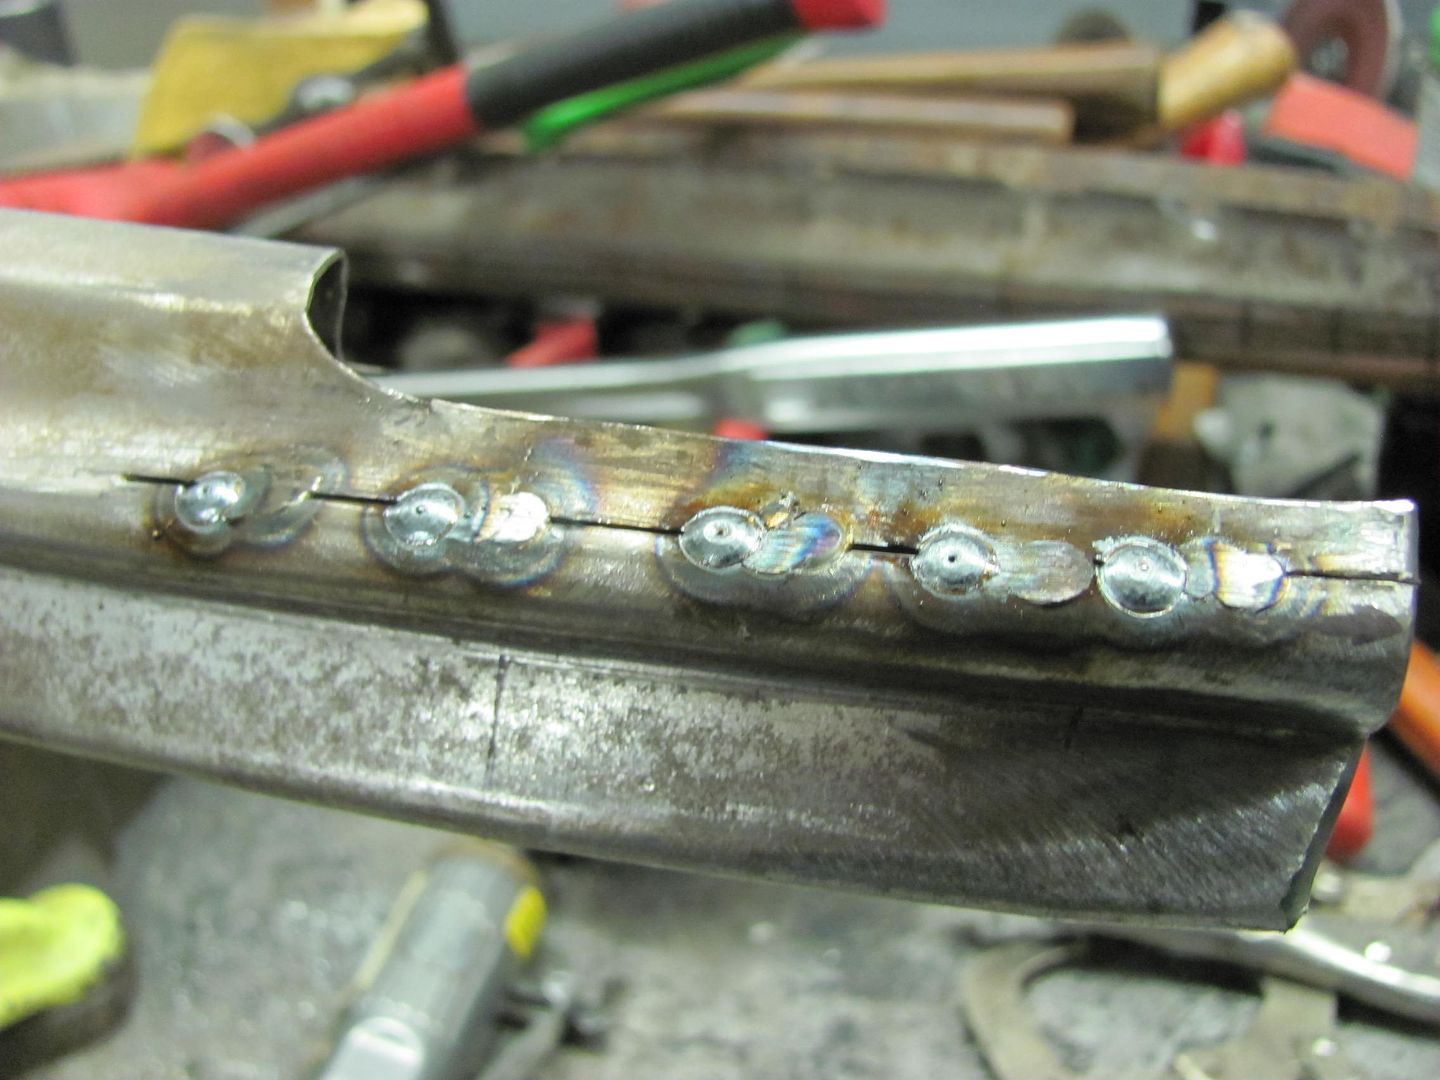
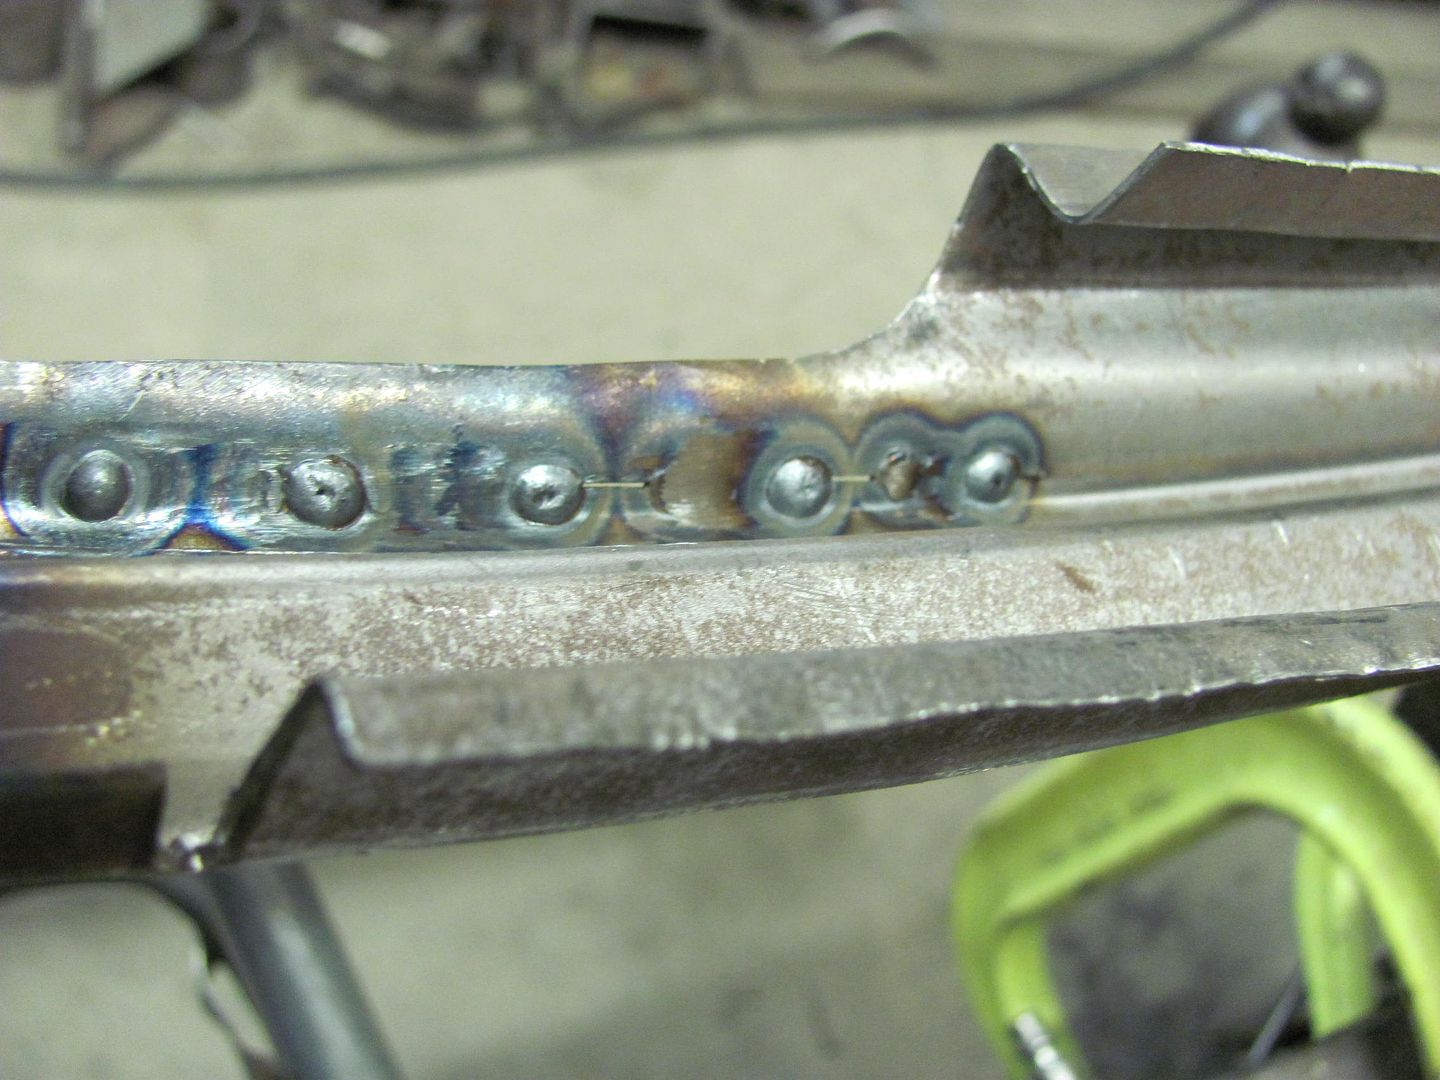
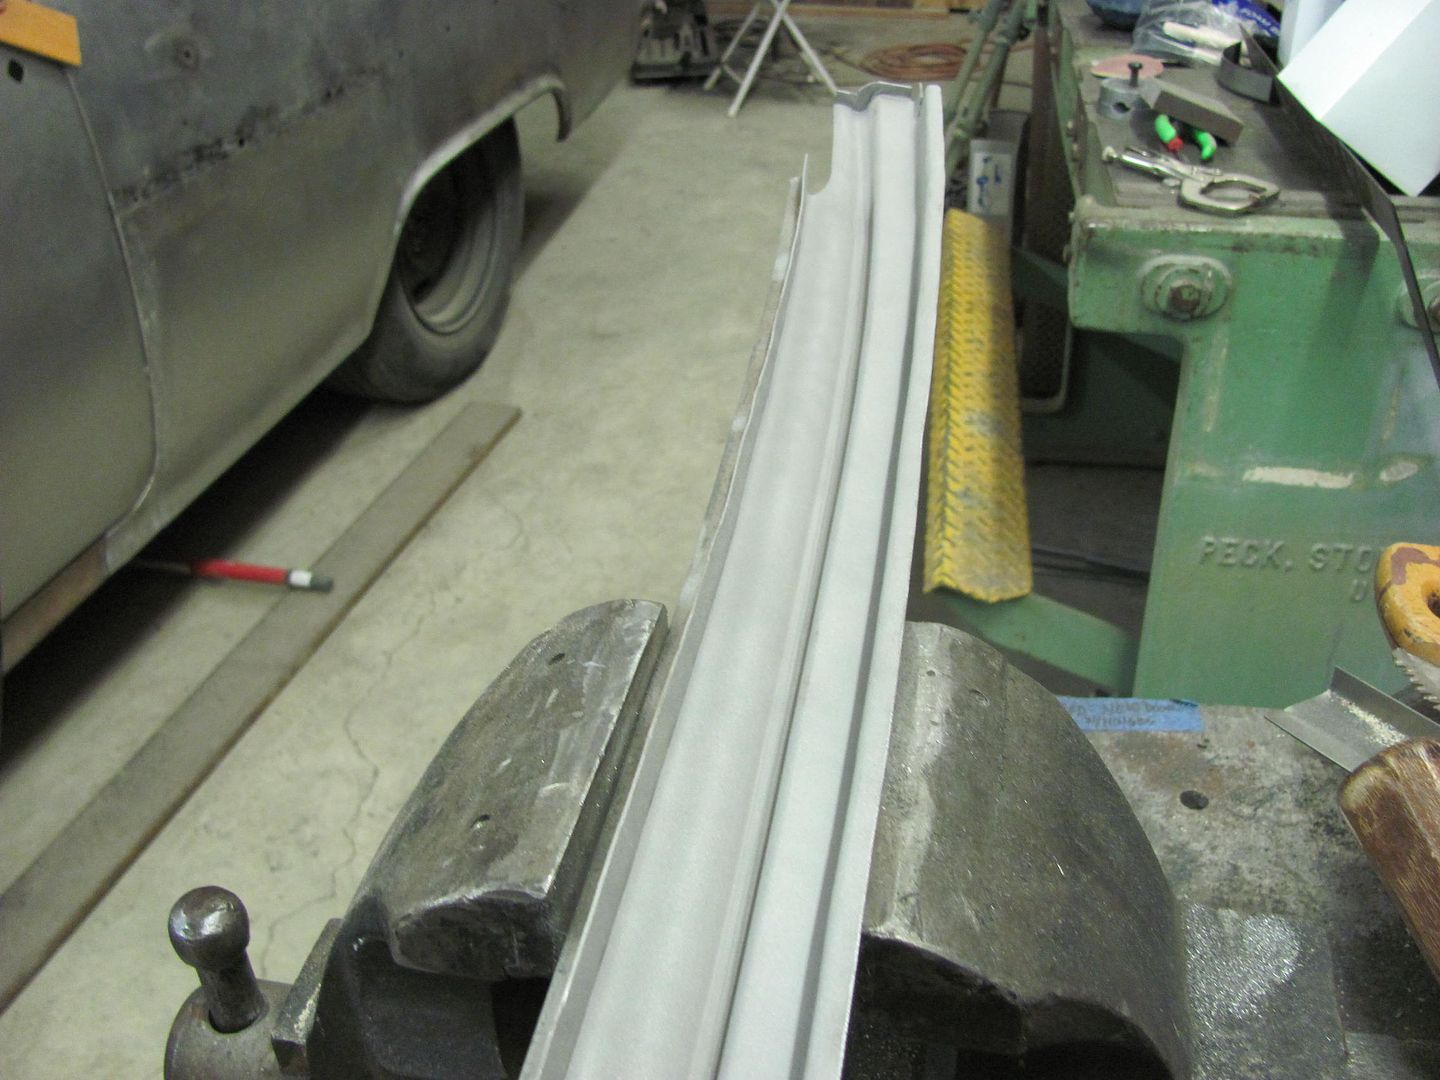
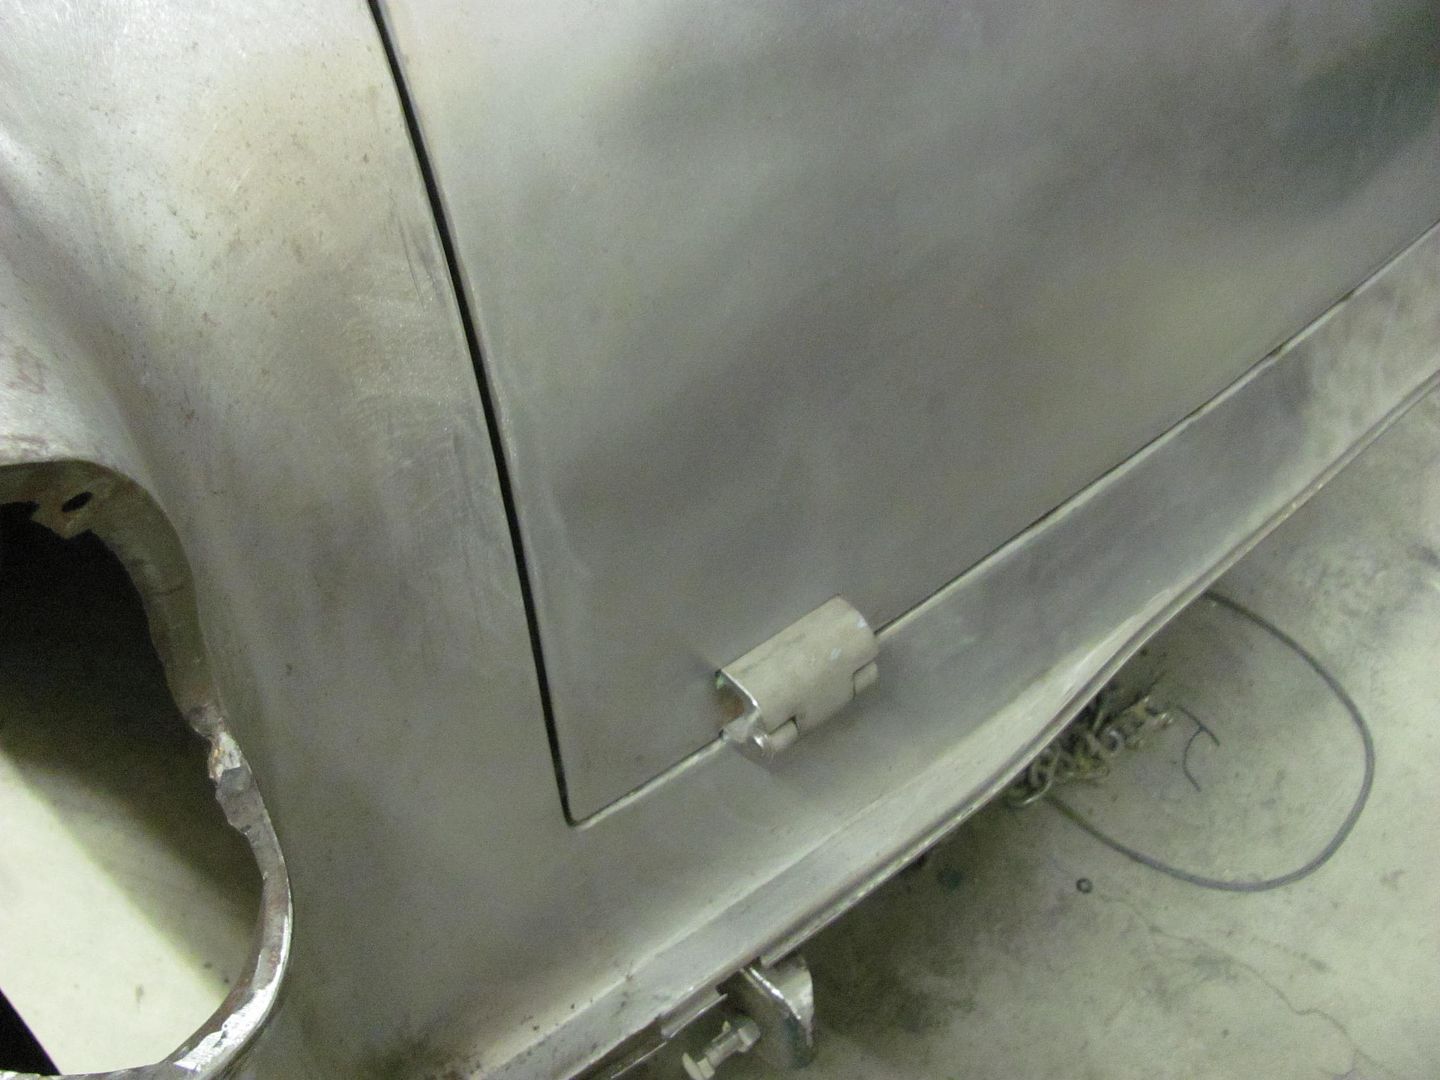
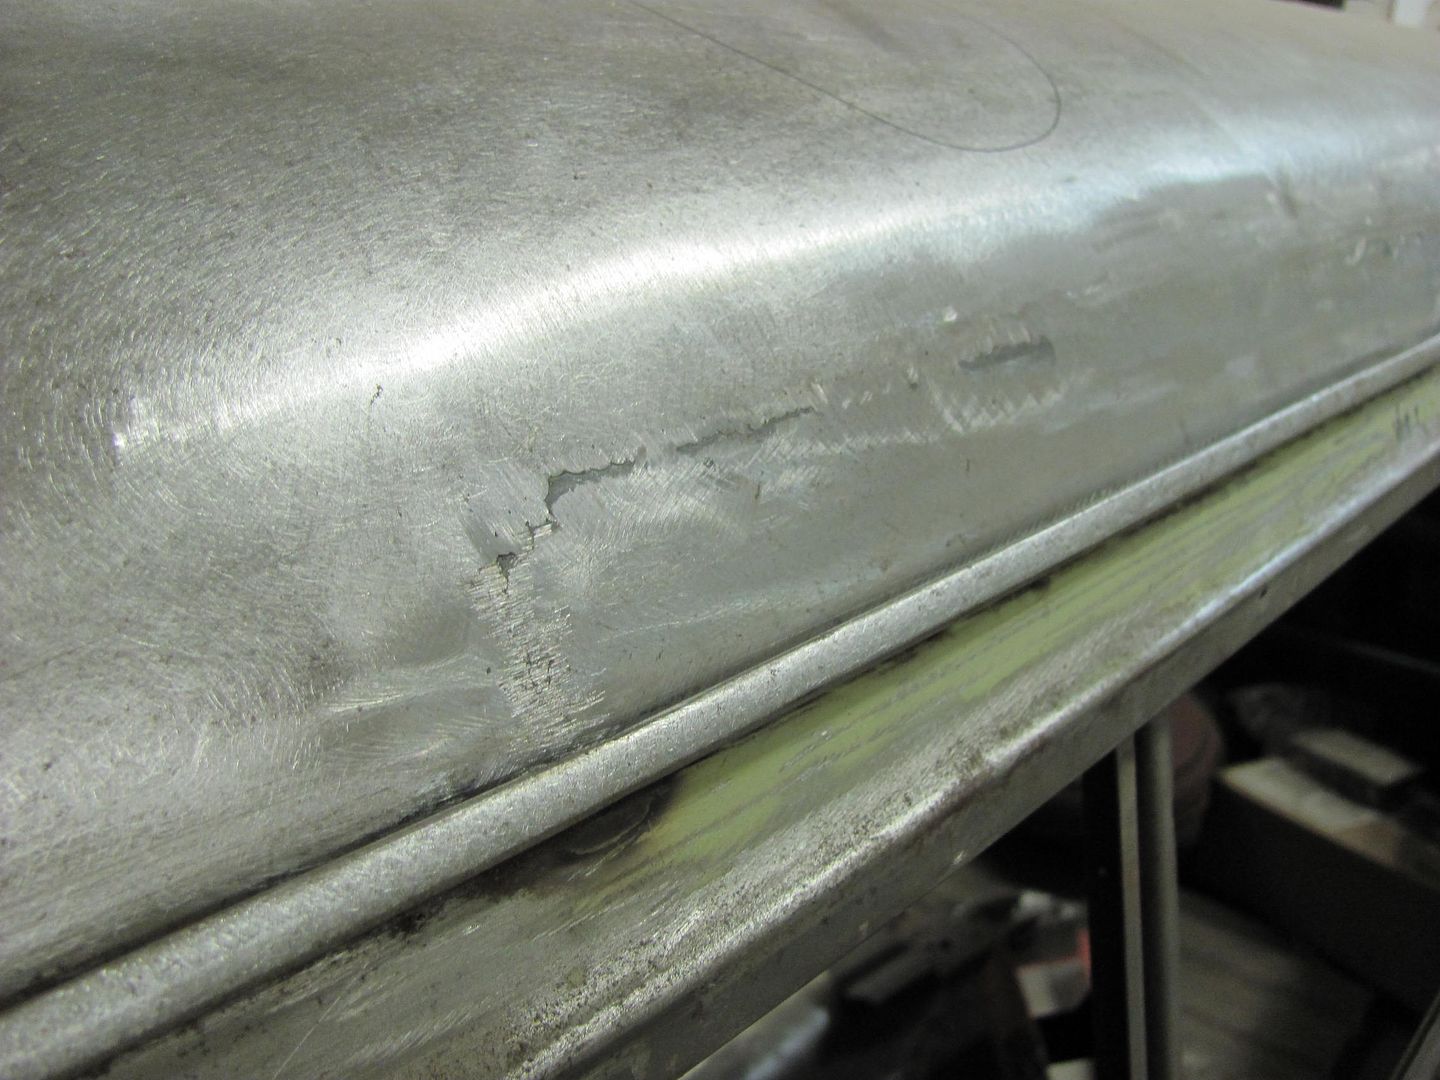
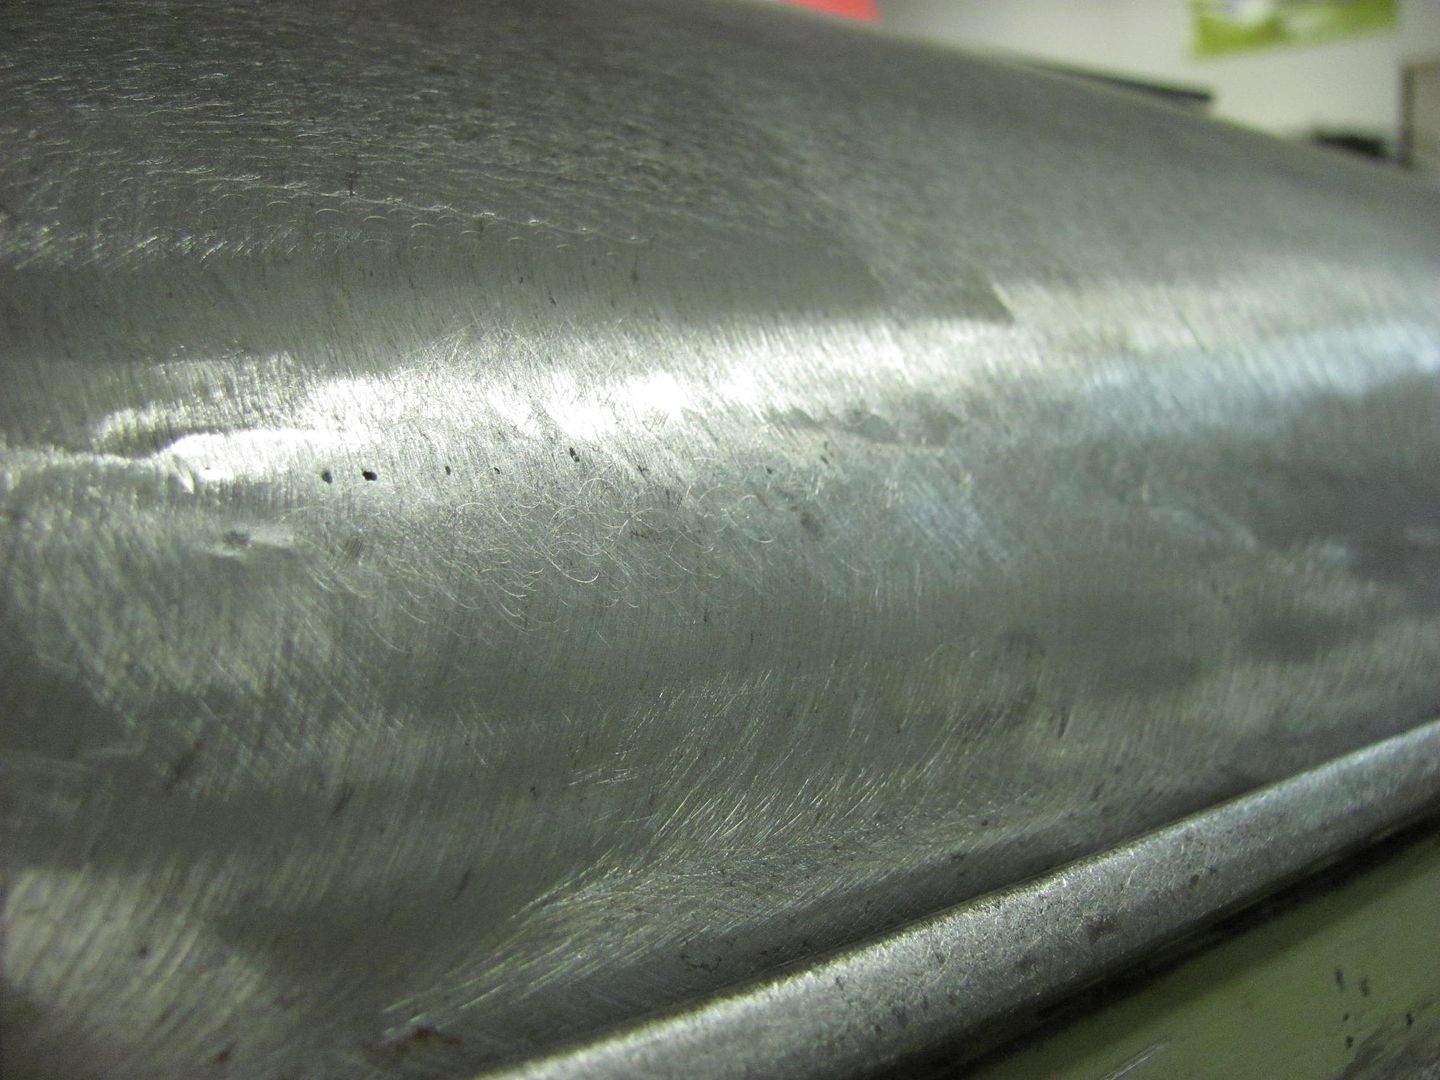
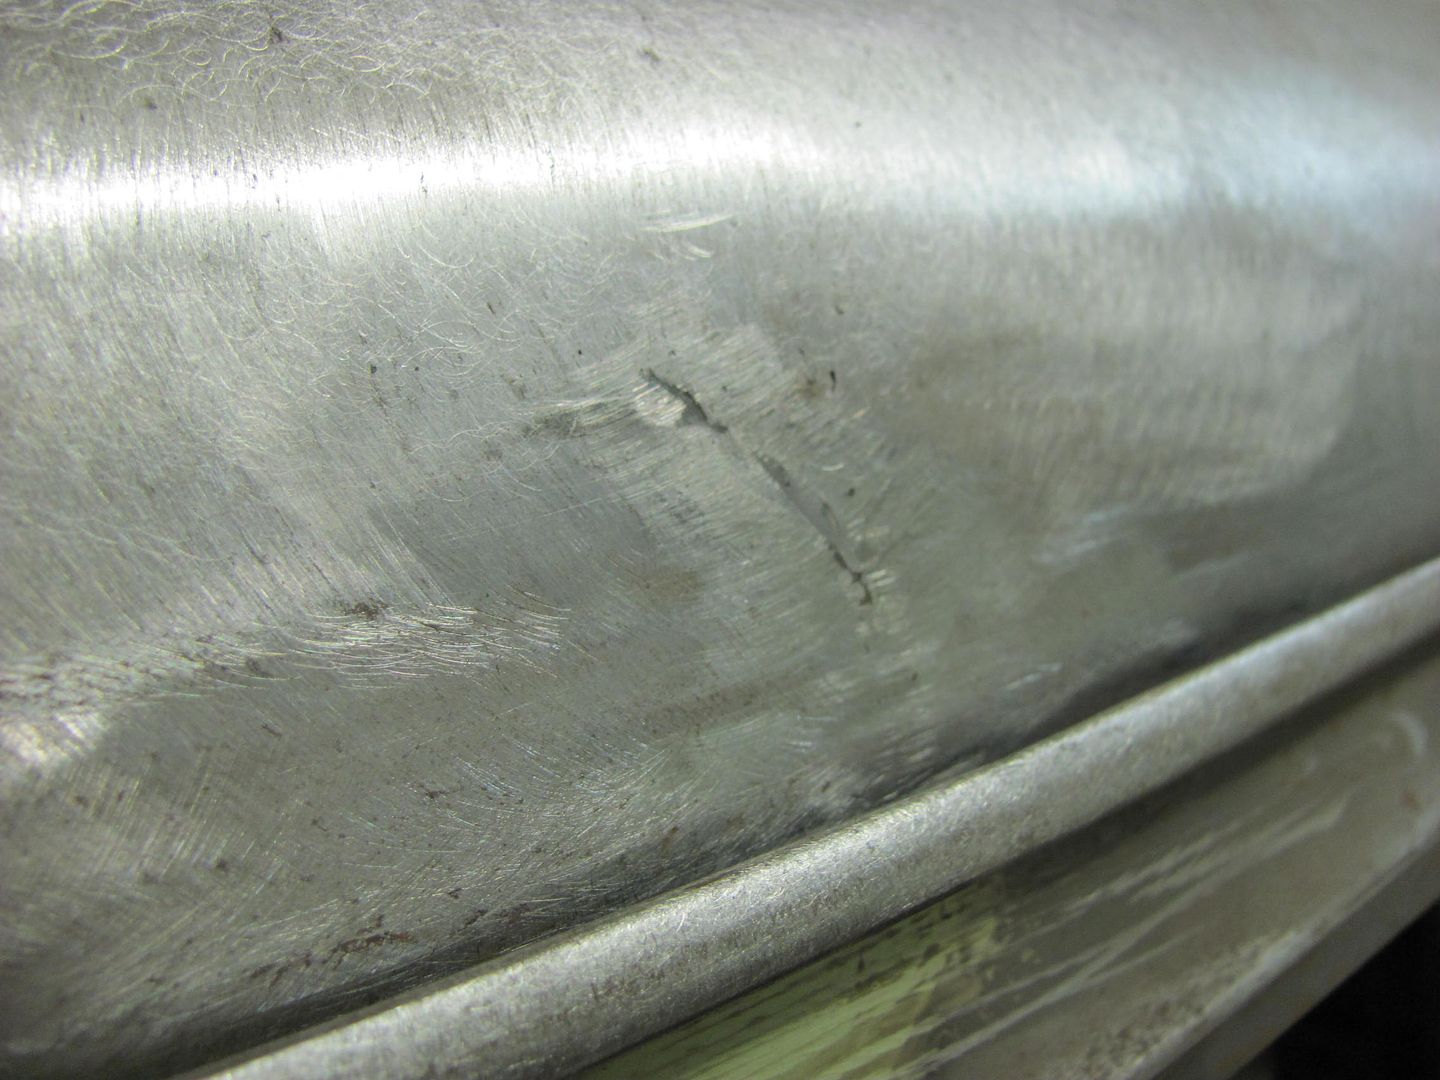
Worked on the other end of the lower patch today, to fix the mis-alignment of the beltline trim...
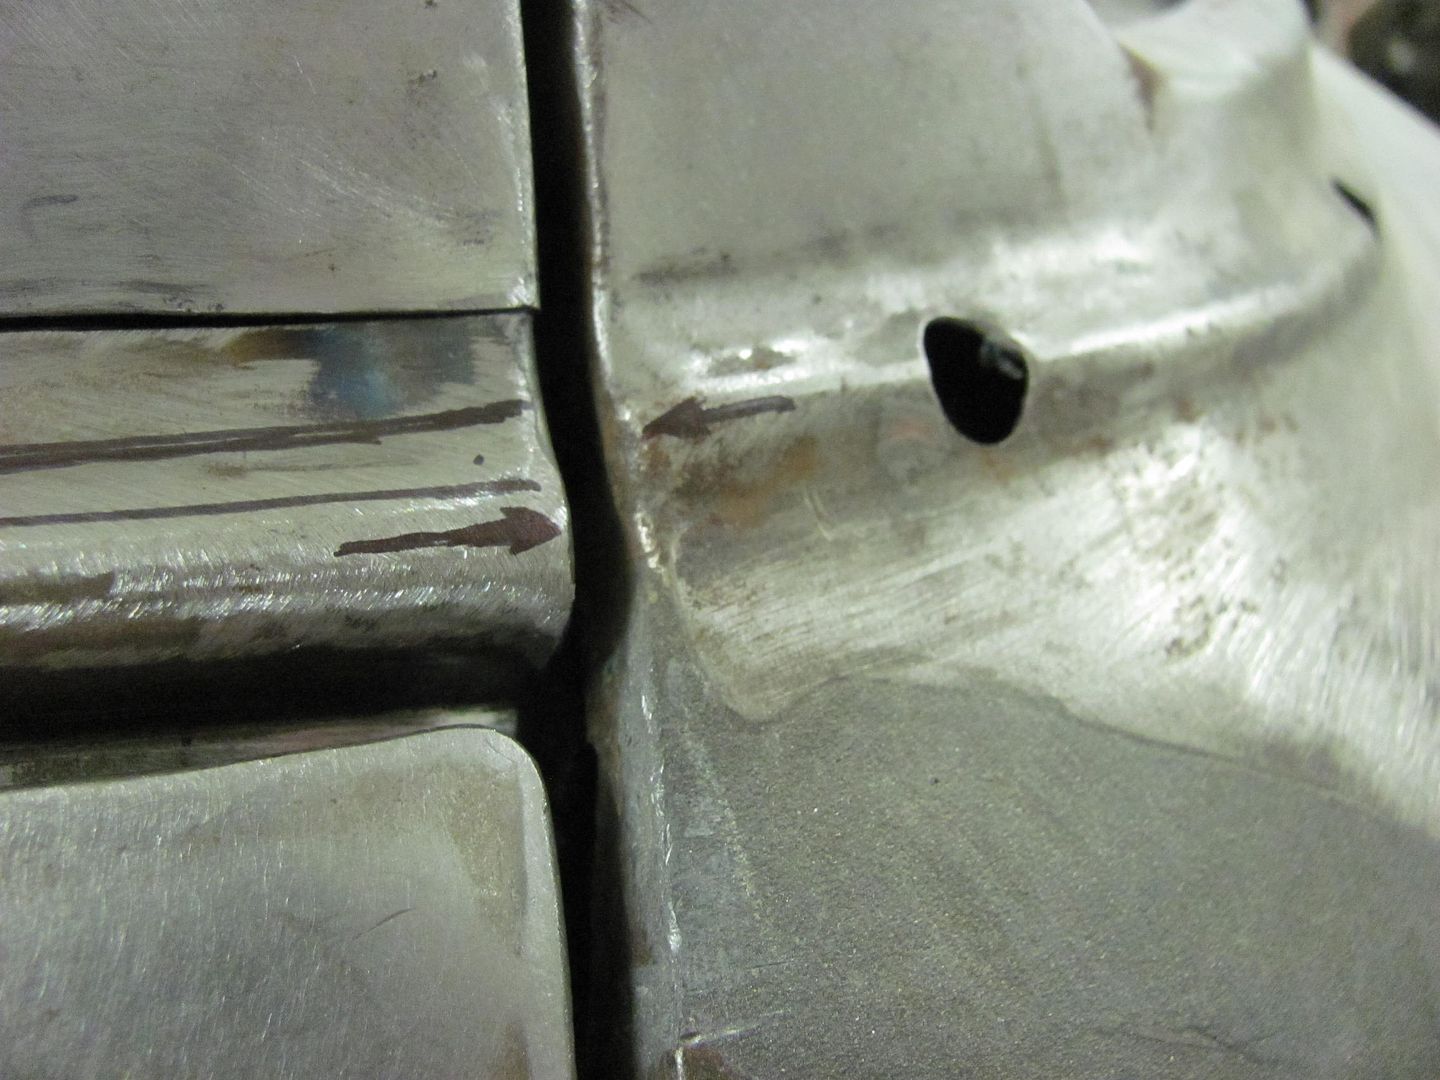
Made a relief cut....
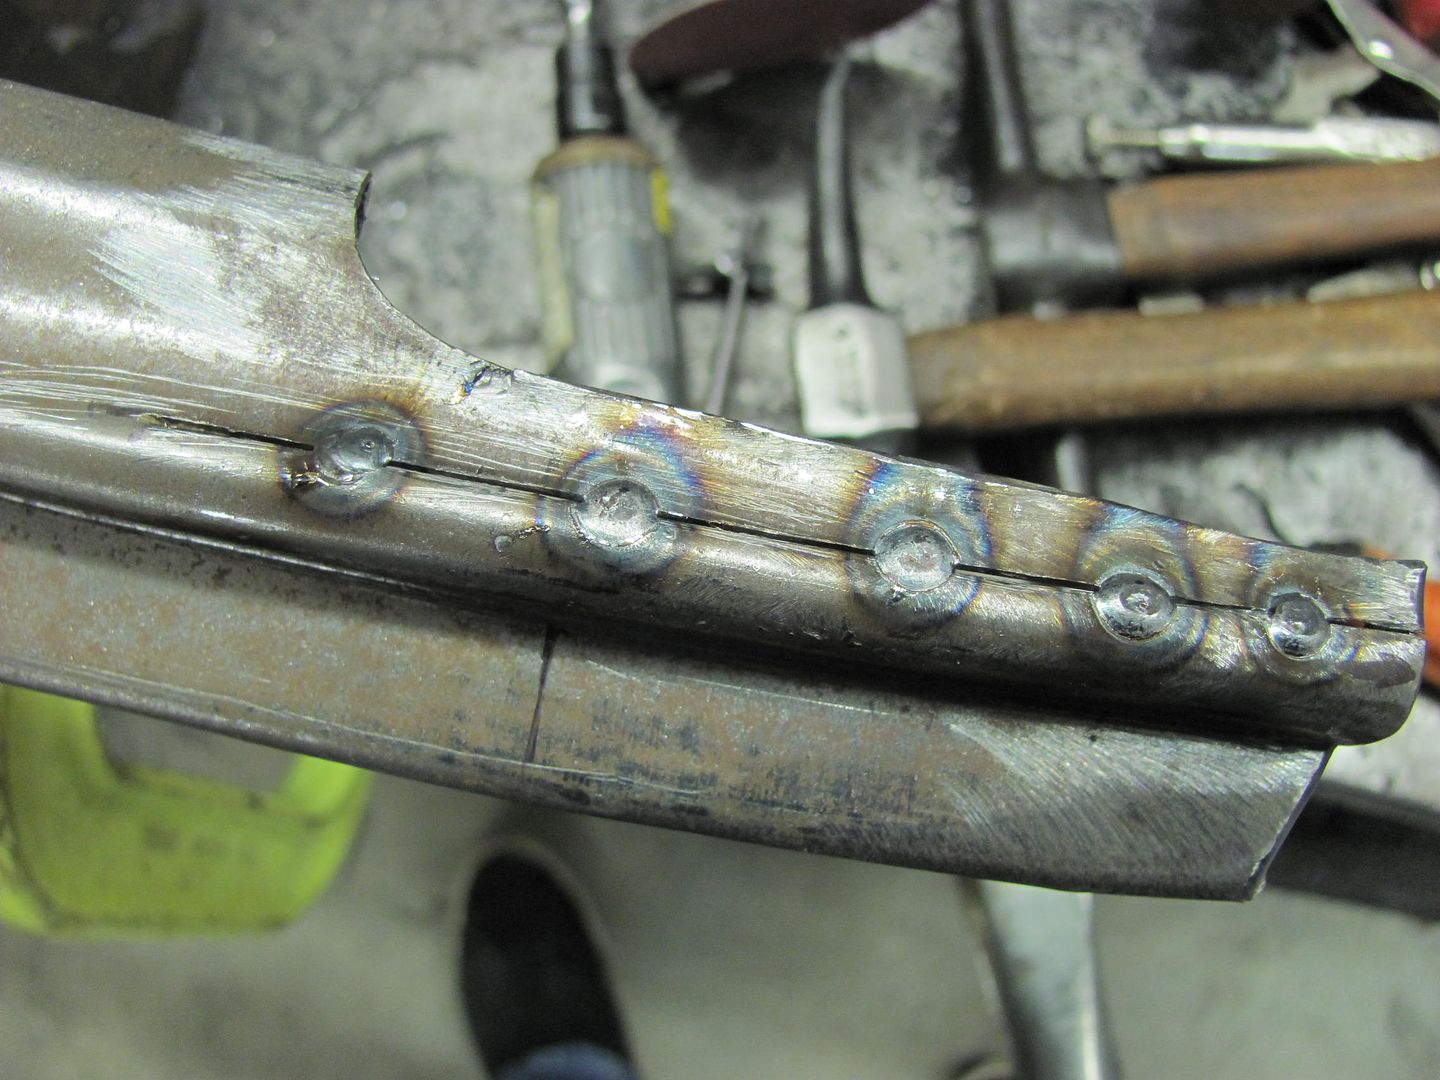
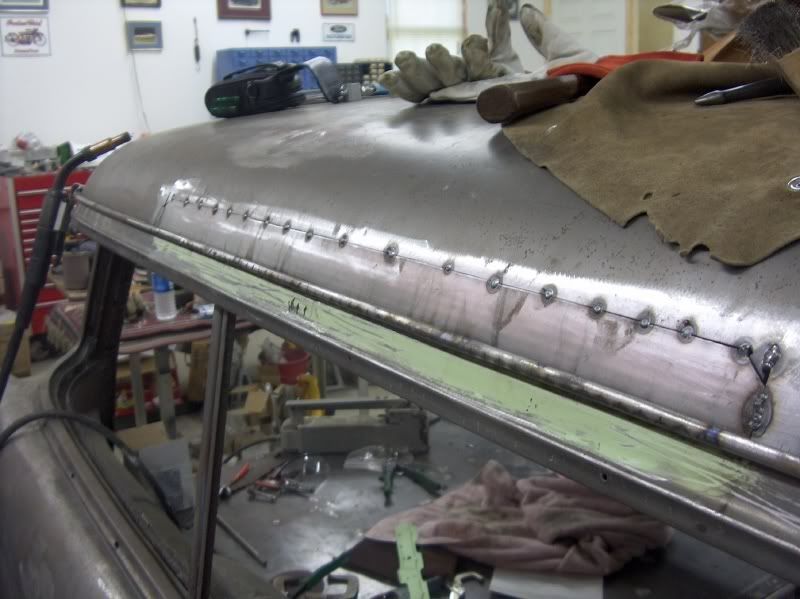
Rear view shows full weld penetration....
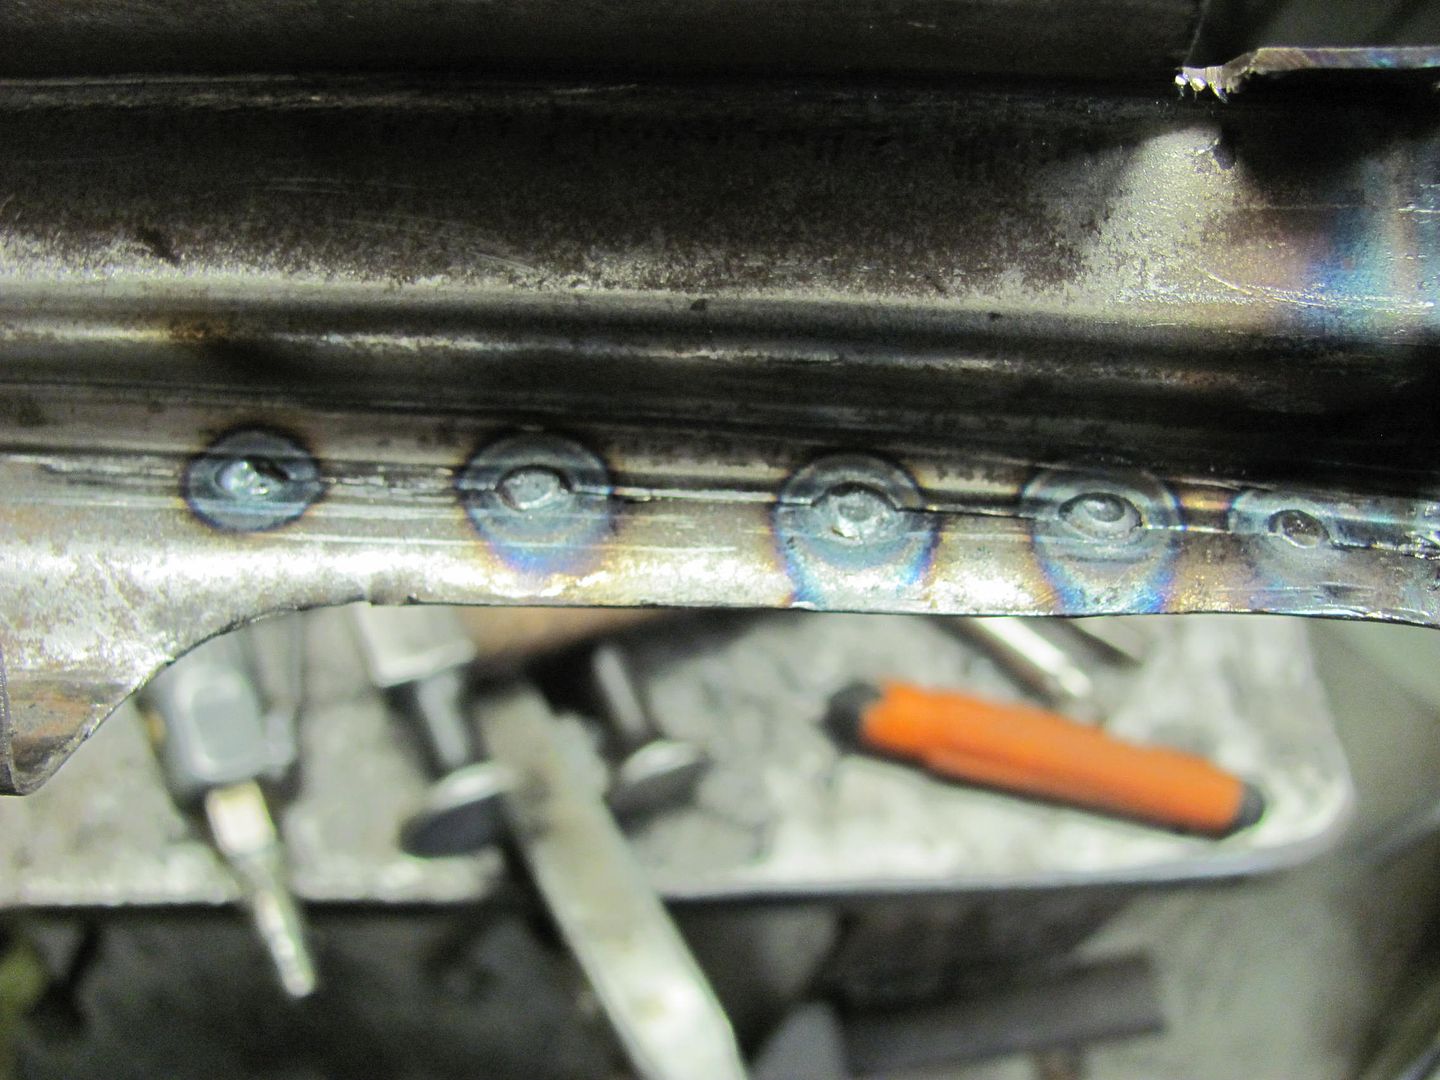
Welds were planished, then ground to just above panel surface, and next weld overlapped, and repeat. The overlapping helps to eliminate any missed welds/pin holes.

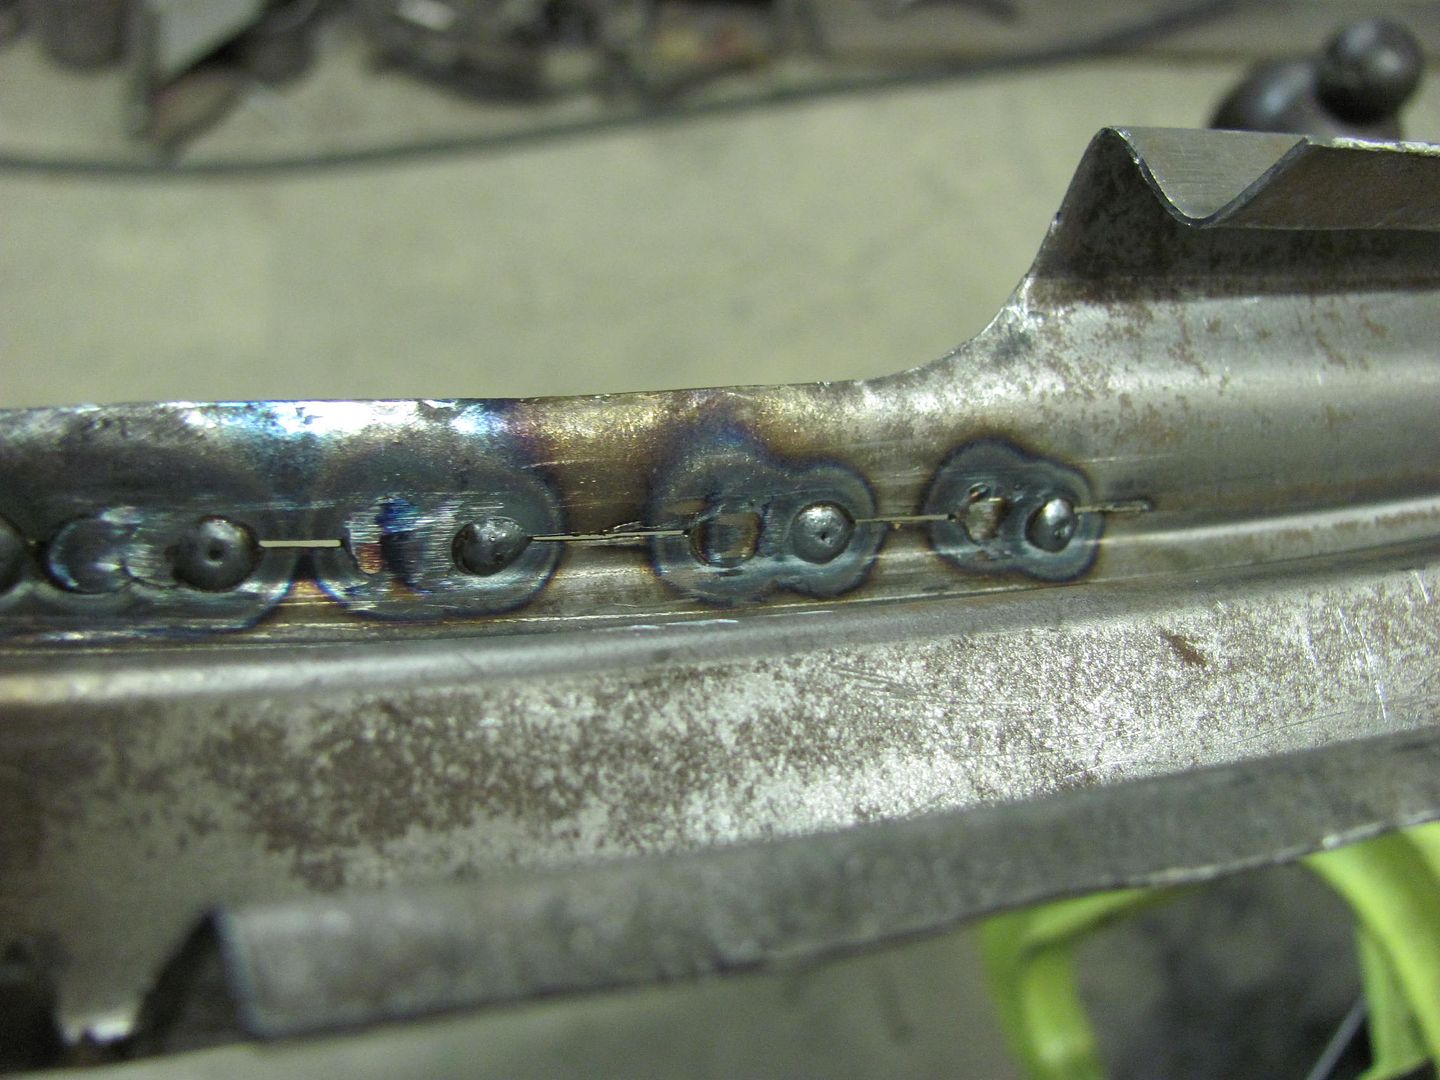
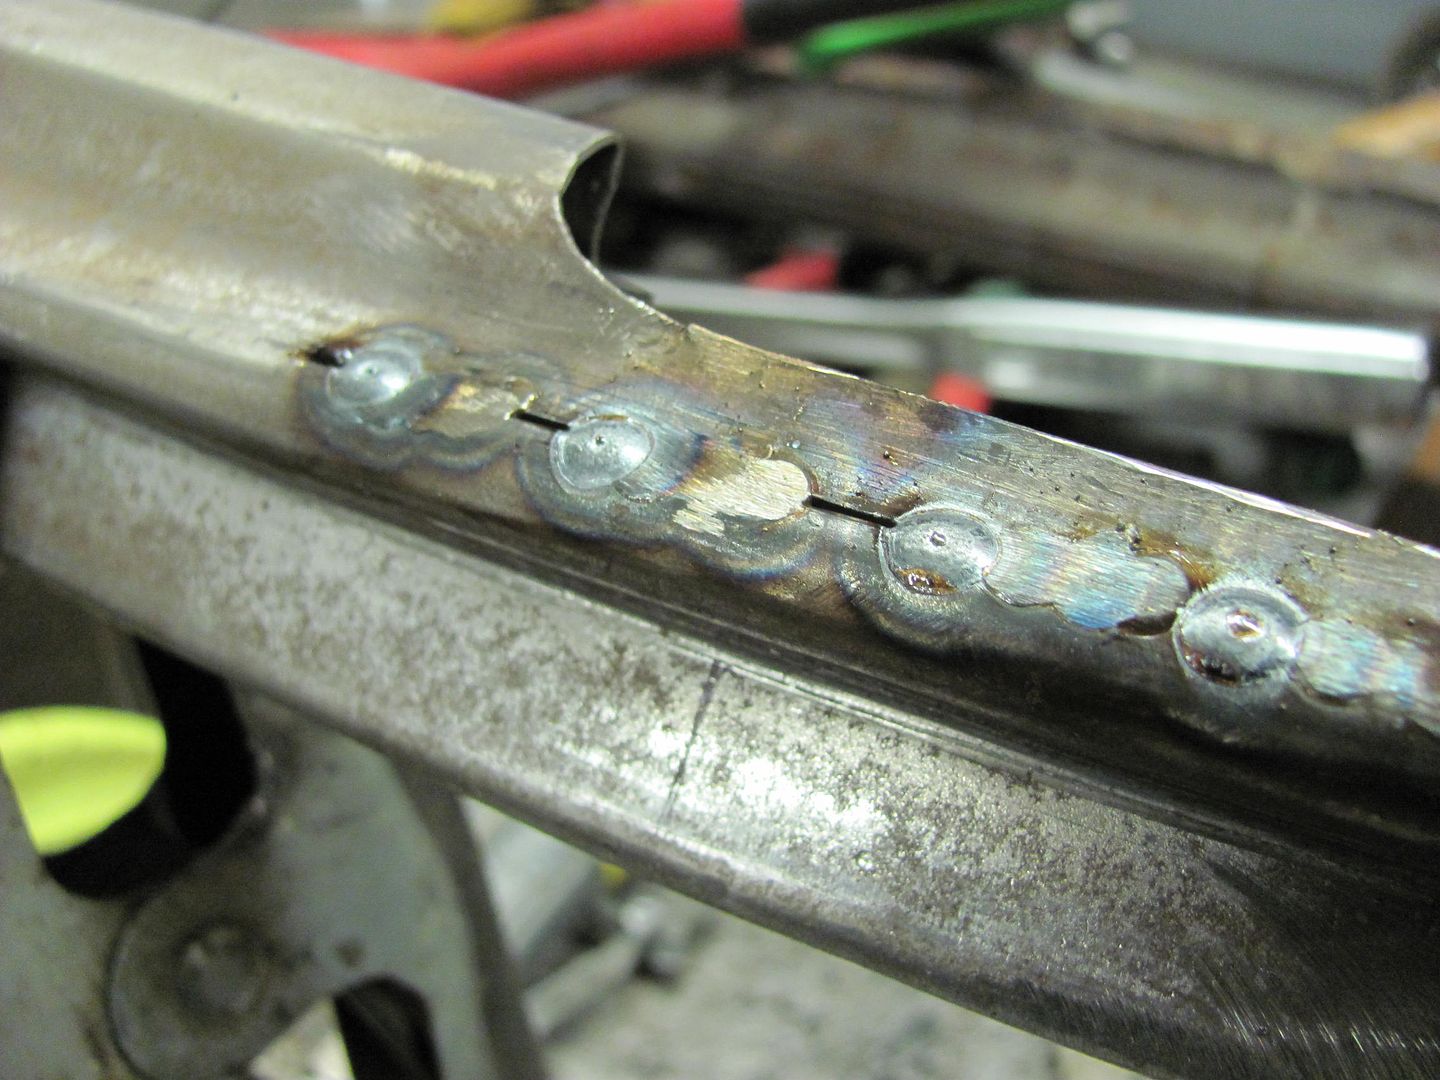
All done and cleaned up....
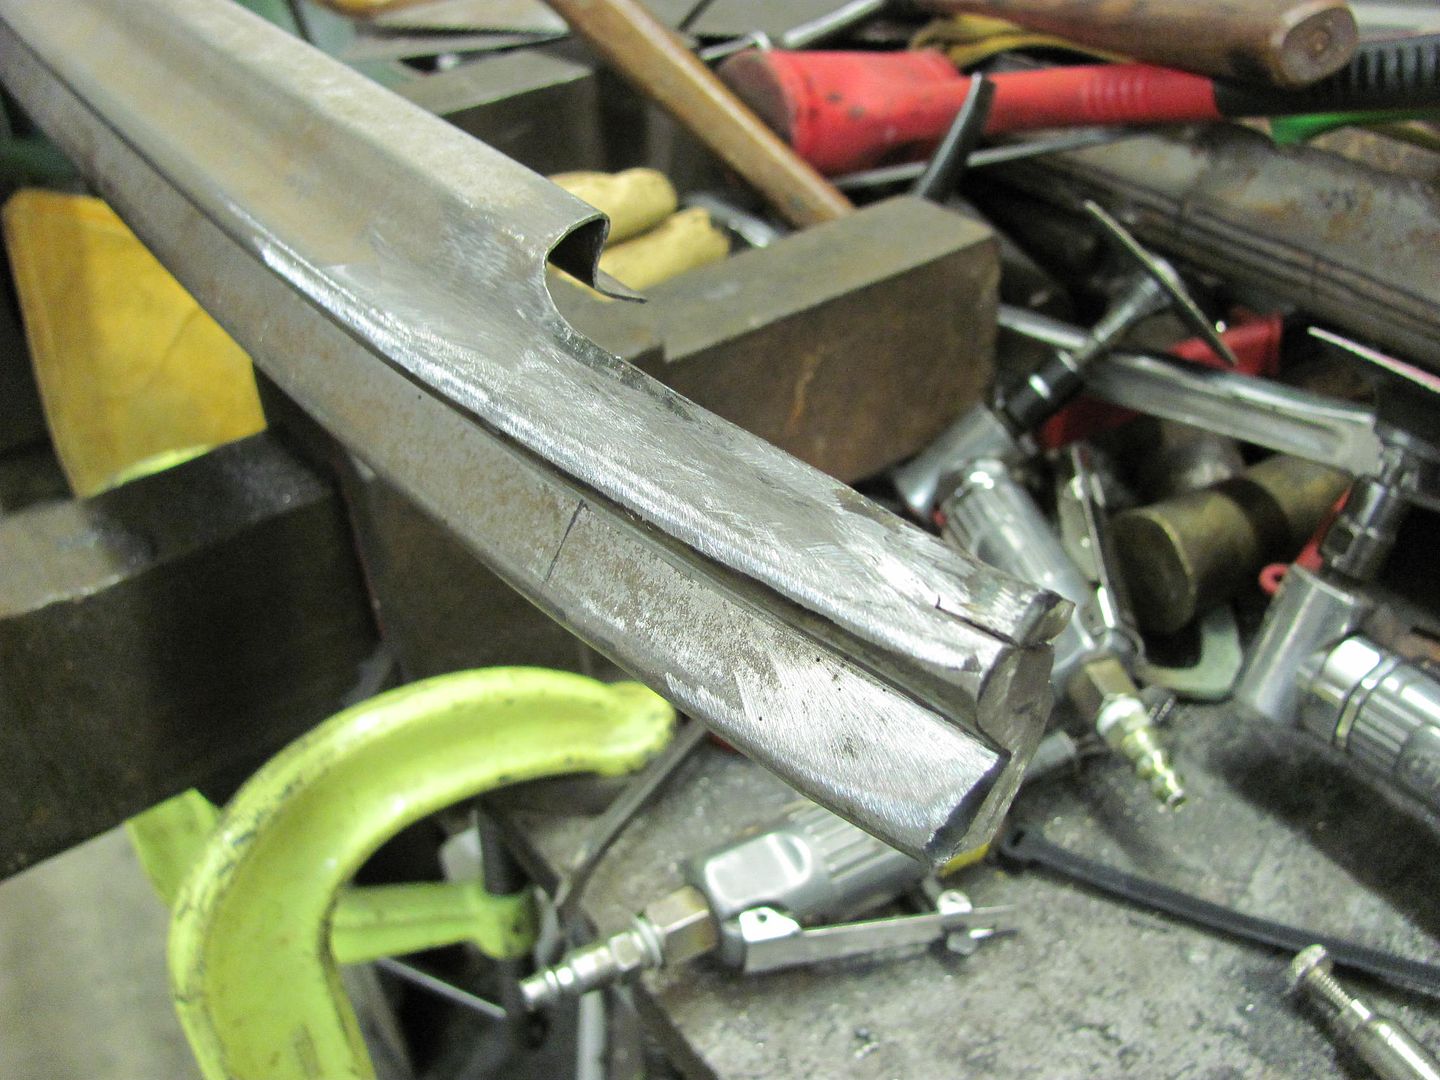
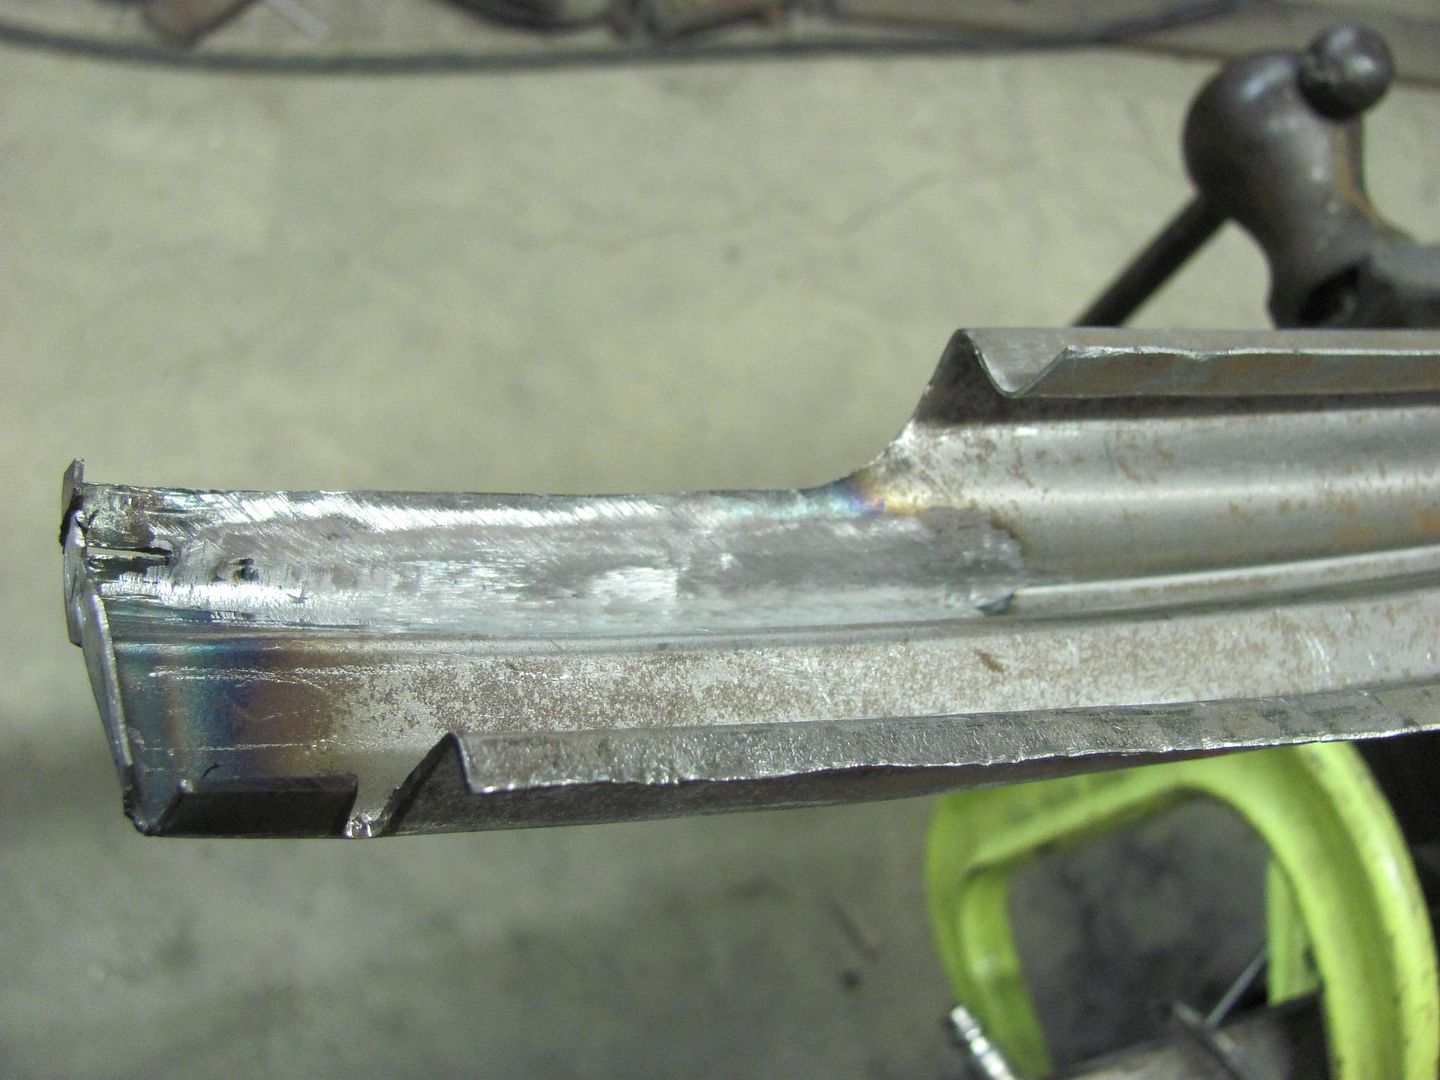
......for a much better fit..
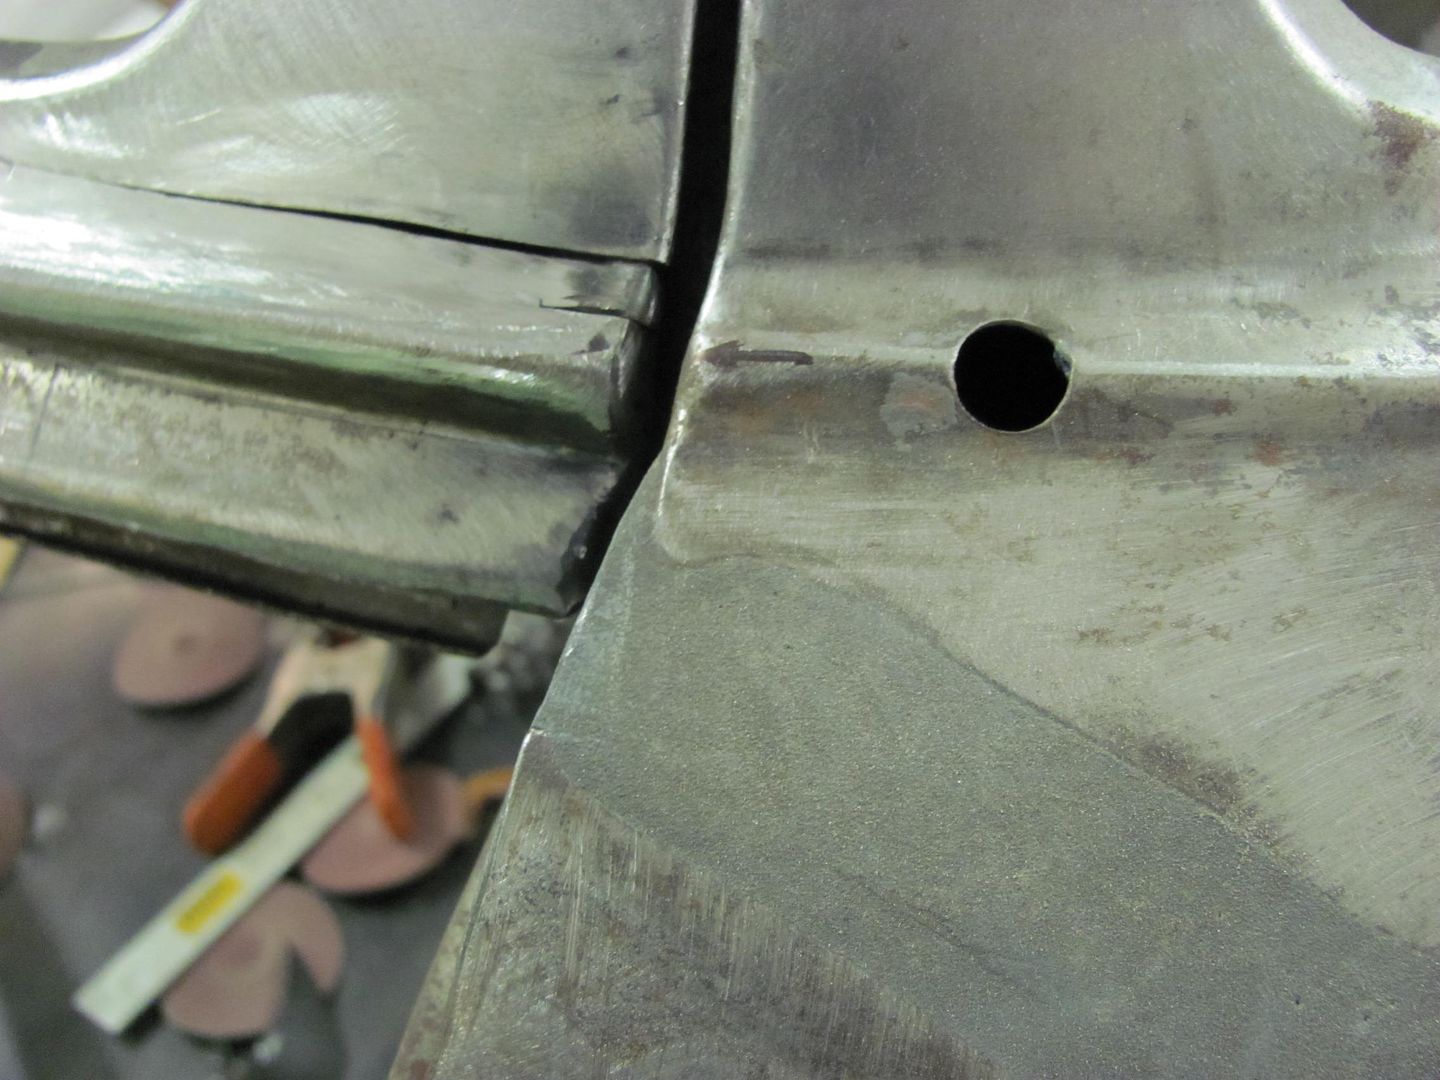
Then media blasted the inside in preparation for some epoxy primer...
.....and did some adjustment of the tailgate fitment.

Comment
-
Wow... I was just thinking... this would have to be parked next to a complete 100 point restoration for someone to see all the subtle differences you are making to this...I feel honored that you see fit to share this with us...Thank You!Patrick & Tammy
- Long Haulin' 2008, 2009, 2010, 2011, 2012, 2014...Addicting isn't it...??Comment
-
NOW QUIT THAT!! You're making me look like the hack that I am!
DanComment
-
Your work is just awesome (not able to find the right words :P)give me a car and i will fix it!!!Comment
-
Ok, even my stuff needs rework... Sometimes you just need to back up and punt.
Even though I have been working on this car far too long, with travel for the day job and two other resto's having been quite an interruption..... you get to where you finally see light at the end of the tunnel, and just come to grips with something that needs to come back out....
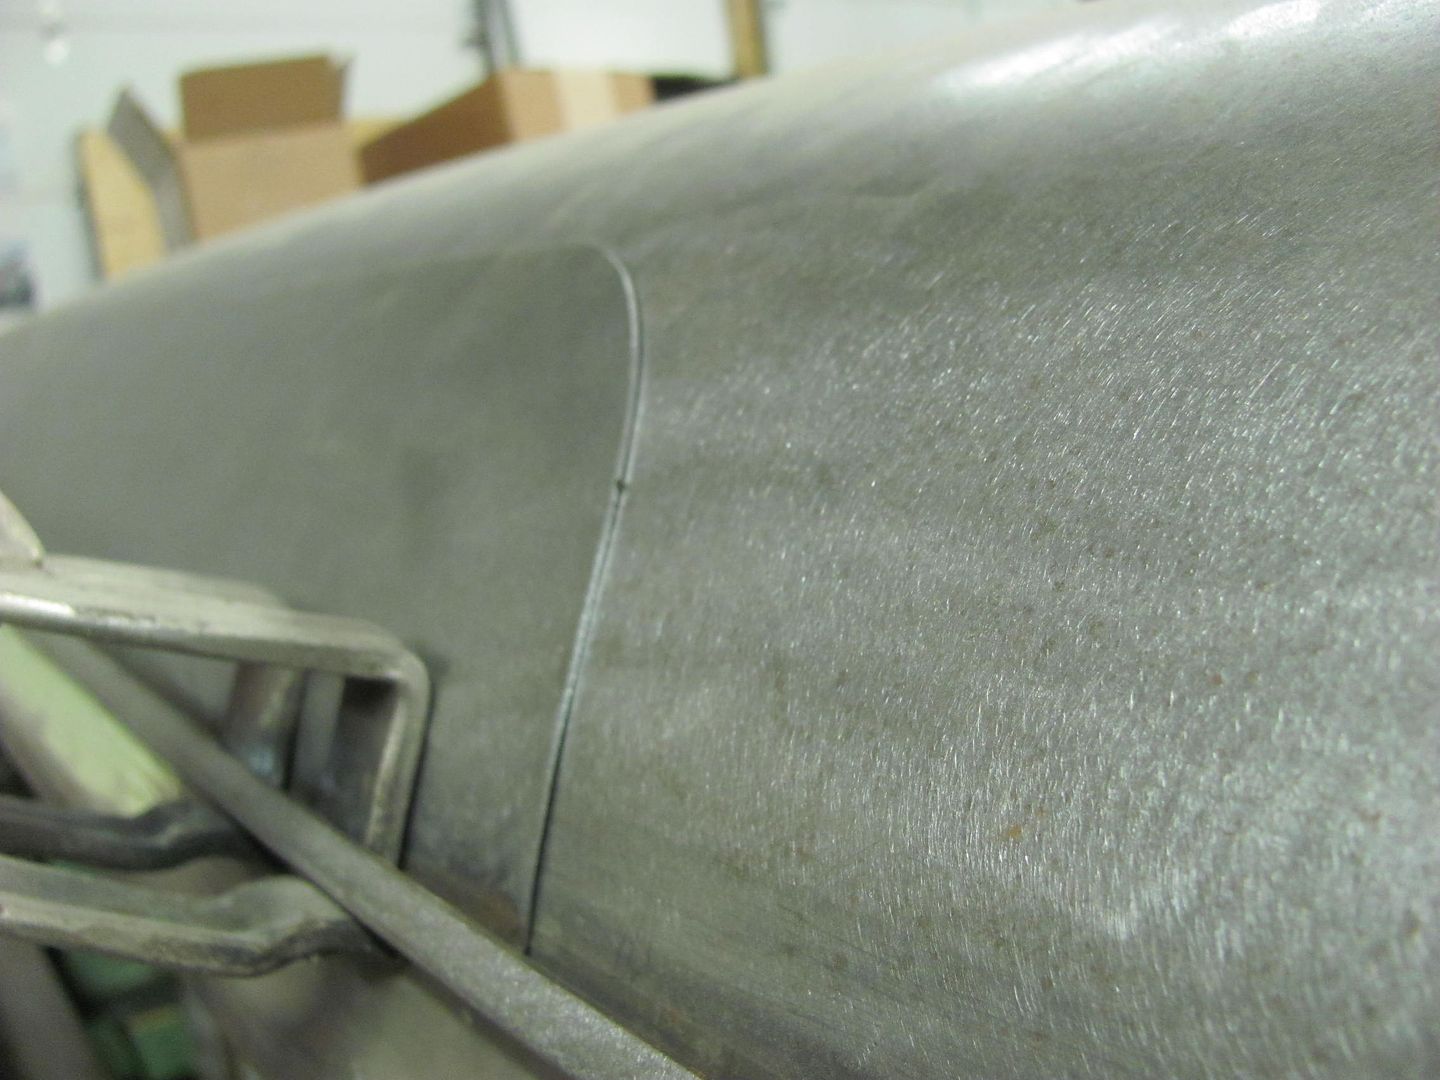
When I originally did this roof repair, I did not have the Lennox nibbler or English wheel or many of the tools I now have, and the patch panel you see below.....
....was fabricated using incremental bends in an apron brake. Given the creases you see due to the fabrication method, I likely made this shorter than I should have in an attempt to limit the creases, and the result was the horizontal weld was not up high enough to be readily accessible for planishing. After making these patch panels for a second roof repair......
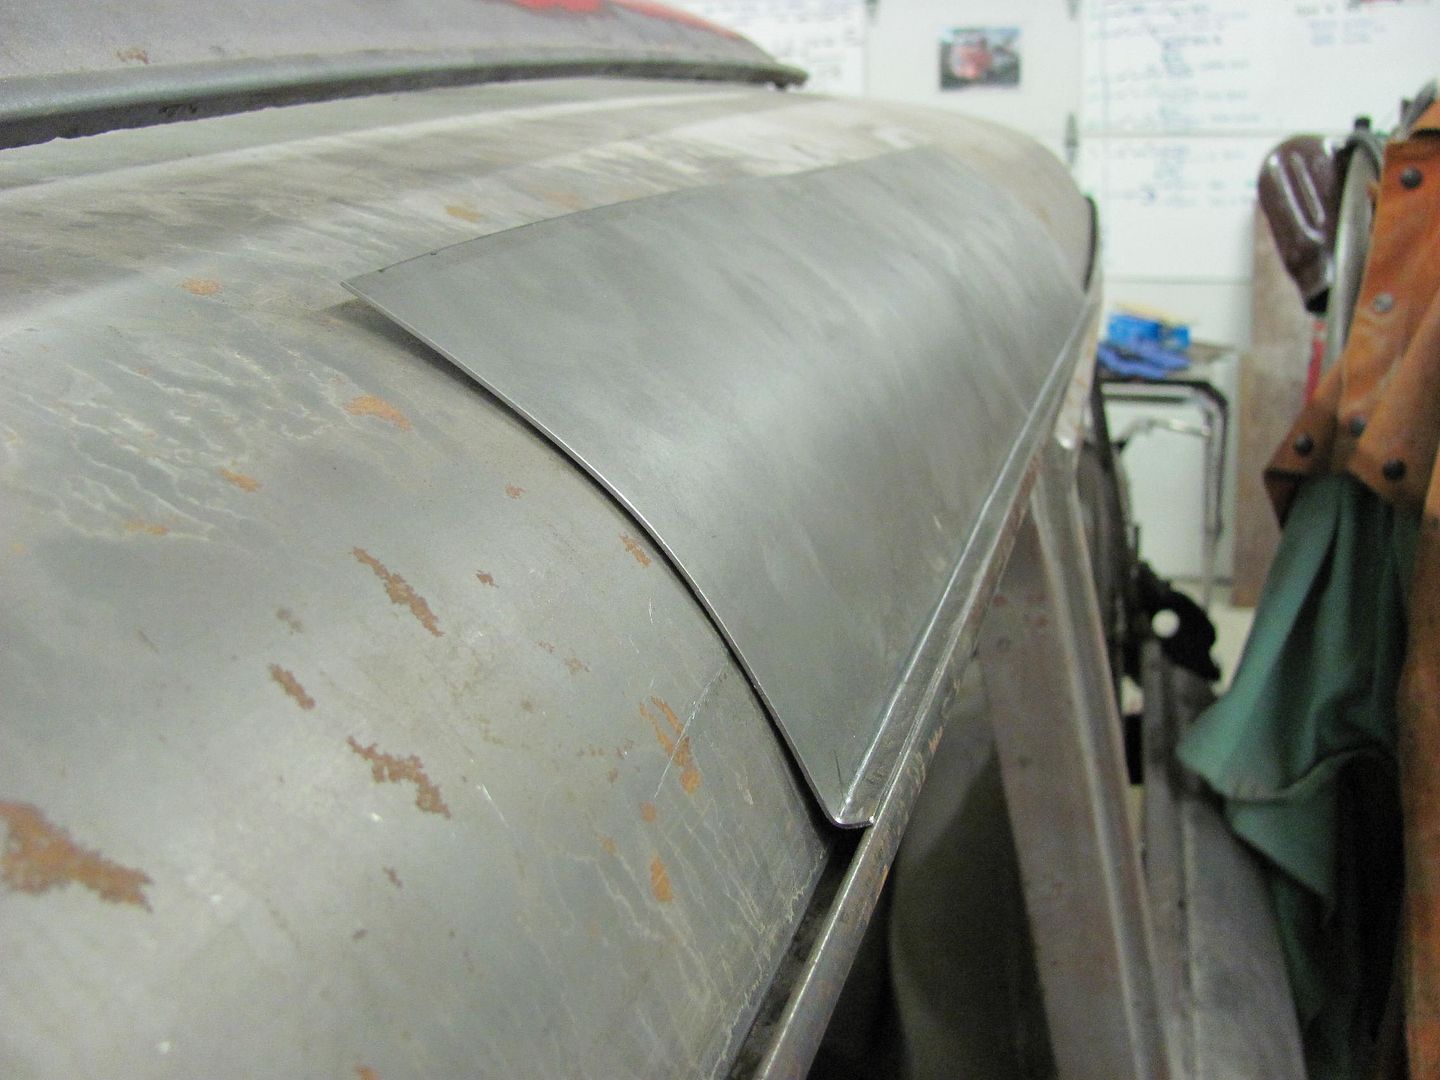
.....it was more apparent that the first attempt was not the best, and if I wasn't happy with it before, this new panel really made the old one grab my attention...each time I've walked by.
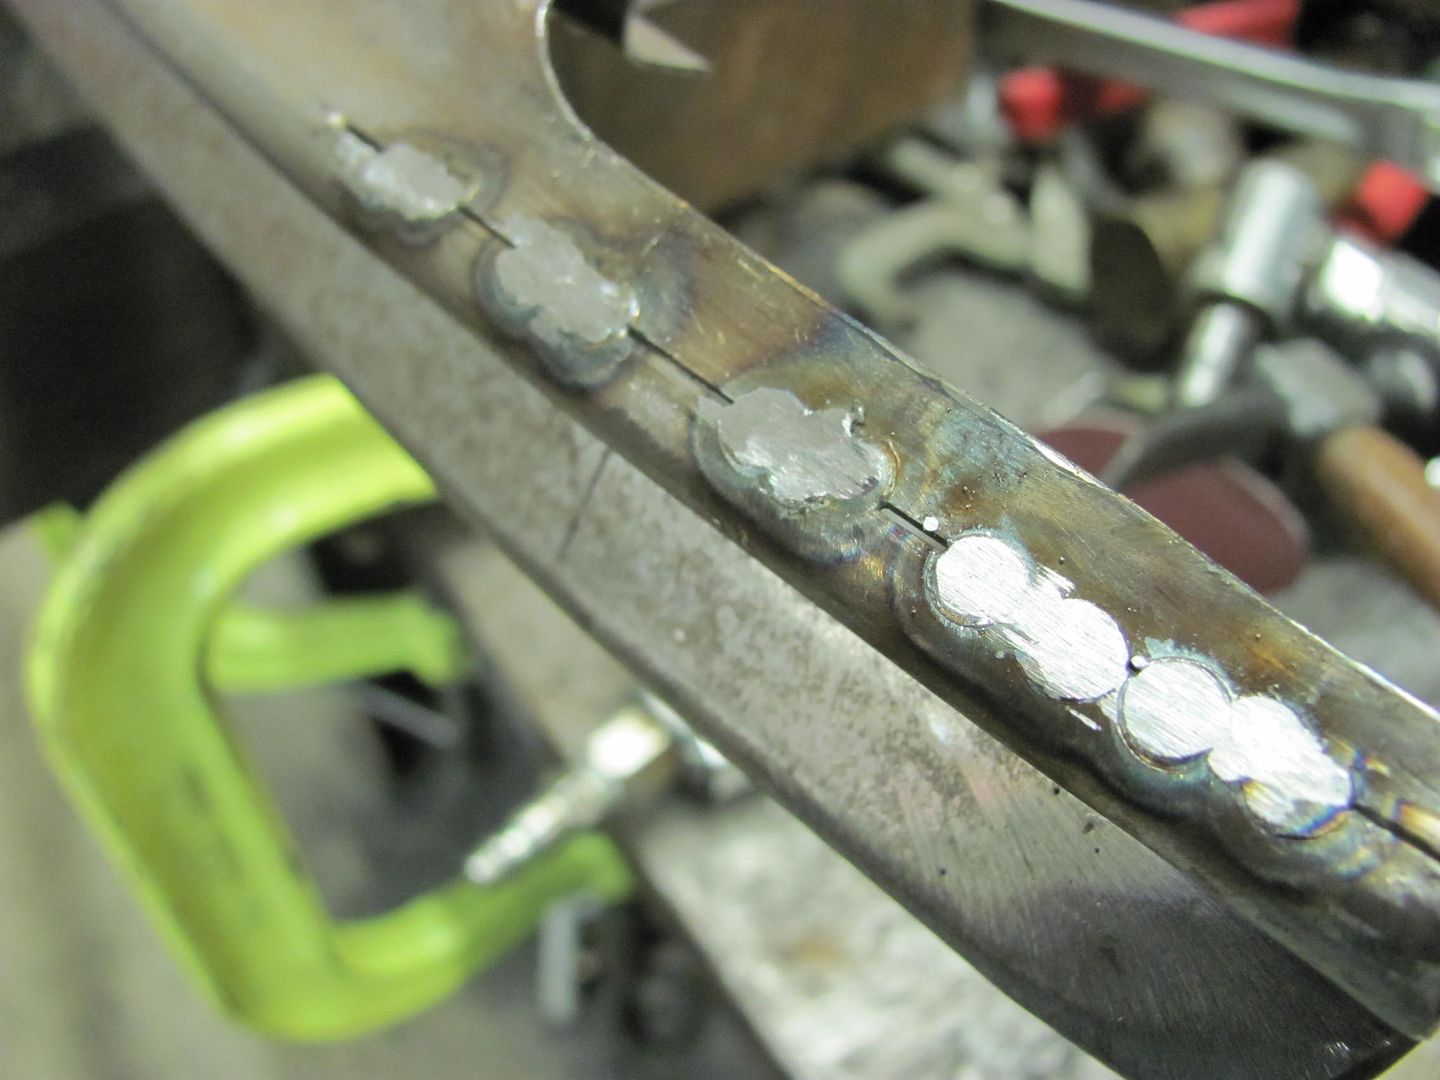
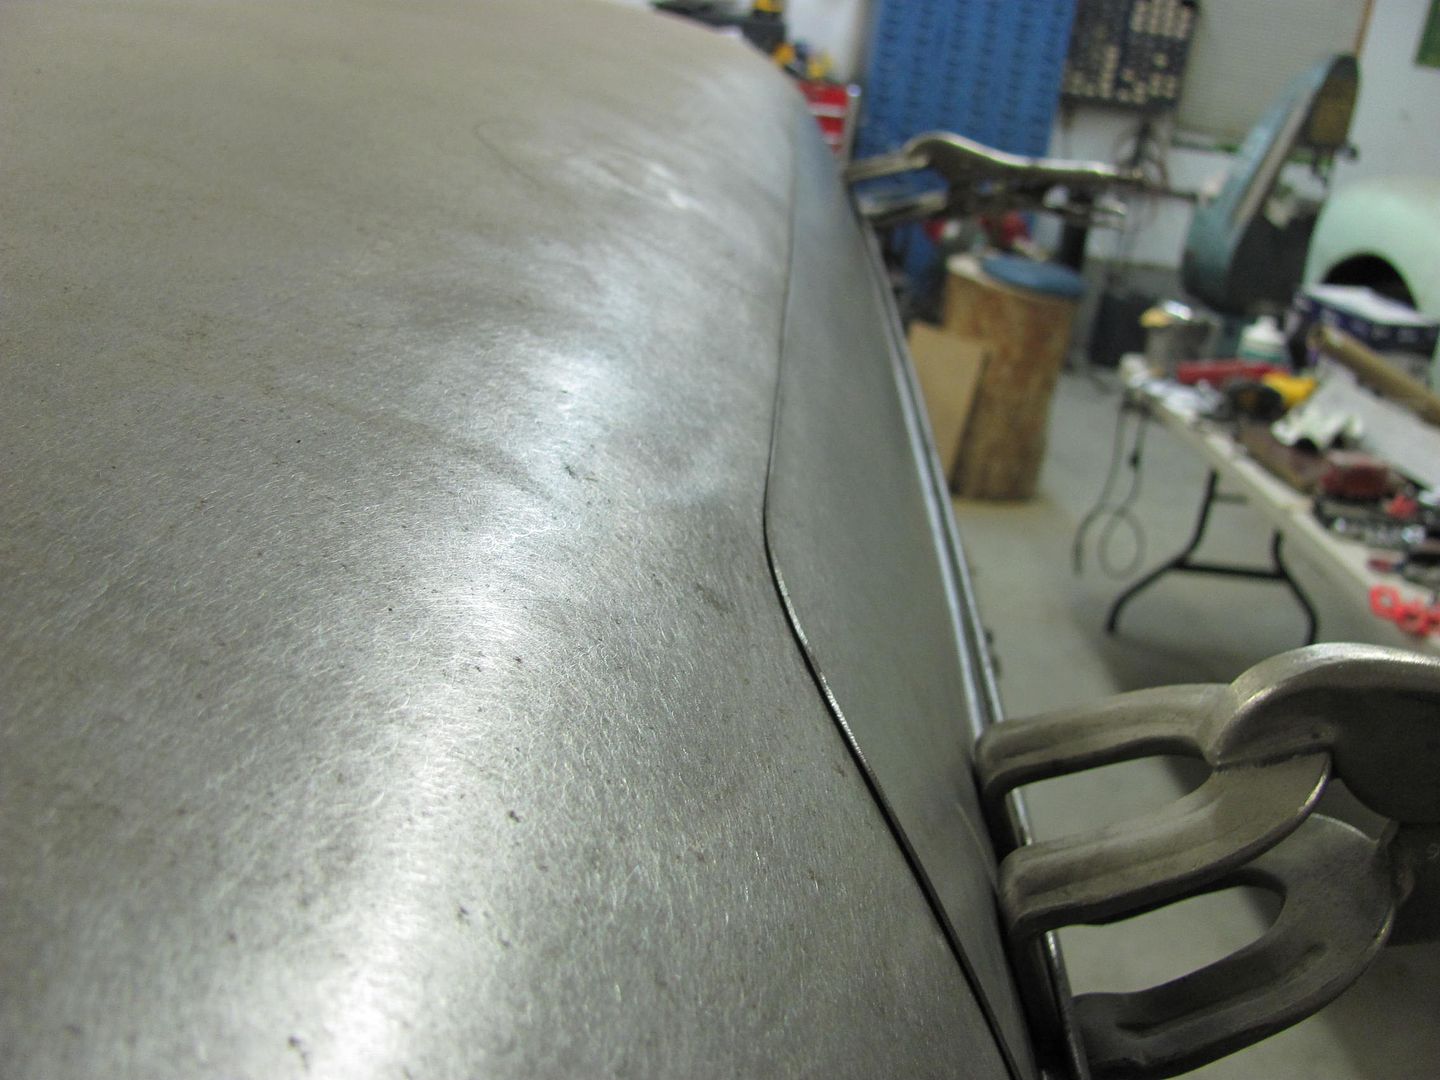
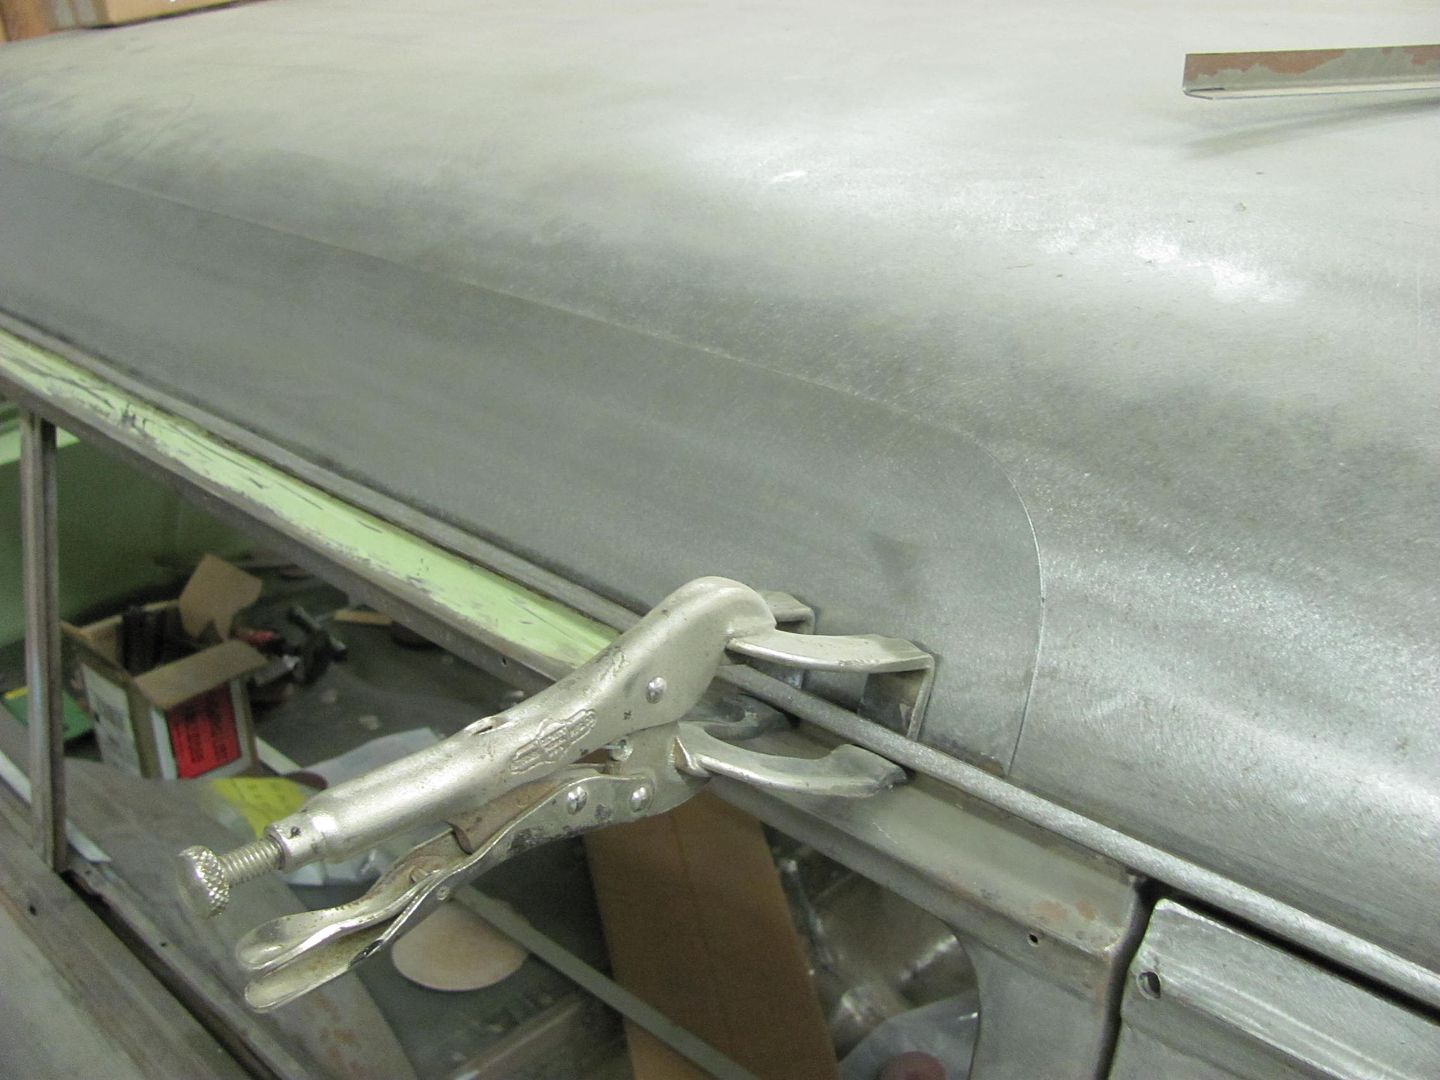
Well a person with spare patches lying around can only take so much, so tonight I checked the fit of one of the spare patch panels.... Looking at the front, the panel needed just a bit more crown....

And the rear needed just a bit less....

So with the Go Kart slick mounted up and ready to go, a 6" then 3.75" radius lower anvil added the crown needed for the front and a 24" radius flattened out the rear for a much better fit.

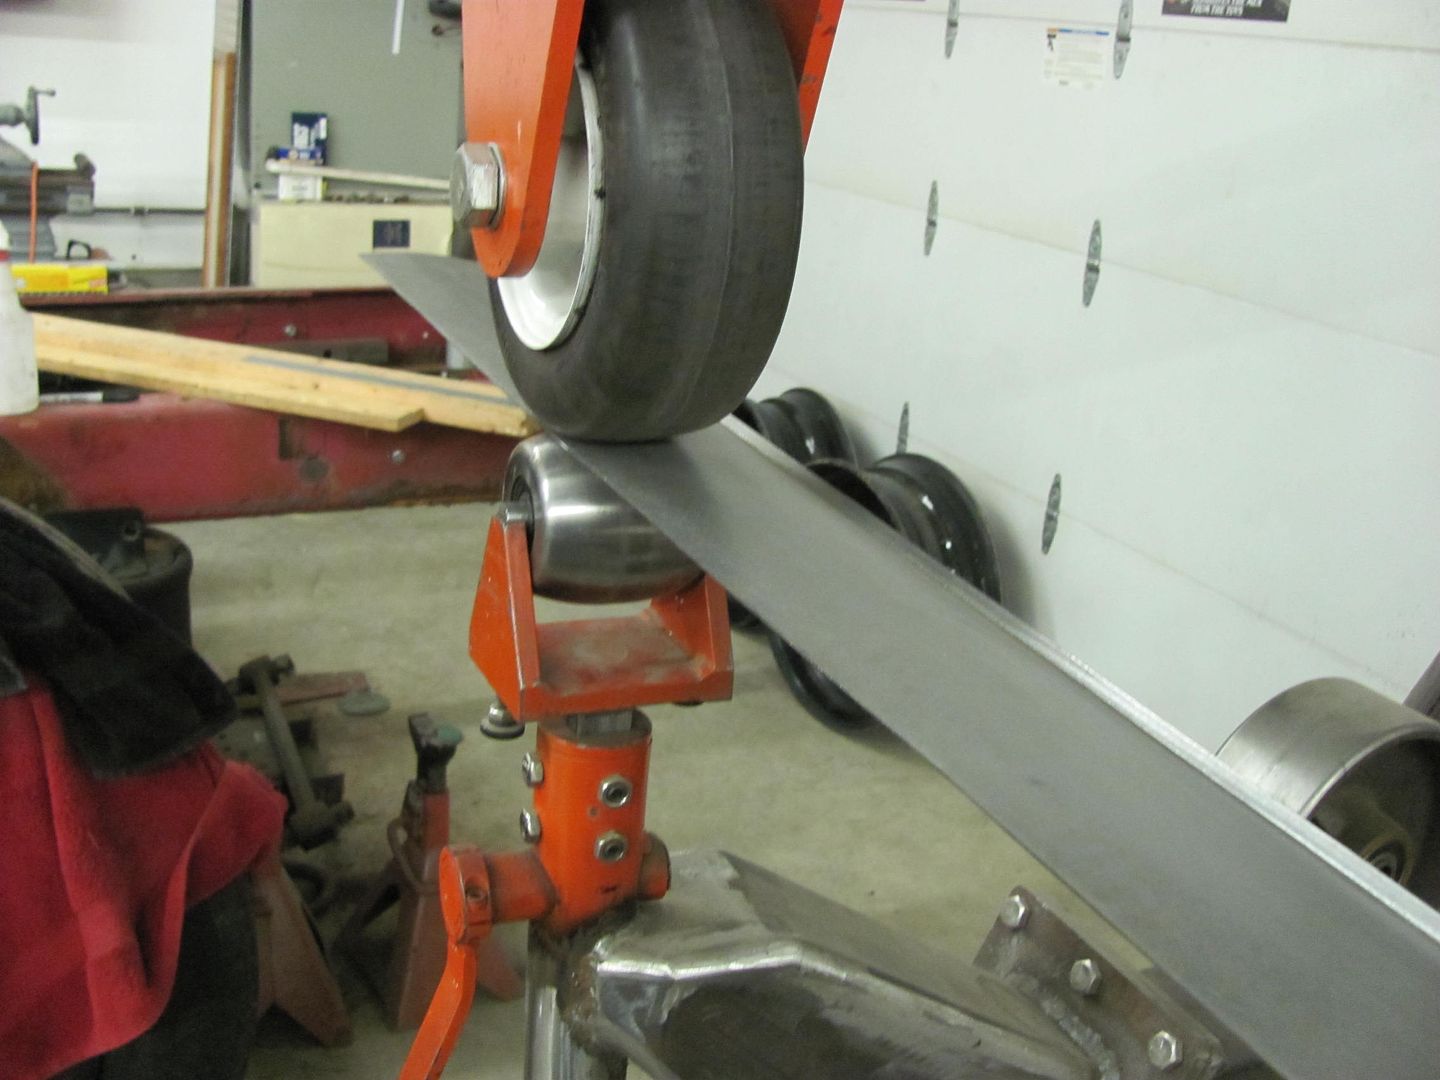
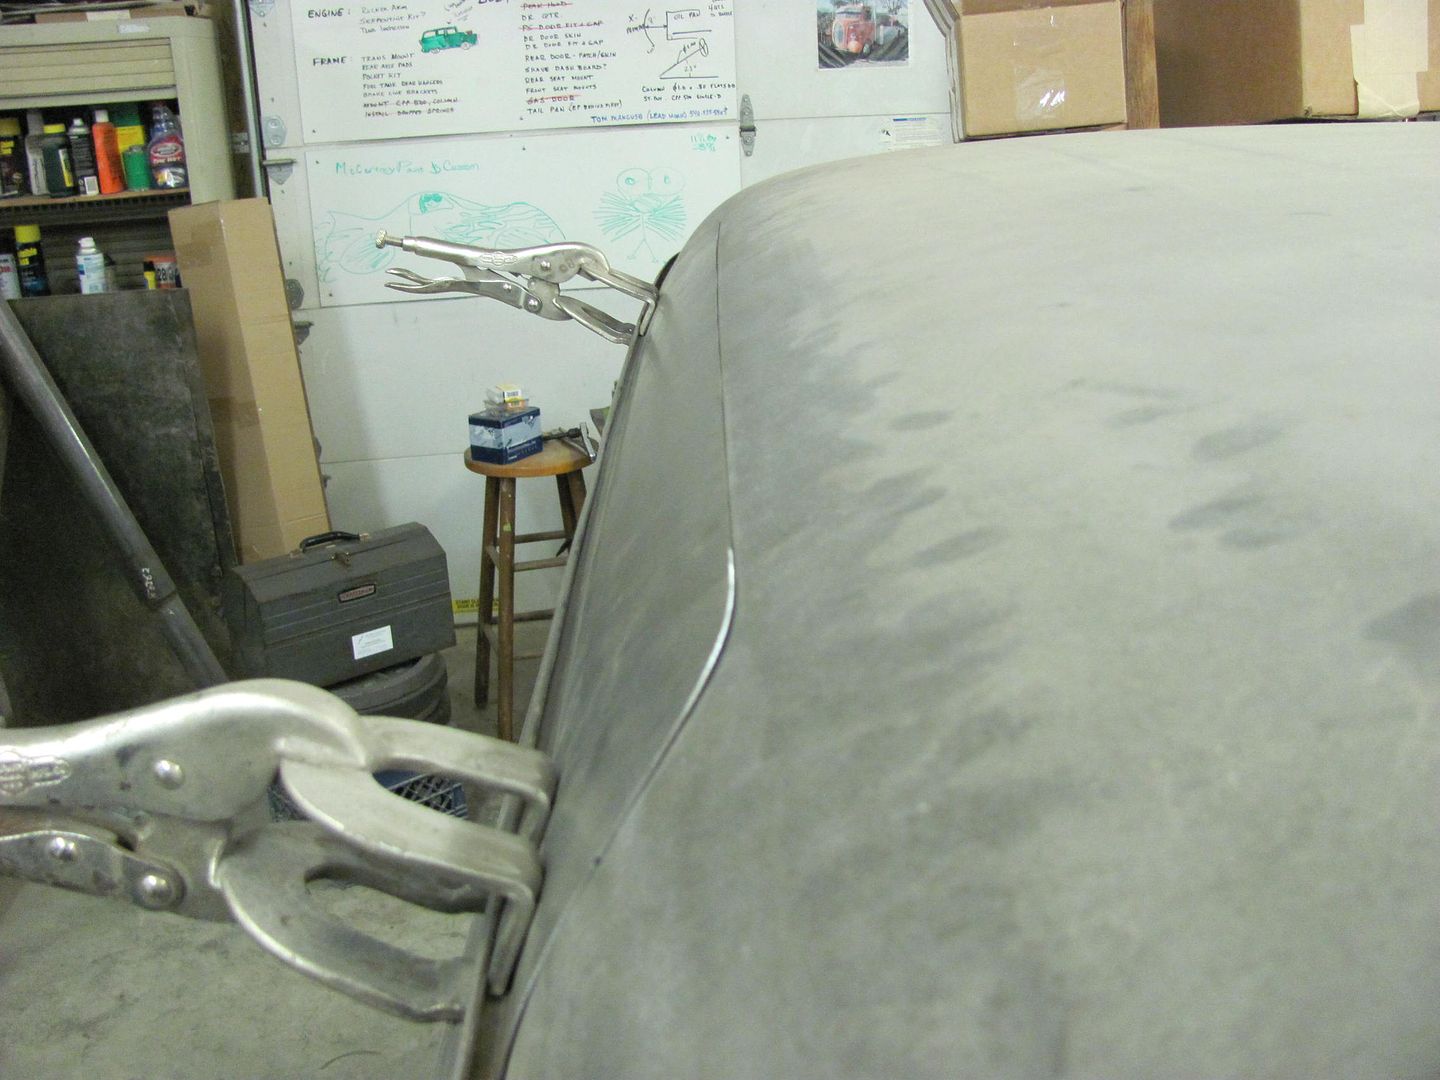

These panels are about 4" high and put the weld up above the roof boxing structure, so planishing will be more accessible to give us a better job. I'll get the patch all primed on the inside and let it cure. Then cut out the old patch and get this new one welded in.. More to come..Comment
-
Now you're just showing off! The old patch and a VERY thin later of filler would have made it invisible. My standards are impossibly low.......
DanComment
-
I love your creativity to solving problems and high quality of work. Impressive!TomOverdrive is overrated
Comment
-
as always, awe inspiring work, it's hard to look at this and not get discouraged, but instead inspired to do better.
Did you build that english wheel? Looks like a massive and rigid structure, as it should be. I'm guessing your shop is at least 40x60?There's always something new to learn.Comment
-
Thanks for the comments guys.
The shop is 34 x 52. It could be twice that size and it would still fill up too quick....
Here is the build on the English wheel. I started with a kit I bought used on CL and some 4 x 6 tubing. Hindsight, should have bought all the components from Joe Andrews (Hoosier Profiles). He makes the best stuff out there for building your own..
Last edited by MP&C; January 3, 2014, 10:10 AM.Comment
-
great - there goes the rest of my morning... haha (new reading material). Flying south, with a flock of bird dogs.
Comment
-
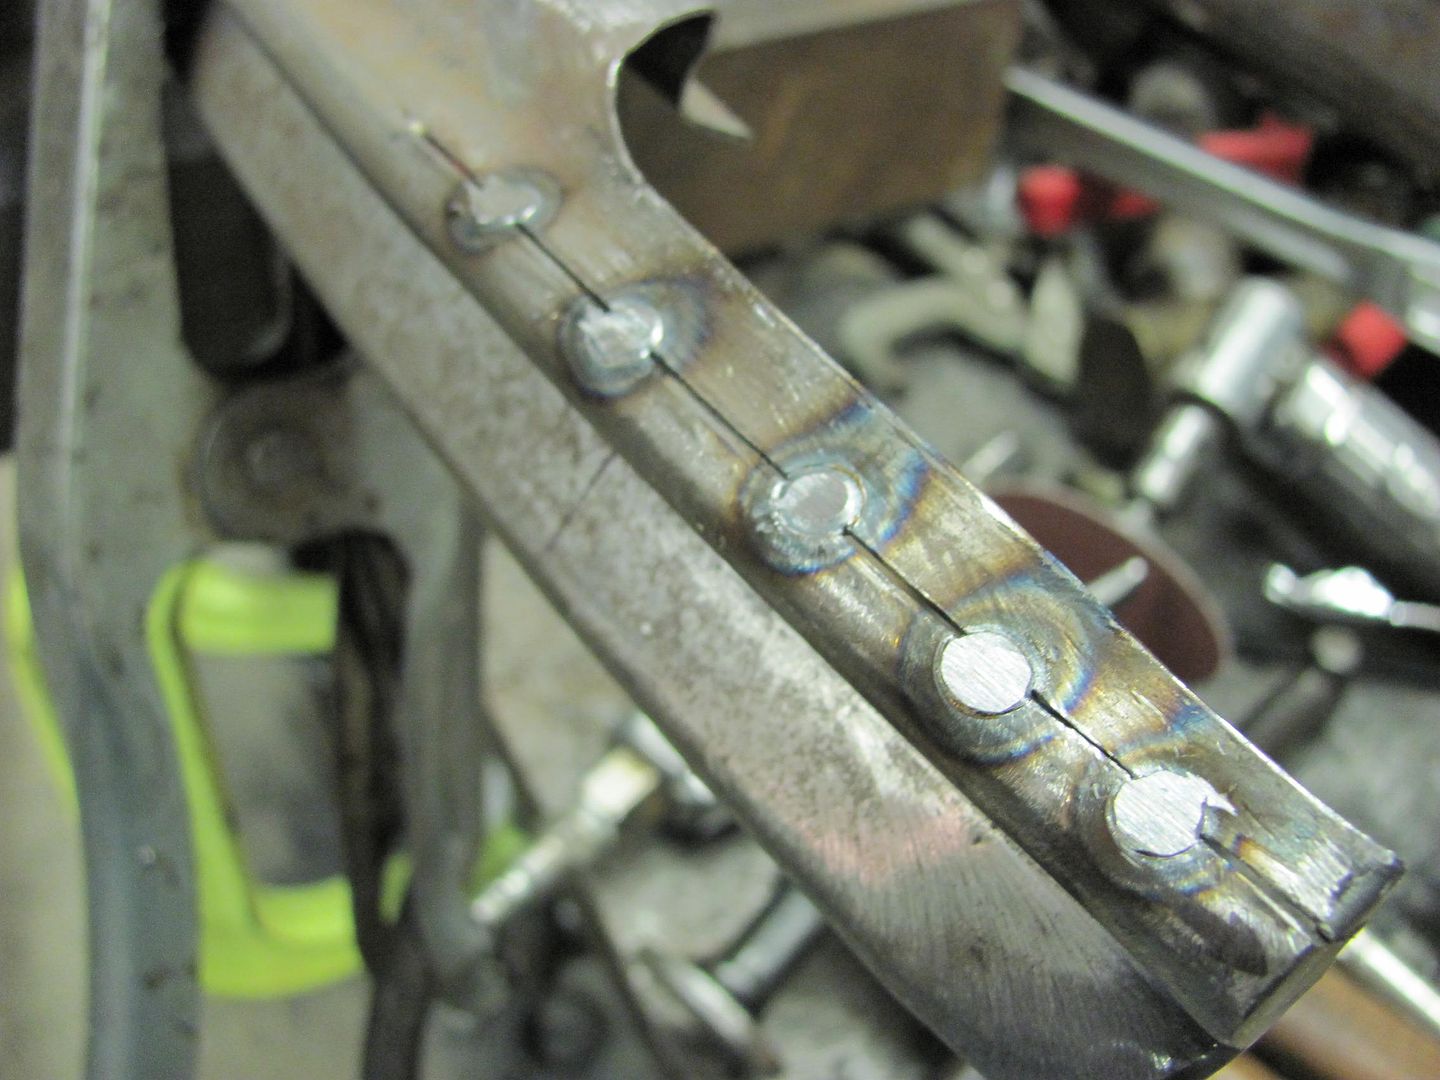
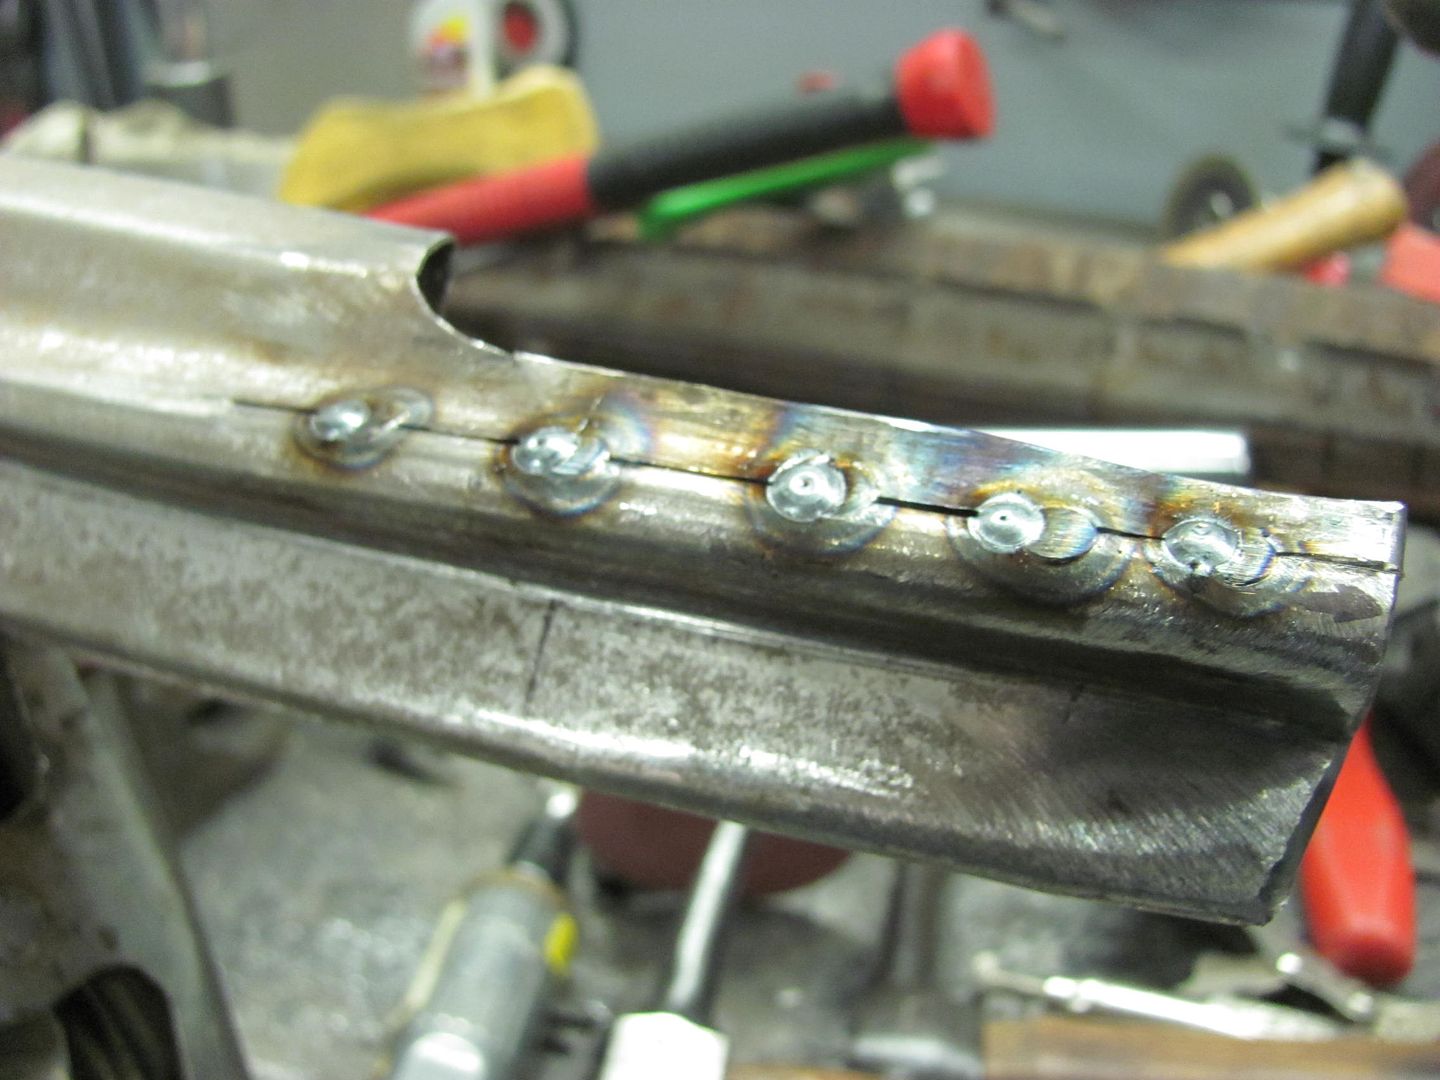
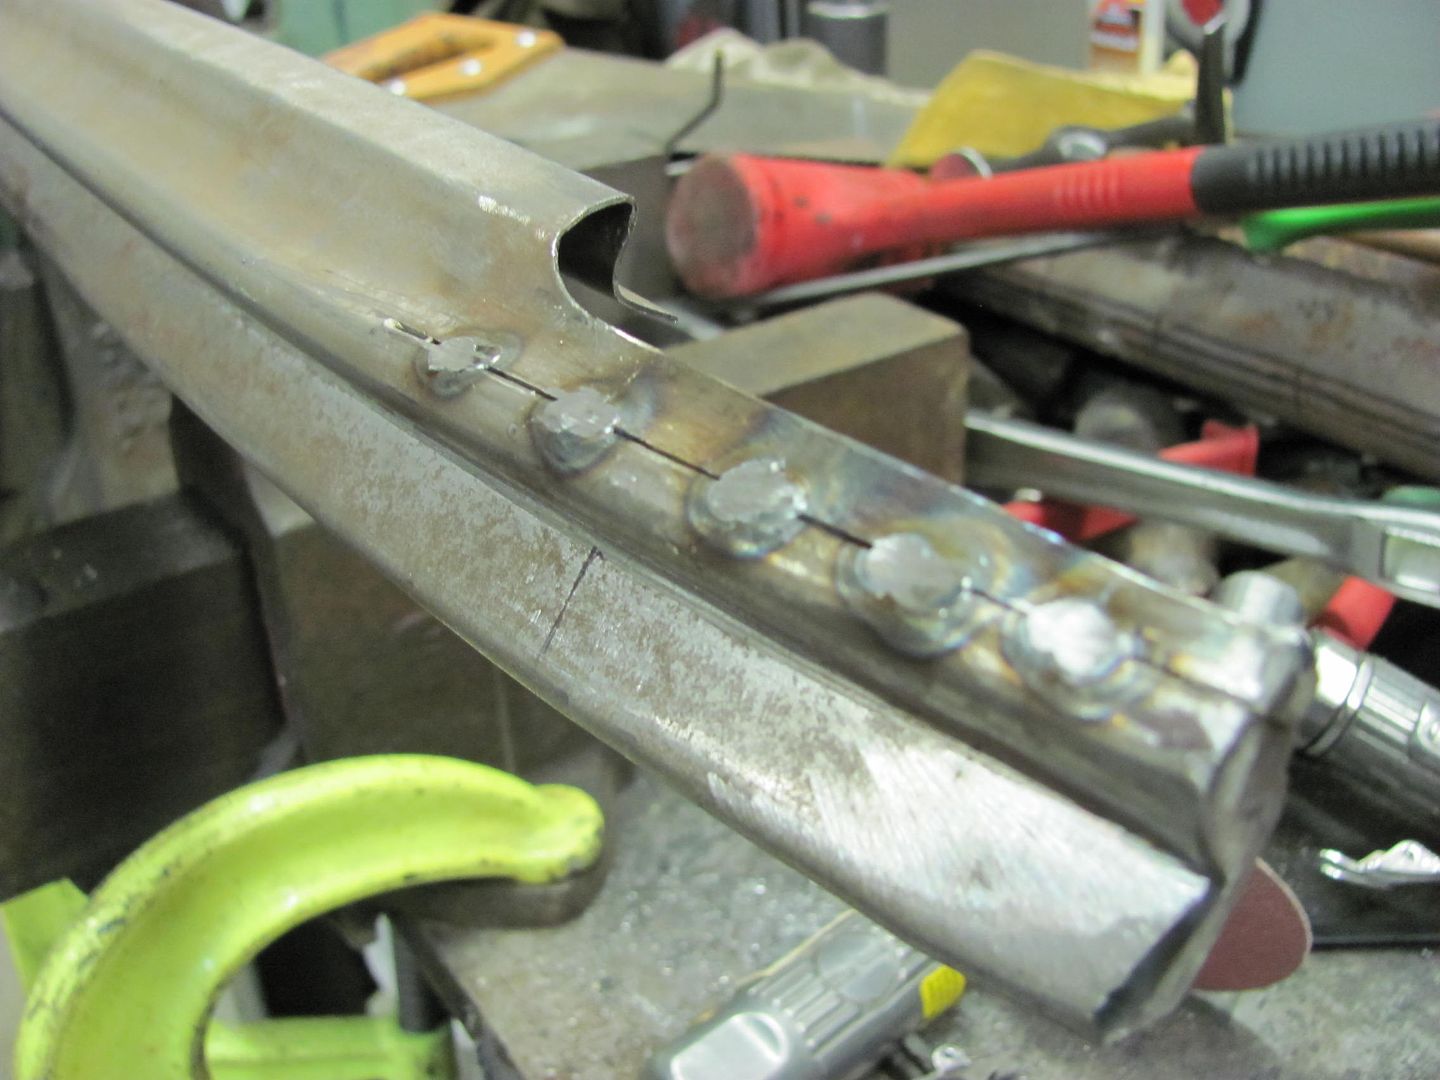
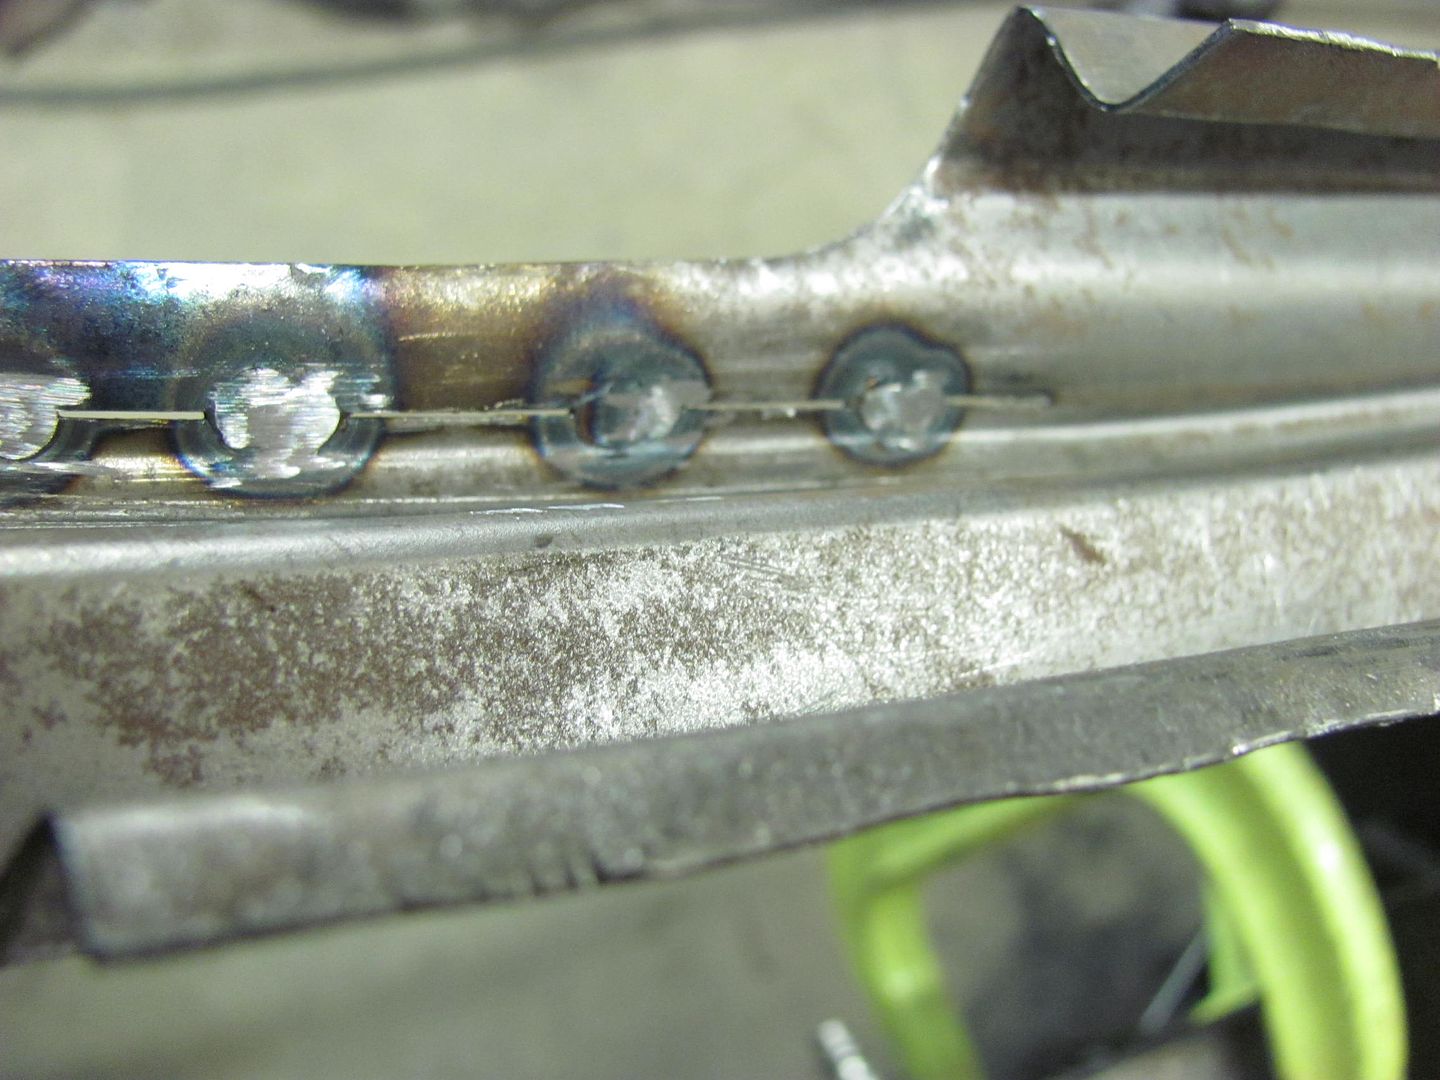
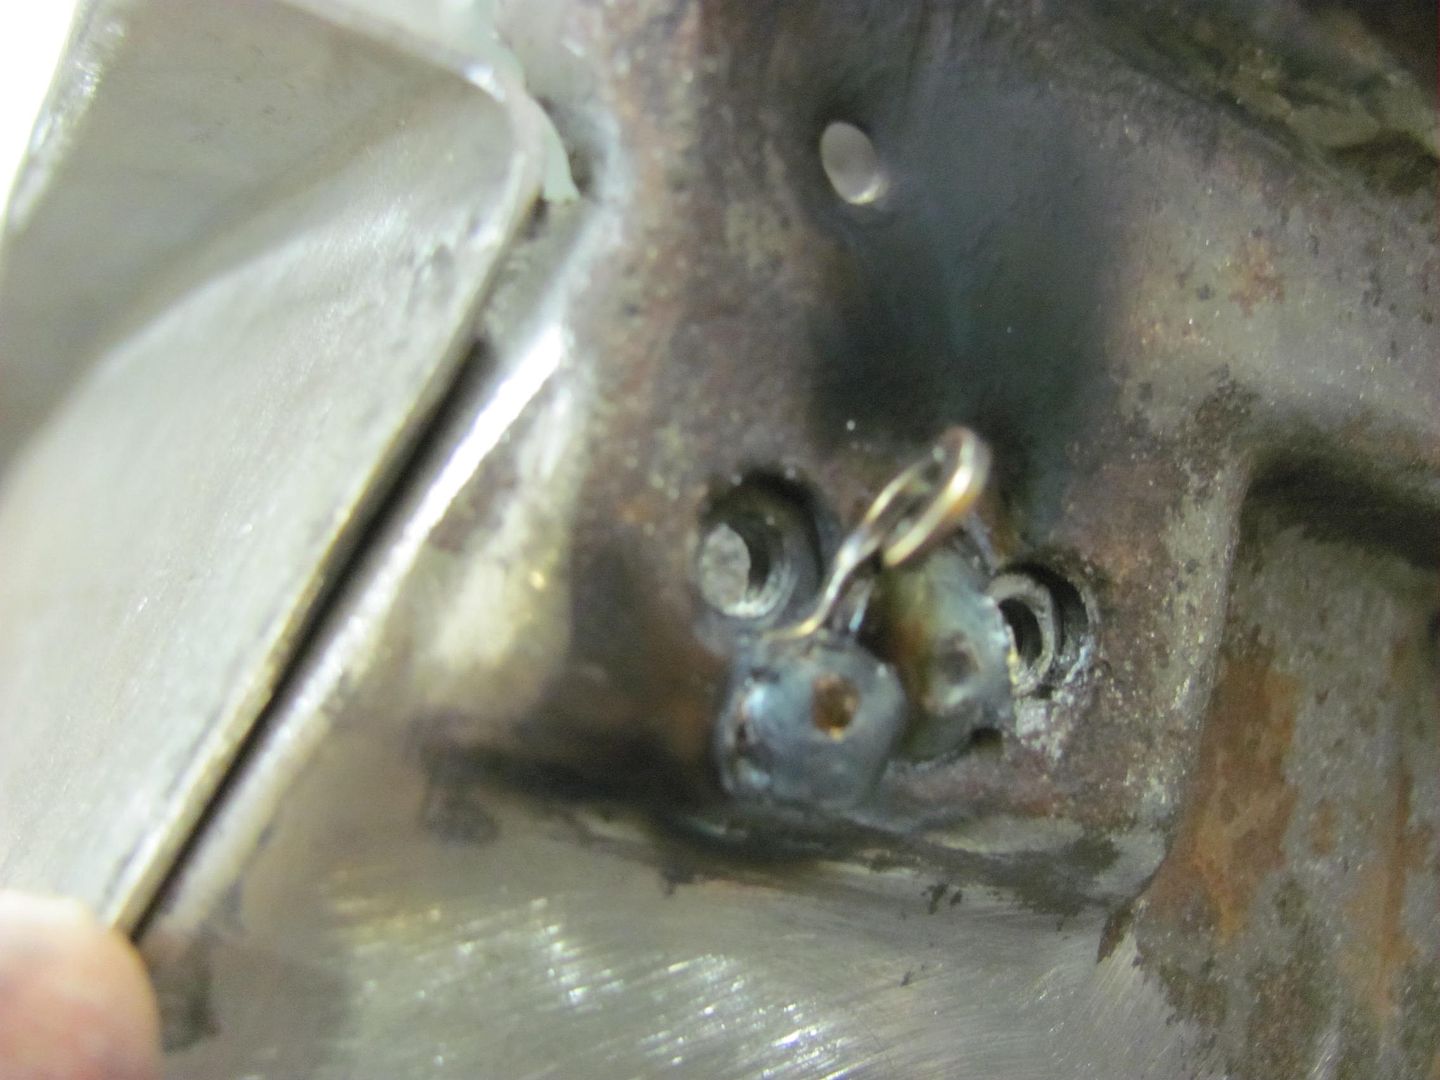
Was in the middle of media blasting the innards of the lift gate and noticed the threads for these nut plates didn't look too "full" A test with a 10-24 screw showed that some of the holes were so bad that they had a "slip" fit.
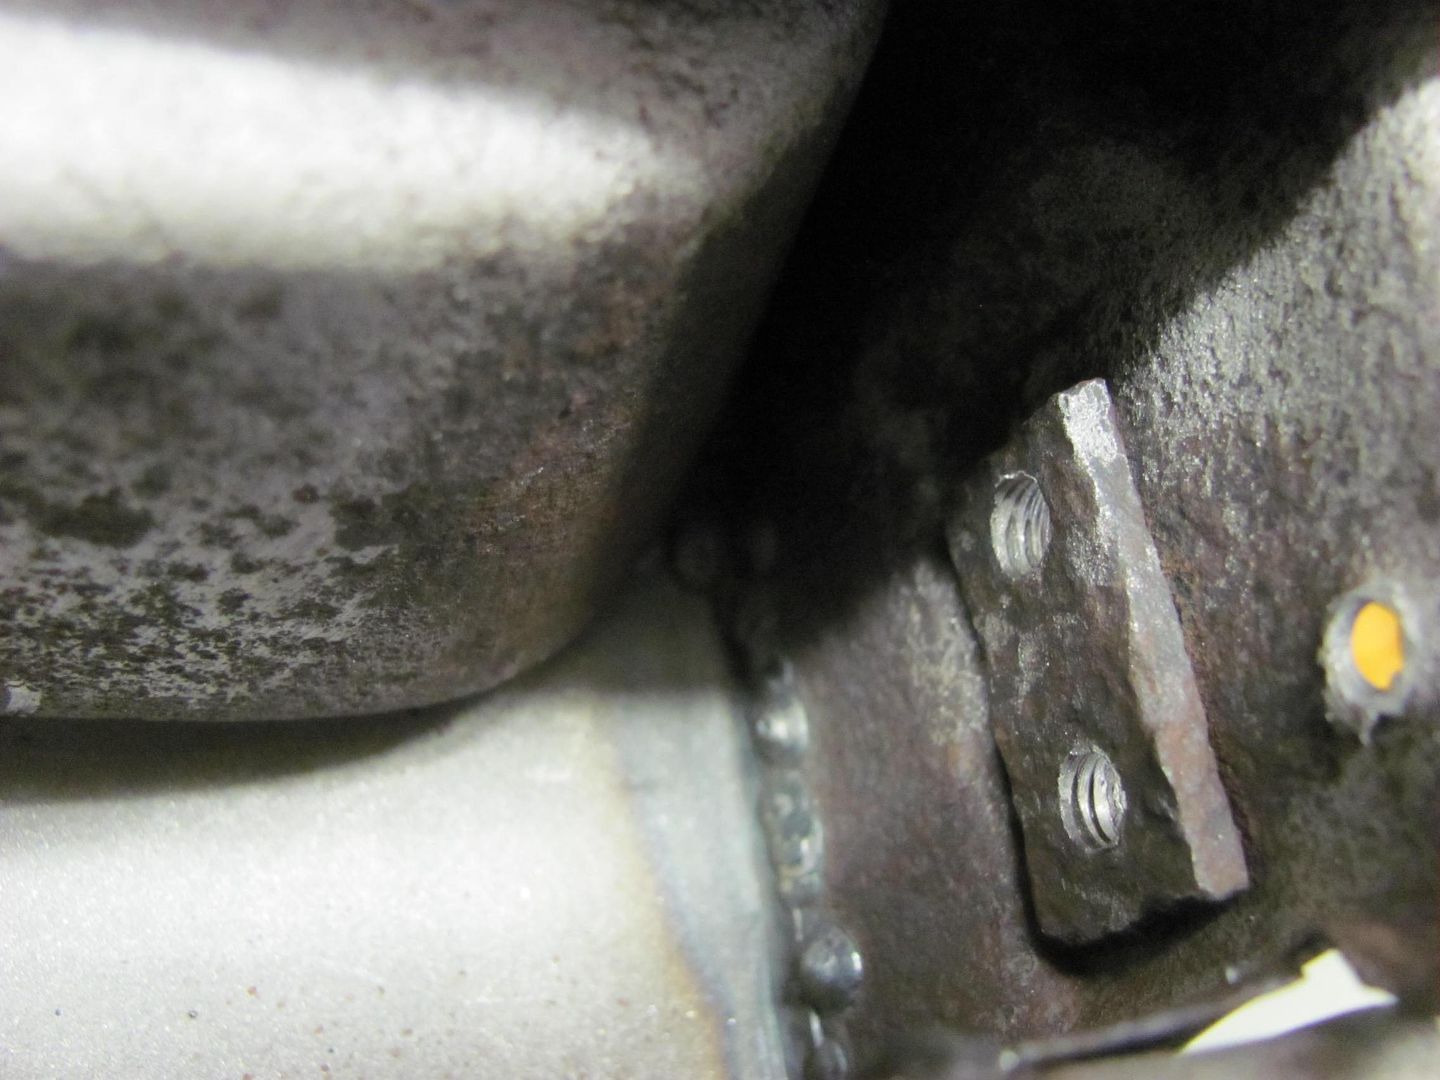
These hold the rubber bumpers on the bottom inside edge of the lift gate. The spot welds are drilled to release the nut plate..

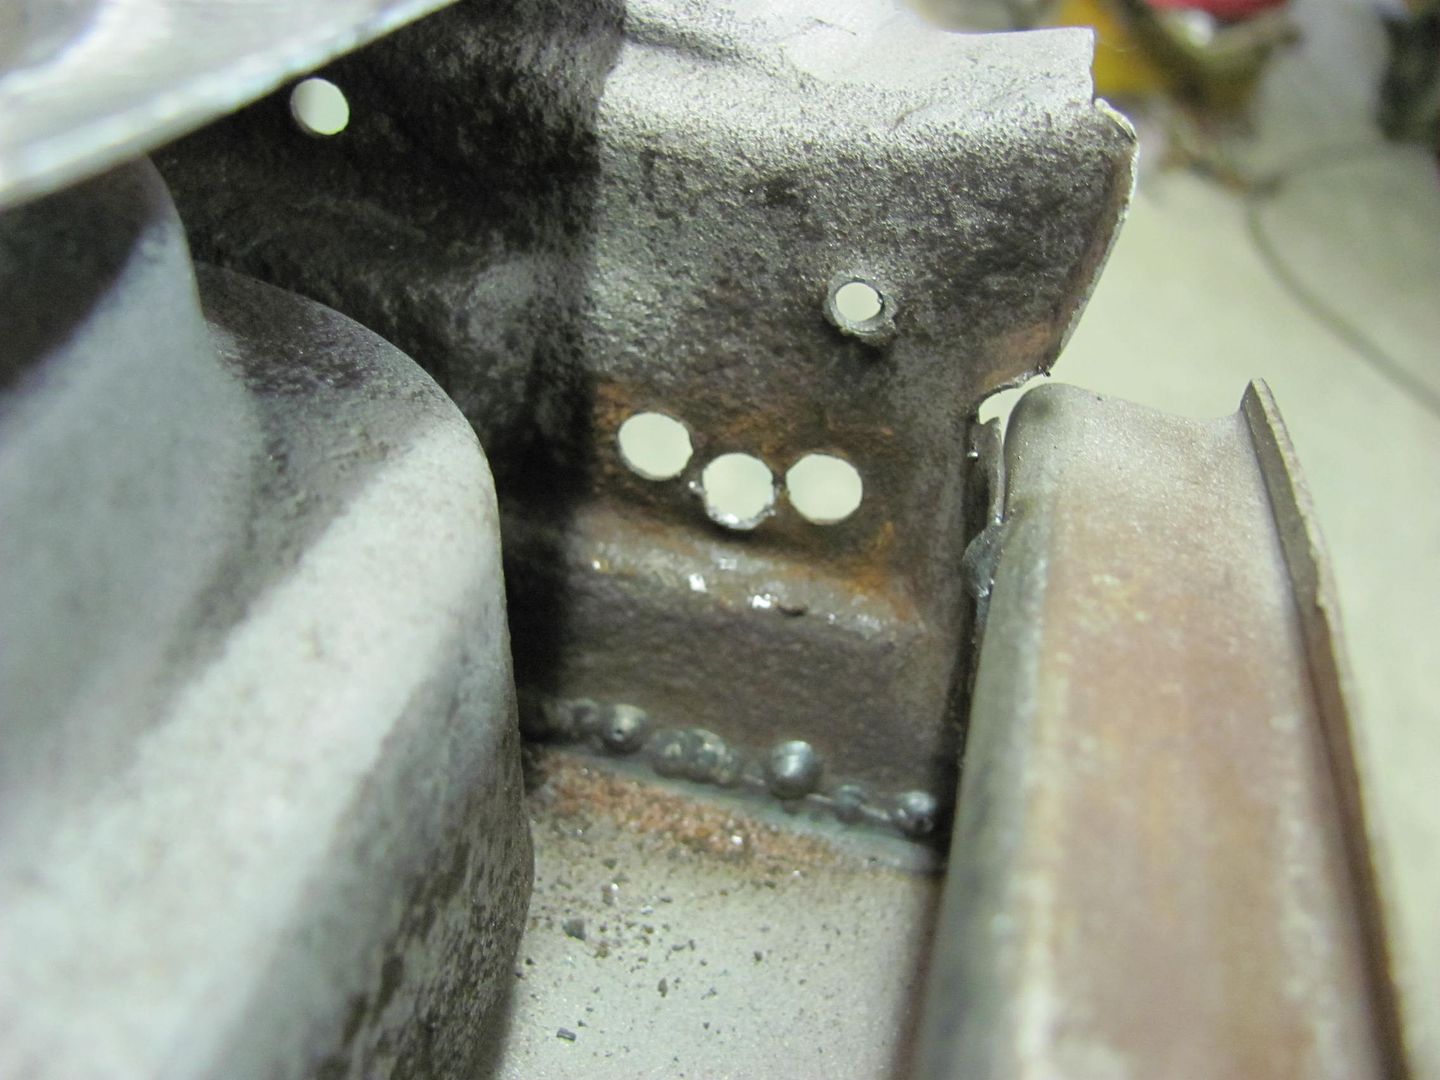
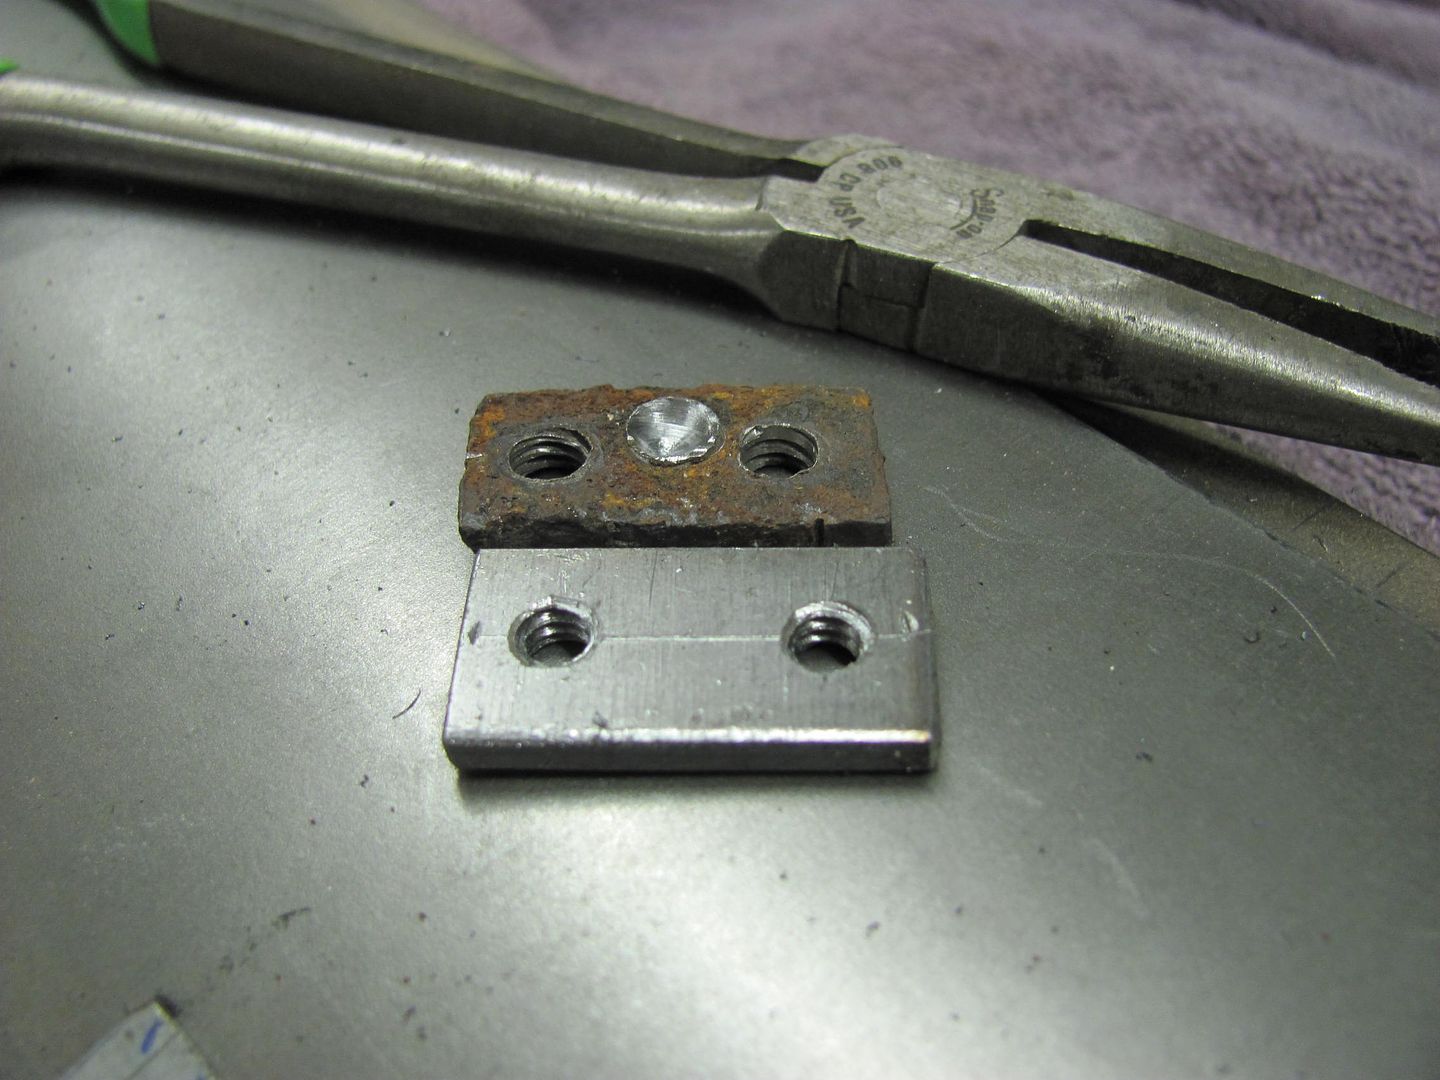
The new ones are cut out of some 10ga steel, holes drilled and tapped.

yeah, these threads look much better....
Where I normally use a couple screws to hold nut plates in place for welding, with the close proximity of the plug weld hole the screw heads would obscure some of the hole, and we would undoubtedly be welding in the screw heads for difficult removal. For this case, we'll use some brass tubing as a spacer. Since the tubing I picked up passes though the screw holes, a sacrificial lock washer is used for it's minimal diameter.
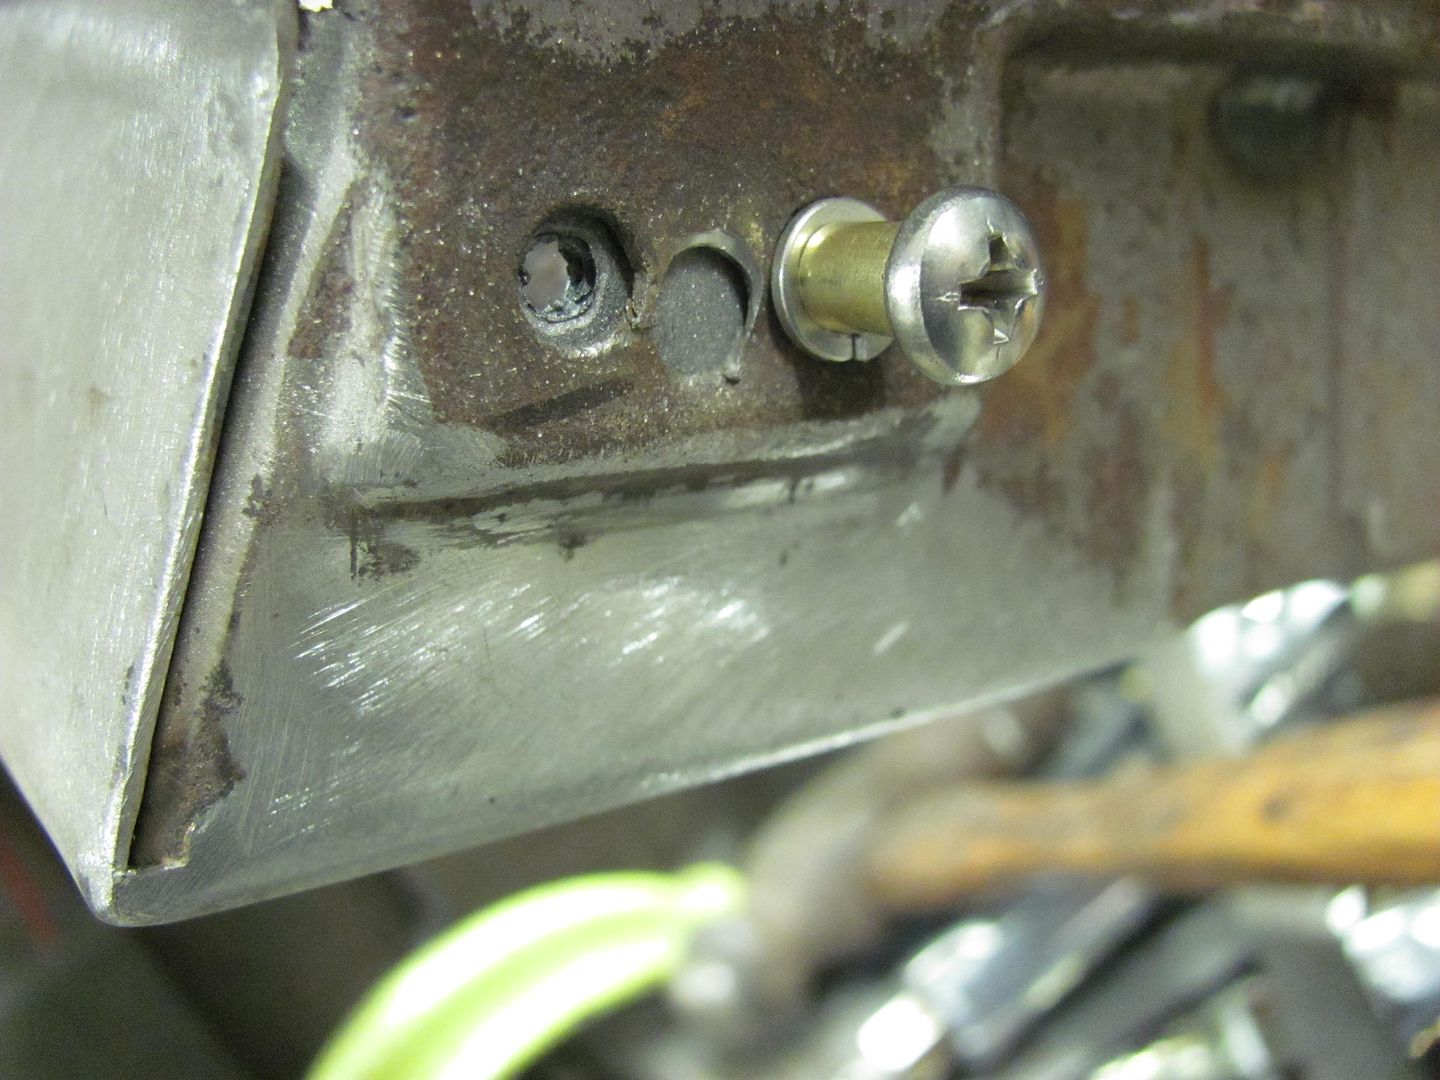
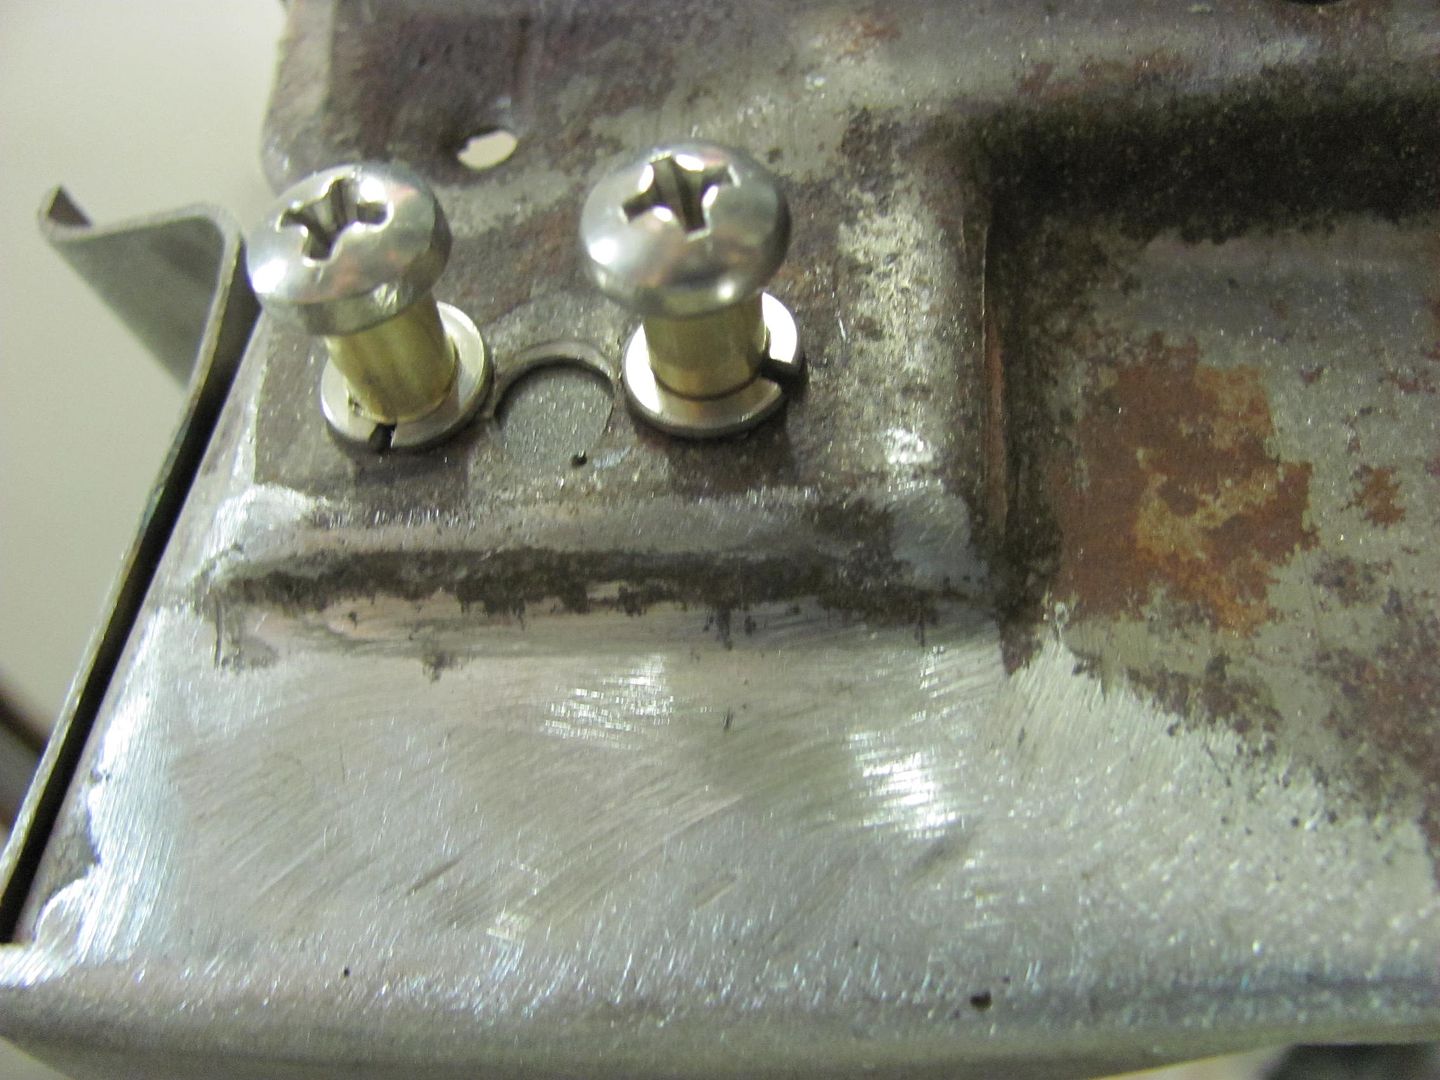
A dab of anti sieze is placed on the screw threads to insure they don't get welded in place from arcing across the threads.. Plug welded, and screws removed.

Lock washers removed and plug welds ground flush....

And now we can finish up the media blasting....

Comment
-
I read through this entire thread last night over a few beers. Thanks for posting this. Im no body man and gave up my first true love to rust. One day, I hope I can use the tips, tricks, and voodoo you show in this thread to save something 22 year old me had to get rid of. Nice work. Thanks, again.Last edited by SSChevyManiac; January 5, 2014, 05:09 PM.Dustin in PennsylvaniaComment

Comment