Announcement

Collapse
No announcement yet.

55 Wagon Progress

Collapse
X
 
  • Filter
  • Time
  • Show
Clear All
new posts

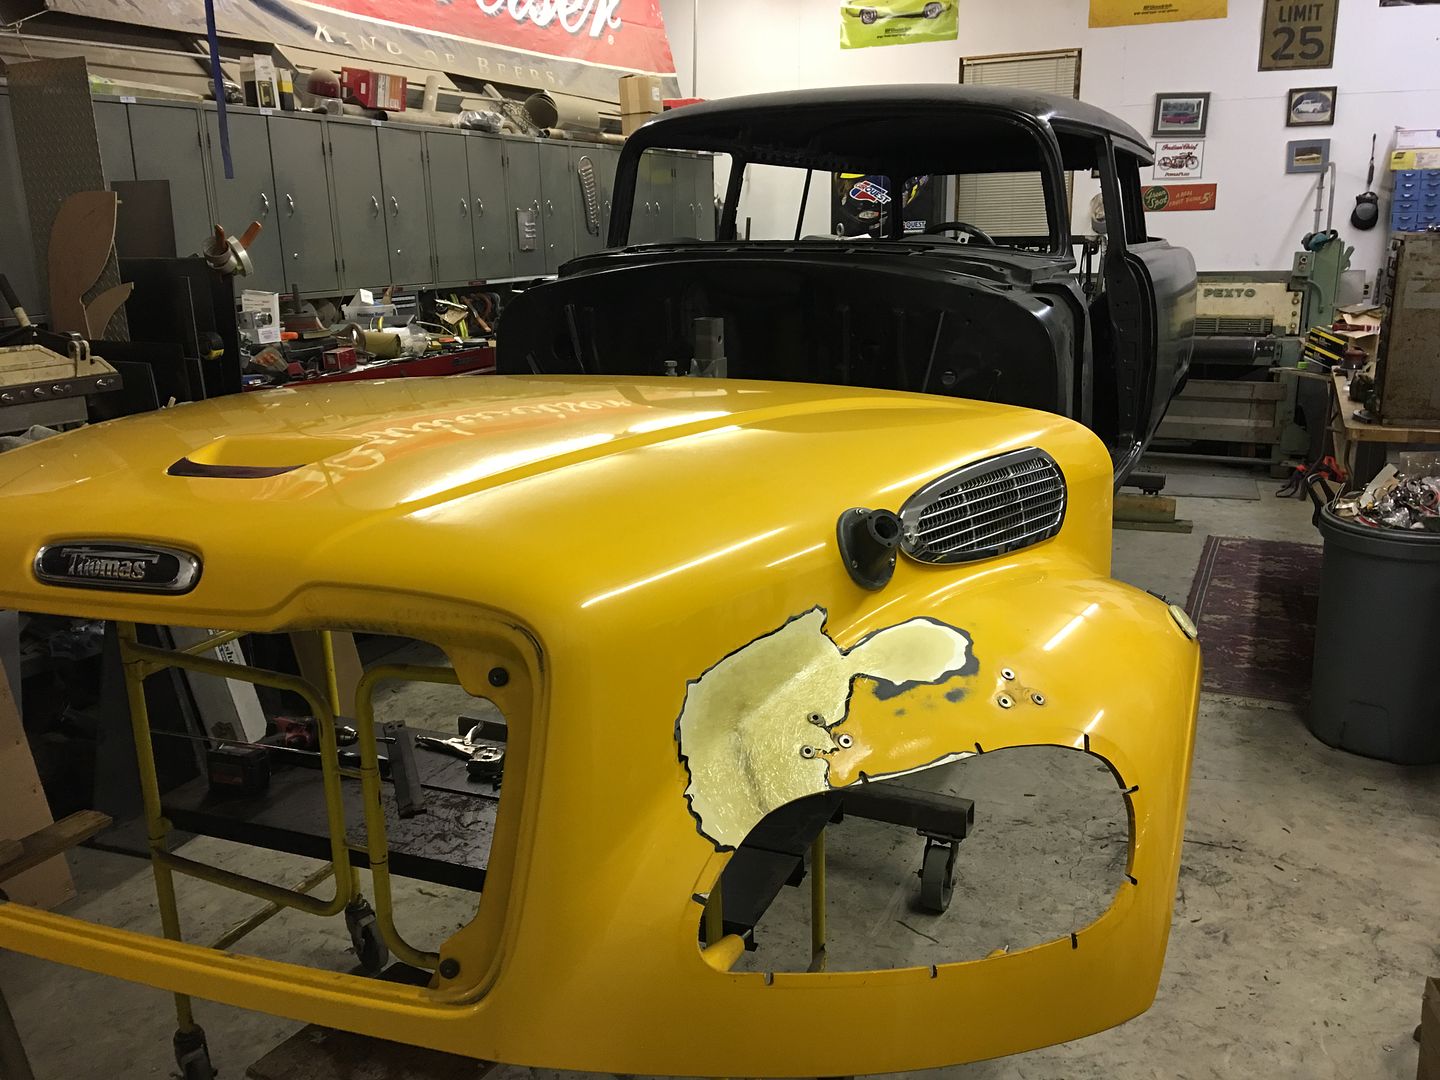
  • After driving the countryside for a couple weeks, Back to the grind, took delivery of the bus with the cracked hood this past Wednesday.


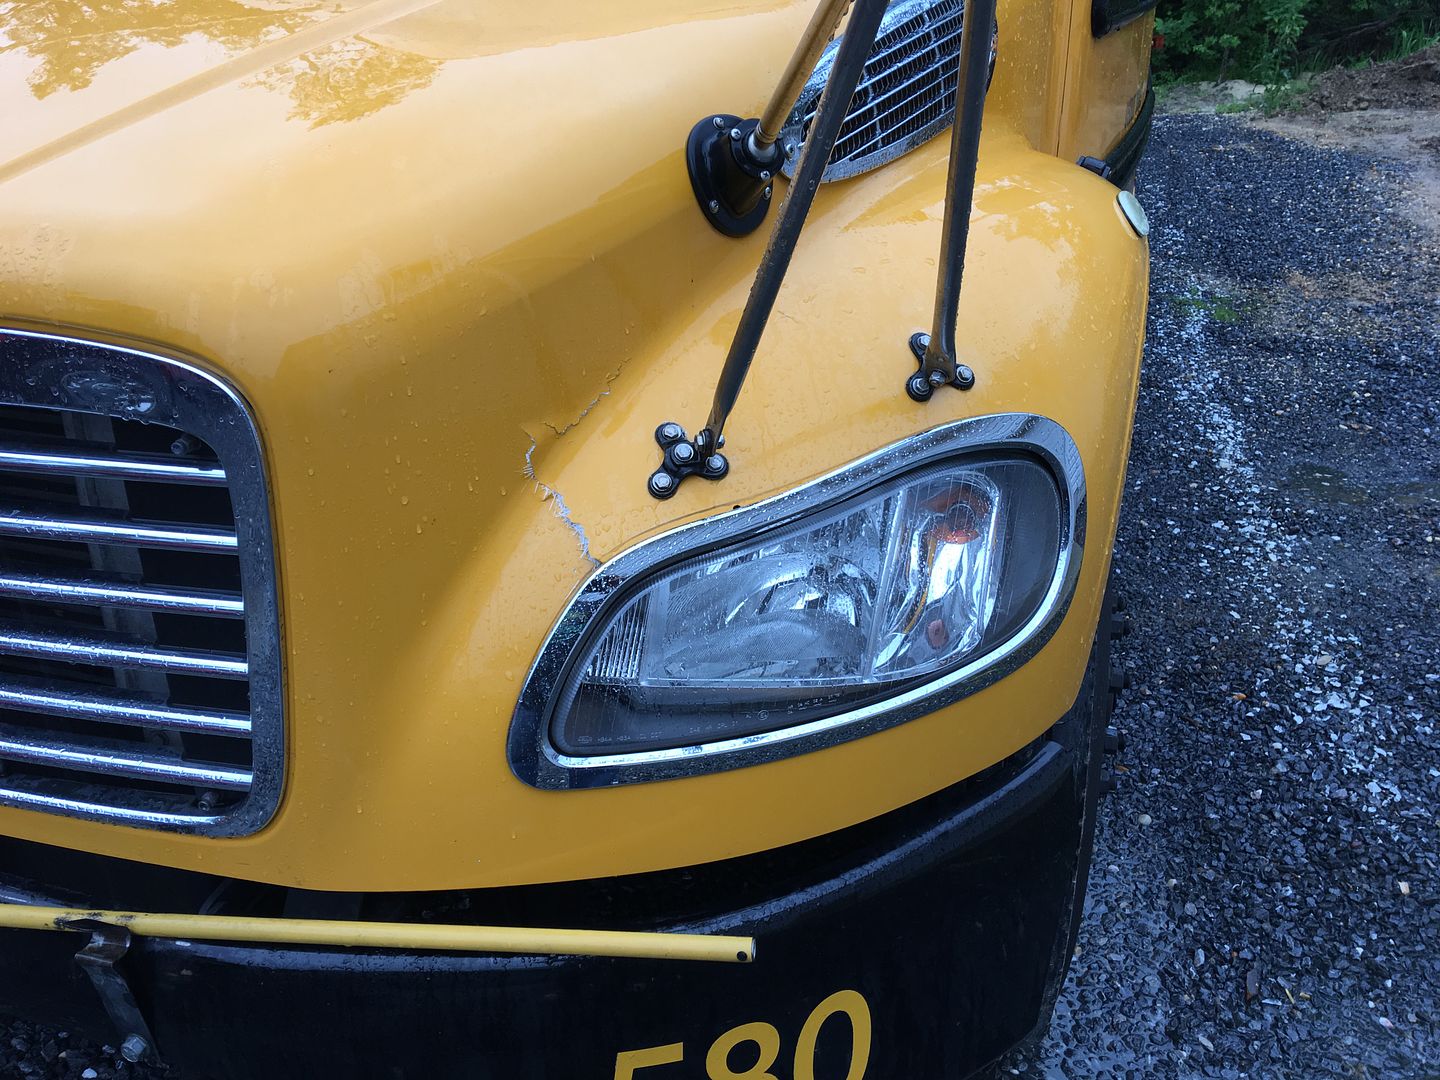
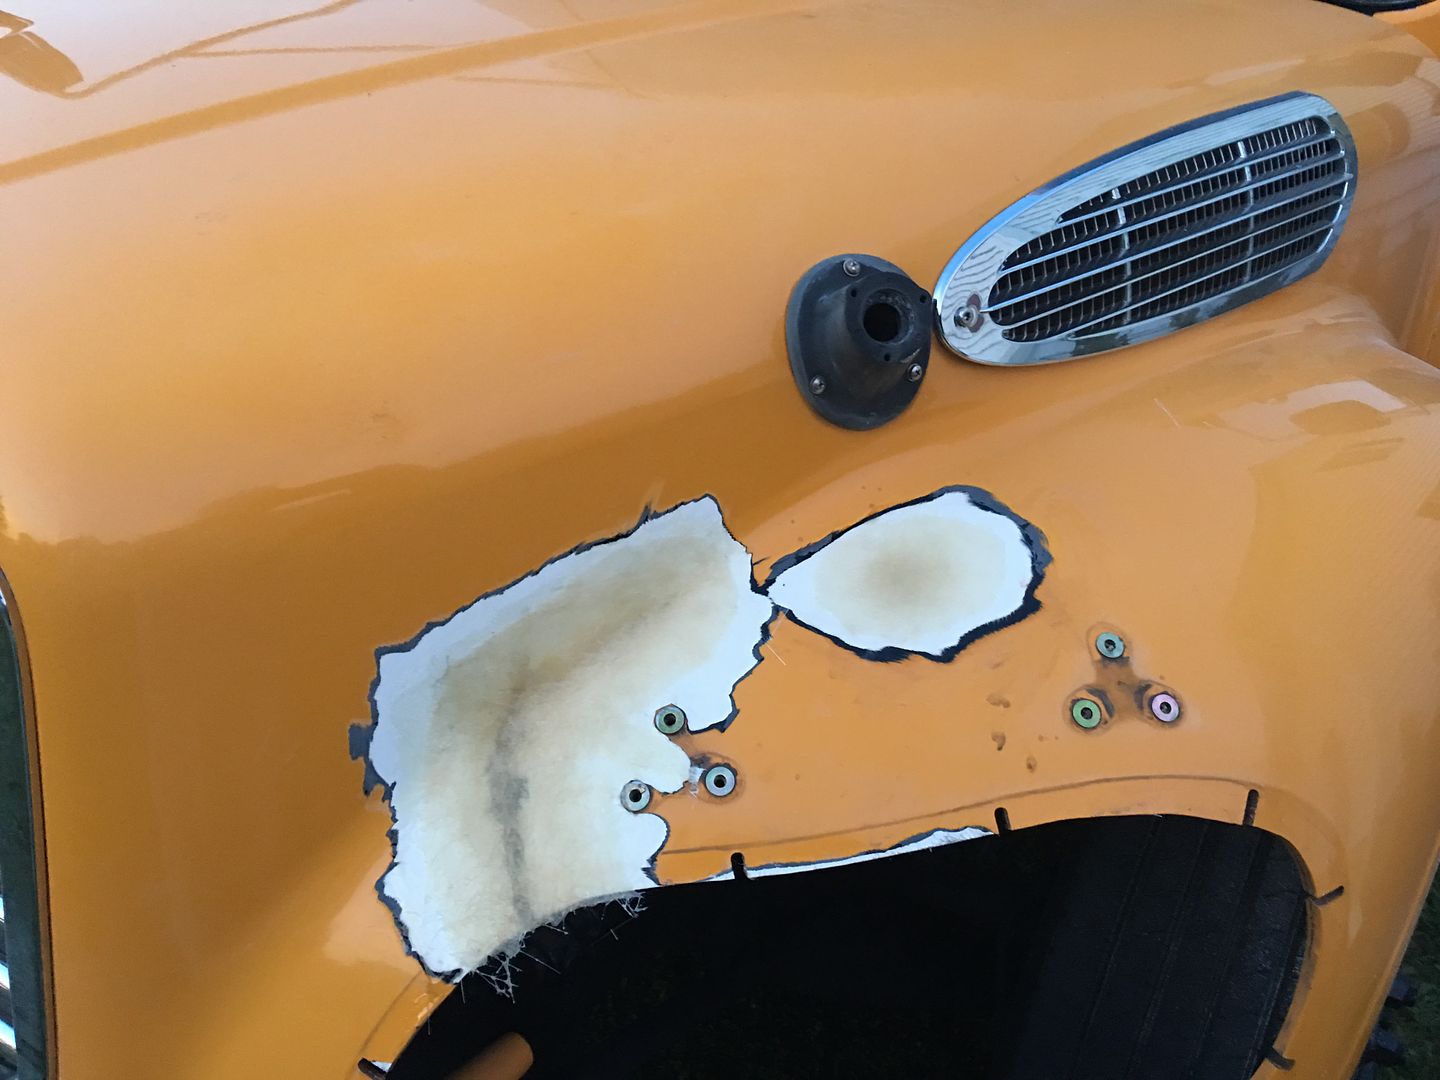
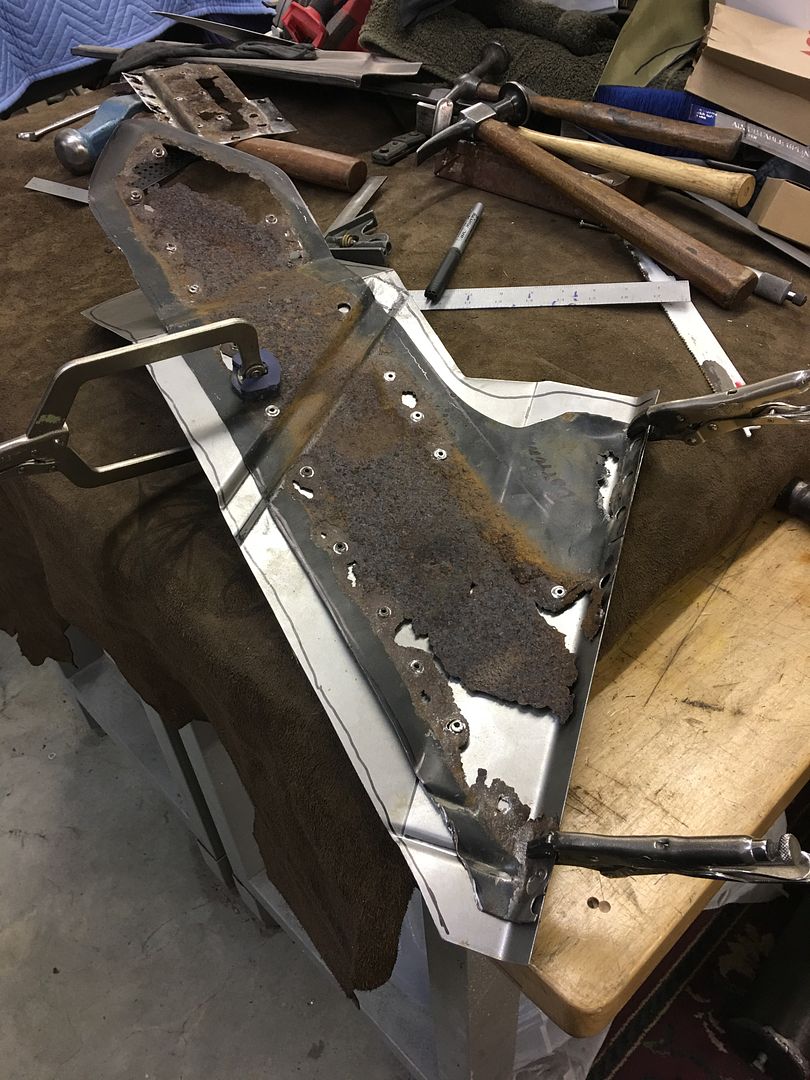
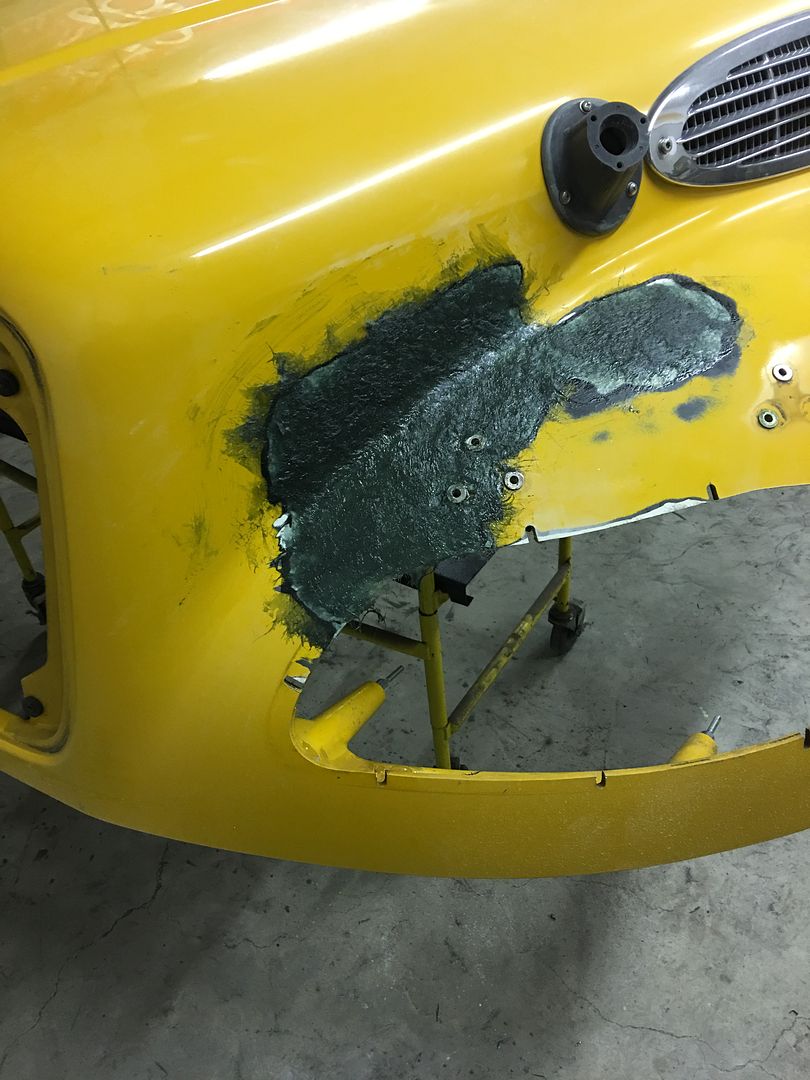
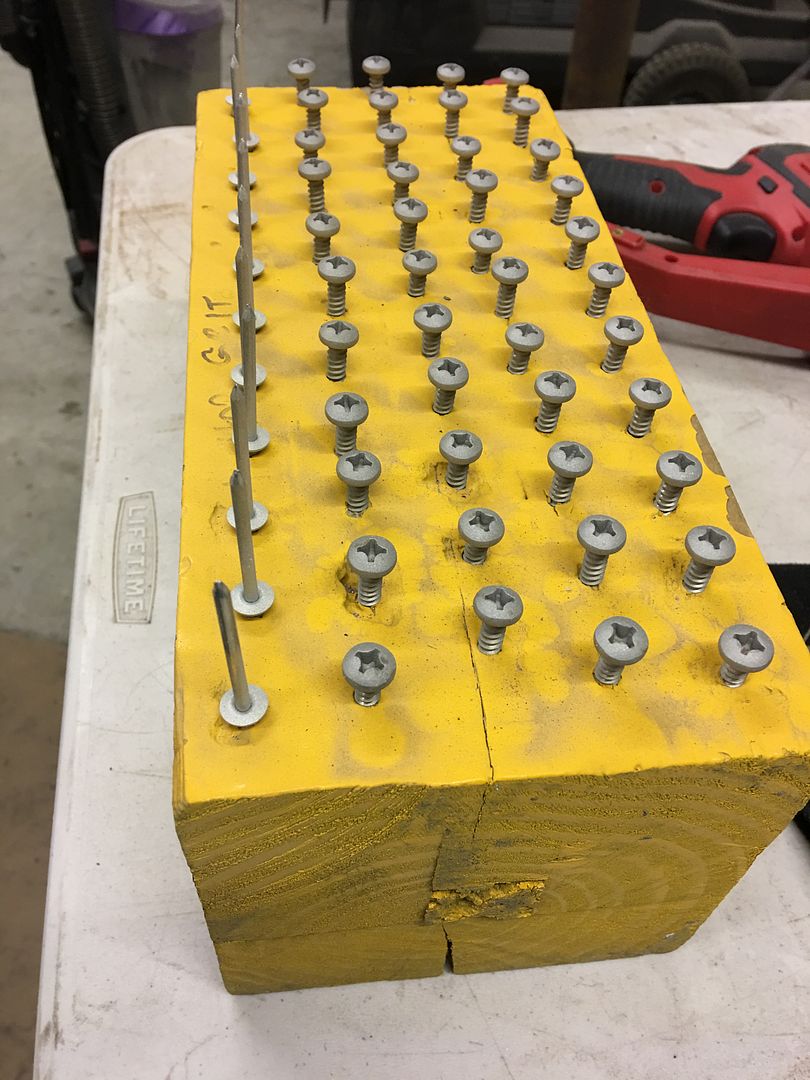
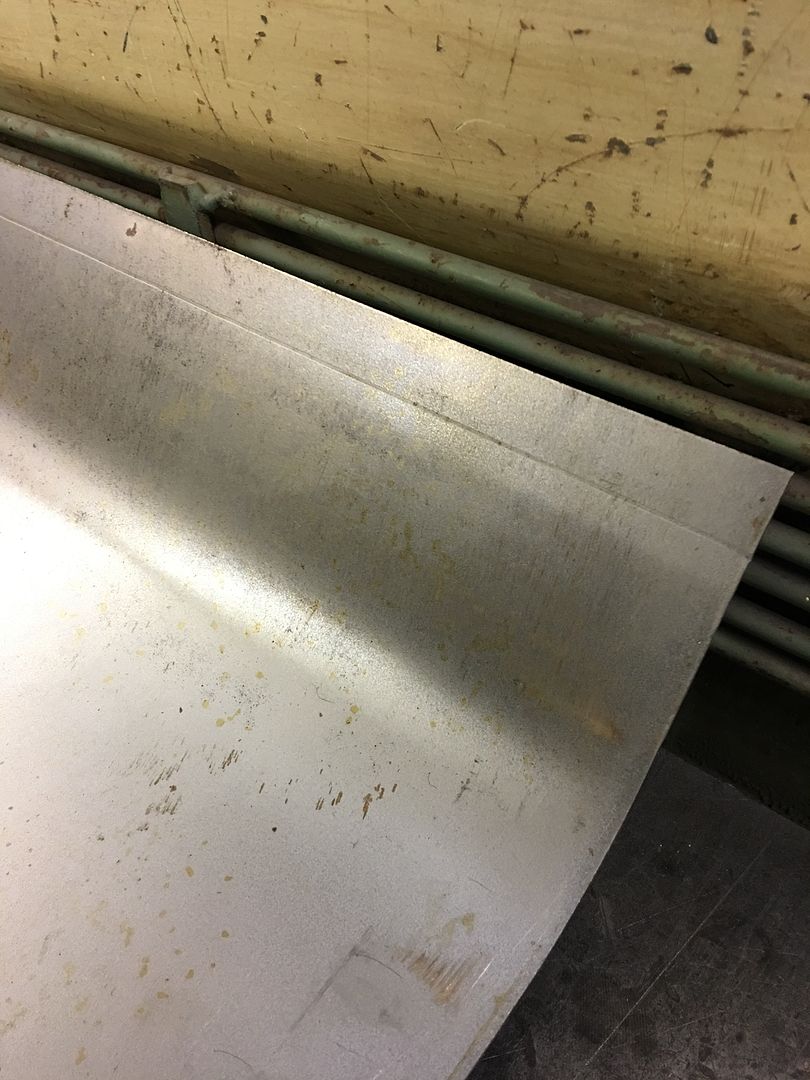
    After removing headlights, I ground out the cracked areas, which relieved the tension and allowed the panels to lay flat again. Epoxy was used between the outer and inner layers, clamped, and let things set up.


    After a couple layers added....


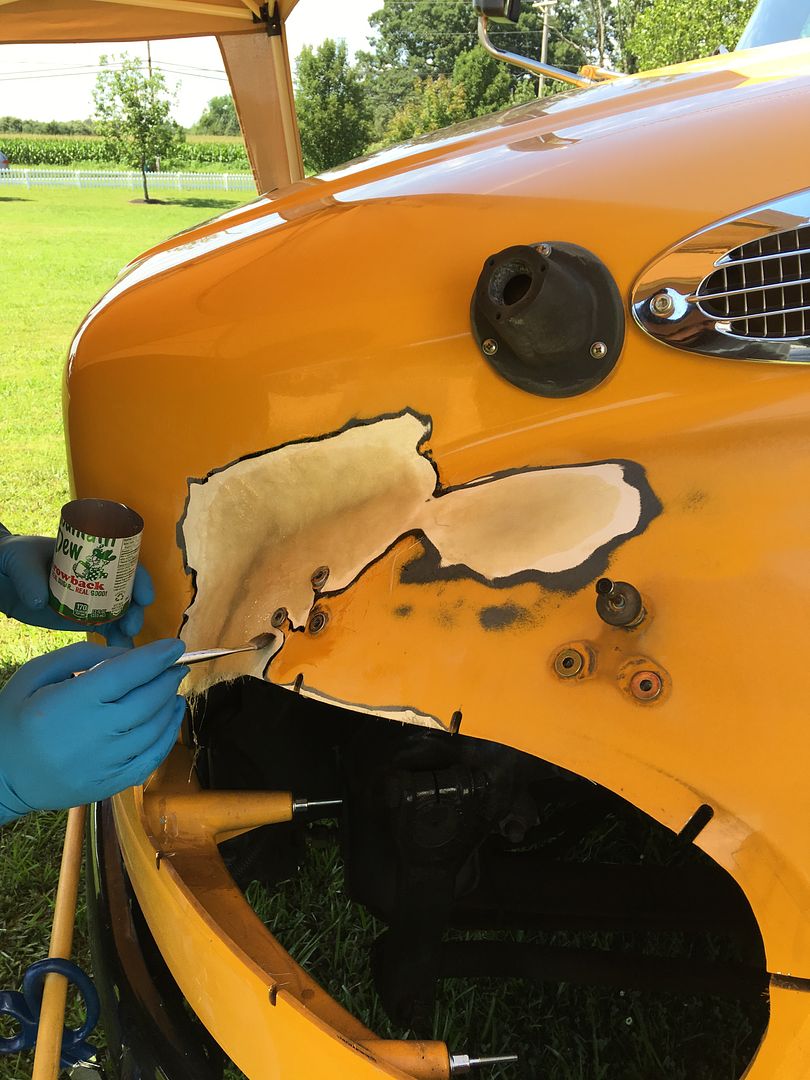
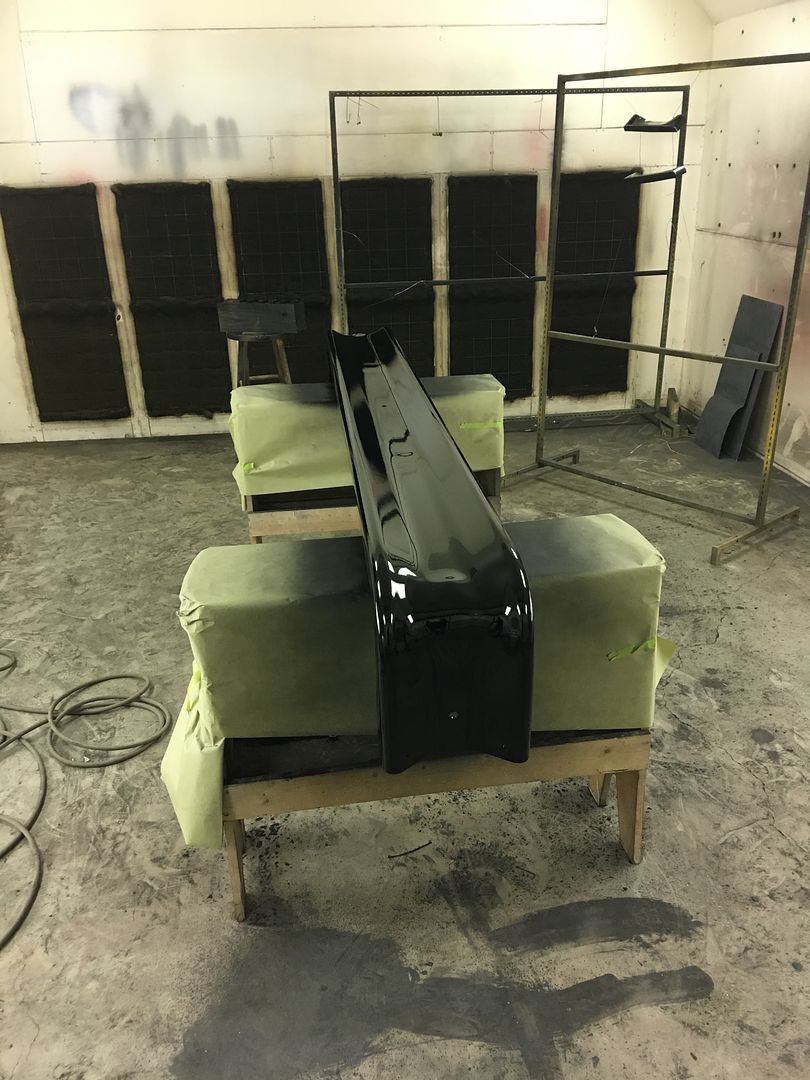
    Left this to cure in the sun for a couple days, then back at it on Saturday.


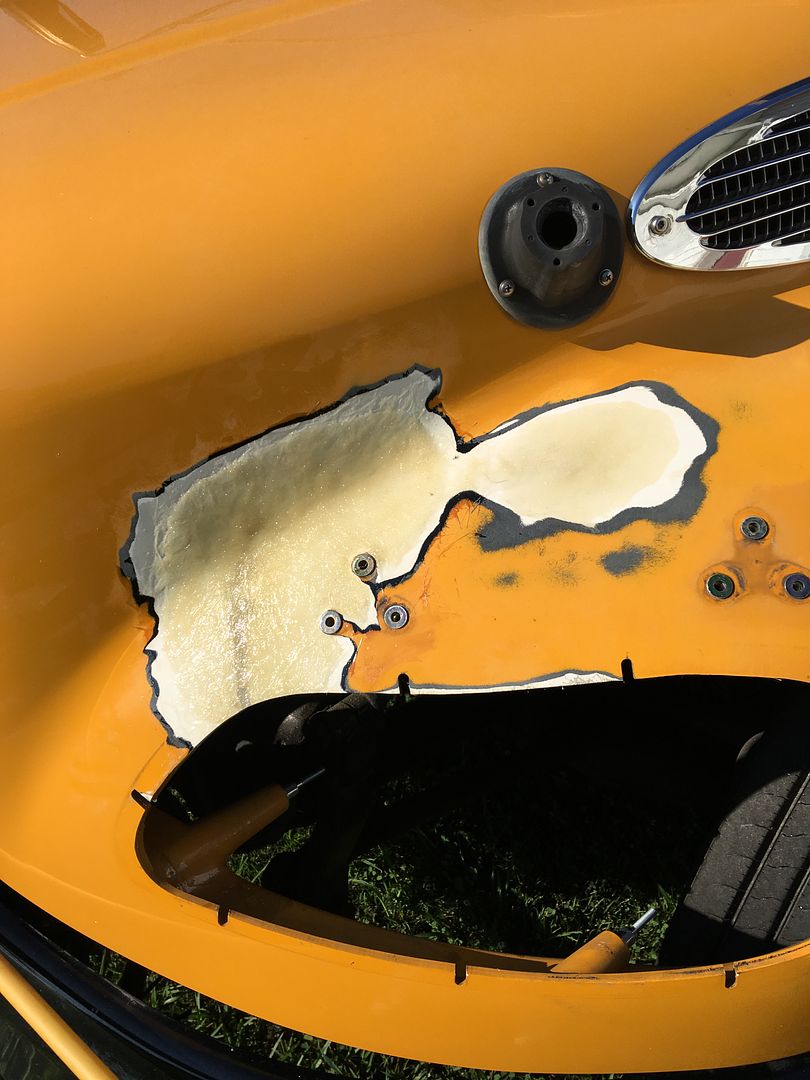
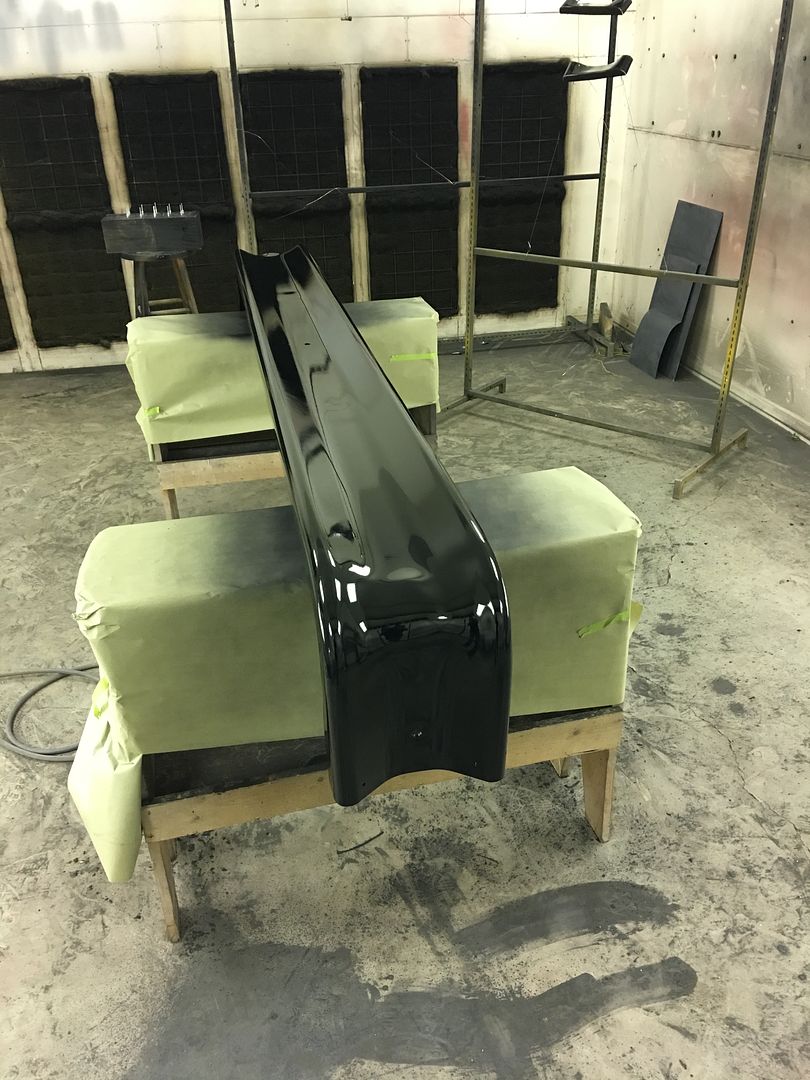
    Ground smooth and hopefully the last layer added...


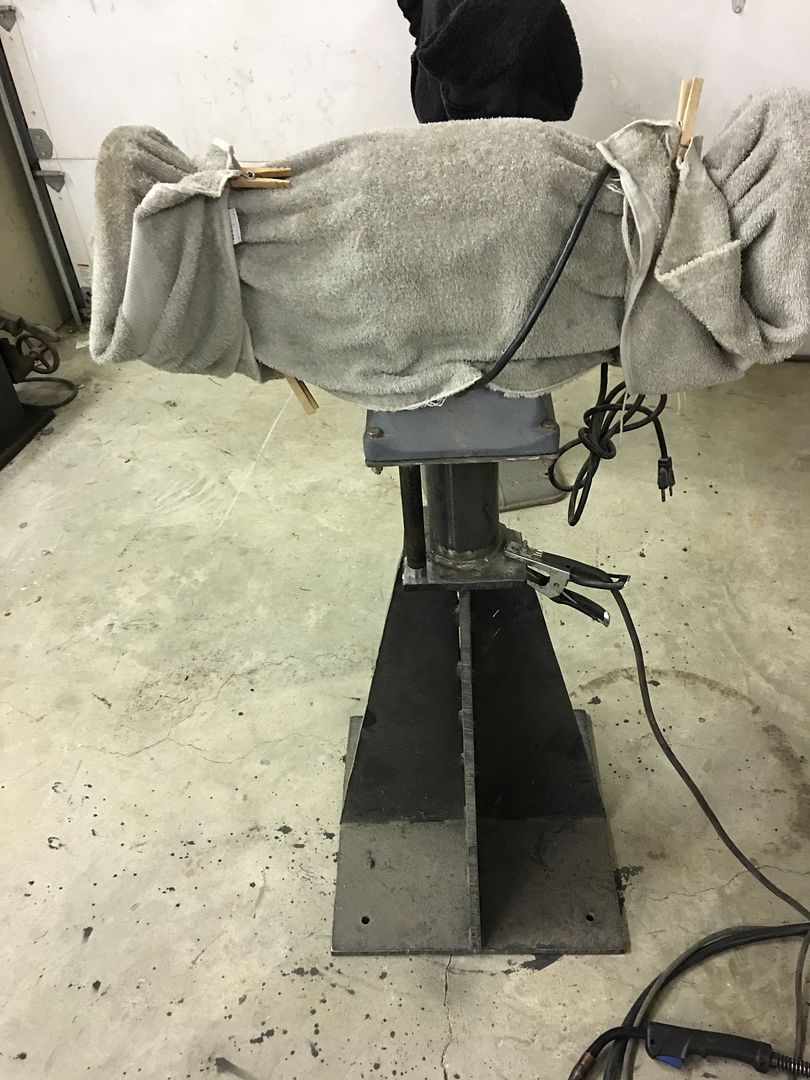
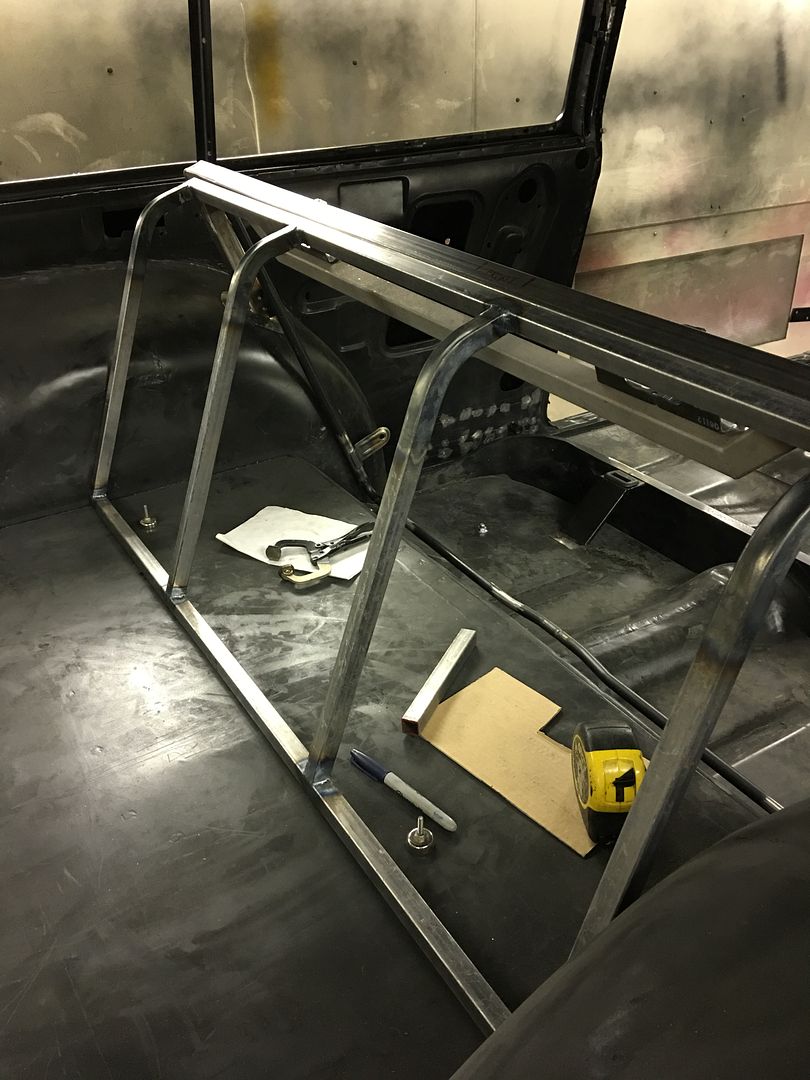
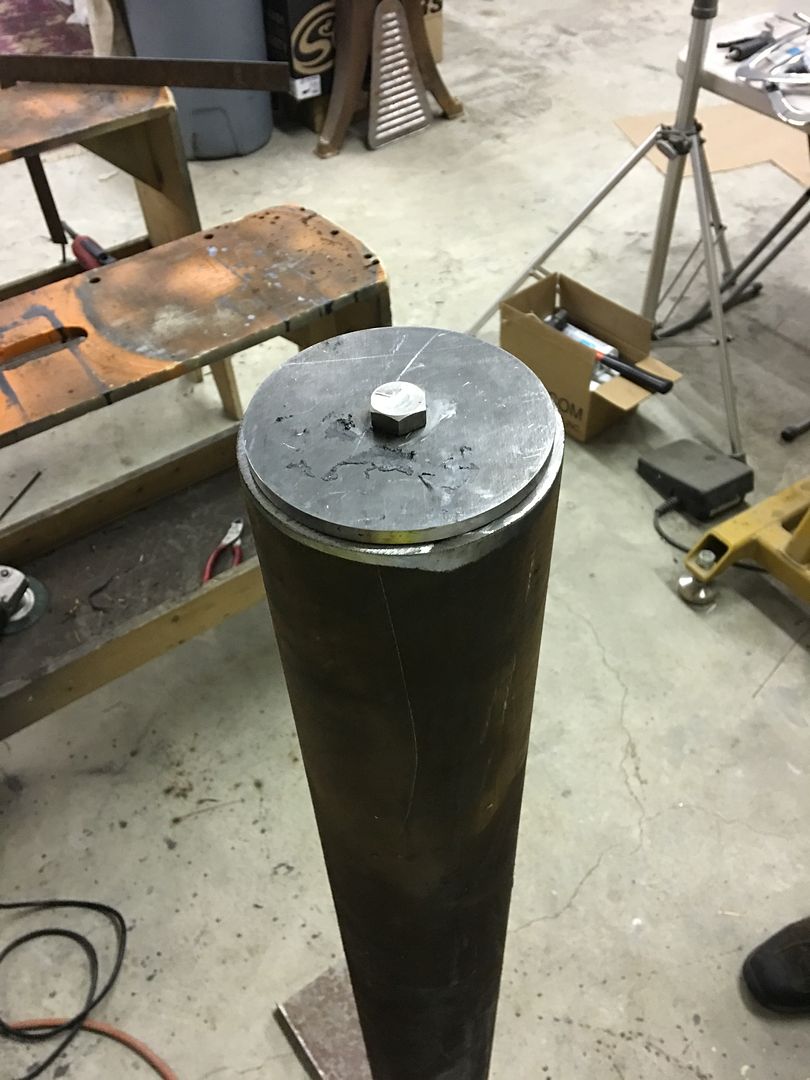
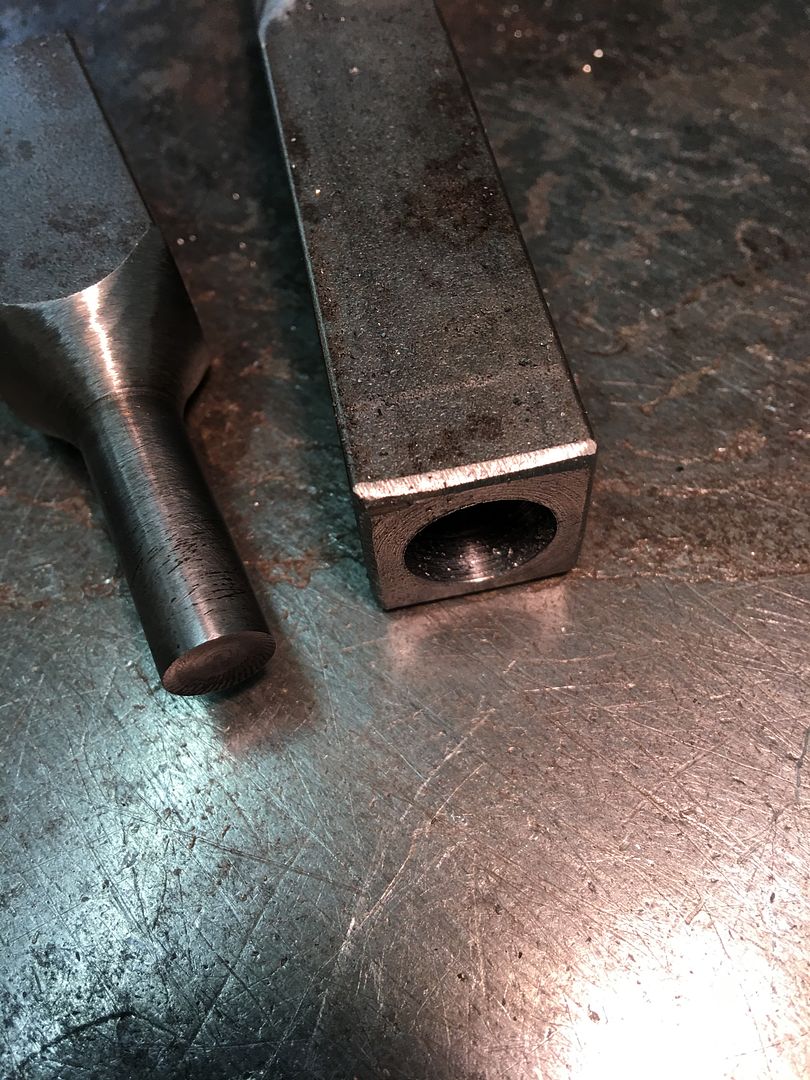
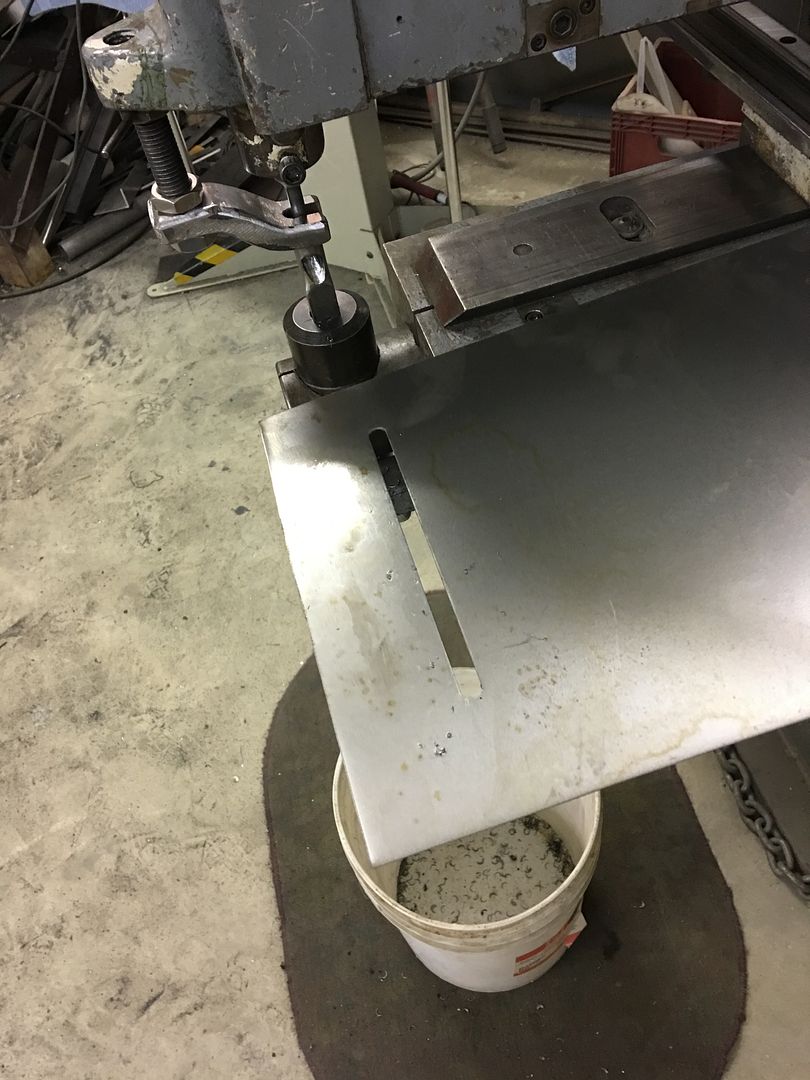
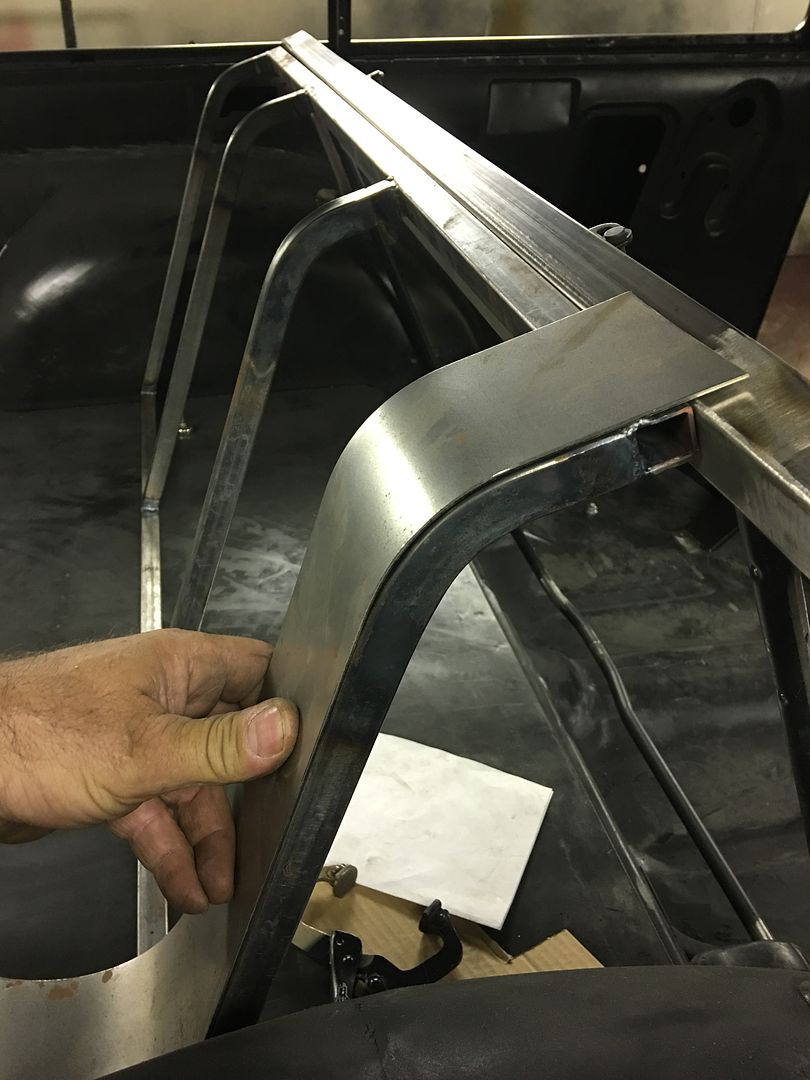
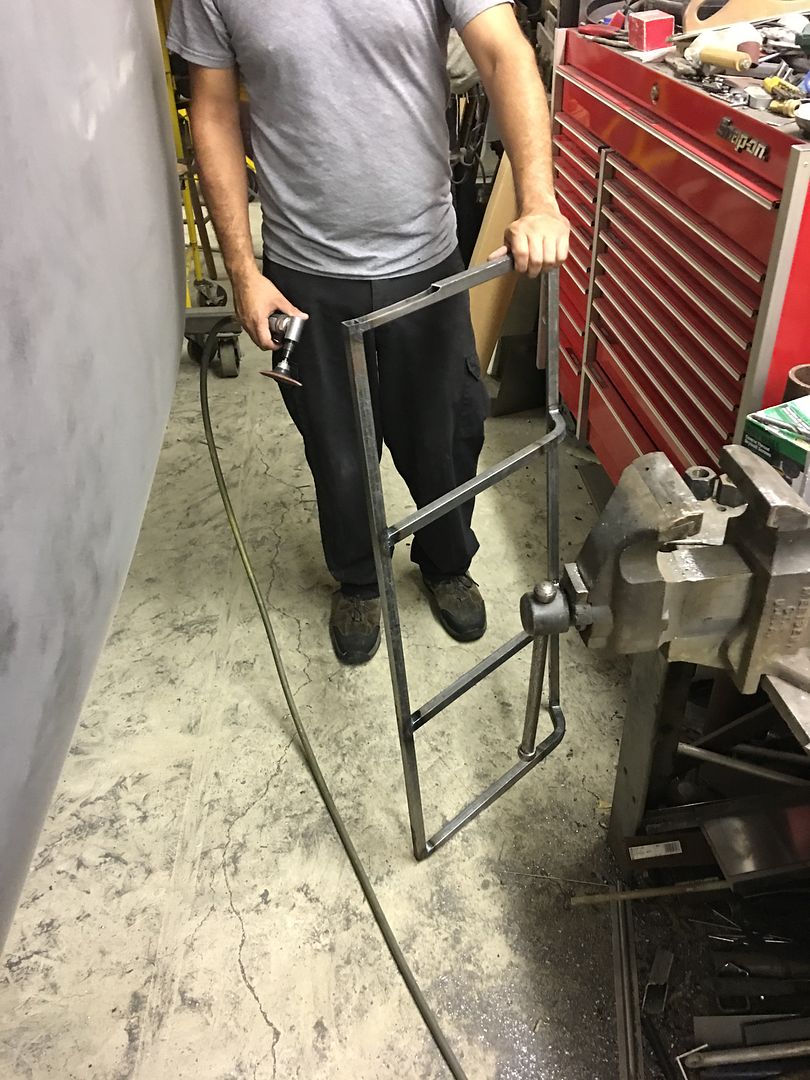
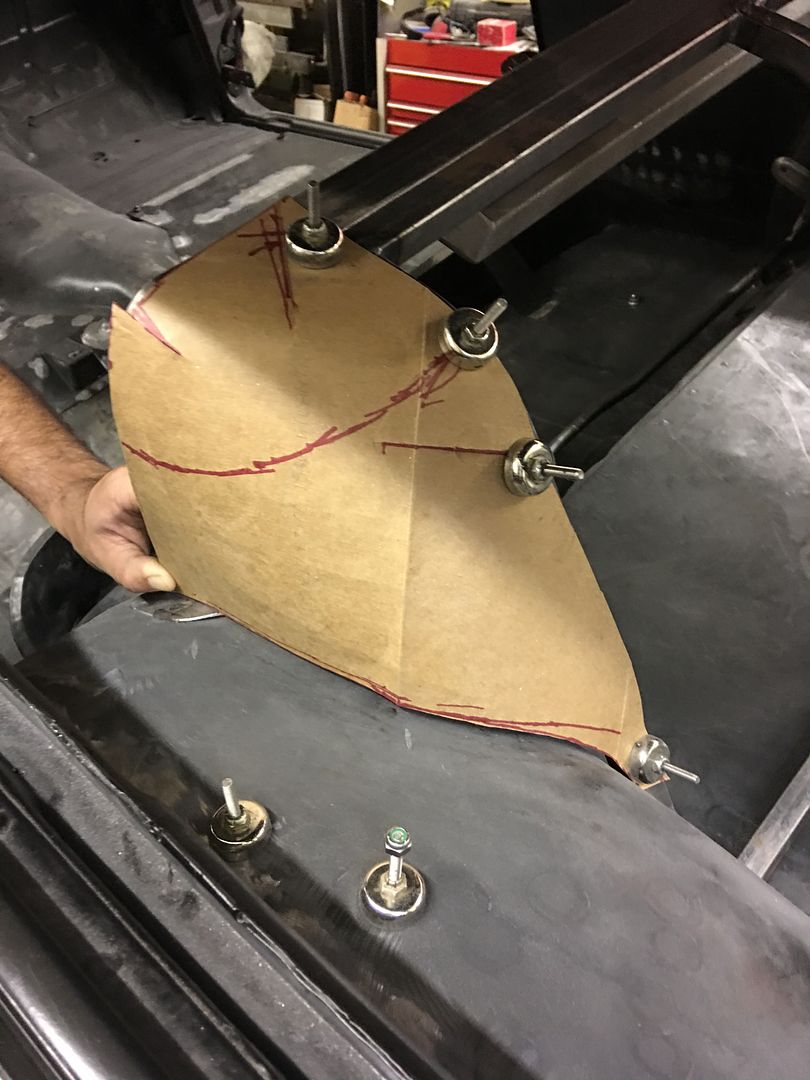
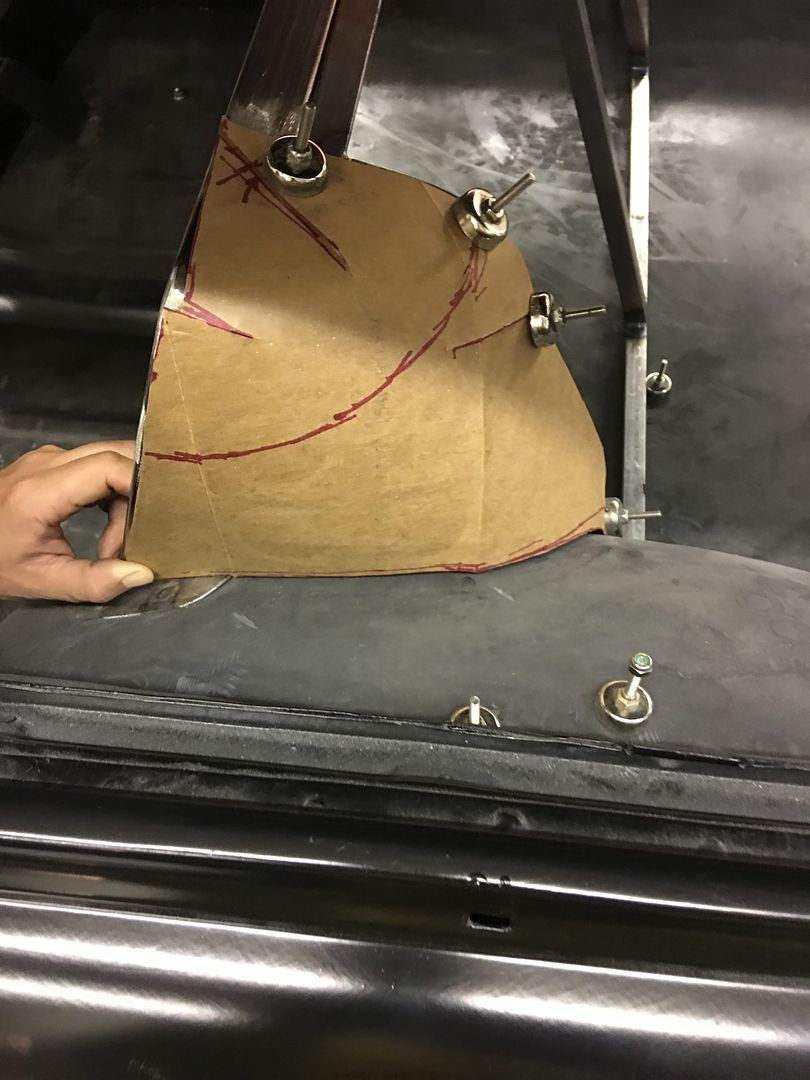
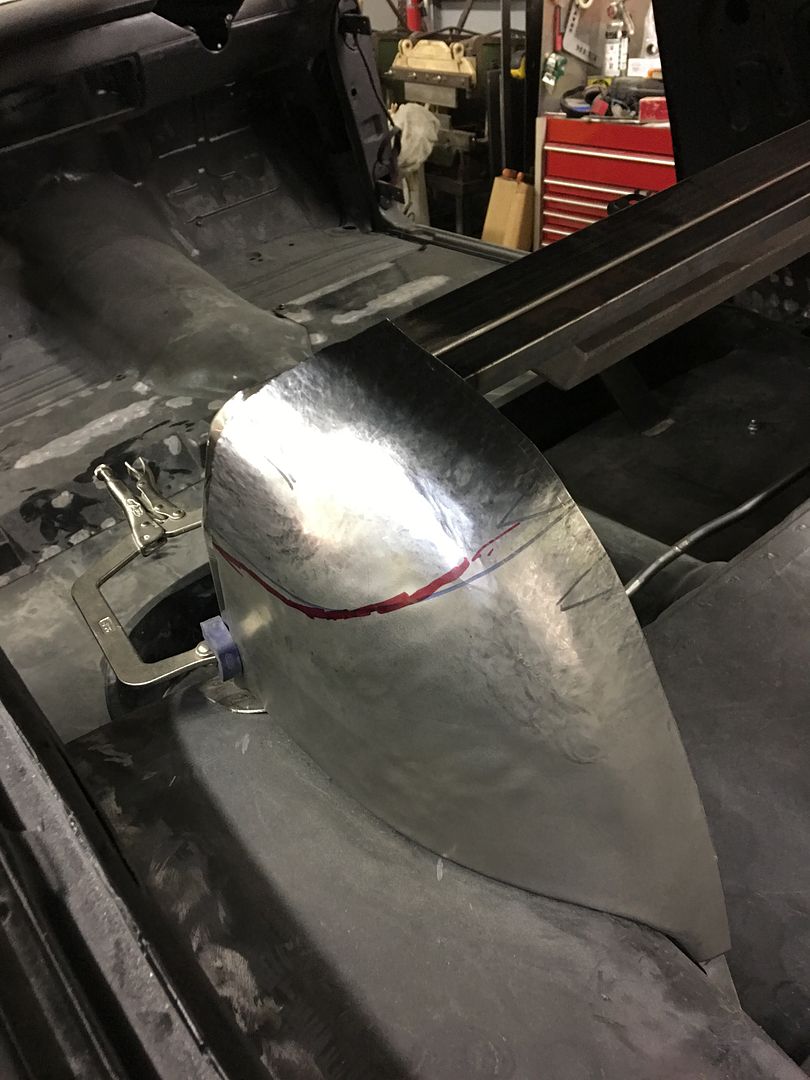
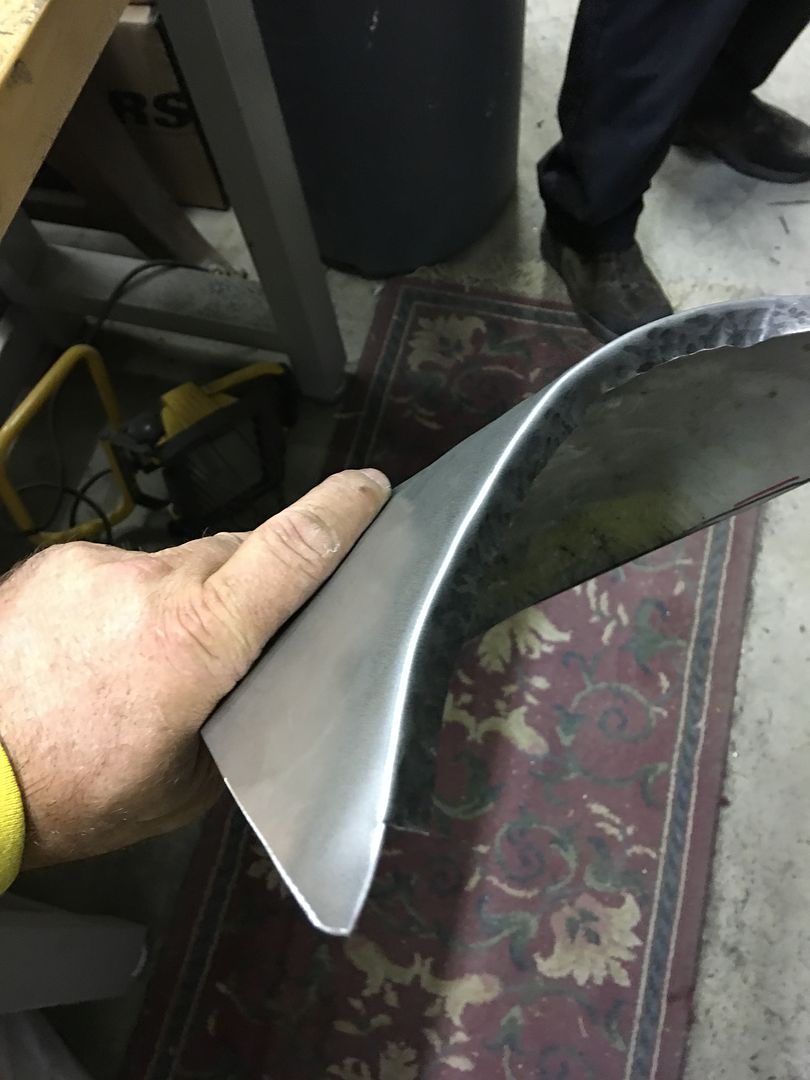
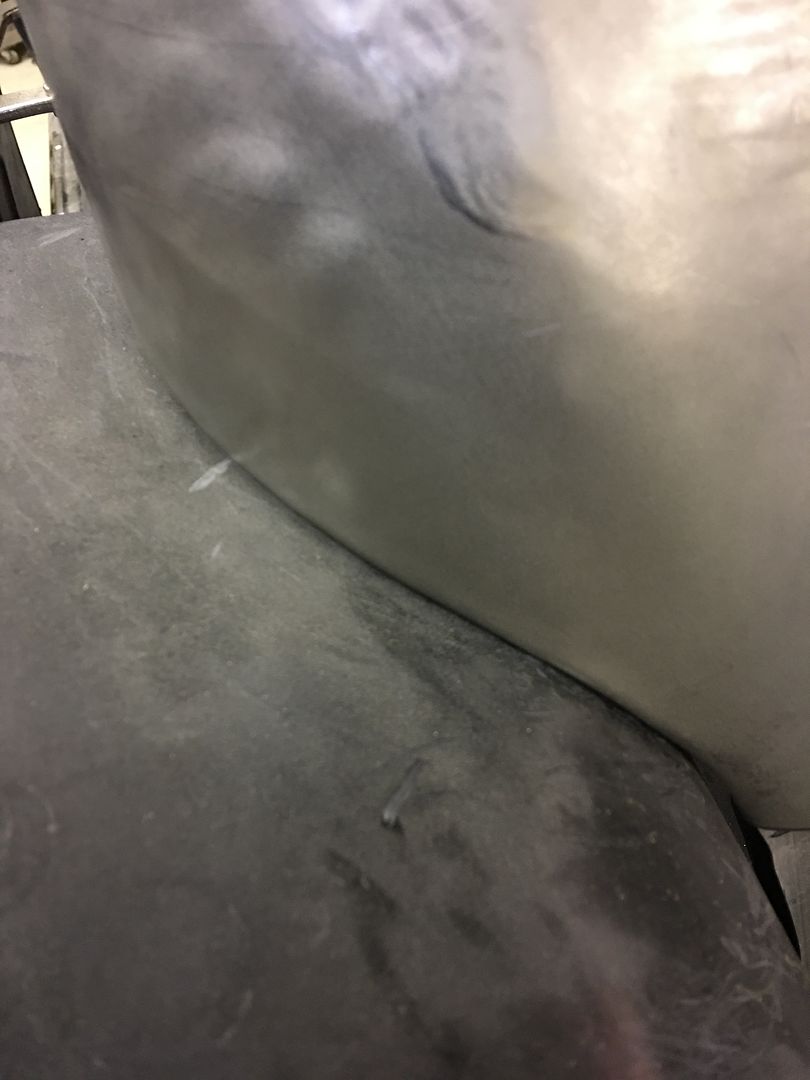
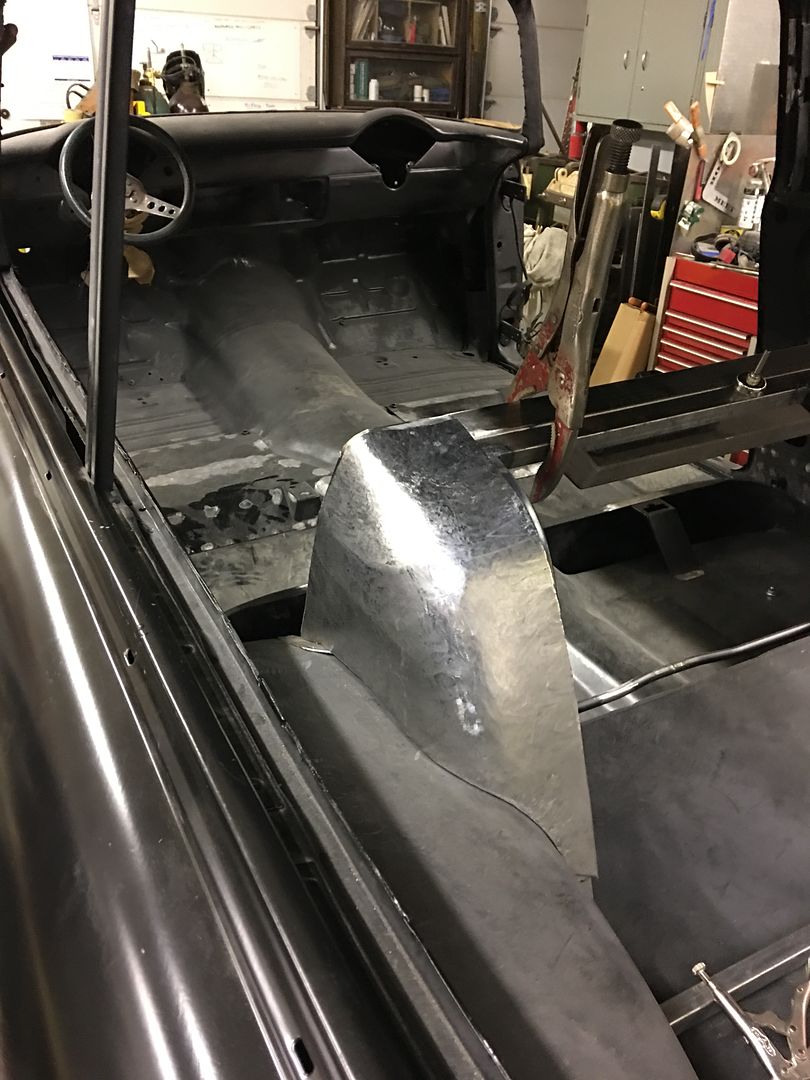
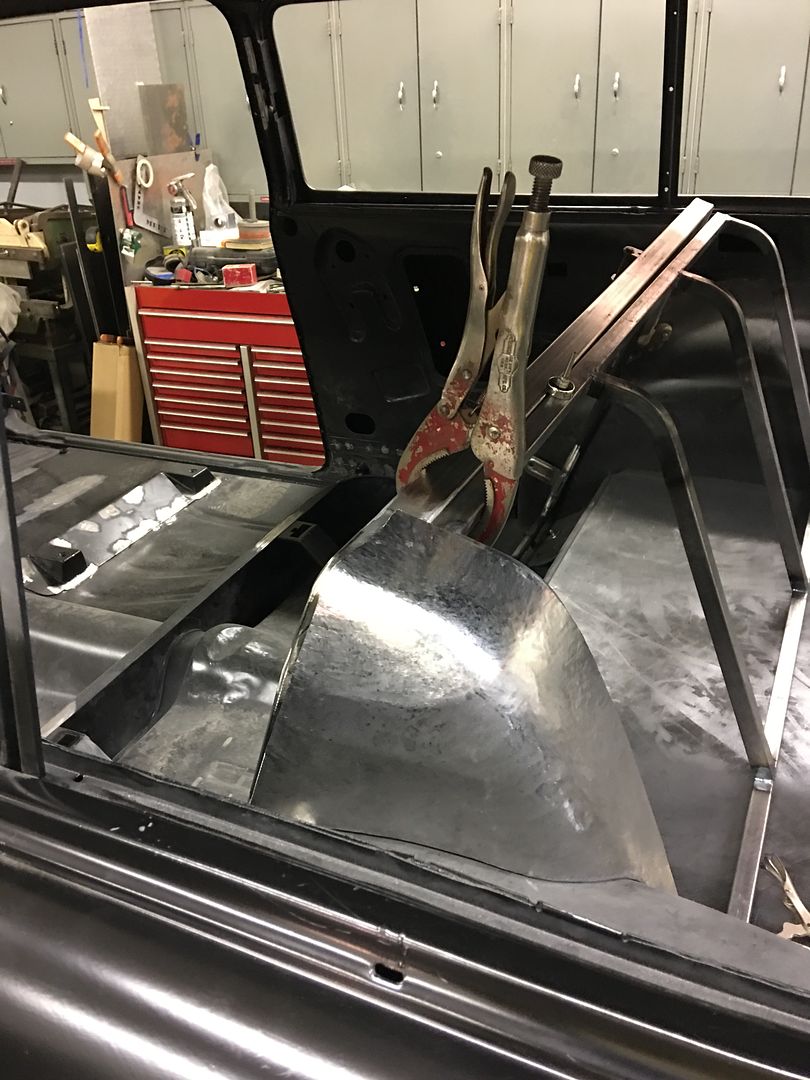
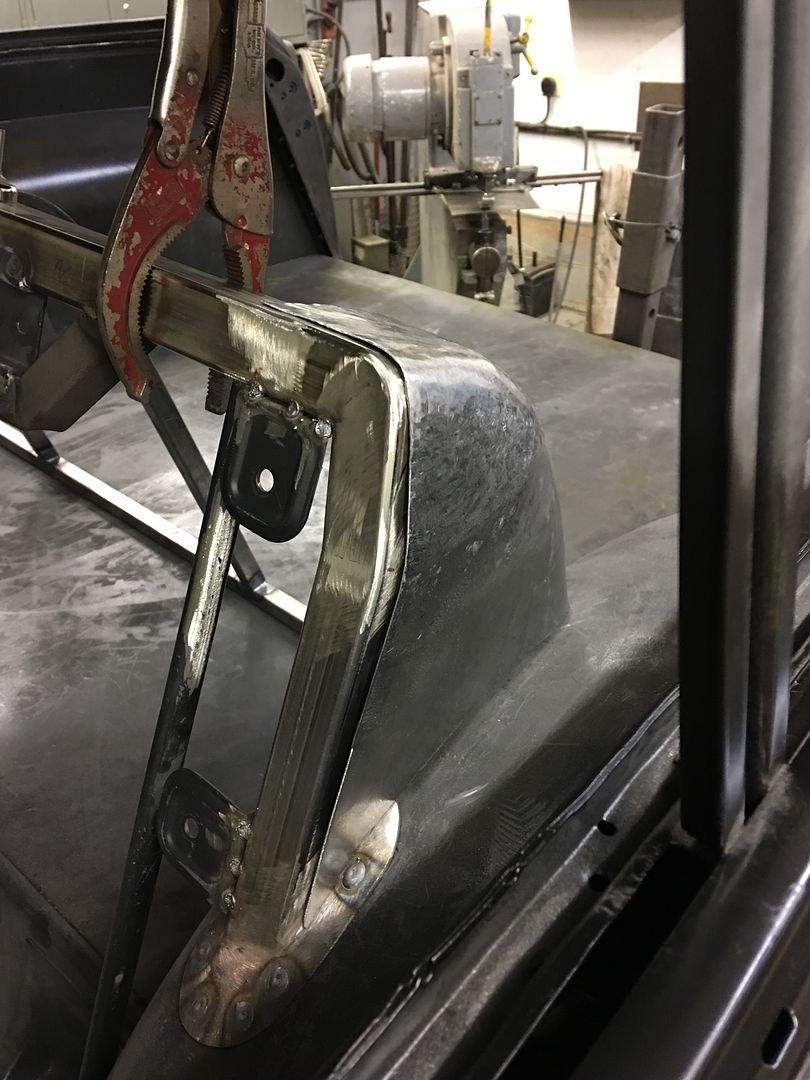
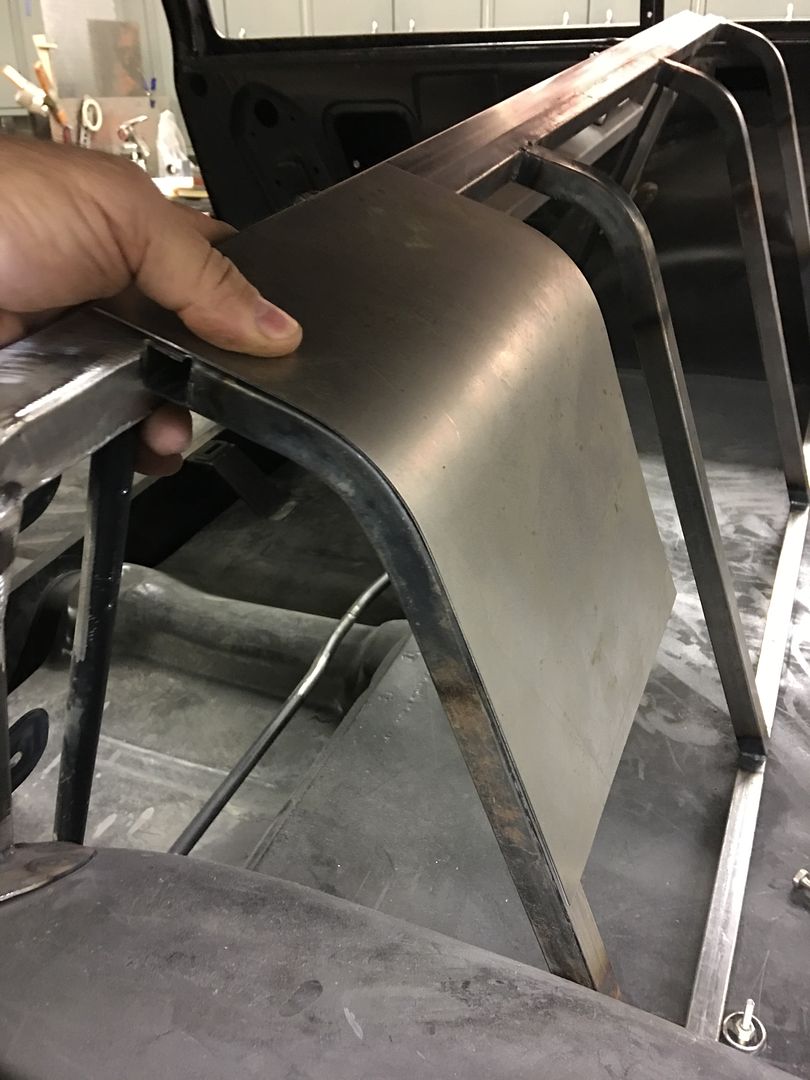
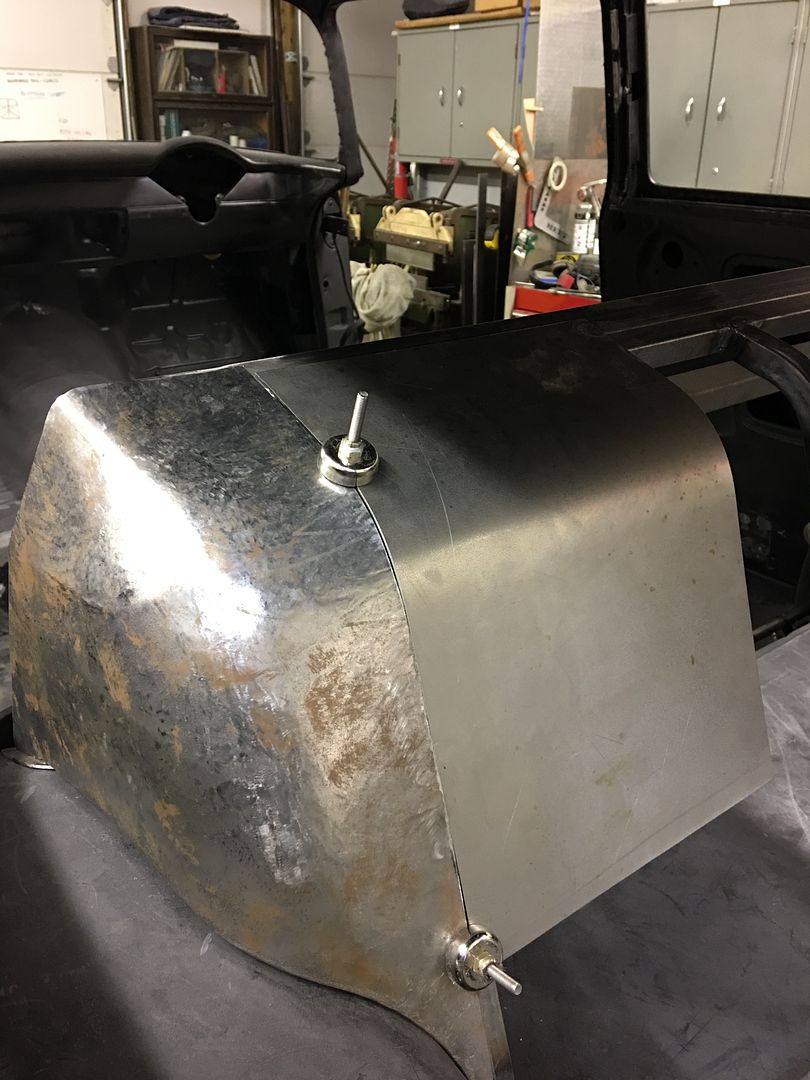
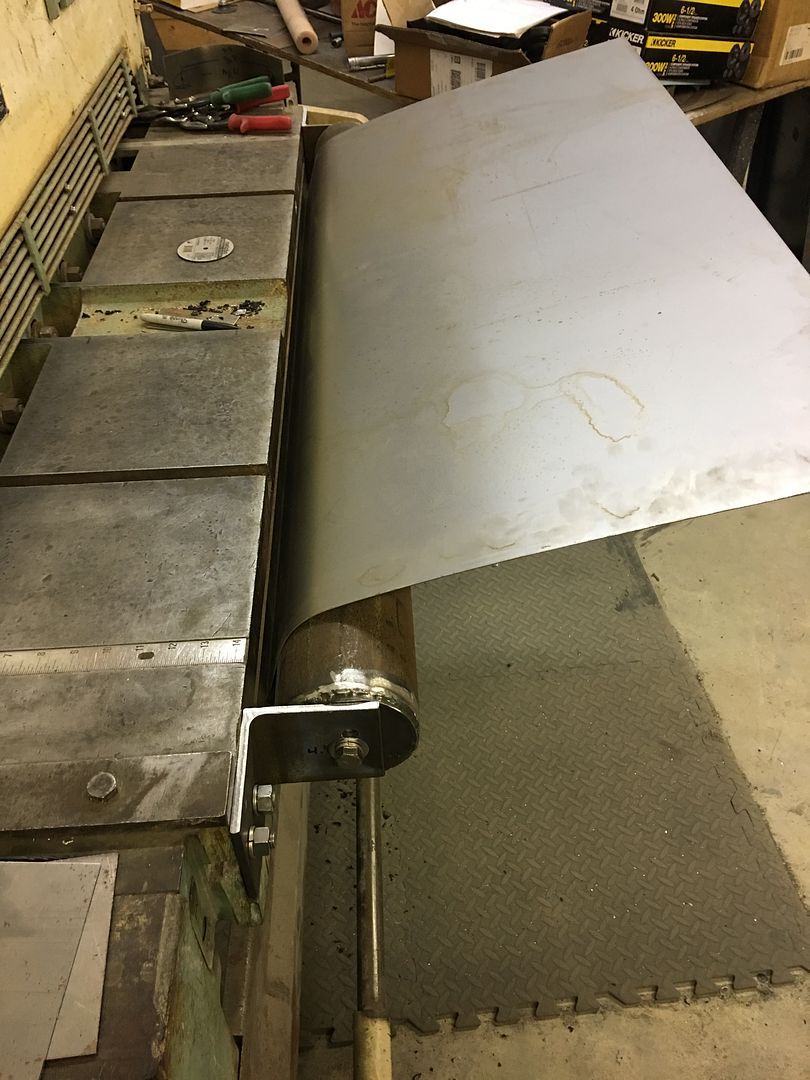
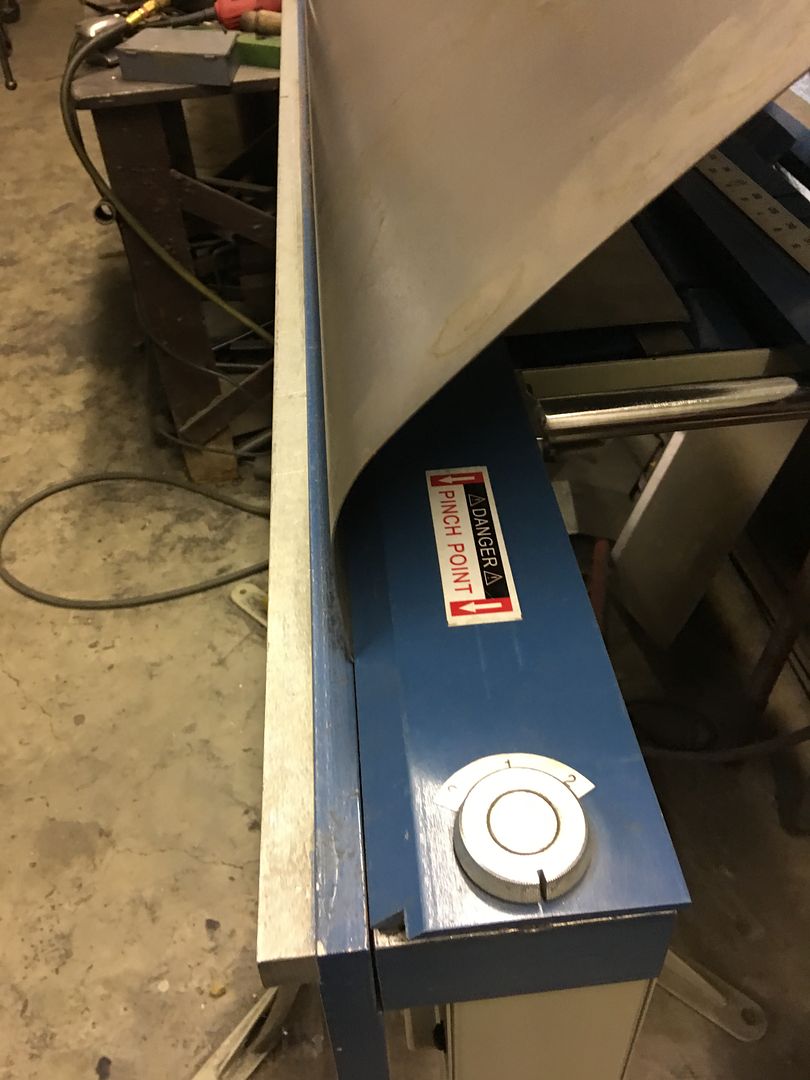
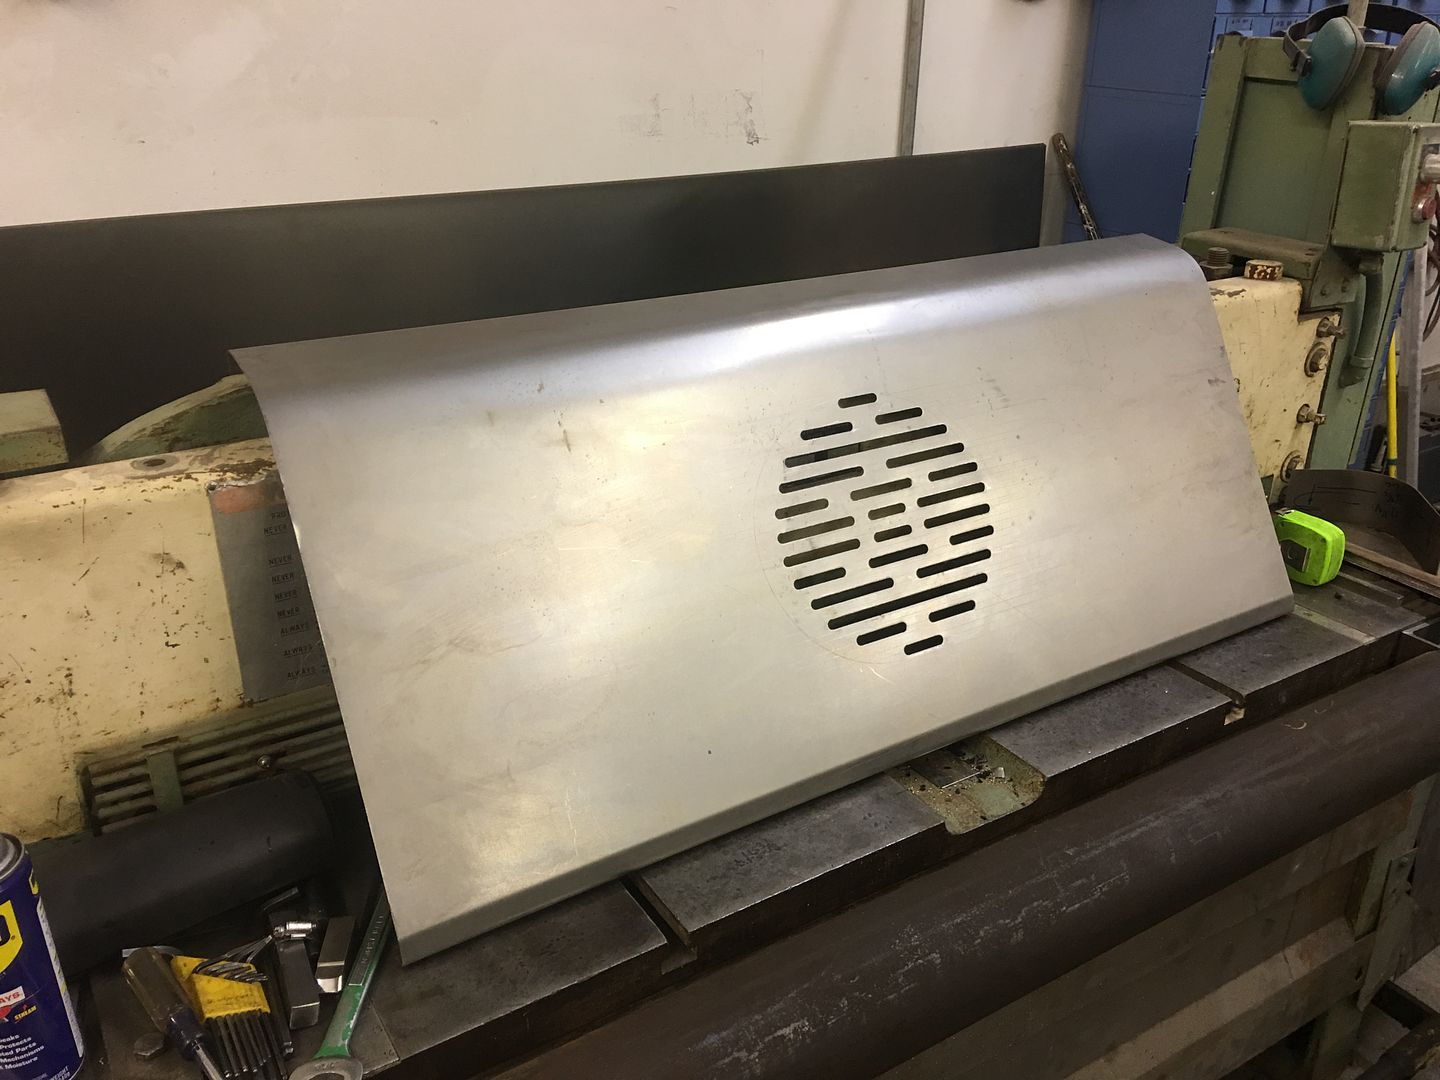
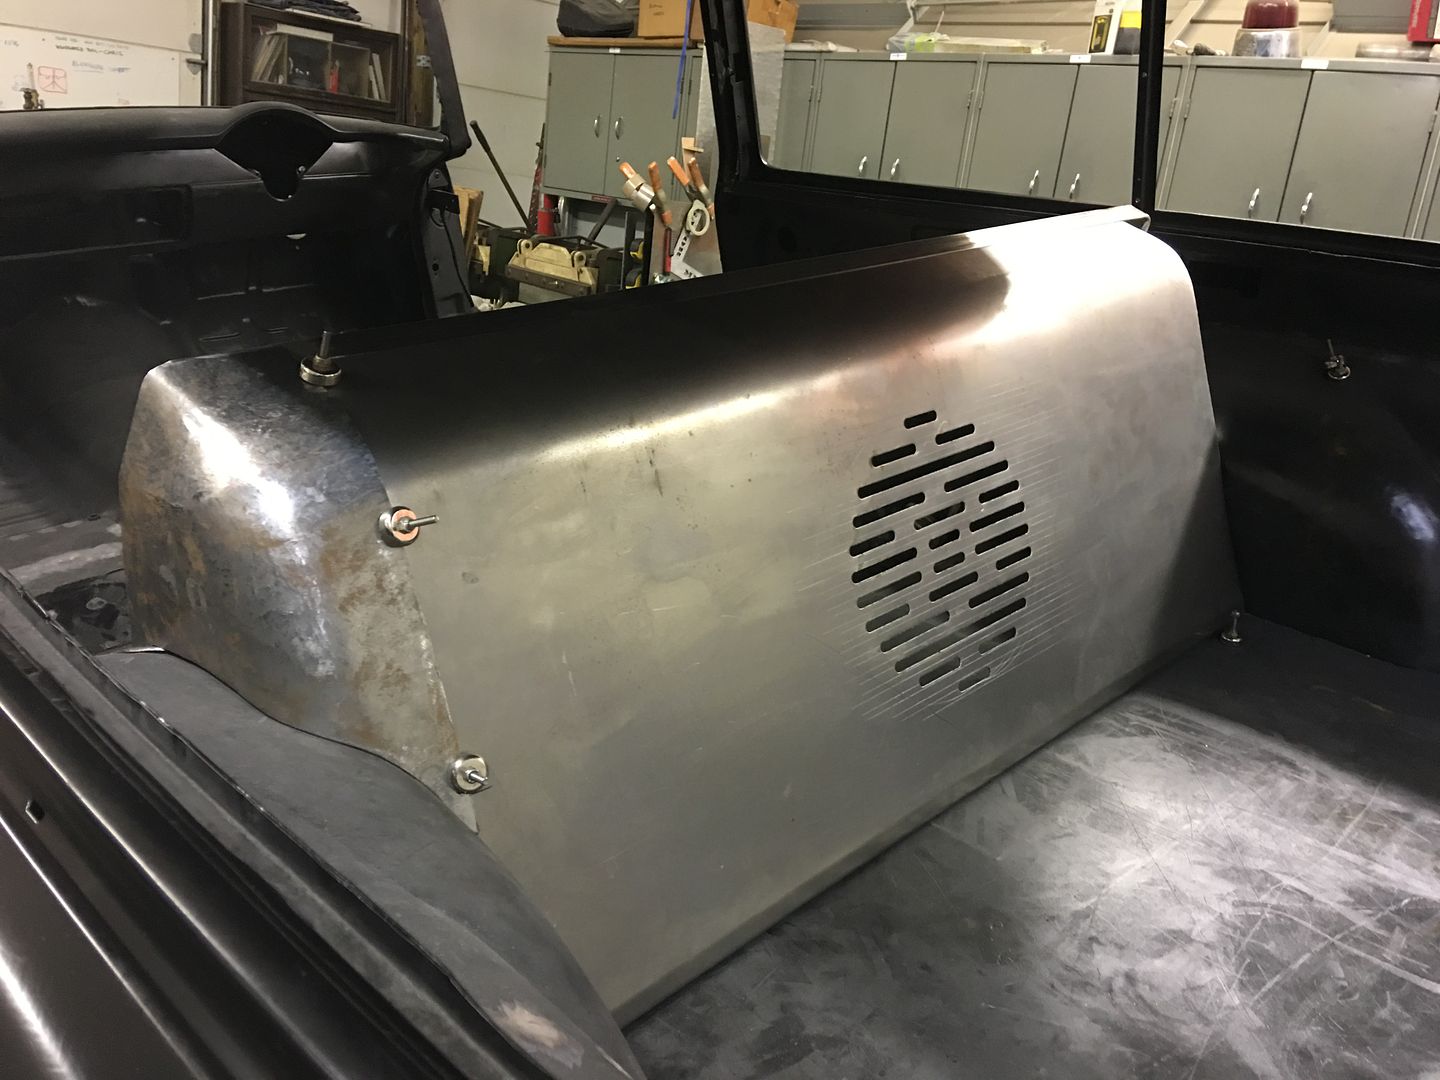
    Back on the wagon, we needed to close off the back side of the rear seat.. We have some square tubing to use but needed a radius bender. The upper part of the buffer stand looks like it may work. As I've told Mike, everything is a tool..


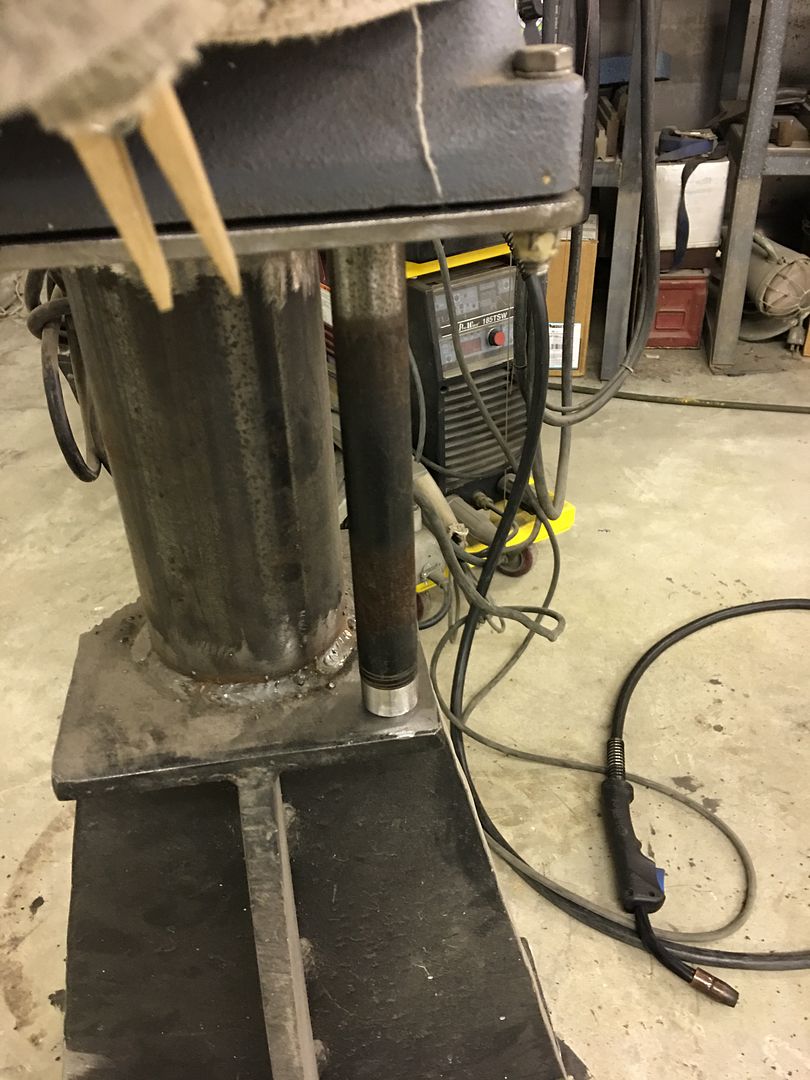
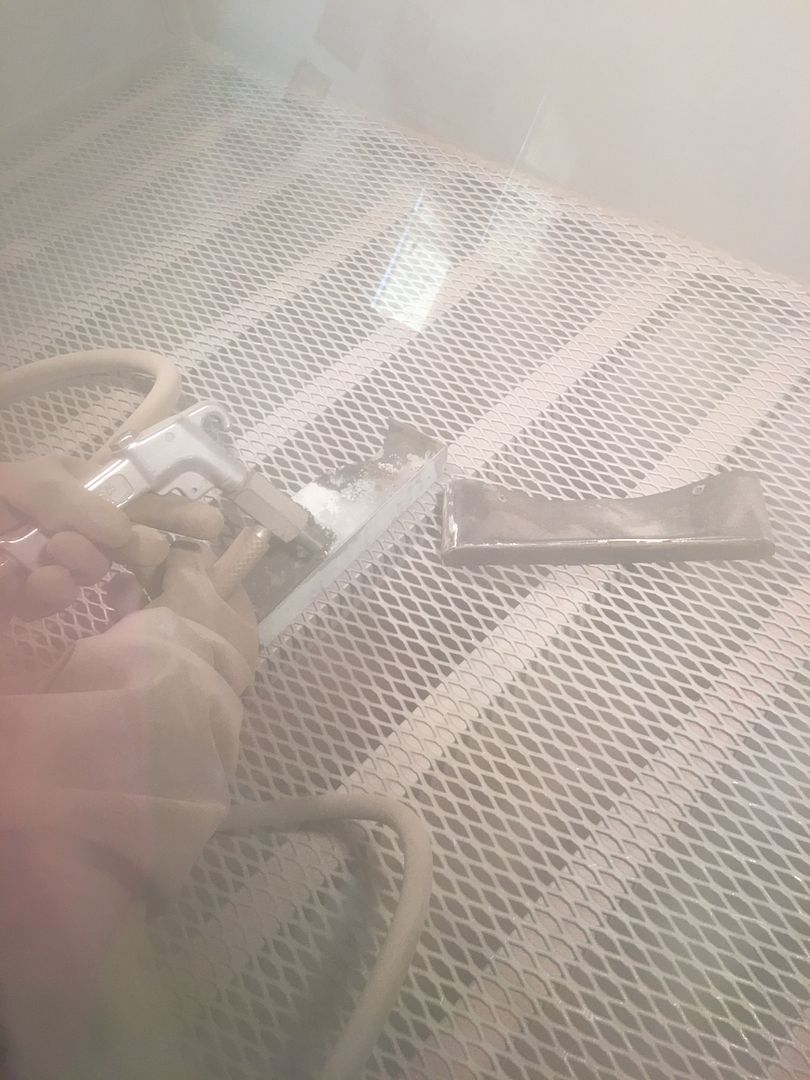
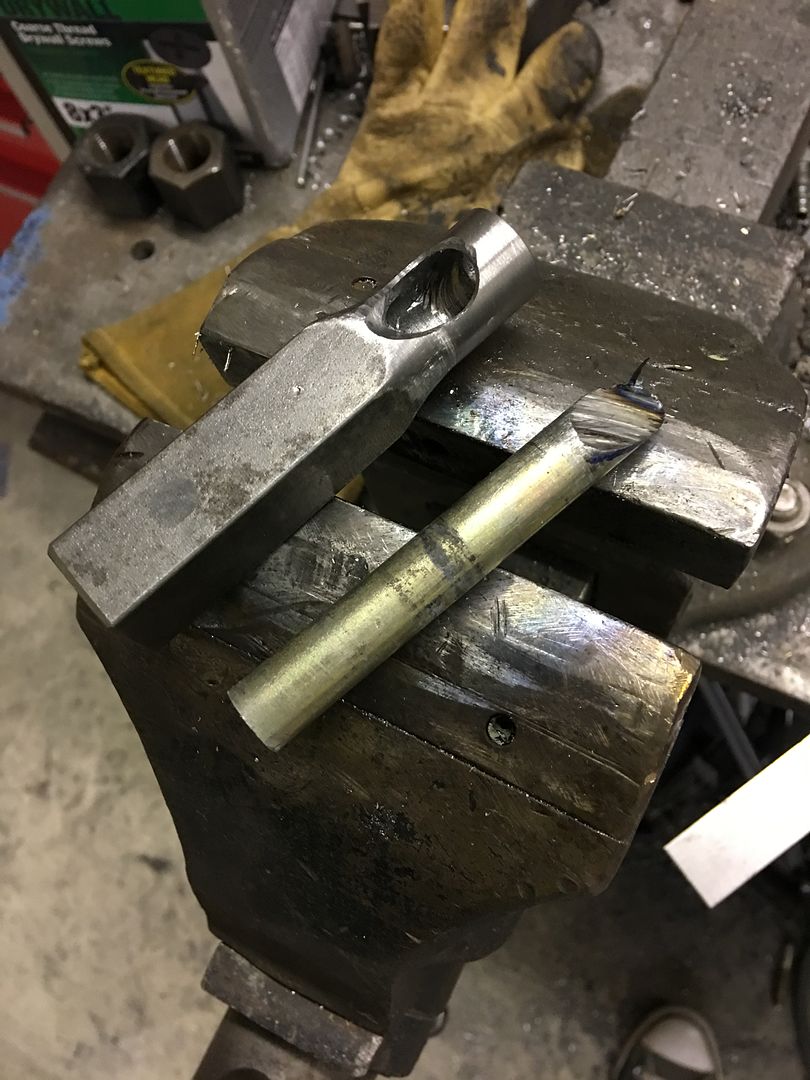
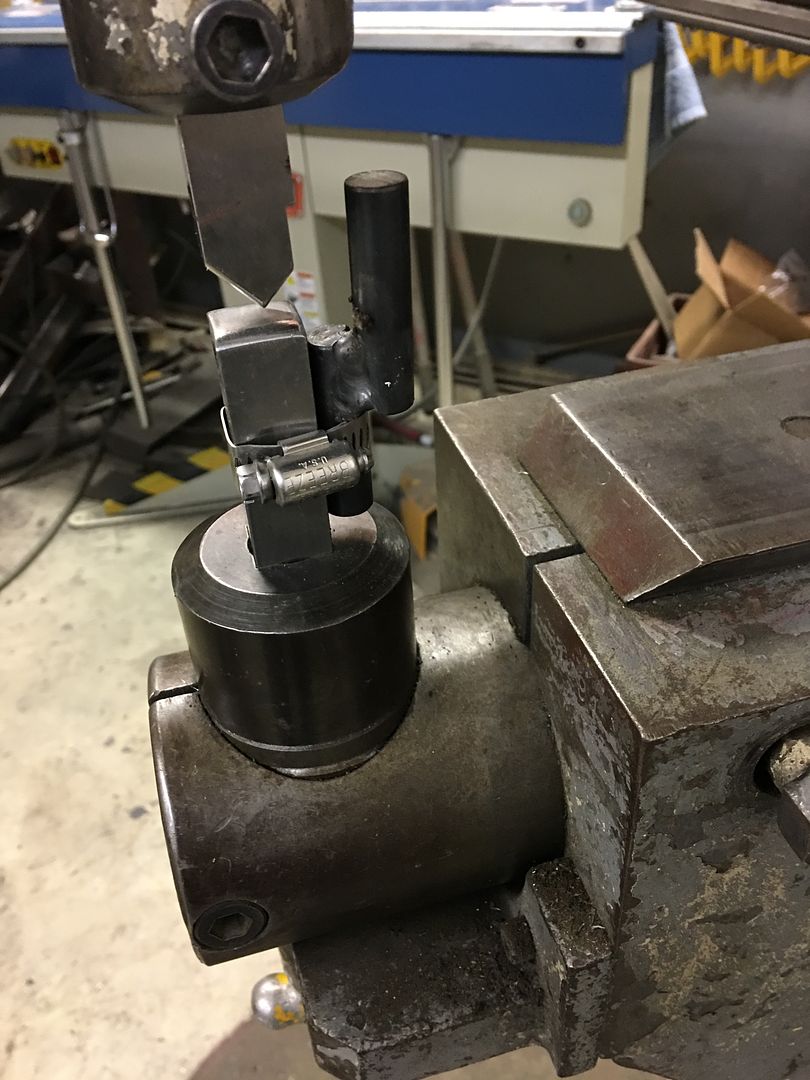
    Add a welder and a piece of round stock for an anchor...
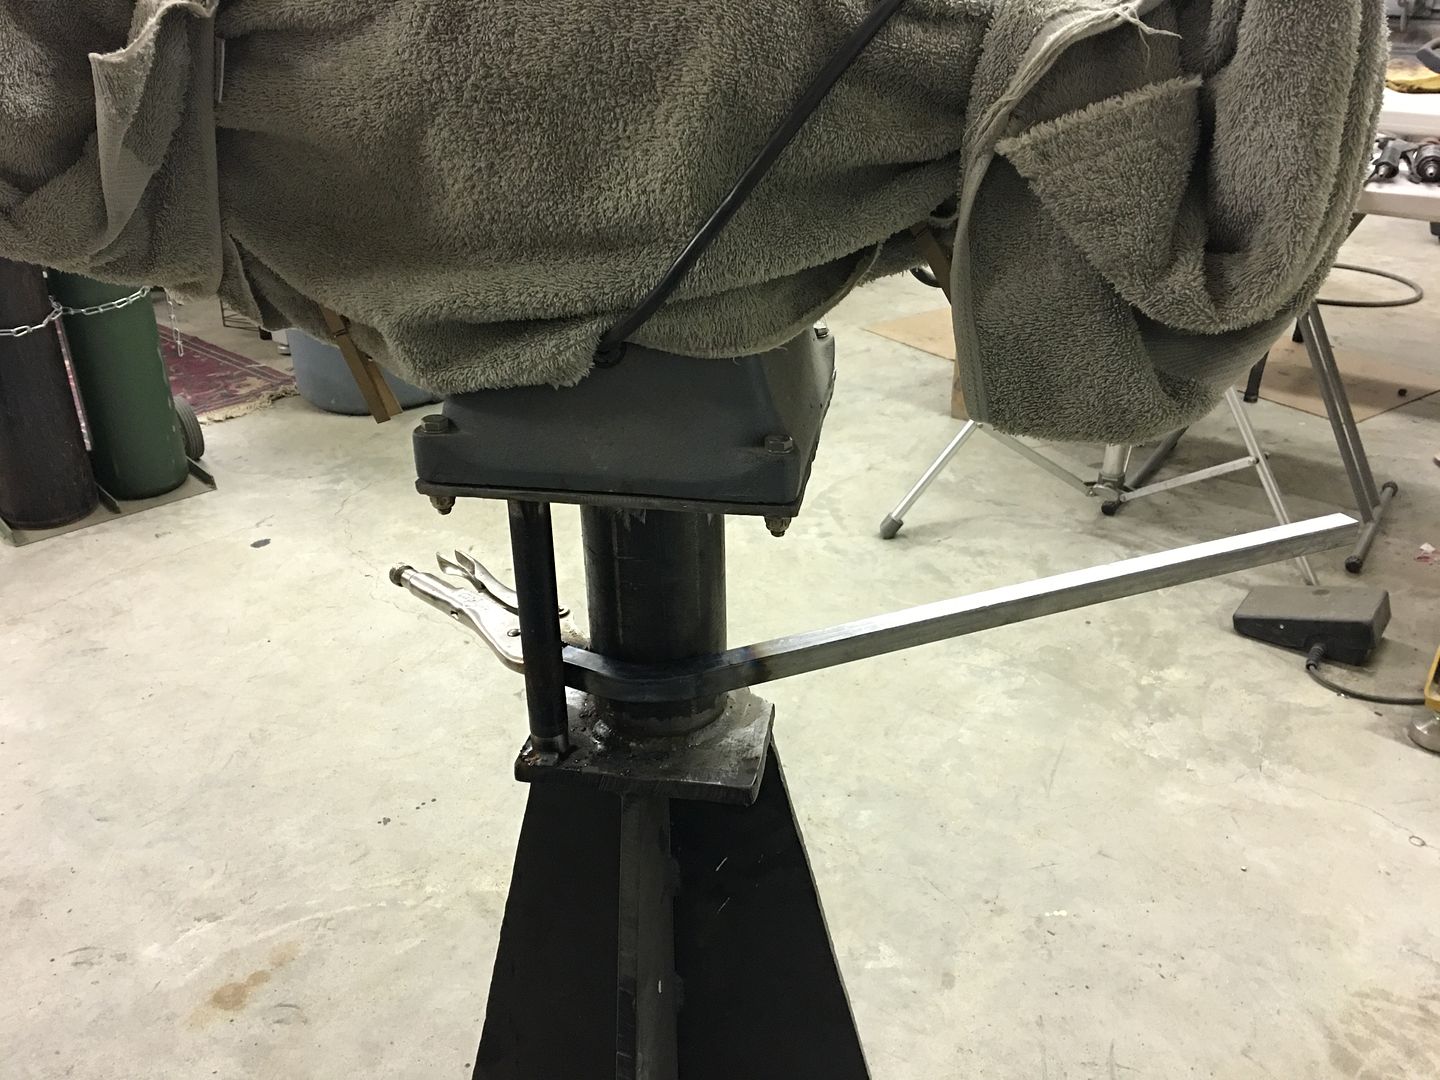
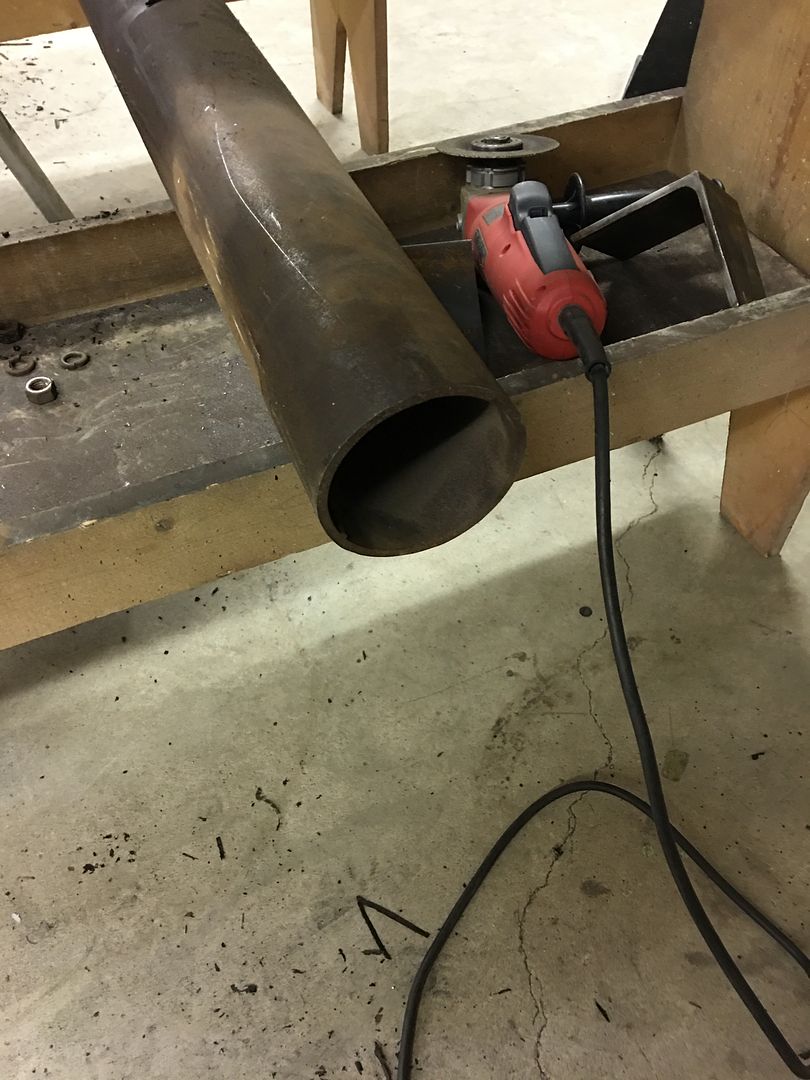
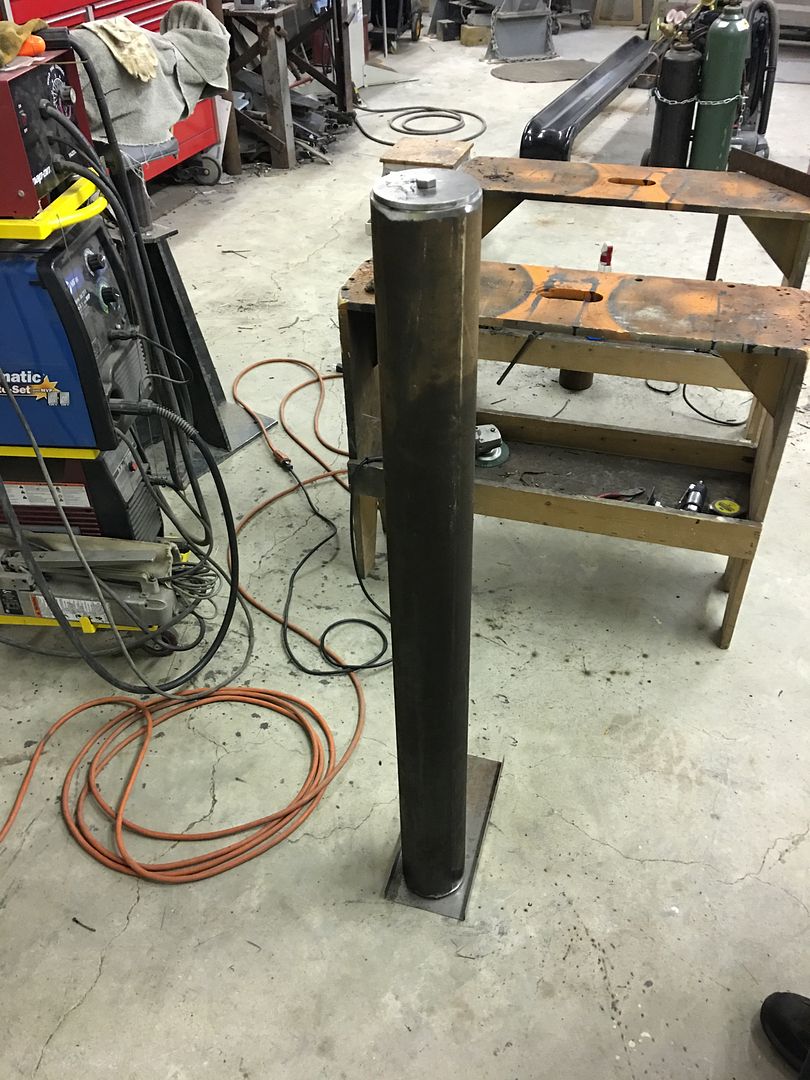
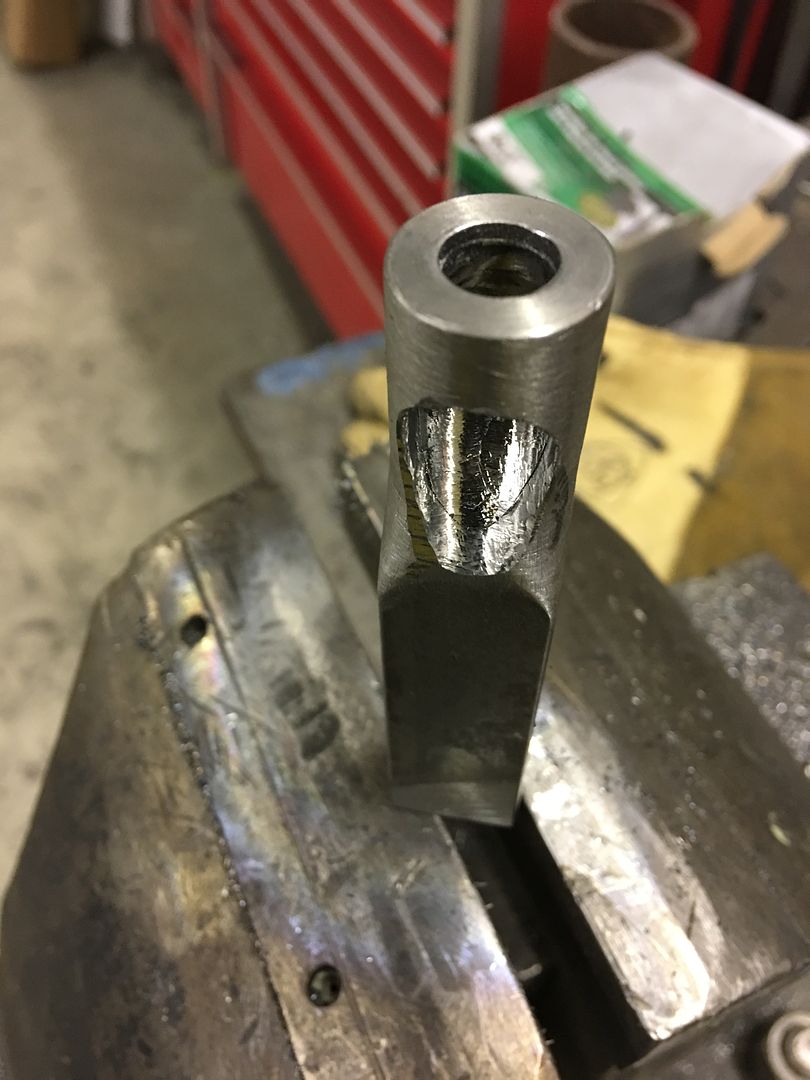


    First test...


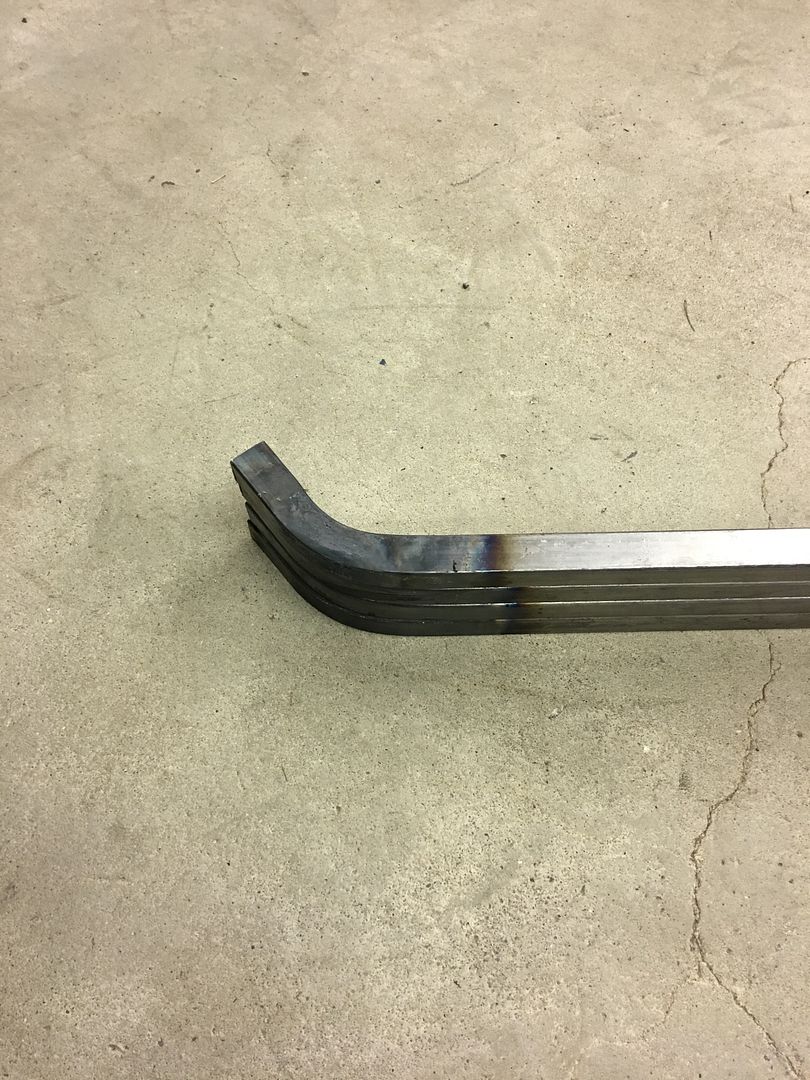
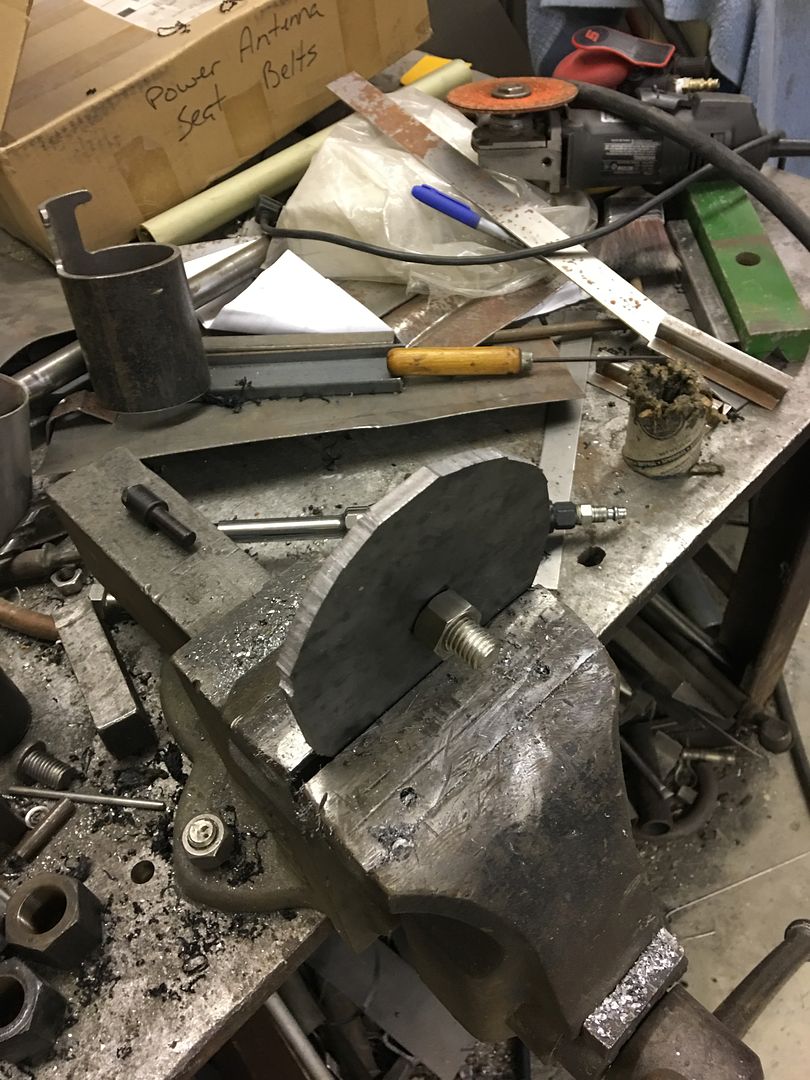
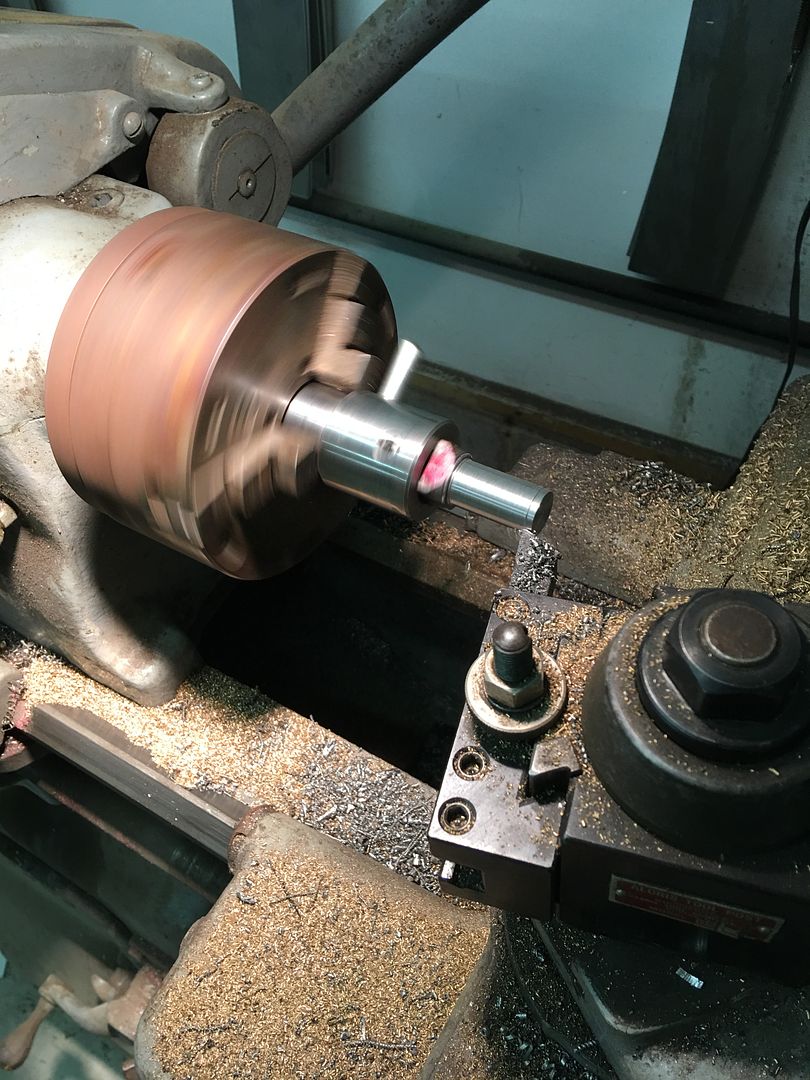
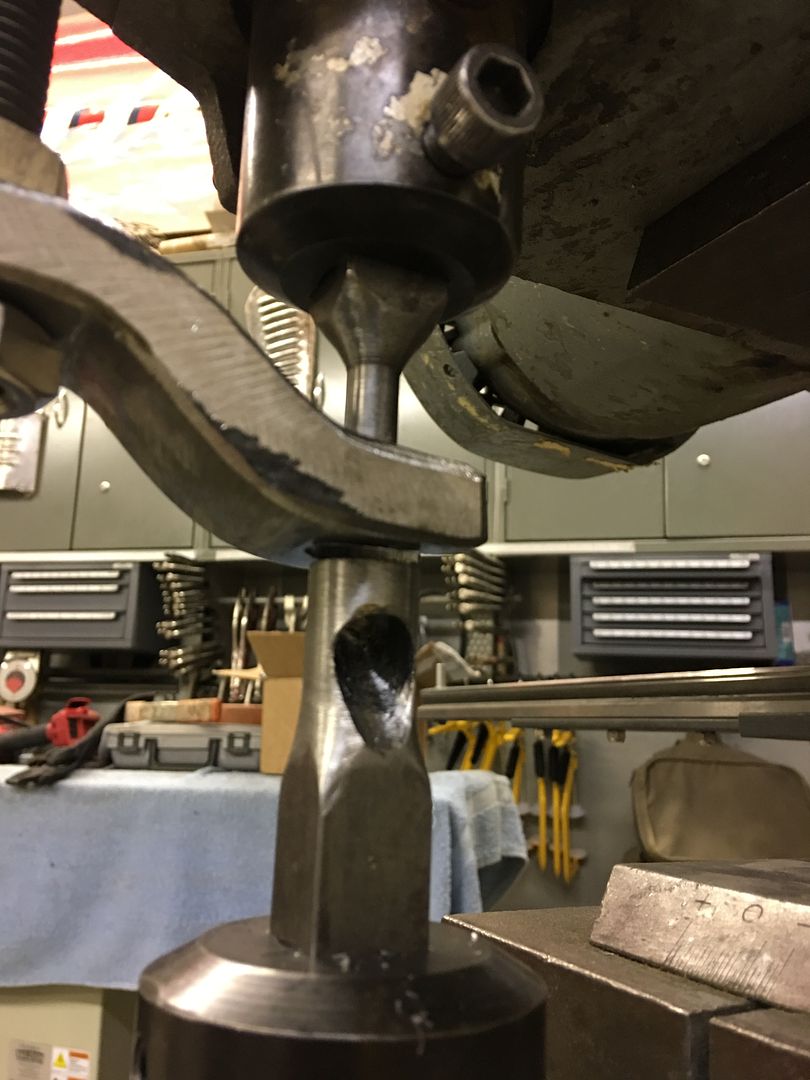
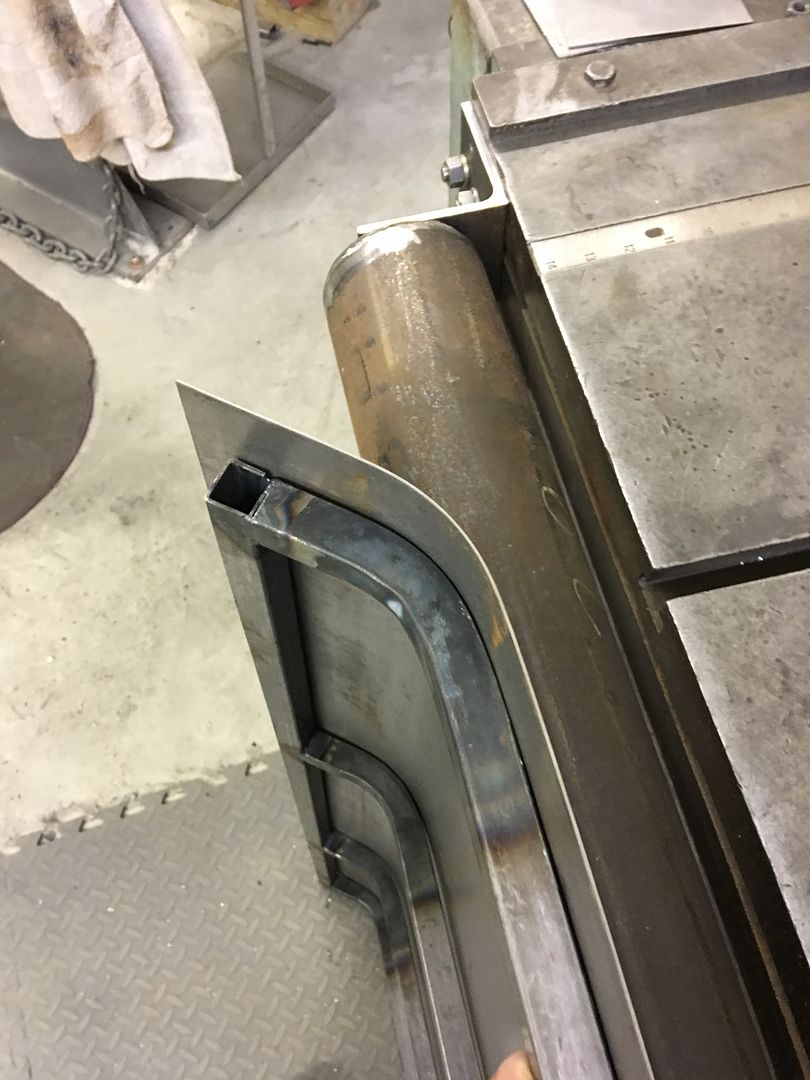
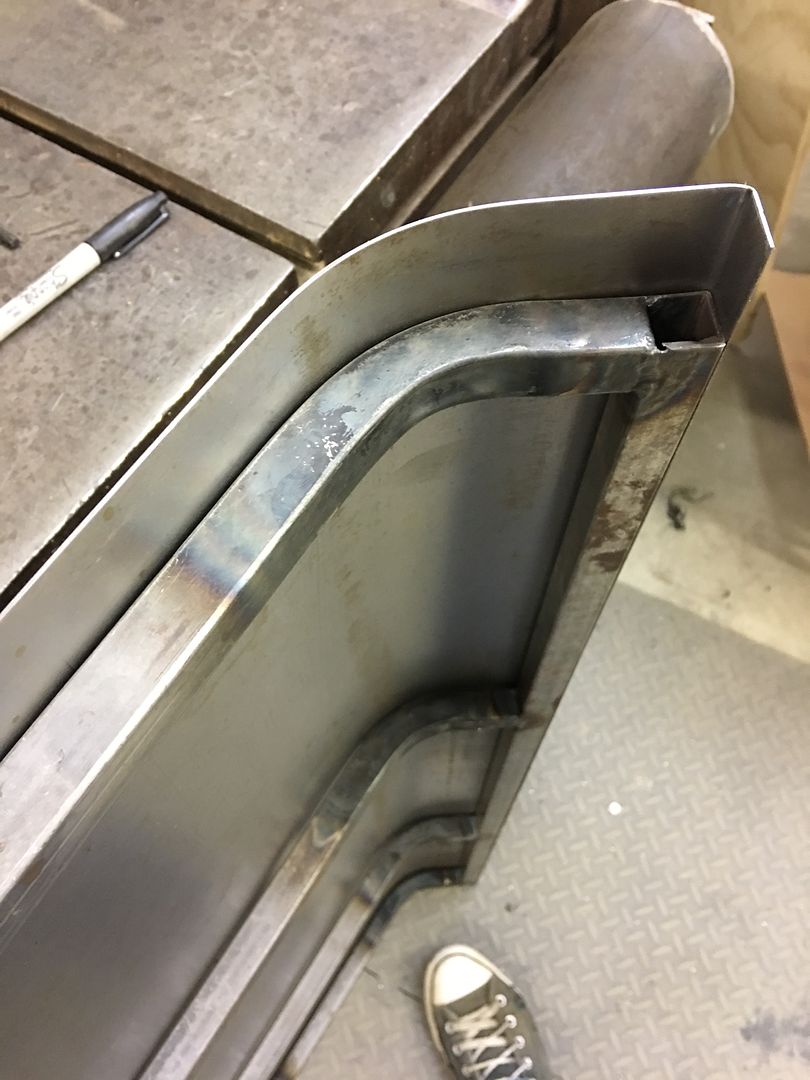
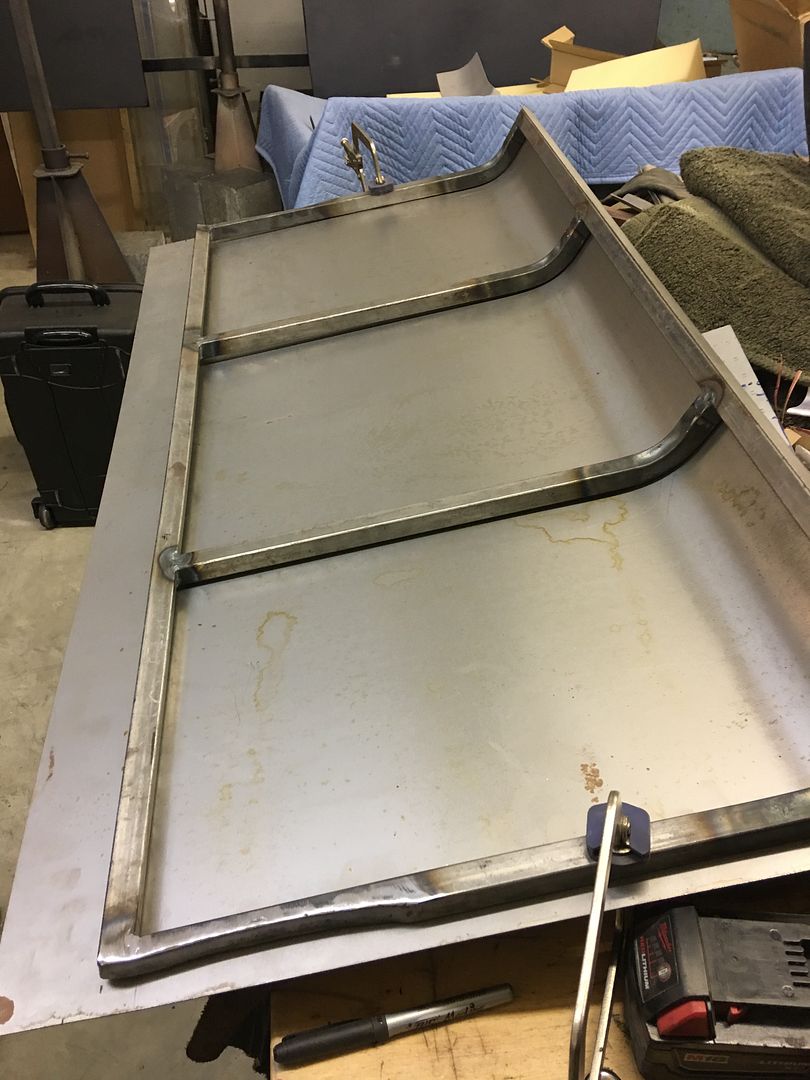
    Four pieces needed...


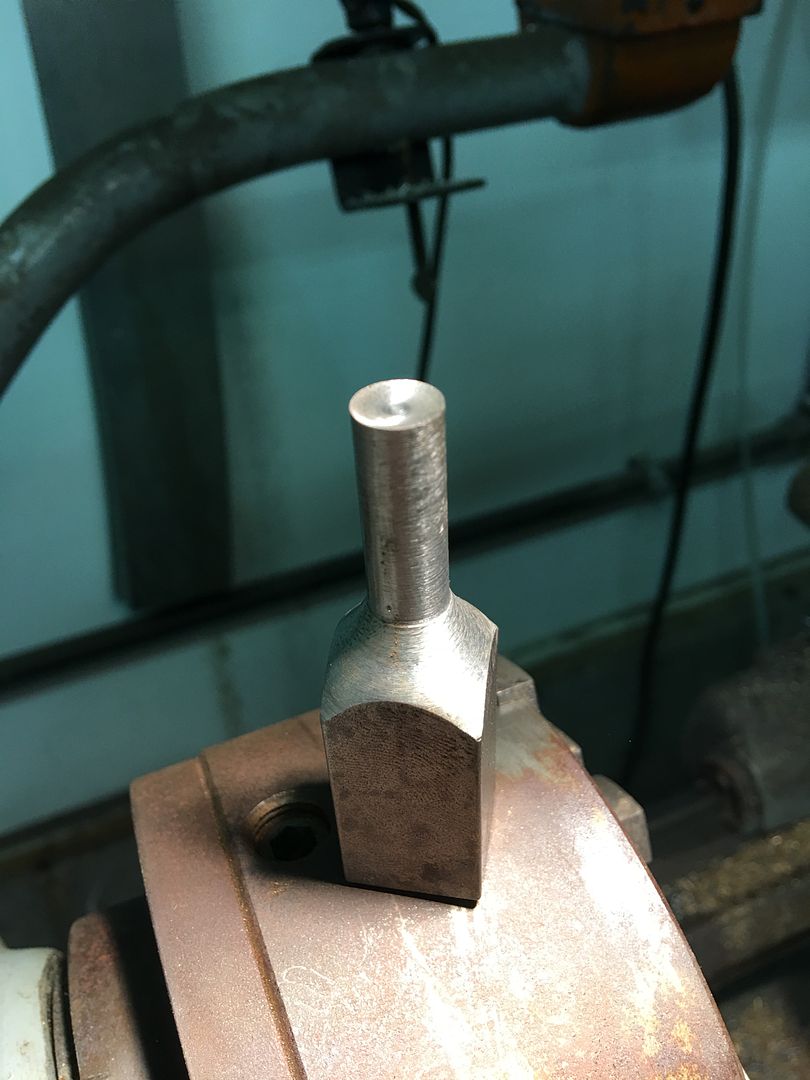
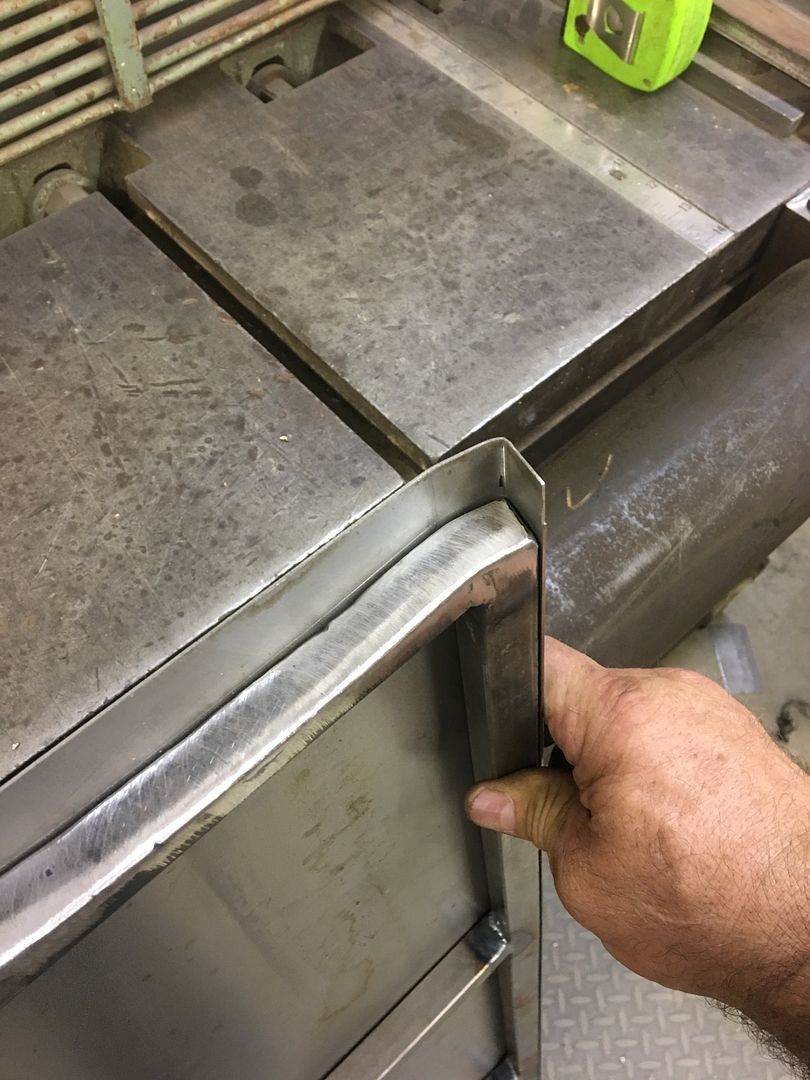
    All TIG welded together...


    Robert


    Instagram @ mccartney_paint_and_custom


    MP&C Youtube Channel

    Comment


    • Yesterdays progress.... Apprentice E got the bus bumper end caps removed by drilling out the rivets, and then media blasted the caps so they will be ready for paint...


      We needed some tooling for the next phase of the 55 wagon's interior fabrications, the radius we installed on the rear seat back framework will need to be duplicated onto the sheet metal covering. A trip to Hill Top welding had produced a suitable piece of 4" pipe. The Pexto shear has a t-slot along the front for it's support arms and we'll use this to bolt on a couple angle brackets to support this pipe along the front. A slight gap behind the pipe will allow us to use it as a fulcrum in adding a radius to our panel... Mike worked on adding some end caps to our radius die....


      Need a ground clamp for a standing piece of pipe? set it on a flanged piece of sheet metal, instant clamp location....


      More to come on that....


      Meanwhile, our sheet metal panel will also serve to cover the rear bass speaker. Not wanting a grille showing, we plan on using upholstery cloth to conceal the speaker. Rather than a big gaping hole that would more readily show the location regardless, some slots will better support the upholstery cloth. So lets make some nibbling tooling..


      This punch will be approx. 3/8 diameter and is made of 4140 oil hardening stock so we can heat treat when complete for better tool life..


      End is formed slightly concave to give a better cutting edge..


      Bottom die gets a clearance hole for the 3/8 punch, then it gets bored from the bottom end using 1/2" bit to within about 1/8" of the top surface. This will allow better gravity flow of any chips passing through our bottom die..


      Then we'll need an exit chute, so a 1/2" angled hole is drilled through the side and a 1/2" plug made to fill the remainder...


      The plug bottom gets chamfered and welded into the bottom die, then a ball end die grinder is used to fine tune the exit chute...


      A "shoe" is formed to hold down the workpiece, as otherwise the punch tends to lock onto the panel after the first punch and raise it in the air, thus preventing any material feed...


      An action video....


      Making nibbler dies for the Lennox. We plan on using slots in our interior sheet metal panels for speakers over a big gaping hole so this will help to bette...


      Our test slot.... this may work yet!


      Robert


      Instagram @ mccartney_paint_and_custom


      MP&C Youtube Channel

      Comment


      • Damn.... both previous posts are just too cool!
        Patrick & Tammy
        - Long Haulin' 2008, 2009, 2010, 2011, 2012, 2014...Addicting isn't it...??

        Comment


        • Thanks!


          Today I got the pipe and brackets that Mike made up added to the front of the Pexto Shear. The top of the pipe is set up the same height as the surface of the shear, so no interference in using the shear. The pipe is 49" long so it can be used for a full sheet if we have enough oomph to bend it. Here the finished product:


          Added a piece of 4" pipe to the front of the Pexto so we can add a radius to the 55 wagons rear seat back panel. Top of the pipe is set up flush to the top ...


          Sometimes you get lucky, here's the radius from our 4" pipe as matched to our seat back...


          Also made up some patch panels for my brother in law's El Camino. He brought some parts over that he had cut out, so we fabbed up some new parts, here's a sample...


          Robert


          Instagram @ mccartney_paint_and_custom


          MP&C Youtube Channel

          Comment


          • Luck, my a$$....That's talent with a major dose of skill!
            Patrick & Tammy
            - Long Haulin' 2008, 2009, 2010, 2011, 2012, 2014...Addicting isn't it...??

            Comment


            • Blind squirrel...


              Well time to relocate the wagon out of the paint booth so we can get some bus parts painted and on the way out the door..


              started with two coats of SPI epoxy on the bumper and end caps, the rivets were media blasted and will get black urethane only..


              In between coats the hood was removed and started stripping all the bolt on items. The fiberglass repair was sanded once more and prepped for a layer of Evercoat Kitty Hair.. starting to get crowded in here..


              A couple coats of the black urethane and we'll let it set a couple days...


              This shows the prep on the new hardware, media blasted using 80 grit garnet abrasive, then it gets Urethane only. Primer has shown to have too much build and results in chips from the Phillips bit, media blast and urethane only has shown to hold up the best.


              Robert


              Instagram @ mccartney_paint_and_custom


              MP&C Youtube Channel

              Comment


              • I follow this on the HAMB board and it makes me insane to look at the new posts... but I do it anyway.

                Comment


                • Yeah, buses are too new to post there....
                  Robert


                  Instagram @ mccartney_paint_and_custom


                  MP&C Youtube Channel

                  Comment


                  • It's the methods, skill, and how to that gets my interest.. New-old, same skill set...basically..

                    Comment


                    • More back seat work on the 55. Mike is trimming up our brackets to give us a bit more clearance around the wheel wells so the upholstery can wrap around our panel...


                      ....and I worked on taking some patterns of the rear corners...


                      Transferred the pattern to some 18 gauge cold rolled steel and started some shrinking on the Baileigh power hammer..


                      Test fit....


                      Bottom edge gets hemmed so the upholstery cloth has less chance of cuts...


                      A bit more cleanup work, but I'm real pleased with how this is turning out..


                      .
                      Robert


                      Instagram @ mccartney_paint_and_custom


                      MP&C Youtube Channel

                      Comment


                      • maybe you should paint the car yellow and call it your short bus?
                        Doing it all wrong since 1966

                        Comment


                        • Not sure she wants that color!


                          More work on the seat back, a test bend to see how well it matches our corner....


                          Then to bend the radius on a piece of 19 gauge for the full width...


                          Then to bend down a flange to "hook" the frame....


                          The metal is thinned at the bend line using a tipping die to give us a more crisp bend...


                          Bent at 90* in the magnetic brake..


                          Next we slotted the panel for our 10" bass speaker. This should let out the sound but still support our upholstery material for a more subtle look..


                          Then the bottom flange is also thinned at the bend and bent on the magnetic brake..


                          .....and our test fit into the car...


                          Last edited by MP&C; August 5, 2017, 08:02 PM.
                          Robert


                          Instagram @ mccartney_paint_and_custom


                          MP&C Youtube Channel

                          Comment


                          • Got the drivers corner for the rear seat back tig welded in place and flange folded. Now for the passenger side.


                            TIG welded the drivers rear corner of the seat back in place. One more corner to go....


                            On a side note, officially gave Photobucket the boot as my subscription expired last Friday. Robert isn't paying their extortion fees. Surprised the pictures are still showing...
                            Robert


                            Instagram @ mccartney_paint_and_custom


                            MP&C Youtube Channel

                            Comment


                            • Still haven't set up the new photo hosting, so todays update via youtube. Got the passenger corner all formed up and Tig welded in place for the rear seat back enclosure..


                              All the welding done, next on the list is the console.
                              Robert


                              Instagram @ mccartney_paint_and_custom


                              MP&C Youtube Channel

                              Comment


                              • Another distraction, Never know what you see pull into the shop. Got a phone call earlier this week to look at a damaged trailer...


                                Apparently someone that had borrowed this for an event did not understand the operation of a Bulldog coupler. Near as we can tell, the split coupler was never compressed when the collar was moved forward, so it rested against it. With a bit more force they were able to insert the safety pin, and the first bump started the chain of events.


                                Looks like the did some plowing in the grassy area of our local county fair...


                                ....just before making contact with the back of the tow vehicle..


                                Inside the operating room on Tuesday night, Jake and I pulled off the carnage of exterior shell... The corner upright had been broken clean off its welds..


                                ....as well as sporting a nice bow...


                                Since we had the correct size square tubing in stock, we cut a piece to length, welded in place, then Jake abraded with the DA and painted with some SPI epoxy primer.


                                The wiring harness also took a beating, we picked up a new harness from TSC and will get that installed tonight, and see if we can get the outer skin bent and installed..


                                Robert


                                Instagram @ mccartney_paint_and_custom


                                MP&C Youtube Channel

                                Comment

                                Working...
                                X