 Tweet
Tweet
Re: Front End Collision Repair How-To - Installment VIII - go to page 4
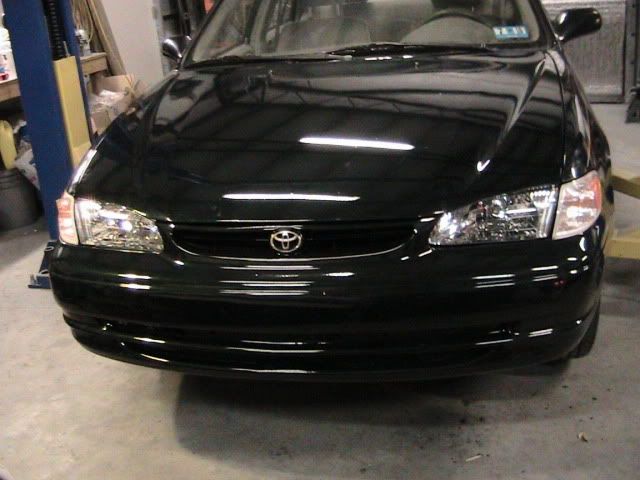
The parts are in color and clear. I'll post pics as as soon as the MAC comes back - hopefully tomorrow. I'm in a quandry. The clear looks pretty good but I can make it mirror smooth without much effort - but the rest of the car is kind of pebbly so the textures wouldn't match. On the other hand, being a garage paint job there are little bits of dust and the like that I could get out with some finishing. Decisions decisions.
Dan
Installment VIII
FINALLY - new pics
OK, here goes. Several steps in one posting.
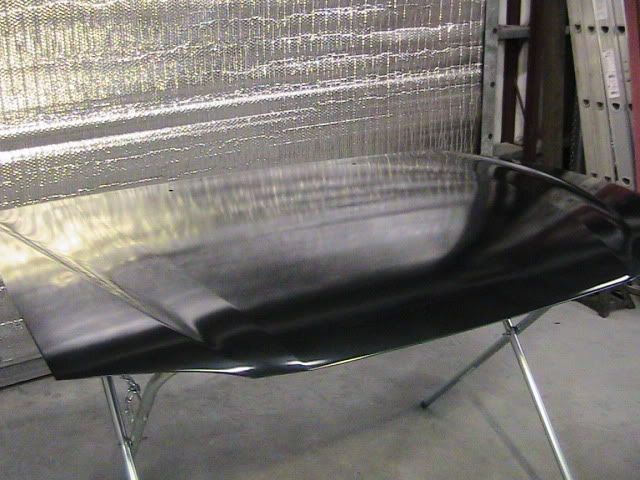
Here's the fascia with the heavy paint glass bead blasted off. It came out better than I thought with no obvious undercutting - I was afraid it might gouge out the plastic.
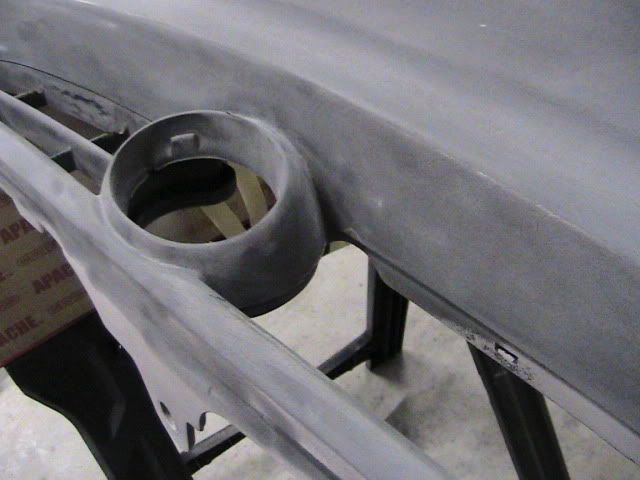
The self-etching primer dried out pretty well. This stuff is THIN - not like the spray can stuff which is pretty much like regular primer in consistency. Here I'm scuffing it up so I can shoot the sealer/DP50.
Here's the components for DP50. The DP series of epoxy primers come in a number of colors, the most famous of which is DP90 which leaves the desirable Hot Rod flat black. I happened to have DP50 on hand and it's fine under the color I'll be painting (a dark green metallic). Notice the can of lacquer thinner - that's what you use to thin DP for use as a sealer instead of primer. Thin according to the directions on the product sheet.
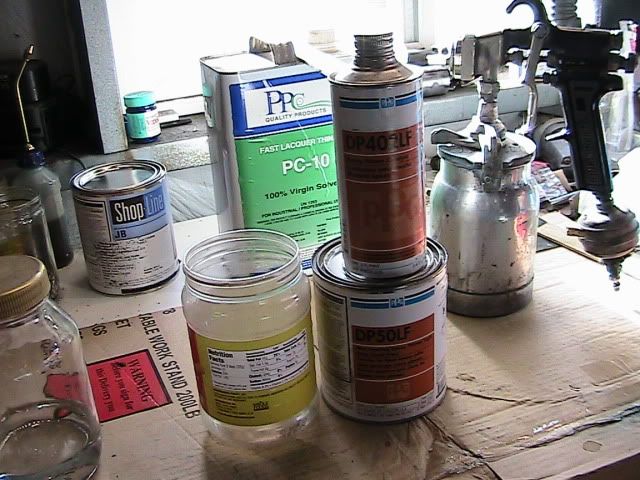
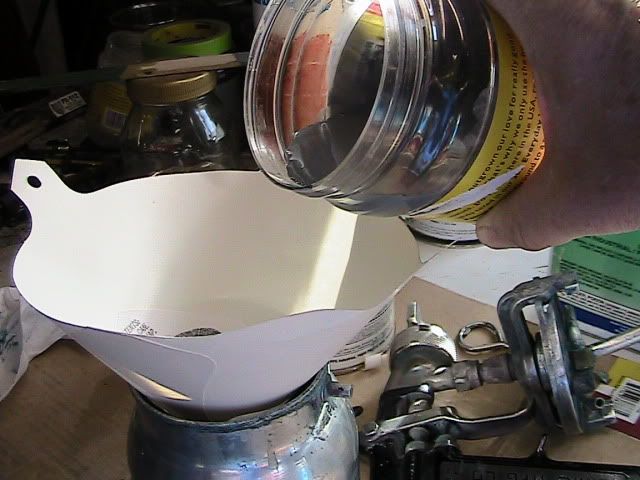
Pouring the DP50 into the can of the gun. A couple of notes: I use old glass jars (run them thru the dishwasher to be sure they're clean) and mark the levels of product you want to put in them on the glass with a China marker. If the dilution is, for example, 4 parts product to 1 part catalyst, you mark the container at, say, 2" of product, then add 1/2" for catalyst. If a third product (say, thinner) is used, add a mark for that. Paint companies make plastic mixing vessels just for this (You'll see them in Chip Foose's hands) but I save a few bucks and save old mayo jars.
Second note - notice the strainer. The paint store will give you a hand full of them when you buy your paint. ALWAYS strain your paint.
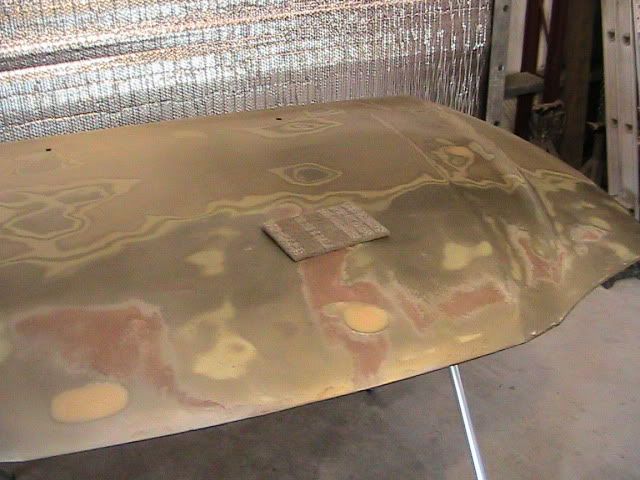
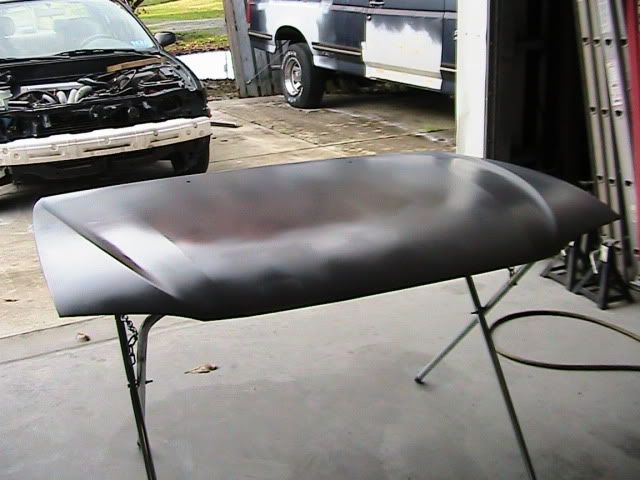
The hood in sealer. For some reason it looks darker in this pic than it really is. You really can't sand DP so get a nice smooth coat on it.
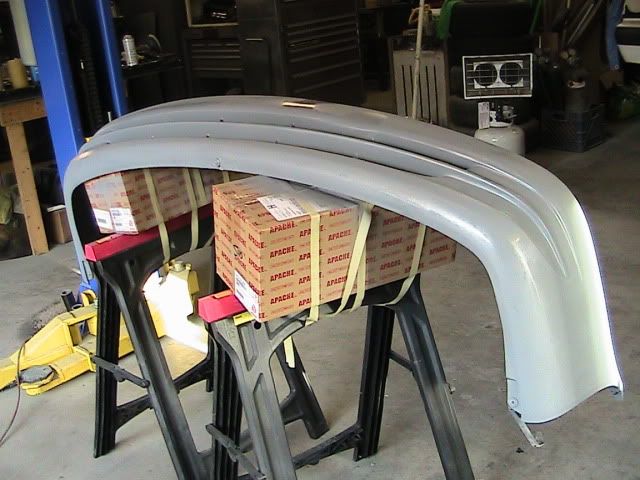
The fascia with both sealer and flexible primer on it. The hood got a couple of coats of lacquer primer/surfacer to fill sanding marks and the like.
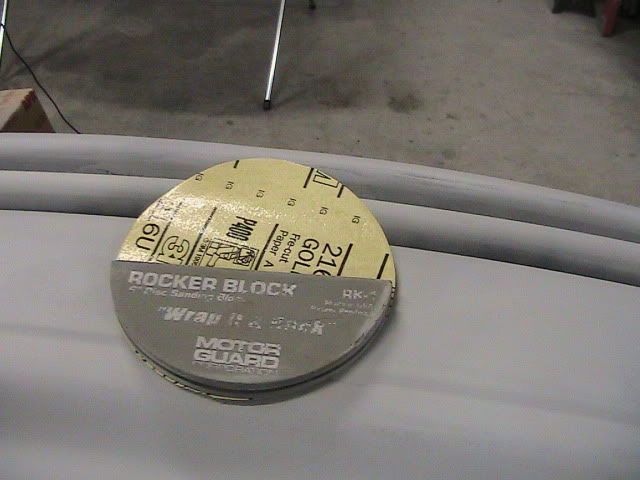
Block sanding time. First trick - try to NEVER use sandpaper with just your hand behind it. In reality, there are situations where you just can't back the paper up and I found some of this on the fascia. Here I'm showing you the famous "taco" (gee, I wonder why they call it that?). It's made to back up 6" DA paper and it turns out to be a really useful shape.
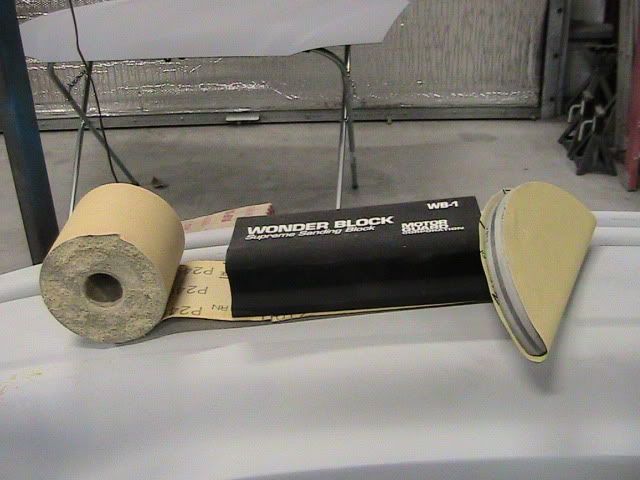
There are MANY different shapes and types of sanding blocks to help make this part as easy as possible - but it's still hard, manual work. Here's a couple that I use. The rectangular block is made to use roll abrasive, which comes with an adhesive back. This one also has a bump to act as a hand hold and it's a lot more comfortable than a plain flat pad (I have arthritis in my thumbs so I look for stuff like this). The roll paper comes in pretty much all grits. Here I'm roughing with 240 on the roll and 150 on the taco (just what I happen to have) and then smoothing up with 400.
Another sanding tip - if it hits the floor, replace the paper. It dulls the paper and there's no telling what contaminants will get picked up.
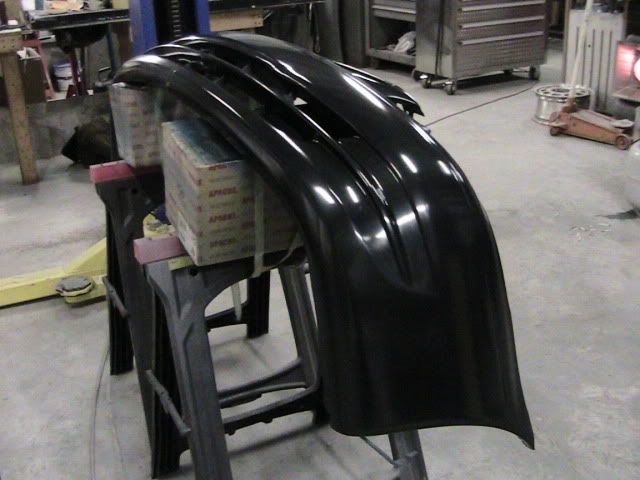
Hood and fascia in base coat. I shot another coat of sealer when I was satisfied with the sandable primer coat, followed by the color. Of course, the parts get a thorough cleaning and wipe down with Prep Sol between each step.
Note that I'm just spraying in my open shop. A booth would be great and is in the plans but this job sort of showed up before that got done. I've sprayed in some horrible conditions and had stuff turn out OK, so don't be stopped just because you don't have all the right stuff. I've worked with a rented compressor and a Sears gun, and the best black job I ever did was on a C60 tractor - OUTDOORS - and the next door neighbor was haying! And did I mention, it was in enamel (which dries the slowest). No BS! Fortunately, the wind was in our favor. My point is - YOU can do this stuff and have it look pretty good.
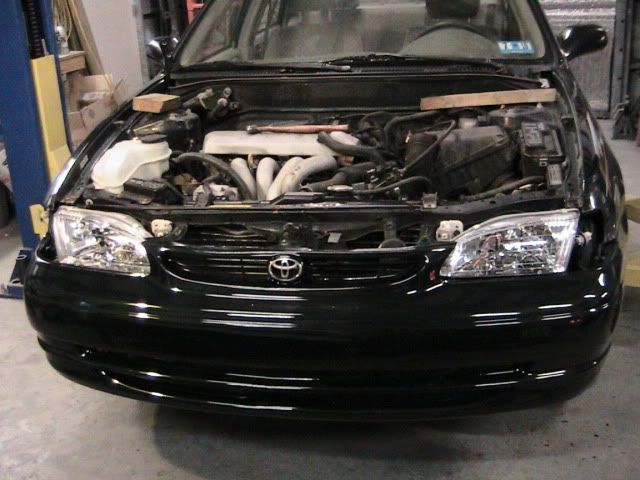
It's all clearcoated now and ready for installation. I'll show the final finish along with the reassembly shots in a day or so. I like to let everything set up a day or two but really you don't need to. I guess it comes from my old days of spraying enamel.
Dan
The parts are in color and clear. I'll post pics as as soon as the MAC comes back - hopefully tomorrow. I'm in a quandry. The clear looks pretty good but I can make it mirror smooth without much effort - but the rest of the car is kind of pebbly so the textures wouldn't match. On the other hand, being a garage paint job there are little bits of dust and the like that I could get out with some finishing. Decisions decisions.
Dan
Installment VIII
FINALLY - new pics
OK, here goes. Several steps in one posting.
Here's the fascia with the heavy paint glass bead blasted off. It came out better than I thought with no obvious undercutting - I was afraid it might gouge out the plastic.
The self-etching primer dried out pretty well. This stuff is THIN - not like the spray can stuff which is pretty much like regular primer in consistency. Here I'm scuffing it up so I can shoot the sealer/DP50.
Here's the components for DP50. The DP series of epoxy primers come in a number of colors, the most famous of which is DP90 which leaves the desirable Hot Rod flat black. I happened to have DP50 on hand and it's fine under the color I'll be painting (a dark green metallic). Notice the can of lacquer thinner - that's what you use to thin DP for use as a sealer instead of primer. Thin according to the directions on the product sheet.
Pouring the DP50 into the can of the gun. A couple of notes: I use old glass jars (run them thru the dishwasher to be sure they're clean) and mark the levels of product you want to put in them on the glass with a China marker. If the dilution is, for example, 4 parts product to 1 part catalyst, you mark the container at, say, 2" of product, then add 1/2" for catalyst. If a third product (say, thinner) is used, add a mark for that. Paint companies make plastic mixing vessels just for this (You'll see them in Chip Foose's hands) but I save a few bucks and save old mayo jars.
Second note - notice the strainer. The paint store will give you a hand full of them when you buy your paint. ALWAYS strain your paint.
The hood in sealer. For some reason it looks darker in this pic than it really is. You really can't sand DP so get a nice smooth coat on it.
The fascia with both sealer and flexible primer on it. The hood got a couple of coats of lacquer primer/surfacer to fill sanding marks and the like.
Block sanding time. First trick - try to NEVER use sandpaper with just your hand behind it. In reality, there are situations where you just can't back the paper up and I found some of this on the fascia. Here I'm showing you the famous "taco" (gee, I wonder why they call it that?). It's made to back up 6" DA paper and it turns out to be a really useful shape.
There are MANY different shapes and types of sanding blocks to help make this part as easy as possible - but it's still hard, manual work. Here's a couple that I use. The rectangular block is made to use roll abrasive, which comes with an adhesive back. This one also has a bump to act as a hand hold and it's a lot more comfortable than a plain flat pad (I have arthritis in my thumbs so I look for stuff like this). The roll paper comes in pretty much all grits. Here I'm roughing with 240 on the roll and 150 on the taco (just what I happen to have) and then smoothing up with 400.
Another sanding tip - if it hits the floor, replace the paper. It dulls the paper and there's no telling what contaminants will get picked up.
Hood and fascia in base coat. I shot another coat of sealer when I was satisfied with the sandable primer coat, followed by the color. Of course, the parts get a thorough cleaning and wipe down with Prep Sol between each step.
Note that I'm just spraying in my open shop. A booth would be great and is in the plans but this job sort of showed up before that got done. I've sprayed in some horrible conditions and had stuff turn out OK, so don't be stopped just because you don't have all the right stuff. I've worked with a rented compressor and a Sears gun, and the best black job I ever did was on a C60 tractor - OUTDOORS - and the next door neighbor was haying! And did I mention, it was in enamel (which dries the slowest). No BS! Fortunately, the wind was in our favor. My point is - YOU can do this stuff and have it look pretty good.
It's all clearcoated now and ready for installation. I'll show the final finish along with the reassembly shots in a day or so. I like to let everything set up a day or two but really you don't need to. I guess it comes from my old days of spraying enamel.
Dan


Comment