 Tweet
Tweet
Originally posted by TC
View Post
-
I use Hemo's I dont know where they came from but look like they where from the 1970's and 80's2007 SBN/A Drag Week Winner & First only SBN/A Car in the 9's Till 2012
First to run in the .90s .80s and .70's in SBN/A
2012 SSBN/A Drag Week Winner First in the 9.60's/ 9.67 @ 139 1.42 60'
2013 SSBN/A Drag Week, Lets quit sand bagging, and let it rip! -
aluminum heat sinks probably work better....
As long as you don't hold the soldering iron on any semiconductors for more than a couple seconds, you can get by without heat sinks.My fabulous web page
"If it don't go, chrome it!" --Stroker McGurkComment
-
this should be interesting I subscribe too..what happened to the last attempt at a thread like this?
I have a one off fuel and ignition, found ms a few years ago..1 other person in their history attempted wjat I wanted to do.
Adding my pc building (I do have some soldering) to a project seemed fun..until I never saw a completed project. I gave up before I began.
the use an empty carb and go throttle body custom etc..that is alot smarter.
..I already have complex questions.Previously boxer3main
the death rate and fairy tales cannot kill the nature left behind.Comment
-
Do you have any before or stock EEC data? Take it to the track before you switch to the MS so you can see how the custom tune changed it.Comment
-
Originally posted by STINEY View Post
Stiney, if you get that caddy 500 MegaSquirted, you have to live my dream of putting a set of 4-6-8 rockers and valve covers on it and let the MegaSquirt flip between 4 and 8 cylinders based on engine load, etc.Escaped on a technicality.Comment
-
x2!Originally posted by TheSilverBuick View Post
also TC, you're not out of the woods yet. There's going to be plenty of issues you scratch your head over, be prepared for them. lol we'll get through them together like a 12-step program. :-)www.realtuners.com - catch the RealTuners Radio Podcast on Youtube, Facebook, iTunes, and anywhere else podcasts are distributed!Comment
-
Funny you say this, my wife walks in the room and I'm looking at those G-tech monitors, she says what you looking at, Jokingly I say the Christmas present your getting me..........Next thing I know she's hitting Buy-it-now and saying good your off my list........God I love my wife!!!!!Originally posted by Russell View PostComment
-
ewww.. burning off the resin....Originally posted by JeffMcKC View Post
I would never cross contaminate. Salmon Illa cold solder joints.
100w Weller. Good for glass. Bad for transistors. Once it's hot enough to pull solder, it's a great time to take the iron off it.
Bamfster, somebody was worser-badder than me. I don't think I'll be a good new dink, but somebody has to hold the spot. I hope it's not permanent. Somebody has to keep Scott whizzed off... and I get bored easily.Flying south, with a flock of bird dogs.Comment
-
Ok got the kit today, guess the Post Office was a bit backed up and they didn't get it out yesterday, which also means I won't get the JimStim until tomorrow.........I did a quick inspection of the components in the box and it seems pretty self explanatory.....like with the resistors, the little bag is labeled (ie. R1, R2, etc) which corresponds with its position on the PCB....
DG you said something about getting me the right manual??.........
And is this where I start??
Comment
-
Yep, start there. The DIYPNP is quite different from the usual ms assembly.Originally posted by TC View Postwww.realtuners.com - catch the RealTuners Radio Podcast on Youtube, Facebook, iTunes, and anywhere else podcasts are distributed!Comment
-
You got screwed this year! You should only look at Full House Crate Engines,Blowers and Transmissions this time of year,everybody knows that.Originally posted by TC View Post
When I had my '03 Mercury Marauder, Kooks headers just came out with thier headers to tail pipe kits,I must have left the page up when I went to work, Christmas Morning my kids came banging down the stairs with a two HUGE boxes they had been hiding in thier rooms.That was a sweet set up....
I also got a 3500rpm converter too that year....
I miss that car.....Comment
-
Ok, after a little office cleanup I clear a nice area on my desk to work at and am almost done assembling the unit.......One note as I said earlier about the light with the magnifying glass, get one, or at least get a magnifying glass as some of the print on the transistors and capacitors is REALLY small and you have to determine which way they go in because some have positives and negatives that you have to line up........Other than that assembly was pretty straight forward, each package is labeled where the parts go in correspondence to its place on the circuit board......Here's a few pics of how it went together, I still need to run the jumper wires from the main board to the adapter board, but that shouldn't take to long once I track down the pin locations.......
Here's a shot of the work area I setup, the red pad is an anti-static pad, the little connector in the lower left hand corner connects to the ground plug on an outlet and then there is also a wrist band that plugs into the connector on the pad......I did this because the components packaged in pink are static sensitive.....

Here's a shot with all the resistors in place..

Here's a shot with all the capacitors in place and the two adjustable resistors, those are the gray box looking things.........

Here I've installed the MAP sensor, power terminal, serial ports, mirco chips, diodes and transistors........

There are also some transistors that mount on the back of the board.....

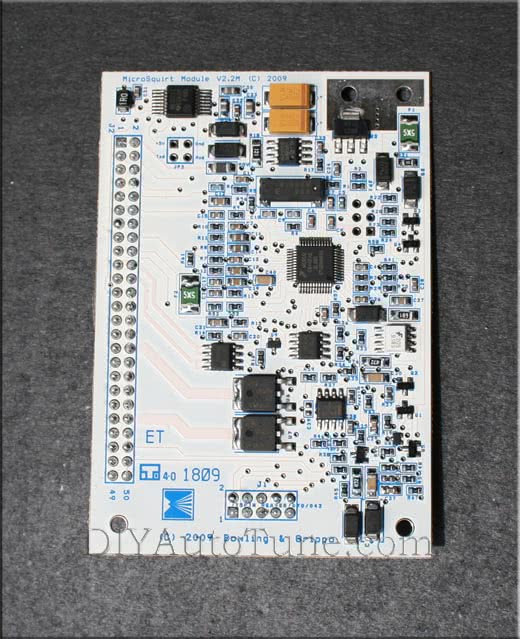
And here it is with the MicroSquirt Module mounted up and that concludes the base assembly of the main board.....

And here a shot of the adapter board......I'll be running jumper wires to the main board to this board to correspond with the factory Pin outs.........

Well I'll post up more as things come together.....so far pretty easy stuff...........Last edited by TC; December 22, 2011, 12:10 PM.Comment
-
excellent work TC!www.realtuners.com - catch the RealTuners Radio Podcast on Youtube, Facebook, iTunes, and anywhere else podcasts are distributed!Comment
-
looking good!
If it was surface mount, you'd want a stereo microscope, like my brother has...
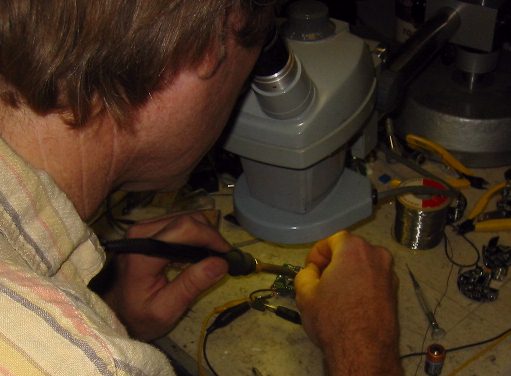 My fabulous web page
"If it don't go, chrome it!" --Stroker McGurkComment
-
Good work !2007 SBN/A Drag Week Winner & First only SBN/A Car in the 9's Till 2012
First to run in the .90s .80s and .70's in SBN/A
2012 SSBN/A Drag Week Winner First in the 9.60's/ 9.67 @ 139 1.42 60'
2013 SSBN/A Drag Week, Lets quit sand bagging, and let it rip!Comment
Comment