


Welcome back to our coverage of Project Power Laggin’! Follow along as we take a tired 1979 Dodge W150 Power Wagon we found in Central Maine and transform it from a derelict roadside attraction to a dependable, powerful weekend workhorse that lives up to it’s given name! In this installment, we finally start addressing the “Laggin’” with a full Hooker exhaust from stem to stern from our friends at Holley Performance!
Last time we checked in with Project Power Laggin’, we fixed some more nagging issues like the brakes and fuel pump, but the truck nearly burned to the ground thanks to a faulty section of wiring harness. With all that now sorted out, we can FINALLY start the fun stuff. And what better way to start than to fully revamp the leaky, cobbled-together exhaust system. In previous installments, we tried patching what was there, but we knew that it would eventually need to be replaced. It was leaking in random spots and becoming a real problem.
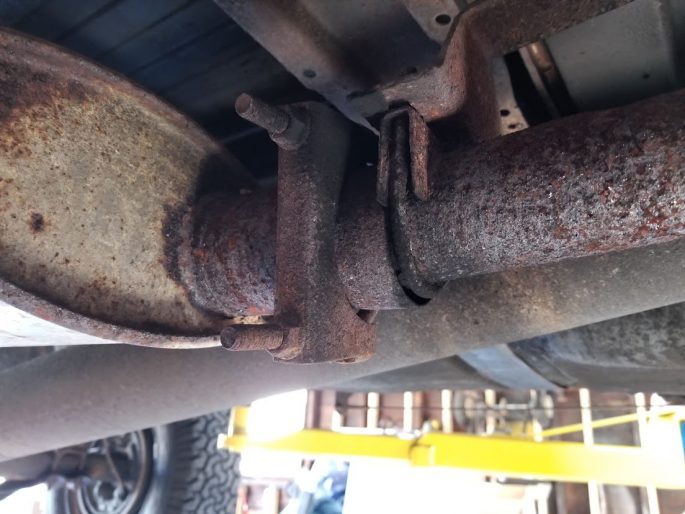
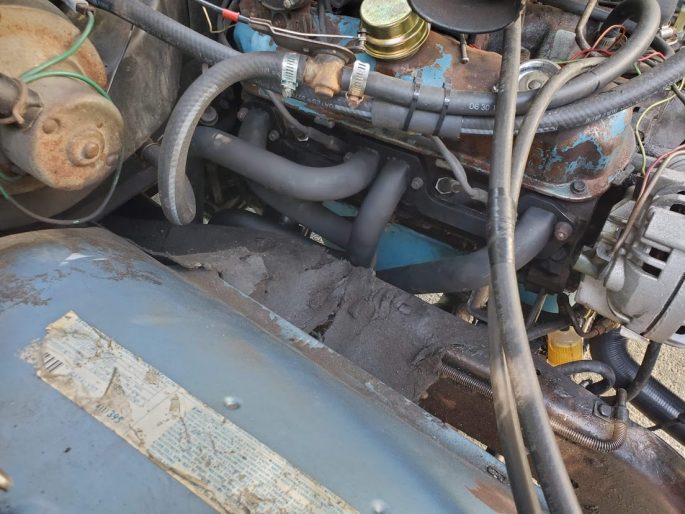
When we dragged the truck home, this is the kind of thing we were dealing with. Random sized, rotting pipes were just placed near each other and called “good”. Spoiler alert: it was not “good”.
After making some repairs over the past couple years, we replaced more than a few sections of pipe, as well as the muffler. But there were certain pipes that were no longer available, like the Y-Pipe. Ours was looking sketchy at best.
As far as replacement parts go, there are companies that make manifolds and headers, but getting some of the stock replacement pipes, like the Y-Pipe for instance, requires a time machine or custom fabrication. We could have gone the custom fab route, but that means we’re stuck with stock stuff. So, we looked into kits. If this was a Squarebody GM truck or any generation of Ford F-Series, there are countless ways to spend your money on mild to wild exhaust options. But since this is a Tin Grille Dodge, specifically one with a stock 18 gallon saddle fuel tank, long wheelbase, and four wheel drive, well… there’s one option that we could find. Lucky for us, it’s a good one.
Enter Holley Performance, and their famous subsidiary, Hooker Headers.

Hooker has been around for decades, and they are one of the only exhaust manufacturers that still list part numbers for this truck. One thing I’ve learned from owning this old rig is that a lot of old part numbers for all sorts of things exist until you try to order them. All of the sudden, No Longer Available. This time, Hooker not only sold the headers; they also had a complete header-back exhaust and the perfect mufflers to go with them. This system is as old school as they come, and the pipe routing is downright wild. Let’s take a closer look at the components and the install process!
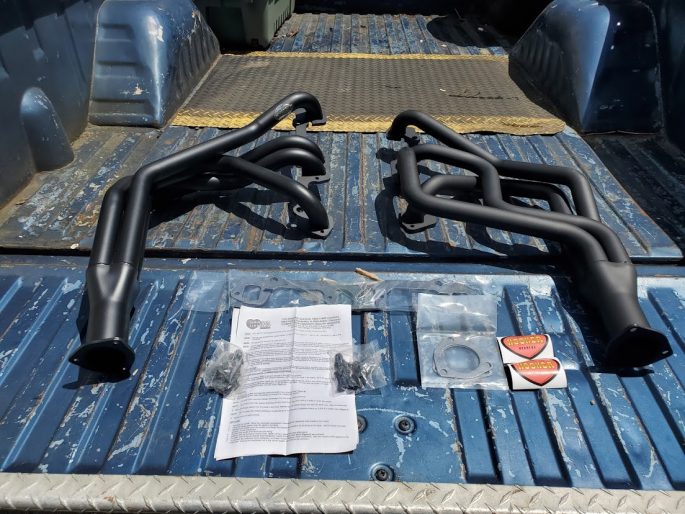
First, let’s start with the headers. Hooker sent us some Competition Classic long tubes for the truck, part number 7806HKR. The kit comes with collector bolts, gaskets, header bolts, instructions, and the all-important stickers. Holley also lists the instructions on their website via PDF if you want to study up on your PC, tablet, or phone before you even open the box.
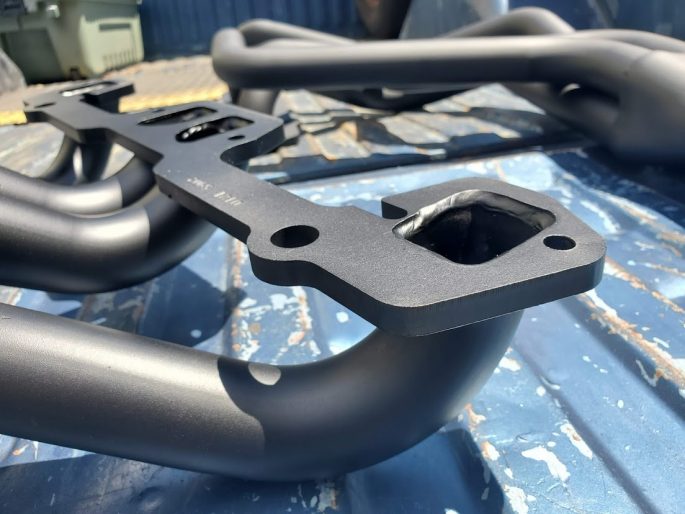
The flanges on these headers are nice and thick, and the surface was perfectly uniform and flat, making leaks far less likely. This is my first set of Hooker headers and this immediately caught my attention. Last couple sets of headers I installed on vehicles from other manufacturers needed a bit of massaging here, but not these. Nice!
Collector flanges were similarly uniform. I’ve had some that were crooked right out of the box. Luckily, these were nice and straight.
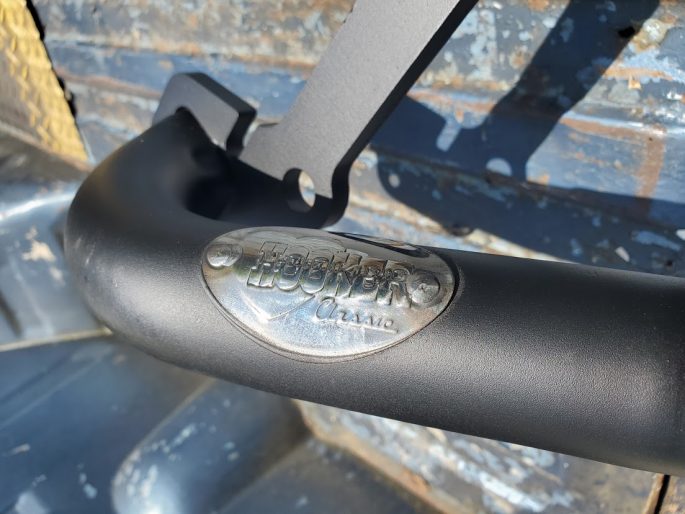
And yes, you get a cool little badge with their classic logo on the driver’s side tubes.
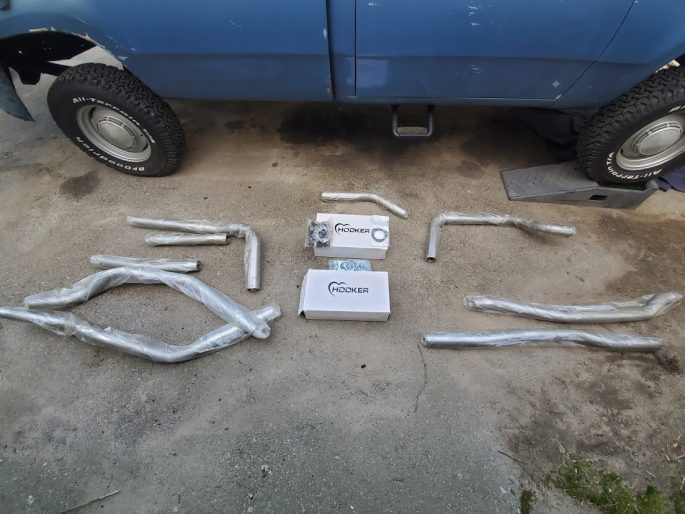
Here’s the kit we used, part number 16552HKR. The exhaust kit we used does not come with mufflers, but Hooker recommends their Competition Turbo mufflers (part number 21005HKR), so they sent some along as well. This kit comes with three different head pipes, tail pipes, and all the clamps, hangers, and hardware you’ll need, and the kit was designed with these mufflers in mind, so they work perfectly. Pipes are 2.25” in diameter and are mandrel bent for smooth flow. Not the largest diameter, but considering the crazy routing of the kit, anything larger may have some trouble fitting under there.
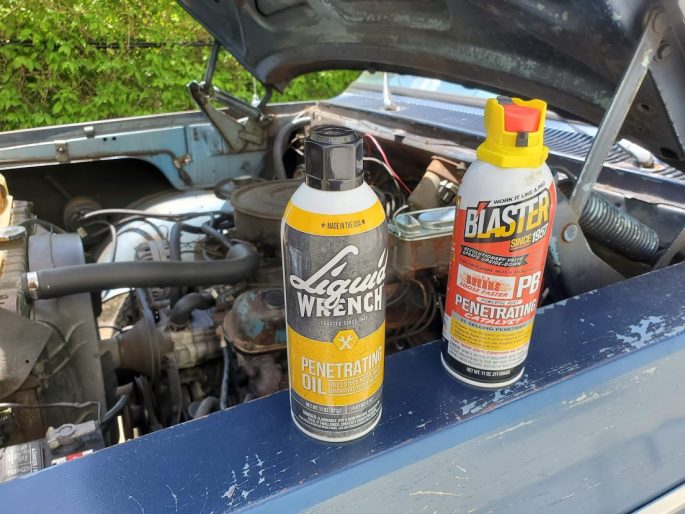
First thing’s first: as with any old vehicle, if you plan on loosening bolts, prepare for that with some intense penetrating oil marination. Since these were exhaust bolts, I was especially fearful of snapping a stud, so I started about a month prior to the install regularly hosing down each stud and heat cycling them by running the engine. This allowed the bolts to get nice and hot, and careful oiling around the bolt heads and the mating surface helped when it came time to turn wrenches. When it was finally time to do that, I tapped around each bolt with a hammer first, and carefully began the process of extraction. An old timer tip I learned was to start by tightening the bolt first. Go slow and with as light pressure as possible, watch for it to move. Once it does, try loosening slightly. Essentially, you go back and forth between tightening and loosening the bolt until it comes out freely. I didn’t break a single bolt pulling the stock manifolds that have been rust-glued to this truck since it rolled off the assembly line by following this method.

A classic rookie mistake is removing the front studs all the way. On Chrysler LA-series V8’s, there’s a coolant passage hiding behind these studs, so if you back it all the way out, you will end up with a big mess on your hands. And of course, this happened to me. In my defense, the stud was a rust nugget, and the nut got stuck at the end of the threads. Once I saw the stud coming out, I made sure I had a drain pan at the ready.

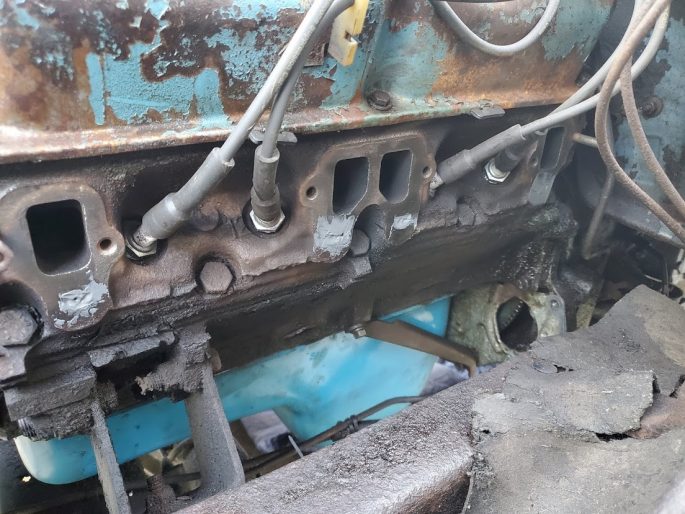
With the manifolds removed, most people will be greeted with a carbon-crusted mess. Since this truck is a ’79, these heads also have air pump holes. To install headers, those need to be filled. But first, let’s clean up that mating surface.
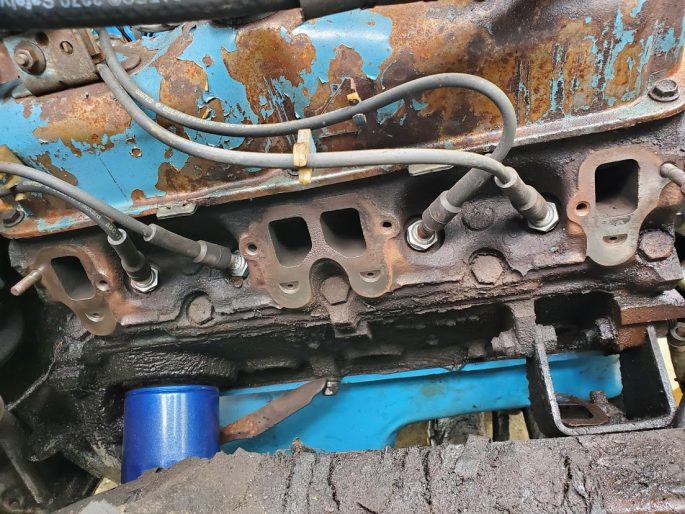
Much better. Now we know what we are working with.
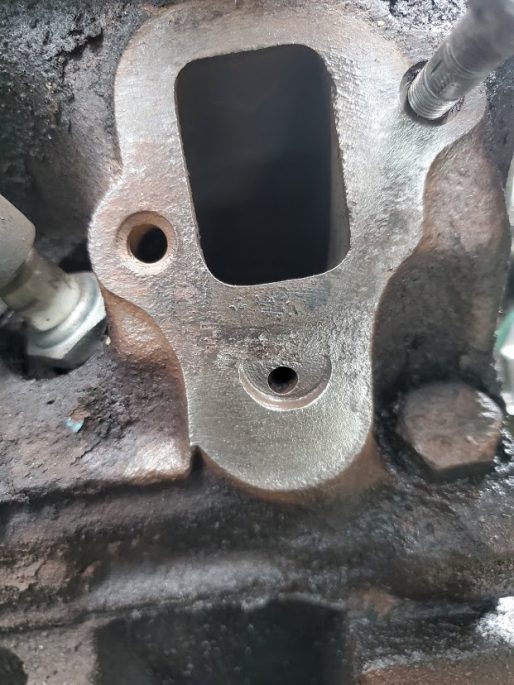
Here’s a close-up of a port and the air pump hole. Headers don’t have a provision to allow airflow out of these holes like the stock manifolds do, so they need to be plugged up. There are a few different ways of doing this, but we ended up going with the most tried-and-true method…
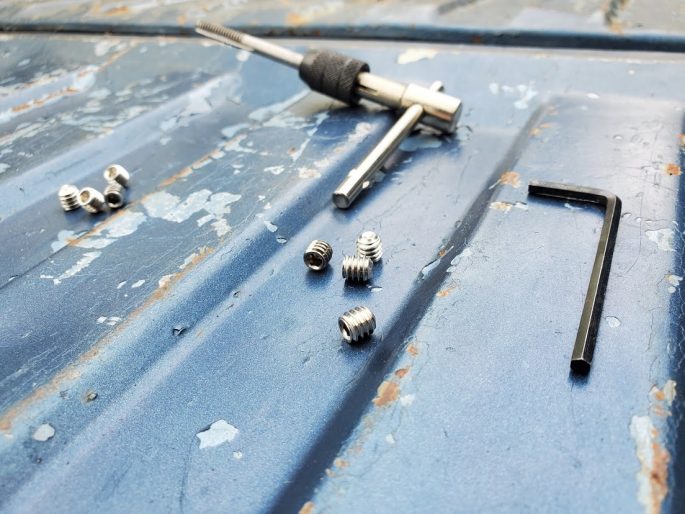
Pipe plugs. There are typically two common sizes for the ports that seem to vary from engine to engine: 1/4 x 20 and 5/16 x 18. And these holes are not threaded in any way, so you’ll need a tap to make some threads in the heads. Our heads had the smaller 1/4 x 20 holes, so we hit up the local hardware store and grabbed some plugs. Also of note, Hooker includes this info right in the instructions as one of the installation steps.
Tapping these holes in the truck wasn’t too hard to do, since the engine bay has plenty of room to access the holes. There are a few keys to doing this: cleaning the holes of any carbon deposits, using plenty of lubrication, using a quality tap bit, and most importantly, going slow. Take your time, keep it clean, and it will get done. The plugs need to fit in the hole deep enough not to stick out and shallow enough not to poke through the other side, so tapping about 3/8 of an inch should do the trick.
In researching how to fill the smog holes, we read about people using JB Weld to fill them. While we thought that solely using it to do that was a bad choice, using it as a sealant to keep the plugs from coming out seemed like a good idea. We mixed some together, slathered it on, and made sure to keep it as flush as possible by scraping off the excess. JB Weld can handle about 500 degree heat, and although exhaust gas can get a little hotter than that, it would mostly be radiant heat from the block, and it’s holding up well so far.
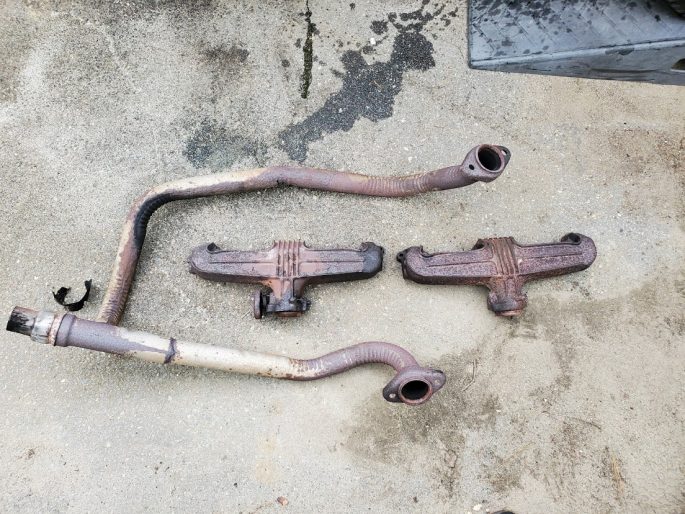
Now, let’s talk about the stock exhaust. Both manifolds were in good shape, but the air tube on the passenger side was snapped nearly clean off, causing a sizeable exhaust leak. Not only that, but the exhaust manifold gaskets were both smoked with large chunks missing. And this Y-Pipe was a mess. Not only was it cobbled together with a random reducer adapter, it had some other problems.
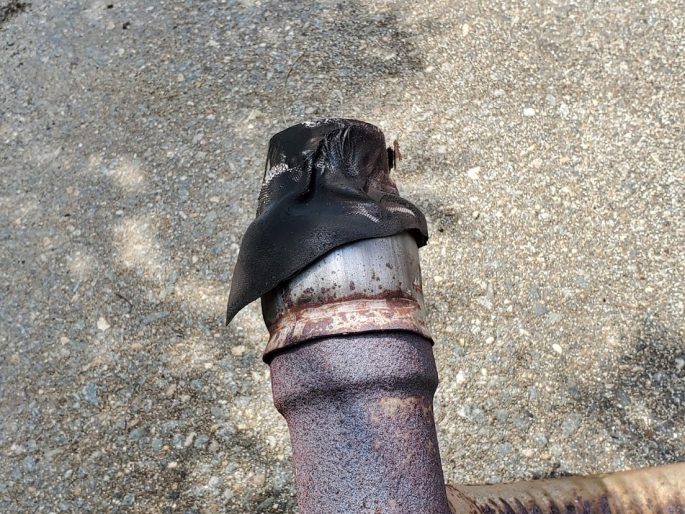
First, we found this stuffed in between the head pipe and the adapter. And yes, it was still leaking here.
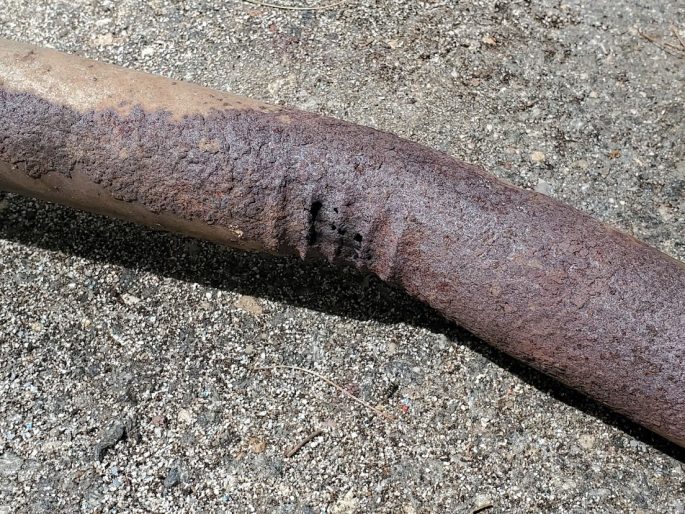
And second, the pipe itself had some holes we couldn’t see until it was removed from the truck. No wonder why it was so loud!

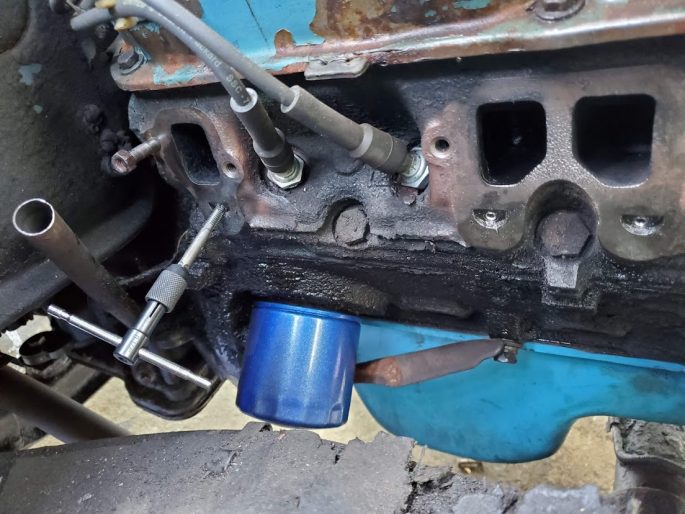
After letting the JB Weld cure for a full 24 hours, we got down to installing the headers. To our surprise, they went in easier than we thought. To install them, a few preparations need to be made other than blocking those smog ports. On the driver’s side, the starter needs to be removed, and on the passenger side, the oil filter needs to be removed and the transmission dipstick tube needs to be tweaked a bit for clearance. As you can see here, the driver’s side header fits great with plenty of clearance. We used the provided header bolts, along with the factory studs, nuts and washers for the ends. Remember to re-tighten these down a few times over the next few weeks after the install. Oh, and make sure you have some stubby wrenches on hand! The end nuts are 1/2” and the provided bolts are 7/16”.
The passenger side fits similarly well. We did deviate from the instructions slightly in a few areas. For one, the headers are both supposed to be installed from beneath the truck. This worked fine on the driver’s side, but on the passenger side, that meant removing the front driveshaft. We started to do this, but realized halfway through that the truck would need to be completely suspended to move the wheels. Remember, this truck has the NP203 and is full time 4WD. And since we were working in a paved driveway and not a fancy shop with a lift, we tried going in from the top before we busted out the jack and extra jackstands. To our surprise, it dropped right in there once we moved the transmission dipstick to the side. Another area where we changed the plan was not notching the firewall. On the passenger side, the instructions noted that you may have to notch the firewall on some trucks for clearance. On our truck, however, there’s still space there, so we left it alone. All in all, they fit great on both sides and don’t interfere with anything.
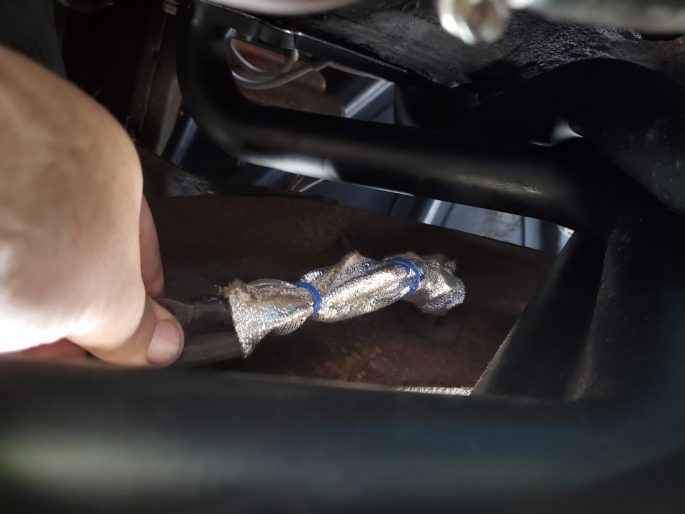
We wrapped the starter cables for cheap insurance. Last thing you need when you have a full payload of stuff in the bed are a set of melted starter wires, so this was a no-brainer.

And about the starter… if you plan on using the original starter on your truck, you may run into some fitment issues. We switched over to this Magnum-style mini-starter a while back when the original gave up the ghost. Not only does it start ultra quick with the touch of the key, it also fits much better with headers. We did have to install it from above, since the transmission cooler lines were in the way. Once it was in there, it fit with plenty of clearance.
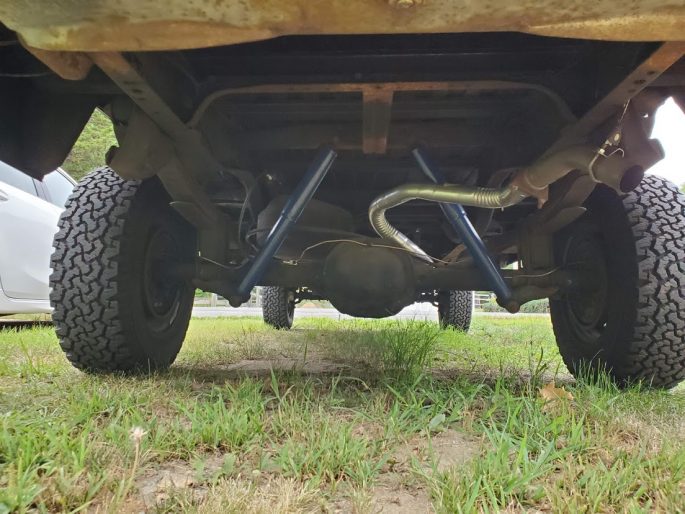
With the headers successfully installed, let’s turn to the rest of the exhaust system. Just like the Y-Pipe, the rest of this existing system has been cobbled and patched over the years by us and previous owners of this rig. We’re talking multiple pipe diameters, universal parts, and a cheap turbo muffler that may or may not have been partially blown out by a lean backfire that scared the crap out of the neighborhood about a month back.

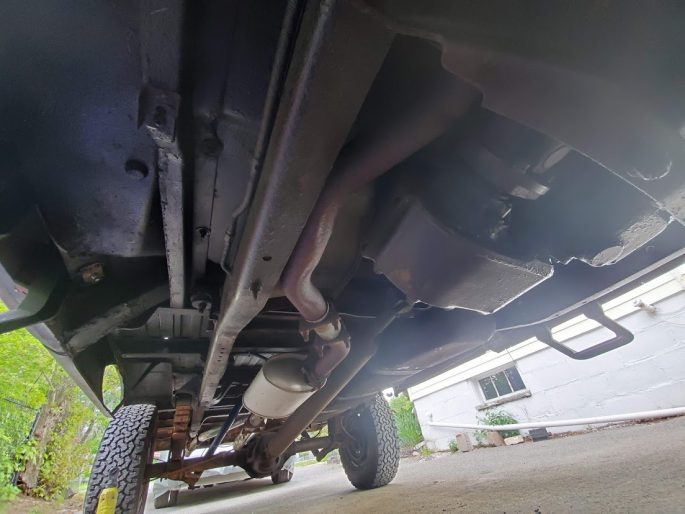
And there it is, off the truck. You can clearly see which sections we’ve replaced over the past couple of years, but it’s not looking pretty.

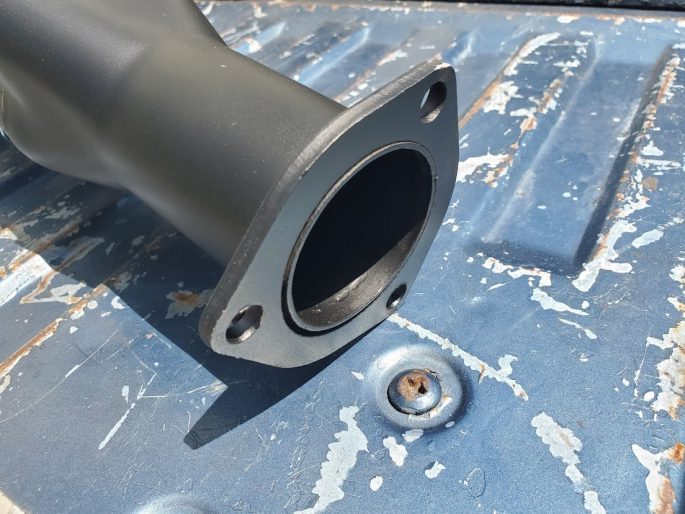
On its way out, part of the head pipe just snapped off. This section of pipe also had some holes we weren’t aware of until this occurred. Yikes.
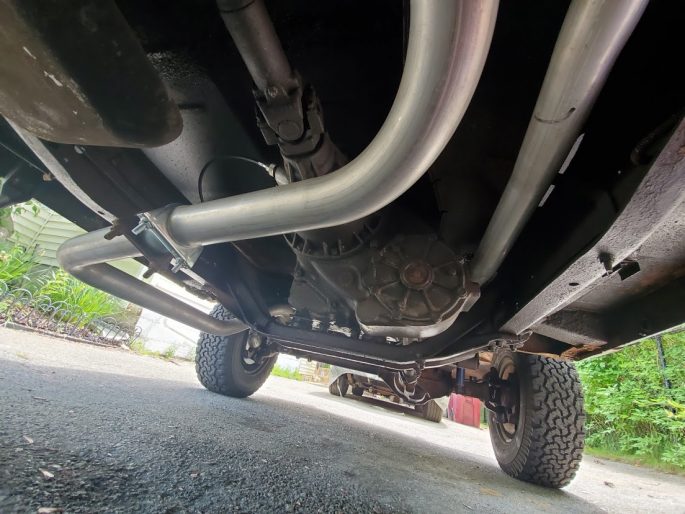
As we said earlier, the new Hooker system actually gives you two different head pipes for the passenger side. We’re presuming one is for the 2WD trucks and the other is meant to clear the transfer case on the 4WD models. We tried them both, and one did fit better than the other, so that’s the one we used. The driver’s side is another story. Check that thing out! It bends under the transmission cross member, then under the frame rail, and then around the fuel tank where it connects with bend that heads toward the muffler. And believe it or not, this is the best way to do it. Unconventional, but functional and completely wild!
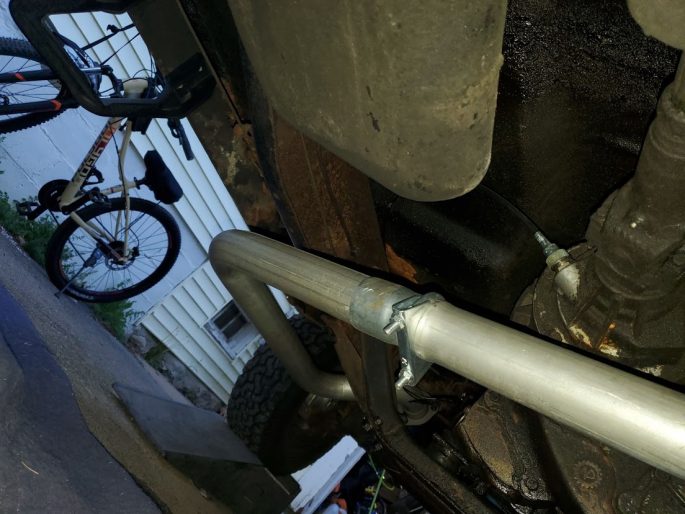
We did run into one spot where we had to make a slight modification. To get the mufflers to fit better in the gap between the driveshaft and the frame rail, we needed a couple more inches length on that crossover pipe to clear the driveshaft. A quick trip to the local parts store netted an adapter that made up the perfect amount of length.

The Hooker Competition Turbo mufflers we were sent fit perfectly in the void opposite of the fuel tank on the passenger side. After utilizing that small spacer, the muffler closest to the driveshaft now had plenty of clearance, and after making some adjustments, the other muffler cleared the frame perfectly.
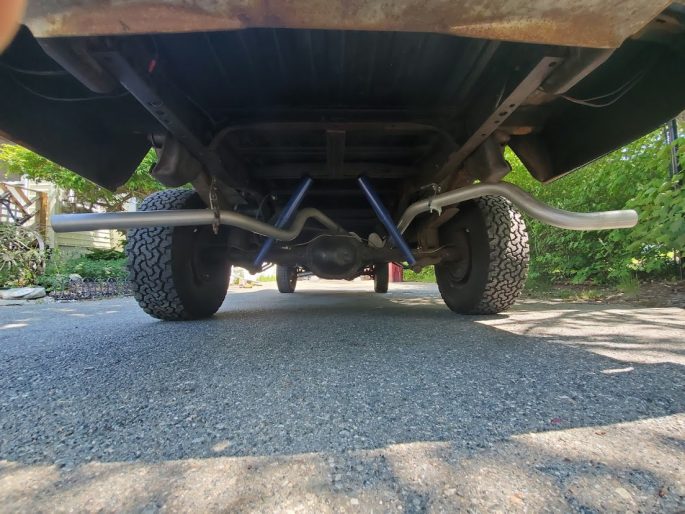
Coming out the back, the tail pipes look a little funky, but they do exit in roughly the same spots on either side behind the wheels. Clearance to the shocks and leaf springs are tight, but after installing all of the hangers and giving them the ol’ shake test, they don’t touch anything. Nice!
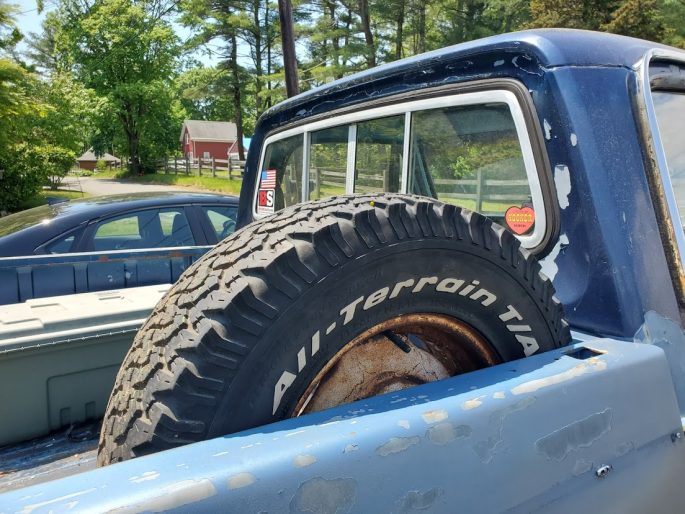
The final part of the install, and arguably the most important of all, is finding a good location for the classic Hooker Headers sticker that comes with the kit. We chose the passenger side rear window. Looks perfect if you ask us!
All in all, the headers and exhaust kit took the better part of few days to button up for mostly one guy wrenching alone on his back in the driveway. And strangely, the only things that fought us along the way had nothing to do with the new parts. One thing that we found along the way was a hole in the lower radiator hose causing yet another coolant leak. While trying to drain the radiator, we noticed that the petcock was frozen solid, so rather than destroying the radiator getting it off, we had to drain it through the old hose. Carefully doing that and getting the new hose on without destroying the radiator took more time than we’d like to admit. Another time suck was removing the oil filter. The truck received an oil change about 2 months ago, but somehow between then and the header install, the filter had fused itself to the block. It was so bad that it had to be cut off in chunks, and very carefully in order not to damage anything else.

Yeah, don’t ask.
The stuff we thought would fight us, like removing the manifold bolts, tapping the smog holes, and getting the headers in the truck, went smoothly. Go figure!
So, you’re probably asking, was it worth it to install all of this on the ol’ Wagon of Laggin’? That would be a resounding YES. The old, tired 318 seems to like having a non-leaky exhaust system. Who would’ve thought? One of the first observations after firing it up was how much quieter it was. Yes, you read that right, quieter. Between the hole in the passenger side manifold and the perforated Y-Pipe, the truck was getting louder every time we drove it. Even with long tube headers and turbo mufflers, the truck is a lot quieter in the cab, and that goes a long way when you’re out and about doing truck stuff all day. Another bonus is the uptick in throttle response and power. It’s not as drastic as slapping a supercharger on the truck, but it now pulls smoothly to redline and cruises with ease with enough power to pass people on four lane roads, which was always a struggle. Loafing around town is now effortless, where before the install, it felt like it needed to be pushed a bit even when cruising. While it is not the fastest vehicle on the road, we can proudly say it’s not the slowest! All that said, we may need to tinker with the carb a bit, since it seems like it’s running on the rich side now. At idle, the truck smells like the pits at New England Dragway. While that smell should be offered as a Yankee Candle scent, it probably means I need to revise some carb settings. But hey, that’s small stuff, and we’re finally on the way to making actual, reliable power out of this thing. And hopefully, fuel efficiency should climb up a few ticks. We’ll provide an update on this in the coming weeks as we drive it more.
Oh, and how does it sound? In a word, nostalgic. This exhaust paired with this drivetrain in this truck brings me right back to childhood in the 1980’s. I had family members that had multiple 1972-93 Dodge trucks, many modified with dual exhaust kits, and if I close my eyes while sitting in it idling, I feel like I’m transported right back to being a kid. Yes, Project Power Laggin’ is now a time machine. As I stated above, it’s quieter than before at idle, but it has a nice, deep rumble like a V8 should. But when you give it the beans, it wakes right up and slaps you in the face with an aggressive, raspy tone that sounds like cruising the main drag in your hometown in the early 80’s. In other words, this really is the perfect exhaust for this truck. The sound truly matches the rest of the truck’s attitude. And since they are really the only game in town when it comes to a complete exhaust solution, Hooker and Holley have it covered. Even if they weren’t the only game in town, we’d recommend this kit to anyone looking for an easy solution to replace your old, inefficient exhaust with something that fits well, flows freely, and sounds great.
So, what’s next? Well, there’s a lot to do, as there always is with old workhorses like this. Like we’ve mentioned before, we really need to tackle some of that bad wiring. We still need to replace those front springs, and we do have some interesting plans for more “Power” to counteract the “Laggin’”. Stay tuned for more!


Sounds good!
LOVE this truck!! Buying something that has been cobbled on for THAT long means you’ll probably need to touch EVERYTHING at some point…but when you’re done, you’ll know what you’ve got! Although…I typically fix all that annoying stuff, then end up selling it and losing my ass!
Curious what you’re thinking for “counteract the “Laggin’” plans. Keep truckin!