


The Charger Chapters:
The nice, pleasantly warm and relatively dry early summer of Kentucky has given way to the hot, humid, and hellish season that I’ve come to know and…love? Is that the right word? I don’t know, but whatever. It’s hot enough that during the day I’m glad I work indoors where there is ample air conditioning, yet once the sun starts to dip down to the horizon and sinks below the tree line, that’s when I’m all about roaming in something older. The Charger hasn’t done much dusk cruising yet, not for any major reasons, but because work has been ongoing. The car has been driven to and from the office a few times, and was supposed to be present at the Hot Rod Reunion that went down in Bowling Green, but lo and behold, the trans pan gasket wasn’t the culprit, but the trans pan itself. So while I sit here, waiting on the new unit with the drain plug to show up – no more ATF baths for me, thank you! – let’s bring you up to speed on the work that has been going on with the late-B body.
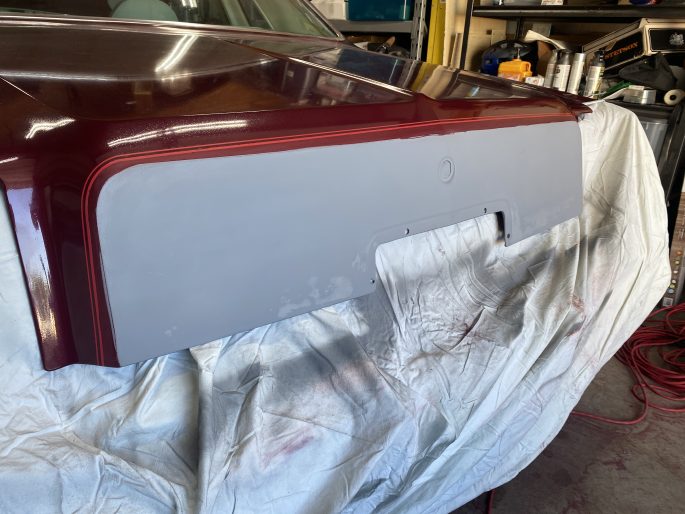
In the last update, I showed you the spot on the trunk where a mild adhesive remover went through the paint faster than muriatic acid. Ultimately, I felt that the only way to make sure any repair to the trunk was going to work out was to strip all the paint off and start again. Sounds like overkill, and maybe it was.
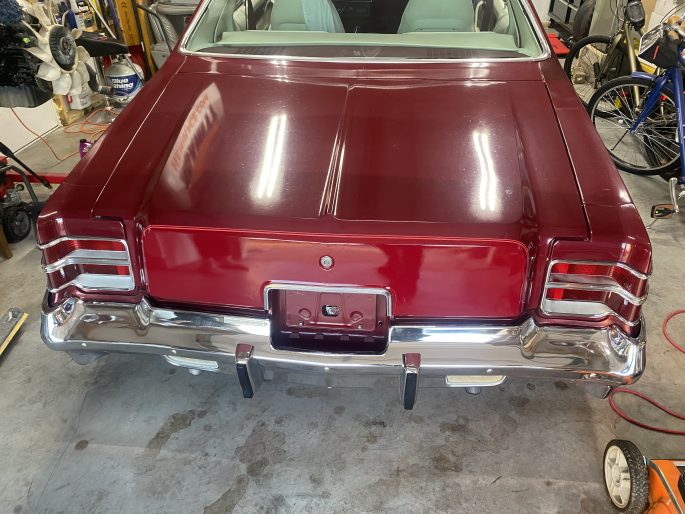
But, all things considered, I’m very happy with how the trunk turned out. I did not layer the two different colors together like I had initially planned. After going through some of the photos I took during the strip-down, I noticed that what Chrysler did was to simply scuff and re-prime the areas that got painted Claret Red (the brighter of the two colors). So I primed, made sure I was happy with the result, and shot two coats of Claret Red, followed by two coats of clear. Get up-close, and you can still see sanding marks and some uneven points from the spot-filler. But the whole car is a 20-footer and the paint quality is top-tier…I really like this stuff. Not bad for shooting from a spray-can!
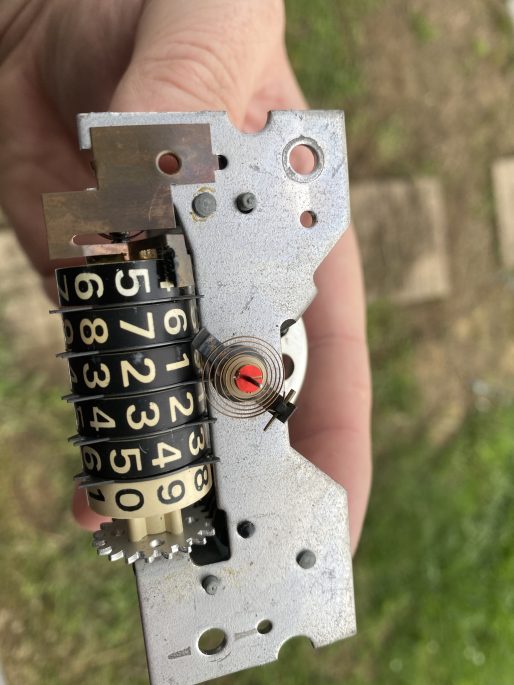
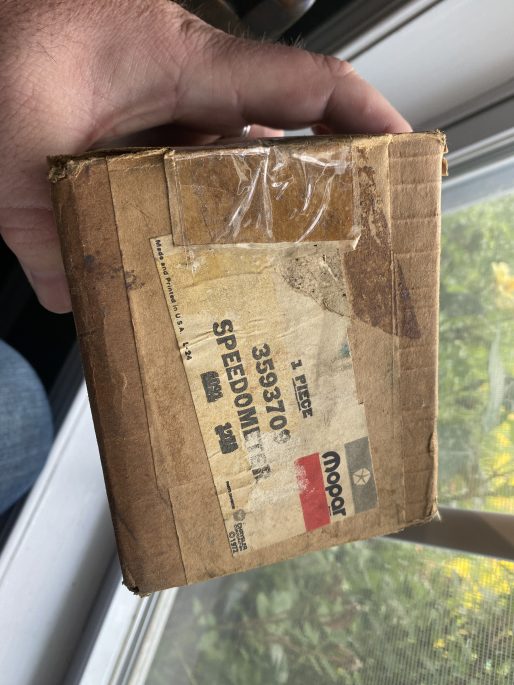
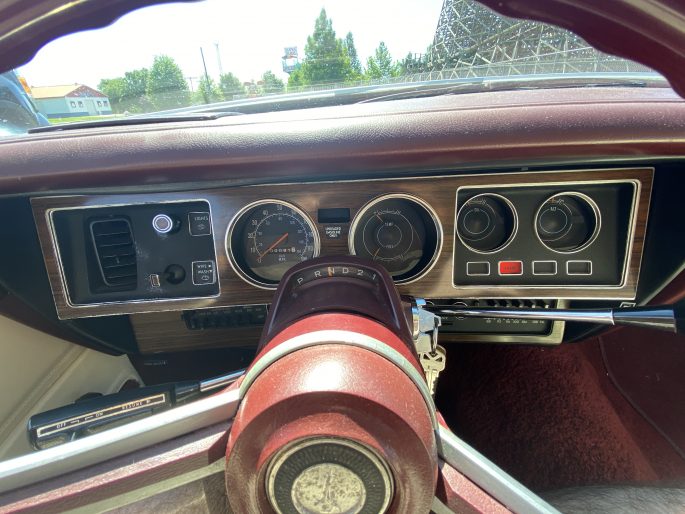
Moving away from the paint, we unfortunately have had to say our farewells to the Charger’s original speedometer, which kicked the bucket at 57,234.9 miles. The autopsy confirmed that the clock spring was completely shot and that the plastic bushing was in two pieces.
You want to know what phrase will drain a wallet as fast as “I want a divorce”? Easy: “NOS Mopar (fill in the blank)”.
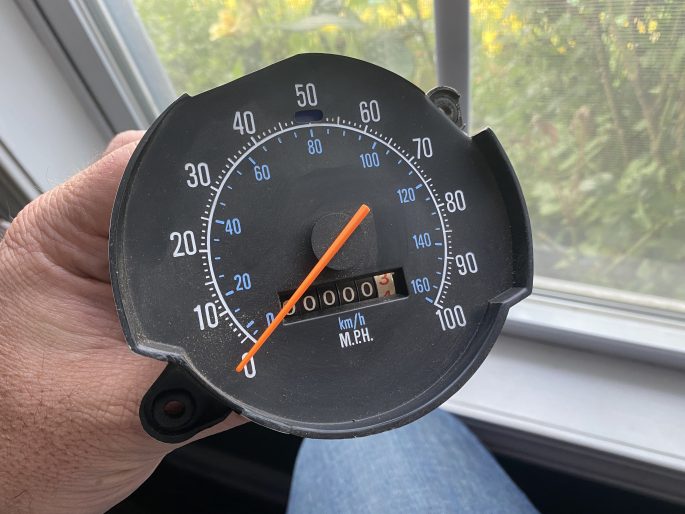
Okay, I might be playing up the damage to my wallet a little bit, but I did buy a brand-new NOS speedometer for the Charger that had 3/10ths showing on the clock. To be clear: this is a stop-gap measure for plans I have later on down the road. But it is nice to know how fast I’m going…and to know that I was really underrating this car’s speed. It’s quite happy around 70 MPH.
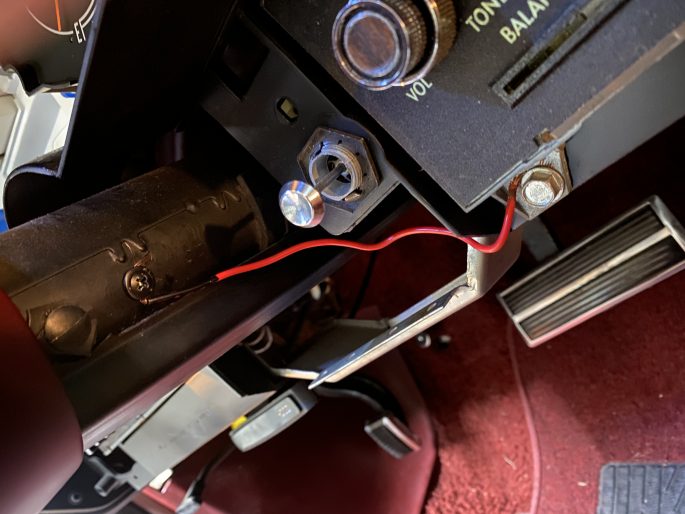
With one gauge functioning, it was time to get to work on figuring out why the other gauges are still refusing to comply. The first thing I tried was to deal with the two “odd” wires, the red one that came off of the column to the radio mounting bolt, and the black wire that runs from the other radio mounting bolt. Other than the seat belt buzzer taking a break, no noticeable difference was noted. I was able to get to the main connector blocks and get them pushed out of the cluster so that I could clean up the contacts. This brought the high-beam indicator light back to life.
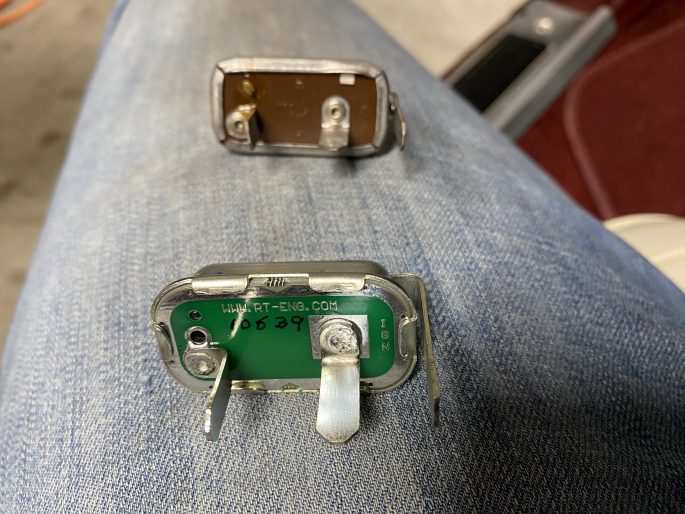
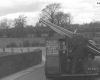
My next move was to replace what Chrysler calls the “voltage limiter”. This regulator is supposed to step voltage down from 12 volts to 5 volts for the gauges. The 5v then goes to the gauge, which has a bi-metallic strip that is wrapped with nichrome wire. When the current hits the wire, the wire gets hot, will heat up the bi-metallic strip and the gauges function. Unless the voltage limiter fails, then the gauges get all of the current before frying and dying. Instead of the old mechanical limiter (far), I picked up a solid-state limiter from Real Time Engineering (rt-eng.com). It duplicates the action of the mechanical limiter, but doesn’t have the risk of it getting hot or de-grounded and sending a full 12v to the gauges.
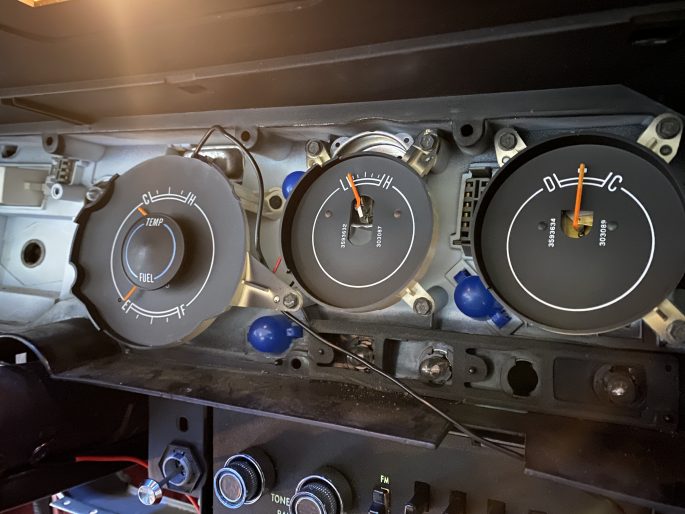
With the new limiter in place (you can see it just above and behind the temp/fuel gauge), we hooked the battery up and hit the key. Our buzzer came back to life, and the fuel gauge moves a tiny bit, but otherwise everything else is dead. The fuel gauge is only useful in the fact that it moves to 1/8th tank when fully topped off and drains back to Empty at an alarmingly fast rate, even though the Charger’s MPG is exactly where I expected it to be (roughly 14 MPG for mostly 60 MPH highway driving and rural backroads, best as I can come up with.)
Unfortunately, that was not enough to get anything to work. The oil pressure, temperature and alternator gauges are irreparably damaged, probably from a 12v spike. Just to be sure, I did a test using a AA battery with one wire going into the temperature gauge’s sensor and the other wire grounded to the car’s battery. Nothing, not so much as a twitch. This begs the question: now what? I could locate a complete cluster, but on late-B bodies, swapping clusters requires the entire dash assembly – dashboard and all – to come out. Not too appealing unless I have a reason for pulling it, such as locating a rare Rallye gauge cluster with tachometer. And I am not keen on putting the three-pack of gauges in a completely unmolested interior, though I might rig up an oil pressure gauge underhood for the time being so I can monitor that when I’m doing inspections. The fuel gauge will be more fun…luckily, there is life to the gauge, so there is hope. But it does mean that I need to inspect its ground, and possibly the sending unit, given the car’s low overall mileage. That will happen once I run the currently full tank of fuel out.


Cool.