 Tweet
Tweet
Hey try welding some real steel, not an oversized soup can. Weld the T Birds doors shut. Then the hood and deck lid.
-
BS'er formally known as Rebeldryver
Resident Instigator
sigpic -
-
Did some work on the Thunderbird this week. Yesterday I replaced the power window motor in the front driver's door. So today I thought I'd take some pictures of changing out the front passenger door window motor. That window hasn't worked since I got the car a few years ago. I could hear the window motor purring away in the door but the window wouldn't move. Over a year ago I bought a set of window motor gears for the car, but then eventually bought four window motor's to replace all of them, but had actually feared how big a job it would be. Turns out it was actually quite simple. So on to the pictures.
First some reading, this is the diagram in the service manual and a few paragraphs to accompany it =P

Starting with an open door.

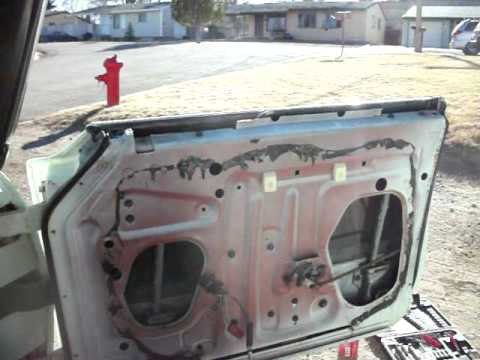
The backside of the door panel. Over all the interior of this car is in great shape. I replaced the stock ford speaker a few years ago.

Clean water shield. I've removed it in the past looking to trouble shoot the window as well as lube the window and locking mechanisms.

The water proof side. All four doors look like this.

Inside the door. You can see the silver anti-seize I've slathered all over the window guide rails. Five bolts have to be removed. Four holding the regulator and one that acts as a pivot point.

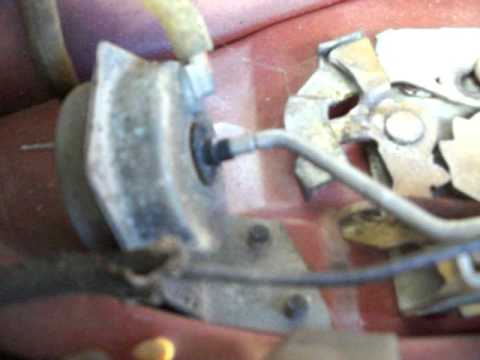
A view of the hinge side of the door with the vacuum power door lock lines and power wires.

The vacuum power door lock actuator. It works!

This screw and one just off to the left is what made this easy. Took the two screws out, and one bolt on the opposite end and the window was unhooked from the motor/regulator assembly.

A nice block of wood to hold the window up and out comes the motor and regulator.

The motor's overall look very similar. I expected the stock one to be larger.

This was the problem. Seems the stock window gear is made as an inner gear and outer gear with some rubber holding the two together. Well the rubber completely sheared. I put a replacement gear in the picture to show that the replacements are a metal inner gear with a nylon outer gear.

The new motor needed threads tapped into the mounting holes as well as having the plug cut and the Ford plug attached.

I lubed the gear and pivot points up and installed it in the reverse order I removed it.

Here is the window in action. I still have to make some slight adjustments to the regulator as the glass makes some noise at the top. But it's the first time the window has gone down (and back up!) since I've owned the car.
And to end the post with the vacuum door lock in action (sorry the video is sideways)
 Last edited by TheSilverBuick; January 30, 2013, 10:36 AM.Escaped on a technicality.
Comment
-
If the motor turns but the window doesn't move, you just need the gear. And you also need to clean and lube and adjust everything, so it won't break the new gear.
Looks like you're good to go now!My fabulous web page
"If it don't go, chrome it!" --Stroker McGurkComment
-
I figured from an amp draw point of view, everything I've read say the new motor's have more torque with less amp draw, so that was my motivation. I don't know about the amp draw, but the new driver's side motor moves at the same rate as the old motor (the same rate as in the video of the passengerside).Escaped on a technicality.Comment
-
To me, it's well worth the $50 to pay a glass shop to do that kind of work in order to save me from cut up arms.BS'er formally known as Rebeldryver
Resident Instigator
sigpicComment
-
That is almost exactly what my '95 truck's window motors look like, and every one in between. I remember Dad's '70 Colony Park looking the same. I think he bought the whole kit which is what I think you got. I did the same for an '88 truck. The plastic nubs between the nylon worm gear and the steel cog disentegrate. Last year or so, I used a 3/8" walnut dowel from Lowe's and trimmed to fit.
The disentegratable plastic was probably to keep from squashing little timmy's head in the window, but since I don't stick my head in the window and roll it up, I went with hardwood. I think it was 2.00... still working. I did the three motors in the Bronco that way and the Lightning's. I've seen kits for just the nylon "buttons" on Ebay for 11.00, but I figure there's probably enough of the 2.00 dowel left for the rest of my life.
Last edited by Beagle; January 4, 2012, 04:10 AM.Flying south, with a flock of bird dogs.Comment
-
Did some more work on the car today. Replaced the vacuum motors for the head light doors as well as the control switch and installed the only available door jam switch, despite it only having two connectors.
Bought a set of rebuilt vacuum motors and a control switch from West Coast Classic Cougar. Pricey, but they are exceptionally made and work perfectly.

The original one on the left. One seemed to work just fine, the other had a leak when it would go to close, which would mess up the other side's operation. These were sold in pairs, which was okay.

The other thing I did was replace the broken door jam switch. Unfortunately I couldn't find one that would work perfectly. The original has three contacts, one for the dome light and one for the automatic swing-a-way steering wheel when the door is opened, and the third is the ground. So I wired in the dome light and swing-a-way steering wires together. The side effect is when the passenger door is opened the steering column mechanism is activated as well as when the headlight switch turns the dome lights on =/

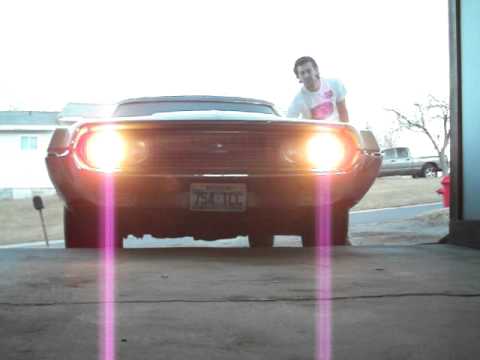
Made a quick video of the headlight doors in action. I'm guessing the slight lag has something to do with the resistance in the pivot points. Good enough for me though!
And since I had the camera out I thought I'd take a quick clip of one of the other reasons I like this car. The lens on the tail lights make the lights appear funny to the camera
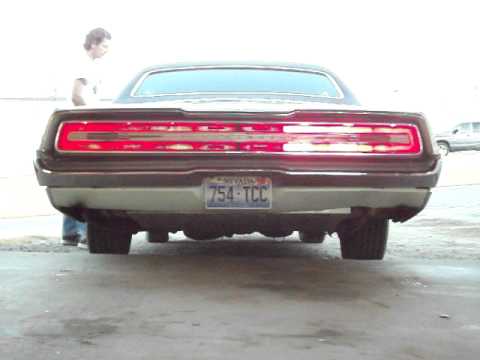
If I'm going to build a time machine, it's going to be out of one of these Last edited by TheSilverBuick; January 13, 2012, 05:56 PM.Escaped on a technicality.
Comment
-
Getting this ready for the Car Craft Anti-Tour. The tour ends in Morrow Bay at a car show. Same as last year, and figured the T-bird was more suited than a primer'd late seventies Skylark (bite me Bruab!).
The power antenna about two years ago quit retracting all the way and would get stuck about 2 inches up. Then this week the antenna got stuck all the way up and wouldn't go down I was thinking the cable broke inside it but really didn't know. Google wasn't any help with old Ford power antenna units, the service manual simply says replace, and ebay wants a few hundred dollars when one does pop up from time to time. So yesterday I popped it out, disassembled most of it and it turned out that dirt or a burr was keeping it from operating and the cable was intact and the motor was actually quite healthy. Some scotch brite pad buffing, brake cleaner then followed up with some silicon spray and it was operating great on the bench. Installed it and it's good to go
  As a double bonus, Ely has a good rockin AM station
And with the MS3 upgrade on the Skylark, I've set up my spare MS 3.0 board for the MS2 with IAC control. If all goes well, tomorrow I might fire up both the Skylark and the T-bird with new ECU's. I'm currently taking the Skylark's tuning parameters and changing the main settings to the T-bird's TBI settings and fuel table. Hoping for good things, worse case I'll bring the MS1 in the car right now with me and if I have problems can switch it back over with a single plug and vacuum line.Escaped on a technicality.Comment
-
I'm shocked that the antenna electric and not vacuum.BS'er formally known as Rebeldryver
Resident Instigator
sigpicComment
-
-
Big FE with a passenger car cam? Vacuum is probably not an issue. Although I've been led to believe that there is no such thing as vacuum...(the earth sucks)
I disagree, naturally. I had a bottled water this morning choking down meds and thought to myself, Life Is Good!
I had a model of this car when I was a kid, I may have mentioned that before. T-birds rock to the point I look for them. I have seen a '62 and a '63 in great shape recently. It hurts to turn away from them. Chad.wrong.T-bird.cool.Flying south, with a flock of bird dogs.Comment
-
Plugged in a MegaSquirt II yesterday. It doesn't seem to be as happy with the coil negative tach signal as the MSI setup. There could be a couple reasons for that, as I switched the input signal from the Hall/opto/Coil settings on the board to the VR settings. The pot adjustments didn't seem to effect anything, though the MSII/extra code's noise filtering settings helped quite a bit, but not entirely. Coil negative triggering is by far the worse method for electrical noise. I have a CDI box I pulled from the junkyard years ago in the basement that I wonder if it has a Tach out wire. I don't want to go through the timing control modifications right now.Escaped on a technicality.Comment
-
This damn thing is still fighting me for a good clean tach signal. The car has always had a dirty electrical system, and I just haven't been able to get a clean tach signal out of it, which causes other havoc with the EFI. Tomorrow I'm going to make one more push to get a good clean signal, and if it doesn't work I'm gonna have to take the Skylark on the Anti-Tour again =/Escaped on a technicality.Comment
-
Replace the wires for the tach.BS'er formally known as Rebeldryver
Resident Instigator
sigpicComment
Comment