 Tweet
Tweet
I dunno Scott, the look kind of appeals the longer I look at it. And I bet the thing would handle like a slot car. Of course, you'll get that with the slightly smaller Nittos too.
-
Michael from Hampton Roads -
The Nittos I picked out are taller. With the larger aspect ratio, they will be pretty close in width.Originally posted by mlcraven View PostBS'er formally known as Rebeldryver
Resident Instigator
sigpicComment
-
What size tire is on the front of the Caprice using the 8" wheel? The design
of the car with the long rear quarter really wants a tall tire, or at least one with
more sidewall, to look right IMO. The ZR1 wheels look good on the front, the
rears don't look quite "at home".Comment
-
The Caprice has 255/60's up front. It has fender bulges just like the 70 Chevelle. I put the Impalas wheels and tires on the Caprice once and the 235's looked tiny on that car.Originally posted by ImpalaSam View PostBS'er formally known as Rebeldryver
Resident Instigator
sigpicComment
-
I got 275's 60's in the back of the 72 and 235's 70's up front. Gonna clean them up this weekend since i finally get a day off and started ordering parts."I live for myself and I answer to nobody."
-Steve McQueenComment
-
Here's my old '73 with 165SR/15's on the front, VW bug tires, and L60/15's on the back. Neither tires lasted long.Originally posted by Runner1972 View Post
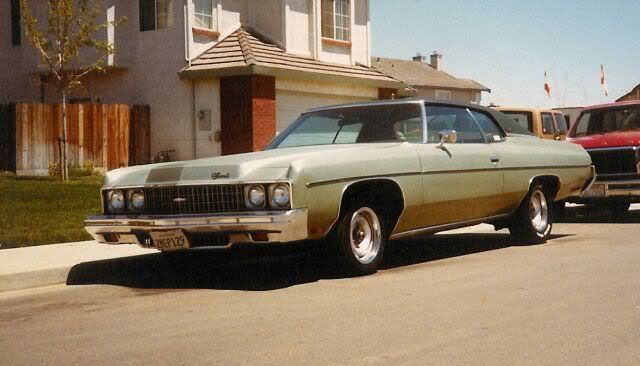
Later, I had 225/70's up front and 275/60's out back.
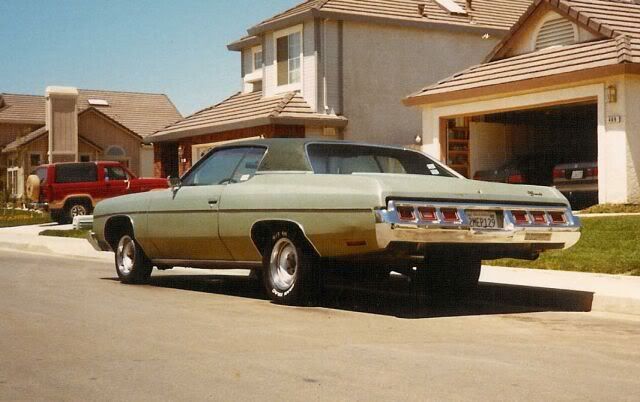
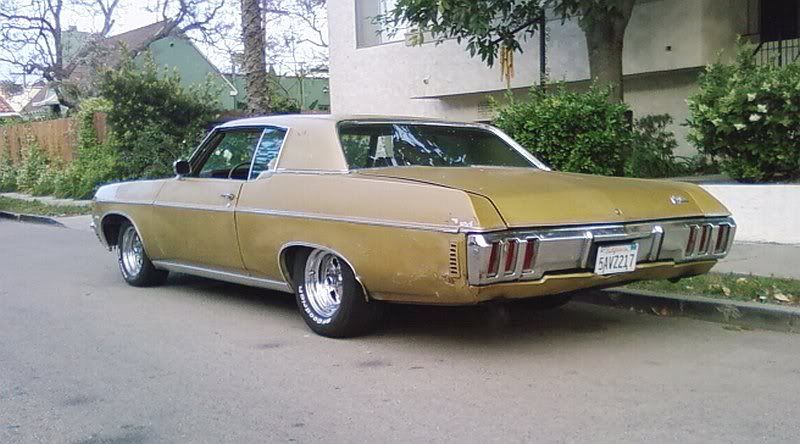
Here's the Caprice sporting the Impala's wheels and tires.
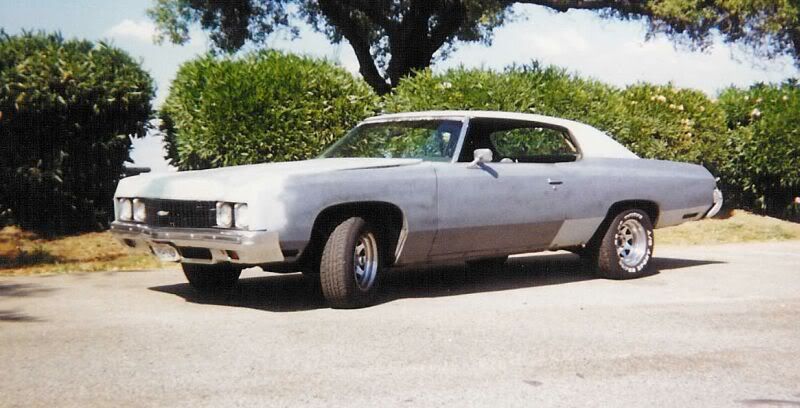
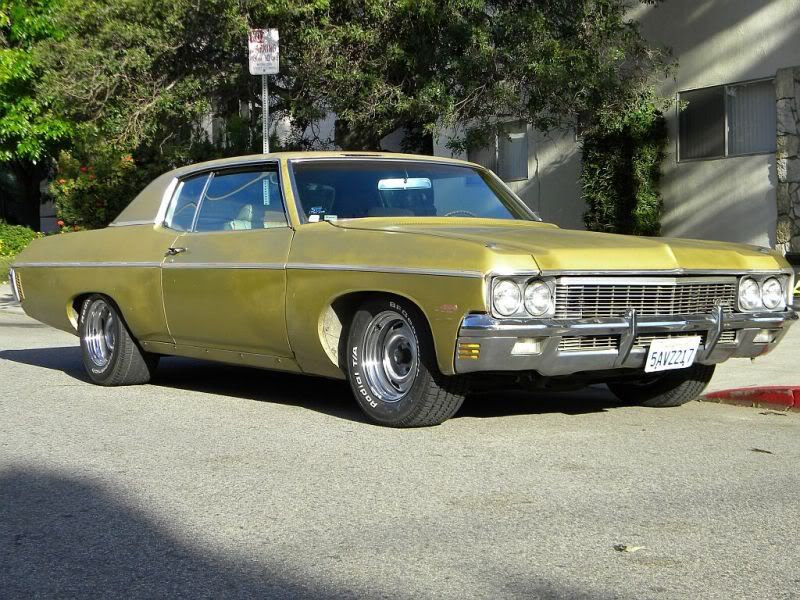
And, the Caprice after I had the rally's widened. 255's on 8" wide up front and 275's on 10" wide out back.
 Last edited by Scott Liggett; April 4, 2013, 11:47 PM.BS'er formally known as Rebeldryver
Resident Instigator
sigpicComment
-
Have you ever tried the 255's on the front of the '65? Do those 8" wheels on
the front have the stock backspacing for an 8" rallye?Comment
-
No. And, no. The fronts have 4 1/2" back spacing. Factory 15x8's are 4". In retrospect, I should have made them 4" to push the wheels a little farther out towards the fenders. They still look a little too tucked in.Originally posted by ImpalaSam View Post
The only time the Impala had the rallys on it, they were still 15x6 with 235/70's on them.Last edited by Scott Liggett; April 5, 2013, 08:23 AM.BS'er formally known as Rebeldryver
Resident Instigator
sigpicComment
-
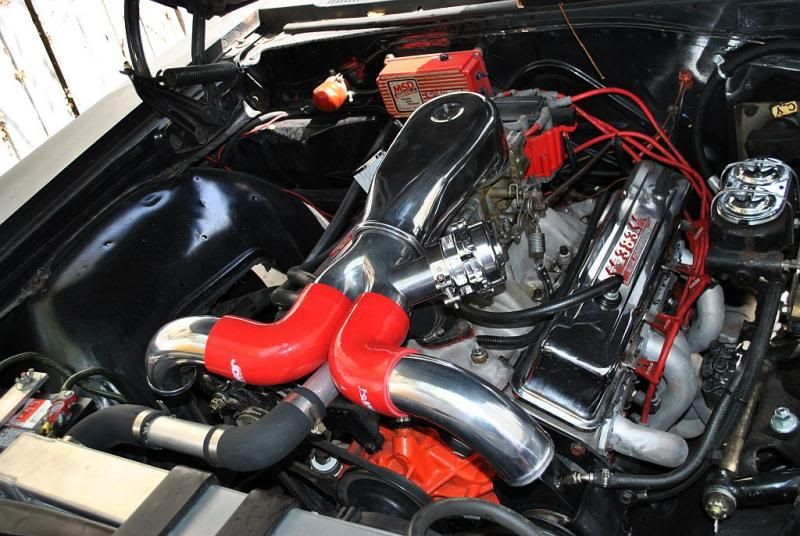
I'm a couple parts closer to getting the turbos installed. Finally found a carb hat that will face forward without hitting the needle/seat screw, this one is from Spectre. Also, have a two-into-one adapter that holds a 50 mm blow off valve. Here's a photo of what it could look like. I now have an 4" to 3 1/2" adapter between the hat and two-into-one from Spectre as well.
 BS'er formally known as Rebeldryver
Resident Instigator
sigpicComment
-
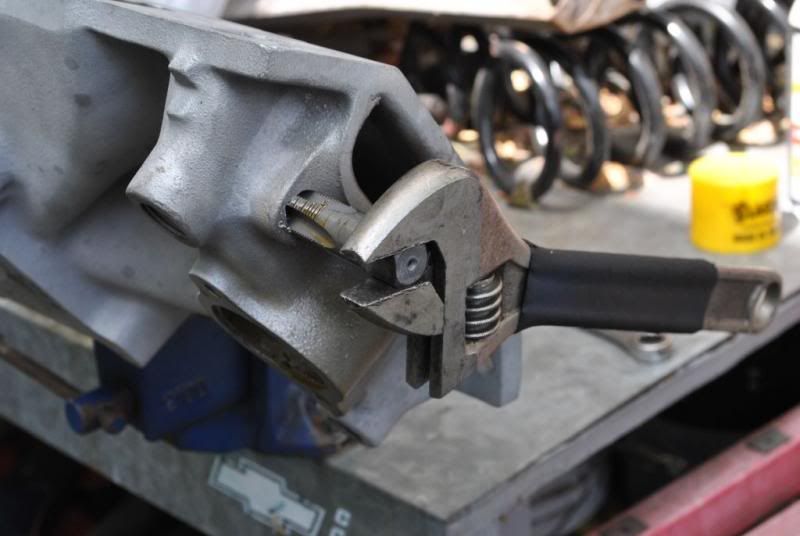
Before I put the turbos in, I have several things I need to do first. One is putting on this swap meet special Victor Jr intake. Before I bolt it on, I need to put a temp sensor somewhere on it. One hole on the intake is for the temp gauge, the other is for the heater hose. Before you all go offering up all kinds of alternative ideas, there are no places in heads for temp sensor. I do not want to jack around with water necks. So, this is what I did.
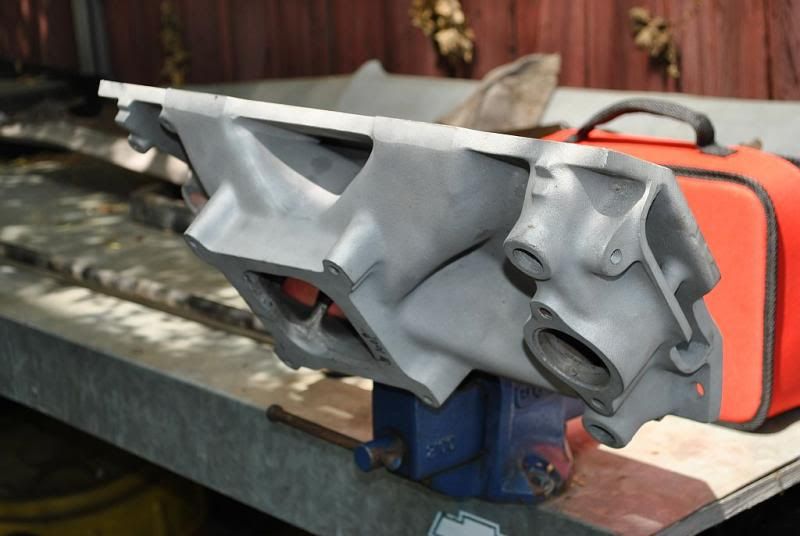
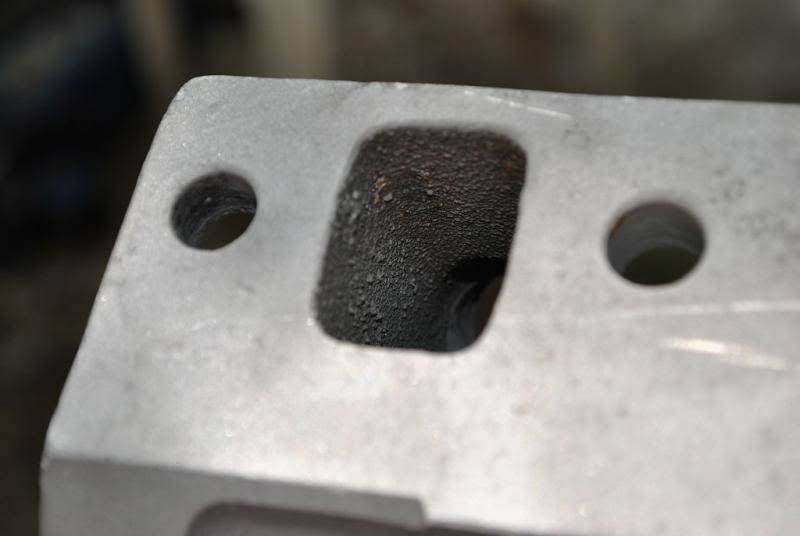
I decided to put it in the front of the intake where that unused bolt hole is. I am going to drill and tap that bolt hole bigger, 3/8 NPT. I bought the tap, but couldn't find an 37/64 drill bit below $25, so I went a step smaller, 9/16.
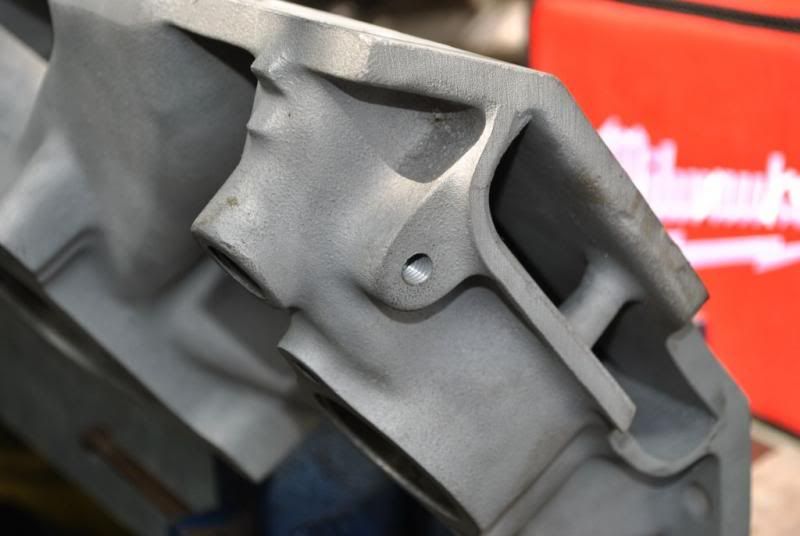
The bolt hole is blind and does not go through to the water jacket. It is for mounting an alternator bracket anyways.
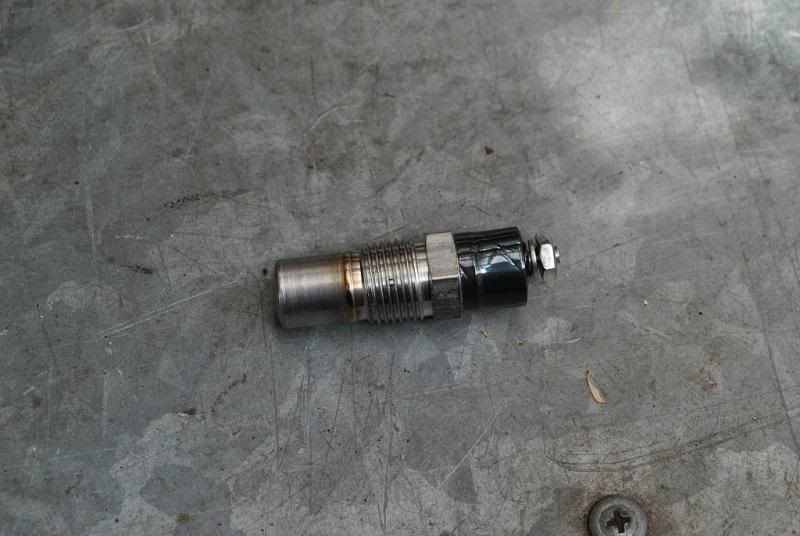
Here's the temp sensor I got from Spal to run the radiator fans. It's supposed to come on at 185* and shut off at 175*.
After I carefully drilled it out until I hit the water jacket, I got out the 3/8 npt tap. This is where I had to be really careful as it is very easy to crack a sand cast aluminum intake doing this especially the area I am working.
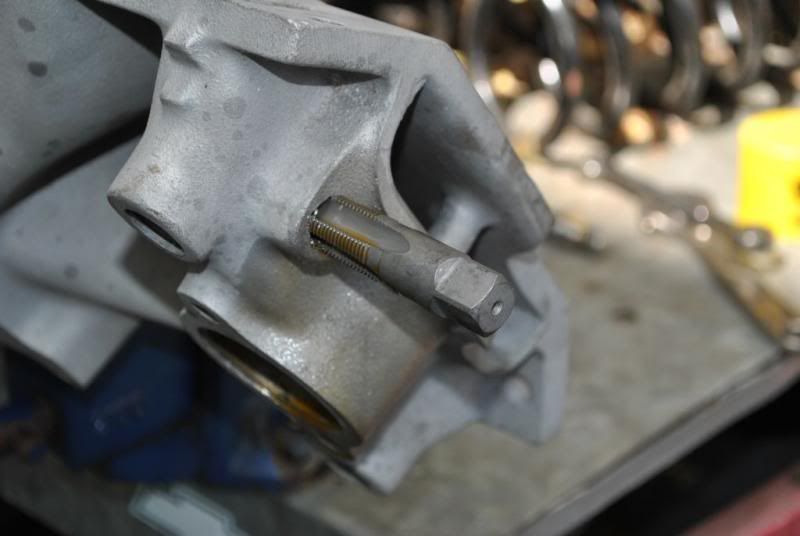
I don't have a tap wrench big enough for this tap, so I used my big crescent wrench. The square is 9/16, but I didn't have enough leverage to turn the tap with mine.
I test fitted the temp sensor, then set the intake aside for now.
 Last edited by Scott Liggett; April 8, 2013, 12:28 AM.BS'er formally known as Rebeldryver
Resident Instigator
sigpicComment
-
Good job.
Seeing the 2 into 1, I understand why you didn't want to use the thermostat spacer.Comment
-
Nice. My only comment for the next time you do the job is WD-40 or some other lubricant always helps, and I use two wrenches (this case 9/16th) in a T fashion to keep the load focused on turning rather than against one side.
I don't know all the details about Chevy engines, but another possible location in my mind would be between the rear two intake bolts on the driver's side. The head should have a port that is blocked off by the intake, that could possibly be drilled and tapped. Has to be centered correctly though to ensure the sensor threads through the intake and into the water passage in the head.Escaped on a technicality.Comment
-
Intersting....I would consider putting the fan temp sensor in the thermostat housing, after the thermostat, so it only gets warm when coolant is circulating. There are housings available from "smog" engines that have a threaded hole in them for a temp sensor (usally they were vacuum sensors).My fabulous web page
"If it don't go, chrome it!" --Stroker McGurkComment
-
I drowned the hole and tap in PB Blaster, NPT taps increase in diameter all the way to the top. Regular bolt hole taps widen to the size of the bolt and don't change after that.Originally posted by TheSilverBuick View PostBS'er formally known as Rebeldryver
Resident Instigator
sigpicComment
-
Next, the problem with big single plane intakes like the Victor Jr. is the the water neck cross over is raised above the stock location. I am using the stock '73 Impala front accessory drive and brackets where the engine came from. The upper alternator bracket wont work with the Victor Jr. So, I had to replace it.
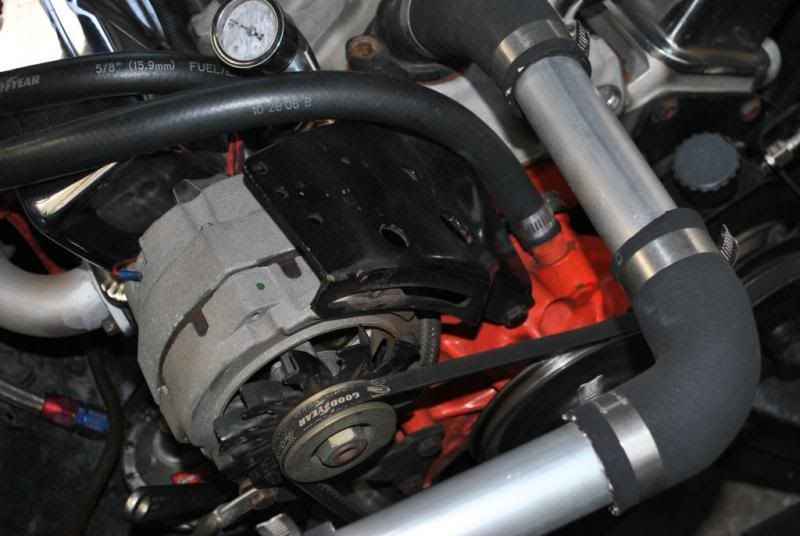
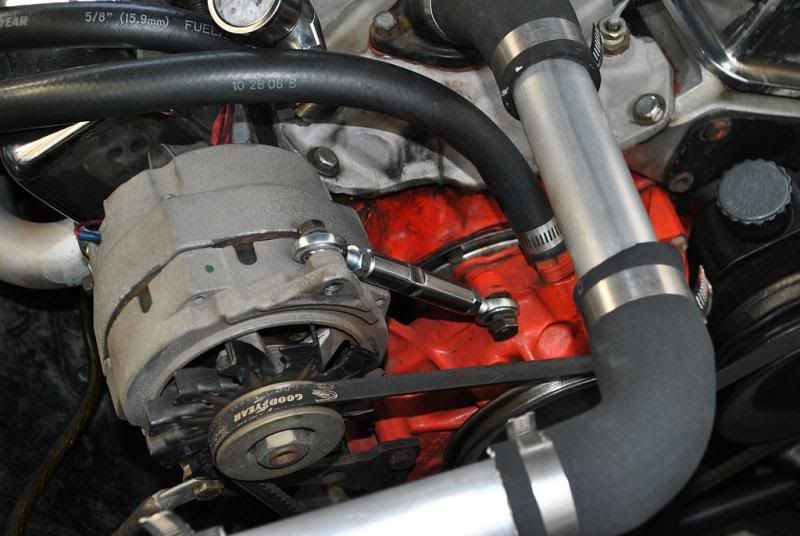
I took it off and the fuel line is removed here as well. I will explain that later. I heeded something to support the top of the alternator and make belt adjustments.

I found this neato, gee whiz turn buckle thing from March Performance for $48. I thought that was pricey, so I went out to the hardware stores and started looking at making my own. By the time I had all the pieces, it would've cost me nearly the same and it wouldn't this nice.
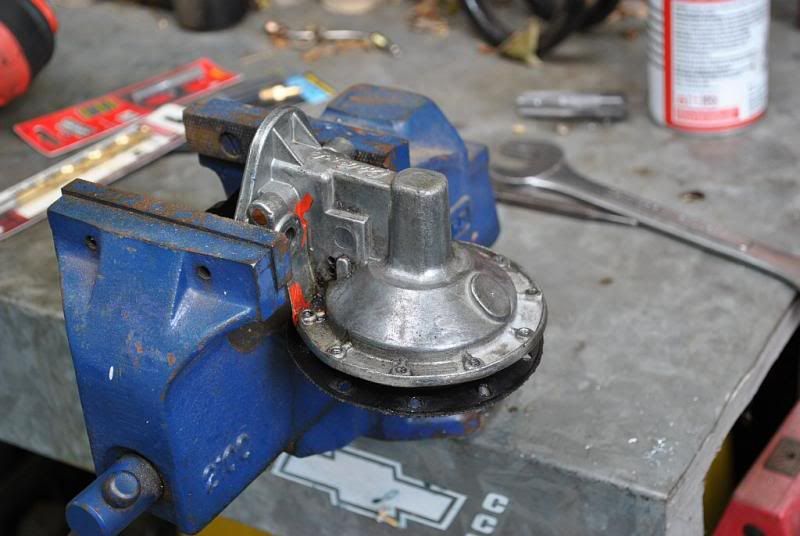
Lastly, I am going to use the Edelbrock Victor Jr. mechanical fuel pump I've had on the car for a while for the turbos to start. I need to boost reference the fuel pump that increases fuel pressure with boost to over come pressure going into carburetor. See that boss on the top of the fuel pump?
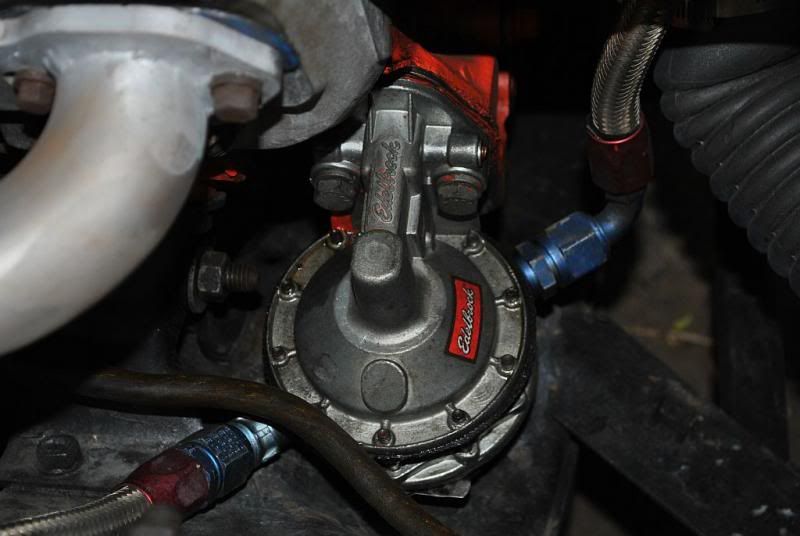
I removed the pump and the ancient braided fuel lines I got used decades ago.
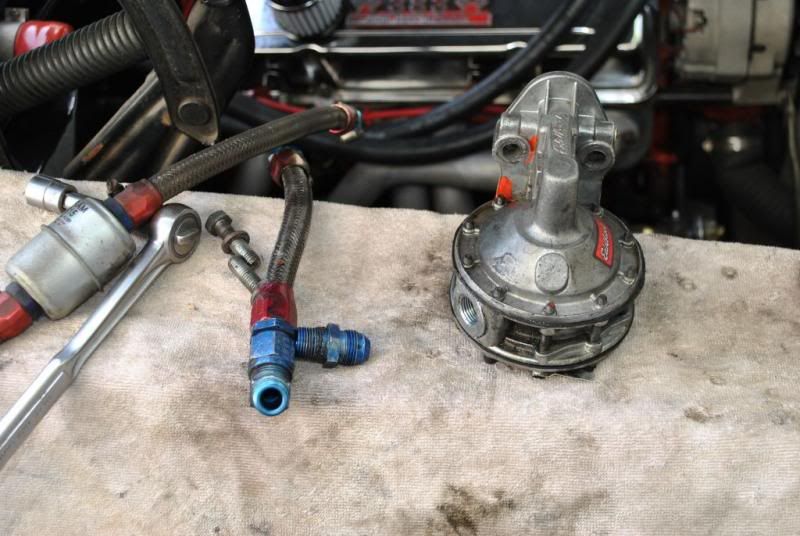
I had to take the pump apart. You can see the six valves in the main body of the pump. I decided not to remove the upper diaphram that is attached to a spring and the lever arm. It's a total bitch to get back together, so I left it.
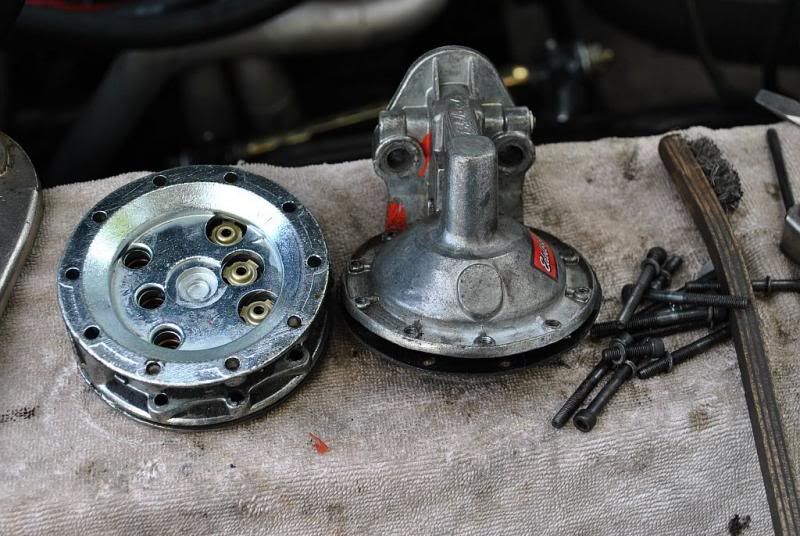
This is where I finished taking pics, I ran out of light last night. I drilled and tapped 1/8" NPT for a vacuum fitting. I had issues with the drill bit wandering even though I used a center punch to locate, so the vacuum fitting got a good helping of JB Weld surrounding it.
I will get a pic of the finished product today.Last edited by Scott Liggett; April 8, 2013, 09:12 AM.BS'er formally known as Rebeldryver
Resident Instigator
sigpicComment
Comment