Announcement

Collapse
No announcement yet.

'66 GTO RestoMod Project - getting close!

Collapse
X
 
  • Filter
  • Time
  • Show
Clear All
new posts

  • #46
    Re: '66 GTO RestoMod Project - getting close!

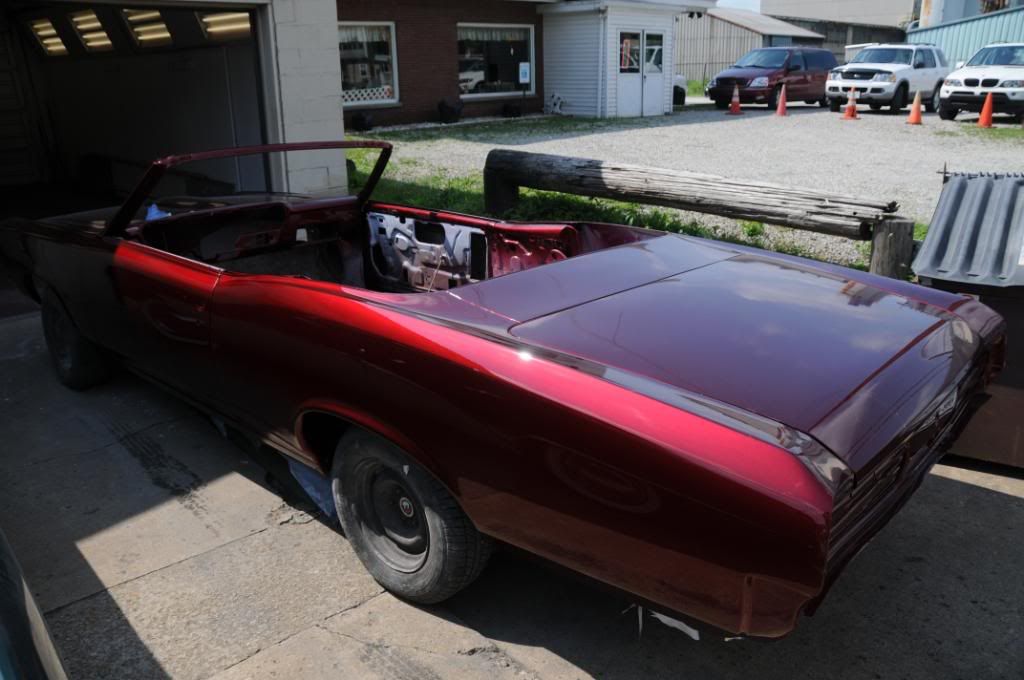
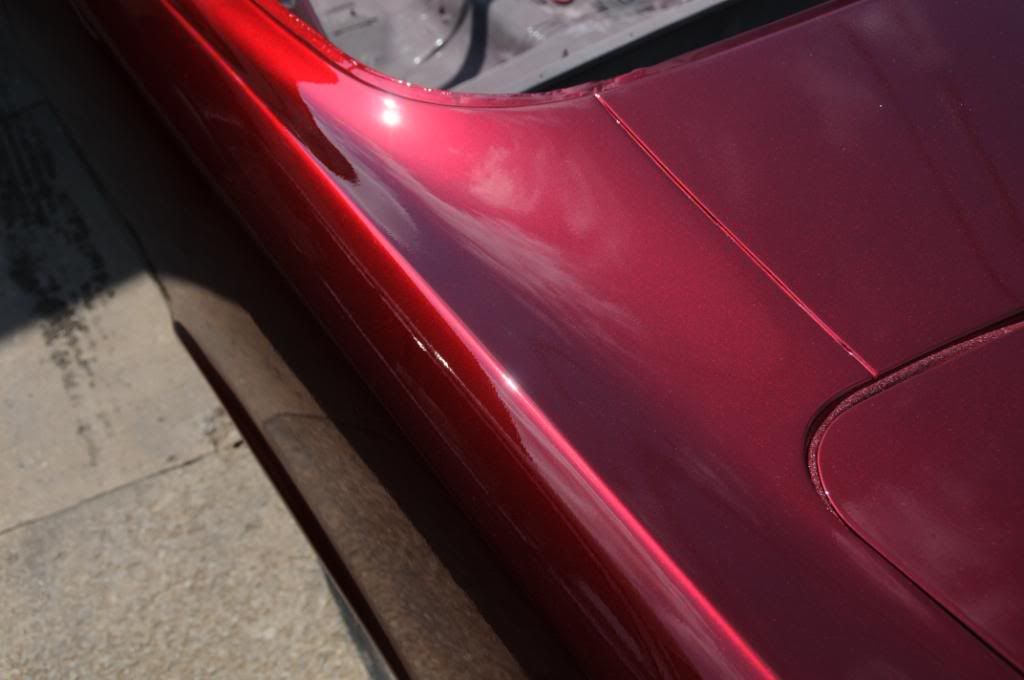
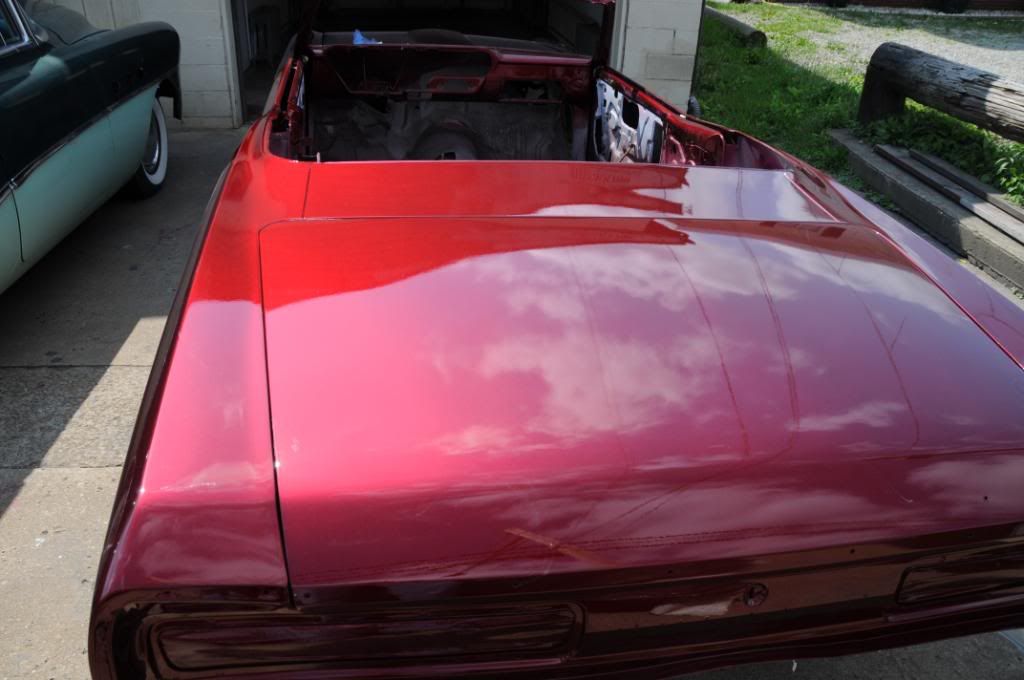
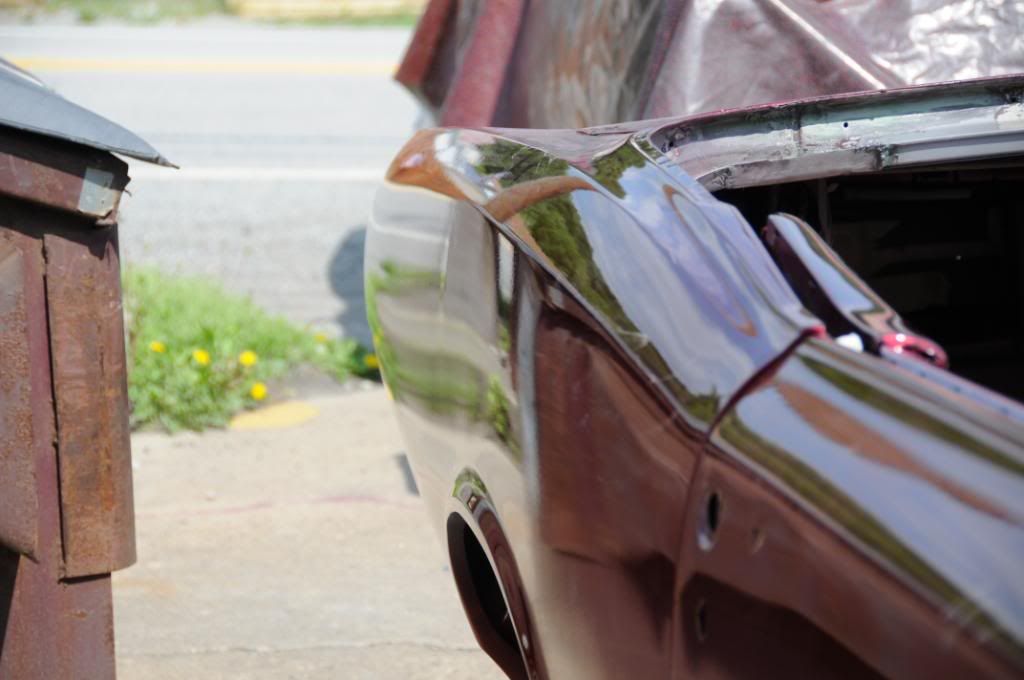
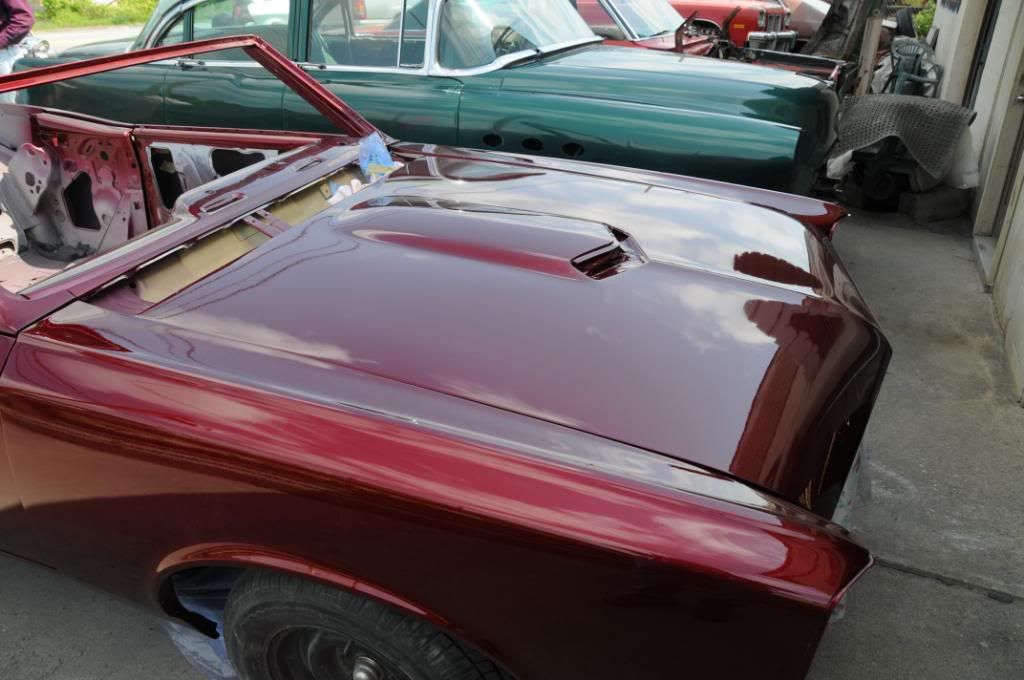
    Well, good news and bad. We just rolled the car out in the sun. The paint is amazing. Even without any wet sanding or buffing, it is incredible.

    The bad? That back right quarter is probably going to need work. The bright light seems to really make it more visible, and we don't think block sanding can fix it. What a bi-polar feeling right now.
    Comment


    • #47
      Re: '66 GTO RestoMod Project - getting close!

      Would it be better to go ahead and put it together, then get it fixed and whatever else might have happened in the assembly?
      That does bite, though....
      Doing it all wrong since 1966

      Comment


      • #48
        Re: '66 GTO RestoMod Project - getting close!

        Originally posted by Buickguy
        Would it be better to go ahead and put it together, then get it fixed and whatever else might have happened in the assembly?
        That does bite, though....
        I would probably do that also....at least get it all done and the kinks worked out then go back to stuff like that.
        www.Nightmare-Motorsports.com

        Comment


        • #49
          Re: '66 GTO RestoMod Project - getting close!

          Much as I'd like to, I need to fix it now. What happened is that we needed to replace metal in the rear quarters. There are no "full quarters" available for '66/7 GTOs, and only skins from one manufacturer. The quality of the skins was pretty poor in terms of the straightness. But since that's all there was, that's what we started with. A huge amount of time was spent trying to get them right. We even painted the back of the car gloss black before this final paint, and saw an issue that we thought we corrected. Unfortunately, we didn't correct it all. While the drivers side looks perfect, the passenger side has a couple low spots. Probably the only way to really correct it is to take the paint off that quarter, dolly the metal out, make sure it's right, and then repaint that quarter. Right now the paint is fresh, nothing else on the car to damage, so this is the best time. Plus, I have the attention of my body guy now. I won't necessarily have it this winter. Even before wet sanding and buffing, the paint and rest of the body work looks so darned good and because the body lines of the back quarters are so darned long, the trouble spot jumps out like it's got neon lights - at least to me.

          Comment


          • #50
            Re: '66 GTO RestoMod Project - getting close!

            Im not going to lie. I am incredibly jealous. Youre basically doing what I want to do to my 67' GTO and youre doing it VERY well. This is a top notch build and i will be checking in. Im sending you a pm BTW

            Comment


            • #51
              Re: '66 GTO RestoMod Project - getting close!

              Well, I seem to be becoming the poster child for examples of how builds never go exactly as planned - no matter how much effort you put into making sure you're focused, prepared and organized. More news.

              First, we're going to strip the quarter, dolly it out, reinforce the back of it a little, and then repaint. PPG is involved, and everybody believes that while this is an unfortunate delay, the end result will be perfectly fine. PPG has a detailed process specifically for this issue and is very confident that it's going to turn out fine.

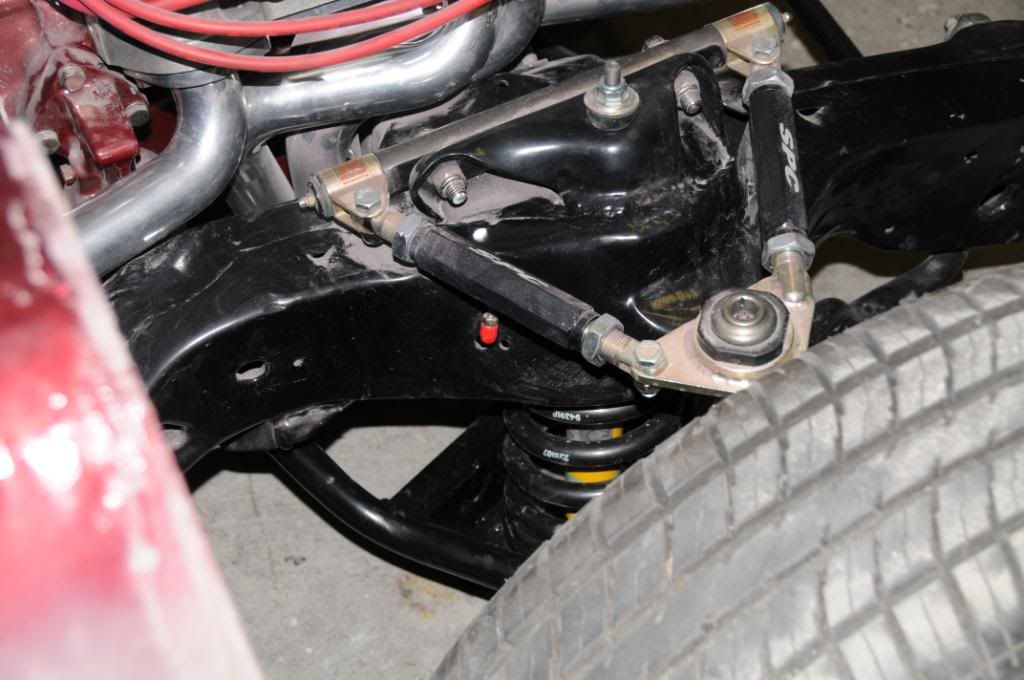
              New problem. I haven't been real happy with the stance in the front in particular with the engine weight, etc on the car. I have SPC billet adjustable front UCAs with Howe tall ball joints and SPC ProSeries variable rate front springs - along with a 3/4" aluminum front spacer. Early this morning I took a look to prepare for a weekend job of removing the 3/4" spacer (equals a 1.5" height difference at the hub). I realized that the lower control arm (stock) has VERY little header clearance, and I won't be able to rotate it down enough to get the spring out. In order to get the headers out of the way, the motor needs to come out.

              Long story short, it looks like I'm going to pull the da$#@!@ motor AGAIN. Plan for this weekend is:

              1) Quickly mock up the Fesler billet hood hinges to see if the inner fender needs to be clearanced
              2) Remove the front fenders and core support
              3) Drain the TREMEC, drop the driveshaft, remove the tranny crossmember
              4) CAREFULLY pull the motor/tranny out after headers are disconnected
              5) Remove the stock, powdercoated lower control arms
              6) Press the Howe ball joints out
              7) Press them into the new SPC tubular front lower control arms (with increased clearance) http://www.scandc.com/images/SPC%20lowerAarms.jpg
              8) Put it all back together.

              Comment


              • #52
                Re: '66 GTO RestoMod Project - getting close!

                so that was the boom I heard this morning ;)
                Nice to know you're taking one for the team... but really, you don't have to; I can't speak for others - but heaven knows I've been there.
                Doing it all wrong since 1966

                Comment


                • #53
                  Re: '66 GTO RestoMod Project - getting close!

                  Being there is one thing. How many times I need to be there is another

                  If it were easy, everybody would do it I guess.

                  Comment


                  • #54
                    Re: '66 GTO RestoMod Project - getting close!

                    It's all just part of the process. Not that you don't already, but it will make you appreciate it more when it's done?

                    Comment


                    • #55
                      Re: '66 GTO RestoMod Project - getting close!

                      Weekend update! Some good news! :D

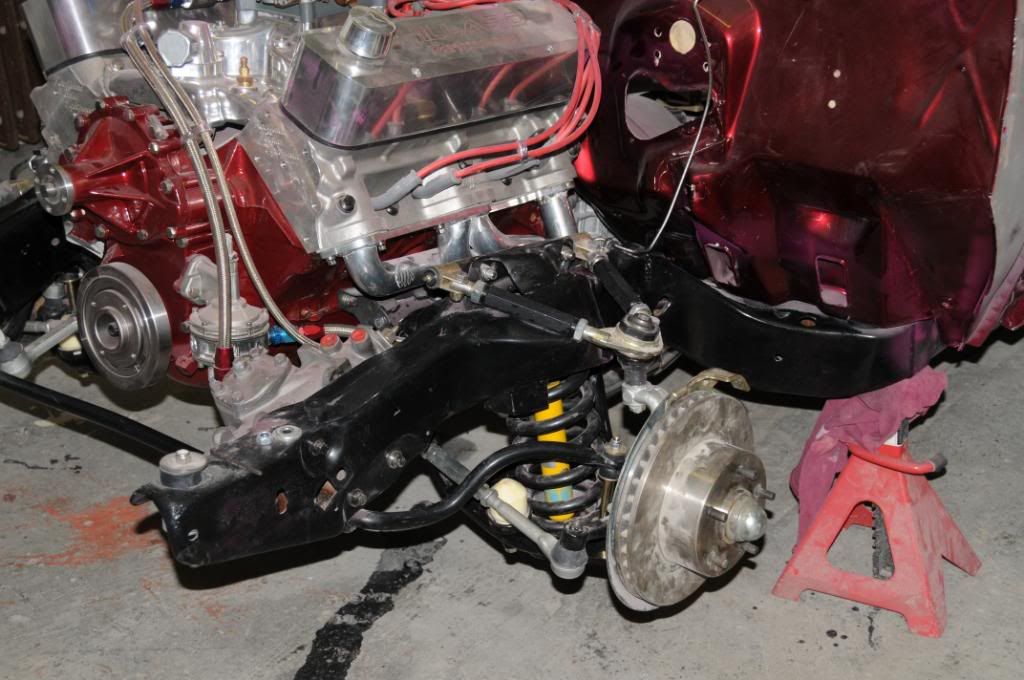
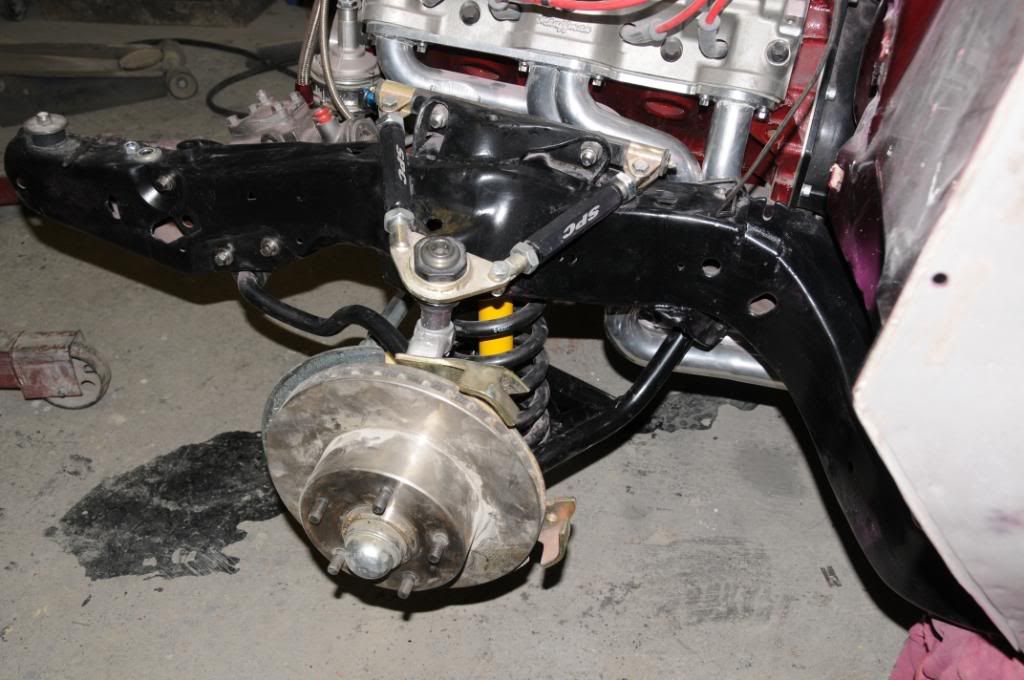
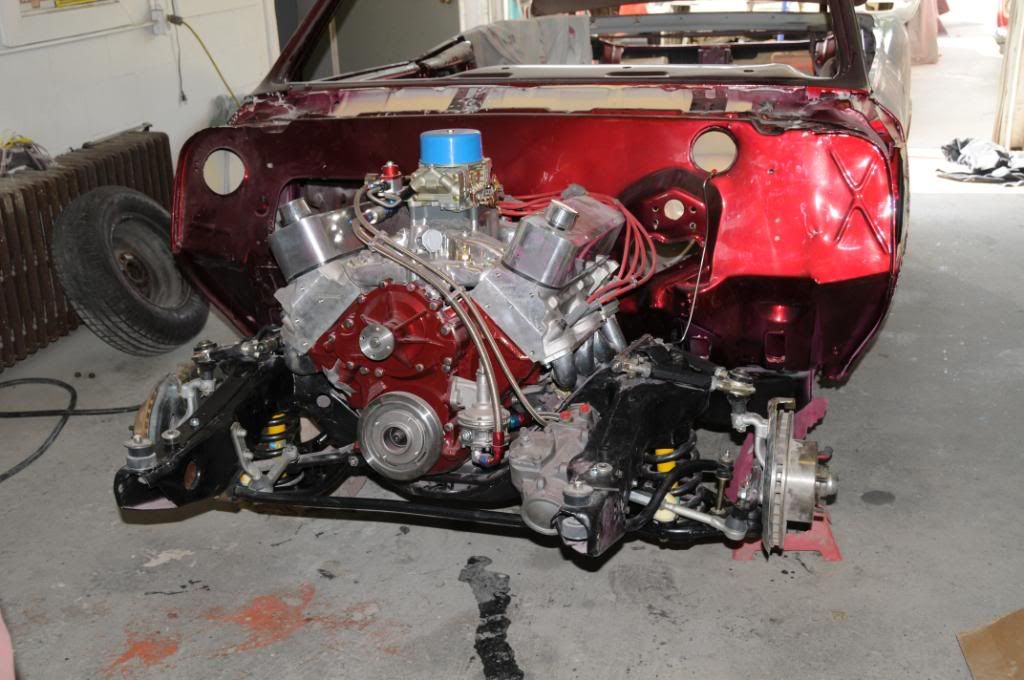
                      Friday late afternoon and evening I got to work prepping the car for the Saturday plan. Drained the tranny, disconnected fuel lines, loosened headers, disconnected sway bar end links, took off tie rod ends, disconnected idler arm from frame as well as two of the steering box bolts to rotate it, etc. As I was doing that I saw that just maybe the engine wouldn't need to come all the way out, but maybe just by removing motor mounts and shifting the motor a little we could get the springs out and the lower A-Arms off.

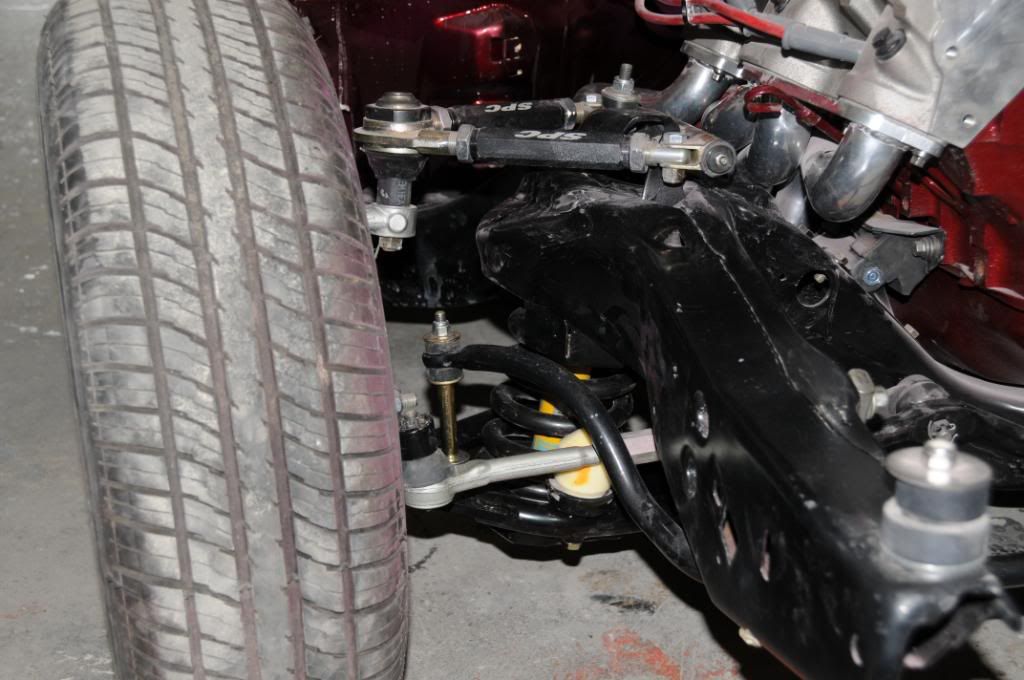
                      First problem: The Howe tall lower ball joints are a real pain to separate from the spindles, because the shaft is longer and the pickle fork really isn't "thick" enough (or wide enough). Had to grind out the inside of the fork and then really play with it to get the ball joint separated. But, after that we were able to get the spring out on the driver side by lifting the motor, as well as getting the A-Arms off. The new SPC tubular lower A-Arms come with "standard" ball joints alread in them, so had to press them out, press the Howe tall joints from the old arms, and then press them into the new ones. Got that done pretty quickly. Mounted the new A-Arms, used one flat and one helical spacer (as per recommendations of Mark Savitske of SC&C) and bolted her up. Before connnecting all the sway bar, steering , etc, stuck wheels back on and lowered the car to check stance. It seems perfect! And I've got tons more clearance between the lower arms and the headers.

                      Second problem: The new tubular lower arms are "thicker". So, the end links would not go back on. Had to grind about 1/4" off the spacers on either side - that solved that problem.

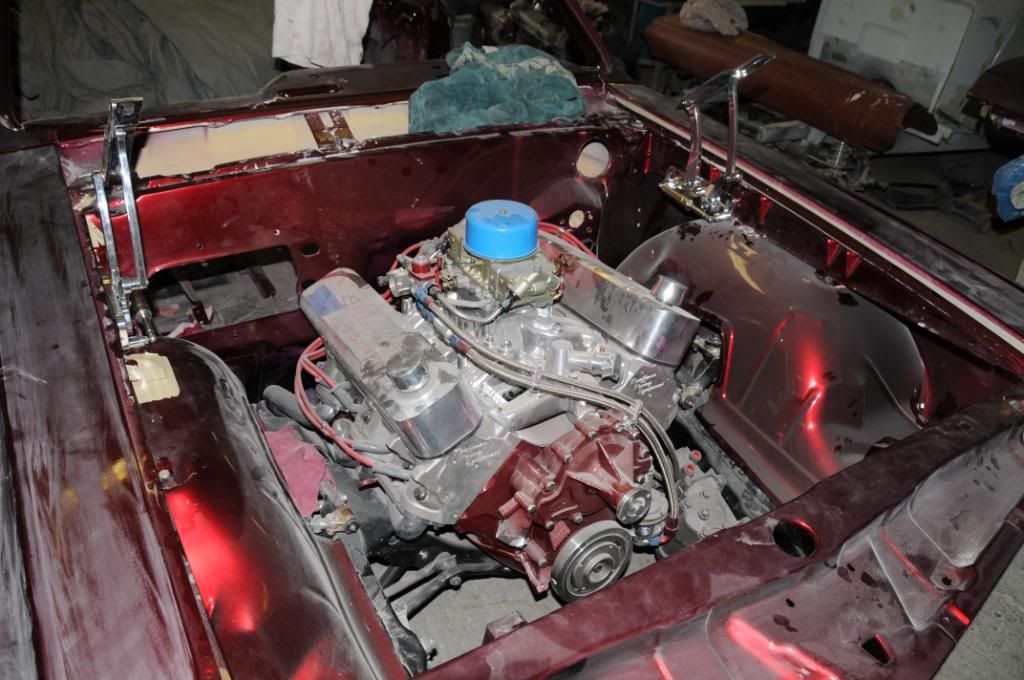
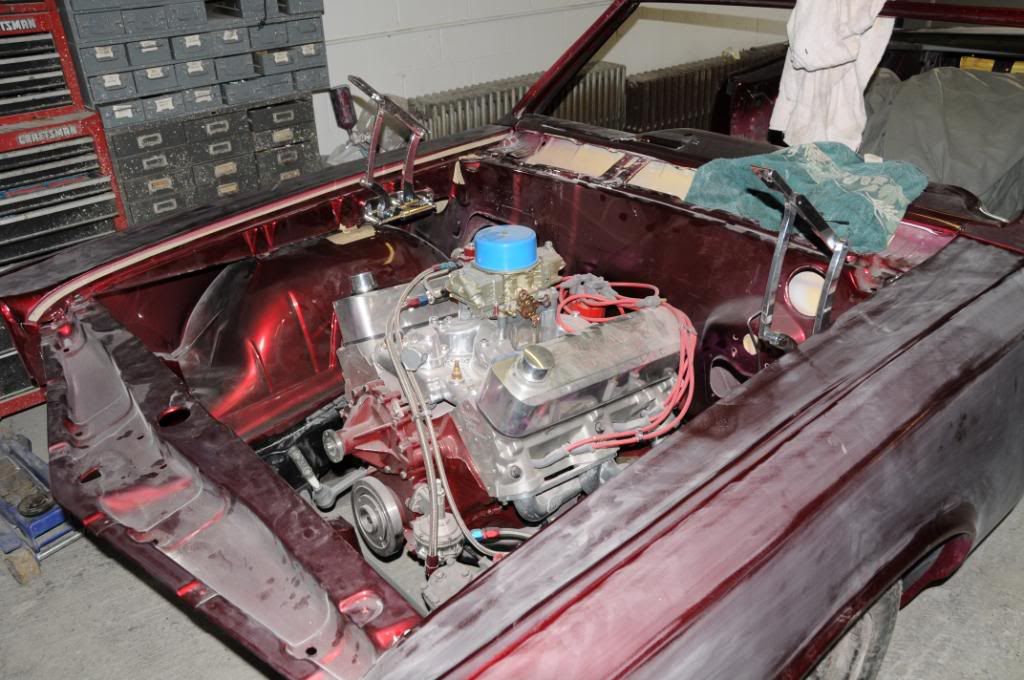
                      So, everything is back together and connected. Here are some pics - please disregard the fact that everything is so dirty! It's definitely a work in progress. I'm just glad the motor did not need to come out. Unfortunately I wasted a few quarters of tranny lube, but I'll take that trade-off any time.


                      Comment


                      • #56
                        Re: '66 GTO RestoMod Project - getting close!

                        NIIIIICE!
                        There's always something new to learn.

                        Comment


                        • #57
                          Re: '66 GTO RestoMod Project - getting close!

                          sweet. I wondered at why pay the extra for tubular lower control arms, now I know.
                          Doing it all wrong since 1966

                          Comment


                          • #58
                            Re: '66 GTO RestoMod Project - getting close!

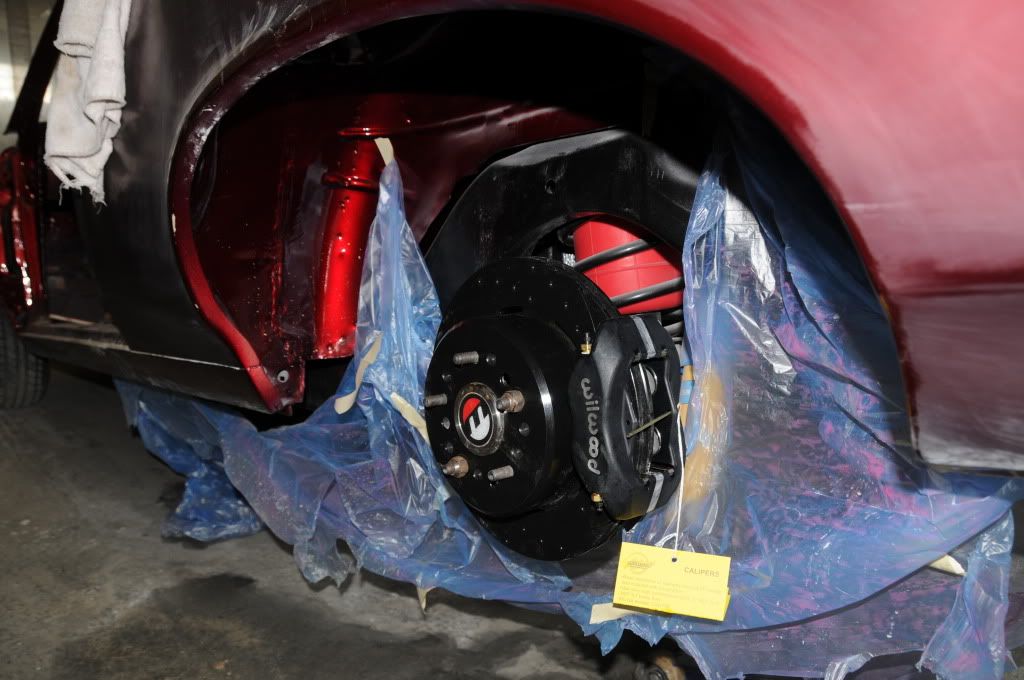
                            Got some more work done yesterday. I need to get the new wheels ordered, and needed to confirm that after putting the Wilwood hubs on the backspacing wouldn't change. So, yesterday I mounted the new rear hub/rotor assemblies and temporarily put the front hubs on. The rears stayed on but the fronts did not. I just stuck the old front rotor/hubs back on until the paint and cleanup is done.

                            The Wilwood stuff comes black anodized, which will turn turn off of the rotors by the pads. It won't be all black when it's done.


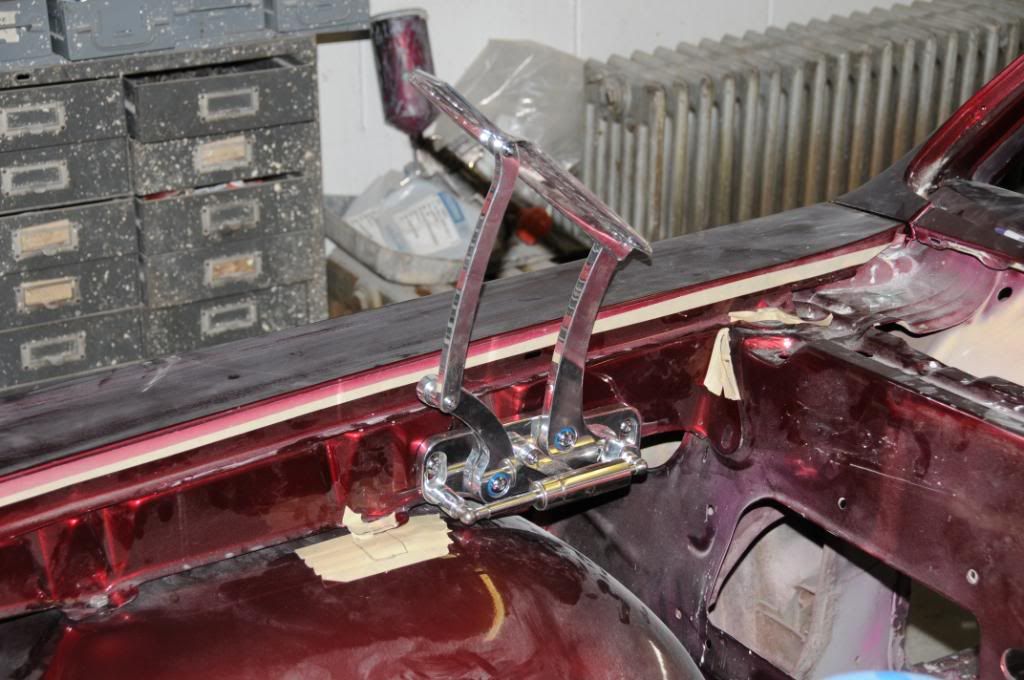
                            Then the front clip went back on, so we could try to figure out what will need to be "massaged" a little in order for the Fesler hinges to fit correctly.


                            Unfortunately, there are clearance issues with the hinges that we're going to have to address. Can't tell for sure you exactly how much because I didn't have the hood clip/bolt things (this generation pontiacs don't bolt up into the hood, there are bolts on clips that attach to the hood and come down through the hinge). Couldn't put the hood on. But it looks as though there may be 3 places on each side that will have to be clearanced. The inner fender may need clearanced under the front strut, the fender in the same location has a mounting tab that may need to be clearanced, and the back of the fender near the cowl may need a slight amount of clearance.

                            Comment


                            • #59
                              Re: '66 GTO RestoMod Project - getting close!

                              I feel your pain! What a great testament to patience. I remember I was painting my 53 Chevy Suburban and the work lamp fell over on the quarter panel. And then it had alot of orange peel in it and when I buffed it out it went down to primer and I had to repaint the rear of it. I've left painting to the pros, unless it's out of a spray can. That car is going to be awesome!
                              61 Olds 88, 69 Plymouth Roadrunner, 68 Pontiac Firebird, 95 Buick Roadmaster LT1

                              Comment


                              • #60
                                Re: '66 GTO RestoMod Project - getting close!

                                Have you scuffed the whole car and intend on redoing the clear coat?
                                Keep smiling,makes them wonder whats on your mind.

                                Comment

                                Working...
                                X