 Tweet
Tweet
[center]How To 1995 Z28 Camaro Engine Removal Out the Bottom

This is my rendition of how I removed the motor from my '95 Z28 myself by lifting the body and dropping the motor out the bottom. As luck would have it I blew this motor up over a year ago when attempting a high RPM third gear shift. At that time I didn't really have a place to do this kind of work. Over the past year I did a lot of research over the internet, read all of the how to's, and any blog that I could find. I figured I had two ways of doing this. The first one was out the top the traditional way, or second drop it out the bottom. The later being strange to me, but it was the way they installed it at the factory. I had read about the "Happy Hooker" device, which some people had used with equal success, but the way the motor sat back under the windshield looked too risky to me. I feel it is wise to allow yourself a full day before the pull to go over everything, check availability of materials, examples like 2x4's, rags, drip pans, tools, both sizes of fuel line disconnects (the cheap plastic ones worked fine for me). Most everything is metric but you do run into a couple standard sizes too. I would suggest a set of shallow and deep 8mm to 22mm, elbows, and extensions.
In the three-day journey that it took me (I'm old and in no hurry), I took notes and plenty of pictures. I will try to describe each step I took, while it is still fresh in my mind. You may choose to do some of these in a different order, I'm sure I will next time (Once you know what your doing this should only take an afternoon with competent help). I will try to let the pictures do the explaining, as I am in no kind of journalist. Meanwhile I have been preparing a different motor that is near completion, which should minimize the time this project takes up space in my garage.
Make sure you have ample space to use a motor picker and roll it back and clear the body.
Set the rear wheels on a pair of old rims and tires as these are very stable and will not allow the back end to move at all and won't hit the back bumper when lifting the front.
If you haven't already done so, while the car is level make sure all fluids are drained out at this time, like radiator (mine used an 8mm allen), disconnect all hoses, and oil. There is a drain on the side of the block, which I think is 10mm, but I could not get to it so I left it in for later.
Most everything should be in front of you at this point, you should be able to touch and spray everything with WD-40, hit anything you think you might unbolt today, tomorrow or in the future. Rusty bolts suck and some of these have not been turned since 1995.
I started by removing from the underside the right and left splash panels (7x10mm each) and lower air dam (9x8mm). You will need the access through here later when you hook up your straps or chains.
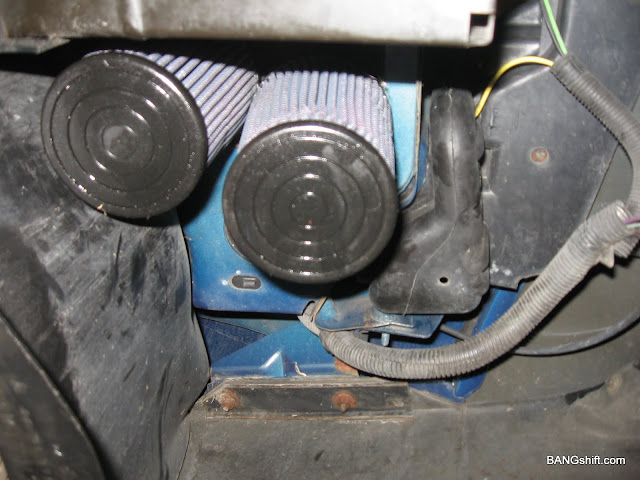
After the panel was removed it provided me access to my K&N air filters that needed to be removed.
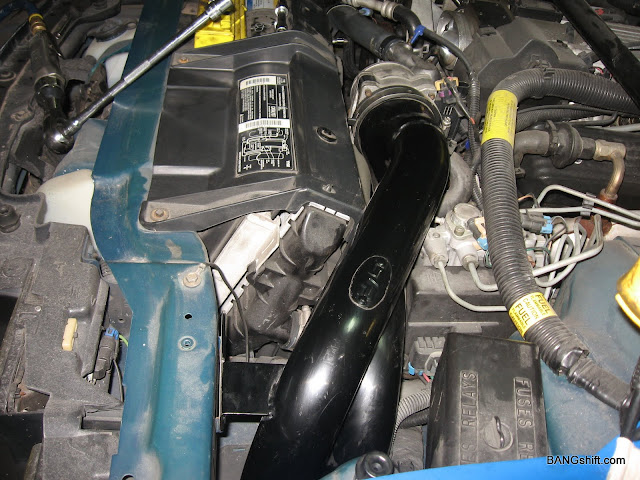
Then up top I removed the SLP cold air intake and MAF.
On the right front it was time to remove the battery tray / overflow, again for later access.
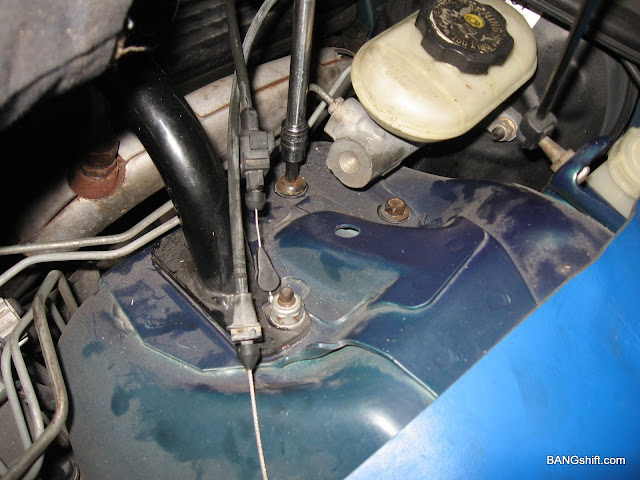
I undone any other hoses I could see attached that might be a problem. This here is for the battery/overflow.
I went under the car next and removed the driveshaft (4x11mm) or (4x7/16?). The torque arm can be tricky, a little easier than on my third gen. This had 3x 15mm, one short on the top and 2 long on the bottom. I have read that some people also remove the 2 long bolts at the rear end, this may help, idk.
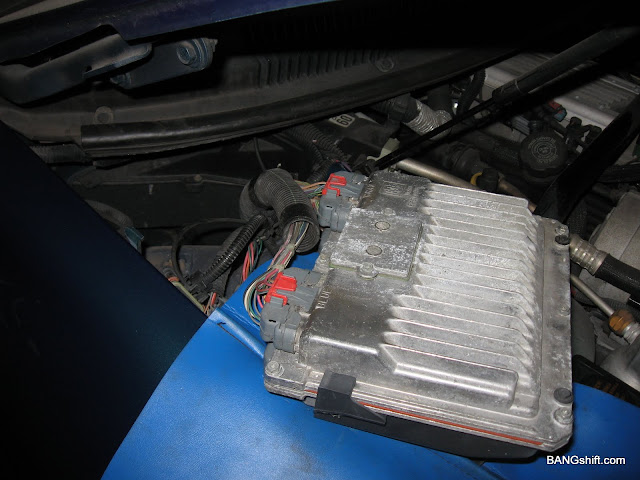
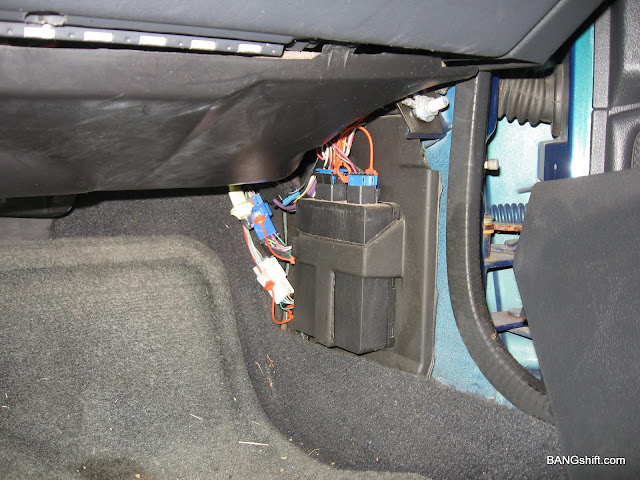
This is the PCM, it held down by 2x10mm and just lifts out.
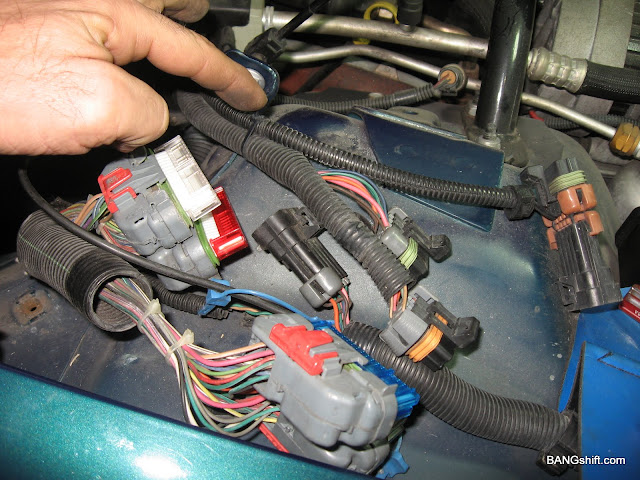
Each connector is labeled, and on the aluminum body with a color name.

Black, Blue, Red and White.
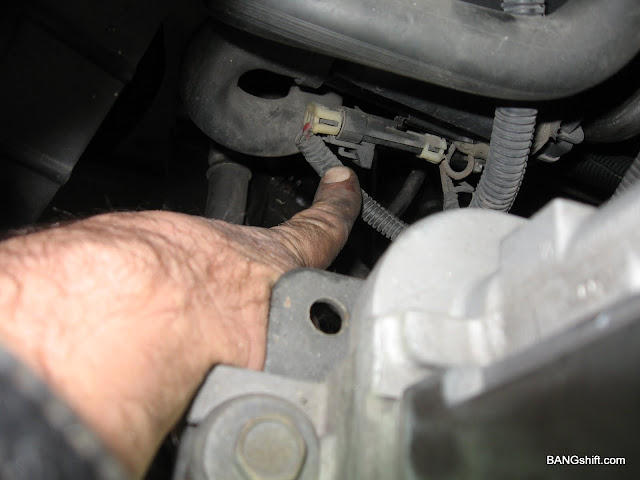
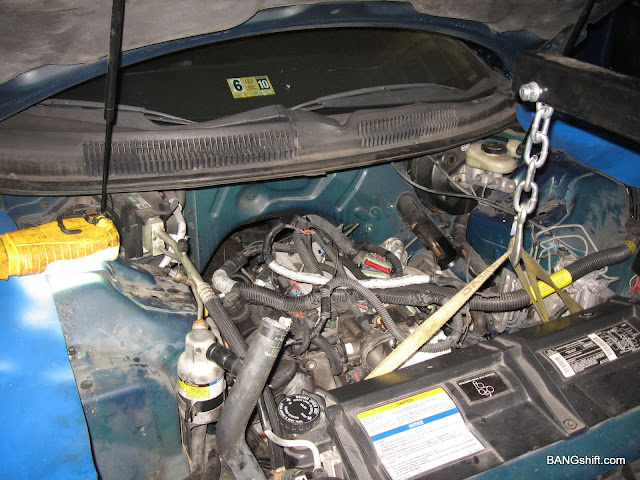
There are two more plugs on top of the right wheel well that must be undone. You will want to keep everything attached to the motor so you can lay the harness on top of the intake. Make sure you trace down each leg of the harness, there are a couple grounds we have yet to undo. Now is a good time to undo your ABS (brakes), it is a small connector, one on each wheel well that attaches to the backside of the spindle. Make sure this is clear and tucked so it won't hang when lifting off the body.
Here was the passenger kick panel; there were four Phillips screws along the door way that needed to be removed. There are three connectors that need to be feed back up through the firewall and a set of blue, black, and green small wires.
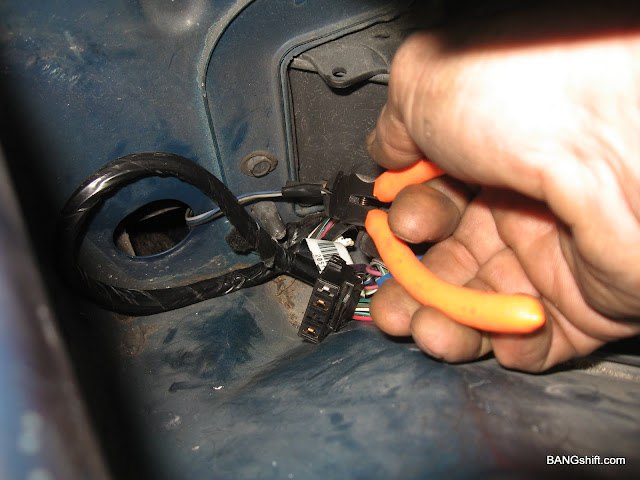
They ran back up in the dash. I taped them together and snipped them. I will put connectors on these, or maybe just disassemble the dash to see what they are for. Not!
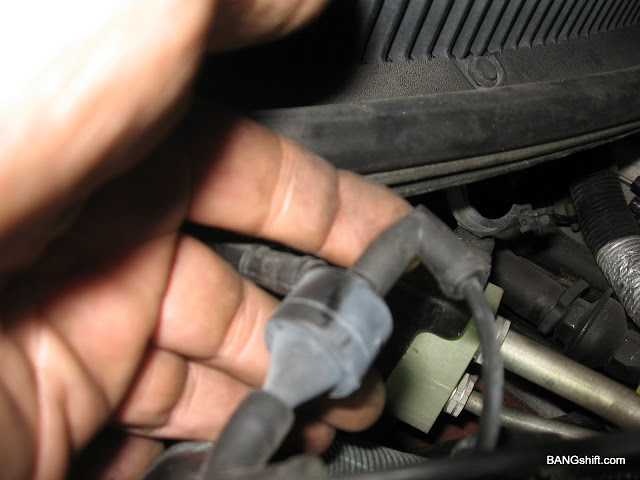
Pay attention to which way check valves are directed. Small mistakes as this could be a real pita to diagnose. You only need to unplug one side of this, the one that runs into the harness toward the motor.
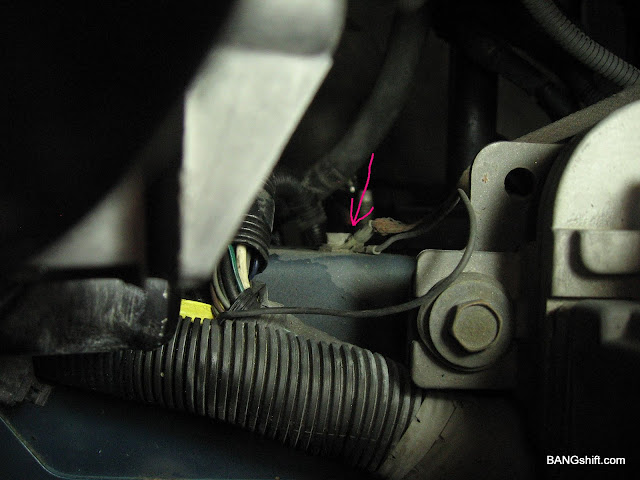
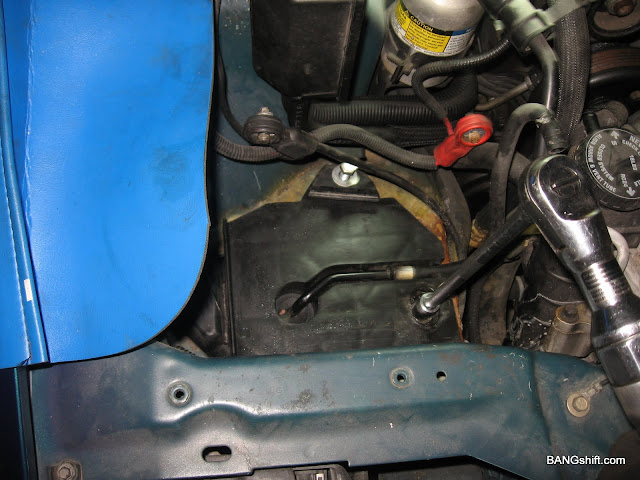
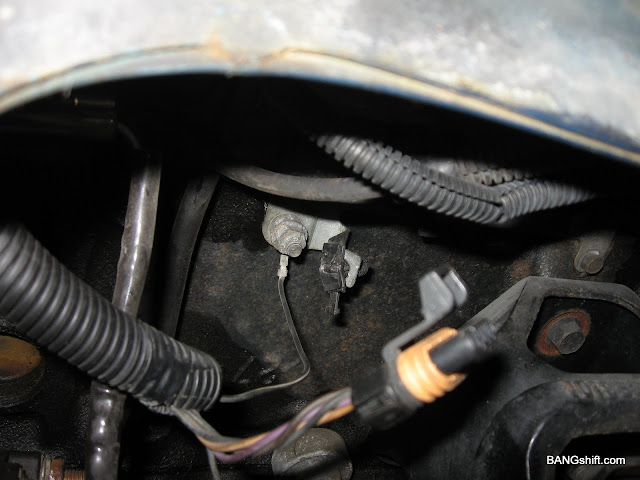
This is the driver side, up near the fan shroud and ABS unit, where you need to unbolt the copper motor ground wire. 10mm
The air pump and the left ABS connector are about the only electrical connections on the driver side that you need to be concerned about.
I am removing the power steering reservoir; it can stay with the motor if you don?t have AC. In my case I later found that the pump lines run through the AC compressor lines and it must be separated to leave the AC with the body.
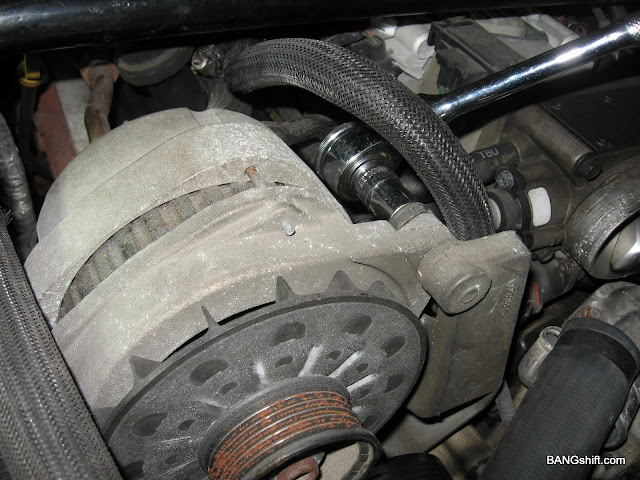
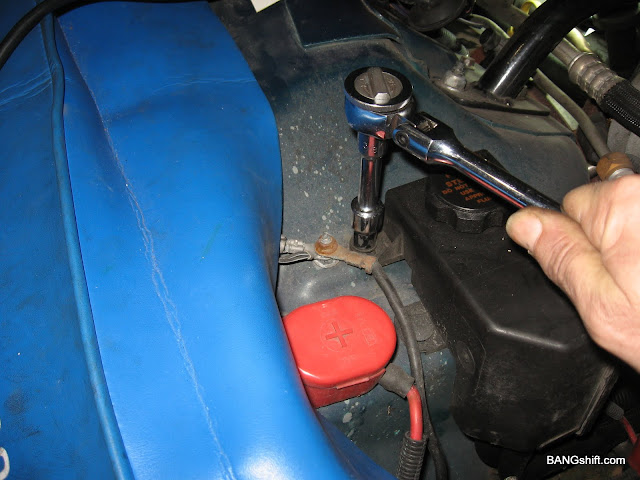
Now is also a good time to get the alternator out of the way. Don't forget the red power connection on the back of it. I will clean it up later.
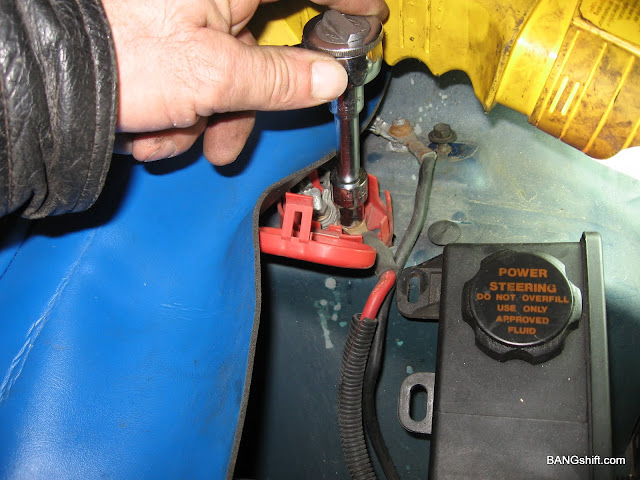
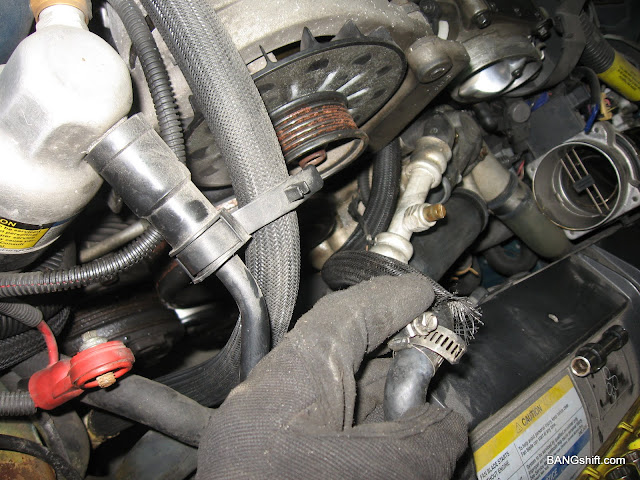
I now chose to unbolt the power leads for the battery, as they drop with the motor. I didn't get a pic, but I also undid the fuel lines and used the cheap plastic disconnect tools. They worked fine.
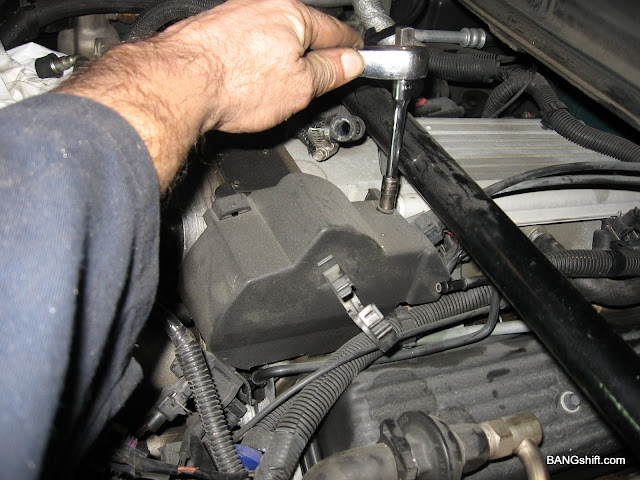
Here is the throttle linkage cover; I used a 9/32" socket for this. Unhook the cables and move them out of the way.
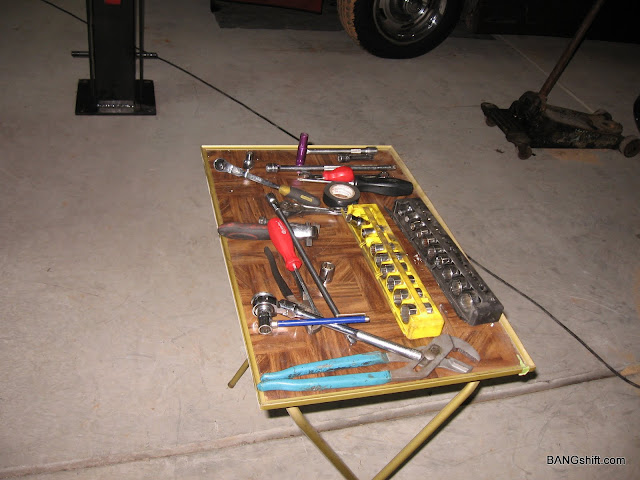
And to think my wife told me to throw this old TV tray away, I use it all the time. It saves steps and time.
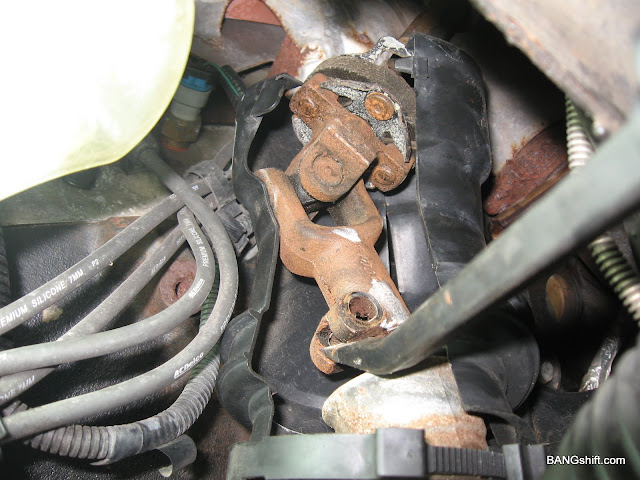
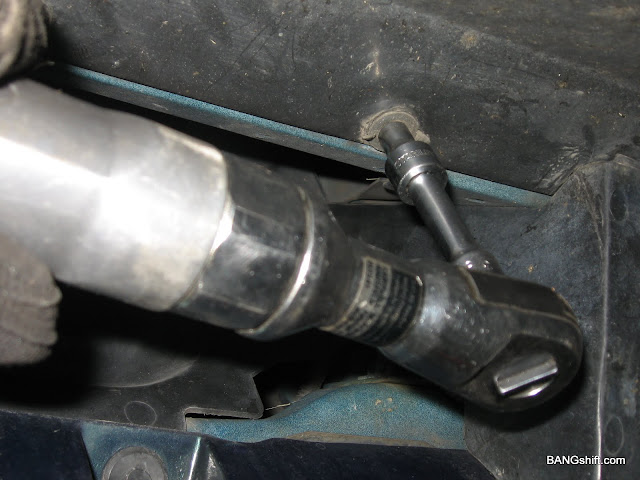
Since I was still up on top, I unsnapped the plastic cover. I then unbolted the top of the steering universal. Here from the bottom I unbolted the bottom and used a pry bar to lift it off the spline.
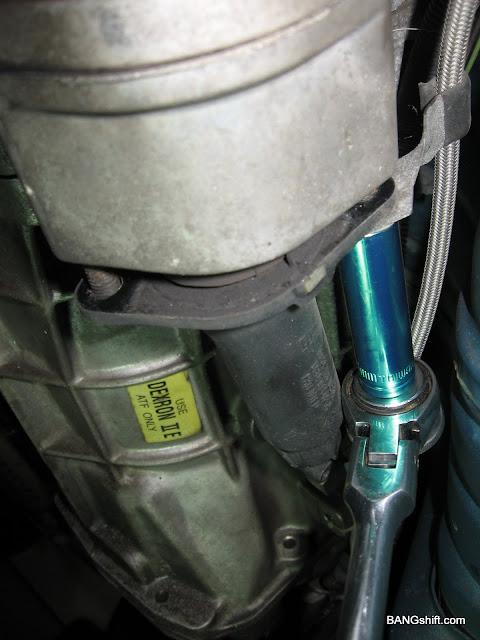
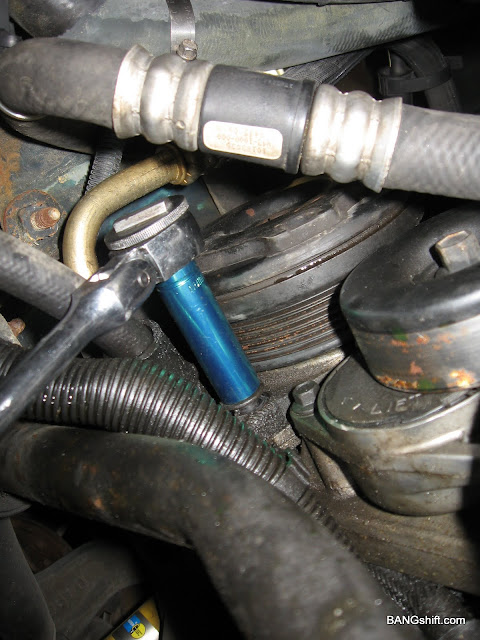
I used a 13mm socket to unbolt the two nuts holding the hydraulic clutch slave.

I tie wrapped it up out of the way so it would not get damaged.
I unbolted the AC unit using a 13mm socket, there is also an electrical connection that has to be unhooked.
On the back I used a 10mm ratcheting box wrench. These things are great! At this point just make sure everything is undone and the AC unit is loose. Later as you lift the body up you will be able to slide it to the front then secure it with tie wraps so it doesn't fall and break a line and you loose your Freon. Remember all the lines are hooked to the condenser in front of the radiator, so be careful!
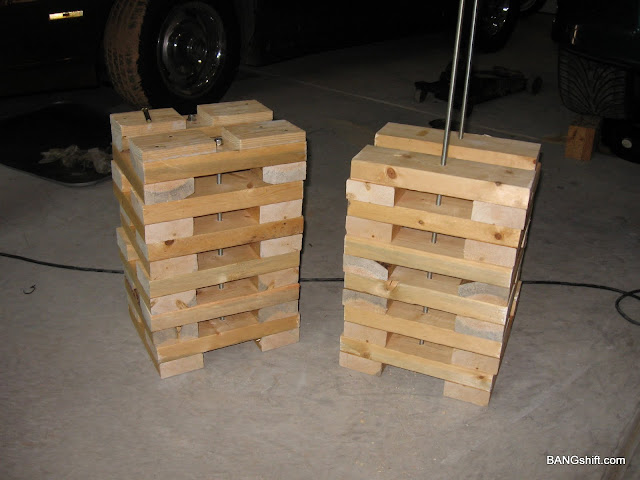
We are getting ready to lift the body soon, so we will work our way down and remove anything else remaining. I borrowed this idea from the internet, and it works great. Here's where planning ahead really pays off. I had taken measurements from my Harbor Freight 1 ton cherry picker earlier to see what the lift height was going to be (I think it was 30"). I then measured the base of my jack stands, which came out to 9.5"x 12". I had three 16' 2x4 already and that's about what it took to make these two, six stacks high. I also drilled a 1/2" hole and added threaded rod through and bolted them for added safety.
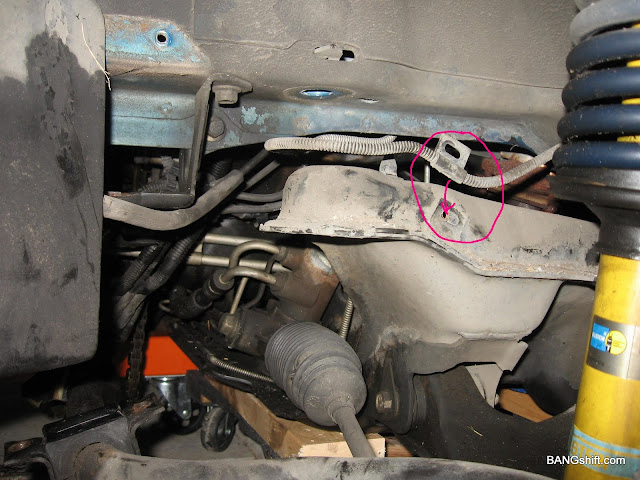
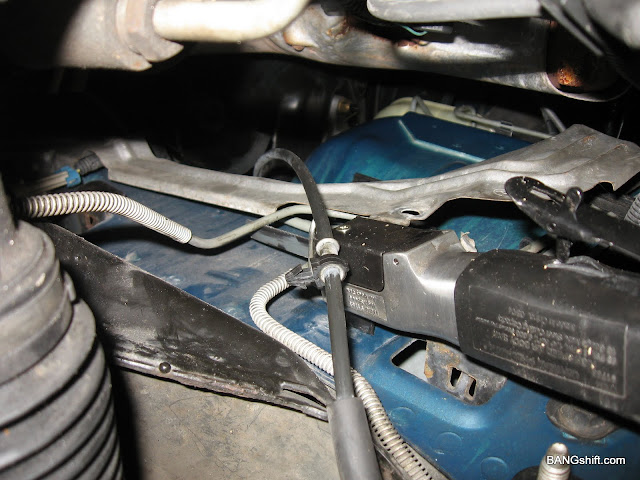
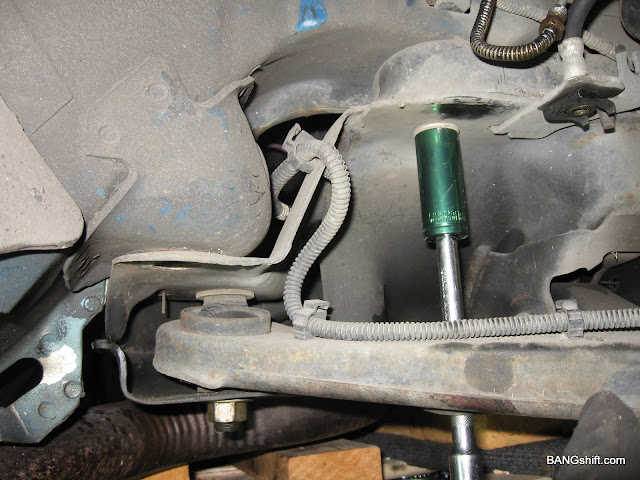
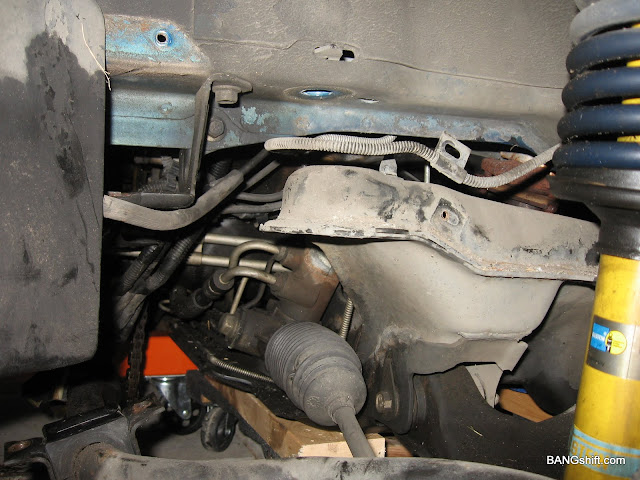
Don't forget to separate the left brake line from the k-member or you will be replacing it. You can see where it was attached.
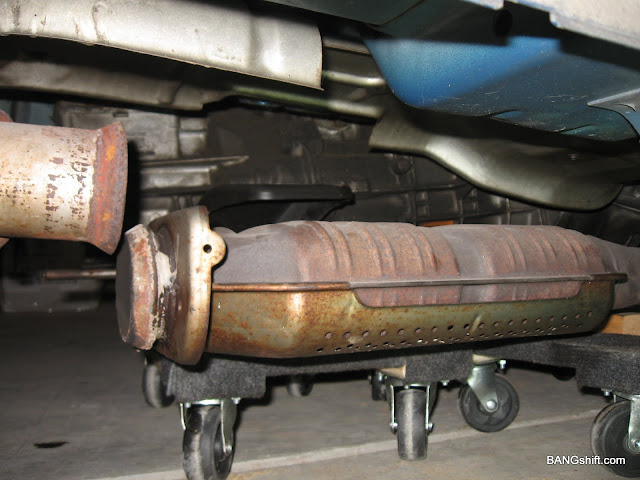
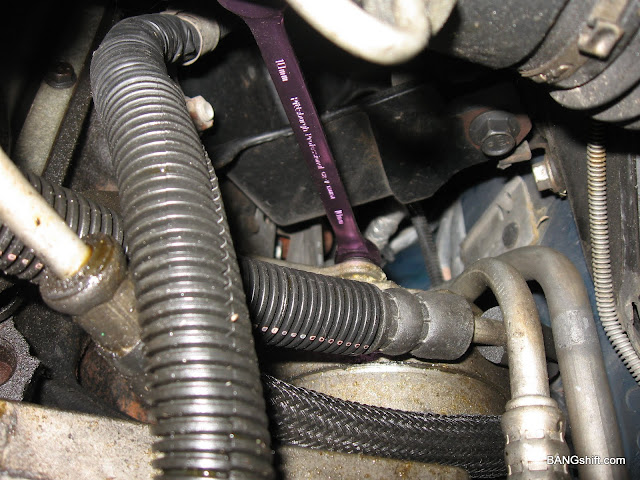
If you haven't already done so undo your cat from the tail pipe. 2x17mm. Remove your sway bar while you are underneath, it's four 1/2" bolts. I also unbolted the cross member, I supported the trans with a jack because I didn't know how much weight would be hanging. Without a distributor to worry about the firewall it only hung down minimally, so I removed the jack and let it hang.
I chose to cut the right brake line here, I think I will use a union to reconnect it (I need to do more research on safety on this). I did this because the line runs behind the rack and pinion.
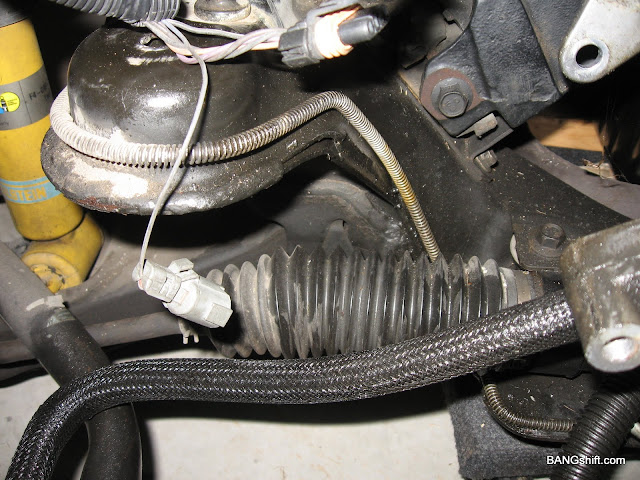
You can see here, it is behind the tie rod.

Don't forget to undo your shifter, mine was two 9/16". Automatic, you might only have to worry about a cable, IDK.
At some point I went around and broke all remaining bolts loose (K-member has six 18mm and strut tower has two T50 torx, four 17mm and two 13mm). I didn't want to run into any stubborn fasteners this late in the game; so far everything has gone smoothly. Maybe I over think things, but I really don't want to be stuck.
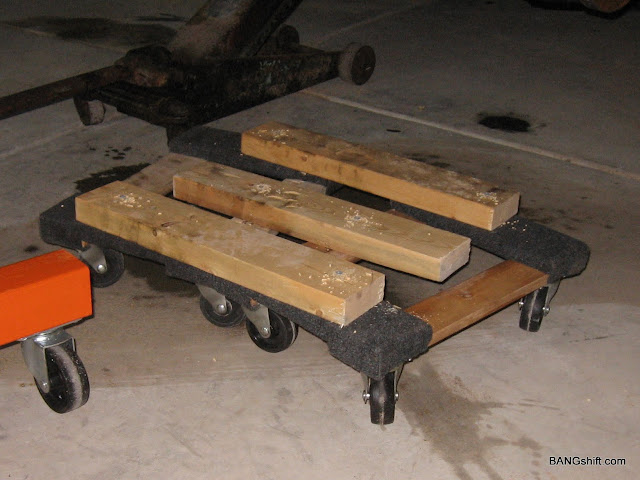
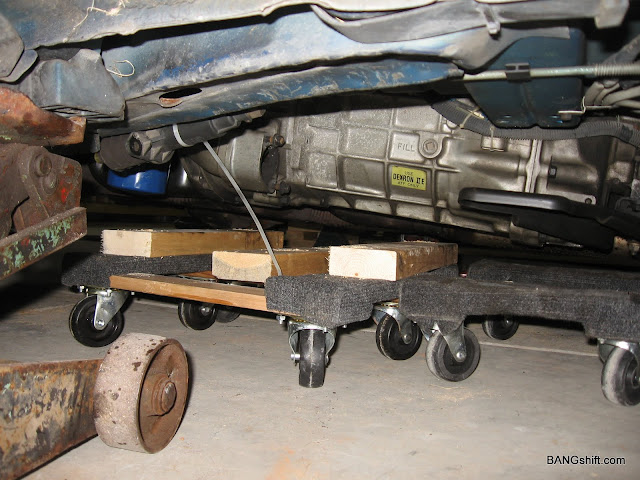
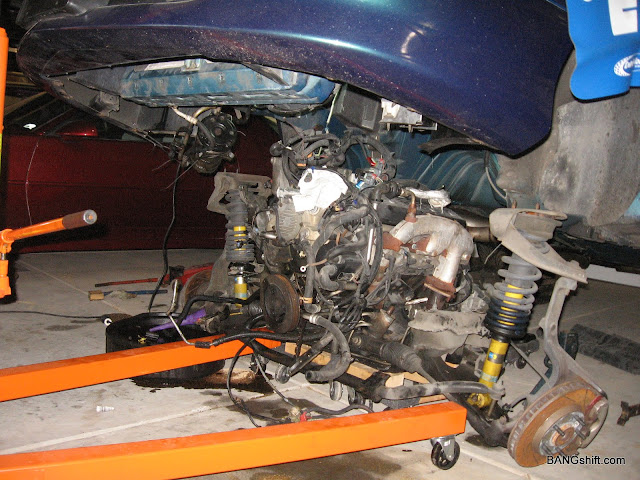
I used two small HF moving dollies, I set them between the legs of the cherry picker then screwed three 2x4?s to them. This is what the motor and suspension will sit on. I had one more I kept under the trans, but it wasn't necessary because everything sat stably on these.
After I removed the front wheels (I had left them on for safety), with two jacks I lowered the car onto these dollies.
Here the front of the car is sitting on the moving dollies.
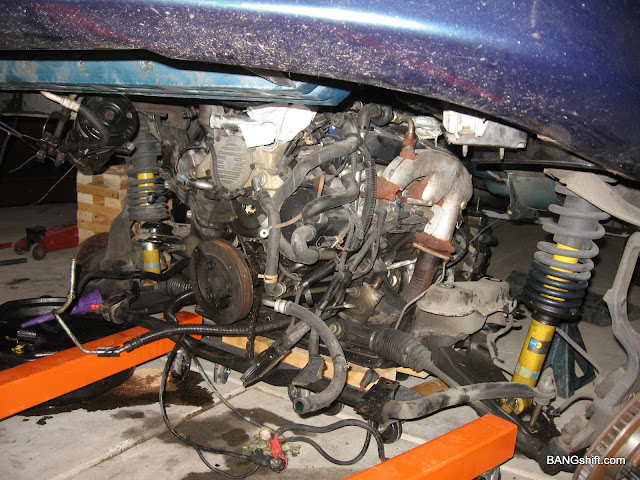
With the suspension sitting with nowhere to fall, it is now time to unbolt the T50, two 17mm, and one 13mm per side, my strut tower brace came off at this point also. After all is undone hook up your straps or chains to the area where the intake was on the driver's side and where the battery box was on the passenger side. My nylon straps were touching the radiator but not enough to concern me. If you are using chains or are unsure you could put something in between them, like cardboard or something.
You have three 18mm bolts on each side holding the body to subframe to remove now.
Slowly start to lift the body up, stopping to check everything every two to three inches.
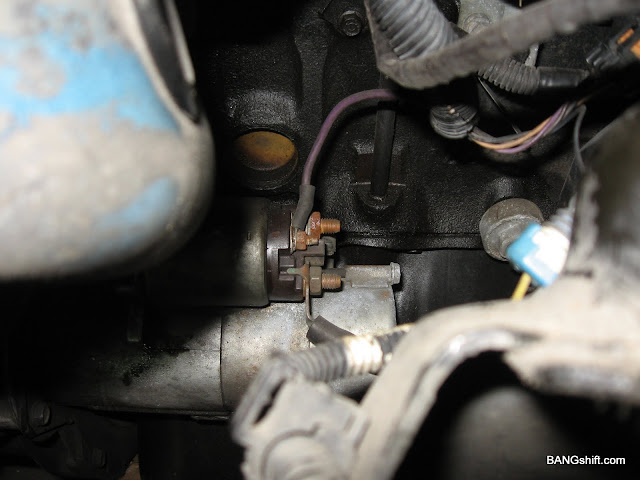
I found I forgot the purple wire on the starter?
And this small ground wire. I can't stress enough how important it is to take your time and check everything each couple inches. If I would have pulled this off and out of the harness I would have never found it and who knows what it is for and the trouble fixing whatever was not working. Take your time!
The body is lifting up a couple inches at a time.
It's almost there.
Huston, we have liftoff.
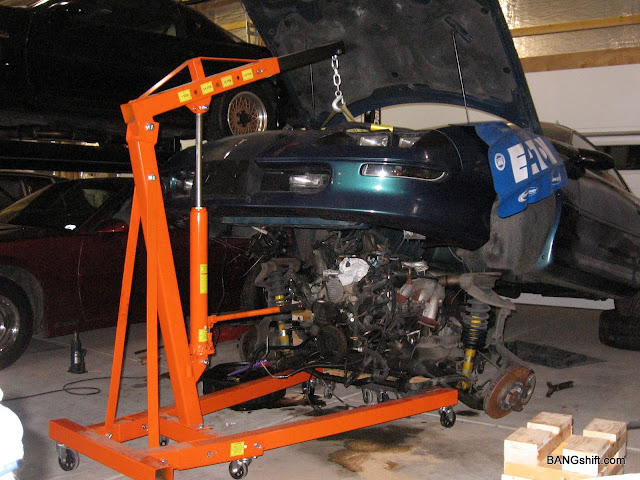
Now it is time for the blocks we made earlier.
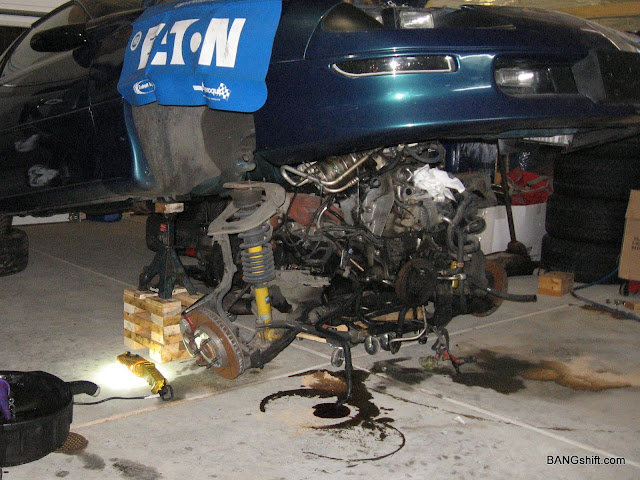
After I had my stacks six high, I realized I only needed them three high with the jack stands. I took them apart, and lowered the body down on the factory jacking points, and then removed the cherry picker. Try to keep your jack stands extended minimally for stability.
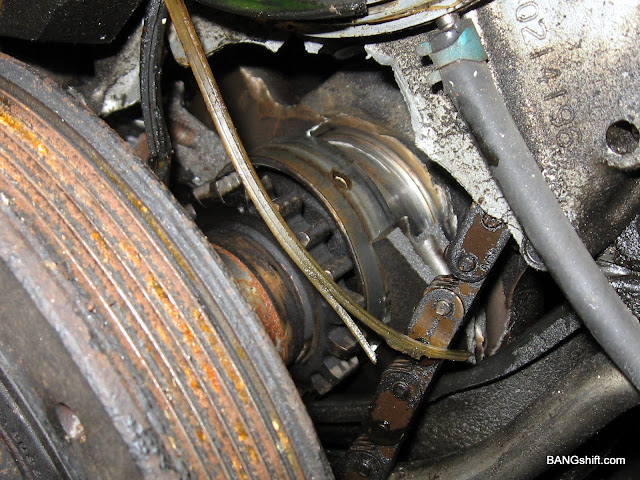
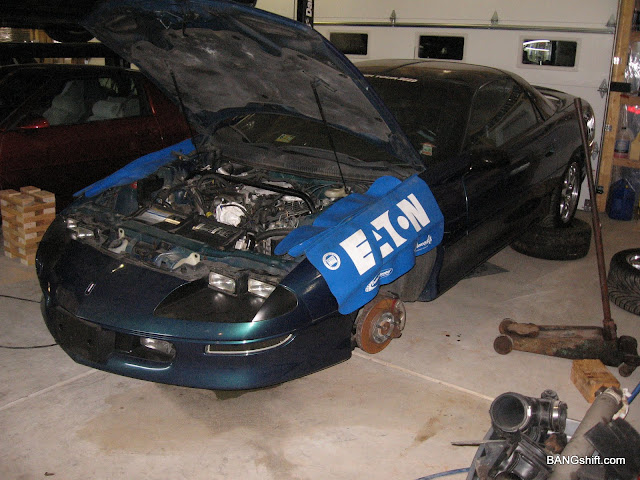
This is why this all came about in the first place.

Here is what mine looks like with the motor gone.

After I rolled out the motor I hooked up the cherry picker again. I bolted my wooden stands back together and set them like this. Four high would probably have been enough, but I plan to clean and detail all of this mess. I'm sure these will come in handy on future projects since they are so versatile.
I want to thank all of you here at BangShift, without your support and automotive enthusiasm I would not have tried something like this a few years ago. :o
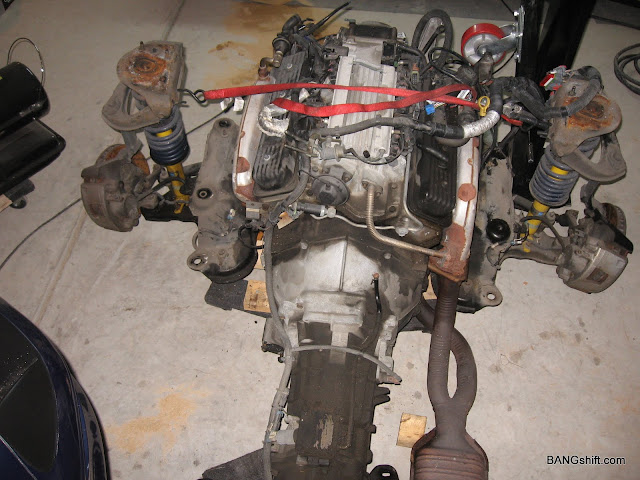
Everything came out as one unit, the motor, trans, suspension. Next the tare down...
[center]
This is my rendition of how I removed the motor from my '95 Z28 myself by lifting the body and dropping the motor out the bottom. As luck would have it I blew this motor up over a year ago when attempting a high RPM third gear shift. At that time I didn't really have a place to do this kind of work. Over the past year I did a lot of research over the internet, read all of the how to's, and any blog that I could find. I figured I had two ways of doing this. The first one was out the top the traditional way, or second drop it out the bottom. The later being strange to me, but it was the way they installed it at the factory. I had read about the "Happy Hooker" device, which some people had used with equal success, but the way the motor sat back under the windshield looked too risky to me. I feel it is wise to allow yourself a full day before the pull to go over everything, check availability of materials, examples like 2x4's, rags, drip pans, tools, both sizes of fuel line disconnects (the cheap plastic ones worked fine for me). Most everything is metric but you do run into a couple standard sizes too. I would suggest a set of shallow and deep 8mm to 22mm, elbows, and extensions.
In the three-day journey that it took me (I'm old and in no hurry), I took notes and plenty of pictures. I will try to describe each step I took, while it is still fresh in my mind. You may choose to do some of these in a different order, I'm sure I will next time (Once you know what your doing this should only take an afternoon with competent help). I will try to let the pictures do the explaining, as I am in no kind of journalist. Meanwhile I have been preparing a different motor that is near completion, which should minimize the time this project takes up space in my garage.
Make sure you have ample space to use a motor picker and roll it back and clear the body.
Set the rear wheels on a pair of old rims and tires as these are very stable and will not allow the back end to move at all and won't hit the back bumper when lifting the front.
If you haven't already done so, while the car is level make sure all fluids are drained out at this time, like radiator (mine used an 8mm allen), disconnect all hoses, and oil. There is a drain on the side of the block, which I think is 10mm, but I could not get to it so I left it in for later.
Most everything should be in front of you at this point, you should be able to touch and spray everything with WD-40, hit anything you think you might unbolt today, tomorrow or in the future. Rusty bolts suck and some of these have not been turned since 1995.
I started by removing from the underside the right and left splash panels (7x10mm each) and lower air dam (9x8mm). You will need the access through here later when you hook up your straps or chains.
After the panel was removed it provided me access to my K&N air filters that needed to be removed.
Then up top I removed the SLP cold air intake and MAF.
On the right front it was time to remove the battery tray / overflow, again for later access.
I undone any other hoses I could see attached that might be a problem. This here is for the battery/overflow.
I went under the car next and removed the driveshaft (4x11mm) or (4x7/16?). The torque arm can be tricky, a little easier than on my third gen. This had 3x 15mm, one short on the top and 2 long on the bottom. I have read that some people also remove the 2 long bolts at the rear end, this may help, idk.
This is the PCM, it held down by 2x10mm and just lifts out.
Each connector is labeled, and on the aluminum body with a color name.
Black, Blue, Red and White.
There are two more plugs on top of the right wheel well that must be undone. You will want to keep everything attached to the motor so you can lay the harness on top of the intake. Make sure you trace down each leg of the harness, there are a couple grounds we have yet to undo. Now is a good time to undo your ABS (brakes), it is a small connector, one on each wheel well that attaches to the backside of the spindle. Make sure this is clear and tucked so it won't hang when lifting off the body.
Here was the passenger kick panel; there were four Phillips screws along the door way that needed to be removed. There are three connectors that need to be feed back up through the firewall and a set of blue, black, and green small wires.
They ran back up in the dash. I taped them together and snipped them. I will put connectors on these, or maybe just disassemble the dash to see what they are for. Not!
Pay attention to which way check valves are directed. Small mistakes as this could be a real pita to diagnose. You only need to unplug one side of this, the one that runs into the harness toward the motor.
This is the driver side, up near the fan shroud and ABS unit, where you need to unbolt the copper motor ground wire. 10mm
The air pump and the left ABS connector are about the only electrical connections on the driver side that you need to be concerned about.
I am removing the power steering reservoir; it can stay with the motor if you don?t have AC. In my case I later found that the pump lines run through the AC compressor lines and it must be separated to leave the AC with the body.
Now is also a good time to get the alternator out of the way. Don't forget the red power connection on the back of it. I will clean it up later.
I now chose to unbolt the power leads for the battery, as they drop with the motor. I didn't get a pic, but I also undid the fuel lines and used the cheap plastic disconnect tools. They worked fine.
Here is the throttle linkage cover; I used a 9/32" socket for this. Unhook the cables and move them out of the way.
And to think my wife told me to throw this old TV tray away, I use it all the time. It saves steps and time.
Since I was still up on top, I unsnapped the plastic cover. I then unbolted the top of the steering universal. Here from the bottom I unbolted the bottom and used a pry bar to lift it off the spline.
I used a 13mm socket to unbolt the two nuts holding the hydraulic clutch slave.
I tie wrapped it up out of the way so it would not get damaged.
I unbolted the AC unit using a 13mm socket, there is also an electrical connection that has to be unhooked.
On the back I used a 10mm ratcheting box wrench. These things are great! At this point just make sure everything is undone and the AC unit is loose. Later as you lift the body up you will be able to slide it to the front then secure it with tie wraps so it doesn't fall and break a line and you loose your Freon. Remember all the lines are hooked to the condenser in front of the radiator, so be careful!
We are getting ready to lift the body soon, so we will work our way down and remove anything else remaining. I borrowed this idea from the internet, and it works great. Here's where planning ahead really pays off. I had taken measurements from my Harbor Freight 1 ton cherry picker earlier to see what the lift height was going to be (I think it was 30"). I then measured the base of my jack stands, which came out to 9.5"x 12". I had three 16' 2x4 already and that's about what it took to make these two, six stacks high. I also drilled a 1/2" hole and added threaded rod through and bolted them for added safety.
Don't forget to separate the left brake line from the k-member or you will be replacing it. You can see where it was attached.
If you haven't already done so undo your cat from the tail pipe. 2x17mm. Remove your sway bar while you are underneath, it's four 1/2" bolts. I also unbolted the cross member, I supported the trans with a jack because I didn't know how much weight would be hanging. Without a distributor to worry about the firewall it only hung down minimally, so I removed the jack and let it hang.
I chose to cut the right brake line here, I think I will use a union to reconnect it (I need to do more research on safety on this). I did this because the line runs behind the rack and pinion.
You can see here, it is behind the tie rod.
Don't forget to undo your shifter, mine was two 9/16". Automatic, you might only have to worry about a cable, IDK.
At some point I went around and broke all remaining bolts loose (K-member has six 18mm and strut tower has two T50 torx, four 17mm and two 13mm). I didn't want to run into any stubborn fasteners this late in the game; so far everything has gone smoothly. Maybe I over think things, but I really don't want to be stuck.
I used two small HF moving dollies, I set them between the legs of the cherry picker then screwed three 2x4?s to them. This is what the motor and suspension will sit on. I had one more I kept under the trans, but it wasn't necessary because everything sat stably on these.
After I removed the front wheels (I had left them on for safety), with two jacks I lowered the car onto these dollies.
Here the front of the car is sitting on the moving dollies.
With the suspension sitting with nowhere to fall, it is now time to unbolt the T50, two 17mm, and one 13mm per side, my strut tower brace came off at this point also. After all is undone hook up your straps or chains to the area where the intake was on the driver's side and where the battery box was on the passenger side. My nylon straps were touching the radiator but not enough to concern me. If you are using chains or are unsure you could put something in between them, like cardboard or something.
You have three 18mm bolts on each side holding the body to subframe to remove now.
Slowly start to lift the body up, stopping to check everything every two to three inches.
I found I forgot the purple wire on the starter?
And this small ground wire. I can't stress enough how important it is to take your time and check everything each couple inches. If I would have pulled this off and out of the harness I would have never found it and who knows what it is for and the trouble fixing whatever was not working. Take your time!
The body is lifting up a couple inches at a time.
It's almost there.
Huston, we have liftoff.
Now it is time for the blocks we made earlier.
After I had my stacks six high, I realized I only needed them three high with the jack stands. I took them apart, and lowered the body down on the factory jacking points, and then removed the cherry picker. Try to keep your jack stands extended minimally for stability.
This is why this all came about in the first place.
Here is what mine looks like with the motor gone.
After I rolled out the motor I hooked up the cherry picker again. I bolted my wooden stands back together and set them like this. Four high would probably have been enough, but I plan to clean and detail all of this mess. I'm sure these will come in handy on future projects since they are so versatile.
I want to thank all of you here at BangShift, without your support and automotive enthusiasm I would not have tried something like this a few years ago. :o
Everything came out as one unit, the motor, trans, suspension. Next the tare down...
[center]

Comment