(Words and Photos by Scott Liggett) In our first episode on the Project Hay Hauler ’67 GMC C1500 pickup, I went over how the truck was when I bought it in August 2014. Almost immediately, I started hitting up the local self service junkyard to fix things and improve my truck. I know what you are thinking, “What the hell can you get at the junkyard that is an upgrade?” Well, when you start with a truck that is a bit of a wreck, you can only go up from there.
This is where I have to give a big shout out to Andersen’s Self Serve Auto Wrecking in Kearney, NE. This has to be the best “you pull it” type of yard in the country. Neat, organized, no giant mud puddles, a bazillion parts carts, and they even have golf carts!! Being in in Nebraska, there is no shortage of pick up trucks and these ’67-72 GM trucks are plentiful in the yard. I am not expecting to get rust free rocker panels there, at least not on one of these trucks, but I was able to find a ton of other really good stuff.
Like I mentioned in the first article, the GMC had good bones. It ran and drove just great. It was getting me to work everyday… except when the motorcycle battery the truck came with died in the Arby’s drive-thru. My lunch got cold while I carried a series 24 battery four blocks, from the nearby Napa store. Even though my arm was so tired from carrying that battery halfway across town, that I couldn’t lift my Arby’s curly fries, it now has enough cold cranking amps that all I need to weld is jumper cables and a coat hanger.
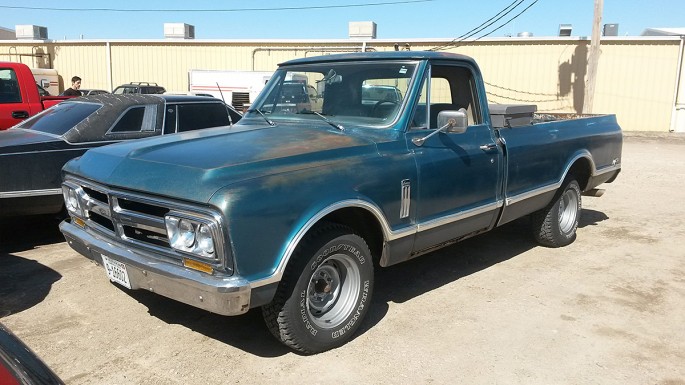
This is how the truck looked when I bought it. Look closely at the rusty wheels, you will notice the left front is different than the rest. So, is the brand of tire. It was a General, while the rest were Goodyears. Well, they were once Goodyears, now they were just Old years. Dated from fifteen years ago, weather checked, and cracked. They did ride smooth and didn’t vibrate, I sure didn’t want to road trip anywhere on them. I also had no spare. And don’t get me started on how ugly these wagon wheels are.
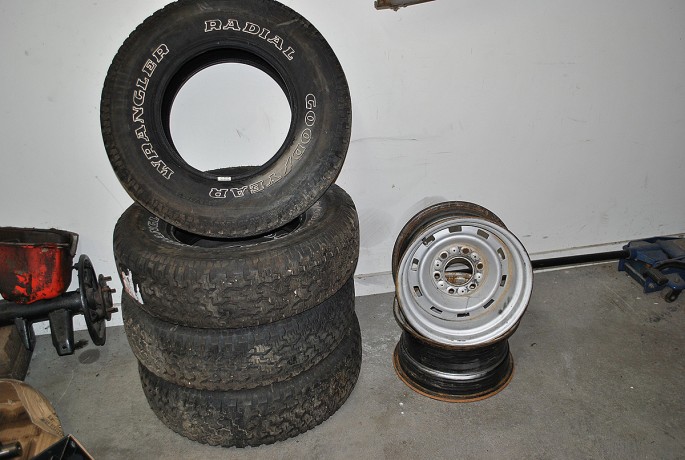
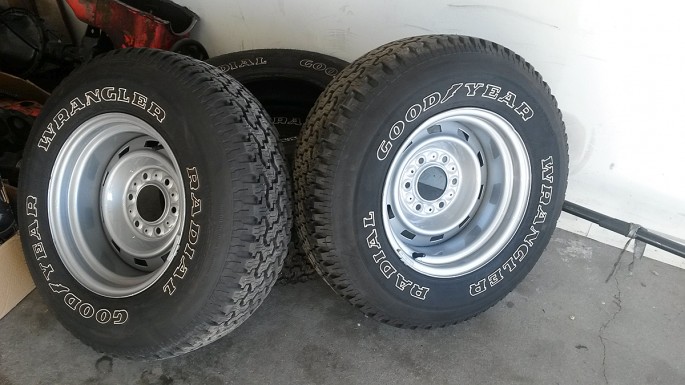
In the lobby of Andersen’s, they often have really good tire sets that come in on vehicles. I was able to get these Goodyear Wranglers, 235/75R15’s. They were on Toyota aluminum 6 lug wheels of unknown vintage. I didn’t want the wheels, but the nice thing is about Andersen’s is they will take back aluminum wheels at $10 each. The $250 for the set got knocked back to $210. I also was able to pick up a pair of 15X8 GM 6 lug rallys for $10 each. GM used these on 4×4 trucks between the late ’70’s to the late ’80’s. Now, I just needed two more.
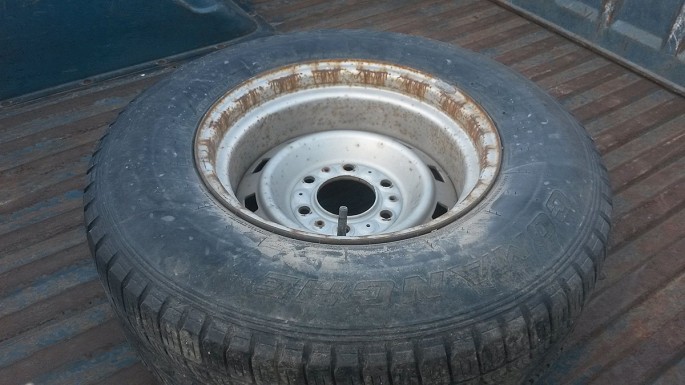
Over the next month, I was a fixture at Andersen’s. I was able to find two more rallys. This one was just lying in the middle of an aisle. The tire was good enough to become my spare when I found a good steel wheel on a ’68 GMC.
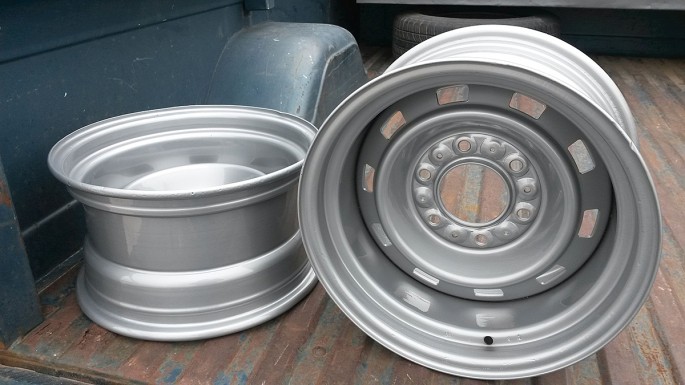
I thought about sanding and painting the wheels to make them look better, but a coworker told me about Ace Irrigation who does powder coating for a very reasonable price. He wasn’t kidding. Ace charges by the hour, but their sand blasting dude is a machine because it only cost $40 each to get the wheels coated in a silver similar to the original Argent Silver GM used. I immediately got the tires mounted and on the truck. Mounting and balancing cost another $60 at a local tire shop. Do yourself a big favor, take a sharp knife and scrape off the powder coating on the inside hub of the wheels before mounting them, or you will have one hell of a time getting them back off.
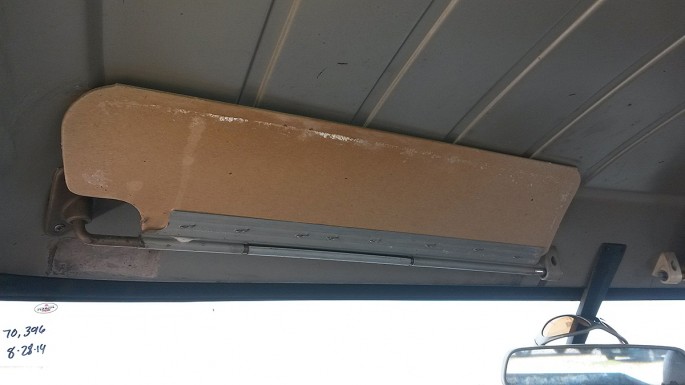
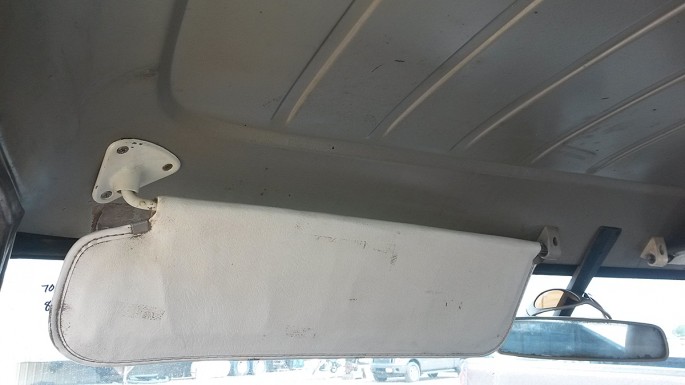
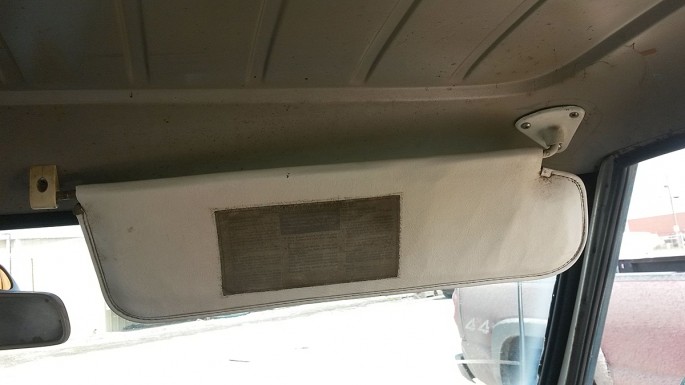
Ever put down your sun visor only to have its cover fall off in your lap? Yeah, me too. This is what is left. Not quite as useful. So, I found a nice pair at the junkyard in a ’72 C20 that appeared to be a former Department of Roads truck. They were white and didn’t match, but they worked.
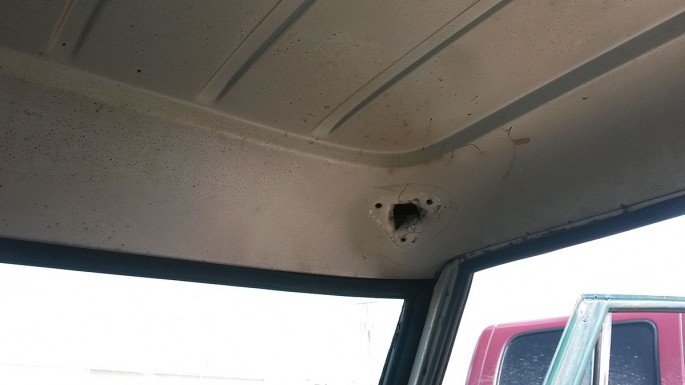
Passenger side sun visors were an option, and in 1967 that must have cost $3 bucks. Too much to spend to keep the wife from getting squinting crow’s feet. A previous owner of this truck must have added it and did this crude cut in the roof. It works. With the new visor, you can’t see the butchery. This visor has the original faded how to start your truck instructions. These two cost $10.
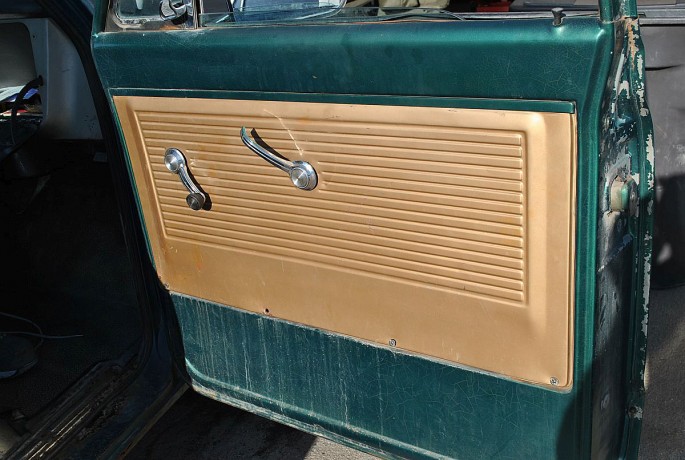
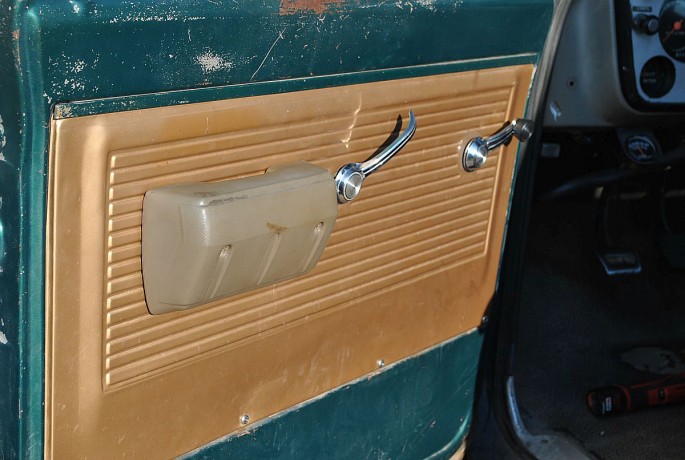
A previous owner painted the insides of the doors in a teal green that is nowhere near the exterior paint. Someone also painted the metal door panels in a completely clashing gold. Ack! Notice there are no armrests. Probably another $5 on the option list back in 1967. I spent $5 to get these wonderful turd brown armrests from a ’69 C10 to further uglify the interior. Yeesh.
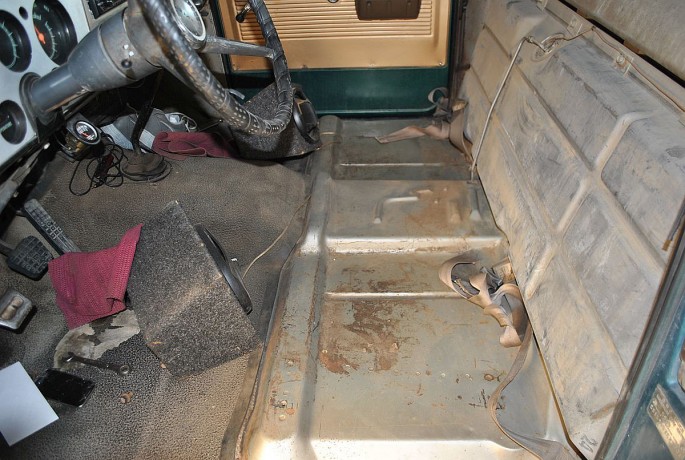
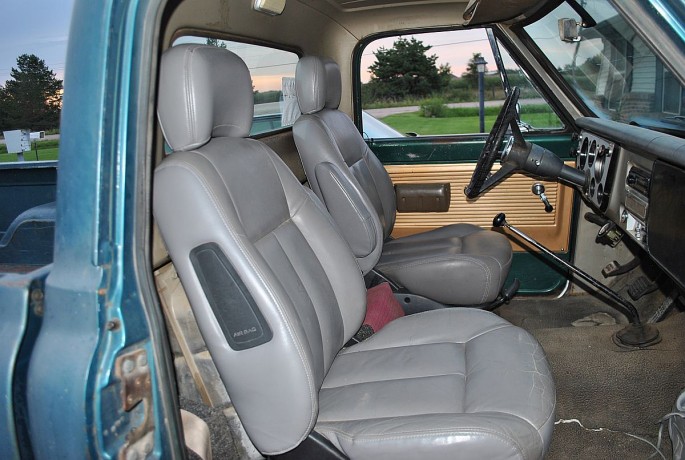
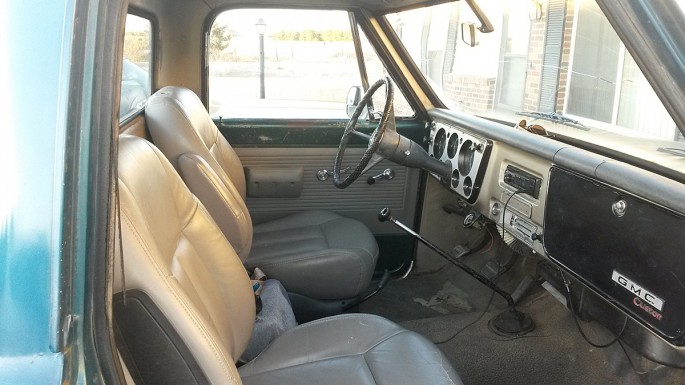
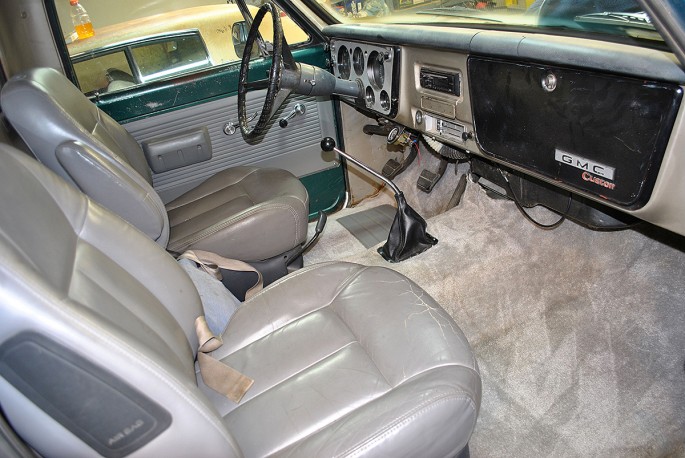
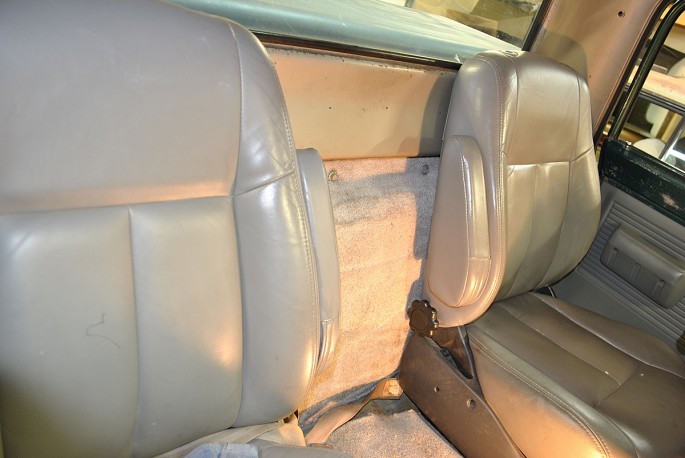
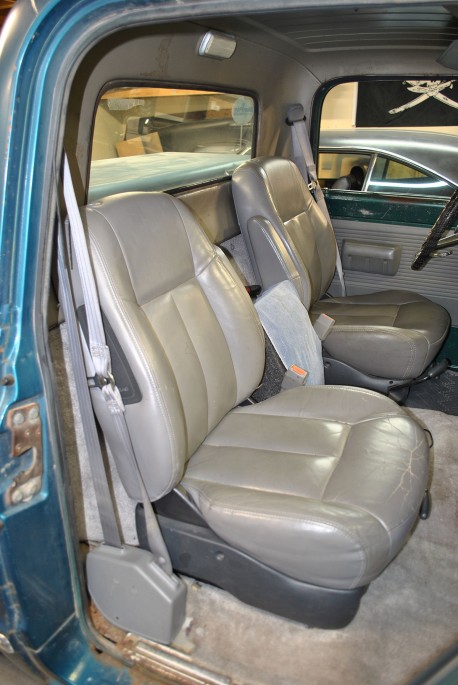
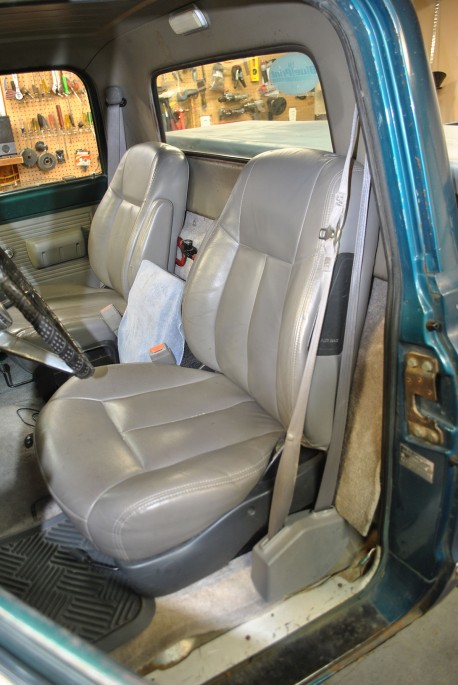
Next up, I had to get rid of that bench seat. It looked nice, but the springs were wasted. My ass was bouncing of the speaker boxes over every bump. The floor is pretty solid. I found these leather buckets from a 2000 Pontiac Montana minivan for $60. I got this idea from a friend who has all three rows from one in his ’52 Suburban. What a great idea. I got rid of the power seat tracks with their complicated wiring for a set of manual tracks from a ’99 Chevy Ventura. I swapped the tracks at the yard so it wouldn’t cost a dollar extra. So much more comfy.
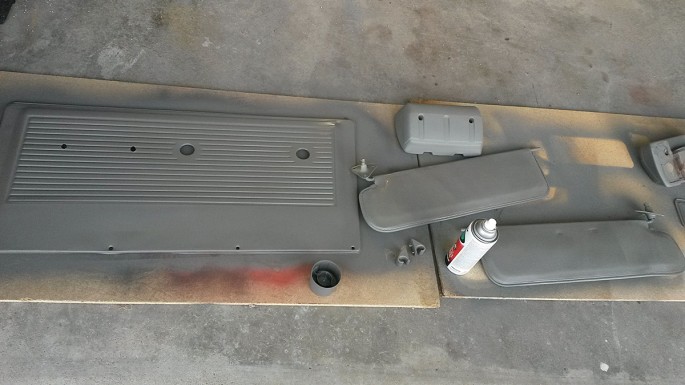
I couldn’t take the multiple color interior pieces for very long and pulled them all out to paint them in a light gray to better match the new seats. The two cans of interior paint cost $8. I didn’t like the head rests on the seats, so I cut them off. This also allowed the seats to slide back farther and give me a bit more leg room.
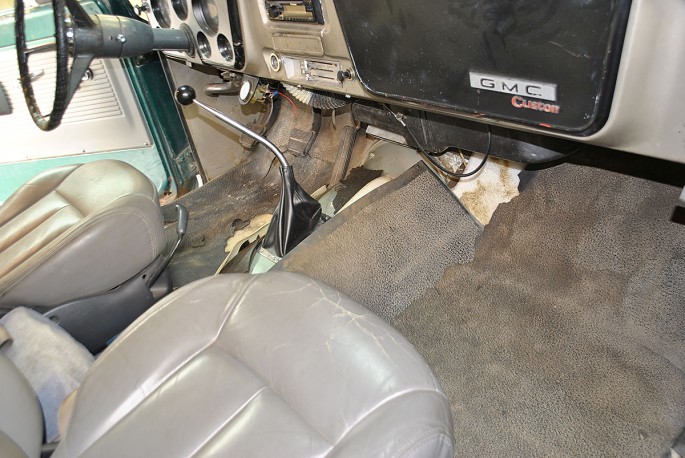
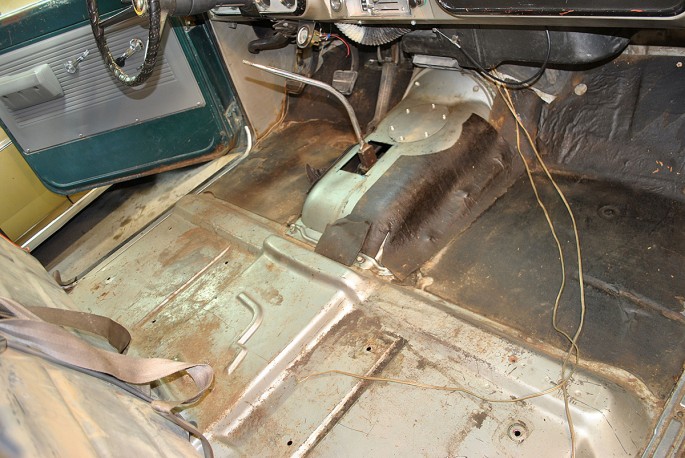
I made a mistake of trying to remove my rubber floor mat and it came apart in ten pieces. This is what it looked like. The new shifter is from a transmission change that I will cover in the next story. Out came the rubber mat and seats.
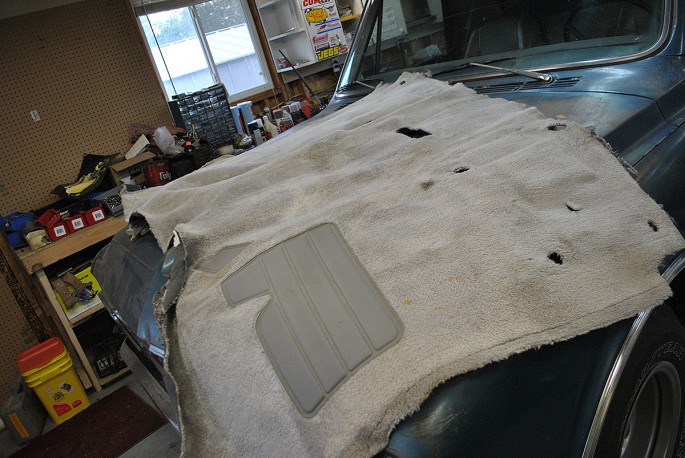
Since I needed to do some future rocker panel repairs in the future I didn’t want to spend a bunch of money on carpet right away. I found this carpet from a ’98 Suburban for $15. With another $3 spent at the wand car wash to clean it, I had super cheap carpet for the truck. It also has the thick jute backing for sound deadening and keeping the cold Nebraska winters out of the truck. The real purpose of getting this. It also brightened up the interior.
I did buy a new Lokar leather shifter boot. It was $30, but added a nice touch. The result of the interior was so much more civilized. But, I wasn’t done yet.
I went back to that same ’98 Suburban to get the piece of carpet out of the cargo area. This time it was to hide that gas tank behind the seats. This cut down on the fumes and the ugly look. I may move the gas tank to under the bed when I do the body work.
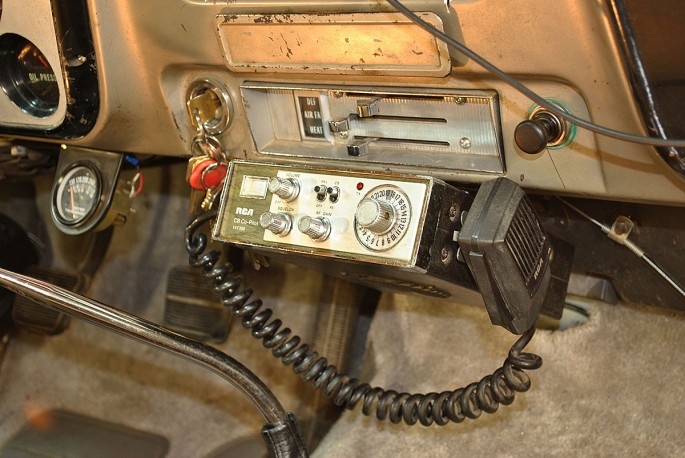
Andersen’s got a ’73 Blazer in one morning and I went straight after to it to get the center console. Unfortunately, someone got it 10 minutes after it got dropped on the ground. But, that uncultured cretin left this mint RCA Copilot CB radio. I even got the owner’s manual. So, I snatched it for $10. I got a new antenna at the local truck stop for $25. Why? If you have to ask, then you are too young to remember the ’70’s.
That same ’98 Suburban gave up its front seat belts for some added safety over the original ’67 ones that were still in the truck. The great thing about these trucks is the upper shoulder belt bolt hole is already there. All I had to do was drill a couple holes in the floor board. I used 1/2″ grade 8 bolts with giant washers to bolt them in.
This is the stock full gauge dash on my GMC. If you ordered the tachometer, it would have been in the center of the gauge cluster. They are pretty rare. You can find original ones on Ebay for about $500. No thanks. The speedo, gas gauge and oil pressure gauge worked. The amp and temp gauge didn’t.
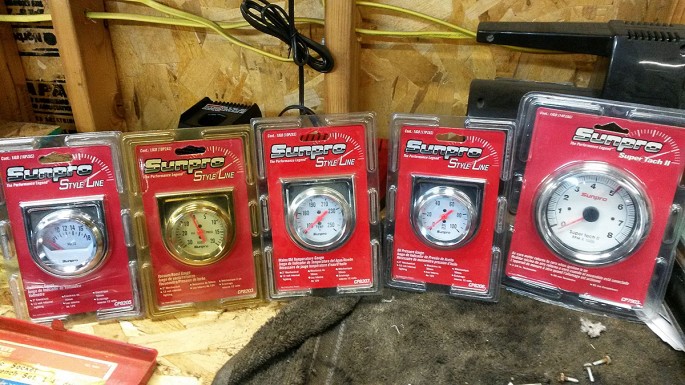
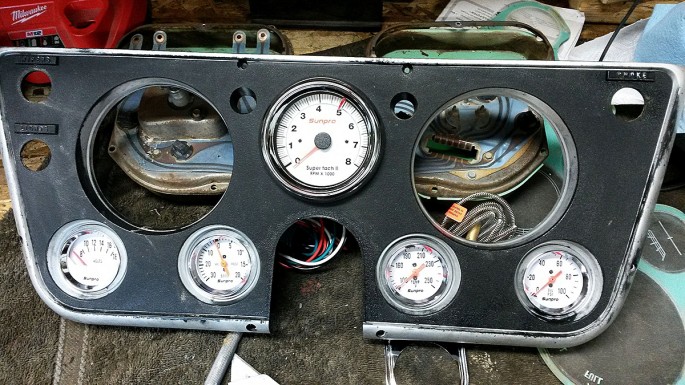
A friend told me about a super sale at Summit Racing on Sun Pro gauges. I do mean super sale. The tach was $9 and the four gauges were $3 each. Wow.
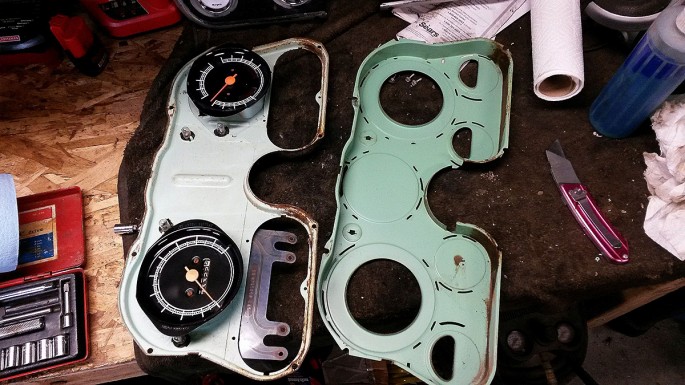
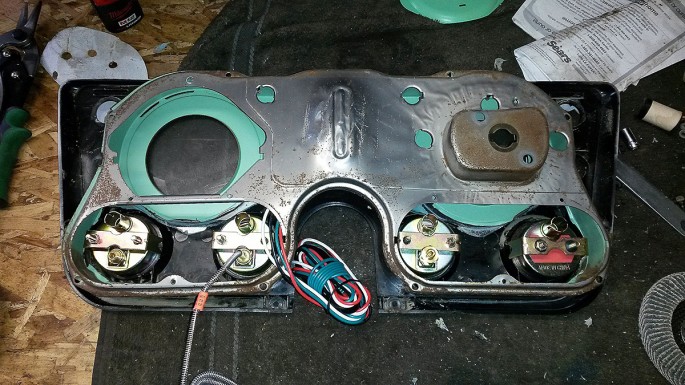
I wasn’t sure how much butchering I would have to do to make this happen. Mine was in good shape, so I got another gauge panel from a ’68 C10 at Andersen’s. These are $20. First thing I did was test fit the new gauges in the holes. I plan on using the original speedo and gas gauge.
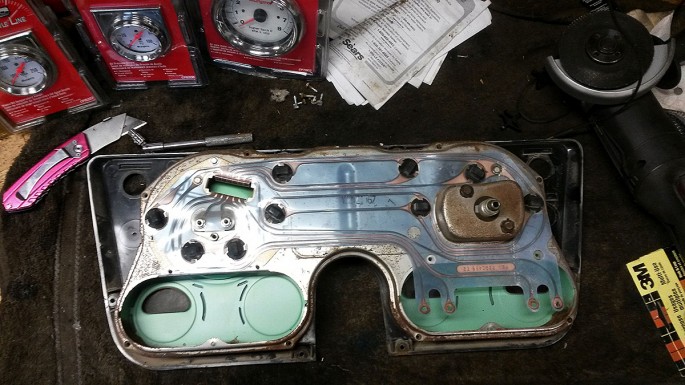
Taking apart the back of the gauge panel was simple enough.
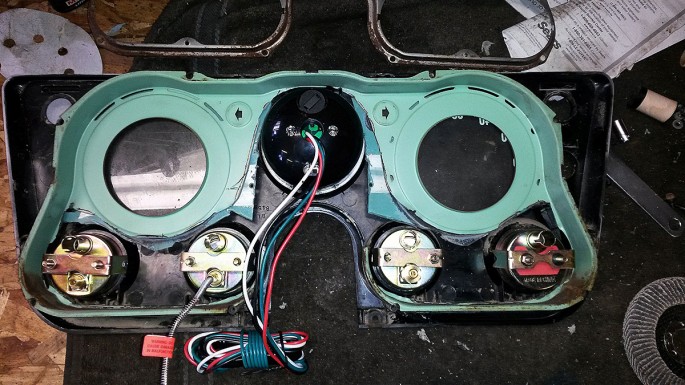
I had to cut up the back metal support structure and dent the backing plate to fit the tach.
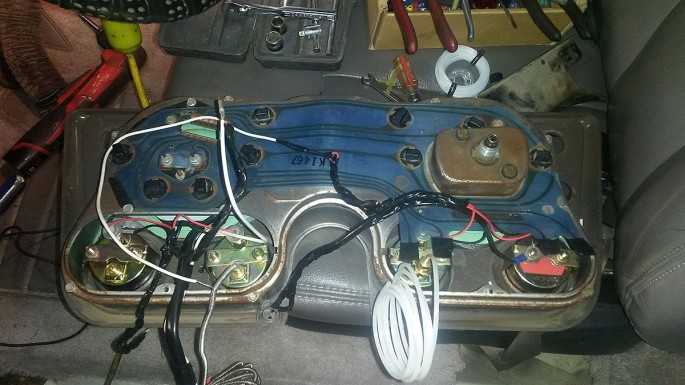
Here is the back after it was all back together and wired up. The plastic tubing is for the vacuum gauge. I used the original copper tubing for the oil pressure gauge. With the tape wiring harness and light bulbs are also back in.
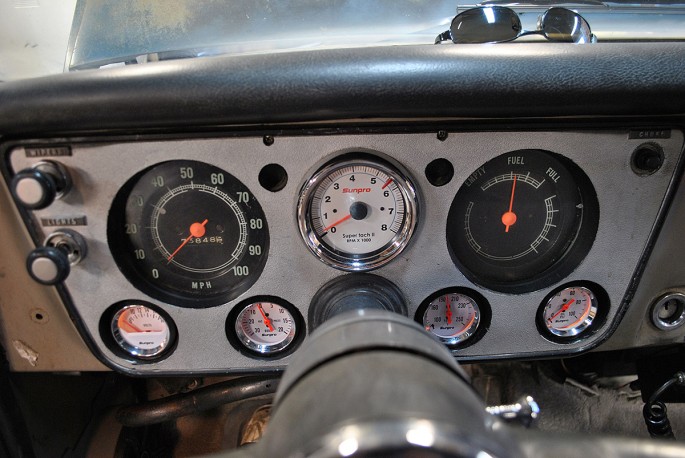
Here is the new gauge panel back in and working. The bottom row of gauges include a volt meter, a boost/vacuum gauge, water temp, and oil pressure. No, I am not adding a turbo. I wanted a fourth gauge to fill in the hole and a vacuum gauge is useful. And, it was $3.
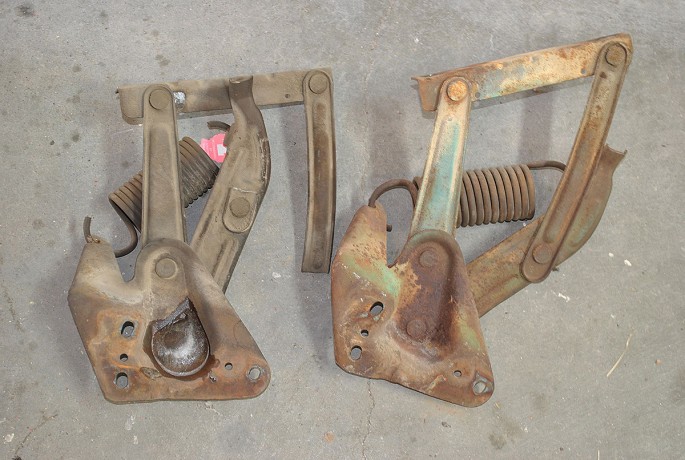
This is why I needed Andersen’s to fix a hood hinge that broke.
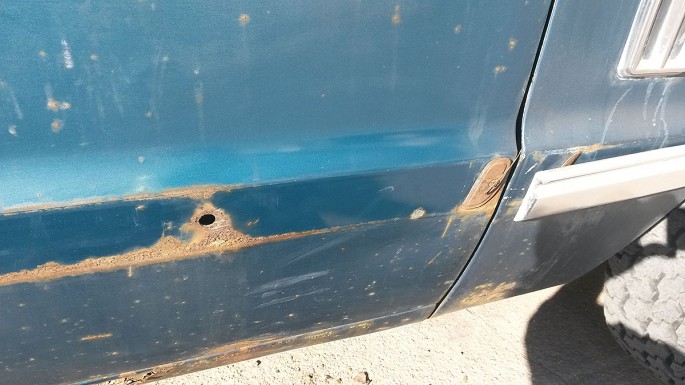
I was looking at the paint under the now missing door trim on the truck and noticed how nice the original Aqua Blue Poly looked. I got out my big bottle of 3M rubbing compound and did a little rubbing, and I was amazed how much color was still left in the patinaed paint.
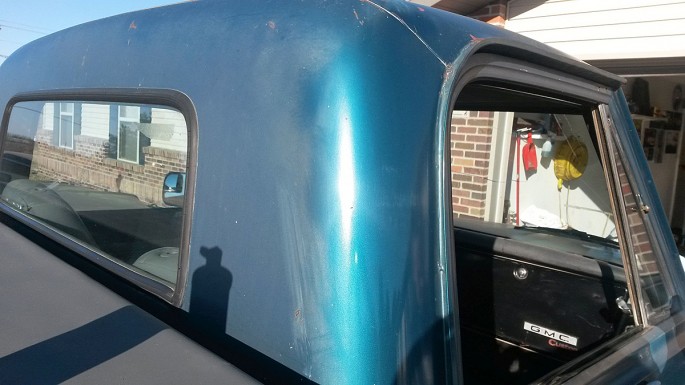
I did a little more rubbing on the C pillar and got even more color.
I turned into that kid from the karate movie and did the wax on/wax off bit and next thing I knew the truck looked a whole lot better. My buddy, Ciara, saw the fun I was having and joined in. We hand polished the paint in two evenings after work.
Lastly, Andersen’s got in a pair of ’67’s and I was able to get the missing trim pieces for the passenger door and rear of the cab.
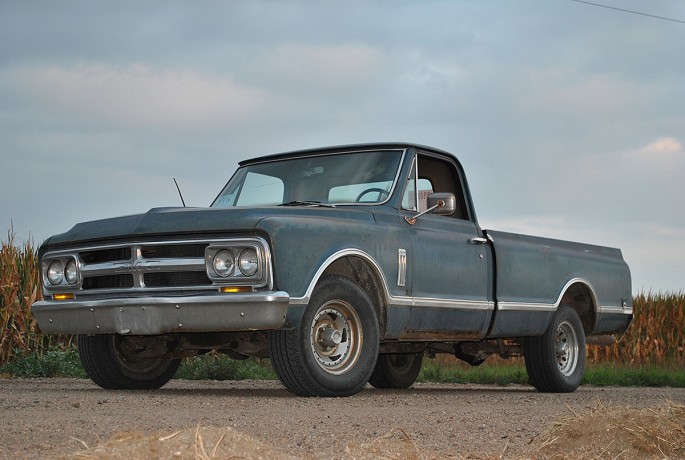
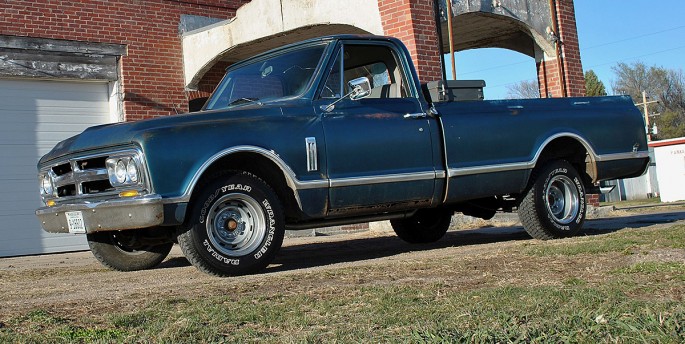
It only took four trips to Andersen’s to find a full set of trim rings that weren’t curb rashed to heck. Yesterday was so nice out, I took a nice drive up to Amherst to get these pics at an abandoned gas station.
We have other features coming in the future on the engine and drive train upgrades. Stayed tuned.








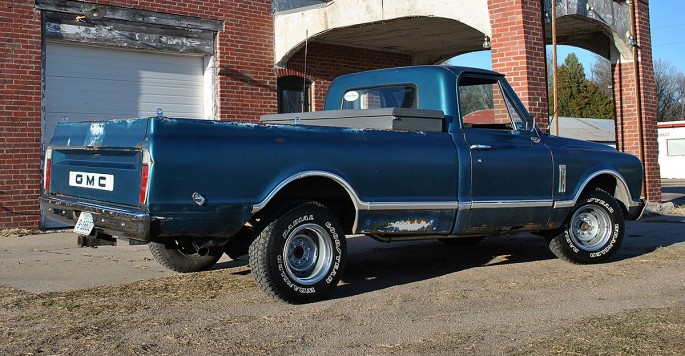


The truck is starting to look good! I like the interior upgrades. My ideal 67-72 Chevy would have a complete ’99 and up drive line swap.
I’m kind of disappointed you didn’t keep the calico interior.
These old Chevys and GMCs are great trucks. My 69 Chevy just keeps on getting it done.
Look for a light duty (7200 GVW) 88-98 3/4 Ton and nab the six lug disc brake parts, for a pretty simple brake upgrade.
That is an interesting idea.
72′ front spindles are disc as well, and definitely a step up in performance from the 4 wheel drums. A 67-72 K5 or Suburban is a nice source for a under bed fuel tank, and in bed spare tire mount.
Some longbox pickups 67-72 had an inbox spare tire carrier as well, the Suburban one is kind of a flimsy welded in thing. I’d look for the larger 27-35 gal tank from a 73-91 Blazer. The best upgrade I did on my 67-72s is swaping in the clam shell motor mounts from a 73 and up 2wd.
The disc brake ’69-72 are five lug, requiring another set of wheels.
But, I like your gas tank idea!! This era of Suburban and Blazer are rare and the yard removes all gas tanks.
Beautiful truck! I’m so jealous, getting parts for my 72′ K5 is like pulling teeth here on Oahu. I finally got a lead on some clean fenders after about 3 months. Their only $100 new, but shipping from the mainland was going to be $565.00!!!!
Did you gut the side airbags in the seats? If not I recommend you do, while a very remote chance, you don’t want them going off.
All the firing mechanisms are gone. They were under the seats in the tracks. Just the bags left.
Great read, Scott….
Nice to see a little worn truck gettin fixed cheap..its loved..it shows 🙂
time to patch the doors and replace the rockers and keep driving it
i would ditch the carb and go EFI cant go wrong with the new systems out there
I agree on the EFI. The Fitech EZstreet is about $800, list. When I swap my 88 350 for a Vortec long block, I’m going to replace the TBI with one.
Nice work!
Keep reading.
Nice Truck
love these kind of articles, keep them coming! Its like looking over someones shoulder while they fix their car – much better than the admin work I’m supposed to be doing….
These stories are great, I suggest you put links in the story to previous story so people like myself can catch up.