


Some cars are born for road trips, and some cars don’t handle it so well. This is definitely put into perspective when you see hundreds of late model muscle cars
partaking in the Hot Rod Power Tour. Modern muscle cars have plenty of power and cool factor, and they’re built to be driven long distances without any headaches. In
fact, most of them are still under warranty. In typical BangShift fashion, we want to take a car that isn’t exactly ideal for long distance road trips and make it work.
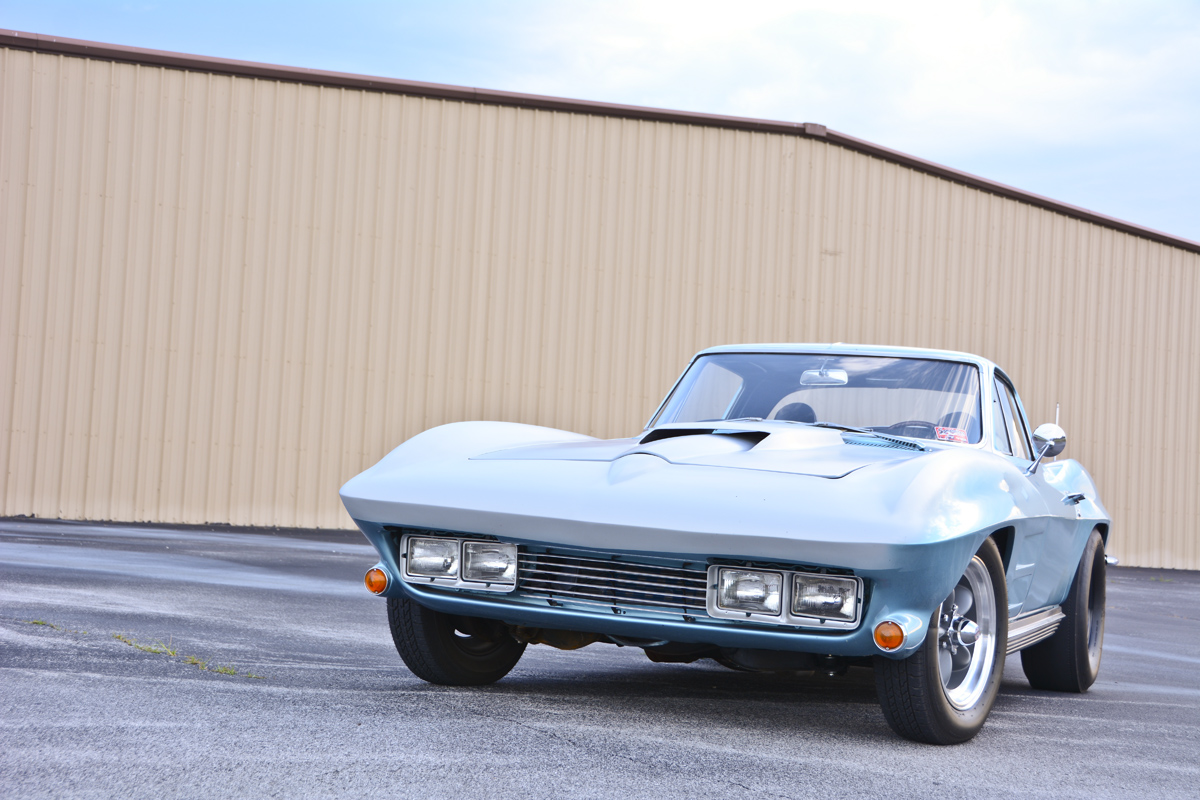
The subject, in this case, is a ’64 Corvette coupe that is a purist’s nightmare. The car has been a hot rod since the late ‘60s, and I don’t have any plans of putting it back to stock. However, I’ve limped it around for years with a cooling system that just wasn’t up to par. The car came from the factory with 4.11 gears, so it didn’t enjoy highway driving, until I swapped in a Tremec TKO-600 five-speed. That helped tremendously, but it still didn’t put the coolant temperature where I want it. I’m sure a lot of car guys can relate to my frustration, as I permanently keep one eye glued to the temperature gauge at all times when I’m driving the car. The car has a mild 350ci small block in it, so it has no reason to be running 200-plus degrees, aside from a poor cooling system. The car has plenty of other faults but we’ll get to those on another day.
The idea that inspired me to perform these upgrades is a road trip with my dad to Bowling Green, Kentucky for the Hot Rod Reunion. We always go, but we’ve never driven a hot rod (which seems like a crime), so 2014 is the year that will change. Before I could stand the thoughts of another painful road trip in the Corvette, I knew
it needed a few upgrades to make it fun. Here’s the plan:
1. Install an aluminum radiator
2. Install an aluminum water pump
3. Install a Powermaster one-wire alternator
Sounds easy, right? Well, it wasn’t exactly a walk in the park, but I’m to blame for the complications. I’m a budget guy, and I know that it doesn’t make sense that a budget guy is tinkering with a ’64 Corvette, but that’s just how it is. I didn’t want to spend a ton of money on this deal, so I went the swap meet route for the radiator. I snagged a universal aluminum radiator for $75 and felt really good about it…until I found myself hacking away at my fan shroud, radiator mounts and anything else that got in the way. I would’ve been much better off spending the money on a nice Afco direct replacement unit, but NOOOOO, I had to be cheap.
So, the radiator install took a thousand times too long, and required way too much effort. Lesson learned. Moving onto the water pump, which is essentially a four-bolt
exchange—a couple of new gaskets, a little bit of RTV and I’m on my way. Nope, not so fast. I did not realize that a Weiand short water pump for a small block Chevy
would not accept my stock double groove V-belt pulley. For an otherwise excellent product, that was mildly annoying, as the pulley wouldn’t seat against the flange without making contact with the water pump body. It pays to have buddies with great metal working tools, so I sent the pulley to work with Denny George and got it back with one less groove. I’m sure they make new pulleys that will work, but again, I’m too cheap and too impatient, so we made it work.
In addition to the cooling issues, I noticed some brittle wiring around the alternator, and that was a big concern for this road trip. The car still had an original style alternator on it, which requires an external voltage regulator. And while these charging systems are perfectly adequate, it was hard to pass up the simplicity of a Powermaster one-wire unit. This was the one part of my under-hood upgrades that didn’t give me any headaches. I bolted it in place, and connected the supplied lead cable to the positive post on my battery and it was done.
All of these upgrades will be put to the test, as my dad and I head north to Bowling Green. It’s not a ridiculously long drive (four hours each way), but we’re hoping the
new parts will make the trip a bit more enjoyable. We’ll document our trip and other members of the BangShift crew will provide plenty of coverage of the event throughout the weekend. Don’t miss the live feed!

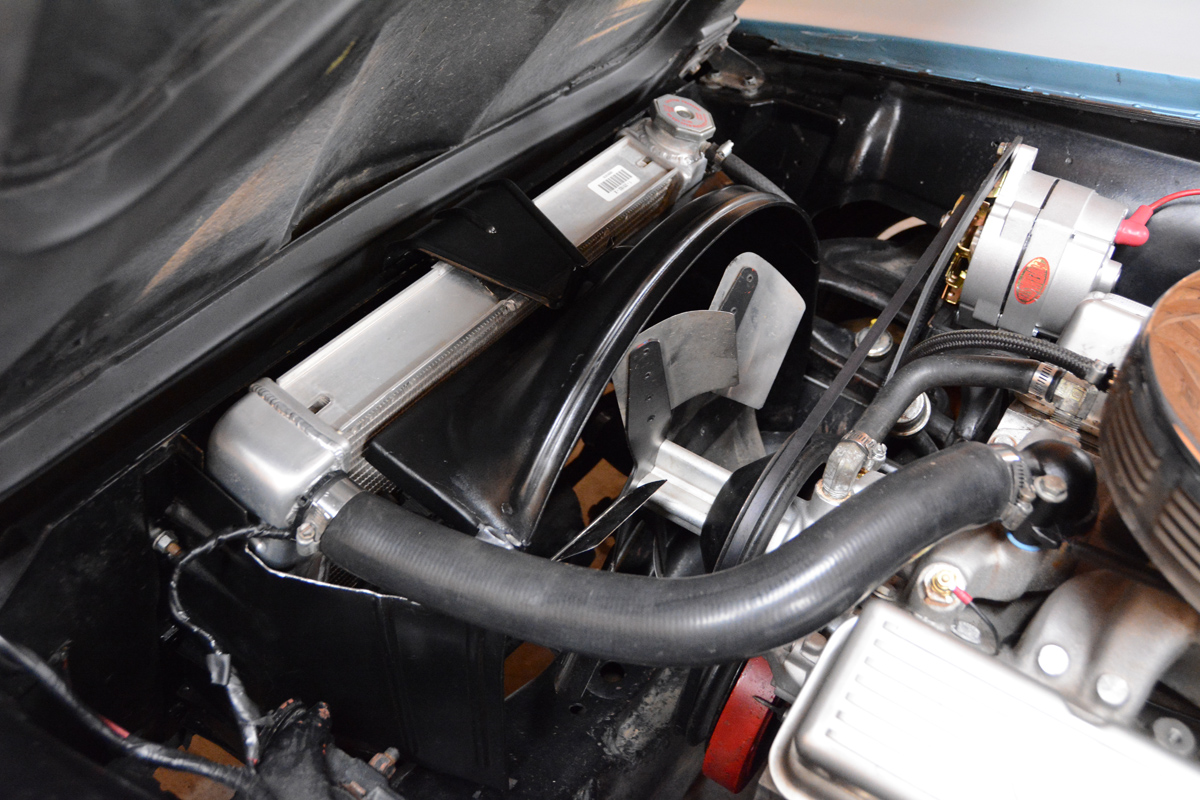
The Corvette’s engine bay isn’t nearly as sanitary as I’d like it, but we can look past that for this piece. As you can see, I’m still rocking a mechanical fan, but I do
have a tiny electric fan as a helper if I get stuck in traffic.
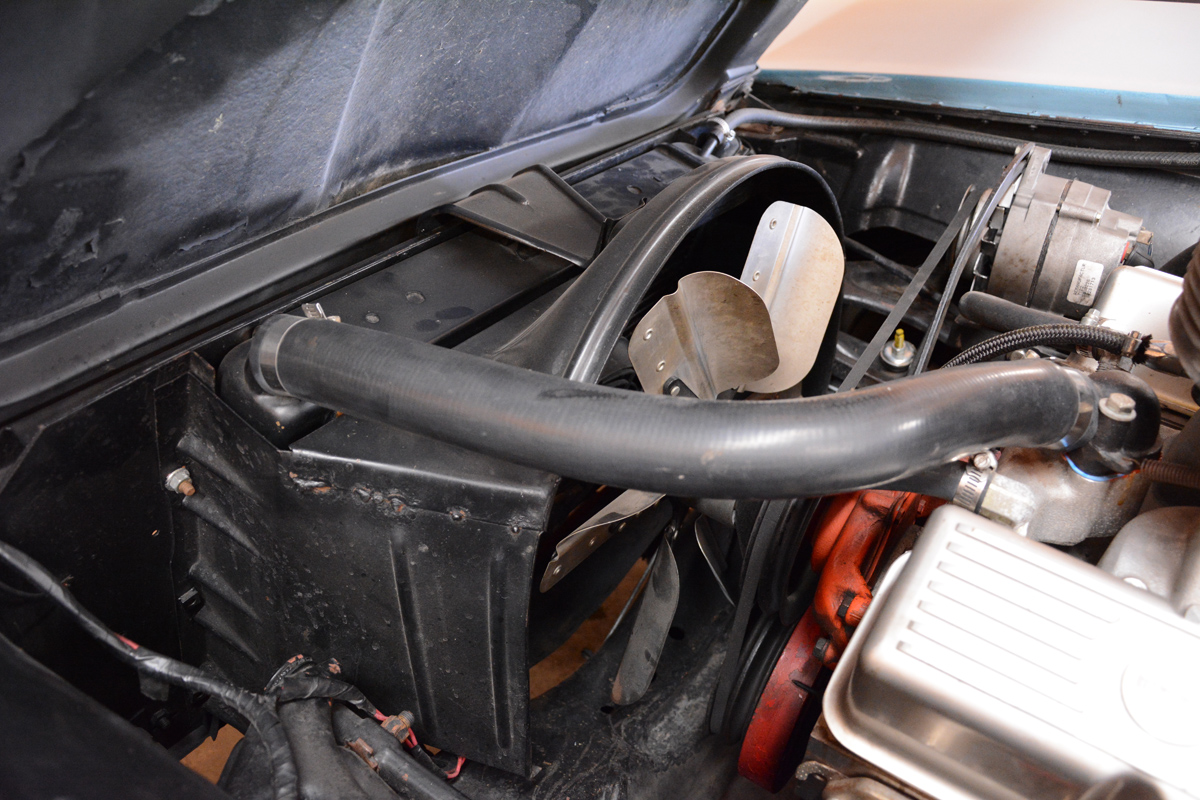
It’s important to note that the original radiator does not have a radiator cap. The system is pressurized using an expansion tank, which mounts on the passenger side.
This design is not efficient and I feel like eliminating the expansion tank all together will be the answer to my problems.
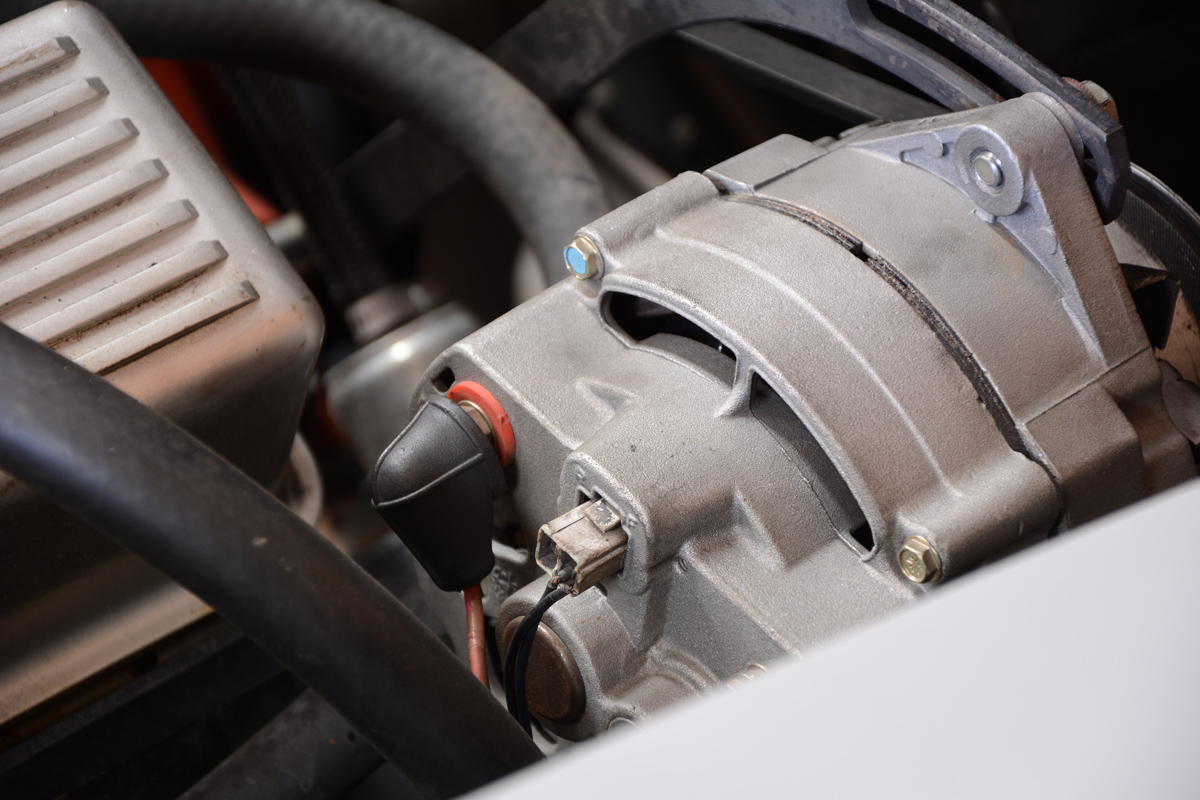
Before we start the disassembly process, you can see the deterioration of the wiring on the stock style alternator. Of course, we could’ve bought new charging system wiring, but Powermaster drives a hard bargain with its one-wire alternators.
Disassembling the car was quick and pain-free. Loosen a few clamps, drain the water and then remove a hand full of bolts—taking stuff apart is fun.
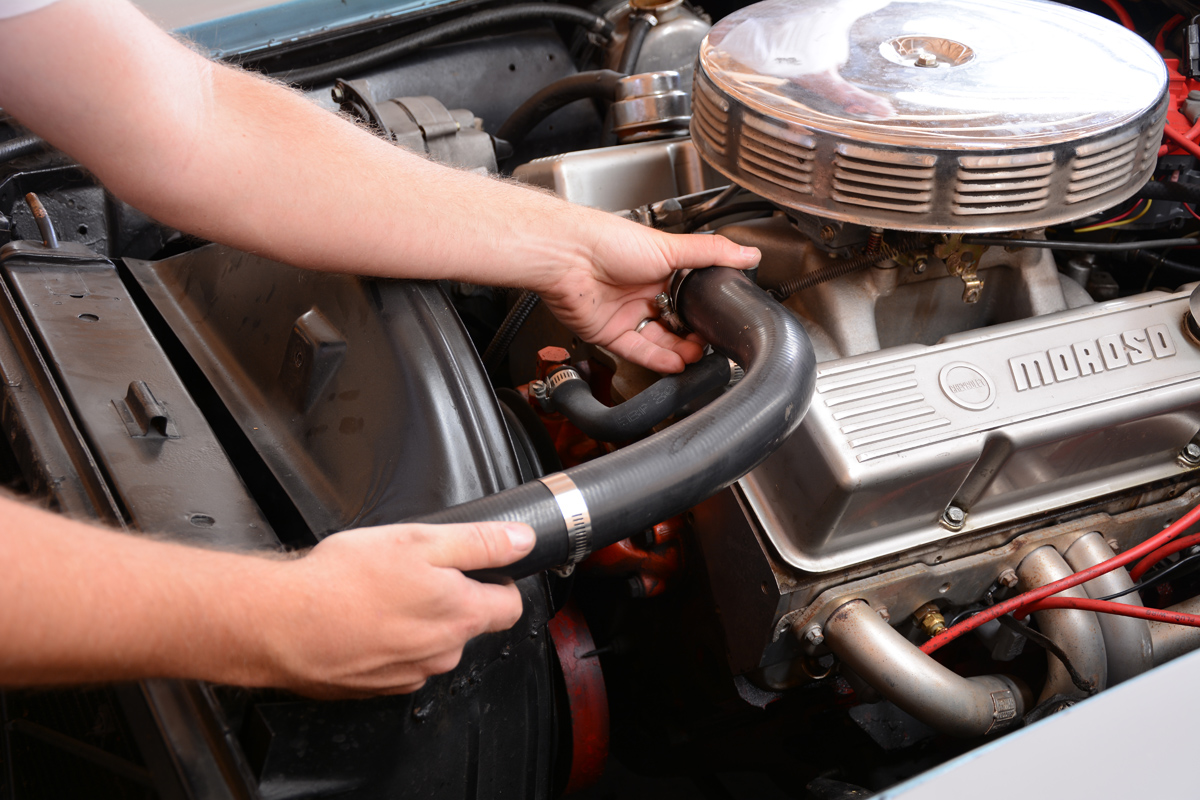
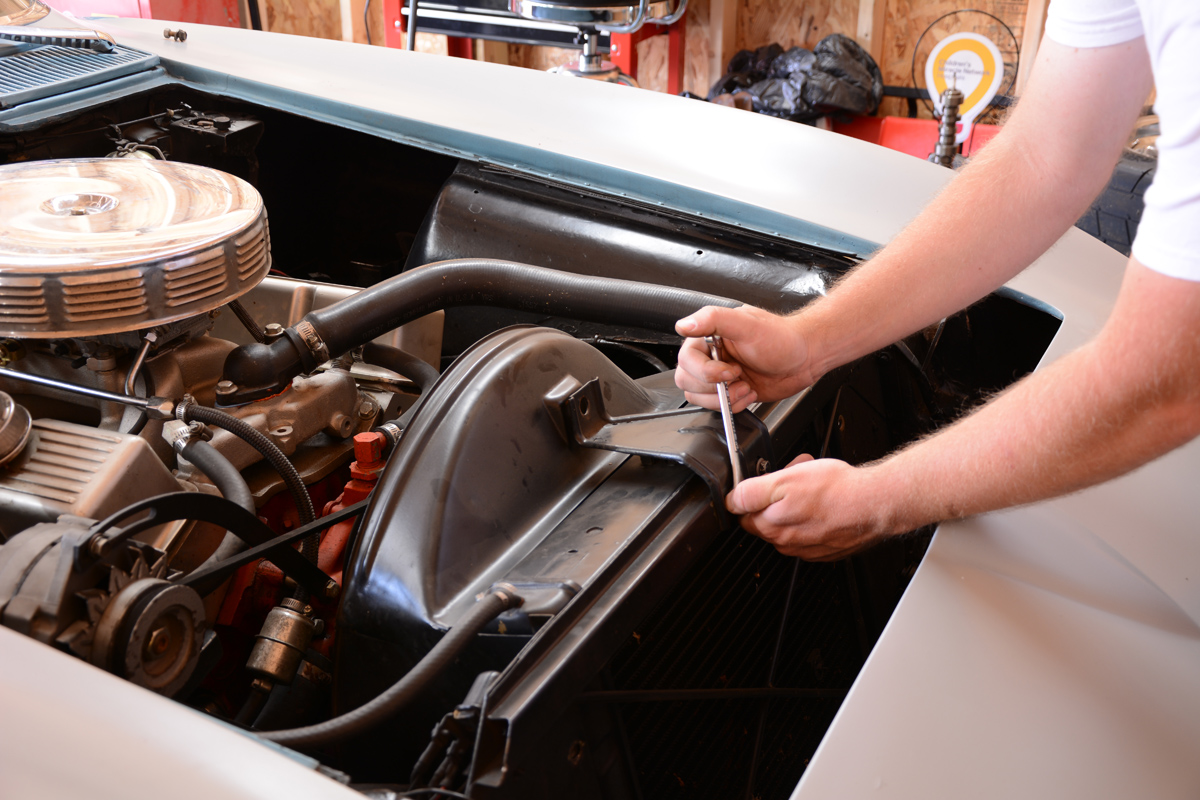
The radiator hoses will be re-used with the aluminum radiator, but I’ll have to make a few cuts to get the fitment just right. I set the hoses aside while I dealt with fabbing up radiator mounts.

And just like that, the old radiator (which had developed quite a nasty leak) is out.

The next obstacle is the original style cast iron water pump. I have no reason to believe that this water pump isn’t up to the task, but it makes perfectly good sense to put a high performance pump on it.

After removing the four bolts, I degreased the front of the engine, and then cleaned the mounting surfaces in preparation for a bit of RTV and a couple new gasket.
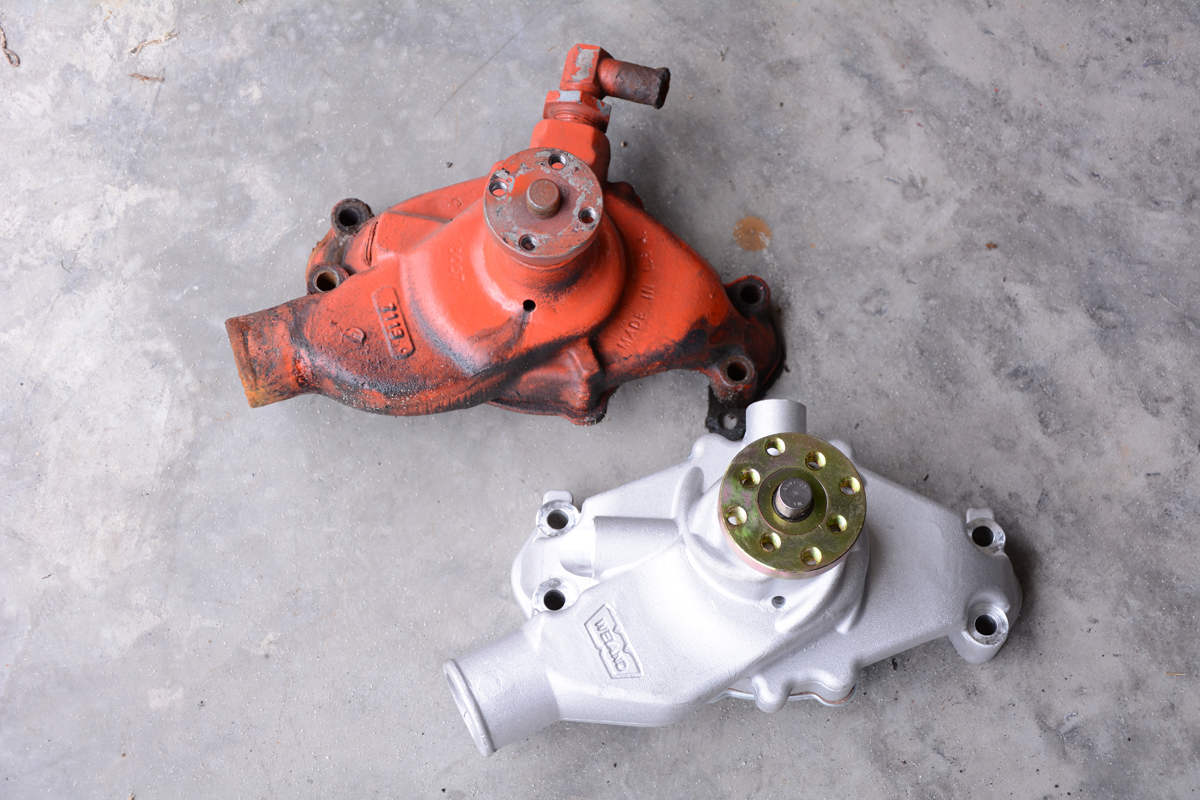
The lightweight aluminum construction, and a high volume design seems like a great move for a car that needs every cooling upgrade it can get. The Weiand pump set us back $100, but it’s a much better piece than a cast iron replacement.

Four bolts go back into the block to install the new water pump. We had to dig around the shop to find some different bolts, as the stock bolts were not the correct length.

We always use pipe sealant (as opposed to pipe tape) on our fittings. It’s never let us down, so we squeezed a bit onto all of the fittings before threading them into place. Since our car doesn’t have a heater, we’ll be plugging off one of the ports on the pump.
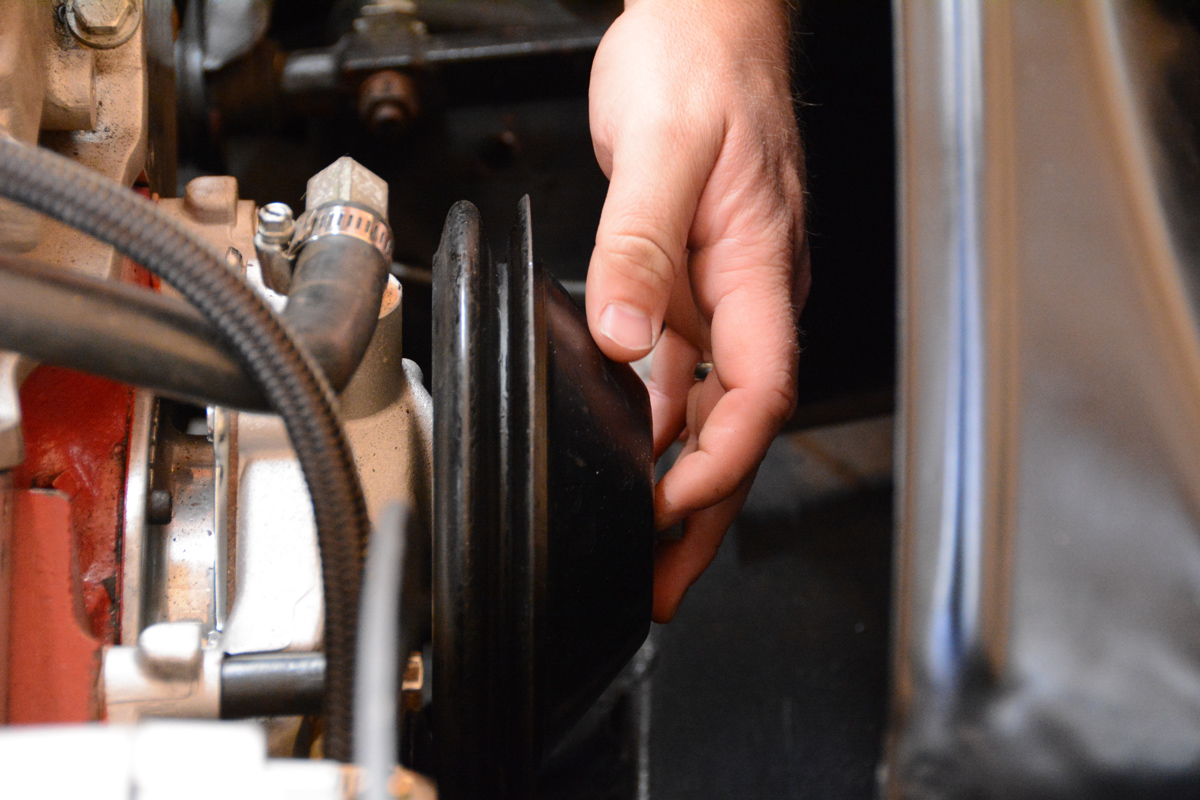
Our custom single groove pulley fits like a champ, but I feel dumb for not knowing that a standard double groove pulley wouldn’t work with this pump. Oh well, now I know.
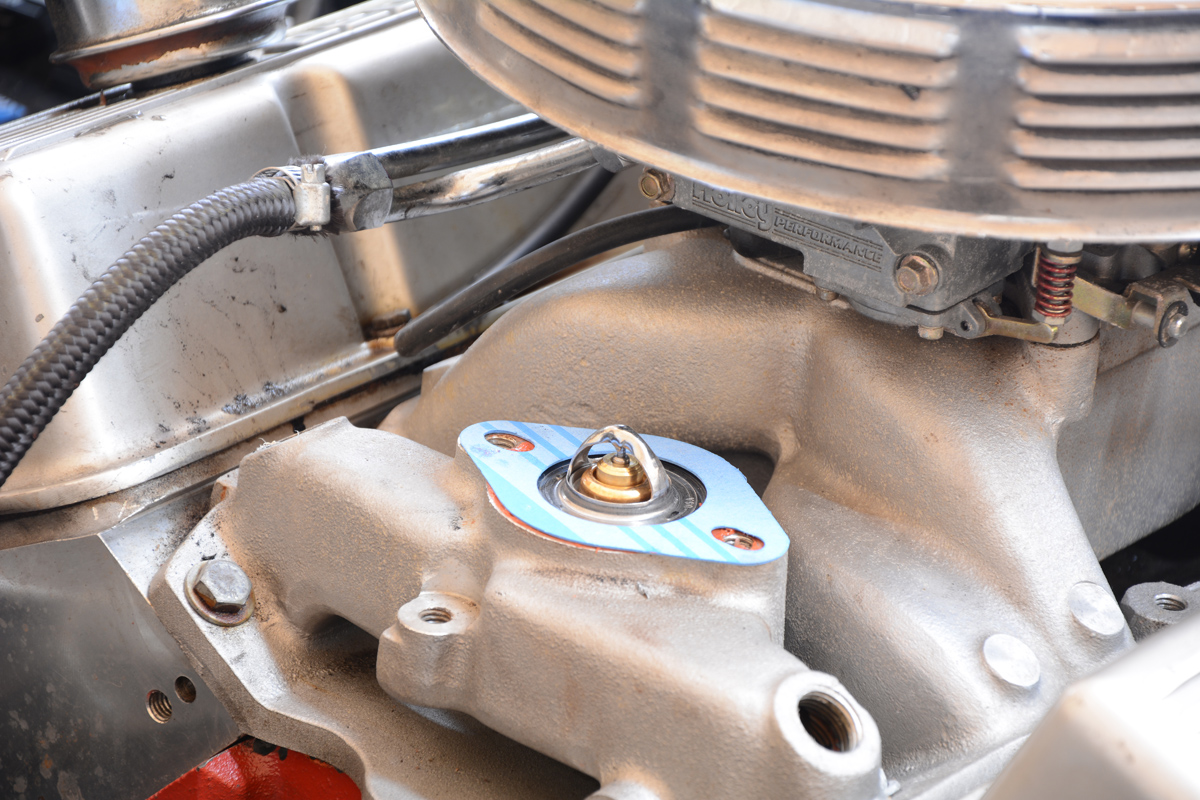
As we went back together with the cooling system, I also replaced the thermostat and installed a fresh gasket. I doubt this will have an affect on the car’s operating temperature, but it was a cheap way to know every piece of the cooling system is up to par.

After a few evenings of cutting, bending and hammering, we made the generic aluminum radiator work with the stock fan shroud and radiator support. The hose outlets are in a slightly different location than stock, so it required some improvisation to make it work.

Luckily, we were able to utilize the original upper radiator bracket, which adds support to the fan shroud in addition to holding the radiator in place. We had to hack a bit on the radiator to make it work.

The original style radiator hoses work nicely after we cut a couple inches off the end. We use worn out tin snips to cut our radiator hoses, and it works great. We used the hose scraps as isolators for any place the radiator comes in contact with a metal surface.
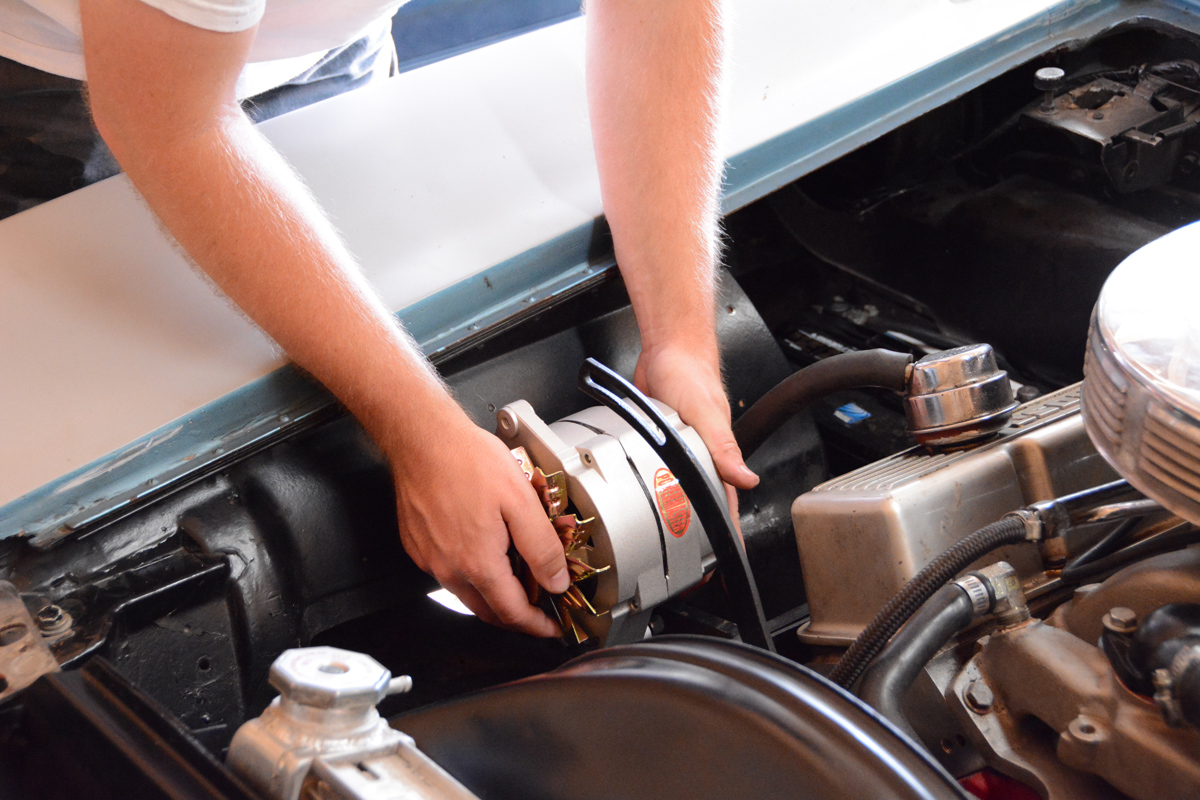
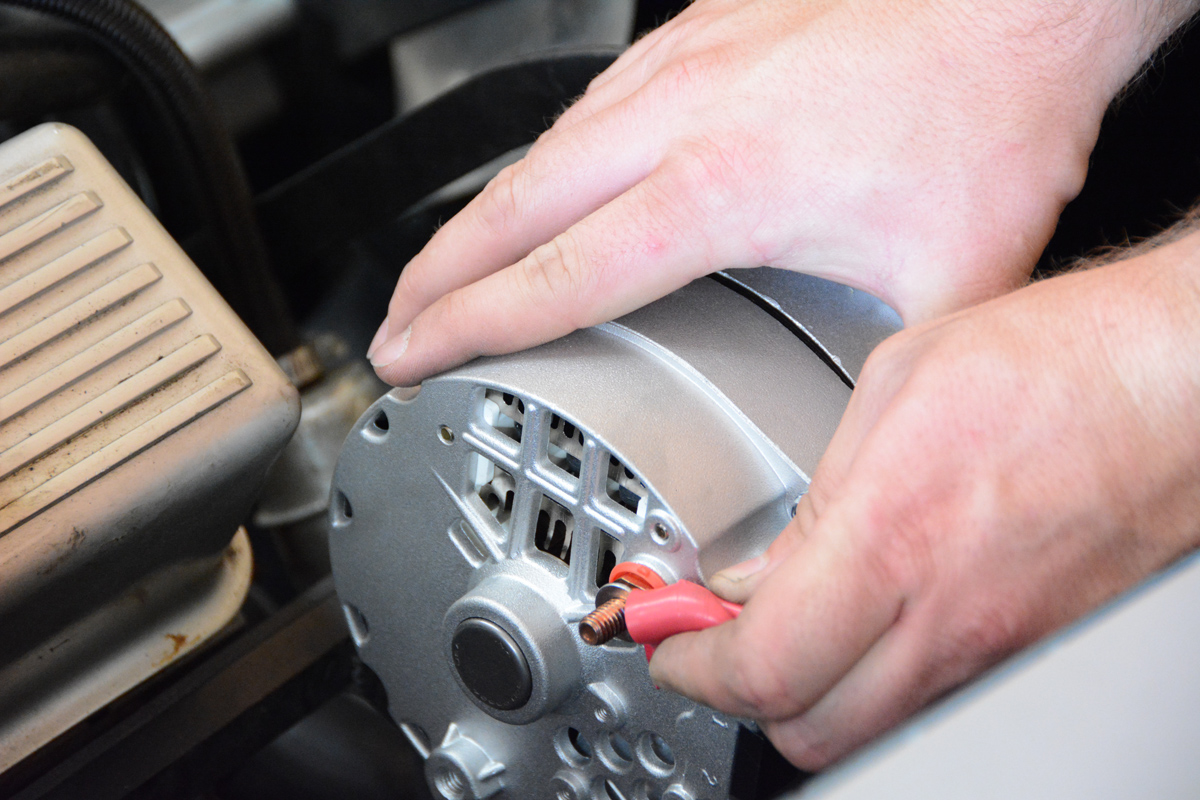
The Powermaster one-wire alternator swap was by far the easiest part of the process, as it bolted in place of the stock unit without a hassle. 18-Powermaster supplied the heavy-duty lead cable that runs from the positive side of the battery to the single terminal on the alternator. It doesn’t get much easier than this.
The finished product isn’t amazing, but it works. I hot-lapped this thing around town as an easy test on Wednesday night, and then made my 80-mile round-trip commute to work on Thursday. No matter how hard I drove it, the temp gauge stayed on 180.
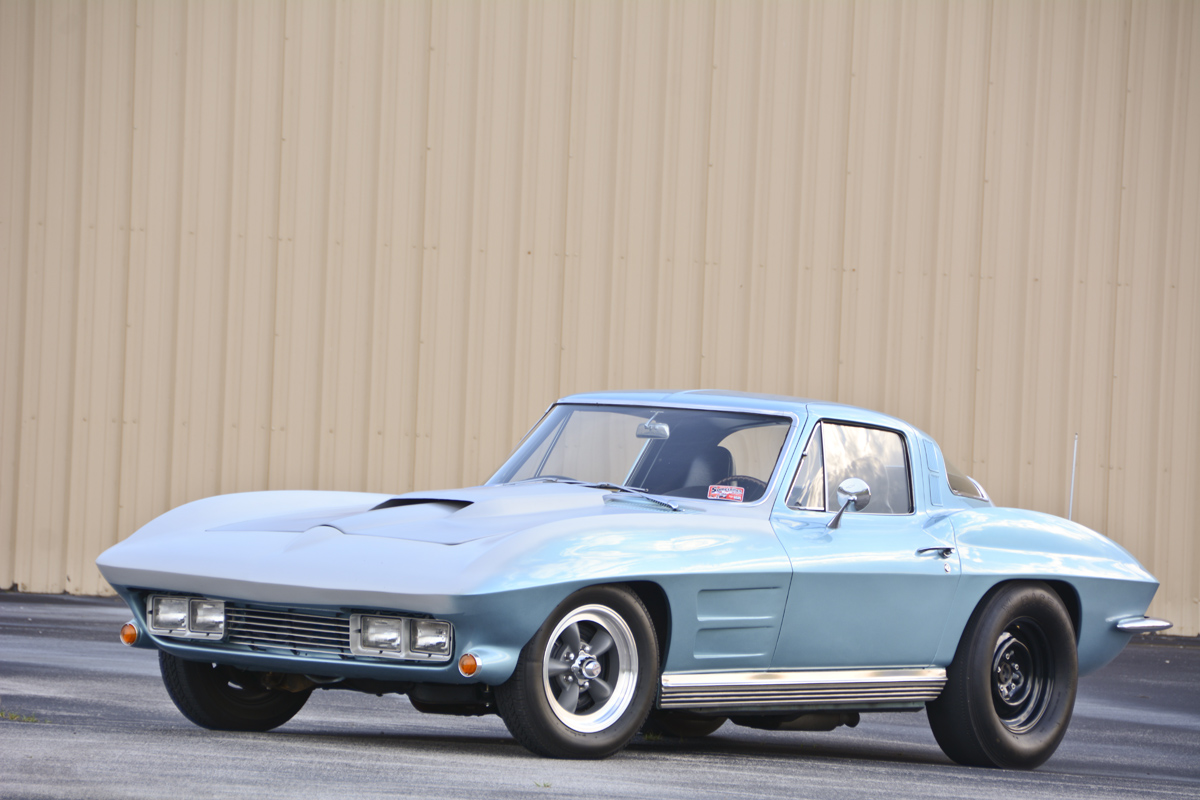
This is the Corvette’s first trip to Bowling Green for the Hot Rod Reunion. I get a lot of head scratchers when it comes to my tire and wheel combo, but I think the car
will blend in nicely.


