That was just a monumental screw-up. Having always had a mechanical mind I can't figure out how anyone could NOT understand how a Bulldog works - that's what I have on my car trailer. But I guess not everyone sees the world as I do. Either way, I know you'll make it better than new.
Some progress from this past weekend.... trimming the painted aluminum panel prior to bending the long folds
Installed.....
Added new hooks on the safety chains
....new wiring harness,
....fabricated a new handle and used a bicycle grip, replacing the duct tape repaired original....
Roof seams were sealed using mesh to help make the repairs more permanent..
All ready for some keg action.. Painted panel was owner supplied, he had ordered it to make an outfield sign at a local ball field, re-purposed it to get the keg trailer back in one piece for a large wedding this coming weekend.
Shit, you aint lived til you attended a Western Pa wedding. Normally held in a volunteer fire department hall, a VFW or some such venue...beer trailer and more cammo that the 1st infantry division...
If you can leave two black stripes from the exit of one corner to the braking zone of the next, you have enough horsepower. - Mark Donohue
Well I think I have google images figured out now, so lets try an update on the wagon.
With the back seat rear enclosure and it's frame both sprayed in epoxy, time to assemble the two together. I didn't want to use hardware/rivets on the skin as I thought it would stay flatter under the upholstery without. Also, with the amp and bass speaker inside the enclosure, we needed something to limit vibration of the adjacent pieces. Our choice is to use some body molding adhesive tape to join the two together.
The tape is applied to the frame, and then the skin attached on top of that..
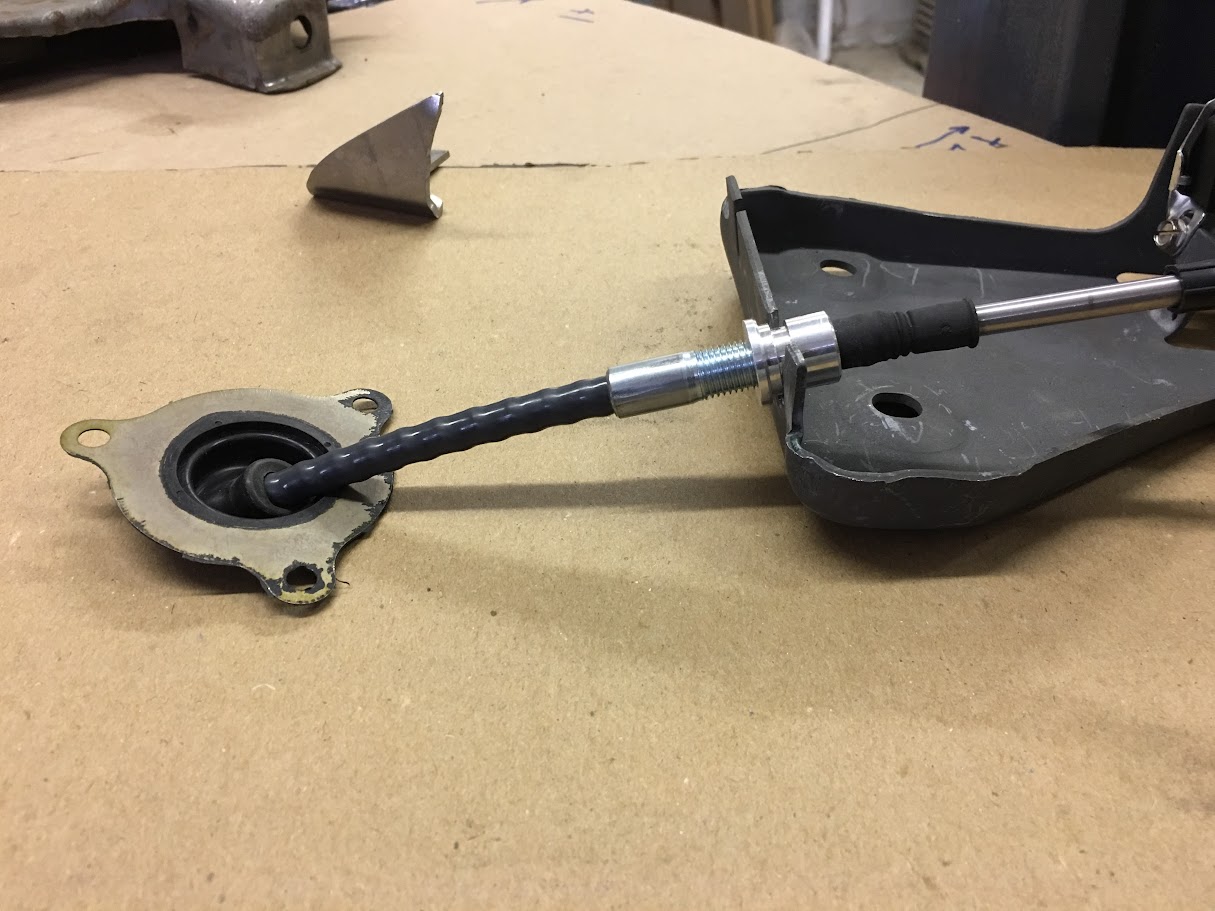
Next, we need to work on our console and the shifter inside of it. We have the console that came with the 2002 Monte Carlo interior, but it has far too much plastic that it didn't belong. In looking at other options, we decided on the horse shoe shifter used on the Chevelle. In conducting a test fit of the cable, we found it's trajectory path was much too straight where it either lifted the front of the shifter, or pulled the bulkhead fitting out of the "tunnel" mockup.
Shifter per kit either lifts front of shifter or bulkhead fitting won't lay flat..
Our solution was to raise the cable exit from the shifter housing higher in order to have a better arc of the cable for entry through the floor. Here a "relocation bracket" has been added:
Bracket all welded in place, looks like this will work for our shifter, return policy officially void now, but cable path fits much better through the floor:
bracket welded in place, cable arc allows shifter and bulkhead fitting to lay flat.. Much better..
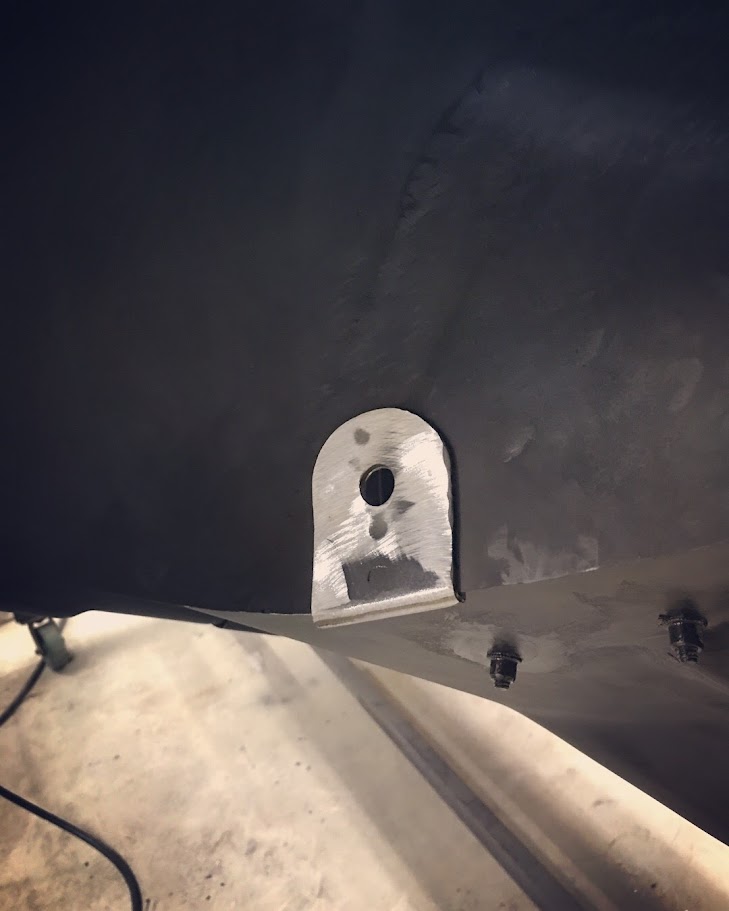
We also needed to finalize seat belts for the rear seats. These are 12 gauge CRS pieces that are plug welded to the floor pan, 1/2" diameter bolt holding the anchor points for inner seat belts.
The outer belts needed to be all the way out to the wheel well, and to better "anchor" we made similar 12 ga brackets, this one with a hemmed end to "hook" the pinch weld seam of the floor pan/wheel well, then plug welded in place to the wheel well. Again, a 1/2" bolt will anchor the seat belt:
While Mike and Jake started the layout of the console.........
......I fabbed up some bucket seat brackets out of 16 ga CRS for a 37 Ford. These had to be 3" high and only 1-1/2" wide, which was too high for my gooseneck die in the press brake. Chose to make them in two pieces and fusion tacked together using the TIG.
some color spray outs for deciding on a color. 1) Corvette Lime Rock Green2) Land Rover Kosrae Green3) Audi Azores Green4) H/K Organic Green Kandy BasecoatW...
Will take another video tomorrow in the Sunlight for the true test.
Color 1: Corvette Limerock Green
Color 2: Land Rover Kosrae Green
Color 3: Audi Azores Green
Color 4: H/K Organic Green Kandy Basecoat
1) Corvette Limerock Green2) Landrover Kosrae Green3) Audi Azores Green4) H/K Organic Green KBC
Didn't get pictures in overcast, but these help to show, 1-3 don't show color well at all in overcast or dim/indirect light conditions. As we'd like the car to look green regardless, we're leaning toward the H/K
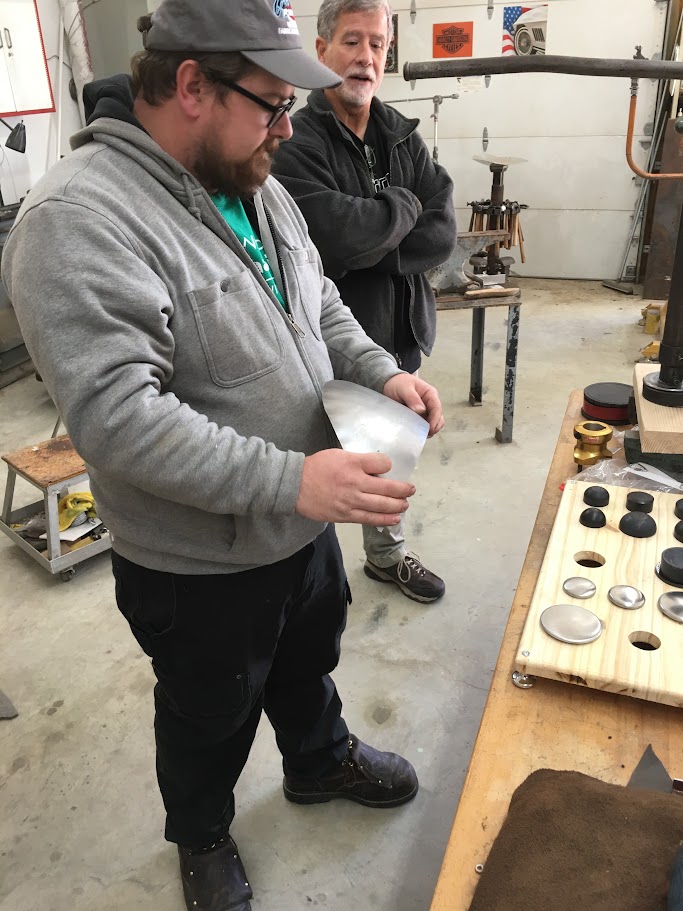
We took a short break from the wagon as we were getting set up for a metalshaping class at the shop a couple weeks ago. Here's some highlights..
Our guest instructor this year was Pat Brubaker of Custom Rides in Hastings Nebraska. We focused on minimal tools this year. A largely forgotten tool that is (was) seen in many shops is the arbor press. Pat has developed a die set to use in the arbor press that makes it an invaluable tool to have in your metalshaping arsenal.
This video shows tuck shrinking, much the same as using the stump, but here using less impact for less stress added to the panel..
Using the arbor press and a selection of dies from Pat Brubaker to remove a dent from a 2002 front fender
It did a good job of removing the majority of the damage, and more importantly, without adding any more stretch. Minimal work at this point would have this ready for paint.
We also discussed various pattern techniques, and the benefits realized with each one. One of the class participants, Laser with a Z, had brought a 1961 Impala front valance to duplicate, as it had many rust issues.
Some of the rust issues were filled with clay in order to get a more accurate pattern.
Flexible shape patterns show better the amount of shape in the panel, and paper patterns were used to get an accurate read on panel material size.
The replacement panel was made in two pieces and welded together. Laser did a nice job of welding, note the consistent width in the HAZ for minimal distortion..
Jake's project for the class was a replacement for our practice fan shroud from last month.. The rear edge was unfinished, so we aimed to fix that, and also make it out of aluminum to better match the radiator.
To finish off the rear edge, we chose to add a bead to the edge and a hemmed flange to close it off, keeping the hem flat so as not to interfere with the fan.
The beads were added, flanges tipped to attach to the baffle panel, and the linear stretch dies in the Lennox used to stretch the correct outer radius.
We attempted various welding methods to attach the shroud to the baffle plates. The spot welder lacked the balls to make the welds, and TIG spot welds or weld passes seemed to add more distortion to our practice pieces than the precise circle we had rolled would tolerate. So we used some stainless hardware and nylock nuts to hold the parts together..
Adapter that allows you to safely cut crowned panels on your band saw. A tip generously shared with me by Dan Pate.
Charlie has been to our class three years in a row, and he is a pretty sharp cookie. Like some of us and getting older, he has the unfortunate issue of arthritis in his hands, and finds difficulty in using hand snips. In much the same fashion as the Beverly shears, Charlie modified a pair of right angle Midwest shears to use a handle for easier operation..
 Tweet
Tweet


Comment