


Welcome to Bangshift Goes Racing! This is a multi-part series that gives a look into choosing, building, and racing a car on the cheap. Here, you’ll see the misadventures of my friends and I as we go through the process of taking a cheap car and transforming it into a race car with the eventual goal of racing in the “Trifecta of Crap”, which consists of the now-defunct BABE Rally, the 24 Hours of Lemons, and the Grassroots Motorsports $20xx Challenge. This second installment will cover converting our 1976 Datsun 280Z from street duty into a working race car.
In our last installment of this series, we covered choosing a cheap, sporty car and resurrecting it from it’s former life as a lawn ornament in Maine. It not only was saved from that fate, but it also successfully traversed the United States mere days after getting it somewhat sorted in the now-defunct BABE Rally. After the trip to New Orleans and back, Greg used the car to commute to work and even do weekend runs to the local landfill while his truck was down for the count, filling the hatch up with trash bags!

Yes, trash bags.
A little while after that, we figured that we should start transforming the car into less of a dump runner and more of an actual, functional race car.
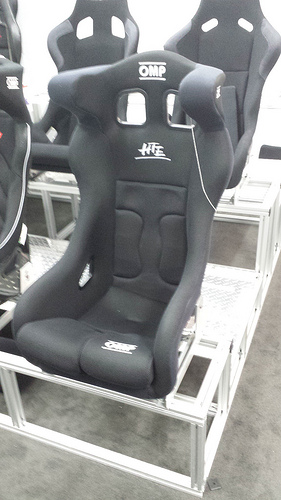
First thing’s first: we needed a place to sit and be safe on track. The stock, flat Z seats would not do, so we picked up a nice racing seat from OMP. Since the seats are considered safety items in the Lemons rules, we opted to get something that would be comfortable enough for endurance racing and be safer than a $20 “Craigslist Special” in case something happened. SFI-certified seats are preferred.
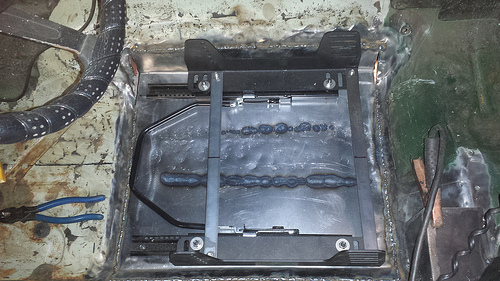
One of the problems with the earlier Z cars is that the seat mounting area is pretty narrow. This makes it tough to run aftermarket seats without lots of modification. While we wouldn’t think of cutting up a pristine 1970 240Z, this 1976 model had plenty of rust, so we cut into the transmission tunnel and created a new seat brace and mount for the race seat. We also felt better about bolting that race seat to fresh steel rather than Frankensteining the thing onto a rusty chunk of floor.

Next order of business was welding in a roll cage. We ordered a Lemons-spec cage kit from Roll Cage Components (www.rollcagecomponents.com) and had to figure out how to get it from looking like a pile of metal fence posts to a Lemons-legal cage. Also, if you think that seat bracket mount was a tricky install, consider that we had to fit all of this stuff in the tiny cabin of the Z and still have a place to sit. We had no idea what we were in for. Did I mention that none of us had ever welded in a cage before?

After measuring, notching tubing, and welding for hours, the cage began to take shape inside the Z’s cabin. The halo bar (the one that goes around the perimeter of the roof) is a real pain to weld in there in position, so we grabbed some ratchet straps and moved it around until it was in the right position. The big yellow strap is holding the two down bars together in position so they can be welded in place. They tend to want to spit out the side of the car until they are welded in.

After getting a rough idea of where everything was going to be, we did some driver test fitting with all of our drivers. All of the drivers took turns sitting in the seat to see if they hit the roof. Greg was able to wedge that block of wood between his head and the roof. Great success!

While we were trying to weld the cage in, we noticed that the passenger side floor brace was atrociously rotted. Seriously, this is BAD. Again, this is why this car was a good candidate to cut up.

We had to fabricate a new floor brace on the passenger side to replace that rotted mess. It goes from the firewall to the rear floor, and we cut out the bad section of floor above it to access it.
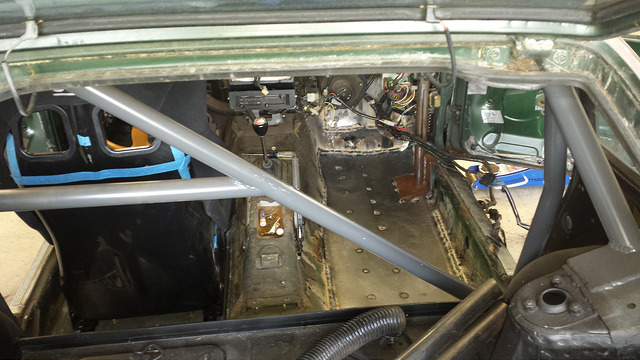
You can see from this angle the result of the floor repairs. Since no one was ever going to be riding shotgun in the car on track, we welded in a simple flat steel floor.

Here are the door bars we welded in. To make the doors shut, we gutted a set of spare doors we had for the car. They make getting in and out a bit tricky, but they are not only required because they will keep you safe in case something happens on track.

We welded these sturdy pads onto the rear shock towers to provide a solid spot for the cage to mount. Not only is this required for all mounting points, it’s better than trusting the flimsy 1970’s steel the rest of the car was made of.
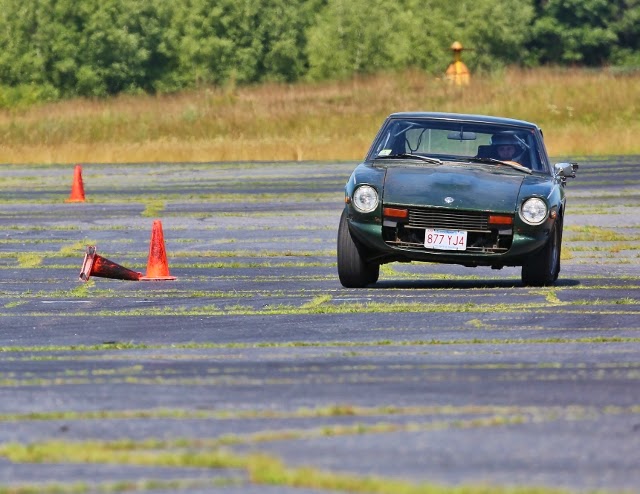
Eventually, we finished the cage install, and dragged the Z to a local autocross event for some baseline testing. At the car’s first autocross session, a few things became glaringly apparent about the Z. For one, the car’s handling was absolutely atrocious! It was squishy and exhibited an obscene amount of body roll. Another thing that stood out was that the car was pretty slow. While it ran great, raw power was not something this car exhibited. It was clear that we had some work to do.
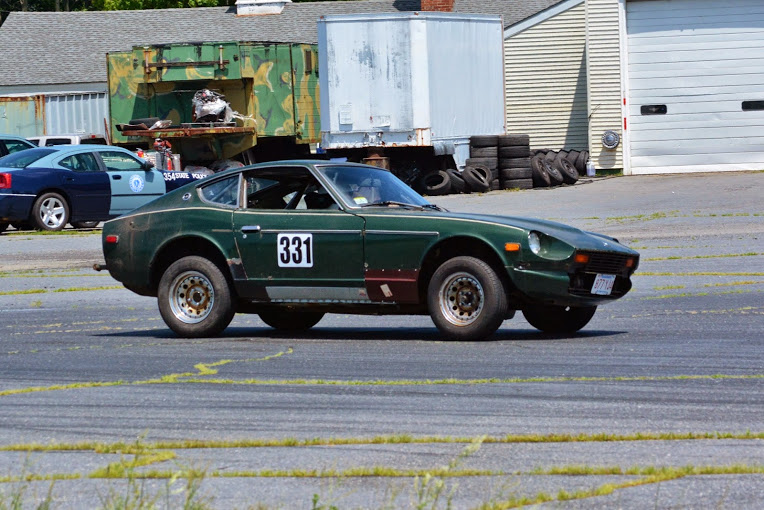
“Race car”? Not yet. Sweet 4×4 stance, bro.
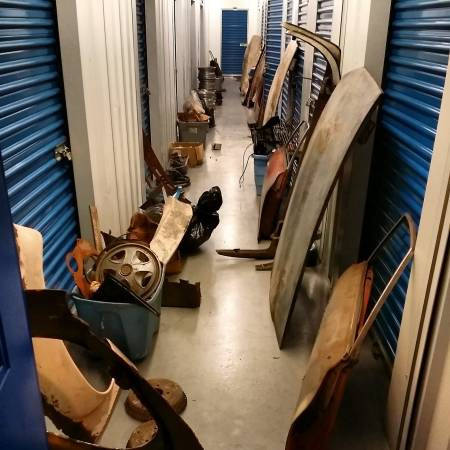
Pro Tip: If you are planning on campaigning a race car, you can never have too many spares. And when someone is clearing out multiple storage units of spares for dirt cheap, seize the opportunity and buy it all! We found a local guy that amassed an unbelievable horde of Datsun Z parts that wanted out of the game and sold it all to us for cheap. It took multiple truck loads to get this stuff home.

What kind of stuff was in the storage units? Wheels, exhaust parts, New Old Stock trim parts, interior bits…
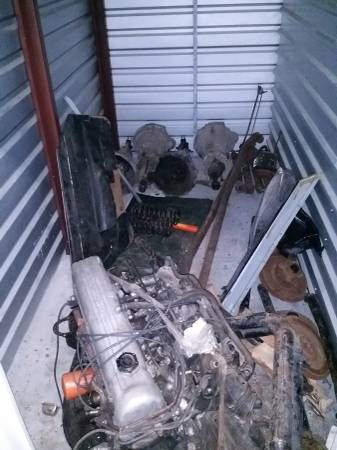
…Engines, transmissions, bellhousings, brake and suspension bits, body parts, and more. There was even a cowl hood and a complete fiberglass tilt front end in there! Basically anything you could imagine was in there, and the guy was glad to sell it to someone who would use it. We sold a good chunk of what we didn’t need to recuperate the cost, and kept lots of great parts. Jackpot!
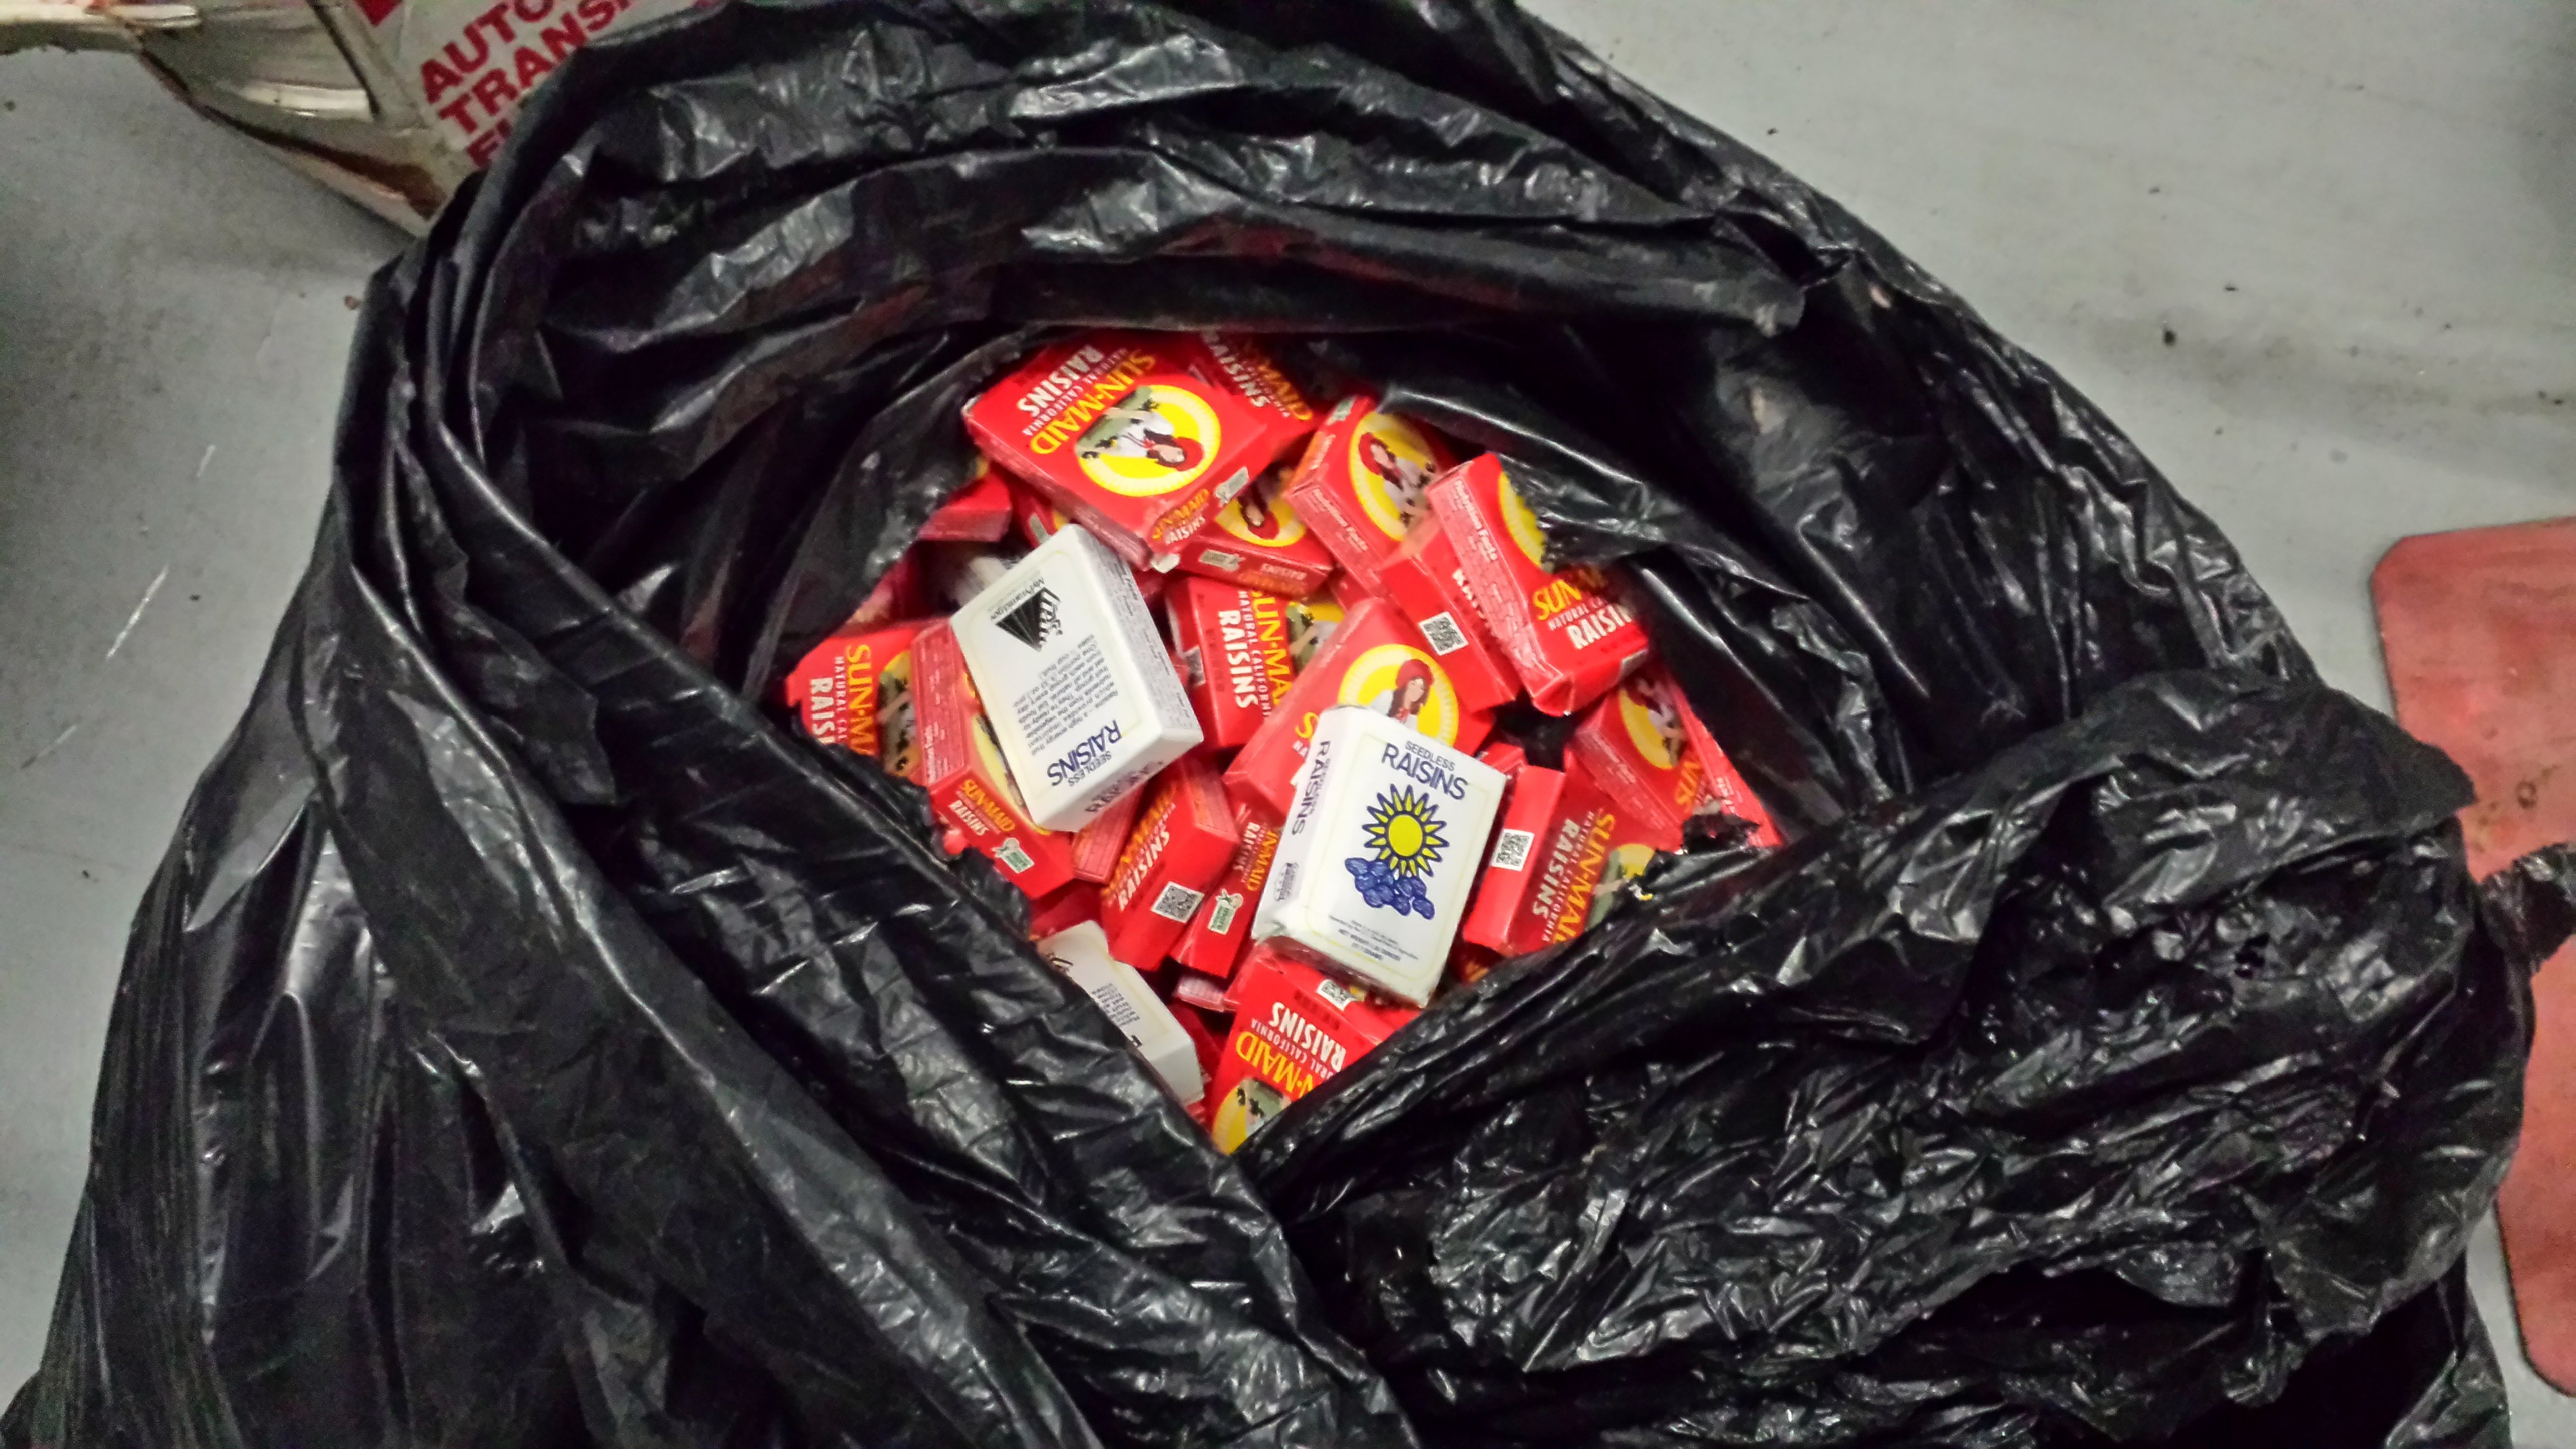
Also included with that epic parts haul was this unexplained trash bag filled with raisins! DOUBLE JACKPOT!

Next step was to get some tires on this thing. When we did that first autocross event, we ran the ancient radials that were on the ugly fake American Racing Outlaw II lookalike wheels the car came with. After rummaging through that parts stash we picked up, we decided on these period slotted mags and some sticky race rubber. Way better, right? We also painted those other ugly wheels black, slapped race rubber on them, and used them as a second set. We also tossed in a $20 eBay sway bar and some random springs from the parts haul and hoped for the best.

After all of the changes we made, the car really started to come together during some shakedown testing with our local autocross club. It stayed much flatter in the corners and turned a lot better, and while we didn’t touch the drivetrain, it was much easier to keep the speed up through the course. We pitted Greg against teammate Pat in his Turbo II-powered 1985 Dodge Omni GLH, and they were competitive all day. That’s a BIG improvement.
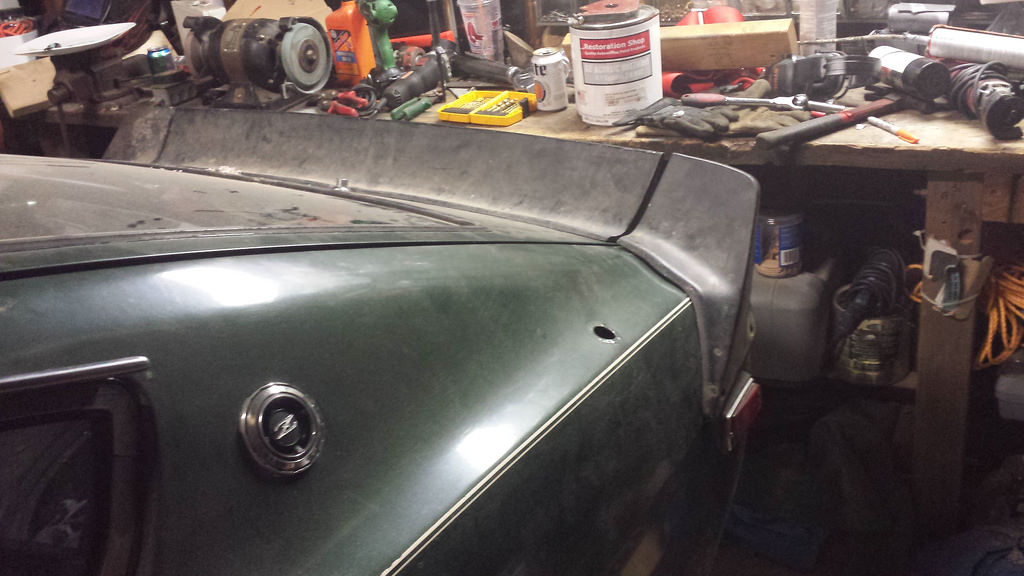
One of the things we found in that parts horde was this sweet 3-piece rear spoiler. We slapped it on because it not only looks awesome, but because it’s a race car! No word on if it actually keeps the car planted on the track, but it sure looks cool.

Since it’s a racecar and it’s running a full cage, we needed to have some sort of rudimentary dashboard that also held all the switches and the buttons for the various systems. We labeled them in a very simple and easy to understand manner that everyone understands.
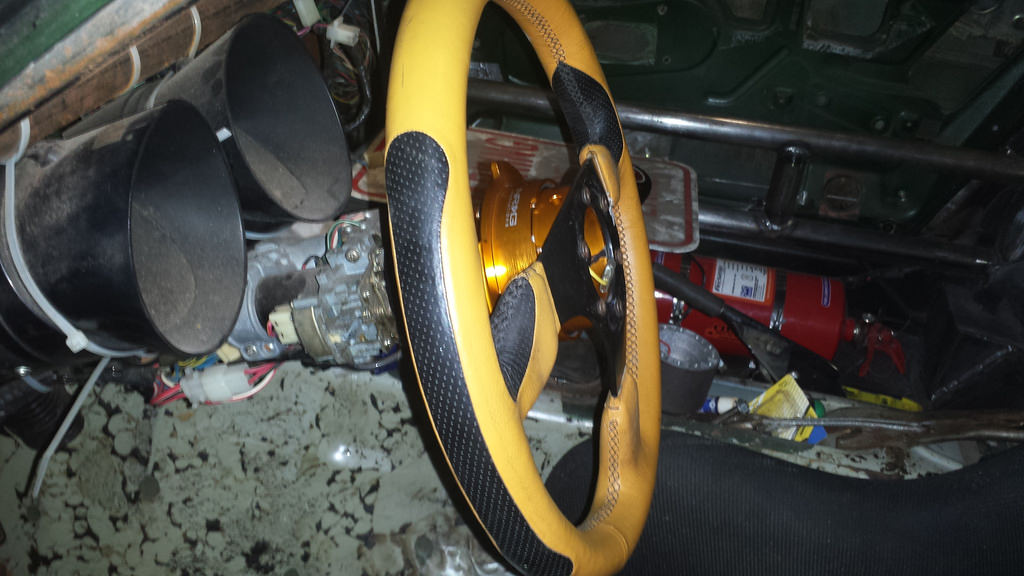
We also added a detachable steering wheel for easier ingress/egress. We found this ugly steering wheel for cheap online and ended up having to mount it backwards because the slight dish made it too close for some of the drivers, but hey, it works!

It’s good to know that all of that hard work paid off, and when we arrived at our first ever race last year, we passed tech with flying colors! Man, that felt good.
One thing that separates a racing series like the 24 Hours of Lemons from a fairground enduro race is the focus on safety. I’ve heard some flack over the years about people complaining that the cars really don’t cost $500, and it’s stupid to call it a budget race when it really isn’t. And those people are both right and wrong. The cars themselves cannot cost more than $500, and the judges do use their discretion to separate the cheaters from the rest of the pack with various penalties. Here’s an excerpt from the official rules about that:
4.1: Total Investment in Vehicle Can Not Exceed $500: Except for items described in Rules 4.2 and 4.3, the total spent to purchase and prepare any car may not exceed $500.
-
4.1.1: Lame-Ass Rationalizations: Cars that “should be” worth $500 don’t count; cars that “were worth $500” before you spent another $2000 to fix them don’t count; cars you’ve owned for 20 years and spent more than $500 on during that time don’t count; “it would have been worth $500 if it didn’t already have a cage” doesn’t count. Five hundred dollars means five hundred frickin’ dollars.
-
4.1.2: Lame-Ass Rationalizations About Parts: Same deal. “Free” parts, parts given to you by your buddies, parts left lying around the shop…that crap doesn’t impress us. It’s worth whatever the last real guy paid in the last real purchase. Don’t think you’re clever.
But don’t expect to be able to build and field a car for $500! Safety equipment is necessary for both the car AND for the drivers, and is exempt from the budget. And you’ll need it. That roll cage we installed came in a kit that as of this writing goes for $474.90 with the NASCAR-style door bars. And that’s the cheapest kit that fit our Z. Then, you’ll have to weld the thing in. If you do not have all the tools to do that, then that can get expensive whether you farm the job out to a pro or have to buy the tools like a tubing notcher and welder. Then, you’ll need a full race suit for each driver: shoes, pants, shirt, gloves, flame resistant undies, socks, and a good helmet. And then you need a harness and a HANS device. Our driver’s seat was around $800. You’ll need a fire suppression system of some sort, and that’s more money. And trust me people, YOU WILL NEED THIS STUFF. Accidents CAN and DO happen on track. This is the stuff that keeps you alive and ready to race at the next event, so you don’t want to cut corners here! The full rule set can be found at the 24 Hours of Lemons website.
Also, you’ll have to factor in consumables: brakes, tires, fluids, fuel, spares, and more can add up and you’ll need them to keep your $500 miserable pile-on-wheels running for hours on end. Also, factor in travel costs, admission, fees, food, and lodging for the events. It really does add up. While we did prepare for this stuff as much as possible, it does kind of slap you in the face when everything is happening at the track.
With all that said, we were ready to hit the track. We signed up for the “There Goes The Neighborhood” event at Thompson Motor Speedway in Thompson, CT on August 8-9th 2015 to see what we could do. Mind you, only one of our four drivers on our team had competed in a wheel-to-wheel race on a track, and that was about 8-10 years ago. You’ll also have to come up with a team name for yourselves. After many beers and hours of deliberation, the best we could come up with is “Nuthin’ But A Z Thang”. I’m sorry.
Stay tuned for our next installment, where we finally get the Z out on a road course to see if all of those modifications result in making it a decent race car.


cool
Rules.. are outdated…
finding a running 500.oo car is not going to happen in many parts of the US of A..
and after going and seeing 5 of these races, most of the field are not 500.oo cars..
Price of scrap is down to $35 a ton. There are plenty of $500 cars out there right now.
not really… running…
I don’t call buying a 500.oo car then spending 300 to get it home and then 200 to get it running a 500 buck car
No 500 cars at these races. Been to them, read the rules, went on their message board, plenty of ways these guys get around it. Seen a few LeMons cars for sale on Craigslist, most are 3-5k.
After the cage, race seat, fire suppression, and all the safety gear $500 cars become $3-5k cars. If it makes you feel better call them $5k cars. Still one of the cheapest way to go wheel to wheel racing.
Having “claiming” rules would prevent the $3000 cars posing as $500 cars like the one in this article.
There is a claiming rule and a couple cars have been claimed before.
Rusty Z with a messed up engine? If they spent $500 to start with they over paid.
Z-cars run a lot better with 2 more cylinders. Ours was happy at 6.3 liters. I’m kinda partial to school bus yellow paint too…. ☺