


(Cover Photo Credit: Wayne Deslauriers)
Welcome back to our coverage of Project Power Laggin’! Follow along as we take a tired 1979 Dodge W150 Power Wagon we found in Central Maine and transform it from a derelict roadside attraction to a dependable, powerful weekend workhorse that lives up to its given name! In this installment, we check in with the truck and see how it’s doing after the engine swap, and spruce the rig up just enough to enter it into the annual Spindles Car Club Autofest show. Read on to see how we did, and for a twist you won’t see coming!
When we last reported on Project Power Laggin’, the Magnum 360 V8 was so fresh in the engine bay that the paint was still drying! It was running and driving, but there were still some tweaks to be made. So, we set a goal: there was an upcoming car show on the calendar that we liked to hit up every year. Could we get some of the quirks smoothed out before then and enter this rig into the show? And to further throw another wrench in the works, could we spruce the thing up a bit in the looks department along the way? Let’s find out!

First, let’s start with the mechanicals. While the engine was running well, something seemed off with the transmission. The truck has a Torqueflite 727 3-speed automatic, and while driving, it seemed sluggish off the line. Furthermore, when you mashed the gas pedal, it was reluctant to downshift. We pulled some data logs, and we noticed that from a stop, there were only 2 shift points. That means we either borked the transmission, or there was something wrong with the downshift cable. We started with taking a look at the downshift cable. As a reminder, we are running a Lokar throttle and kickdown cable setup on this truck to replace the stock rod linkage which is not compatible with the MSD Atomic 2 EFI’s throttle body. If it was out of adjustment, it would cause lots of issues, including the loss of a gear and the ability to downshift.

To correctly set cable tension on the throttle body, you’ll need a helper to hold down the gas pedal and adjust the kickdown cable until it’s as tight as you can get it in order to get full travel out of the kickdown lever on the trans. On the day I did this, I was by myself, so my “helper” was this large rock I found in my yard. You can’t knock it if it works! And yup, the cable was very much out of adjustment. Thanks to my “helper”, we got the job done, and after some fine tuning, all three gears are present and accounted for, and the transmission kicks down when you need it to. Nice.
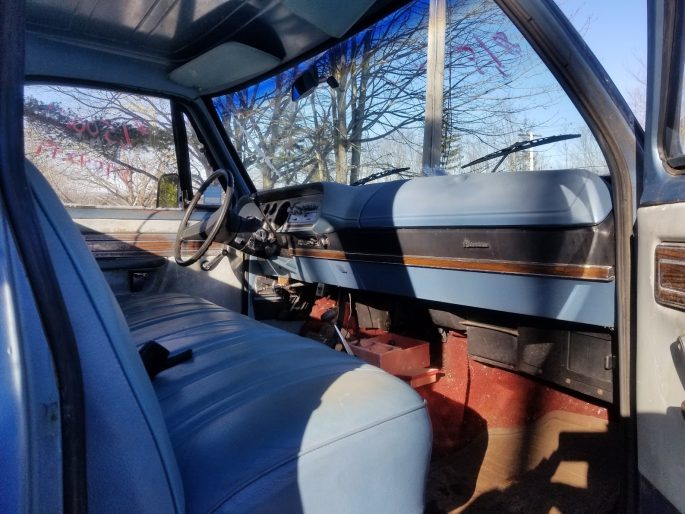
With the truck running better, and the transmission doing transmission things, we turned our attention to the looks department. One thing that we’ve wanted to do since we dragged the truck home was address the stock bench seat. While I don’t mind the bench, the one in the truck needed some major repair. The upholstery was torn and cracked in multiple places, and the foam was collapsed and missing in spots. To refresh the bench, it would need new foam and upholstery. When we looked up those items in the resto catalogs, they were backordered forever. With those options out of the question for now, we looked into swapping different seats in the truck. But which ones?

Option 1: a set of factory Buddy Seats. These came mostly in the Macho Power Wagons and Lil’ Red Express trucks. They are also hard to find and very expensive, even for a set of cores to rebuild. And they only came in black, so if we wanted blue ones, that would require custom upholstery.
Option 2: Ramcharger seats. These are easier to find than the Buddy Seats, but that said, they are still hard to come by. It’s been years since a decent set was up for sale around here, and the junkyard supply has all but dried up.

Option 3: Go aftermarket. There are many companies that will sell you a set of truck seats, ranging from basic benches to fancy 40/20/40 ones with center consoles and storage. Only downside is that they can get quite expensive and require some customization to work.
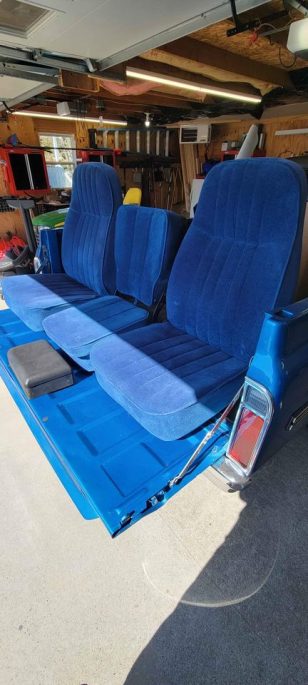
Then, fate intervened. Knowing we were on the hunt for new seating, a friend shot us a message about this set of luxurious Smurf Blue Velour aftermarket seats for sale locally. They were sold by Smittybilt a few years ago, but they are no longer offered. The seller had them briefly in a 1970 C10, but found that it was a bit cramped in the cab with the original in-cab fuel tank, so he sourced a set of Suburban buckets instead.

We struck a deal, and brought them home. The middle seat folds down to reveal a console, and there’s even under-seat storage. And they are practically new!

The two side seats and center console/seat mount to this ladder frame separately, and allow the left and right seat to move independently on their sliders. The only caveat is that you have to adapt them to whatever bench seat floor brackets are in your vehicle in order to get the correct pitch and angle.

To do this on a Tin Grille Dodge, you need to yank the bench and then pull off the two floor brackets. The bench sliders are riveted to the bracket, so those need to be separated using your spinny death wheel of choice.
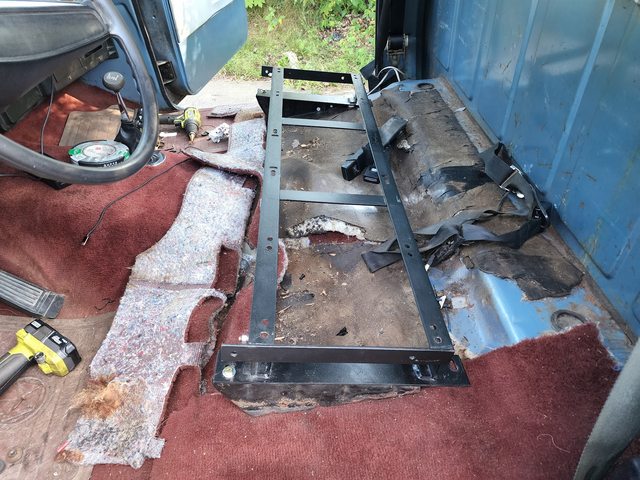
After carefully divorcing the sliders from the brackets, the mock-up began. Width-wise, the frame was just about perfect. There are a few adjustments that can be made for height and for side-to-side fine tuning.

When we originally measured the seats, we did not account for the “squish factor” of the stock bench. The old bench was like sitting on a couch, so you sink in a bit. This resulted in a way-too-high seat height. Also, the stock 15″ steering wheel was not helping matters.

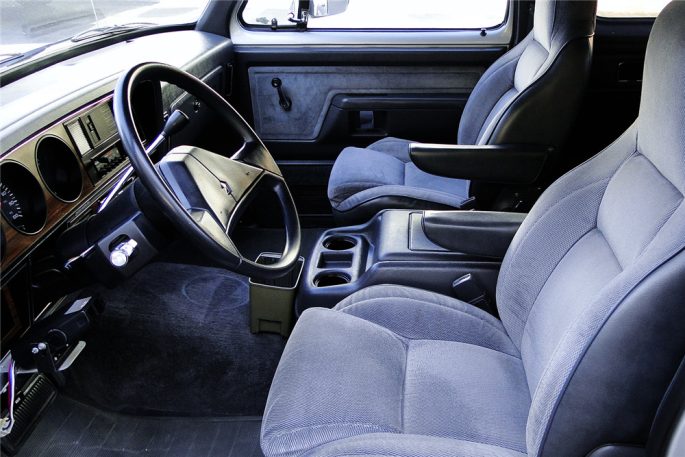
After slotting the seat frame’s height adjustment holes a bit, we got it to drop about an inch, which certainly helped. And man, look at these things in there! Not only does the sumptuous velour fit the Malaise Era vibe of the truck, the added utility of having console storage was much needed.
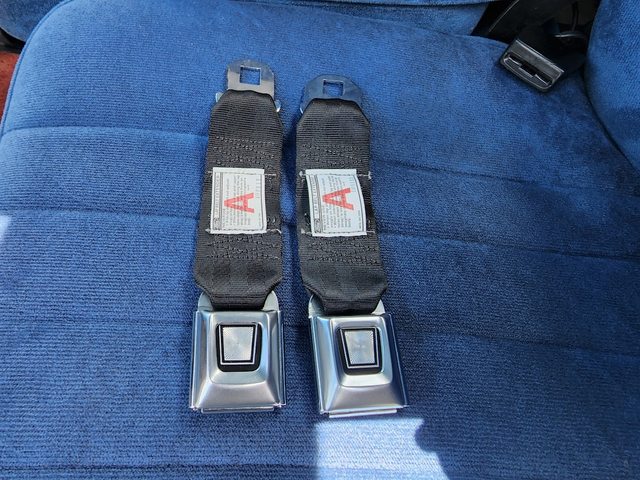
One problem we ran into is that the seat belt receivers weren’t long enough to reach the belt with the new seats. Trucks with Buddy Seats and the Ramchargers have longer receivers, and after checking the local junkyards, we came up short. So we looked into temporary seat belt extenders. Turns out that Ford makes these ones, and they are the perfect length to make up the difference. We massaged the male end of the buckle with the grinder to match the shape of the Dodge ones, and plugged them in. These will do the job until we can find some proper receivers.

Continuing on our quest to spruce things up in the cabin, we decided that it was time to order up a new steering wheel. We opted to go with the classic Grant Challenger 860, as it looked a lot like the old Mopar Tuff Wheel and it was smaller at 13.75” in diameter, which would help with getting in and out of the truck. We also ordered an install kit as well as a 2” spacer

As you can see, it’s quite a bit smaller in diameter than the stock 15” wheel, and it looks the part in there. Clearance to the lap is still tighter than I’d like, but it’s much better than before.

When we installed the wheel, we thought we’d try it without the spacer first to see how bad the rim clearance to the turn signal stalk and the column shifter would be. And yeah, it was tight! With hands at 9 and 3, they hit the controls.

There, that’s better. Plenty of room to do steering wheel things now! It also has that classic Mopar look we were looking for.

Continuing to the outside of the truck, one thing that has been an eyesore since day one is the missing bed trim on the passenger side of the truck. We’ve been looking for years for this, and we were pretty much giving up hope. Then, a local ad popped up with someone parting out a 1979 Dodge D150, so we asked if they had the trim. And as luck would have it with just days to spare before the big show, they did!

One thing we didn’t consider is the scarcity of these trim clips. The truck still had most of them hanging on the rivets, so we figured we could just mount the trim back on. Plus, the seller of the trim gave us all the clips they pulled from the parts truck. Well, that was foolish to assume that 40+ year old plastic would hold up, as they nearly all broke! On top of that, they stopped making these clips around 1994, so we had to improvise.

The next best thing in a pinch was a roll of this stuff. We strategically cut up some of this double sided molding tape and placed it on the trim in spots where the clips were gone. But would it hold?
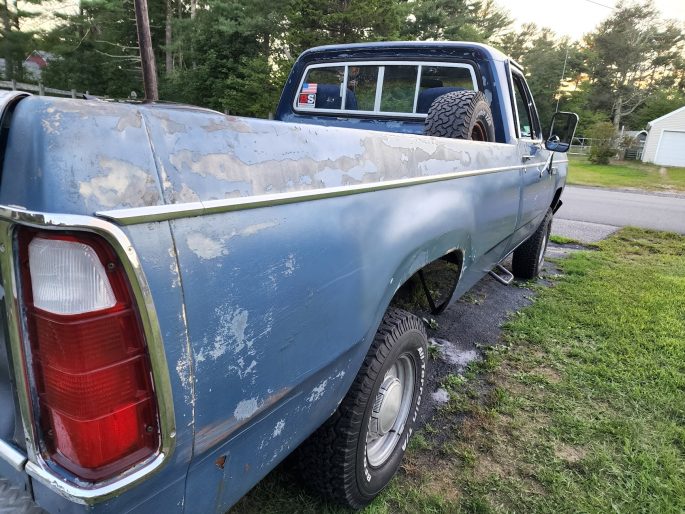
The answer is YES. The tape in conjunction with the few remaining clips did a great job at keeping the trim where it needed to be. Having a full set of trim on the truck for the first time in years was a satisfying sight.

In addition to the trim, the seller threw in this bed mat that’s specifically molded to fit the old Tin Grille trucks. These were discontinued long ago, and this one was in great condition.

The last thing we did was break out the random-orbit buffer and some rubbing compound to see if the terrible paint had any life left in it. Now mind you, it’s still falling off in chunks, but I think the results speak for themselves.

On the day of the show, we spent some time observing what the attendees were saying about the truck. We got comments like “I haven’t seen one of these in years”, “I used to have one”, “What engine is that”, “Where’s the ballast resistor” and quite a few “Why is this pile of junk even here” comments. One guy was very animated when he saw the truck and busted out some “cold start” videos of his ‘78 with a 440. All in all, it was a good experience, and we took the time to reflect on how far the truck had come since January of 2019. We didn’t place in the show or anything, but the very fact that the truck could do this at all was a big win in itself!

And now, for the aforementioned twist. As we were leaving the show, this happened. The truck stalled, and I heard a loud POP. The clutch fan had loosened up and flew off, taking out the radiator in the process. Luckily, it happened in a side lot and not on the main show grounds, otherwise the embarrassment level would have been through the roof!

First off, here’s a Pro Tip: to properly tighten a fan clutch on a Mopar Magnum V8, you need an air hammer and one of these fan clutch wrench kits. Tighten the fan up as much as you can by hand, and snug it down with the air hammer. Don’t be like us and use a pair of vice grips and “call it good”, because that’s how you get the radiator to fly off and bounce around your engine bay.

With no radiator, ol’ Power Laggin’ had to take the Ride of Shame back to the homestead for repairs. While this was not the first time it broke down, this was in fact the first time it had to get hauled back to home base with a flat bed. With no radiator and trans fluid spewing everywhere, there was no chance of driving it. As soon as the truck got home, we hit the interwebs and ordered up a replacement radiator from Champion Cooling Systems and started assessing the damage.

Check out this carnage! The fan chopped the outlet tube hard enough to dent it, and while it was whirling around in there, the fan ripped the transmission cooler fitting out, threads and all, and punctured the radiator in a few spots. Impressive!

If you’ve been following this project for a while, you’ll recall that when we ordered the last radiator, no one made the correct-sized radiator for this truck. Back in the 70’s, there were two possible radiator sizes these trucks came with: one with a 22” wide core and one with a 26” wide core. The 22” core units are much more common, but our truck has the 26” wide model. Well, someone at Champion Cooling Systems was listening, because this time around, the proper radiator was available! It’s the proper height and width, and even has the proper mounting tabs. This one also fits most of the 1981-93 trucks as well.

After swapping in the new radiator, and PROPERLY tightening the fan clutch assembly with the installation tool, we were back in business. We pondered swapping some electric fans in the truck, since the Atomic 2 EFI system is designed to work with them as an optional upgrade, but we figured that there are millions of Magnum V8’s still chugging along out there that don’t have this issue, otherwise there would have been a recall issued by Chrysler Corp long ago. We’ve kept an eye on it since installation, and it’s as tight as the day we installed it.
So, what did we learn?
First, when you install an engine in a vehicle, make absolutely sure to double and triple check everything in the days following installation. We did go back and double check things like bellhousing bolts, the engine mounts, and more, but we should have made a list of things to check that included that fan clutch nut. They make it look so easy on TV, but when you’re rushing around trying to meet a deadline, take the time to check everything, or else you’ll end up taking the Ride of Shame just like we did.
We also learned that people still love these old Mopar trucks. While the Squarebody Chevys and OBS Fords get all the glory, we did get some warm comments at the car show from people waxing nostalgic about the Dodge they used to have or someone in their family used to have. Old vehicles can provide a tangible connection to the past, acting as a time machine for your mind, just like an old song or movie can do. It’s part of why we still hang onto old rides for years and years. For your author, even though we’ve had this truck for a short time, it reminds me of riding around in my uncle’s old Power Wagons and visiting my “car-guy” great uncle who had a removable top Tin Grille Ramcharger in his fleet when I was a kid. While those vehicles are long gone, this one is still putting in the work and making new memories. It really feels like a member of the family now.
What’s next for Project Power Laggin’? We’ll be addressing some long-overdue maintenance, as well as tackling the rusty floors and the rest of the interior. While the floors were “repaired” previously, they were done by the same guy who twisted bare wires together on the alternator wiring harness, so they really need to be re-addressed. Until next time!


I love this set of articles! Thank you so much for sharing. I have a 2001 Dodge 1500 4×4 – not a tin grill but getting up there in age.