Welcome back to our coverage of Project Power Laggin’! Follow along as we take a tired 1979 Dodge W150 Power Wagon we found in Central Maine and transform it from a derelict roadside attraction to a dependable, powerful weekend workhorse that lives up to it’s given name! In this installment, we button up the install of the MSD Atomic EFI 2 system and get the old rig running!
Last time in this mini-series covering the MSD Atomic EFI 2 install on Project Power Laggin’, we replaced the decrepit stock Mopar ignition components with new Holley Hyperspark bits. These will serve to play nicely with the new EFI system and offer more tuning capability and added reliability over the stock stuff. With that done, the race was on to wrap up the install, and we have a lot to do. The truck had been down for a bit of time, and we had Truck Stuff to do! So let’s dive right in and tie up those loose ends and see what happens!

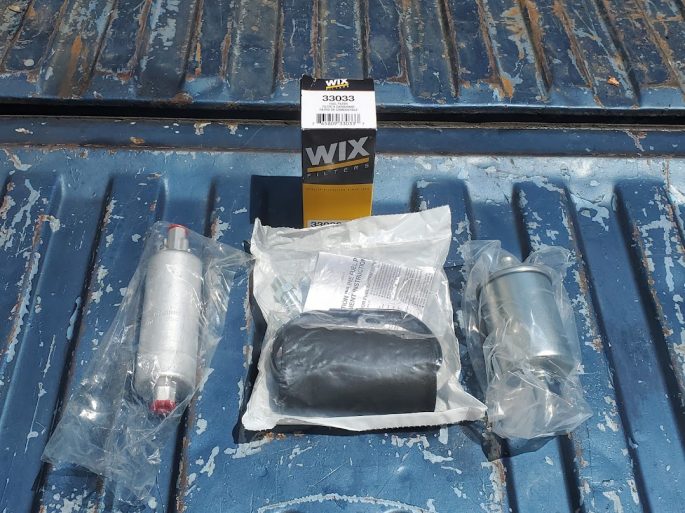
Next up on our list was completing our fuel system. We had already set up the lines coming from the tank prior to installation, so it was a matter of mounting our external fuel pump, running the lines to the engine bay, and wiring the pump up to the new main wiring harness. As part of our install kit, we got an external pump, a mounting bracket, pre-and-post filters, and more, so it was time to get that assembled and on the truck.

Now we’re talking. Also of note: you can use an internal pump of your choosing, and Holley does offer some drop-in sending unit solutions for some vehicles. They most certainly did not have a drop-in solution for our truck, since this is likely the first 1979 W150 Power Wagon on the planet with such a setup, so we opted to use the external pump. If you go external, just make sure you mount it below the tank so you can get a solid fuel prime. Mounting it above the tank will make it work harder and burn it out quicker.

We found a spot in front of the tank just below tank level with a pair of pre-drilled frame holes that were perfectly spaced for mounting the pump. It’s like the designers of this truck knew we would be doing this 42 years later!

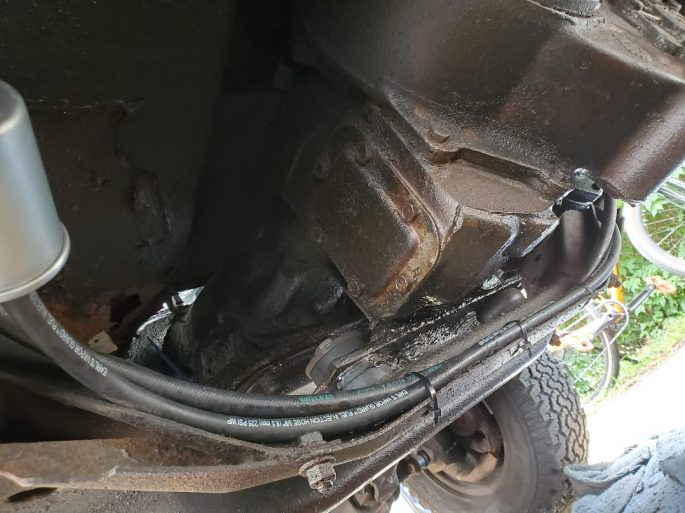
With that done, we ran the lines across the transmission crossmember and up through the passenger side frame rail into the engine bay. And yes, we will find a better way than zip ties to secure these lines to the crossmember. But hey, it works for now!

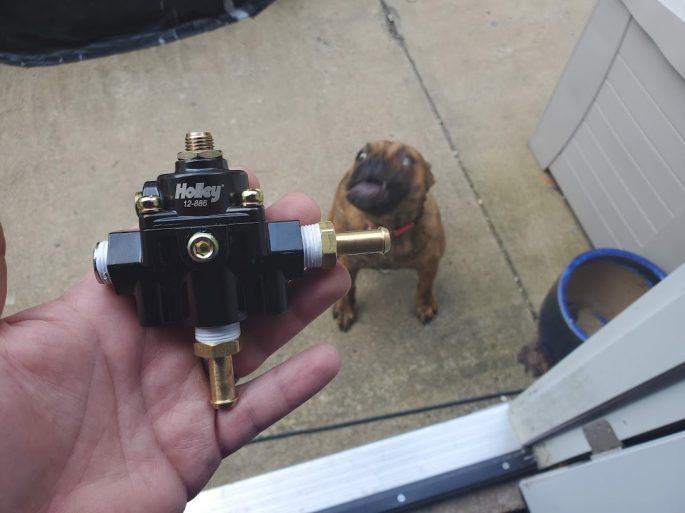
Next, we assembled the fuel pressure regulator. We went with Holley’s part number 12-886, which is recommended since it runs at the necessary 60PSI. They also make it in chrome, but we thought the black was snazzy looking and matched a lot of the other components. Note that these do NOT come with the necessary fittings and plugs. For our application, we needed a pair of ⅜ NPT fuel fittings for the inlet and return ports as well as one ⅜ NPT plug for the outlet side, which is not used. And note that my insane puppy Olive has a very strong opinion of the regulator. Not exactly sure what she’s thinking here, but I caught her mid-bork expressing it.

We mounted it to the fender with the supplied bracket and hardware and plumbed it up. Two Pro Tips: You’ll want to use a brass plug for the unused side. The brass works better with the cast body of the regulator, and isn’t prone to cracking the regulator if you overtighten, since the brass is generally softer. Also, make sure to use a sealant on the threads, but stick with a liquid, fuel-rated sealant and skip the teflon tape. This will ensure you don’t blast raw fuel all over the engine bay.

Out of the box, the sheer number of wires coming and going from seemingly everywhere looks like a daunting task, but in reality, wiring up this system was not too hard. Starting with the ignition box, you have a heavy positive and negative that go right to the battery terminals, a red wire that goes to switched ignition, a white “points” wire that connects to one of the throttle body harnesses to provide a signal, and the plug that directly plugs into the coil. We spent time routing the wires and making sure the connections have a good, soldered connection.Speaking of soldering, these “helping hands” clamps rule.

From the throttle body, you have two main harnesses that you’ll have to worry about; one provides power direct from the battery and switched ignition to the unit while also providing power to the fuel pump and distributor, while the other serves to connect to the ignition box and accessories, like A/C relays and electric fans, if so equipped. Since the ol’ Wagon of Laggin’ doesn’t have such amenities, we were able to keep things simple and skip wiring those, but it’s nice to know that we can add those later without worrying about compatibility.

An important step is to find a good, clean switched ignition circuit to tap for the ignition box and throttle body. These need to also power up while cranking, so get out the multimeter and start poking around. After probing a few plugs and components, we found multiple spots that were getting ignition power, but after our wiring meltdown a few months ago, we decided to trace the wiring back to this welded splice. This provides power to the ballast resistor, the coil, the old ignition box, and even that weird diagnostic port. Wiring directly to this splice cuts out the middleman and gives us clean power for our new components.

After wiring those up, we started locating homes for other components, like this inline fuse and the fuel pump relay. We bolted these to the firewall using the mounting holes from the old ignition box.

We then ran the blue power wire down to the fuel pump. We made a small ground lead and grounded the pump right to the frame. Perfect.

With most of the wiring complete, we identified all of the wires from the old system, like the coil positive and ground wires, tagged them, and taped them up to tuck away. We would like to keep it so if we ever had to revert back to stock, it would be easy.

One of the last components we installed was the O2 sensor. There are two ways to do this: either with a special clamp Holley provides, or the old fashioned welded bung. The sensor has to be mounted within 10 inches of the merged pipes on the header collector, so we drilled out a spot on the passenger side collector and welded in the bung. While the clamp-on method certainly works, having this permanently attached to the header seemed like a better idea.

For an air cleaner, we thought about modifying the stock one to work with a four barrel carb, but we found an old, rusty 14” air cleaner in our parts stash. After thinking about it for a minute, it gave us an idea. The lid had some great patina, so we clearcoated it and painted the bottom a nice shade of rust to match.

Paired with a blue reusable 14×3 filter element we found on clearance on one of our many parts runs, we think it looks absolutely killer!

On the inside, we added a touch of class to our Atomic EFI control screen by wrapping the housing with rich, luxurious woodgrain that we had left over from fixing some dash trim.

With that done, we turned the key to see if the screen would power on, and it did! A quick visual and smell test offered nothing on fire or melting, so we went ahead with the initial setup. Basically, the unit asks you some general questions, like engine size and type, what ignition you will be using, and more. Once you run through the questions, the unit flashes a base configuration to the ECU. You then cycle the key, and if you did it right, you’ll hear the fuel pump prime. This is a good time to check for fuel leaks, as you should be seeing full 60psi in the system.
So, with all of that done, let’s see what happens when we turn the key:
FINALLY, IT RUNS!!!
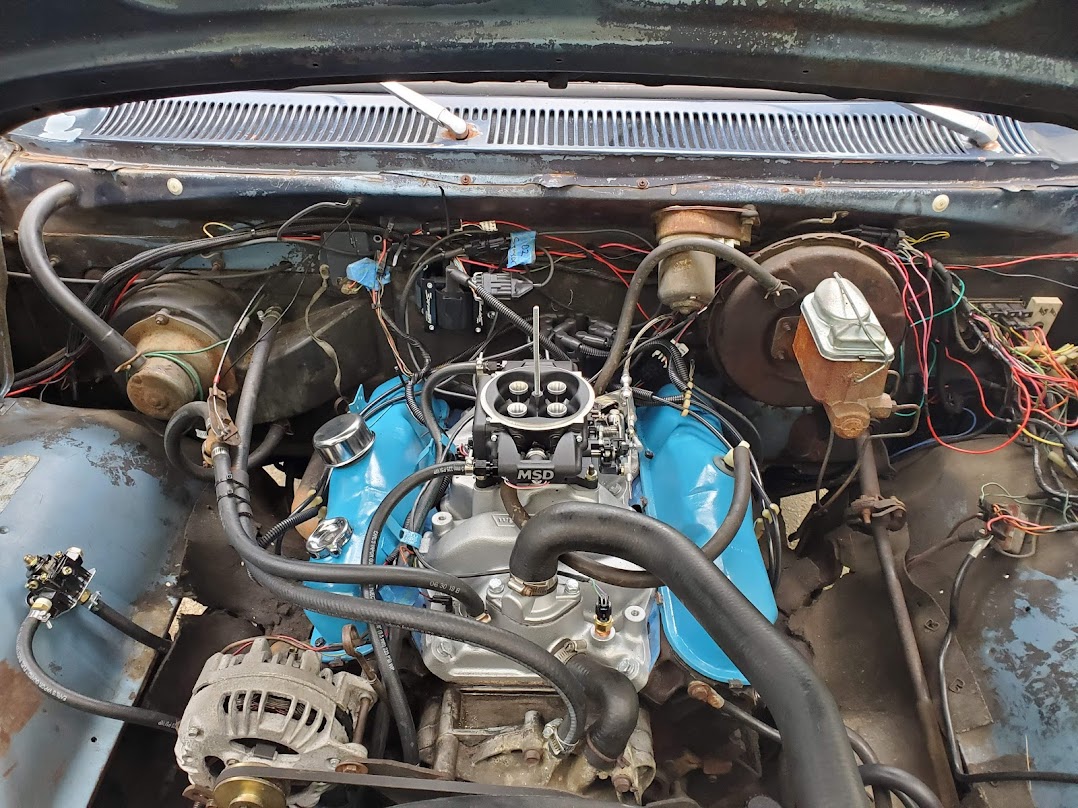
We now have one of the only, and maybe THE only, 318-equipped 1979 Dodge W150 Power Wagons on the planet running MSD Atomic EFI 2 and Holley’s Hyperspark ignition! It was one hell of a slog, but we did it! Now, even though it runs, there is still a bit of work to do. If you notice in the video, it’s farting and popping a bit. This is due to a few factors: timing adjustments, the fuel tables in the “Wizard” tune needing adjustment, and more. We’ll bring you along for the ride as we figure out how to tune the setup, as well as dealing with the inevitable hiccups that will show up down the road. Until next time!


You probably could make a pump drop in as long as you have a suitable bulkhead connector on the gas tank – you can stick an inline pump where your fuel sender sock went, and slip it in through the original sender opening.
However, I’ve found that doesn’t solve low-tank slosh issues. So for my Dart, I went with an external pump but welded a cake pan onto the outside of my tank for a super-cheap sump.
The sender cut out on this tank is really small, so it would be tough to get a pump in there. One possibility is swapping in a later tank from a 1987-93 truck with TBI; those have a larger tank and a fuel pump on the sender. The problem is finding one though, since they are NLA and most of these trucks have dissolved back into the Earth around here.
This fuel tank is plastic, right? We are doing a Holley EFI swap on a 1978 Dodge Crew Cab. We got a later plastic tank (to ditch the in-cab tank) and grafted on the flange from a Magunm-era Dodge tank so the sweet Holley fuel tank module would drop right in
Also, a clean source of power can be found without gutting the factory harness. We use a starter relay from an early EFI era Jeep which has one more pin on it. Clean power that we can hook directly to, just swap out the inner fender-mounted starter relay. Look for an article on Holley site soon
Yes, this truck has a factory 18 gallon poly plastic saddle tank. Since it has the bolt-on flange, the opening is smaller than the ones you usually see on the later tanks. I may swap to a later tank from a TBI truck with the factory sender with the pump as part of the assembly later on, provided that I can find one. Those tanks have a higher capacity as well.
On the harness, the factory harness has been spliced up in many areas, so this was also an opportunity to clean it up a bit. We’ll be cleaning up the wiring further in future installments. I like that Jeep starter relay swap idea!