


We’ve been saying it ever since the whole stay home, stay safe mindset came into being: if you’re gonna be stuck at home, there’s a garage and probably a project car that needs attention. At BangShift Mid-West, we’re in no shortage of work. There are two Mustangs that need to get sorted and put back together. One is for my wife, who has been admirably patient with me while her car spent almost a year on jackstands in the garage, which needs to be out and cruising. The other is the Rough Start Fox, the hatchback that I’m dying to kill tires in. The wrenches have been spinning and the work has been progressing as quickly as I can make it happen, so here’s some updates as to where both of the resident Fox Body Mustangs are at:
Great Pumpkin Mustang:
 Getting the Great Pumpkin Mustang out of the shop was more of a chore than I initially wanted to deal with right off of the bat. I was hoping to hold off until I at least had dropped the 302 into the Rough Start car, but circumstances forced my hand…we wound up having to tear out and replace a healthy section of floor in our house due to water damage and as a result, our furniture had to go somewhere, so with the eviction notice in hand, we had to hurriedly slap the car together and get it moved onto the concrete pad out front. The American Racing Hammer wheels looked absolutely badass bolted up onto the car (they were part of the deal for the Imperial) but the fronts are way too big for the car. But that wasn’t even the worst part of it all. During the slap-dash assembly, I failed to notice something until it was too late: SN-95 spindles and a Fox steering rack equals pigeon toed stance.
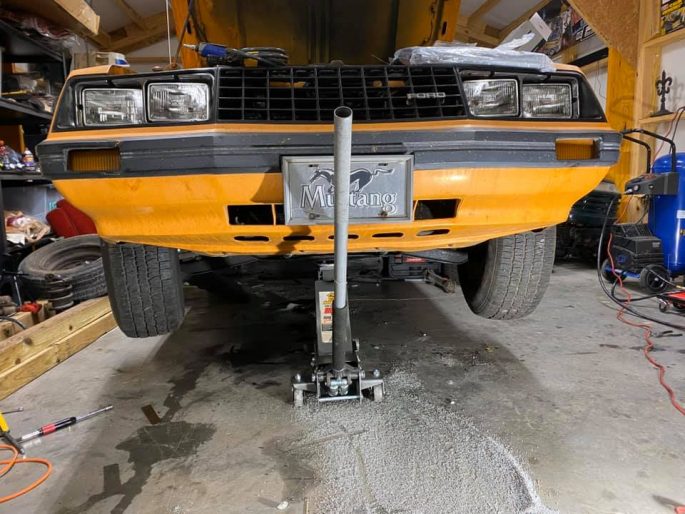
Well, you do what you have to, so using a tractor and a couple of heavy-duty tow straps, the Pumpkin was wrestled outside. Once parked, the nose went back up in the air and progress started in earnest. The brake lines were connected, the passenger front requiring an adapter that was sourced from Late Model Restorations. New front rotors and pads are in the shop, waiting, as well as a solution for connecting the SN-95 rack to the Fox steering wheel…we’ll cover more of that in-depth soon. We also are waiting on rear calipers, rotors and pads, but that’s really not a lot of work to do before a first drive happens. So, while we were waiting, why not see if the 4.2L wakes up? Sure enough, a quick shot of fuel down it’s gullet and the underwhelming but dead-reliable V8 barked into life, coughing out old gas and built-up crud from the tailpipes. We’ve run about half a tank of fuel through it so far and the exhaust cleared up and the car kicks right off like it wasn’t parked more than a day. The GT-40P 302 will still get swapped in here, but man, I don’t think the 255 needs to be trashed. It’s too stable. Maybe a cleanup build is in order…
Rough Start Fox Body:
When I haven’t been working on the house or the Pumpkin, the red Mustang has had my attention. After cleaning out the slop tray that the 302 was, we took stock of what was needed for the build. After sending the information off, I turned my attention to a subject that long-time BangShifters might smile at: the gauge lights. I’ve got a history with dash lights…they f*cking hate me. I scored the 140-MPH speedometer out of a parts car Mustang, but it’s printed circuit board had a huge break near the passenger-side connector. Not good. The plan: swap the 140-MPH cluster’s guts into the housing from the stock 85-MPH unit, which had a perfect board. It was pretty straightforward if you don’t count stabbing myself with the sharp-as-hell needle that lies underneath the gauge needle you see normally. How’d it turn out?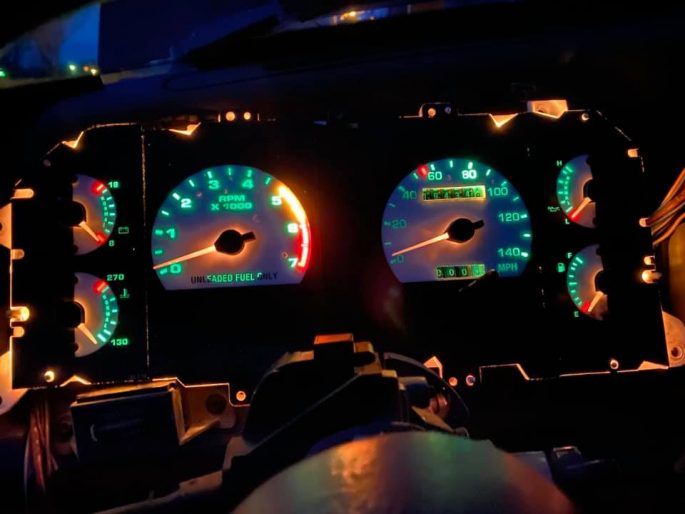
Even if I can’t get that one section to light up, that’s a win, but I probably can get it to come online. These dash clusters have bulb sockets that actually have polarity…they have to be in the right place in order to come on. I’ll flip the sockets around and if that doesn’t work, then I’ll test other housings to find ones that work. No big deal.
What was going to be a big deal, however, was the lack of turn signals. I had hazard lights, I have functioning wipers, I even had functioning high-beam/flash-to-pass functionality out of my signal indicator stalk. But no turn signals. I checked everything I knew right off the bat: I had voltage at the fuse, I had two known good flasher units installed (one is in the fuse block, the other has it’s own connector) and my outer bulbs functioned with my hazards.  One of my better purchase ideas was a factory electrical troubleshooting book. The diagrams are awesome and the basic troubleshooting tips are spot-on. Tracing the wires, I learned that everything flows from the turn signal switch, through the hazard switch, to the bulbs. Okay, so it had to be the switch, right? I raided the switch out of the parts car, hooked it up, and…nothing. Not even a change from the original switch. When you run out of troubleshooting points, it is usually time to break out a test light or multimeter. It’s the least fun part of electrical work, but diagnosing will be straightforward. It will either work or it won’t.
 Unless, of course, you pop out the hazard light switch and learn that not only are half of the wires not making contact, but that the locking clips that are supposed to be holding those connections in place are dust. With the wires gently pushed back in to the engagement point, the turn signals worked like the car had never been under water. So, not twenty minutes before I started writing this, I ordered new connector ends that will have fresh locks in place. That’ll cure that ailment.
Another fun task was getting the engine presentable. While I’m waiting on parts to show up, I might as well deal with the ugly-ass engine block, right? Here’s my secret: after waterproofing everything I can, it’s Gunk gel, a scrubbing with a stiff brush after a five-minute setup, then a quick blast with the pressure washer. Once the engine is dried, I put a wire wheel on a drill and work over every bit of surface that needs to be painted. Then it’s a good coat of engine primer, followed up by two light coats of engine color. The transformation is always rewarding…

And that brings you up to speed on the cars for now. I’m waiting on a bunch of boxes to show up so I can get to building, and I’ll probably get the heads prepped and painted tomorrow in the same fashion as I did the block. I’m pleased with the progress so far!
Previous Rough Start budget left: $4,010.45
Ford “blue oval” hatch emblem: $30
302 Oil Pressure Sending Unit extension: $24
Oil Pressure Sending Unit: $20
1987-93 Mustang multi-function switch repair harness plug: $13
1987-93 Mustang Hazard repair harness plug: $37
Mahle Engine Gasket Set P/N 95-3374: $115
Remaining Rough Start budget: $3,771.45


Good job on the progress!.. These kind of down in the trenches “Rough Start” style builds are EXACTLY what I like to read! Keep up the good work!
Remember, a cluttered, unorganized garage is the sure sign of a genius. I dig the Pukekin, err, I mean Pumpkin.
I agree with 4 nomor\’s comments above. This is the type of build I can relate to. Keep the updates coming, good luck.