


Written By Steve Baur – Photography by the Author
Most everyone with a performance car thinks about how they can extract more performance from his/her vehicle. Whether it’s improved handling, speed, or maybe even just better drivability, anything that makes the experience behind the wheel more enjoyable just adds more smiles per mile. If you followed part 1 of the Bugeye Revival, then you know we repaired an ailing 2003 Subaru WRX by swapping out its original USDM 2.0-liter engine for a JDM 2.0 powerplant. While the car was back up and running well, we wanted to give it a performance makeover as well, and take control of the engine calibration while we’re at it. To do that we called up Cobb Tuning.
Cobb Tuning quickly became one of the biggest names in the Subaru performance aftermarket from the very introduction of the WRX to the United States in 2002. The company held a reputation for offering quality performance upgrades, and its Accessport calibration tool became the standard for not only Subarus, but also many other brands of automobiles leading up to today.
Our subject vehicle had received a few aftermarket changes over the years, with one brand of catless up-pipe, another brand of catalytic converter-equipped downpipe, and a cold air kit that was eventually ditched thinking it might have been causing the issues we were experiencing. Moving forward, we wanted to go with a proven package that improved performance as well as the sound and appearance of our Bugeye.
After talking with Cobb Tuning’s Marshall Glasgow, we went with the company’s Stage 2+ Power Pack, which includes the SF intake and airbox, and the post-MAF hose on the intake side. After the boxer has ingested the necessary atmosphere, Cobb’s 3-Port Boost Control Solenoid (BCS) provides flexibility and the precision needed to properly control boost pressure. When the combustion process is completed, Cobb’s 3-inch stainless steel downpipe with cast bellmouth and high-flow catalytic converter provides optimal exhaust flow to the Cobb 3-inch polished stainless steel cat-back exhaust.
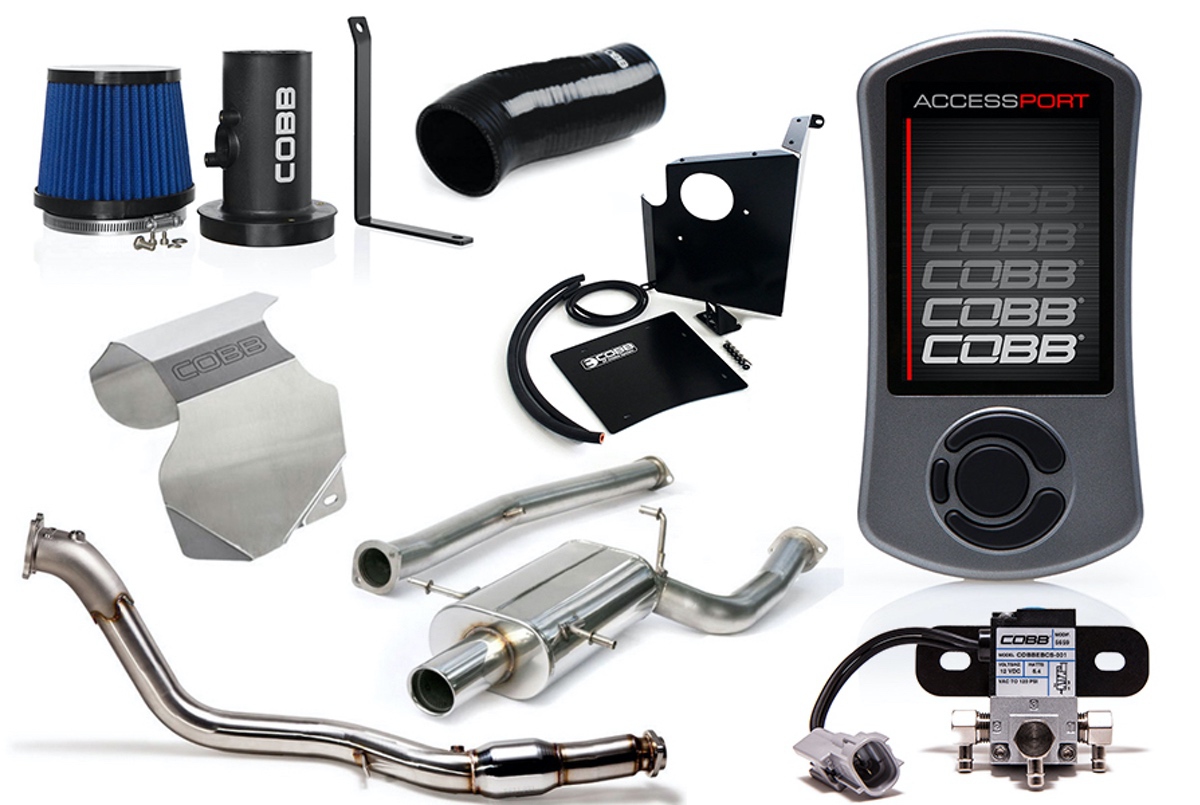
Rounding out the package is Cobb’s stainless steel turbo heat shield so you can lose the pedestrian-looking stock shield (if it’s even still there), and the all-important, and highly capable Cobb Accessport V3 that would allow us to save the stock engine calibration and upload a higher performing version. The Accessport also offers on-the-fly datalogging, real-time engine parameter monitoring, performance measuring, and more. It’s also very customizable, so you can put your personal touch on it as well.
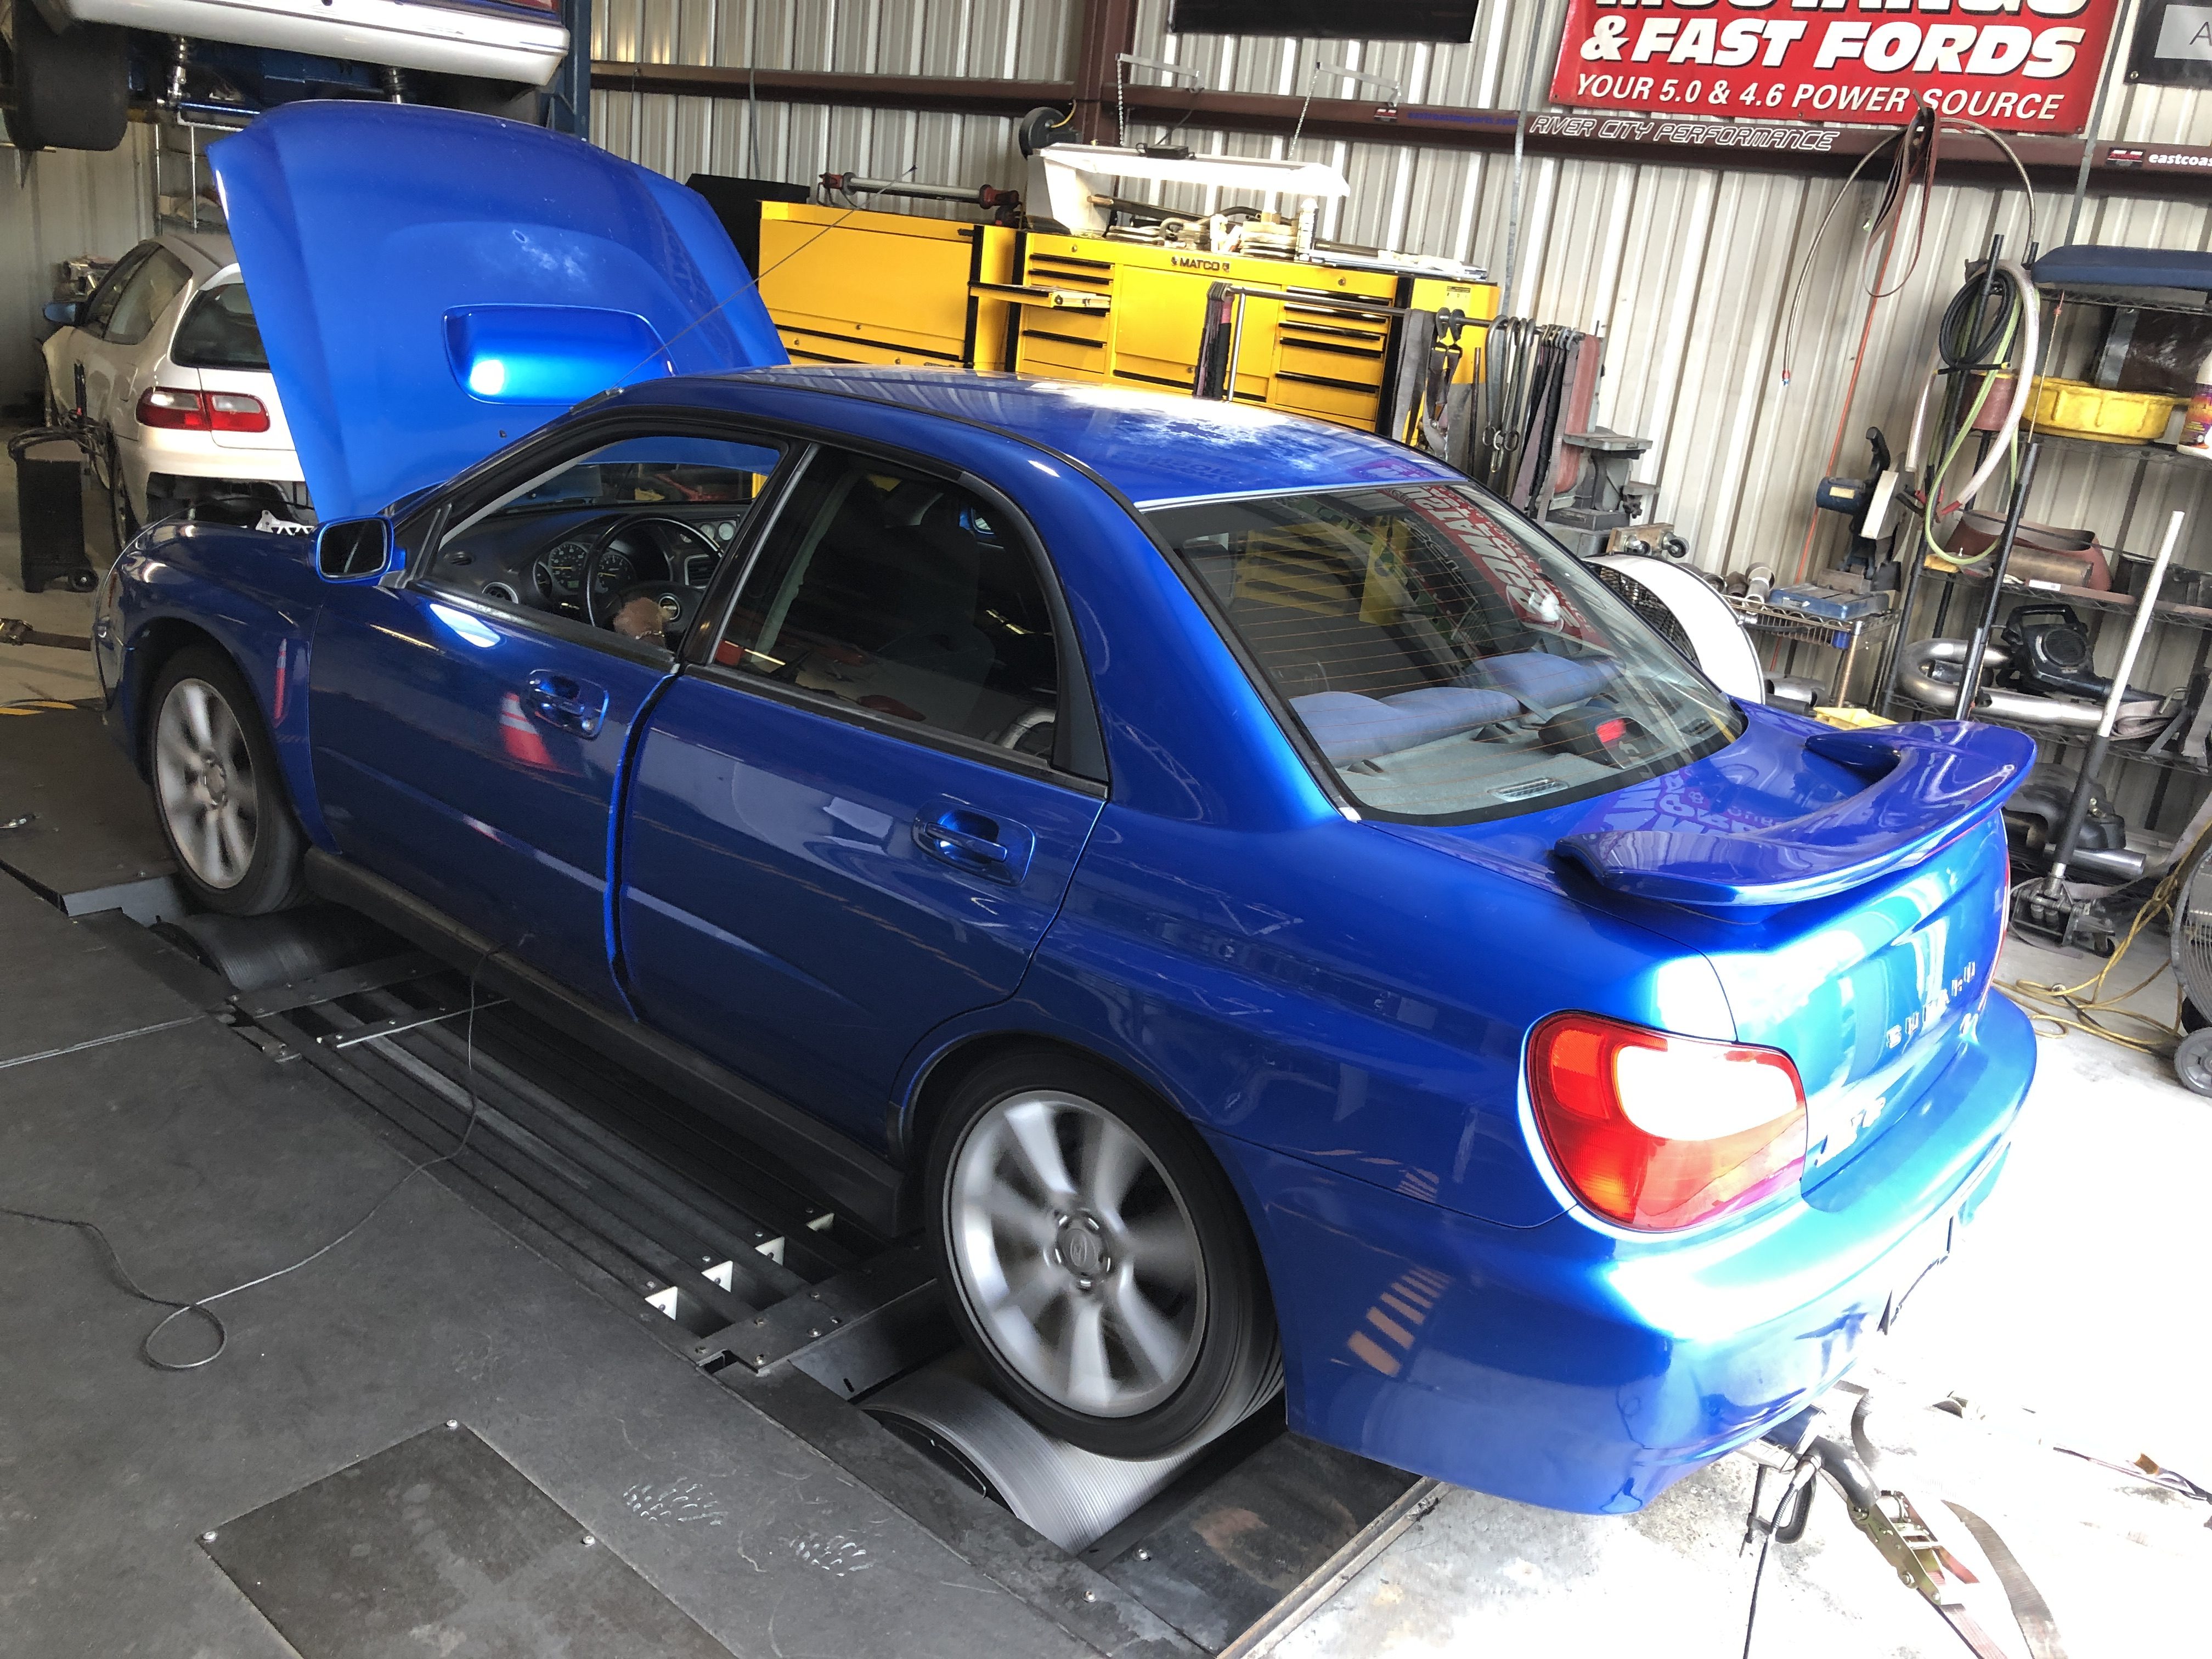
We planned to perform before-and-after dyno testing and to accomplish that, we dropped by Tuners Inc. in Orange Park, Florida, where proprietor Tony Gonyon had us pull the WRX up on his Dynojet all-wheel-drive dyno. Tuners Inc provides tuning and dyno testing for all sorts of vehicles, be they 2WD or 4WD, and the shop also has a lift that Gonyon allowed us to use to facilitate the testing for this article.
Now that we have all that out of the way, let’s follow along and see how it went!
(hit the photo to see some dyno pull video!)

Despite this WRX feeling zippy out on the road, the dyno pulls were long. Thankfully, the performance upgrades improved the driving experience on a number of levels.
Cobb Tuning offers a number of upgrades for all model years of Subaru WRX and WRXSTI and it also offers its Power Packs which groups a number of these upgrades together. The Stage 2+ Power Pack we chose includes all of the performance goodies for just $2,350.
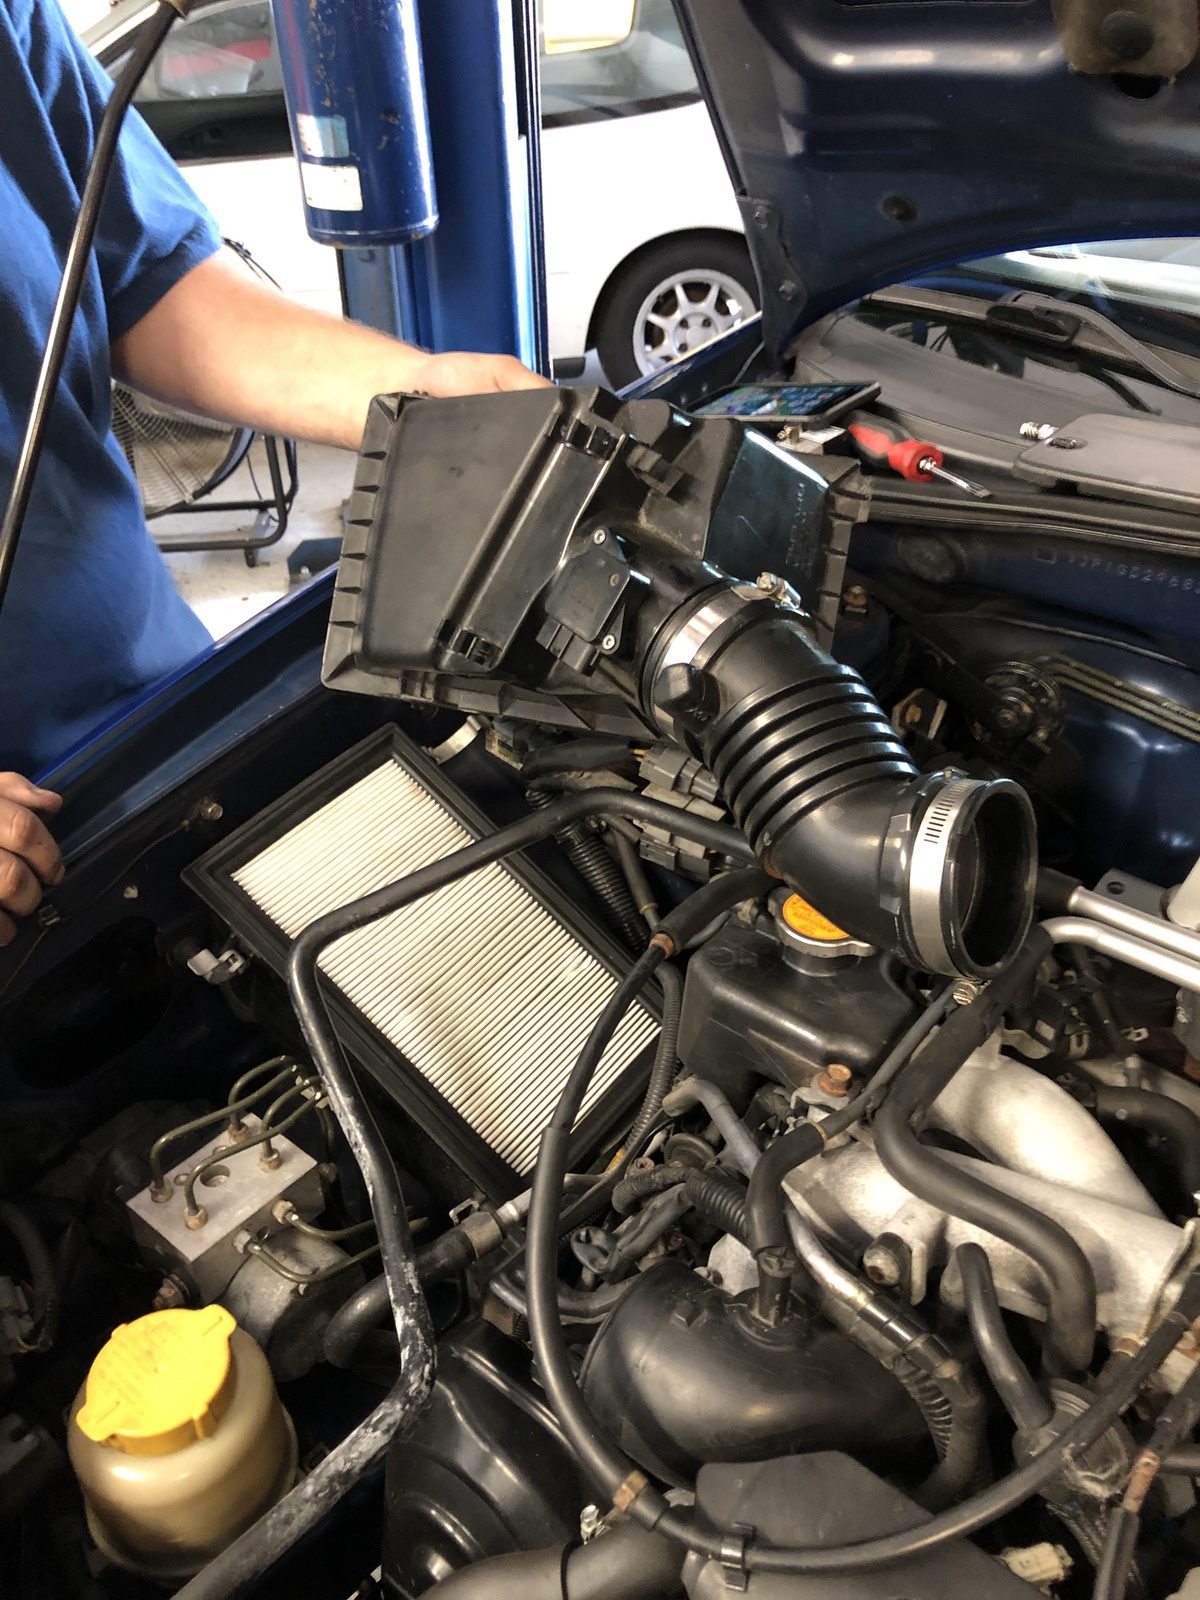
To begin the installation, we started with removing the factory air box.
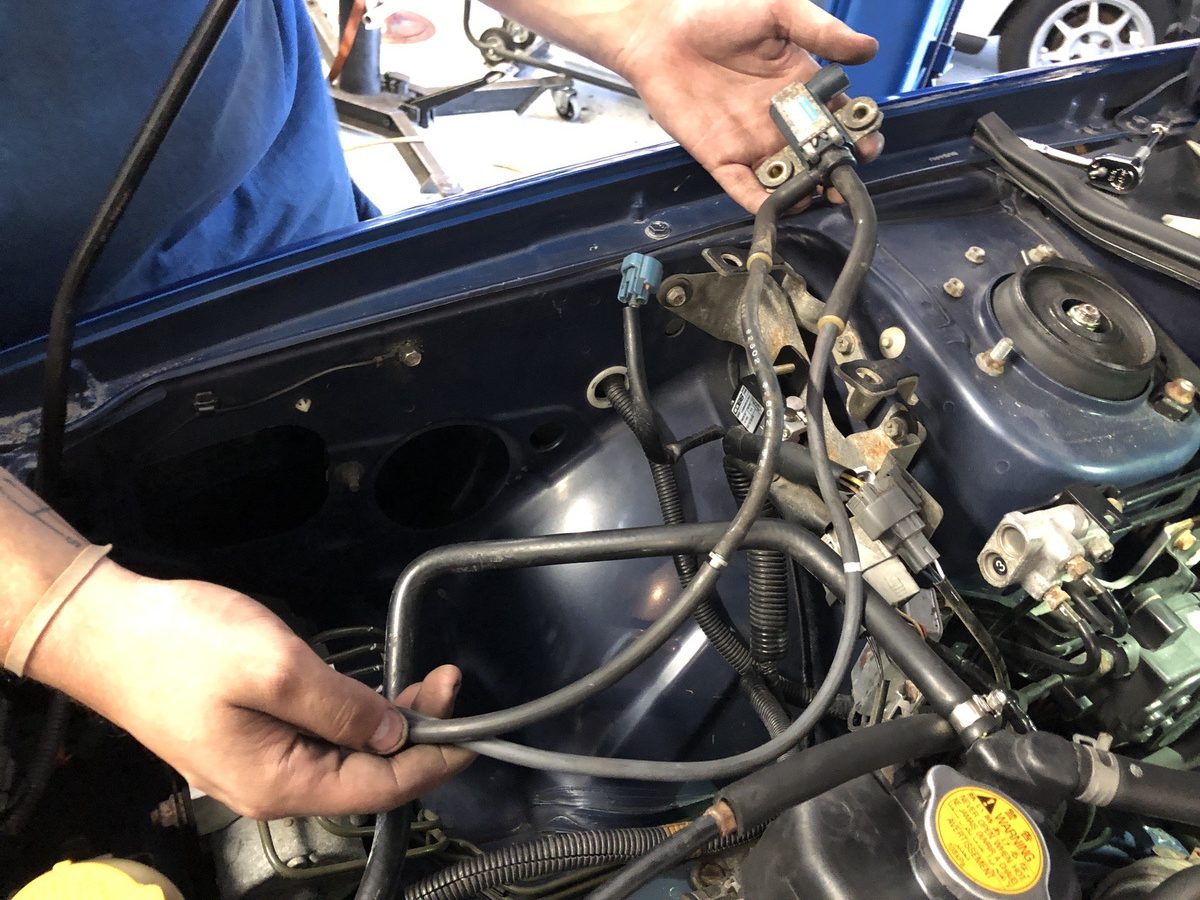
While the air box is out of the way, it is a great time to swap out the factory boost control solenoid for the Cobb 3-port boost control solenoid, which mounts in the factory location on the strut tower just behind the air box. We recommend grabbing a sheet of paper and mapping out where all of the vacuum lines are routed prior to disassembly.
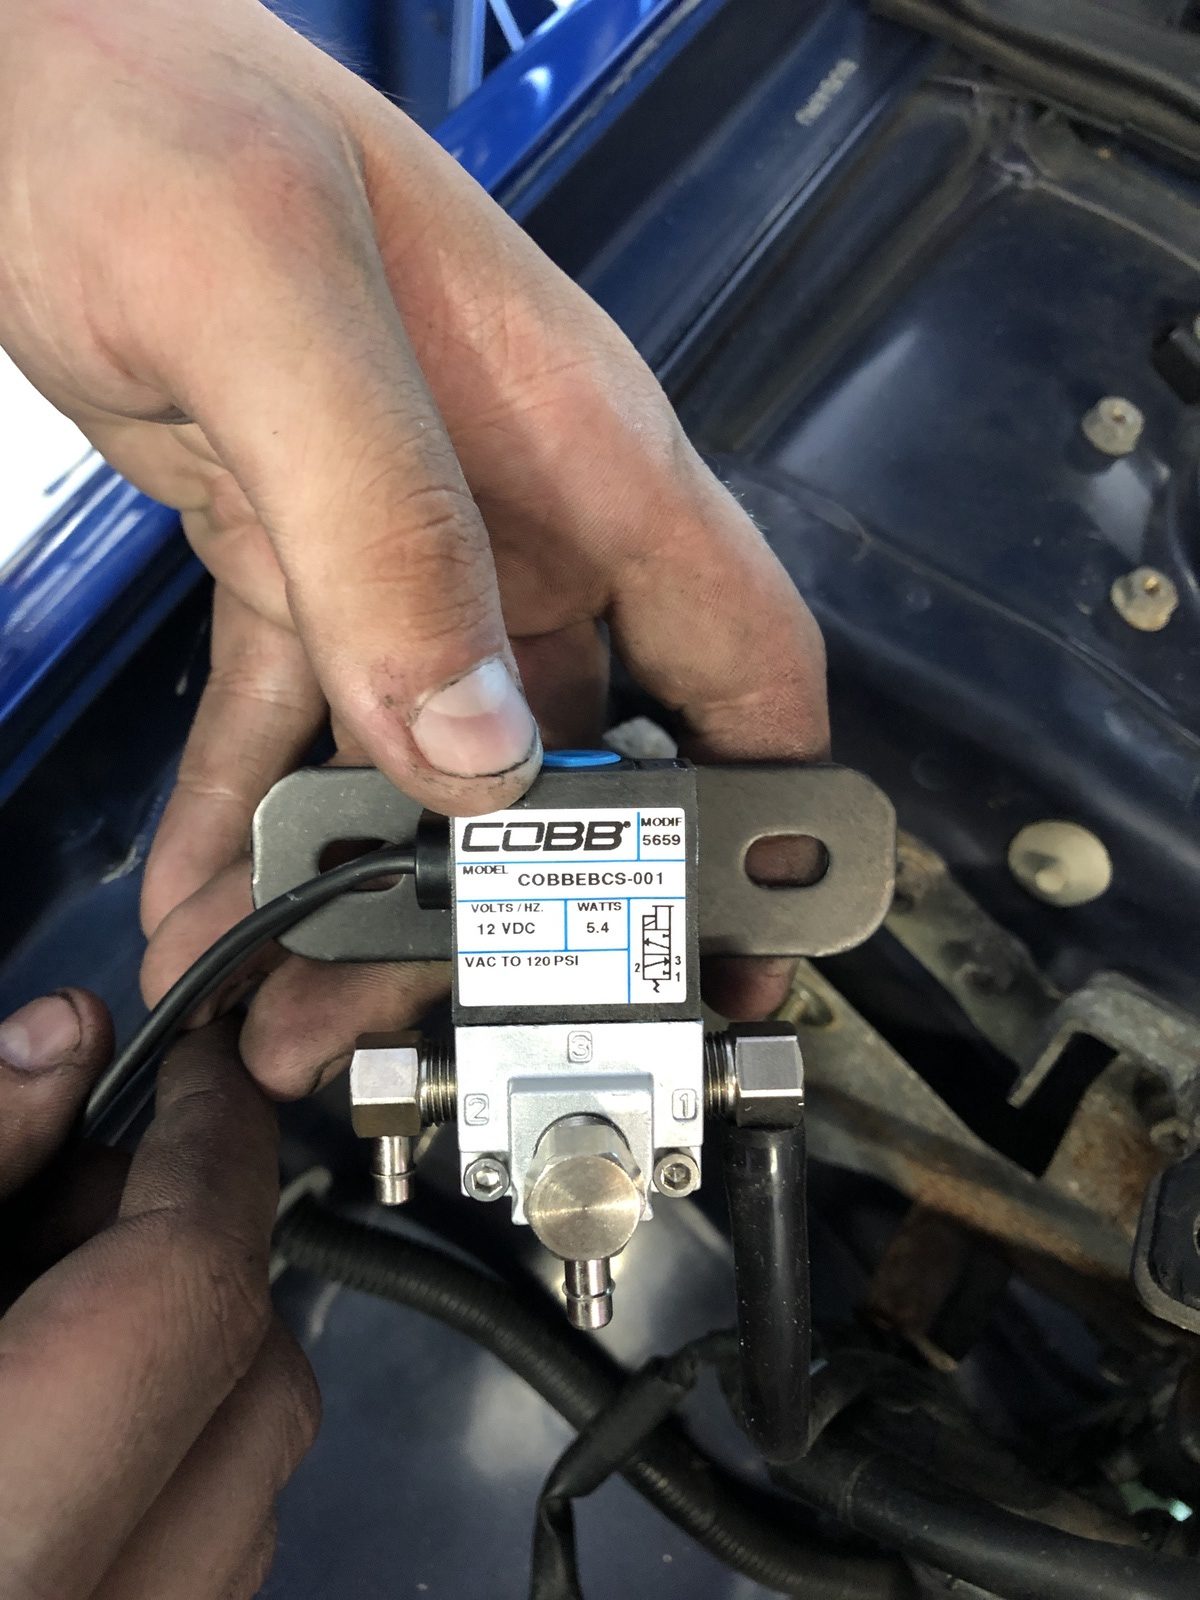
The Cobb Tuning 3-port boost control solenoid is designed to eliminate the boost fluctuations seen in the factory controller, while allowing superb control at much higher than stock boost levels.
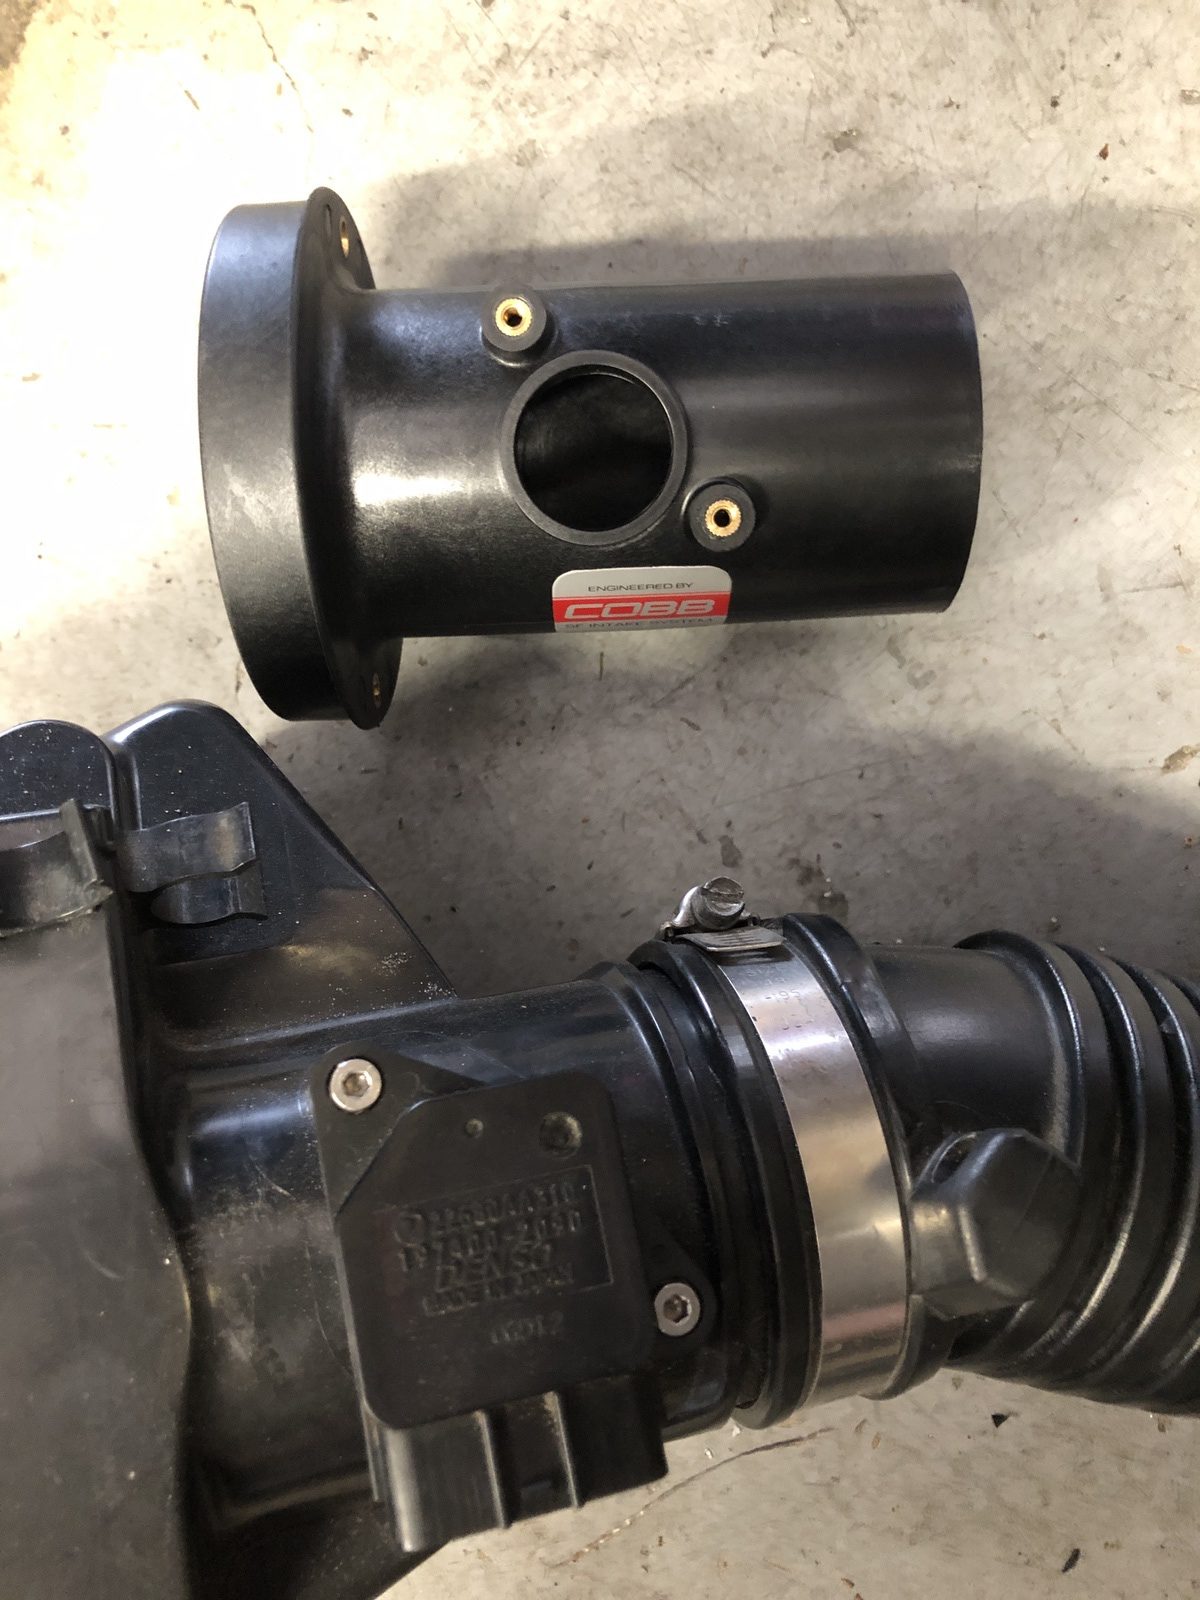
Next, we need to remove the mass airflow sensor from the original housing and mount it to the new Cobb high-flow unit. The SF intake from Cobb is CARB-certified and can be used in an open short-ram configuration or housed in the Cobb air box. Installation of the Cobb intake will greatly increase the intake sound and allow you to hear the turbo spool, which is one of the best parts of owning a turbocharged car if you ask us.
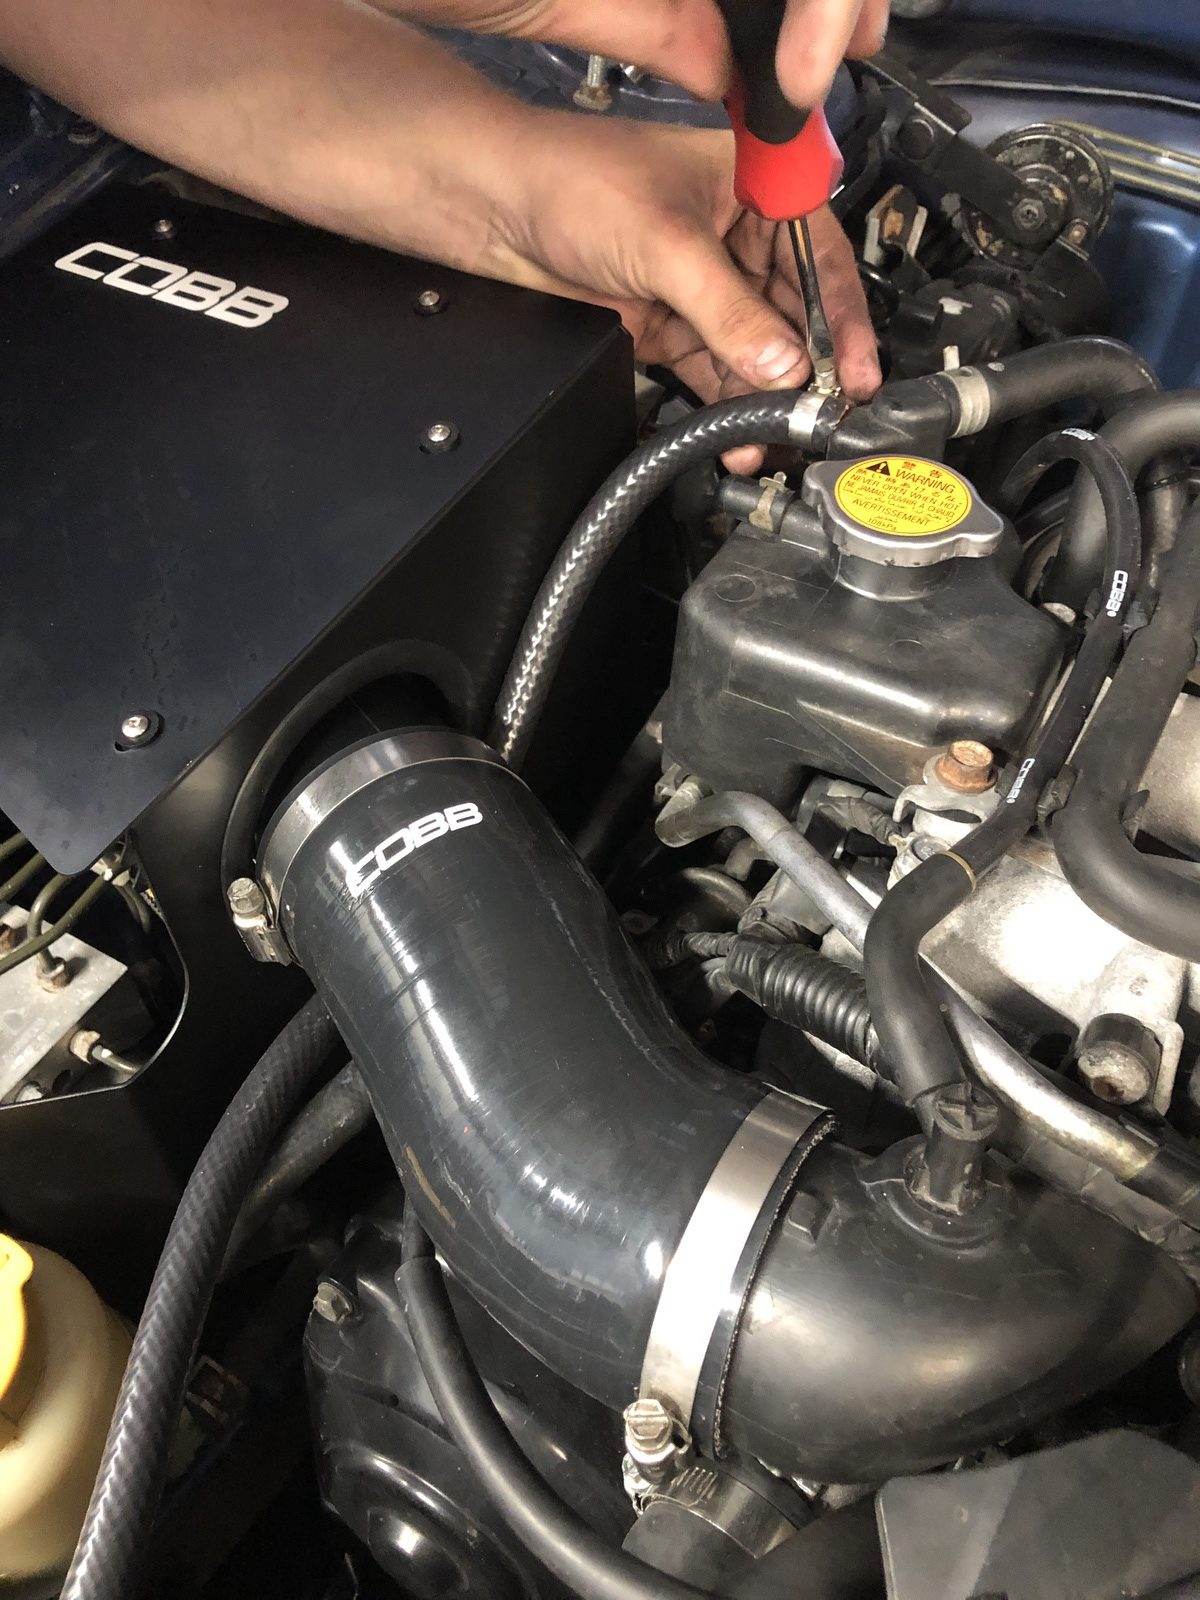
After transplanting the mass airflow sensor, we could connect the cold air kit with the factory turbo inlet, and install the additional components to the kit. With that, the induction upgrades are complete.
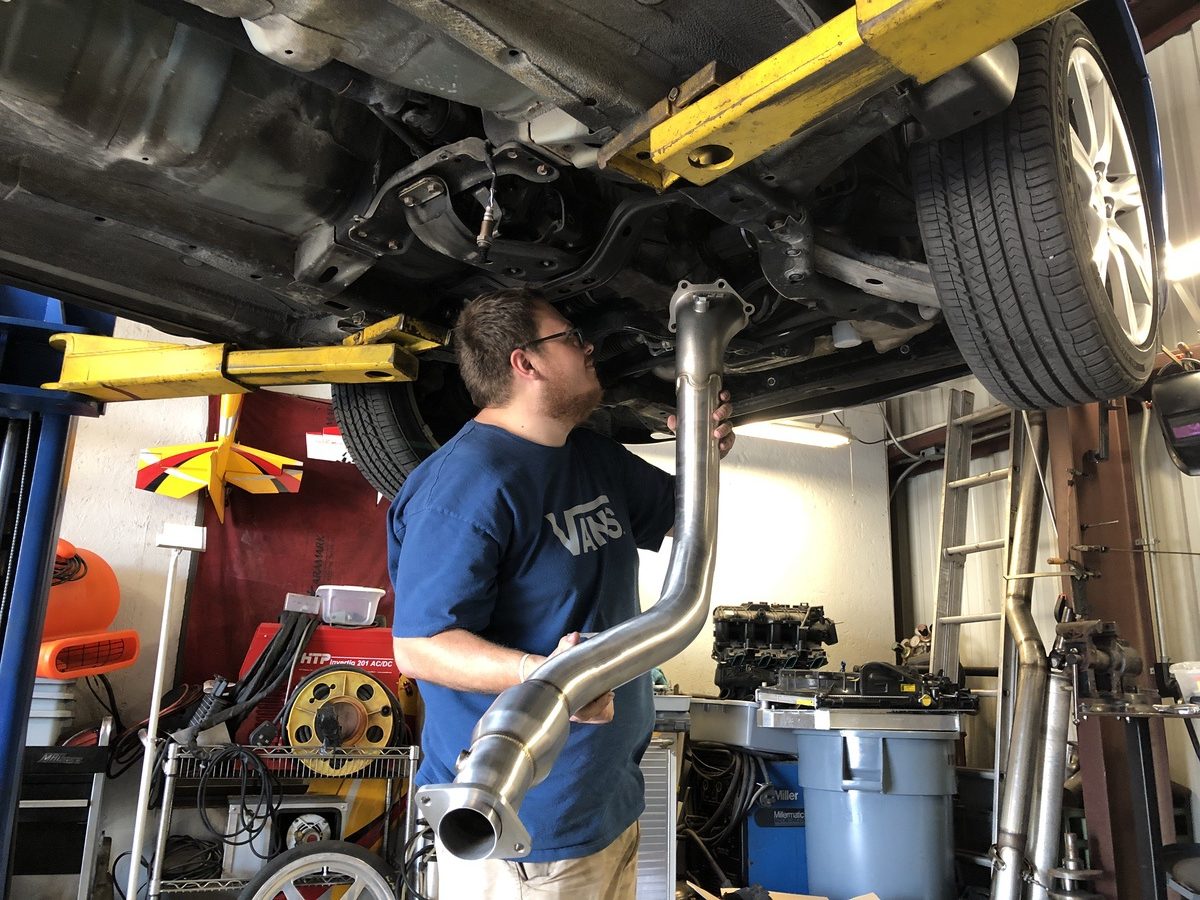
Before sending the Subie skyward, Garrett removed the downpipe fasteners that secured it to the turbocharger exhaust housing. Thankfully they didn’t put up much of a fight, and as soon as the car was raised, the old downpipe was out and Garrett installed the Cobb catted, stainless steel downpipe. You can see in this photo that Cobb uses a cast bell mouth to improve exhaust flow coming out of the turbo and integrated wastegate.
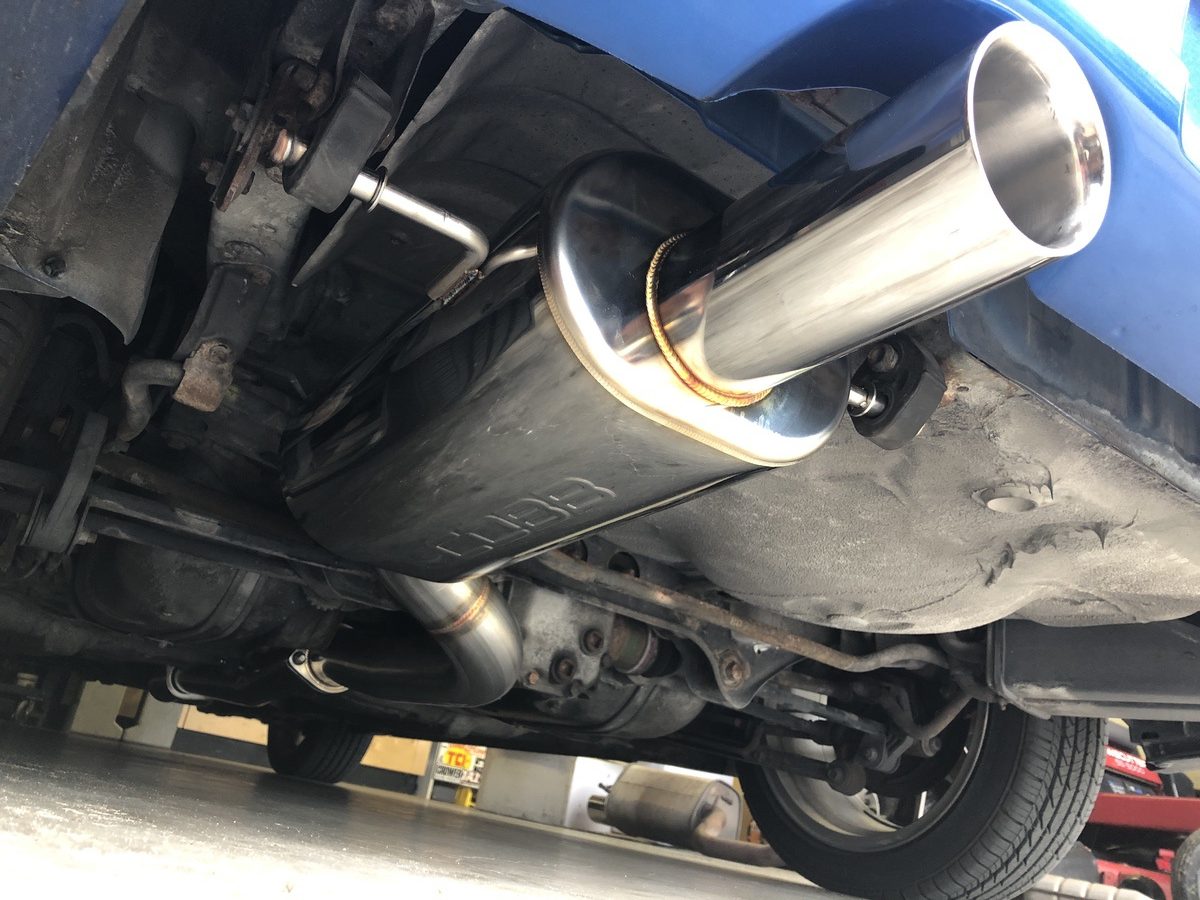
The rest of the Cobb exhaust system bolts up easily using the factory hangers. Having had numerous exhaust systems and combinations on the car previously, we can honestly say that the Cobb is the best sounding and offers the best compromise. It’s not so loud as to be annoying to the neighbors or the vehicle occupants on long drives, yet it growls aggressively when the throttle is opened up and reminds you that the little sedan was bred for racing.
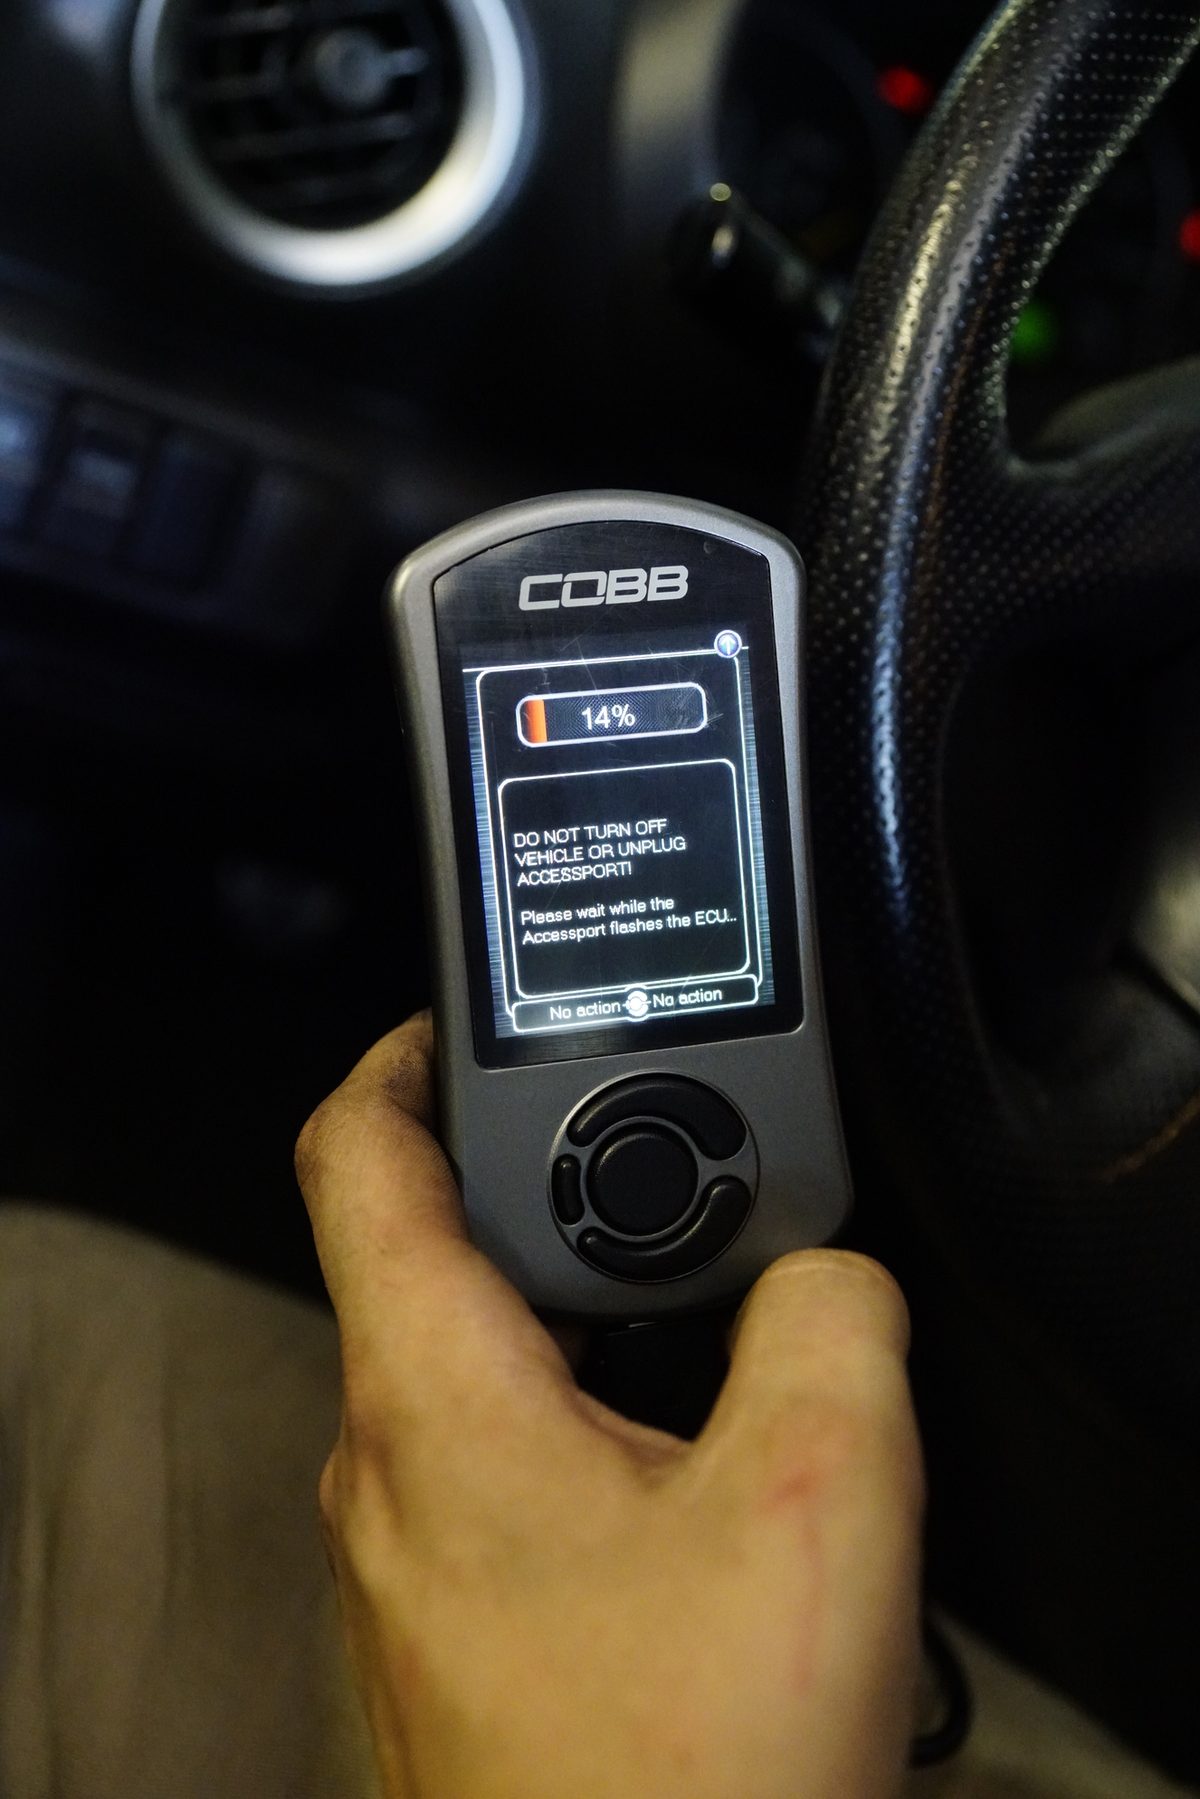
With the induction and exhaust upgrades completed, it was time to turn up the wick in in the ECM. To do that, Garrett connected the Cobb Accessport through the car’s OBDII port at the bottom of the dash beneath the steering column. The prompts are easy to follow and we uploaded the factory calibration to the Accessport first, before installing the Stage 2+ calibration.
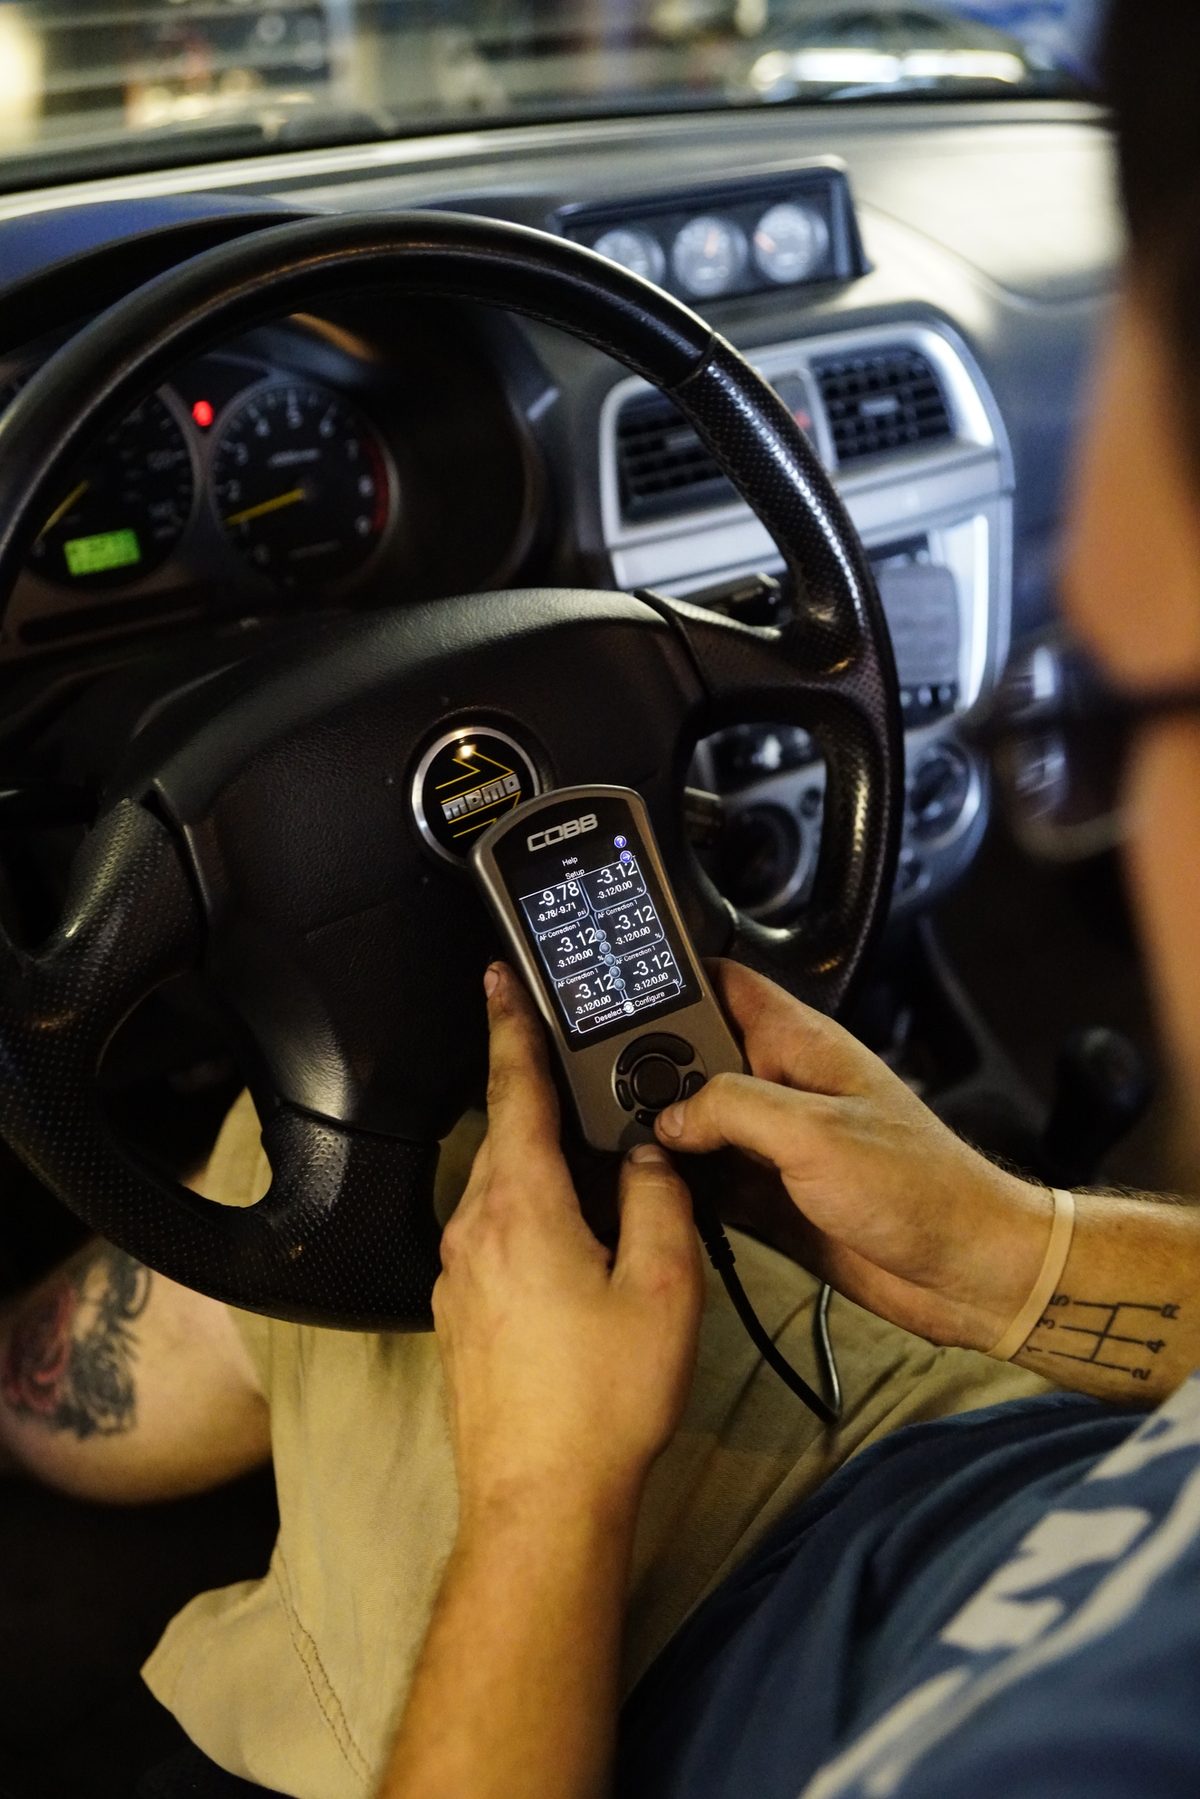
Garrett then set up the Accessport gauge readouts to his preferred options. These included air/fuel ratio, knock retard, air/fuel corrections and others, with the Accessport offering room on the screen for six different data streams.

While the Cobb performance parts installed without any issue, things got weird once we hit the dyno. Our baseline runs showed that the JDM engine, equipped with an aftermarket catalytic converter-less up-pipe, catted downpipe, and stock ECM calibration, was a stout little piece, offering 230 whp and 231 wtq at 14.7 psi of boost pressure. Unfortunately, and startlingly, the engine was running way too lean, with the air/fuel ration going as high as 15:1 and staying above 14:1 for the duration of the dyno pulls. This might be fine for a naturally aspirated vehicle, but not for a turbocharged or supercharged one. Normally, you’d like to see something closer to 11.5:1 under boost. We pressed on with the parts install, hoping that perhaps the Cobb ECM calibration might fix the issue, but it did not, even when using Cobb’s low-boost ECM calibration. As Gonyon has often pointed out to numerous customers and now to me, “You can’t tune out a mechanical problem.”
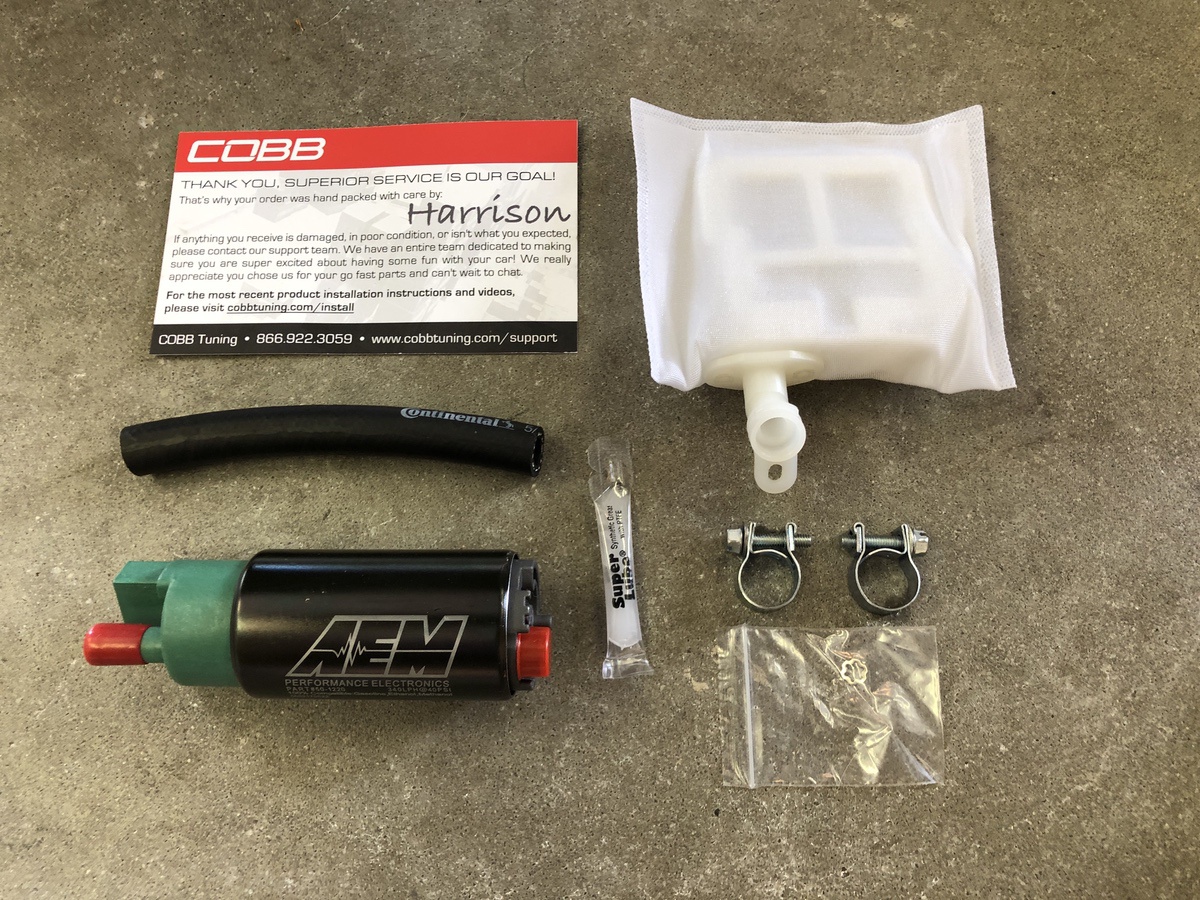
Back home, we discussed the issue with Glasgow at Cobb and decided to try swapping out the factory fuel pump for this AEM 340lph unit that Cobb Tuning sells. The pump (part number 312450) is E85-compatible, and at just $150, it’s a highly capable fuel pump that runs as quiet as the factory one.
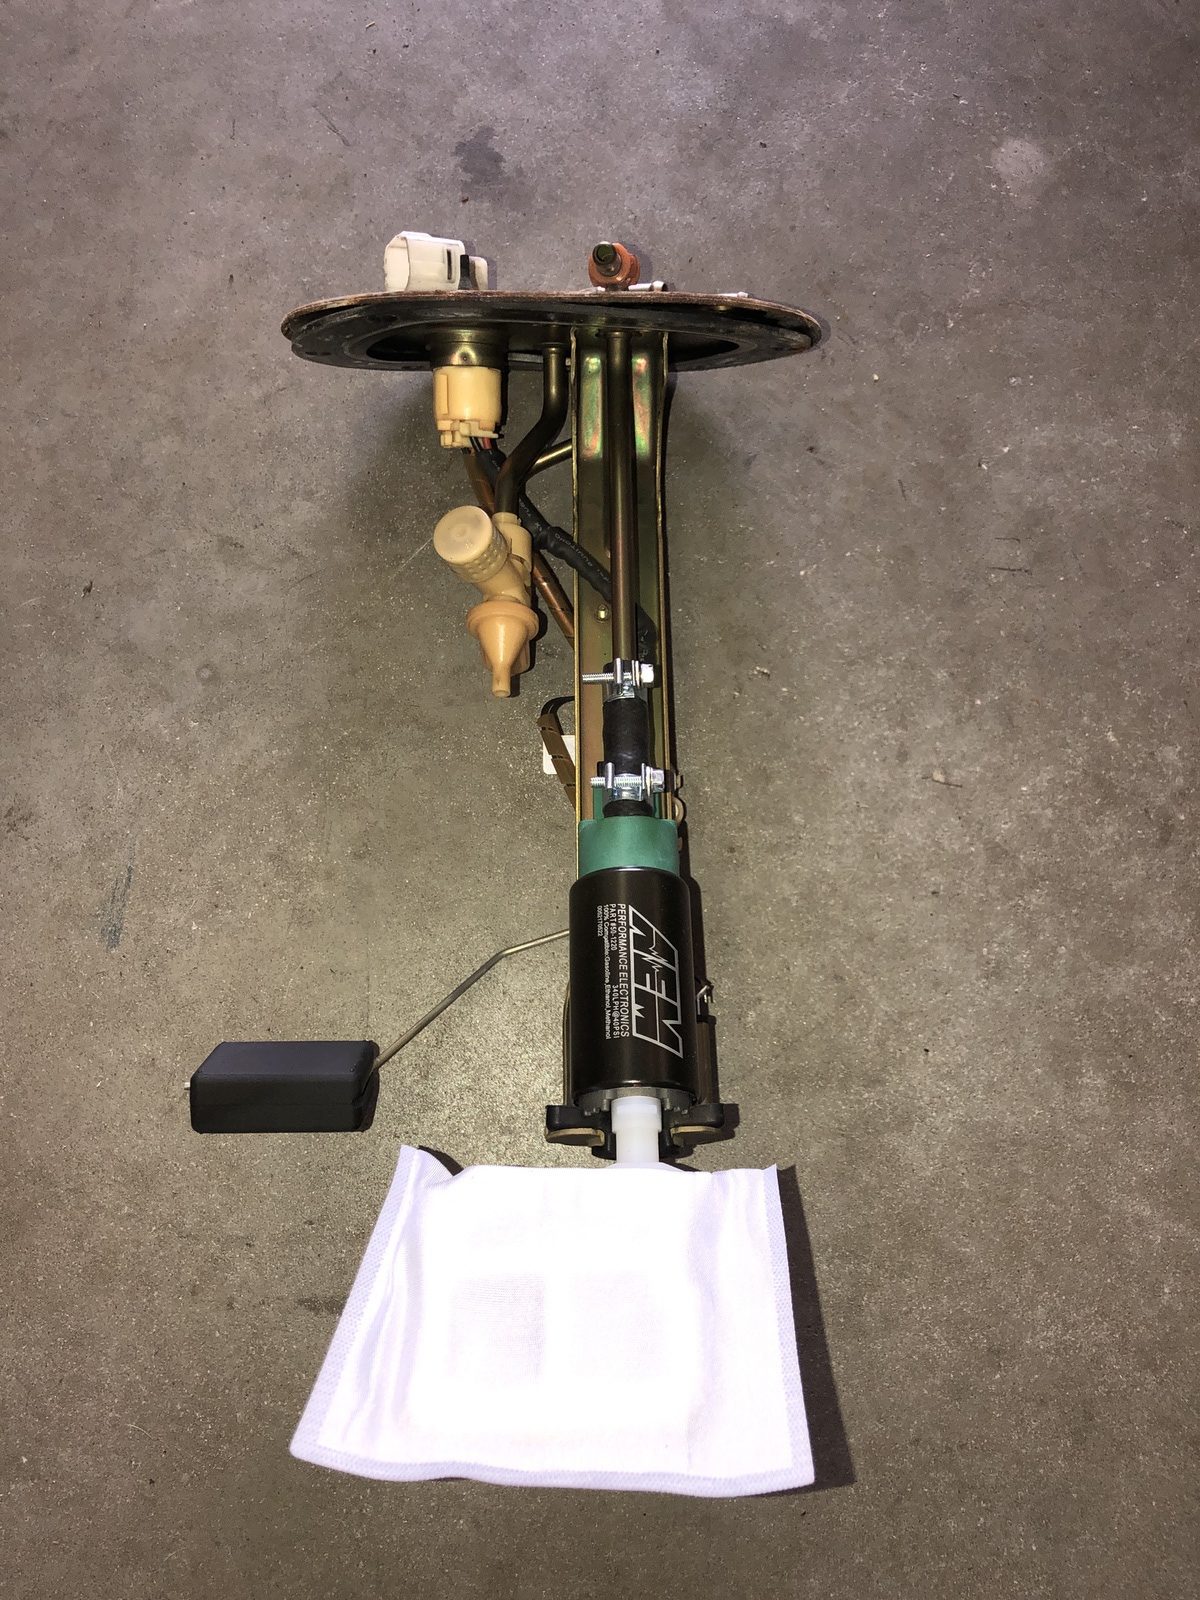
The AEM pump from Cobb Tuning fits right into the factory assembly. Despite having well over 200,000 miles, the pump assembly looked to be in good working order. To swap the pump out, you’ll need to open the access hatch located in the trunk floor. Once you have removed that, then you can remove the fuel pump assembly hat and carefully work it out of the fuel tank.
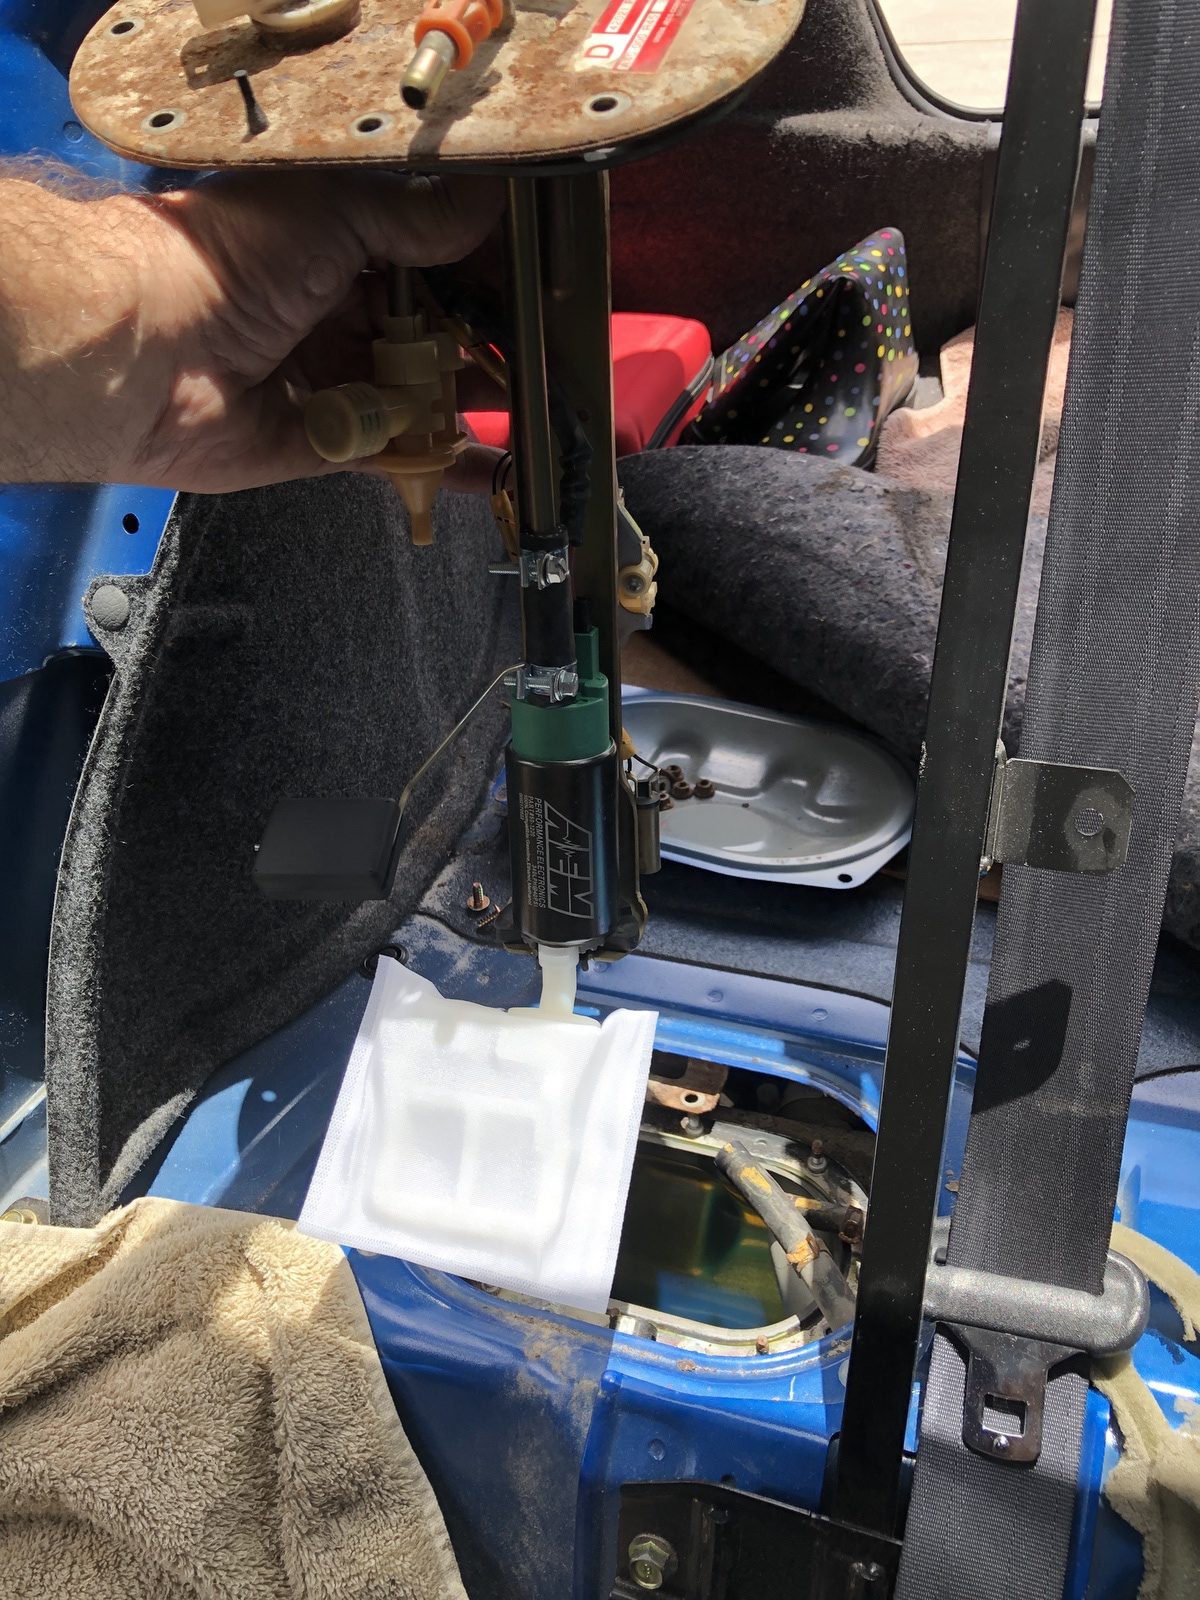
As you can see in this photo, we actually found it easier to remove the back seat and work from inside the car, as the access port in the floor is all the way at the front of the trunk floor. We cleaned up the top of the gas tank and assembly hat before removing it so we wouldn’t get dirt—of which there was a surprising amount on top of the tank—into the tank during extraction and installation.
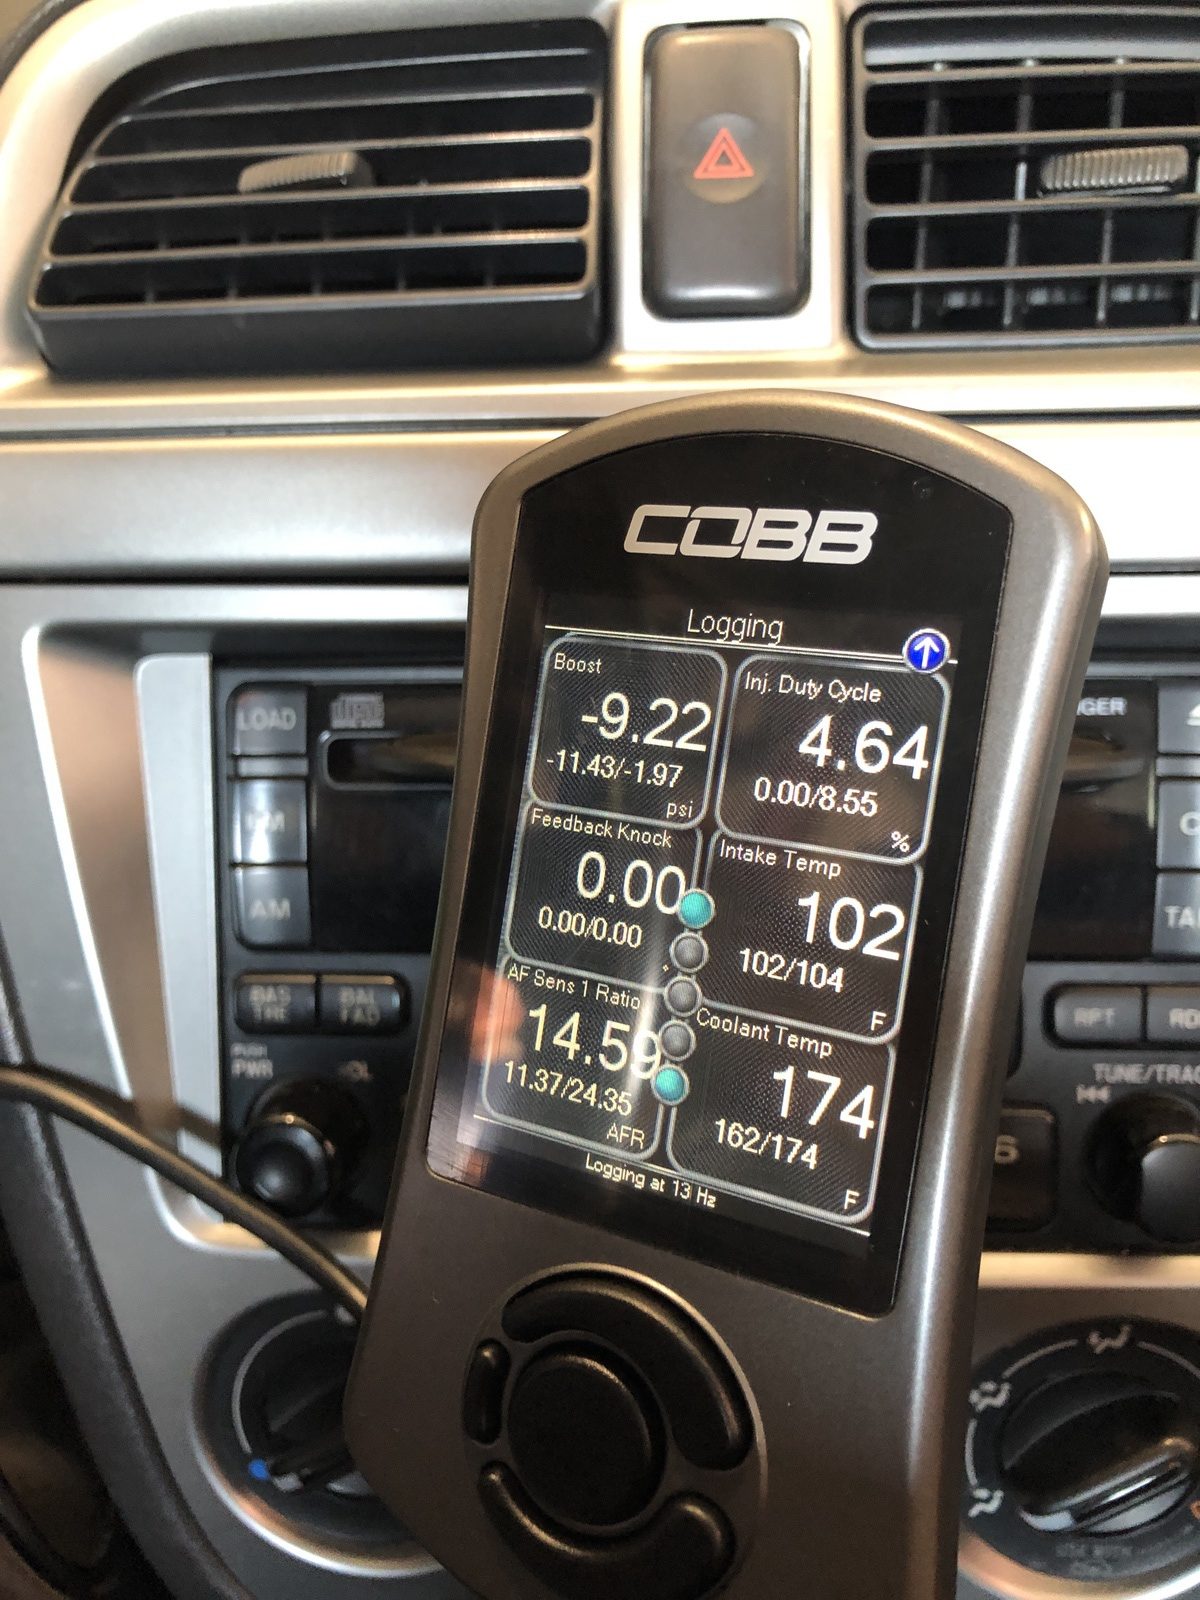
Using the Cobb Accessport to datalog pulls under load out on the road was very easy, and handy, as we didn’t need to travel back to Tuners Inc. and strap the car back on the dyno to see if the new fuel pump fixed the lean condition. The logs, as well as the real-time air/fuel data supplied by the Accessport, showed that the new pump did not solve the problem. The next things to consider as cause the lean condition were the mass airflow sensor or an un-metered source of air getting into the engine. With the engine running rather smoothly, the airflow sensor was deemed in good working order, but we did go ahead and clean it with an appropriate sensor cleaner.
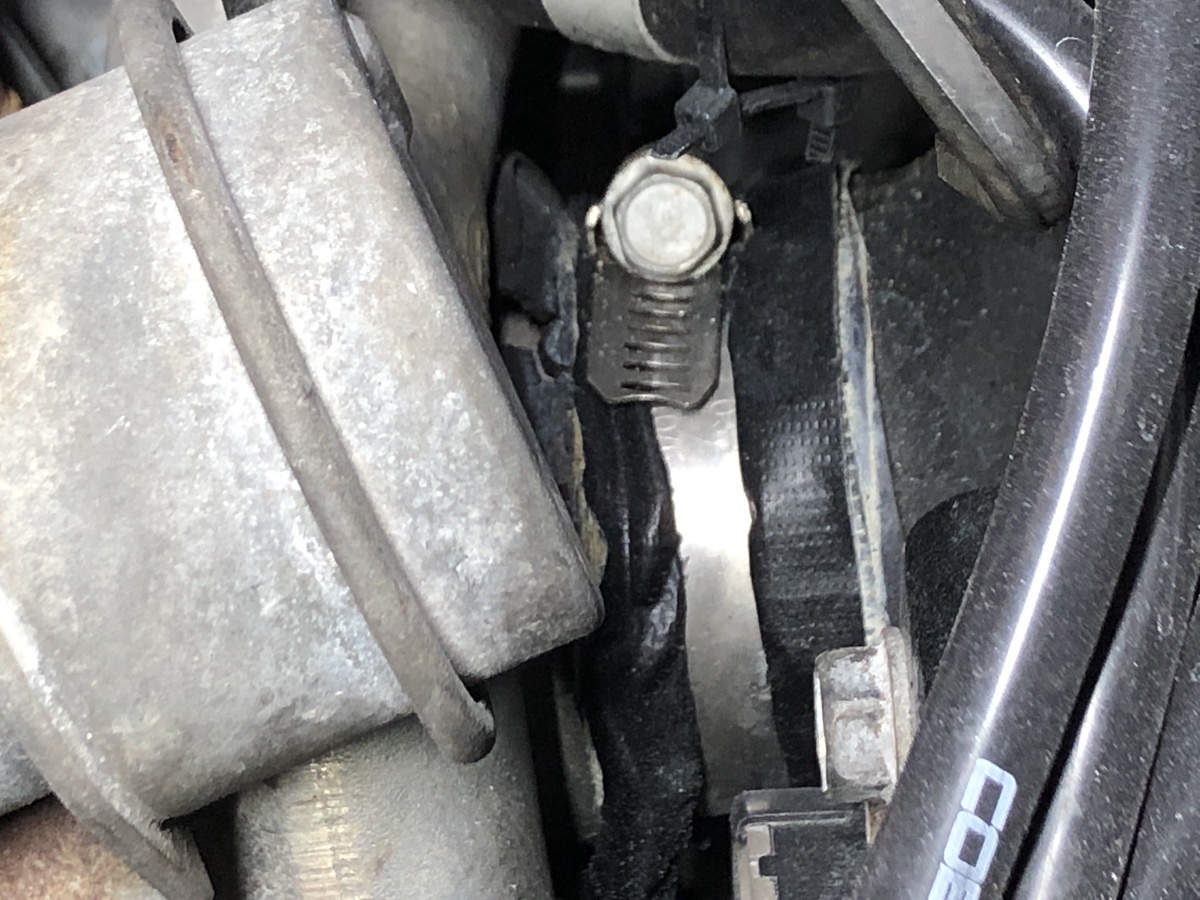
The next thing we did was rig up a smoke machine to fog the intake for air leaks in the intake tract. While there are plenty of commercial and thus expensive ones out there to use, we employed a smoke machine from a party store and closed off the end of the factory turbo inlet tube where we had inserted the hose from the smoker. The test revealed significant leaks where the turbo inlet was fastened via hose clamp to the turbocharger itself. As we didn’t have another turbo inlet to install, and said installation requires the lengthy process of removing the intake manifold—at least when installing a factory plastic inlet—we wrapped the rubber part of the inlet with some black duct tape and put the clamp back on. Subsequent fog testing showed the leak had been fixed, and data logging showed that the lean condition was no more and we were back to an acceptable air/fuel ratio.
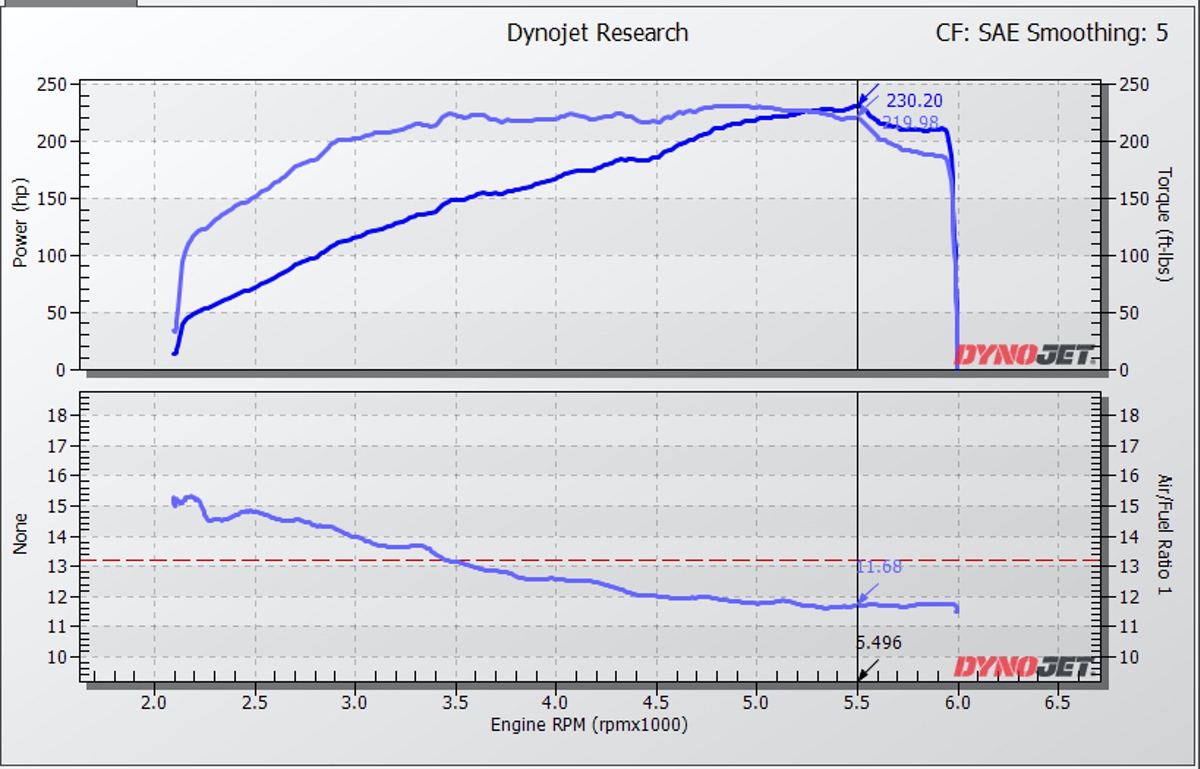
The next test was to load the Cobb Stage 2+ tune into the ECM, which worked perfectly. The air/fuel ratio remained stable and the seat of the pants feel was noticeably improved. Drivability was surprisingly better, with improved throttle response from the normally laggy 2.0-liter boxer engine. We returned to Tuners Inc. for further dyno pulls with the engine functioning properly, and were greeted with 230.20 whp and 231 lb-ft of torque, all with a proper air/fuel ratio of 11.68:1. While we didn’t see a significant change in the horsepower or torque numbers from the baseline, we did equal them, but with a much improved air/fuel ratio. Stock WRXs usually put down around 180-190 horsepower at the wheels, so our dyno numbers definitely show that the upgrades delivered a boost in performance.
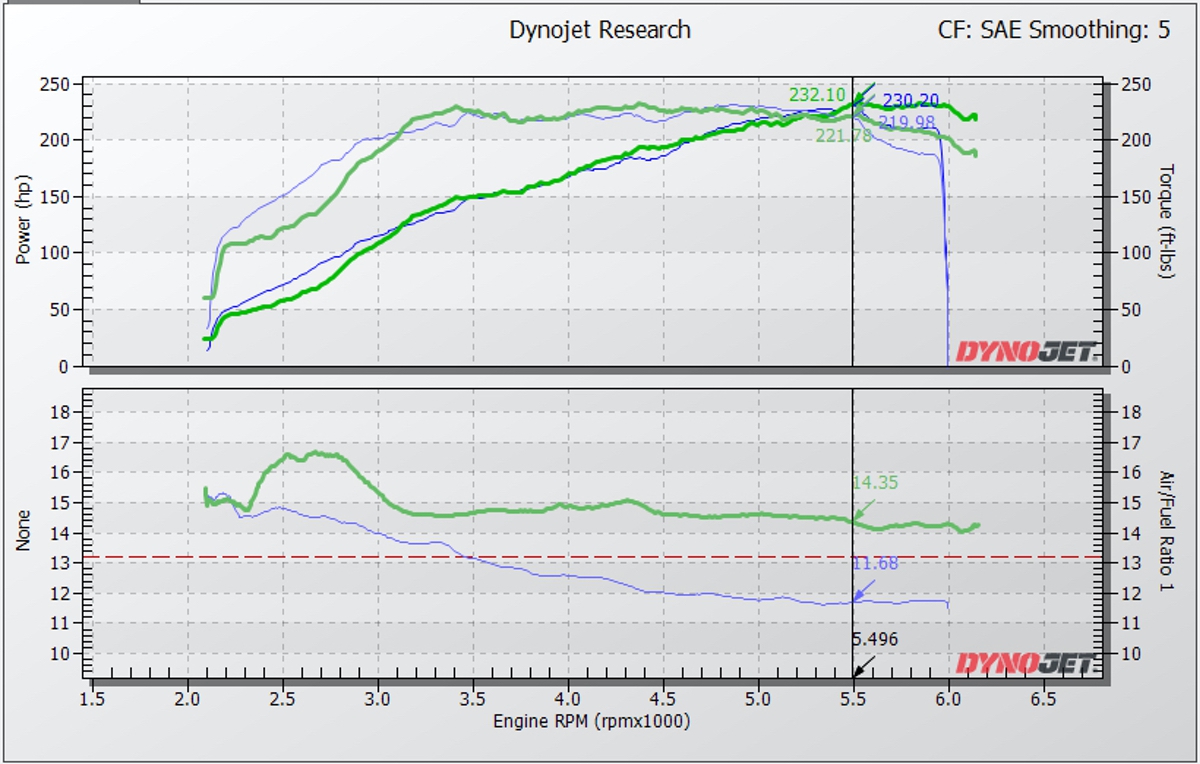
In this graph, you can see the difference between the very lean baseline run in green and the final run in blue. Now that we have the Cobb Accessport, we can see the air/fuel ratio in realtime and verify that we aren’t in an extremely lean condition again, which quite possibly contributed to the demise of the original engine. The Accessport also gives us the opportunity to try a myriad of available calibrations, with options for low, medium, and high boost levels, as well as different fuel octane ratings readily available for download from the cobbtuning.com. Further calibrations are available online as well for those with modifications well beyond what we currently have. Come to think of it, our turbo is about ready for an upgrade!
Sources
Cobb Tuning
(866) 922-3059
Tuners Inc.
(904) 276-7223
https://www.facebook.com/tunersincperformance/


