


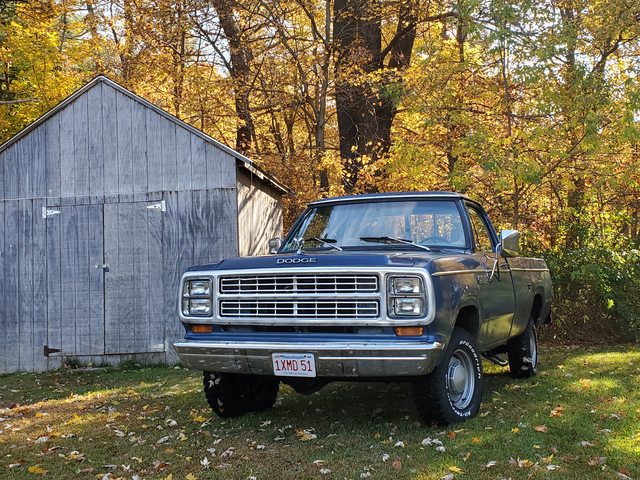
Welcome back to our coverage of Project Power Laggin’! Follow along as we take a tired 1979 Dodge W150 Power Wagon we found in Central Maine and transform it from a derelict roadside attraction to a dependable, powerful weekend workhorse that lives up to it’s given name! In this installment, we attempt to reign in the rust-hungry tin worm, as well as stopping some of its many fluid leaks! Would any complications arise? Read on to find out!
In the last installment of Project Power Laggin’, we made some much needed repairs to the suspension, steering, brakes, fuel system, and more. The truck was starting to become more reliable, and able to tackle basic “truck stuff” errands around town without leaving anybody stranded. With the cold weather on the way, the urgency to fix a few of the truck’s remaining major issues became paramount. Since picking up the truck, I noticed that it liked to leak all sorts of fluids everywhere (especially oil), and that the paint on the roof was coming off in sheets while it drove down the road. Before it becomes so cold that it hurts to be outside, these needed to be addressed.

First up: the roof. If you have any experience with 1972-93 Dodge trucks, you know that the roof is one of the biggest trouble spots for rust and rot. They really like to rot at the drip rails, and once they do, it’s new cab time, provided you can find one that already hasn’t rotted into dust! This truck had some surface rust developing from a really bad paint job it received long ago, but nothing had rotted through yet. I wanted to make sure that it didn’t have the chance to do so.

This is not great. It looks like someone just painted over what was already there, but did zero prep work. Paint was literally coming off while I drove the truck around!

As I started to sand things down, I immediately found a GIANT roof dent that was haphazardly covered up in body filler, which has since cracked. I had to sand all of this down to metal and address the dent later down the road. I haven’t seen this much filler on anything since college, when a guy pulled up to the dealer I was slinging parts at with a car that he Bondo’ed the rear doors shut to make a “coupe”. Yikes!

After sanding for what seemed to be an eternity, things started to look better.

Full disclosure: I am not very experienced with body work. This was my first attempt at doing any sort of body work since the late 90’s, when I had to fill a hole with body filler on my old 1987 Mercury Cougar XR7.

After sanding things down, I hit the roof with some self-etching primer and let it cure overnight. It’s already looking 100% better than it did.

The next day, I went down to the parts store with a chunk of the old paint in hand and attempted to find something “close enough” in spray can form. I left with two cans of blue paint that would do the job. I knew it was going to look terrible, but I wanted to seal it up with something to avoid things rusting further. I’m going to be painting the entire truck the right way down the road, so this will do for now!

With the roof significantly less rusty, it was time to tackle the other elephant in the room: the fluid leaks. I scheduled some time at my friend’s home shop, and planned on replacing the oil pan gasket. Oil was leaking at an alarming rate from multiple areas in the ancient pan gasket, so that was definitely top priority. We also noticed that both valve covers were also leaking quite a bit, and if you know old LA-series small blocks, you know this is very common. If there was time after the pan, those would get replaced as well.

On the older LA-series Small Block Chrysler V8’s like the 318 in this truck, they use a four-piece oil pan gasket. The sides are traditional cork, and the ends are rubber. After a while, that rubber can get brittle and break, like we see here. Check out that missing chunk! The later Magnum engines switched to a different style pan and one-piece rubber gasket that’s a lot less prone to leaks.

Well, yeah… those are SMOKED! Needless to say, the pan was leaking out both ends at an alarming rate.

With the pan off, I was able to get a good look at the condition inside the engine. Everything looked ok, save for some sludging on the block walls and in the pan. This thing probably didn’t see regular oil changes or maintenance for most of its life, probably because they just kept adding oil as it leaked out for decades. Another observation: it smelled BAD! I’ve opened up all sorts of engines over the years, and none of them stunk like this! Puke-tastic!

One thing I wanted to check was the oil pump screen, especially since I saw sludge elsewhere in the engine. We swapped in a factory oil pressure gauge and sender a while back, and it was always reading on the low side, and this gunk in the screen could be part of that. Of course, it could always be a bad ground or the fact that the gauge was pulled out of something that was 45 years old sitting in the weather for most of that time, but this may have something to do with it.

After de-gunking the inside of the oil pan…

…As well as the outside, it was ready to go back on the truck. It was checked for holes, and none were found. On you go!

I had to pull the flexplate cover off to get better access to the back of the pan, so I cleaned that up too. I didn’t even know it was this color!

Even the bolts were disgusting, so every bolt I pulled off got tossed into a cup of brake clean to soak while I cleaned up the rest of the parts to re-install.

Here’s an important word of warning to everyone: You need to know when to put down the tools and walk away! I decided after getting the pan re-installed that I wanted to tackle at least one of the valve covers, as it was leaking profusely. BAD IDEA. It was getting late, and I was tired, and I rushed the job. The result: hot oil all over the even hotter exhaust manifold, and almost catching the truck on fire! I made it home, but just barely. Again, don’t be dumb like me; quit while you’re ahead!

Shortly after almost burning the damn truck to the ground, I decided to tackle both valve covers again. As said earlier, valve cover leakage on these old LA small blocks is a very common problem. They are notorious for leaking for a couple of reasons: the gasket surface on the head side is not machined like newer engines (like the Magnum V8’s) and they use stamped steel valve covers that are prone to bending. Gaskets are an issue as well; I found three different Fel-Pro gaskets for the truck when ordering replacements, two of which I purchased. At least the valvetrain looks cleaner than the bottom end did!

Like I said, there are three types of gaskets: the original rubber, a rubber coated fiber “heavy duty improved design” gasket, and cork. I bought the rubber and the rubber covered fiber ones, the latter of which I installed during that failed wrenching session. Not so sure what’s “improved” about these. There’s no give to them, and if the cover edges have any deformities, out goes the oil!

This is the original-style rubber gasket. Note those little tabs; they are important.

Those tabs fit into slots on the valve cover and keep the gasket where it’s supposed to be. Much better! With the cover off, I inspected the edges and noticed that it wasn’t exactly straight in spots, so I tweaked it a bit to straighten it out. Any remaining gaps between the gasket and the metal were filled with Ultra Black RTV. After I bolted the cover back on, I also tapped the edges lightly in the high spots with a socket extension and hammer to flatten it back down. That did the trick, and the leaks were gone!

The passenger side cover which I didn’t mess with yet was also leaking quite a bit, and oil was making its way down the back of the block and onto the Y pipe. It was also leaking at the front corner and pooling up on the intake manifold. Since we are trying to rule out all forms of self-immolation, this needed to be fixed. There are a few more steps on this side of the engine, including removing the vacuum assist pump and some wires that are routed through the cover’s built-in wire holder. Not a big deal.

The valve cover was also leaking on the intake side, which led me to think that the intake gaskets were leaking, but upon further inspection, it appears that it was just the valve cover gasket leaking everywhere. I also found this hole where the heat crossover is on the head. While it’s not leaking oil, should this be exposed like this? Mopar guys, feel free to chime in!

After cleaning everything up and installing the new gasket, everything went back together nicely. This side also had one of those rubber coated fiber gaskets, which explains a lot. Once again, with the original style rubber gasket, there are no valve cover leaks! I let the truck run for a while to burn off the existing leaked oil, but the smoke just kept coming. Could there be another leak?

You have got to be kidding. When I had the pan off, it was inspected and found to be free of holes. WRONG! There was a pinhole in the pan, causing oil to leak all over the Y pipe, making it smoke like a chimney. I probably shortened my life span by about 5 years breathing in all the oil smoke.

After draining the oil and cleaning up the suspected area, the hole was located. If you squint and look at the middle of the picture, you’ll see it. Since all the parts houses stopped stocking oil pans locally for the truck sometime in the mid-1980’s, and governed by the fact that “Truck Stuff” needed to continue, it was off to the parts store to see what kind of goop we could slap on there to stop that leak.

After a trip to two different local parts shacks, three eligible products were procured. So, let’s play the Oil Pan Sealant Dating Game! Bachelor #1 is a two-part play doh-like epoxy called Qwik Steel that can be used on metal. Bachelor #2 is the tried-and-true JB Kwik that sets up real fast. And Bachelor #3 is another two-part epoxy putty called Water Weld that loves working underwater! Project Power Laggin’ chose Bachelor #1 because it says “Oil Pan” right on the label. BUT WOULD IT WORK?

I’m sure some of you are familiar with this stuff, but for those that aren’t, here’s the deal: You drain the pan of oil and clean up the area the best you can. Then, you cut a chunk of this clay-like two part epoxy and start kneading it together. Once it gets hot to the touch, start spreading it out on the affected area like Silly Putty on a newspaper comic strip. It sets up in about 5 minutes, so you have to work fast.It completely sets up for an hour, but I gave it a few more before adding oil back to the pan. After firing it up, no leaks were present, so we’re chalking it up as a win! It’s ugly, but have you seen the rest of this truck?
Where does this leave the state of the Wagon of Laggin’? That oil pan repair worked, but it’s only a matter of time before the rest of the rust spots turn into pinholes, so a new pan is a must. Also, since that oil pickup screen is gunked up, it should really be replaced. And since that’s connected to the oil pump which has to come off to replace the screen, that should be replaced as well. With those parts removed, I can also replace the rear main seal. All of these repairs are necessary to keep the old rig rolling, and should be simple enough to do. But one thing has been looming at the back of my mind: the want for more power. Now, there are two ways to do this relatively easily:
One: See what can be done with the stock 318.

This is a smog-era, 40 year old 318 2bbl, so it has the lame-o small port heads and was geared toward low emissions and low performance. It runs well enough, but it’s seriously lacking in both power and efficiency. This thing gets 8 MPG on a good day! On the road, it is very tractor-like without much excitement. A 4bbl intake, carb, and mild cam would certainly wake it up.
Two: Magnum Force.

The Mopar Magnum engine family that appeared in the early 1990’s were welcome upgrades in many ways to the older LA engines. They had roller cams, improved valvetrain components, better flowing heads, and were fuel injected. They are plentiful and dirt cheap, and a 5.9 Magnum will plop right into the engine bay where the 318 currently resides. Mopar even redesigned all of the problematic gasket mating surfaces that we tackled in this story, so they leak far less! They also have some issues, like cracking heads and different intake bolt patterns than the older engines, so some planning will need to be made before undertaking this swap.
So, what would YOU do? Would you keep soldiering on with the 318, or would you consider upgrading to a newer Magnum V8? We know which way we are leaning, but we have a lot of thinking and bench racing to do before we ultimately decide. Let us know what you are thinking below!


More cubes than 318 would be welcome in a full size 4X4, and fuel injection too. Maybe a Holley system?
Continue with the 318 repairs while getting the truck running reliably, find yourself a 360 block and heads to rebuild and put into the truck later.
Excellent update!!
Very tough questions…if the existing engine was in perfect condition…I’d say 4 barrel & intake.
But since it looks like you might have low oil pressure…and more repairs are needed, I think swapping to something in better condition with more cubes is definitely the right way to go.
The biggest issue is finding a GOOD replacement that doesn’t just give you a different set of issues.
While the Magnum series is a great idea…I’d also be asking your Mopar buddies if anyone has a solid 360 short block & 340 heads…
What compression are you shooting for? I assume if you want to do REAL truck stuff (heavy loading)…you need to keep it at 9:1 or below?
the hole you found where the heat crossover is perfectly fine. designed that way from the factory.
Cool truck and good article!!!
Depends on how long you are going to keep the truck. If its going to be around for a long time move up to a magnum or a good 360. If you are only going to keep it for a couple of years don’t break the budget on a new engine. Cam, headers and a 4 barrel will move it along good enough for the short term.
Gen 3 HEMI!
Get a wiring harness from a donor vehicle. Slap on eagle heads and slide in a better cam.
I would do the same thing I’m doing to my 71 Dart, Magnum Swap! I’m looking at 5.2s right now as they are about as common as they come, but even that should be a nice step up from any smog era LA.
magnum swap 5.2 or 5.9. cheap and plentiful. you can have the redrilled and use an LA style intake. and you could use the ignition and pulleys you already have.