(Words and photos by Scott Liggett) – This technical, how-to, blog was not in the plans. It just came about by accident. One of our project cars had small 1 5/8 inch primary tube Hedman Hedders and we wanted to go up in size. The problem is that no one made anything bigger for our small block Chevy powered ’65 Impala SS. At least, none of the big header companies made a set. We did find one smaller header company that had a template for our car, but they were quoting us just under $1300. They make great stuff, but it was way out of our price range.
So was having a local custom fab shop make a set for us from scratch.
Our next idea was to get a set for another chassis and then modify them to fit our car. Our idea was to get Hooker Super Comps, or Hedman Husslers for a ’67-’68 Camaro because they have a similar rear steer mounted steering box set up like our Impala. Again, the price was pretty high. At $450 from Summit for the Hookers, we were a bit skittish about paying that for a new set only to cut them up.
Finally, we decided to see if we could find a set of Hooker or Hedmans, or some other companies 1 3/4 inch primary headers used for a first generation Camaro, and cut those up. Let’s face it, used headers go cheap. After perusing the usual internet sales places: eBay, Craigslist, etc, without any luck, we hit up the local swap meets.
On our first trip to the swap meet, we thought we scored. We walked out with a set of good quality 1 3/4 inch full length headers in fantastic shape for just $40. We couldn’t shove our cash in the seller’s face fast enough. After getting home with our score, we tried test fitting the headers
on the Impala only to discover we didn’t get Camaro headers, or even small block Chevy headers. We bought a set for big block Mopar. D’oh!! In our defense, we are hardly the first to screw up like this at the swap meet. It looked like we were now selling a set of Mopar headers and still searching for the headers we wanted.
A few nights later, we had a BangShifty idea. Let’s change the Mopar headers to Chevy headers. Yeah!! All we have to do is cut off the Mopar flanges and weld on Chevy flanges. Ok, maybe we’ll have to move a couple pipes around, but it will be easy, and cheap, and if pulled off right, fun as hell.
Speedway Motors had 3/8-in flanges for 1 3/4-in pipes for just $27.95 a pair. Speedway also had 1 3/4-in U-bend pipes for just $8.99 each. We ordered three of them. We went to Summit Racing for 3 in. collectors for $24.95 to mate up with our 2 1/2 in exhaust pipes on the car.
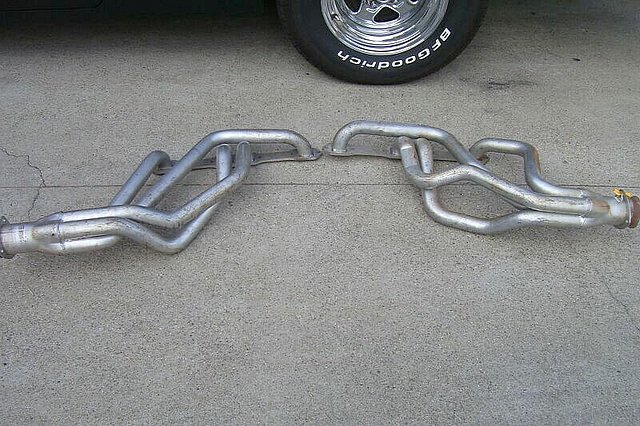
Here’s the Mopar headers we mistakenly thought were sbc. A total
noob mistake. They were good quality headers with 3/8 in thick flanges. That’s
silver paint that was done well and didn’t peel off as soon as they got hot.
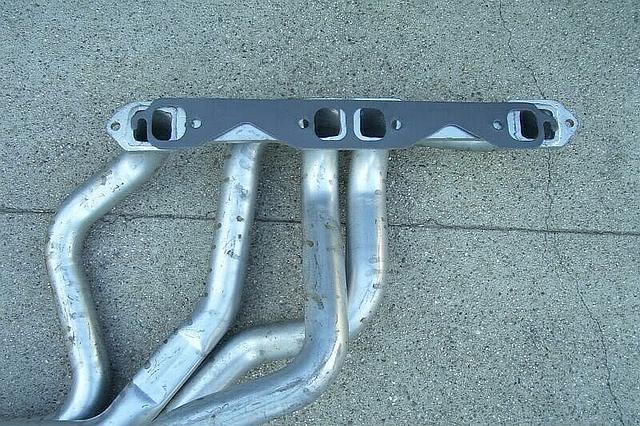
You can see the Mopar headers flange is similar to the sbc header
gasket. The 1-2-1 port design looks like the work to make them fit the sbc
flanges seem easy. This is when we had a gearhead epifany and decided to modify
these headers to fit our Impala’s small block. Maybe, some beer was involved in
this decision.
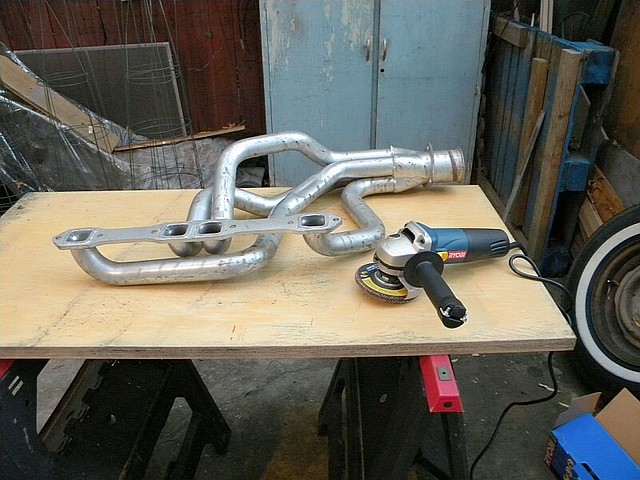
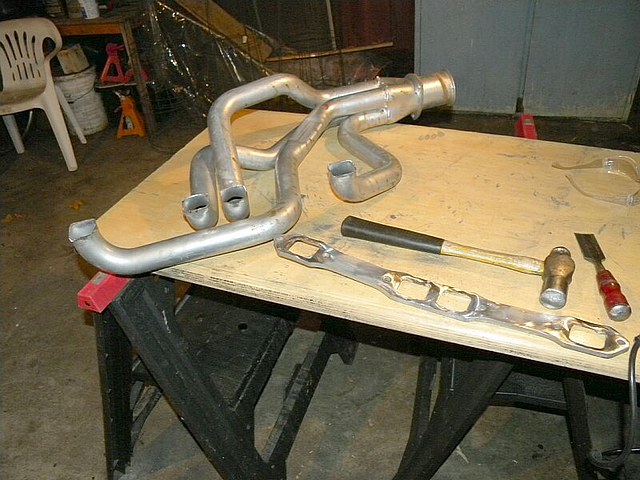
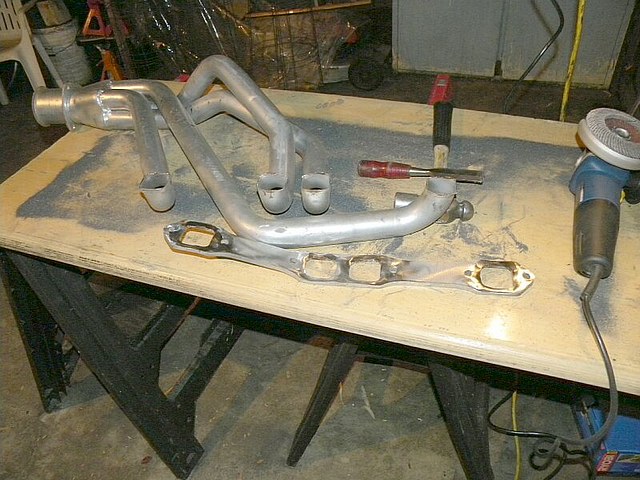
The first order of business is removing the Mopar flanges. We
grounded the welds down from the inner side of the flanges because it was
easier to get to all the welds with the grinder. Later, we realized we could
save us a lot of work, and a smashed hand by hammer blow, if we just used the
Sawzall right along the outside of the flange.
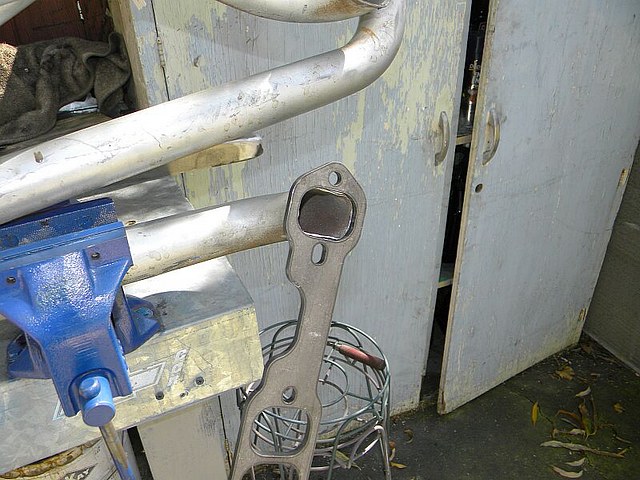
Next, we had to reshape the pipes from square to rectangular-ish
to fit the flanges. We initially bought piece of steel to make a drift, but
discovered they were easily reshaped with a little hammering.

We’ll show you the driver’s side first as it had the most work. We
had to go back and forth between the car and work bench more than a dozen times
in engineering this side. We originally planned to keep the #1 and #5 pipes in
their original locations in the new flange, but it wouldn’t work out that way
on the car. The #3 and #7 pipes are already cut off the collector.
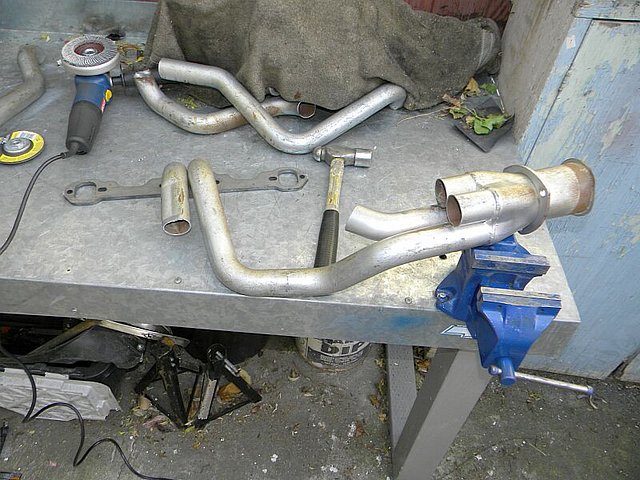
First the #1 pipe would be in the way of the #5 and #7 spark
plugs, so out came the sawzall and off came that pipe from the collector.

Test fitting on the car showed the #5 pipe fit the chassis and
steering linkage better if it was moved to the #3 position. This picture showed
our first attempt at engineering the #1 pipe. It was a total failure as it was
totally in the way of the pitman arm’s movement, so we started over.
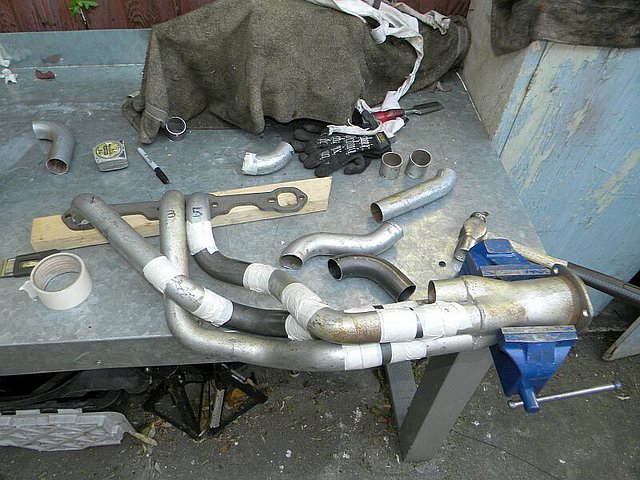
We had to put a couple of 90* bends in the #1 pipe in order to get
it around the steering box and pitman arm. This showed us where the #5 pipe
would have to go. The steering box was in it’s way. The darker sections of pipe
are pieces of the three U bends we bought from Speedway. The rest are pieces of
the original pipes we cut and moved around to fit the new puzzle.
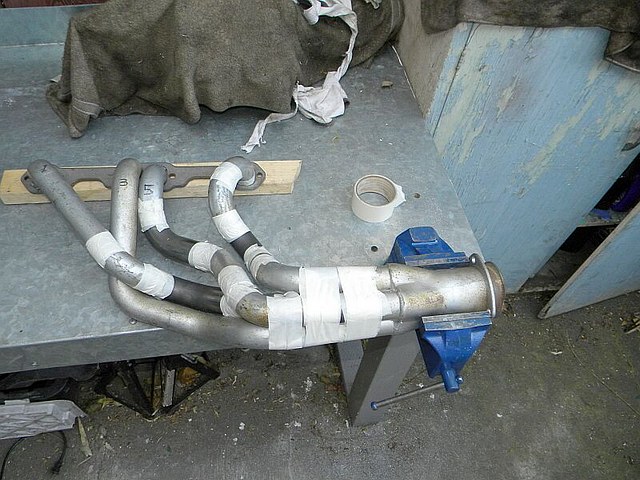
The #7 pipe just had to drop down and curve towards the block
without hitting the oil filter. At this point we didn’t have a welder so we
were using masking tape to hold the pieces together. This picture showed the
new header just before we test fitted the final design. Test fitting will
become quite regular as we progress on this project.
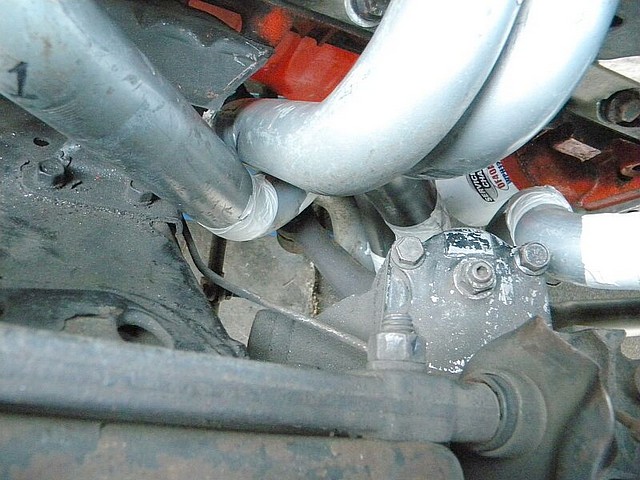
With the new header bolted to the engine, we can see that all the
stuff that might be in the way wasn’t. The steering box, pitman arm, steering
linkage, crossmember, clutch linkage, and oil filter are all avoided with
enough clearance for engine movement from torqueing.
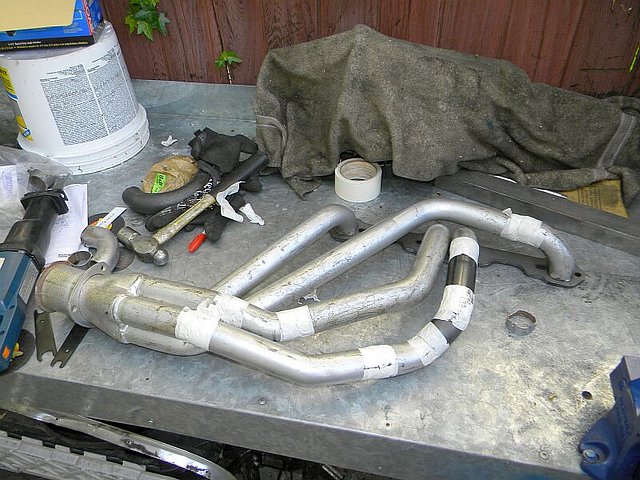
The passenger side was much easier. Only two pipes, the #4 and #6
had to be totally re-engineered to fit the car. The starter was the only thing
we had to work around on this side so it went much faster. The # 2 pipe just
needed shortening and the # 8 pipe was left alone. So, in the end, these
headers still have two pipes that were designed for a Mopar.
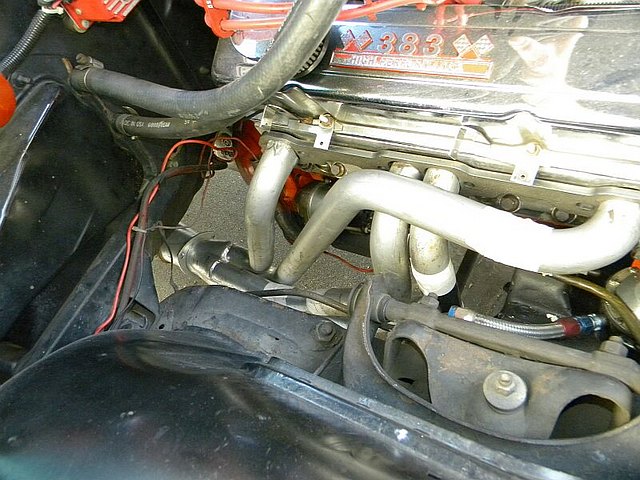
Test fitting the passenger side header showed it cleared the
starter and scattershield easily, but we wanted more room for spark plug wires
between the # 2 pipe and the cylinder head. We will move that pipe a bit for
more clearance.
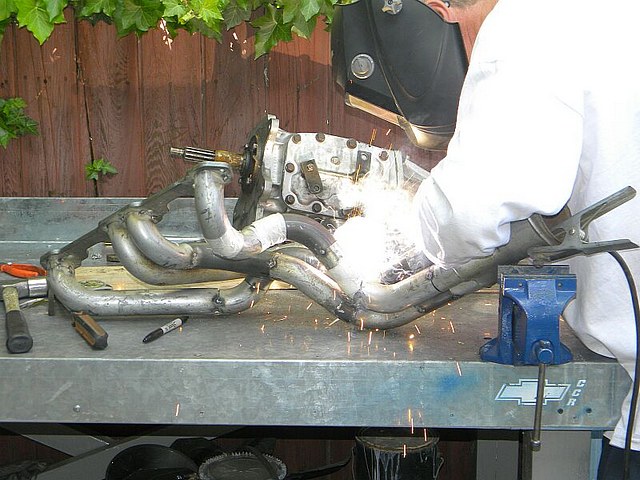
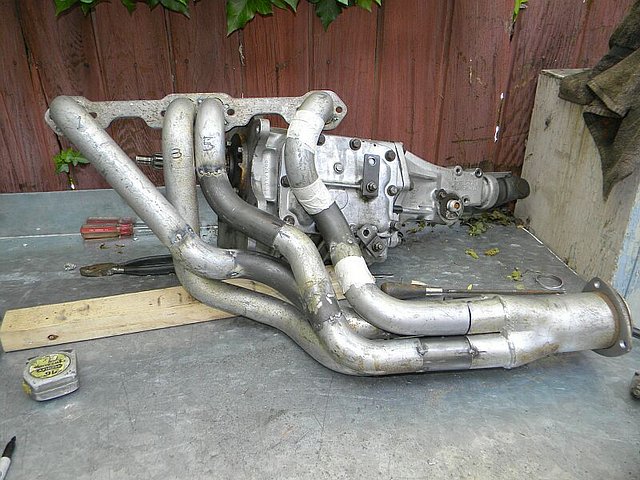
At this point, a buddy came by with a Lincoln 110 welder with flux
core wire to tack weld the pieces all together to take it to the Yannick Sire
of Sire Custom Performance who would be doing the final welding for us. This
was a mistake as we didn’t show Yannick what we had before tacking everything
together.

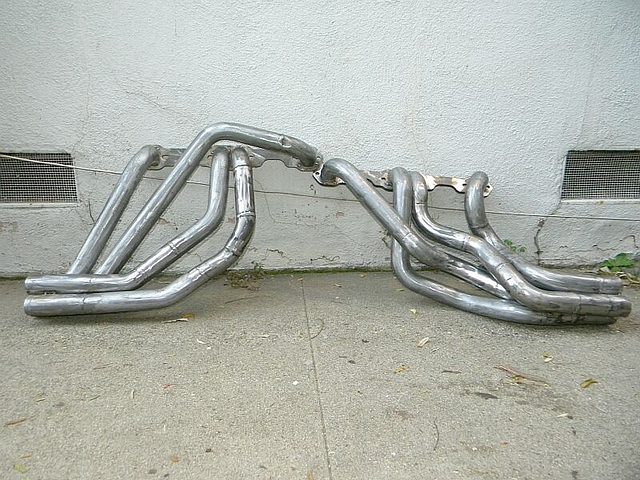
When we got home we had to cut the flanges back off and then cut
off the collectors completely so we had eight individual pipes. Yannick could
then weld all the pieces easily. Here is the mess of snakes back on the bench.
After Yannick welded the eight individual pipes, we tacked them
back on the flanges and tacked the four pipes together at the collector. At
this point, double check they fit car before final welding. Good thing we did
because we discovered the angle of the passenger side flange was off and we had
interference with the starter and bellhousing. This picture shows how the
headers looked before we returned to Yannick’s shop where he welded the pipes
to the flanges and collectors.
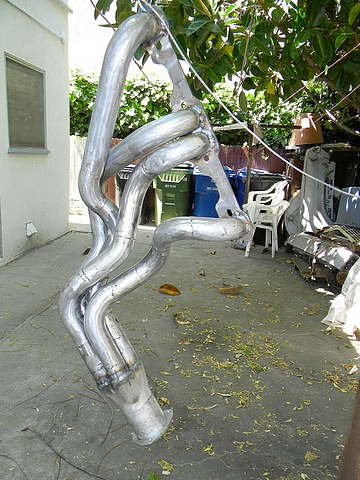
Here’s the driver’s side header after final welding. It’s ready to
paint.
We cleaned the headers of dirt, then used Auto Prep on them before
painting them with VHT’s Flame Proof paint.
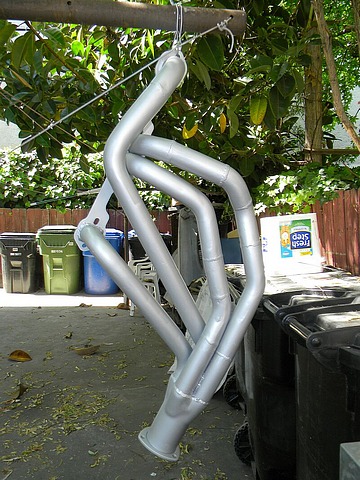
The headers now painted in flat silver and finished, ready to be
installed in the car.
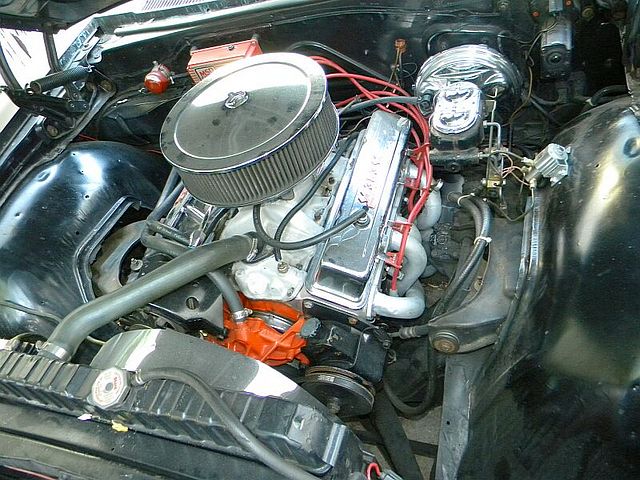
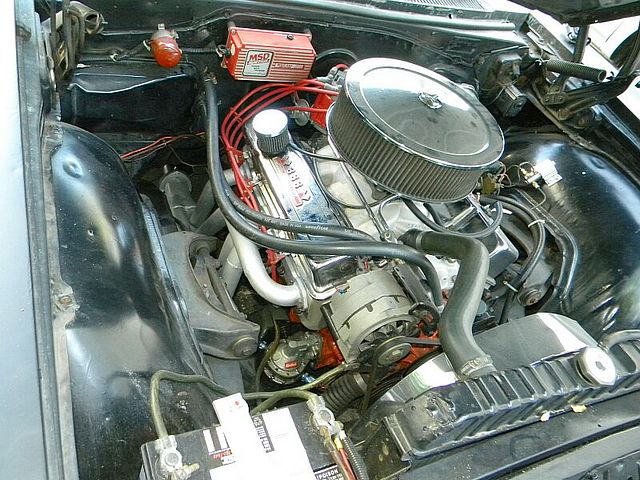
Finished and bolted in the car. We did have to dimple the back
side of #7’s pipe just a tad for more clearance for the MSD wire boot. We fired
up the car for five minutes with the headers uncorked. It sounded great, but
drew unhappy neighbors.
It was a lot of work on our part, but the money we saved was well
worth it. If you can weld, then you can save even more. Below is a list of cost
that totalled $113 including the cost of the headers we cut up and rearranged.
That’s cheaper than a rusty, used set of big tube headers for small block
Chevy’s. We got a buddy deal on the welding from Yannick, but he had a total of
one hour labor involved. We ended up only using two of the three U bends and
had few pieces of the original header pipes left over.
Mopar 1 3/4 headers $40 Swap meet.
SBC Flanges 1 3/4 in. pr. $27.99 Speedway Motors
U bend pipes 1 3/4 in. (3) $24.97 Speedway Motors
Collectors 3 in. pr $24.95 Summit Racing
VHT Flame Proof Paint (2 cans) $19.00 Checkers Auto
Collectors 3 in. pr $24.95 Summit Racing
VHT Flame Proof Paint (2 cans) $19.00 Checkers Auto




LOVE IT, Scott!!! I have to admit to having made the same swap meet mistake several years ago: thought they were Buick 350 headers, but ended up being BB Mopar as well. They’re still sitting in my dad’s shed.
Really enjoyed reading this……having to have a set made for the 409 I can relate.
Seems the issue around the starter is universal.
It’s all good when a plan comes together.
Beautiful work. i once modified big block Camaro headers to fit a big block in a 38 Buick. Fortunately for me, no photos exist of that mess. Yeah, they sorta worked, but they looked horrible.