The first thing that comes to mind when you hear ‘Gasser’ is a lifted front end, most likely with a straight-axle under it. This style is making a comeback and for good reason – they are bad ass! We decided to take a 1955 Bel Air four door and turn it into a Gasser. Besides the straight axle, one thing it really needed was a nice choppy idle. That’s part of it! At first we didn’t feel like swapping the cam and just wanted to get it back on the road.
But the engine in this ’55 Bel Air had a slight mishap. Our guess is that an injector was stuck open, which filled a cylinder with fuel, and then when we tried to crank the engine over, it hydro-locked and snapped the rod. At the time it had some nasty old gas in the tank that most likely caused the issue. It never ran this way and the rest of the engine was in perfect shape. While we were replacing the rod and piston, we figured now was the perfect time to upgrade the camshaft as well to get that choppity-chop idle we all love.
One Camshaft, Please
This engine is a bone-stock, ultra-low mile LS1 out of a 2002-ish Camaro. This ’55 is getting turned into a Gasser, so we wanted something that would add a little pep but also have a nice choppy idle. However, we wanted it to have amazing street manners and still provide enough vacuum for the brakes. Sounds like a tall order, right? We gave COMP Cams a call and gave them our requirements.
We spoke with Dallas Moss, Engine Builder Sales and Support rep. Dallas recommended more than just a camshaft, he also recommended a new set of valve springs. We figured while we were in there upgrading, we might as well upgrade the rockers as well with the same set we’ve used on a blown LS before as well, for a little more insurance.
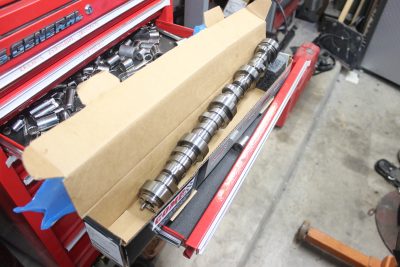


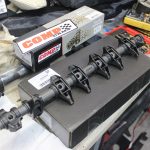
A few days later we had new parts at our doorstep. Camshaft No. 54-457-11, Spring Kit No. 26926TS-KIT, and BSR Shaft Rocker System No. 1981-16. The camshaft’s operating range is from 1,700-6,800 RPM’s and features a .610 intake and .617 exhaust lobes with 112 degrees of separation.
Assembling And Upgrading LS Engine
We had the engine pretty well torn apart at this point. The head was off and the old rod and piston were out. We started there first, installing the piston onto the new rod, then installing that onto the crankshaft. From there, we put the head back on using OEM torque-to-yield bolts. Then the fun part came, installing the new camshaft and parts.


In order to access the camshaft, we had to remove the crankshaft pulley. This required us to rent a puller tool from our local auto parts store. With that off, we removed the timing cover along with the cam sprocket after making sure to line up the dots on it with the crank sprocket.
Before yanking the cam out, we had to remove the rockers and pushrods off the other head to relieve that pressure. Then we utilized a set of tools we picked up from COMP a few years ago. These rods slide into the oil passages on either side of the cam and hold the lifters up. On these LS engines the lifters can fall out of their retainers which means the heads have to come back off. With the rods slid into place, we slid the factory cam out.
Before installing the new COMP Cam, we applied a copious amount of assembly lube to it, then slid it into place. From there we reinstalled the cam sprocket and timing chain cover. On the top end, it was time to install the new valve springs and rockers.

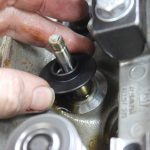
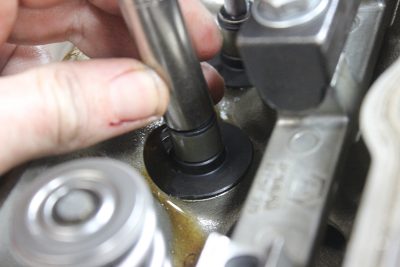
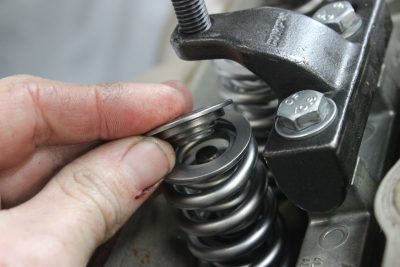
The first step is to ensure the cylinder we were replacing the springs on is at Top-Dead-Center so the valves wouldn’t fall into the cylinder. Then we used another slick tool we got from COMP a few years back, an LS Valve Spring Compressor. This tool mounts with two bolts and compresses both intake and exhaust valve springs at once. After removing the valve retainers, we slowly released pressure and removed the factory springs. Under the springs is a valve seat/valve seal that we removed.


Then the new COMP Cams seat and valve seals along with the dual valve springs. Using the compressor again, we compressed the springs and installed the retainers before removing the compressor a final time. Then we repeated the process seven more times to get all the springs changed out.


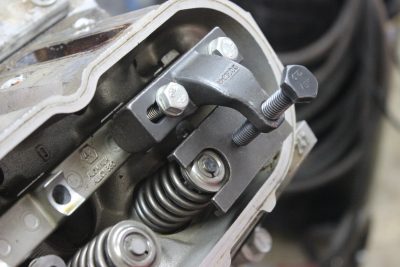
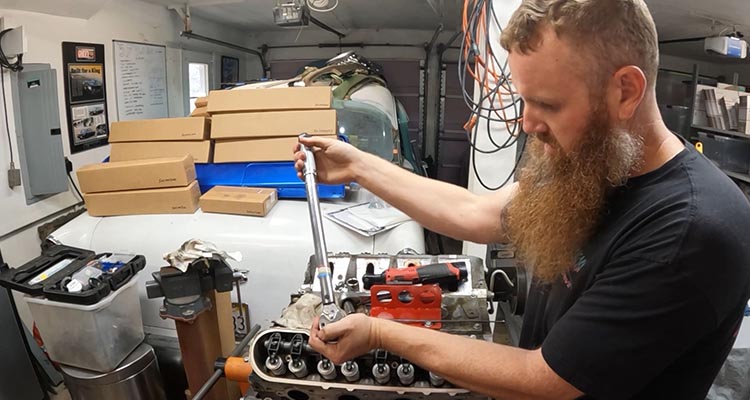
The last step is to install the new COMP BSR shaft rockers. These eliminate the failure-prone needle bearings of the factory rocker arms and strengthen the entire assembly. Installation is insanely easy for them too. After setting the pushrods back into place, you simply set the entire rocker assembly into place. We ran the bolts down and then torqued down accordingly.

After that we slapped the engine back into the car and fired it up to hear it run! Check out the video where you can hear it run with the stock cam vs the new COMP Cam. Now to finish the rest of the car so we can drive it and see how it feels going down the street.