


Welcome back to our coverage of Project Power Laggin’! Follow along as we take a tired 1979 Dodge W150 Power Wagon we found in Central Maine and transform it from a derelict roadside attraction to a dependable, powerful weekend workhorse that lives up to it’s given name! In this installment, we make sure our truck’s fuel system is up to snuff before we install our Weiand Stealth Intake, MSD Atomic EFI 2 system and Hyperspark Ignition!
In our last installment, we decided to flip the script on the ol’ Wagon of Laggin and ordered up a MSD Atomic 2 EFI system along with a Holley Hyperspark ignition system and a Weiand Stealth intake manifold in an effort to make it both more efficient while adding more power. With parts on order, we went on enjoying the truck with the headers and exhaust, which sound fantastic and did add a bit of power on their own. Our original plan was to fit in another story between the last one and this one about gas mileage and power increases with the headers after a few weeks living with the exhaust, and then do the EFI install down the road. To be honest, after years of fighting it, the truck was finally running great after the exhaust install.
Yeah, about that… the truck RAN great. For about a week. Then suddenly, it wouldn’t run at all. Again.
Because, of course.

Since this is old habit by now, we checked the usual things. Fuel? Well, the filter was full of it at a quick glance. Spark? Yup, has that, although a bit weak. Any air obstructions? Nope. Does it run off of starting fluid? Yep. If you’ve been following this project for a while, you’ll remember that in a previous installment, we had a dead fuel pump that we replaced with a proper Carter pump, just like Mother Mopar intended. We did that swap because the existing fuel pump wasn’t doing fuel pump things after just 6 months on the truck, and it would only run on starting fluid. As the great Yogi Berra once said, it’s like déjà vu all over again.
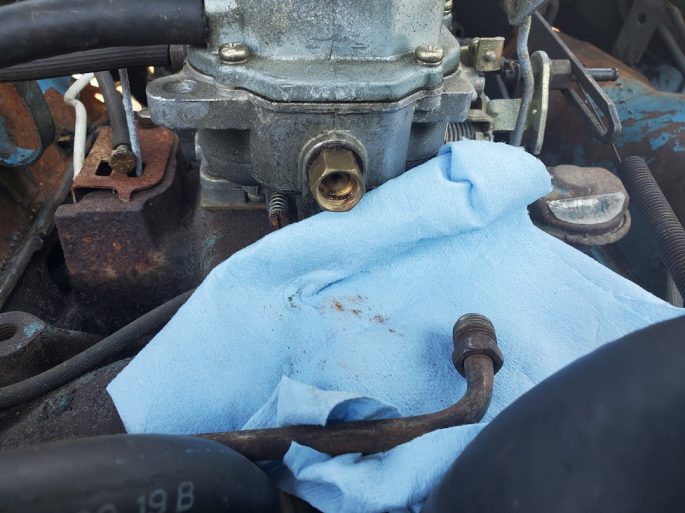
There was fuel in the filter, but was there fuel getting to the carb? That’s a negative. We confirmed this by pulling the fuel feed line to the carb, which was bone dry. The pump was dead after mere weeks. But why?

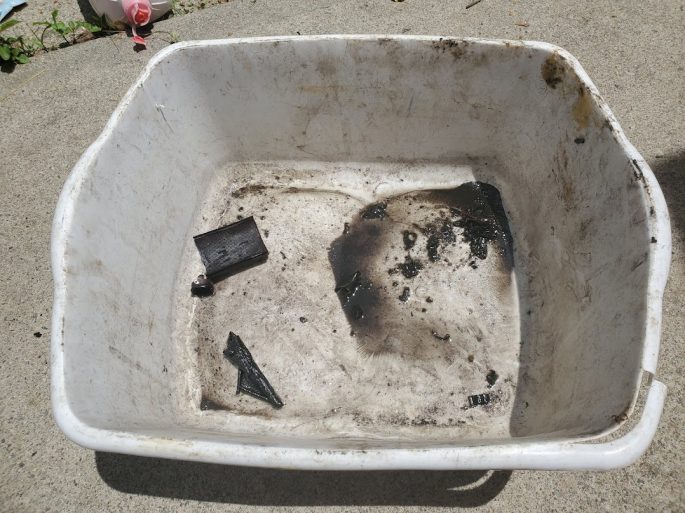
A closer look at the fuel filter revealed this. Man, that’s ugly. What is all that stuff? And since we had a filter after the pump like the factory does it, this is the stuff that made it through! Gross.
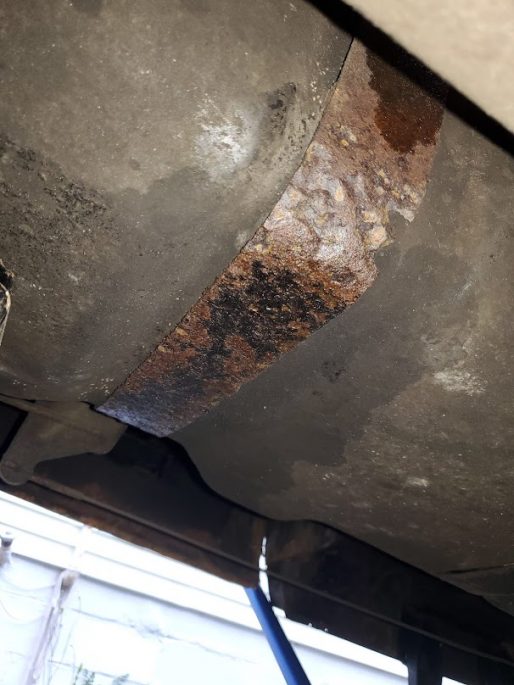
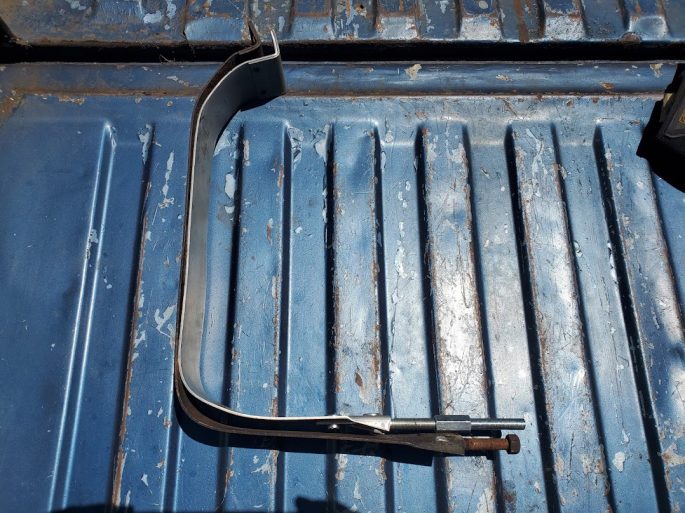
After seeing all that junk in the filter, the decision was made to drop the tank and see what’s in there. The good news is that these old Dodge trucks came with poly plastic tanks, so rust and sludge could be easily cleaned. The bad news is that dropping this tank was not such an easy task. Early in this series, I attempted to drop the tank and failed miserably. Every fastener was rusted solid and had transformed into a nonstandard shape over the decades of New England existence, and two of the three straps were also in tough shape, as you can see here. And to add insult to injury, fuel tank straps for these trucks are hard to come by. If this was a Chevy or Ford of similar vintage, I could get straps just about anywhere, but for Dodge trucks, you’re limited to an Ebay seller or two or finding a non-rotted set in a junkyard somewhere. I found a seller that had a set of three straps listed for a “18 gallon poly plastic side saddle tank”, which is what’s on the truck, and ordered them up.

This is what showed up. This set was listed for a Lil’ Red Express or Warlock, which uses the same tank as our Power Wagon. They utilize two short straps and one long strap. They certainly look the same as the ones on the truck, except not rotted into Swiss cheese.

First step in dropping the tank was draining it. Of course, I had just gotten gas, so it had a full 18 gallons of fuel in it. Last time I dropped a tank out of something, it was a rusty tank in a 1987 Shelby Dodge CSX about a decade ago. I made a real mess of it and ended up high on the fumes and passed out in my backyard for about 45 minutes. My wife found me on the ground mumbling incoherently. In order to keep as many brain cells as possible this time (and the integrity of my marriage), I opted to use an electric parts store pump and add both a pre-and-post filter to it in order to both salvage as much fuel as possible and not kill yet another pump. I was able to utilize an ignition-on source formerly occupied by a choke thermostat harness that self-deleted a few installments ago and grounded the pump to the fender. This also served to get the truck going in order to move it into the “Service Bay”, AKA my driveway.

With ignition turned on, the pump turned on and did its thing. I filled gas cans over and over and filled up all the lawn equipment and some of my vehicles with clean, double filtered fuel until the truck tank was nearly dry and the pump started chugging.
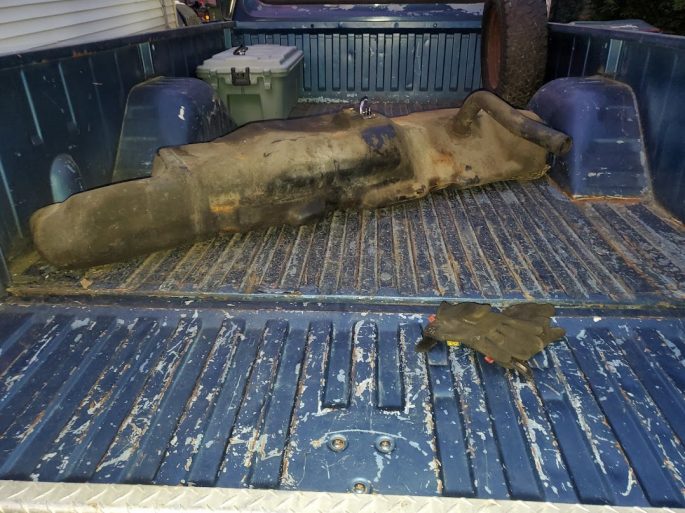
With that done, we removed the tank. With new straps ready to go, I was able to remove one strap that was suspiciously in better shape than the other two with normal tools. The others were cut off carefully with the ol’ Wheel o’ Death. A quick external inspection of the tank revealed a lot of filth and no surprises. It was downright nasty, but there were no cracks and the rollover valve was intact. I could hear things rumbling around inside with the little fuel still left in the tank, so we definitely had some debris to remove.
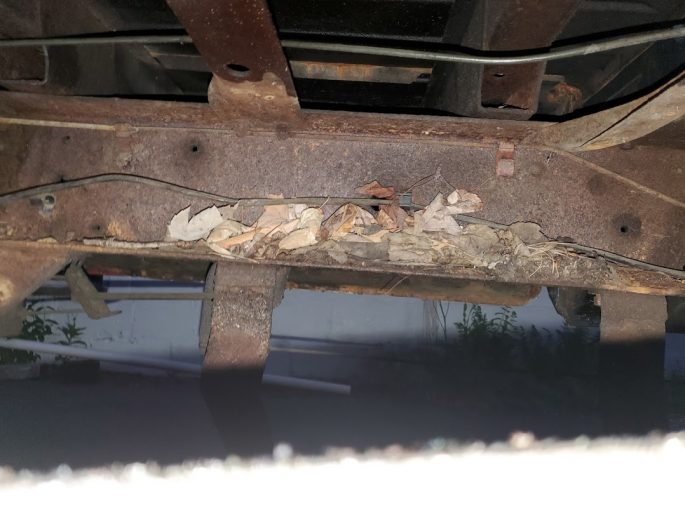
With the tank down, I was able to finally see what’s been hiding behind it for the past few decades. Turns out this was a catch-all for leaves and moisture, but the frame itself was rock solid. After cleaning it out, I could access the bolts that held the straps to the frame side.

Speaking of tank strap hardware, removing the six bolts that held the three straps up took hours of time. Since the bolts were rusted to the point where they became one with the nuts, we used a variety of tools to get them off the truck, including an air hammer and chisel, nut splitter, and cutoff wheel. It’s the little stuff like this that can really turn into a time suck on old vehicles.
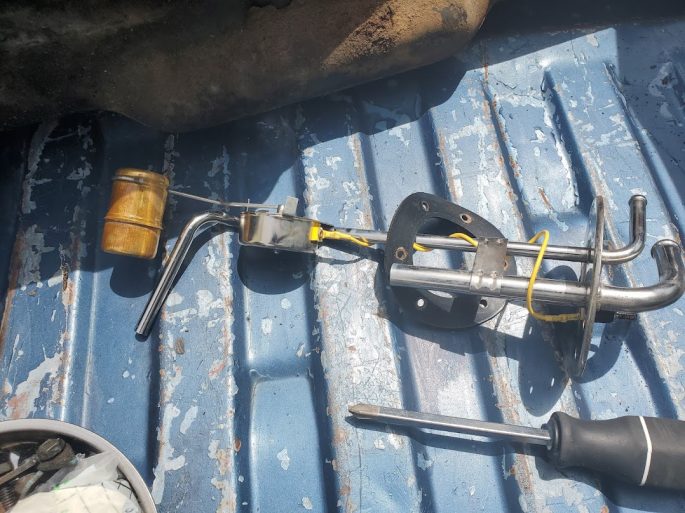
A couple years back, we installed this new fuel sending unit. When I removed it, the filter sock was missing, which explains why things were making it up to the fuel pump. Wonderful.
After draining the remnants, the culprit was revealed: the fuel sending unit sock from the original sending unit had fallen off and come apart in the tank. All the little metal stitches, staples and fasteners that held it together had been clogging up the works for miles. The good news is that the inside of the tank was remarkably clean with no varnish or build-up, so after making sure every speck of debris was out, it would be good to go.

After hosing it down with degreaser and letting it marinate for a while in the sun, a little elbow grease cleaned it up nicely. Even the original filler hose cleaned up well!

1972-80 Dodge Truck people with regular “Sweptline” beds take note: remember earlier when I said that there were two short straps and one long one? Well, turns out I need three long ones. While the frame side on the stepside… ahem… “Utiline” trucks is the same, they have different bed crossmembers that are closer to the tank for two of the straps. Well, that’s annoying. These were hard to get to begin with, and the seller had an absurd restocking fee, so I opted to just find some coupling nuts and threaded rod to extend these ones to work. The thread pitch on the threaded rod is 3/8-24 Fine, not the much more common 3/8-16 Coarse, and none of the hardware stores in my area had anything in stock, so we had to order those online and wait some more. Just great!
Pro Tip: the fuel sender flanges on these old Dodge trucks do not have lock rings. Instead, they bolt on with small machine screws. The bolt pattern only allows it to fit one way due to the hole spacing, and it’s a pain to find. Mark the flange and the tank with a grease pencil so you’ll line it up right the next time you need to remove it.

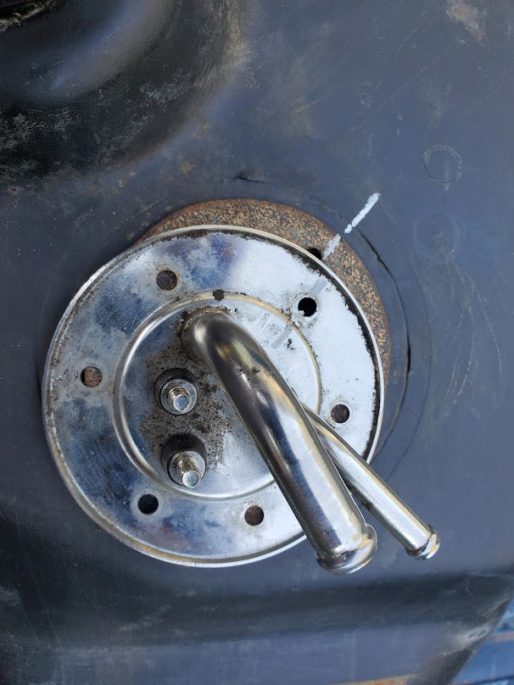
While we were waiting for the hardware, we got to modifying the fuel system to accept a return line. Later 80’s Dodge Ram “1st Gen” trucks and Ramchargers are equipped with return lines, but ours doesn’t have one. There are two ways to do this: either add a bulkhead connector to the sending unit flange or drill a hole in your gas tank. Since there was no room on our sender flange, we decided to drill a hole right into our unobtanium poly plastic fuel tank. No pressure at all, right?
While waiting for the strap hardware to show up, some of our EFI parts started trickling in, including the accessory kit we ordered. In there was the bulkhead connector, which consists of a few different parts: The return tube, two fuel fittings, the 90 degree elbow, two nuts, and two washer gaskets. We assembled it to get an idea of where we could mount it in the tank.
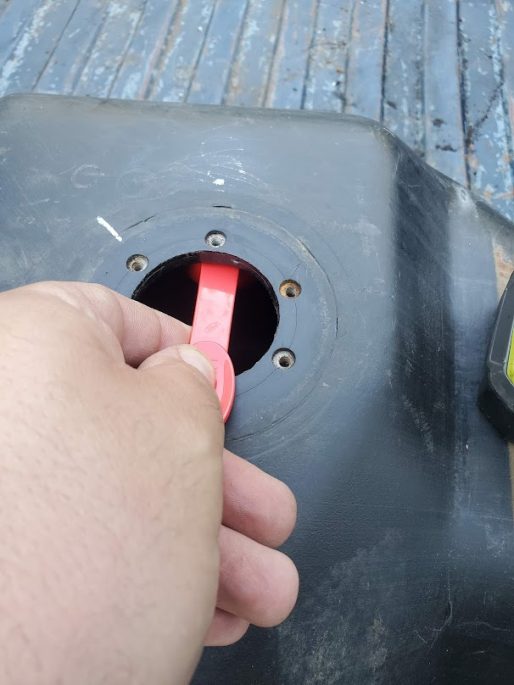
The key here is finding a spot where you can get a wrench on the inside to tighten the bulkhead nuts but out of the way of the sender float arm. We decided that a couple inches above the flange hole would be perfect, so we marked it with a grease pencil. Per the instructions, you use a step drill bit to get the hole large enough to install the connector. I used a measuring spoon (the red thing I’m holding) from our kitchen to catch any plastic tank bits from falling in the tank. Worked great! Don’t tell my wife.

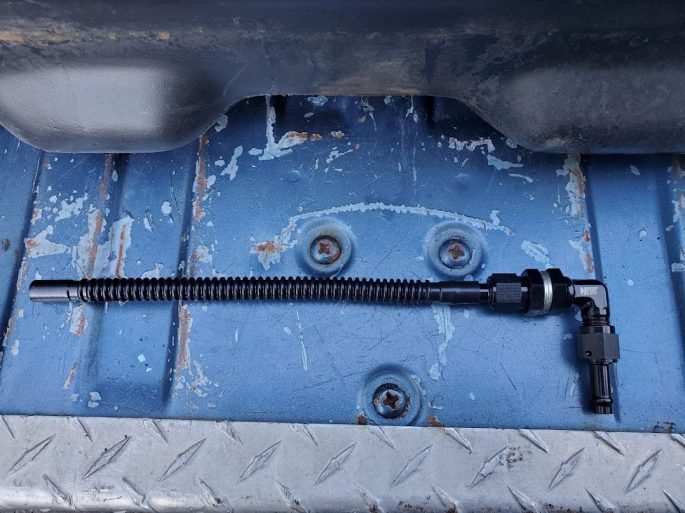
The bulkhead connector has a drain tube that attaches on the inside of the tank. This tube must stay submerged to avoid aeration. If you look inside the tank, you can see that it fits nicely, and should stay under the fuel level without interference.
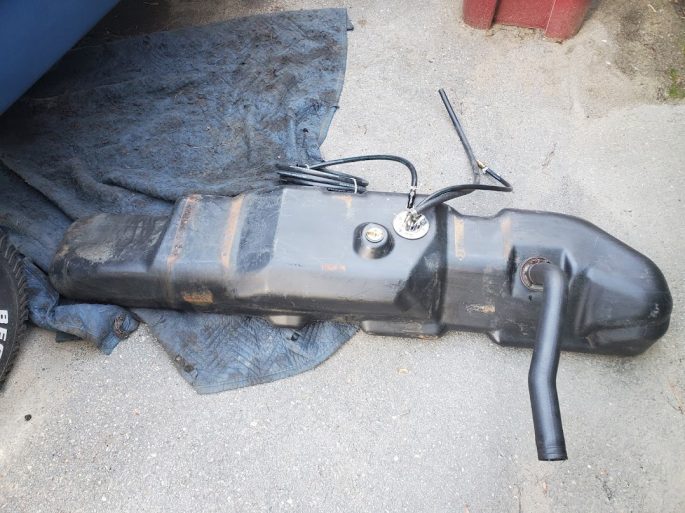
With that done, the tank was ready to install. Man, that looks so much better. Nice and clean!
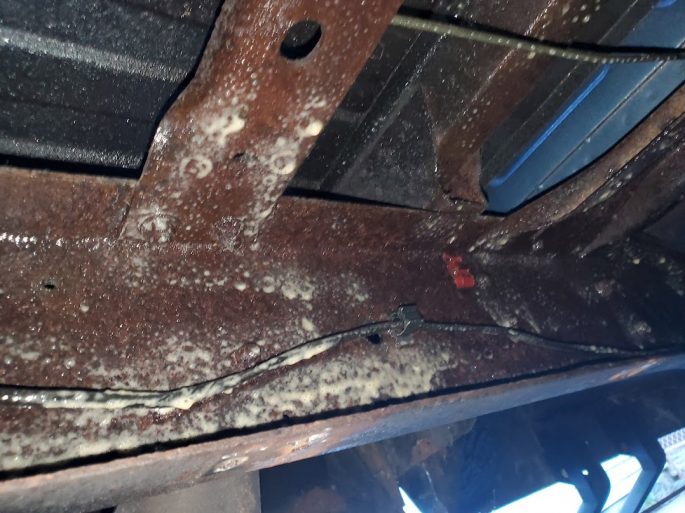
Before installing the tank, we hosed down the frame and crossmembers we couldn’t see with Fluid Film. We have used this in the past on other parts of the truck, and it’s preserved what’s left of it very well.
After another week of waiting, I had some couplers and threaded rod in hand to use to extend the straps. And extend them I did. I cut the rod to length, slathered the rod ends in high-hold threadlocker, and called it good. Looking back, I probably should’ve also used some jam nuts, but the threadlocker was doing its thing well enough, so up it went.

There, much better. The extended straps worked perfectly, and the tank was bolted back in without issue. At last, our fuel system was ready to do EFI things.
While all of this was unexpected, we are happy that this breakdown occurred before we bolted our fancy new EFI onto the truck. Although it held things up a bit, it truly was a blessing in disguise. We don’t even want to think about the potential carnage that those small bits of debris would have caused if they had 60psi of fuel pressure behind them! And with that done, we’re done with another installment of this series. Next up. we’ll install our new Weiand Stealth intake and a few other “while we’re in there” modifications. Stay tuned!


WITH IGNITION ON AND NOT RUNNING YOU WILL BURN UP THE BALLAST RESISTOR QUITE QUICKLY
Don’t worry, where we’re heading, we won’t need a ballast resistor ever again!
and where do you think the points are , [ open ] , [ closed ] , take a guess , it does make a difference . and the ballast resistor will probably be fine , but the coil will be cooked .
Also remember not to cross the streams as this can cause a chain reaction, which may lead to total protonic reversal. Imagine all life as you know it stopping instantaneously and every molecule in your body exploding at the speed of light.
Yeah, I can post irrelevant information too.
I don’t think there is enough accumulated experience with the electric drive to recommend it, though it might be a good option. After my own experience with an atomic 4, I would recommend getting rid of it.