Idle hands are the devil’s playthings, right? After spending more than couple weeks home from the world of motorsports, it was time to put my money where my mouth was. Hell, I’ve been writing blog items for weeks encouraging people to get out in their shops and take on the projects that they’d been avoiding, finish the jobs that they didn’t want to, and all of that stuff. The truth is that I was doing the same thing around my own place. Fixing the nagging things that had been delayed because of my travel schedule, organizing things, cleaning stuff, and finally I just ran out of junk to do and needed a project. My sons needed something to do as well. That’s how Project Isolation Restoration came about.
For starters, this was Plan B. I had found a killer old 1950s era chainsaw that I was going to buy and restore with my boys Tom and Jack. Well, that saw kind of disappeared before I was able to get my grubby mitts on it. Undeterred I kept looking for a fun basement-sized project we could take on that would be different, cool, and something they could really sink their teeth and little gearhead minds into.
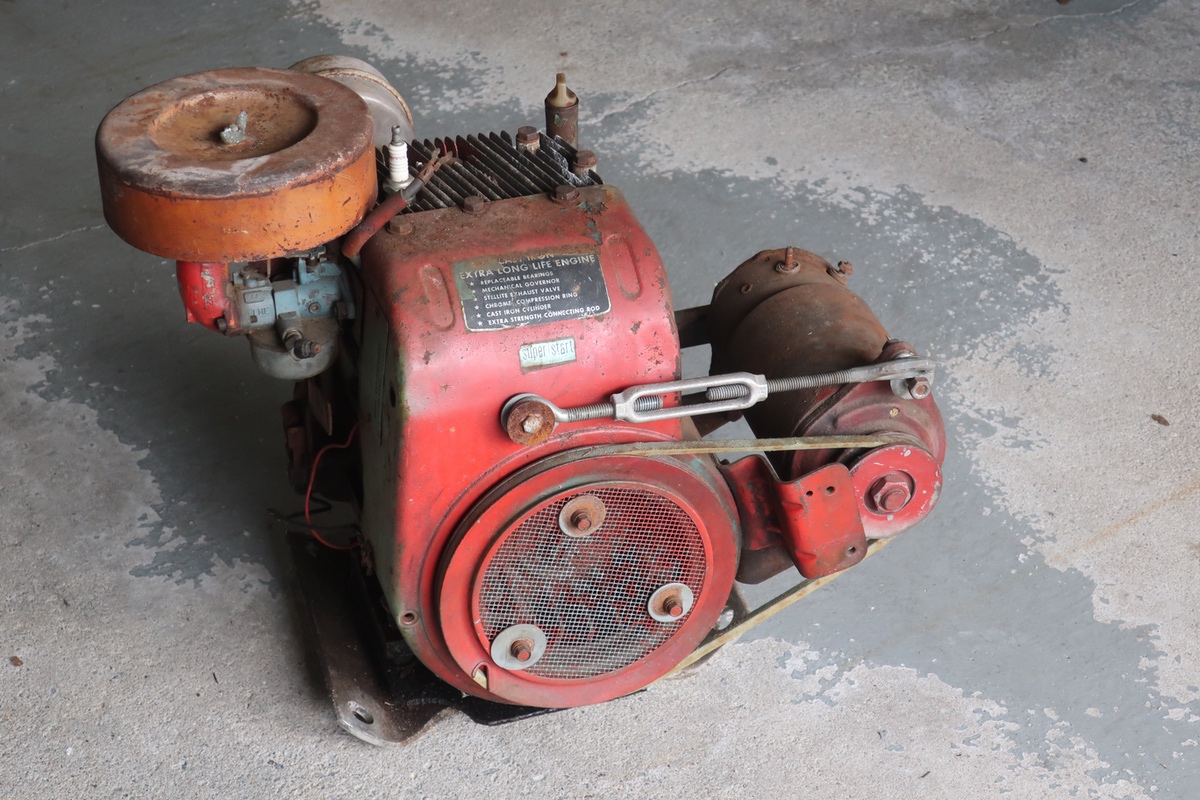
That’s when I found this:
You are looking at an early 1960s vintage Tecumseh HH120 engine. A single cylinder 12hp beastie that was likely found in a Sears garden tractor when LBJ was in the White House. This engine appealed to me because it is 100% complete (aside from the gas tank) and it comes with this bitchin’ AC-Delco starter/alternator. The engine presents a perfect opportunity to teach the guys about rebuilding a carb, rebuilding an engine, and rebuilding the starter/generator. Outside of that, the thing is just cool because it’s 50+ years old and I had never really wrenched on one before.
Perhaps not as glamorous as turning a car engine around but we’re starting here and using this as a stepping stone. Also, these guys will learn the lesson of doing the job on a tight budget and making some money after we’re all done with it.
This thing falls into the “they don’t build ’em like they used to category and you’ll see more of that as we tear it down in the story. This view shows the air cleaner, the top of the head, and the exhaust pipe coming out the rear of the engine. I was reasonably concerned at the chances of getting that thing out cleanly but we’ll get there soon enough. The air cleaner is neat and the fact that this whole thing is so robustly built makes me smile. Heck, the air cleaner itself is an automotive type circular job. Heavy duty!
After meeting a farmer on his property in Central Massachusetts we ripped home and decided to give the engine a once over to get a look at what we were dealing with. As the engine weighs about 120lbs without all the brackets and the heavy ass starter/generator on it, we field stripped some stuff in the garage before I lugged it down to the basement where the majority of the work will take place. Tom busted out his socket set and got to work. I am looking forward to the rebuild of the starter/generator and the fun we’ll have powering electrical stuff with it.
Sufficiently relocated to the lab, it was time to employ the liquid goodness that is Lucas Oil’s penetrating oil onto all the stuff that we’d be pulling apart the next day. I gave the exhaust pipe a few blasts over the afternoon and evening preceding it’s attempted removal. I did not want this thing to break off in the block and make a big mess for us. After making attempts with smaller artillery the following morning, I called in the heavy guns.
The jack-handle and pipe wrench worked like a charm and the exhaust spun out like a dream. A great omen fo this project in my eyes! As this engine was clearly well taken care of and stored during it’s life, the exhaust was the only really nasty rusted thing that as outwardly concerning to me with regard to disassembly. With the exhaust off, it was time to kick the job into high gear and get to the bones of our single cylinder fire breather.
This engine uses a Walbro LME carb which will be completely rebuilt before we reinstall it on the engine. Tom had no problem removing this little bugger. The elbow that mounts the air cleaner is pretty cool. When we look at small engines today, that stuff just doesn’t really exist, especially one cast in aluminum! No plastic here, kids. This thing is all beef. The carb rebuild will be its own installment when we get there.
The teardown continued with the engine coverings being removed, the magneto being pulled off by the Jack man, and me supervising the process. I am happy to report no knuckles bled and no bolts were rounded off during the process. I did have to provide a little dad muscle at points but other than that we were taking things nice and slow and talking about the parts and pieces as they came off the engine.
Then it was time to pull the head off and see what the top of this baby looked like! Seems like good news so far. The piston is really nice and clean, the valves are actuating as they should be with the engine rolling over, and there’s absolutely no ridge at all in the cylinder bore. This is all good stuff. The head had some carbon and stuff on it but that’s to be expected in an old engine. At this point I’m not sure if this thing has ever been apart. The piston being as clean as it is might suggest it has been, but either way, we pressed on!
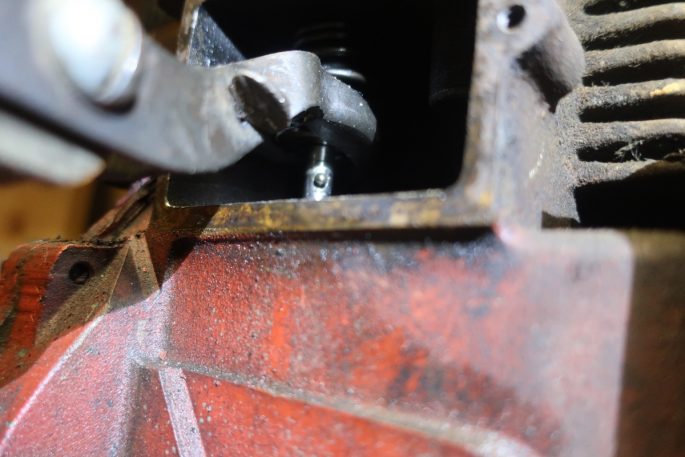
Next up it was time to get the valves out of the block. I did mention that we were going to do this thing for like no money and that means getting creative at times. Yes, they make a small engine valve spring compressor but the big engine compressor worked mint here after adjusting it. The keeper is that little pin at the end of the valve stem. Once I got the spring compressed I used a little pick to knock it out and then a screwdriver to work the valve spring out of the block. I repeated the process on the other side.
With the valves out, we got to check the seats and frankly they don’t look all that bad at first glance. This block will be cleaned in the hot tank at the machine shop and that may change our view but as of now? Lapping these guys in should be just fine. The valves themselves don’t look bad. The amount of crud on the exhaust side may be trying to tell us that this engine has been burning some oil. We’re going to re-ring it anyway, so that’s not too scary.
The next step was to pull the flywheel and get into the real guts of this old Tecumseh. We’re going to pick the story up right there tomorrow! Stay tuned as the teardown is completed and we get the full picture of how this engine will shape up for our rebuild.


it\’s not a complete project until something bleeds. Busted knuckles build character and an opportunity to expand your vocabulary.
Awesome! Looking forward to the next installment.
We had the best starter shop near me, they were the experts on those Delco starter/generators. Used them during my Cub Cadet projects. Of course people found out Autozone was 25 cents cheaper so they are out of business.
Had I known you cats were doing this I’d have loaned you my Tecumseh flywheel knockers, the sledge on the crank threads is making me cringe. Digging this story.
Fun project! One of the things I like about you and Kerri is that you figure out stuff like this to do with the boys. I want their childhood!
Grandpa Dan
Awesome experience, and thankful for the story! I have the same exact motor with tractor. I am interested in what can be done to repair the generator. I can not keep a battery in mine, just seems to drain them after 4-5 cranks. I pulled some battery’s out of a XRay machine I was going a PM on a found better luck with cranks. However, the generator is not working properly.
Looking forward to next steps!
the eyebolt arrangement is a major hack. Fix that!
There’s a thriving industry providing rebuild parts for those of us that use vintage garden tractors rather than todays big box store junk.
Hey, what websites and or resources are you referring too. I have enjoyed getting into this hobby of rebuilding/restore and would like to get me kids into it as well. They lose interest at times due to my lack of knowledge or “next steps”.
Just wanted to get your thoughts.
hahaha, good going. We should make full utilization of our old stuff. Keep it up.
This post is talking about in an extraordinary manner. I like your direction yo talked about your admirable sentiments and realities about this.