With diesel fuel well over $4.00 per gallon in most parts of the country, BangShifters have to do what they can do to get the most bang for their buck at the pump. While good maintenance will help to maximize fuel economy and doing stuff like monitoring tire pressures will also help, there are some easy bolt-ons out there that yield appreciable results for short money and a little time with your wrenches. We called the guys at K&N to procure a cold air intake kit for a 2007 Ford F-250 that is equipped with the 6.0L Powerstroke diesel. The bone stock truck was averaging 15mpg when we installed the kit. To find out what the mileage was after the intake system was installed, read below! The retail cost for this kit is around$240.00 from a mail order warehouse or your local speed shop.
The photos below will take you through the entire install of the K&N system on our Ford.

Lots of guys are freaked out about working on their late model diesel trucks and they shouldn't be. The K&N air intake kit installs with simple hand tools and elbow grease. Yes, everything is jammed in there, but with some time and planning, even novice wrenchers can handle this job.

Before pulling the existing parts off of the truck we laid out our K&N kit. All the pieces were present and accounted for so we moved on.

With the clips off, we removed the large rubber hose on the front of the unit and then lifted the large filter canister out.

Unplugging the MAF sensor and loosening up the factory clams was the next part of the removal process.

Access can be tough in cramped diesel engine compartments, so a step stool is a handy piece of equipment to have in order to reach placed you'd otherwise need to lay on the motor to reach.

Here's what the large factory filter canister looks like on its own. This does not scream high performance.

After pulling the filter can we needed to remove the intake tube and this valve cover breather. We carefully popped this one out with a screw driver. DO NOT BREAK THIS at all costs be careful as we have heard that the box and tube are big money from the dealer parts counter.

Here's the path that the K&N system will follow. You can see how busy this engine compartment is with the diesel living in it,

The next step is to remove a valve cover bolt to mount the support brace that will help hold the air intake system plumbing. A 10mm socket and long extension were the trick here.

Next we removed the breather tube and moved it over to our new K&N intake. Again, BE CAREFUL NOT THE BREAK THIS!

Installing the tube in the new intake tract is as simple as pushing it into the grommet.Next we removed the air filter monitor by unplugging it and pulling it out of the factory intake.

Removing the MAF and transferring it over was next on the tick list. Note the fasteners used. We got nervous about those until we realized that K&N provides the proper tool in the kit.

We then started installing the intake system from the turbo back towards the front. The tubing and couplers were easy to work with and fit great.

After getting the tubing installed it was time to set our air box in place. With some wriggling to get it into the small space, we were set.

The large K&N Filter was well made as one would expect and the couplers were high quality as evidenced here.

This nut screwed into the front of the filter and the threaded end picked up a brace that comes off of the radiator support and helps to carry the weight of the filter.

Installing the filter was as easy as sliding it into the coupler in the rear and into the bracket up front. NOT rocket science here, kids!

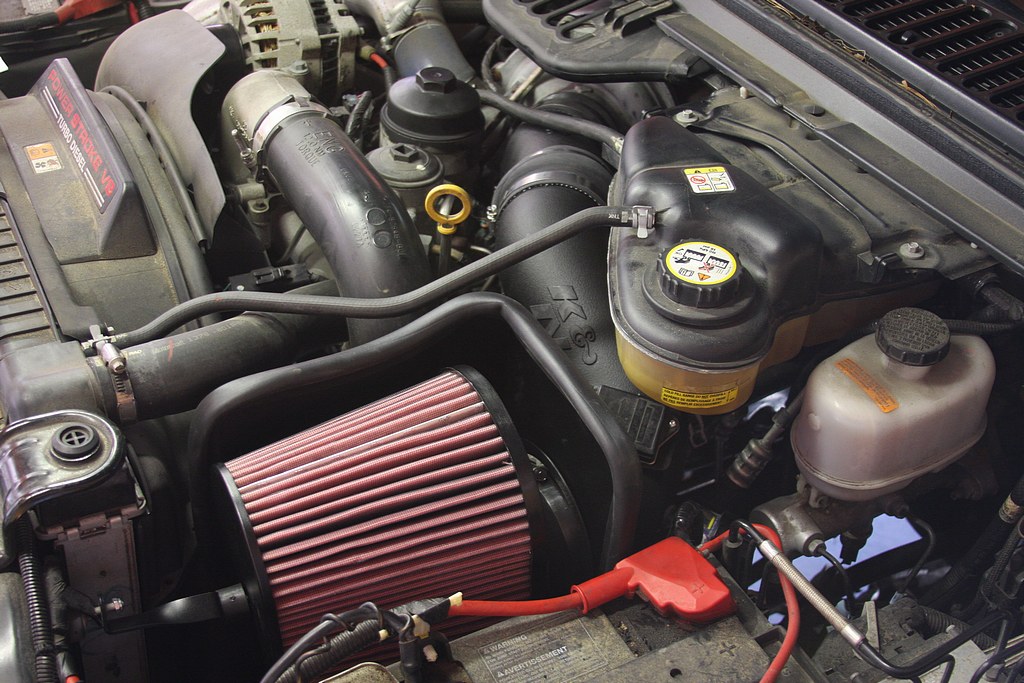
Here's out finished product! The install was a smooth as butter and the results were just as tasty. Outside of the improved power and throttle response, the truck owner reported a pretty astounding 2.5MPG increase after the install. What that means is that this $240.00 system will pay for itself in a few months of normal driving. The K&N system was a perfect fit and is something we'd recommend to BangShifters the world over. It installed well and delivers great value in the fuel economy department. Now that we have gotten in the intake side of things improved, it makes sense that we should improve the exhaust side as well. Stay tuned!


Brian, Nice article. Filled up again this morning and the 2.5 MPG improvement continues.
Also, I am deligheted with the noticeable difference in throttle response and pickup.