


(Words and photos by Scott Parker) – There’s just something about taking what other people consider junk, and making something beautiful out of it. We shared this sentiment with Greg Lovell at AntiVenom, as he was proudly putting the finishing touches on the T56 for my 1983 Buick Regal (aka “G Machine”). Some of the best projects start this way, and the G Machine is no exception. Someone literally gave me this car (I had to force him to take gas money for the tow), which had some intense Pennsylvania rot going all the way through the floorboard and many other areas. Road salt combined with sitting in a field for years turned it into a Fred Flintstone-mobile. Prior to that, it had been a daily driver for one G-body lover. He gave me the keys to the T-type knowing that I would turn this bucket of rust into something. With the help of some good friends, that is just what I intend to do.
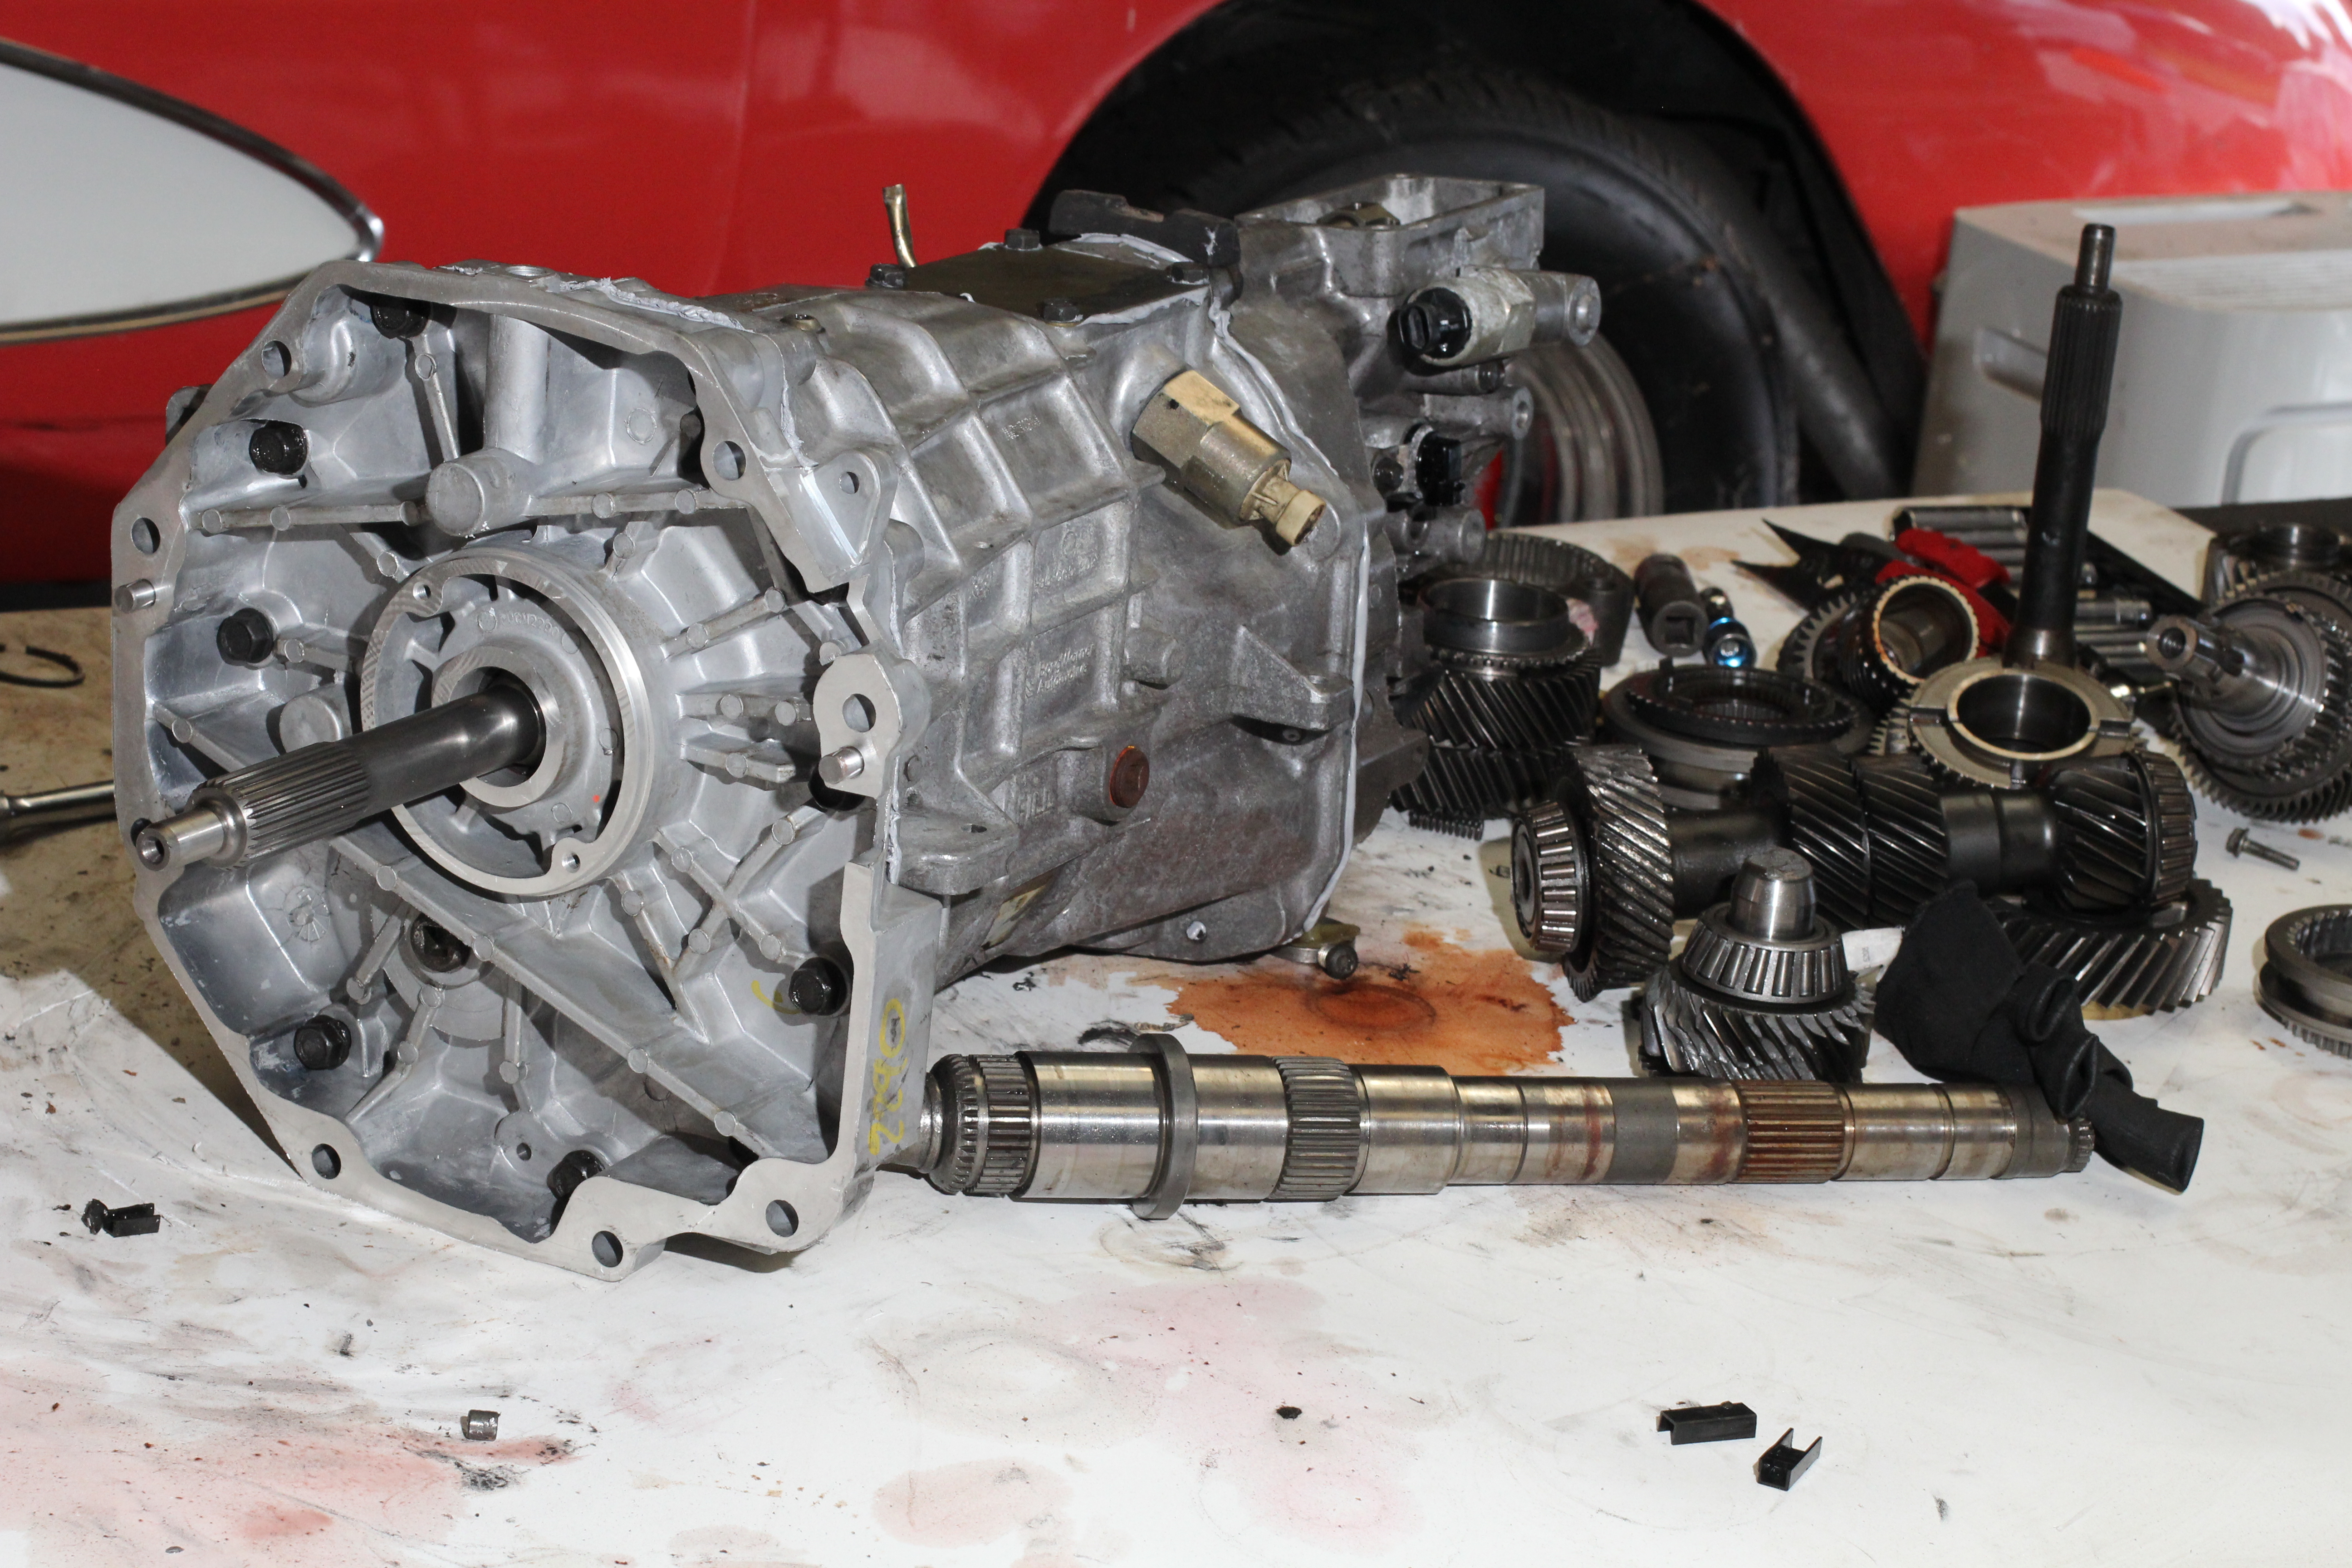
With the intention of turning corners, we decided to ditch the 200-4R and go with a T56 6-speed manual. Just like the 8.8-inch rearend conversion we did last time, the T56 was never meant for a G-body, but with a little ingenuity it can become reality. We’ll cover the install another time, but for now let’s slap together a few gears. As the basis of our T56, we had one F-body style core that had been to hell and back. When a driveshaft came loose it destroyed the tailhousing, cracked the mid-plate, and bent the shiftrail as well as the input and output shaft. The driver was literally holding the shifter to keep the trans from hitting the pavement. That’s some carnage! We also had a second transmission that was toast, but had a much less traumatic life. Our plan was to put the halves of these two transmissions together, reach into AntiVenom’s parts bin when needed, replace the wear items with new pieces from American Powertrain, and sprinkle it with fairy dust.
Any person in their right mind will tell you not to do this. In fact, American Powertrain begged us not to…they said just buy a T56 Magnum. Like many of you, we are most certainly not in our right mind, nor do we have deep pockets. This forces us often to do things the hard way. It sucks. We bleed. We curse. But in the end, we triumph (most of the time).
WE’RE TELLING THE WHOLE STORY IN PHOTOS – READ ON

Our primary core transmission was beaten and battered, but originally came out of an early LS1 F-body. As such it has a tailhousing and overall length that is ideal for many muscle cars, but is a single synchro type as opposed to the Corvette and later style triple synchros. Single synchros will be fine for pairing with a stock LS3. The mid-plate (aka the front plate) you are looking at [here] incurred damage on its ride.
The tailhousing took the brunt, though, breaking into two pieces. The output shaft (aka main shaft) is toast and so is the shift rail.
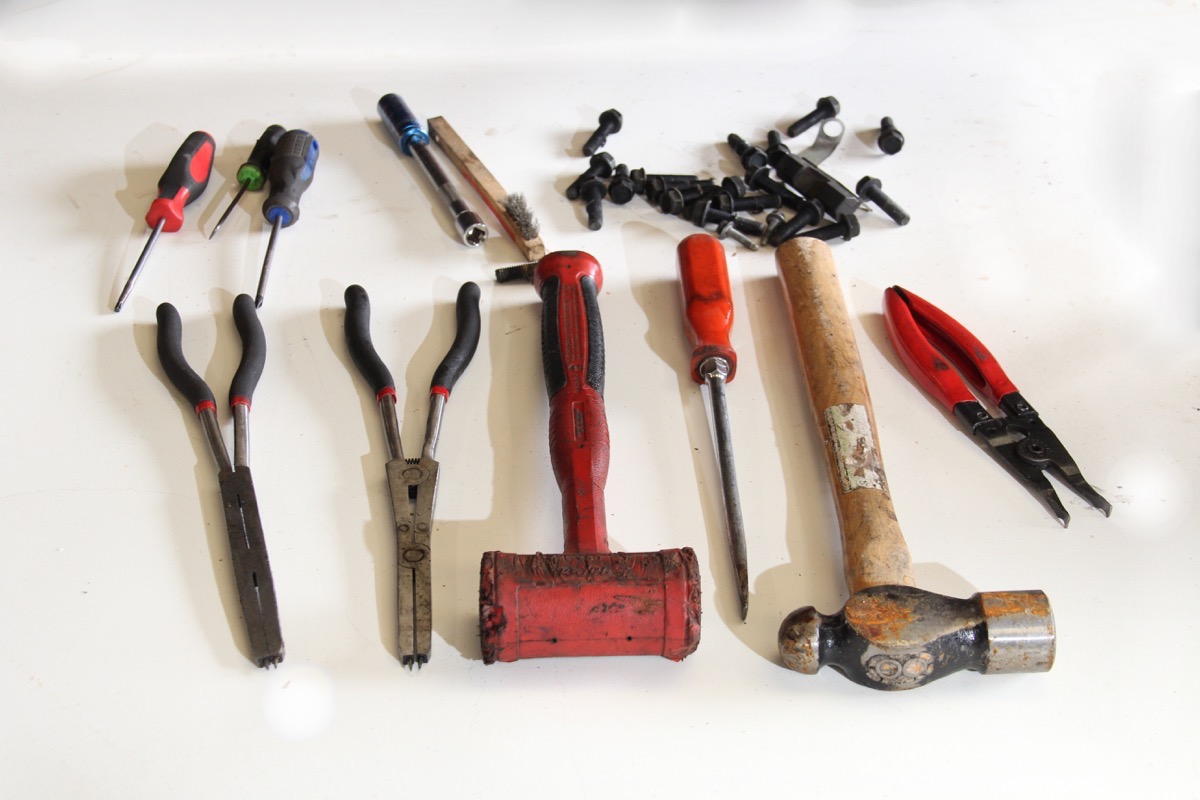
These basic hand tools and access to a press are pretty much all you need to assemble a T56. A roll pin punch set also comes in handy, and can be purchased at a Brass Pro Shop or other firearm retailer. To hold the transmission you can buy an expensive vice, use an old tire, or (my favorite) cut a “glory hole” in the center of a sturdy wooden table. We chose the latter.

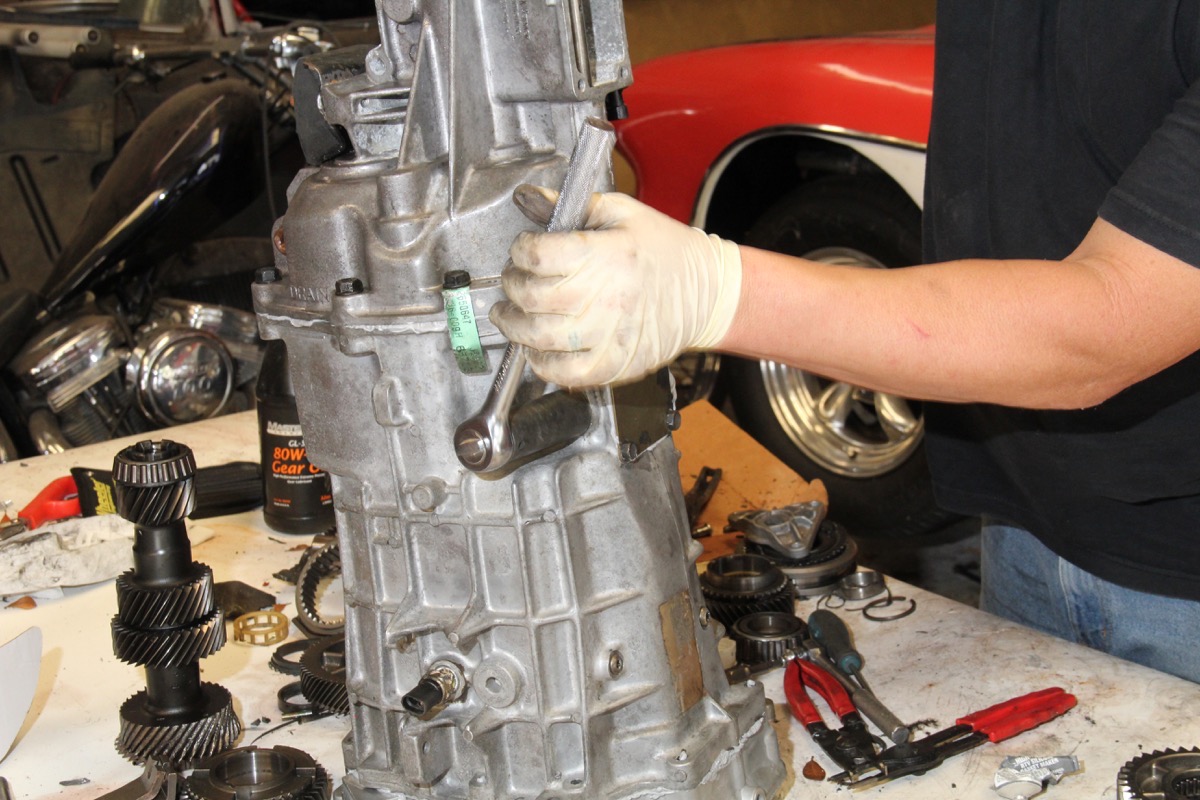
Equipped with his favorite shirt, a mallet and a homemade drift punch, Greg “WTF” Lovell of AntiVenom knocked out the roll pins and the shift guide pins to start. The shift guide pin was broken (a rare occurrence).
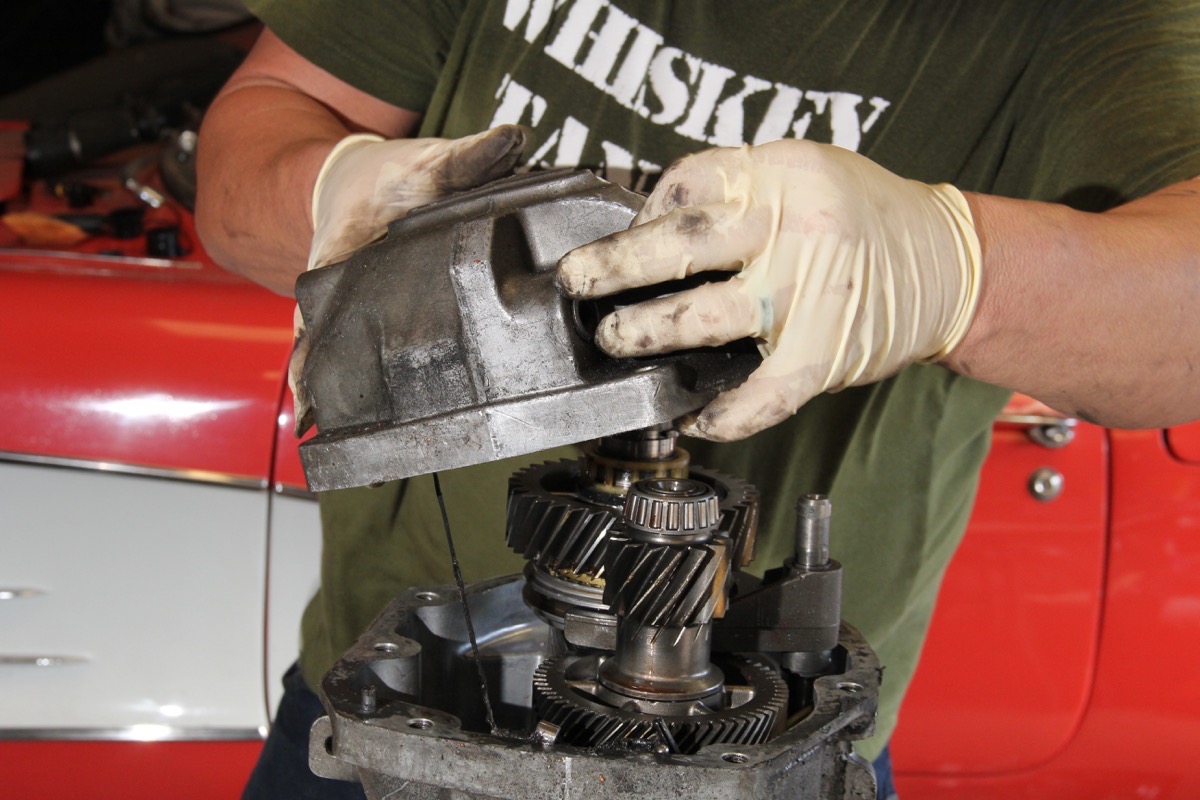
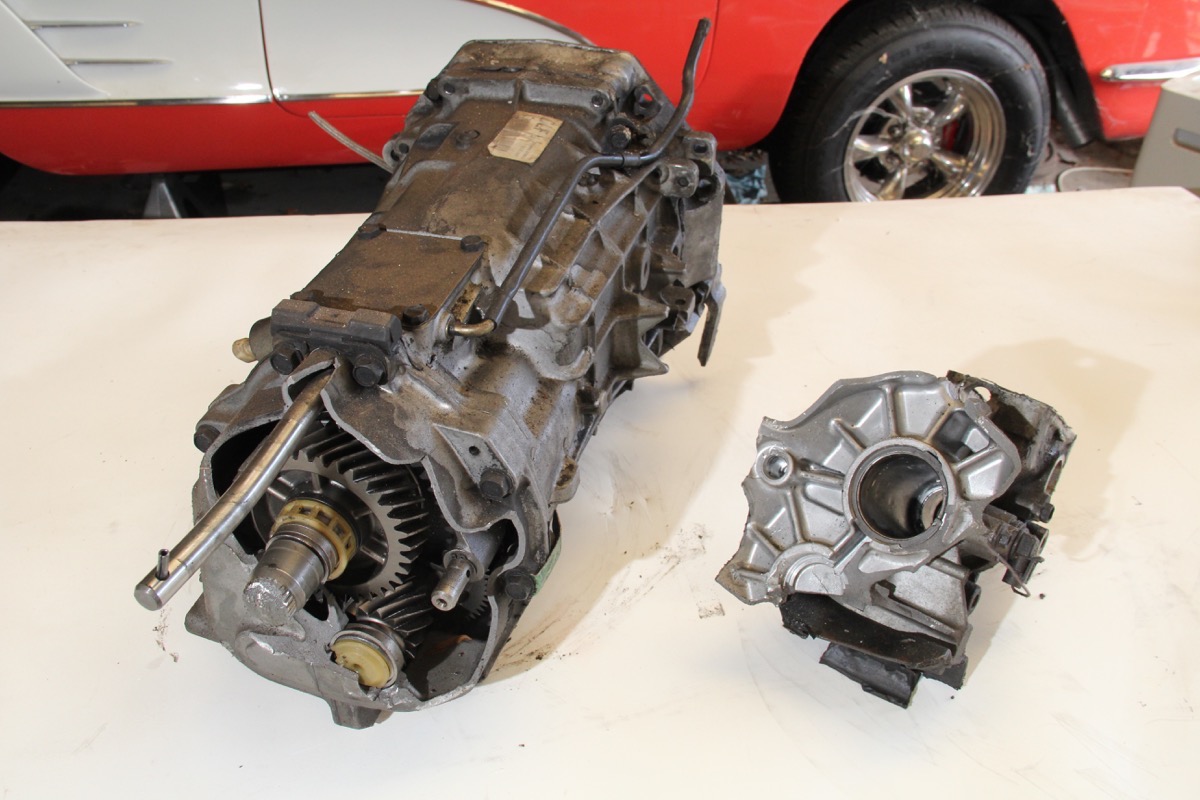
Greg removed the bolts on the mid-plate with a 15mm socket and the top plate (tailhousing) with a 13mm. What was left of the tailhousing popped off fairly easily in this case as you can imagine.

As Greg opened up the transmission, we continued to find more damage inside. Several of the gears like this one (the 5th-6th cluster or drive gear) had damage to the teeth. Thankfully we had half of another T56 and some spare parts lying around. While basic service parts are easy to purchase, hard parts are increasingly hard to come by.
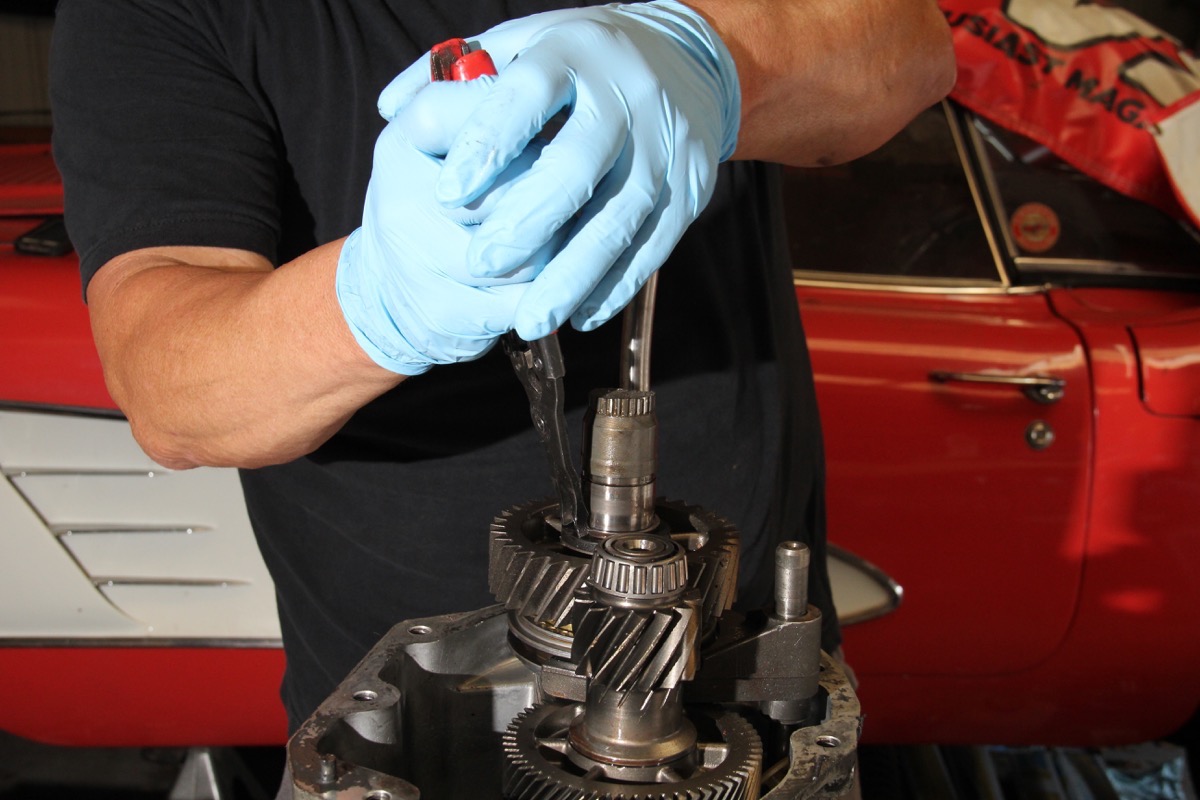
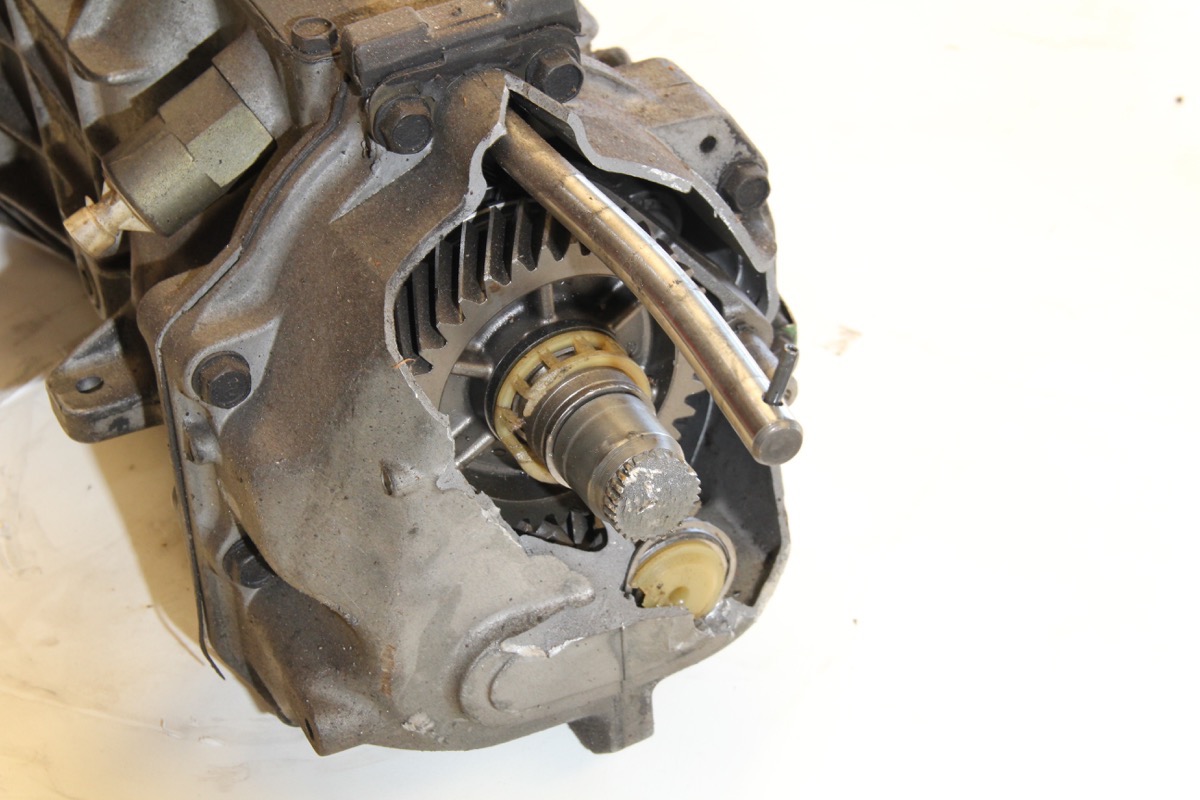
A snap ring on the main shaft needs to be removed to continue disassembly.
Here is a closer look at the snap ring as Greg slides it past the broken main shaft (output shaft). The opposite side is open, so it needs to be pried open to release tension and slide it up.
5th and 6th (driven) gear can then slide off the main shaft.
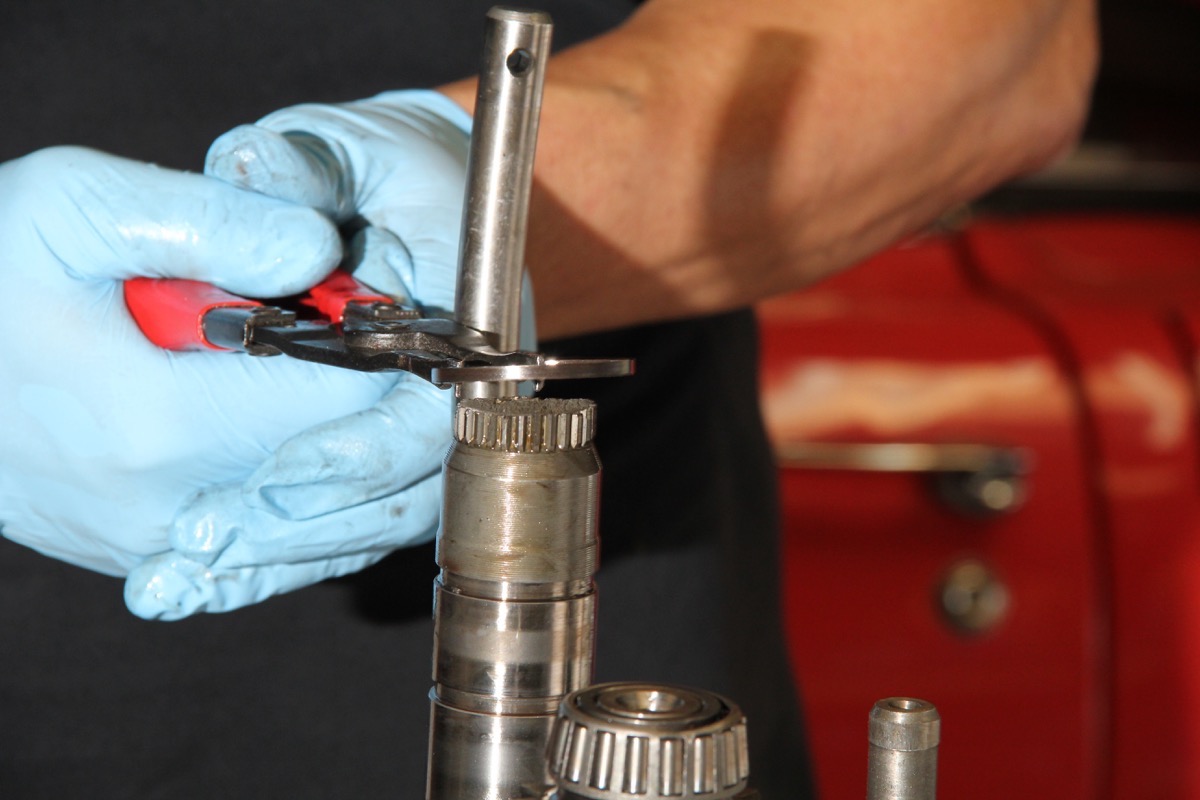
A similar snap ring is used on the reverse fork.

With a few gentle taps of a mallet, Greg unsticks the case from the mid-plate and lifts it off like a shirt. Mm…sexy!

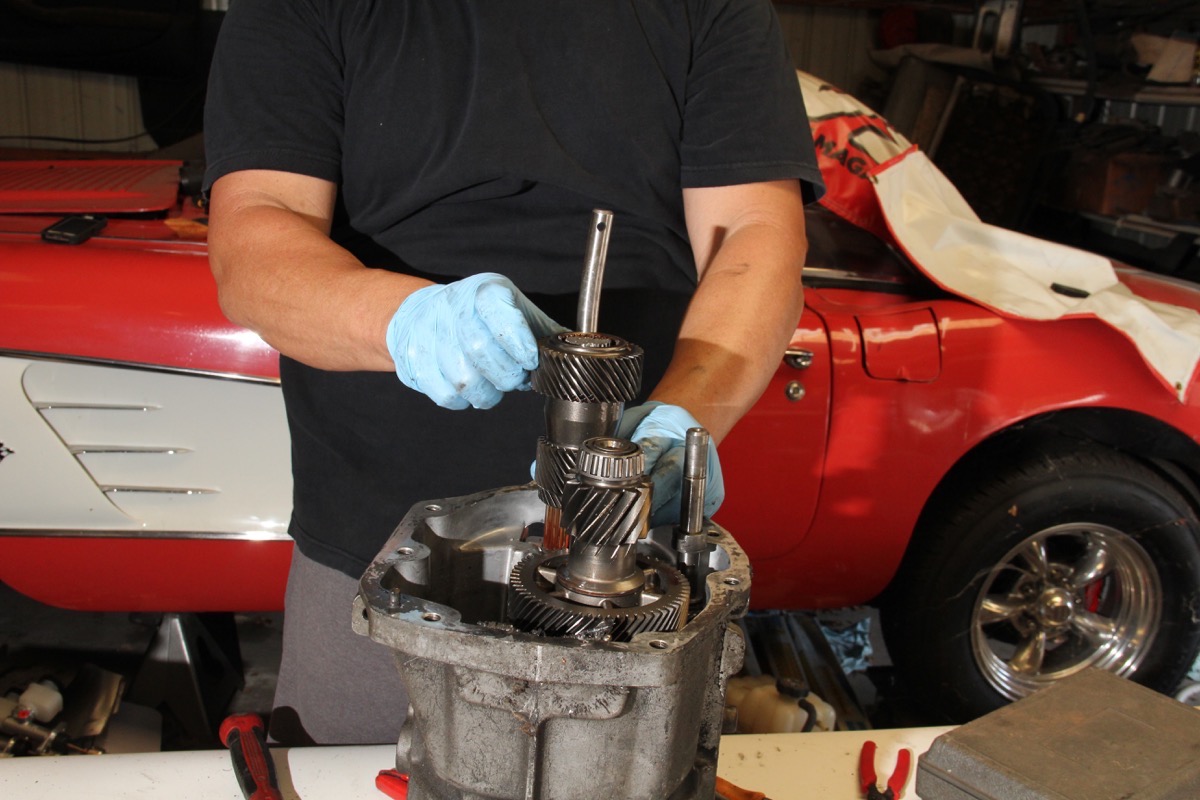
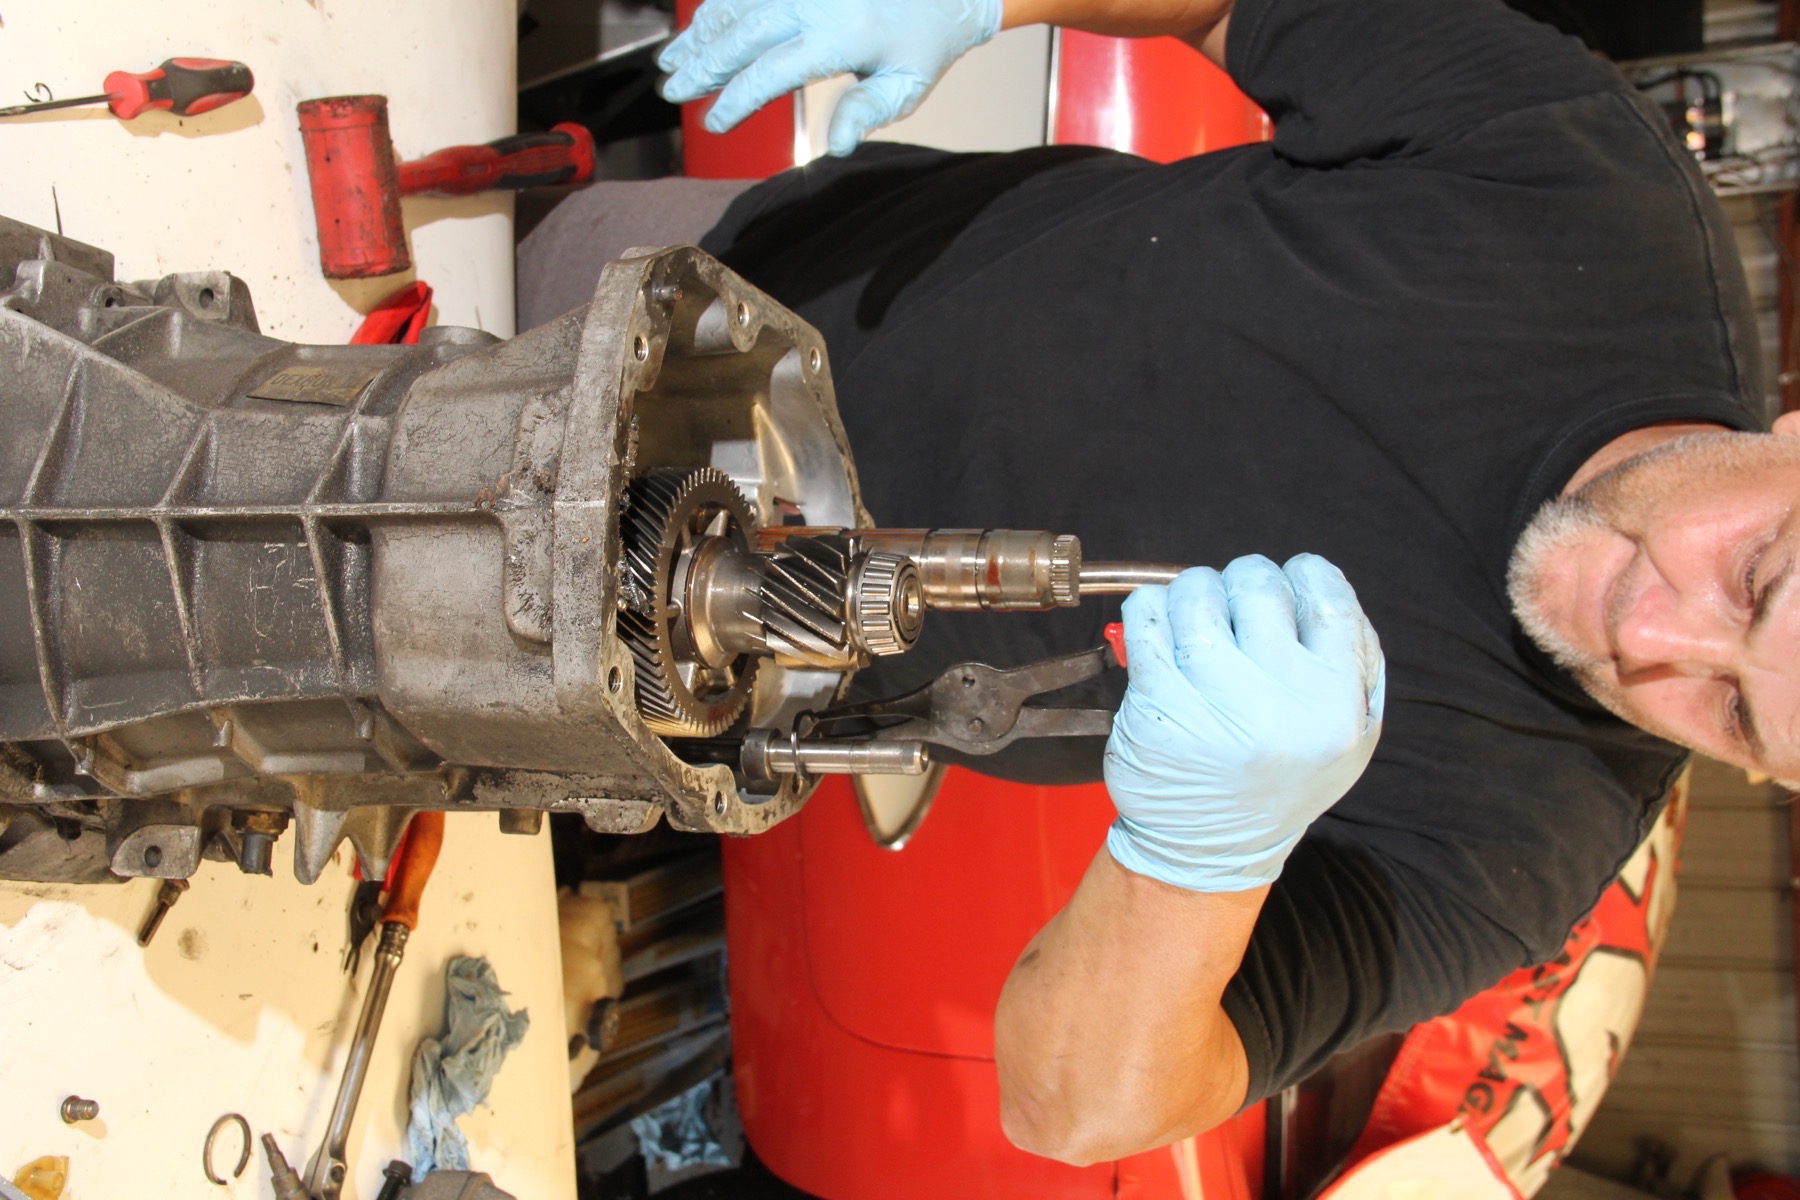
Greg pulls apart the main shaft, countershaft, and shift rail. The input shaft is also trashed. Luckily we have a new one from American Powertrain. There was plenty of debris inside the tranny from all the carnage, but a good amount of the internals were salvageable.

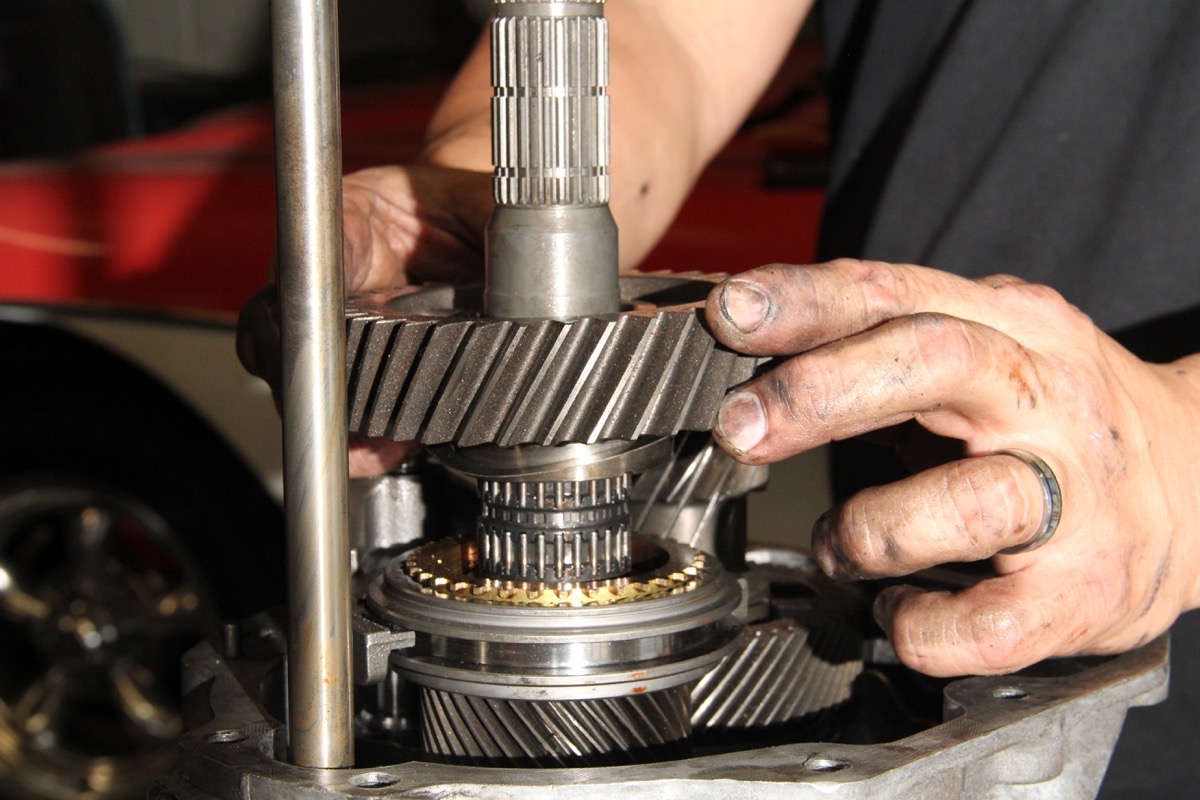
First, Second, and Third gear (right to left) ride on the main shaft. As you can see in-between the gears, some of the teeth have been worn down.

Here is a closer look. These are the teeth that engage the synchronizer, and we wound up junking this gear.

“Dr. Puerto Rico” is the economical cleaner of choice here for internals. All the hard parts need to be as clean as possible before reassembly.
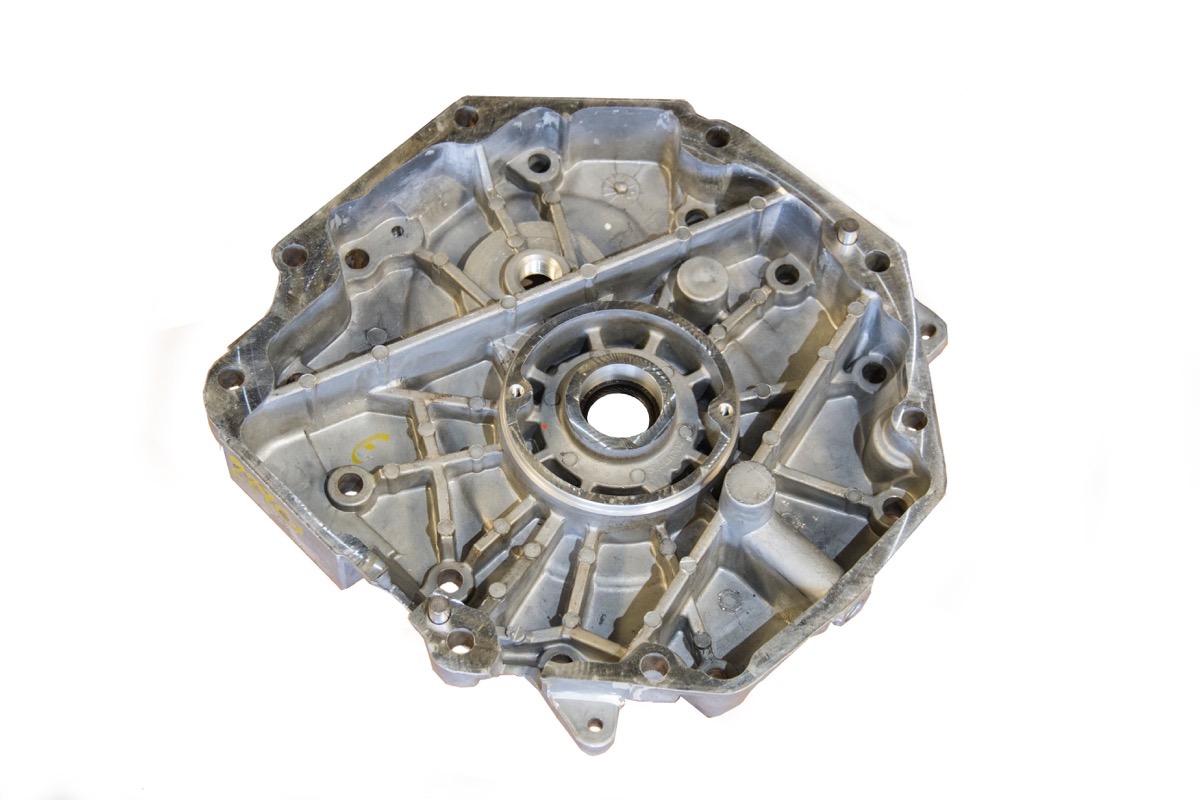
This thing might as well be made of solid gold. American Powertrain managed to hunt one down for us, which interestingly looked a bit different than the OEM mid-plate with provisions for a pump like the TR6060.

American Powertrain also provided a complete bearing kit including new input and countershaft bearings. Greg gently tapped the Timken race into place and then dropped in the bearings on the new mid-plate to start reassembly. Once he plugged the countershaft hole, he was ready to start assembling the trans.

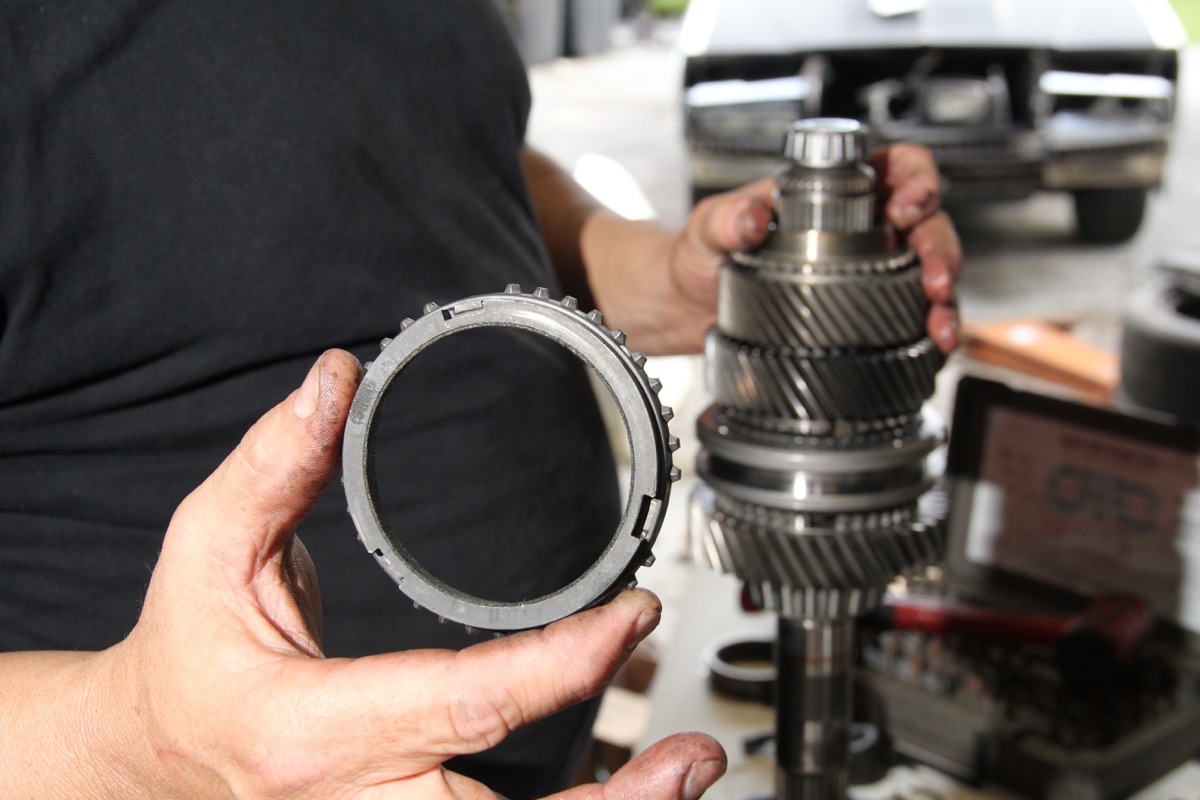
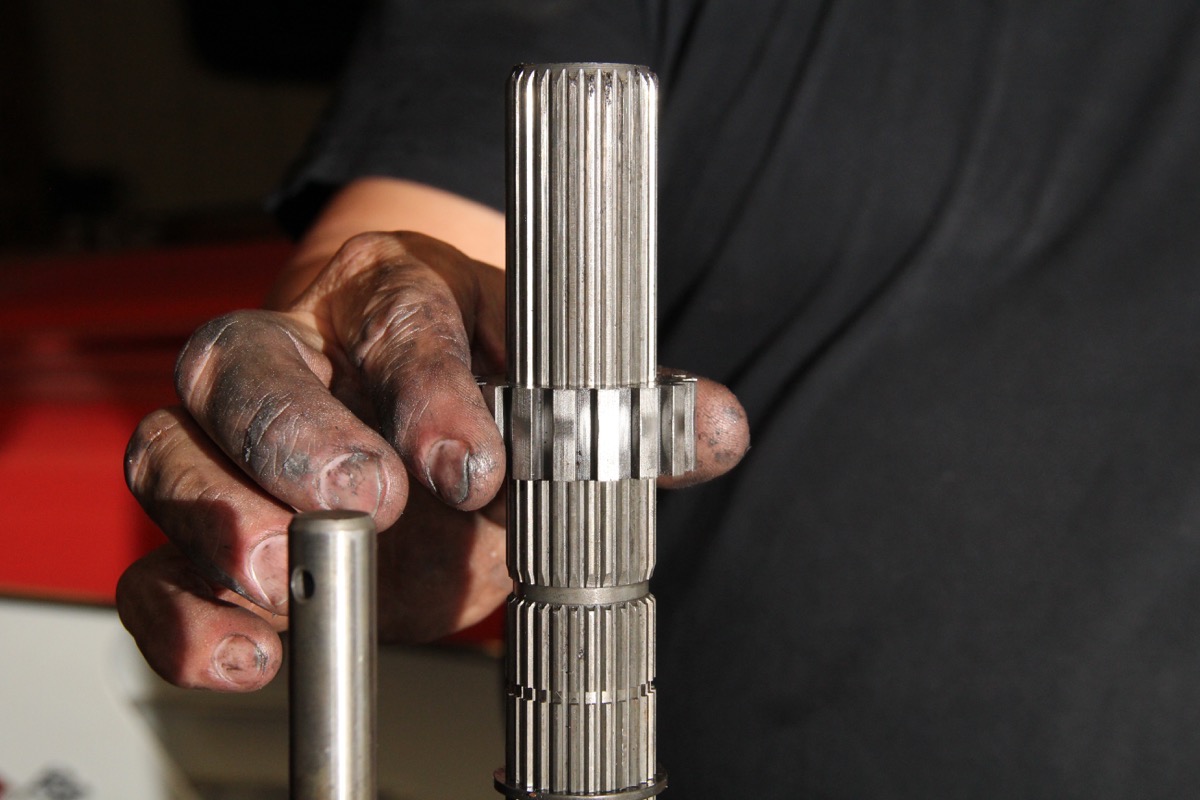
Greg holds up the input shaft that he pulled out of this transmission (left), and in his other hand is an input shaft from a Corvette with the famed triple synchro. The GTO, CTS-V and SSR also used triple cones. Unless you plan on shifting at 7,200rpm regularly, the single cone synchros are sufficient.
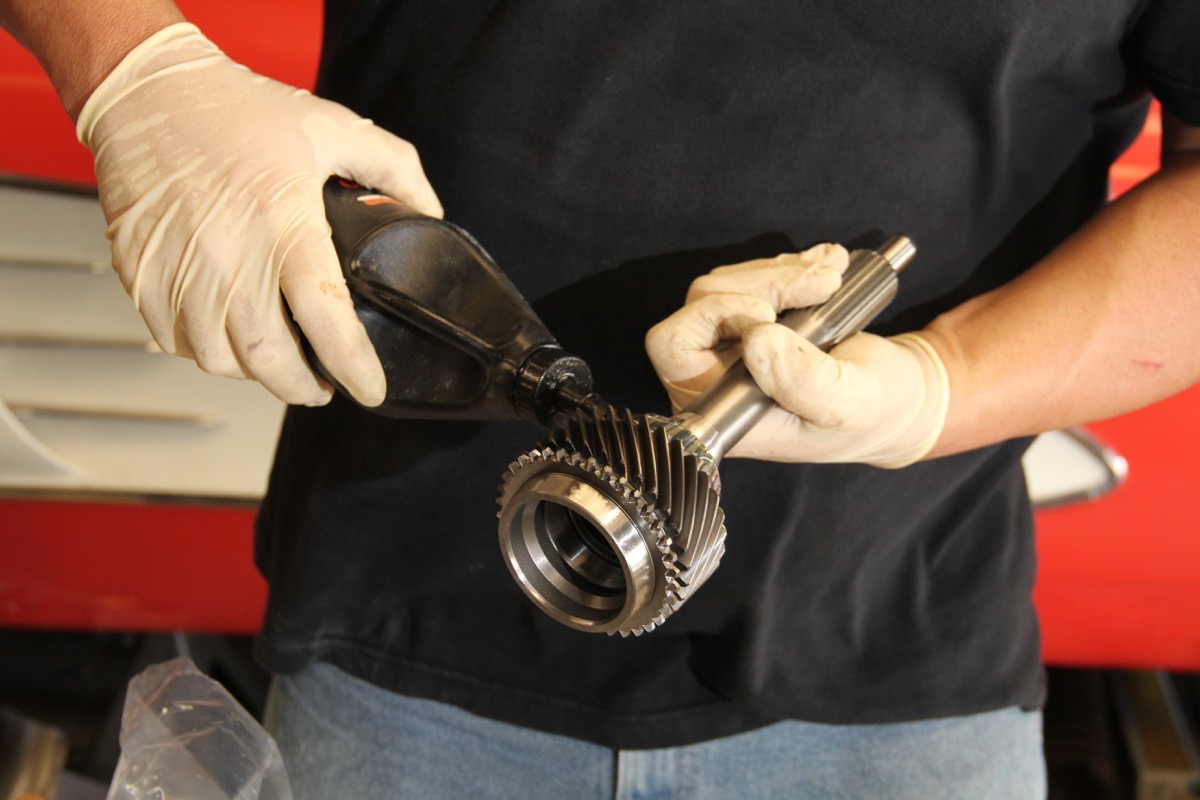
After pressing a fresh bearing on to the new input shaft from American Powertrain, Greg lubes up the gears with lightweight oil.
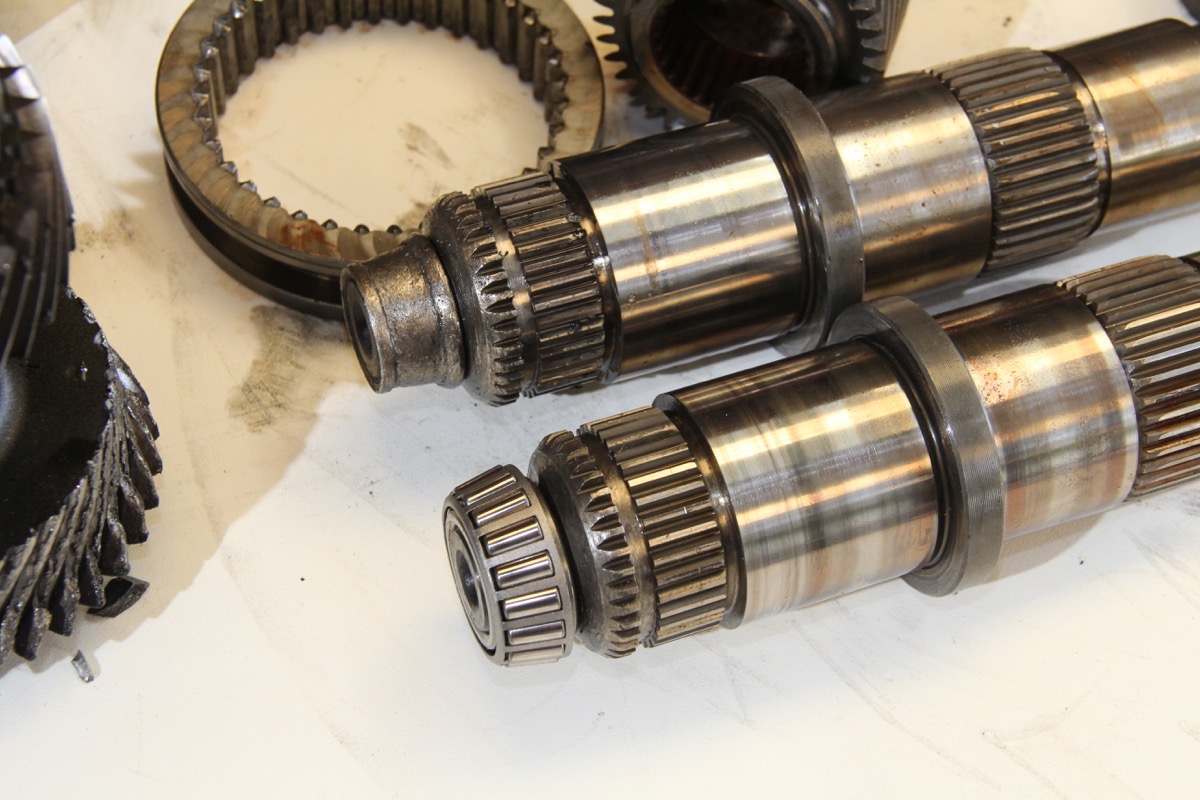
There isn’t much left of the bearing on the main shaft at the top, which is obviously a wear item. Greg pressed on the new input bearing from American Powertrain on the bottom one, which he says is the most crucial since it spins at a different speed than the input shaft except in 4th gear (1:1 ratio). He went on to say that they typically fail because they are the hardest to lubricate, given the position, and it is important to fill the transmission with as much fluid as it will take.

After scavenging the spare transmission and parts bin, Greg gave the gears and synchronizers a quick dip in mineral spirits prior to assembly.
These are the new carbon blocking rings from American Powertrain that go between each gear and synchro. Just like a clutch, this material provides friction, which stops the gear from spinning and allows the slider and gear to couple (or synchronize) to the main shaft. When they wear out, they become too close to the gear and cause it to grind when engaging.

First, Second, and Third gear are slid on to the main shaft along with the synchronizers. Greg says he uses an educated feel as it comes together, looking for “slop” as he spins the gears. He watches the teeth go by as it spins, feeling if it glides smoothly or catches.

When assembling the synchronizers, you want to make sure the keys line up with the divots in the ring.

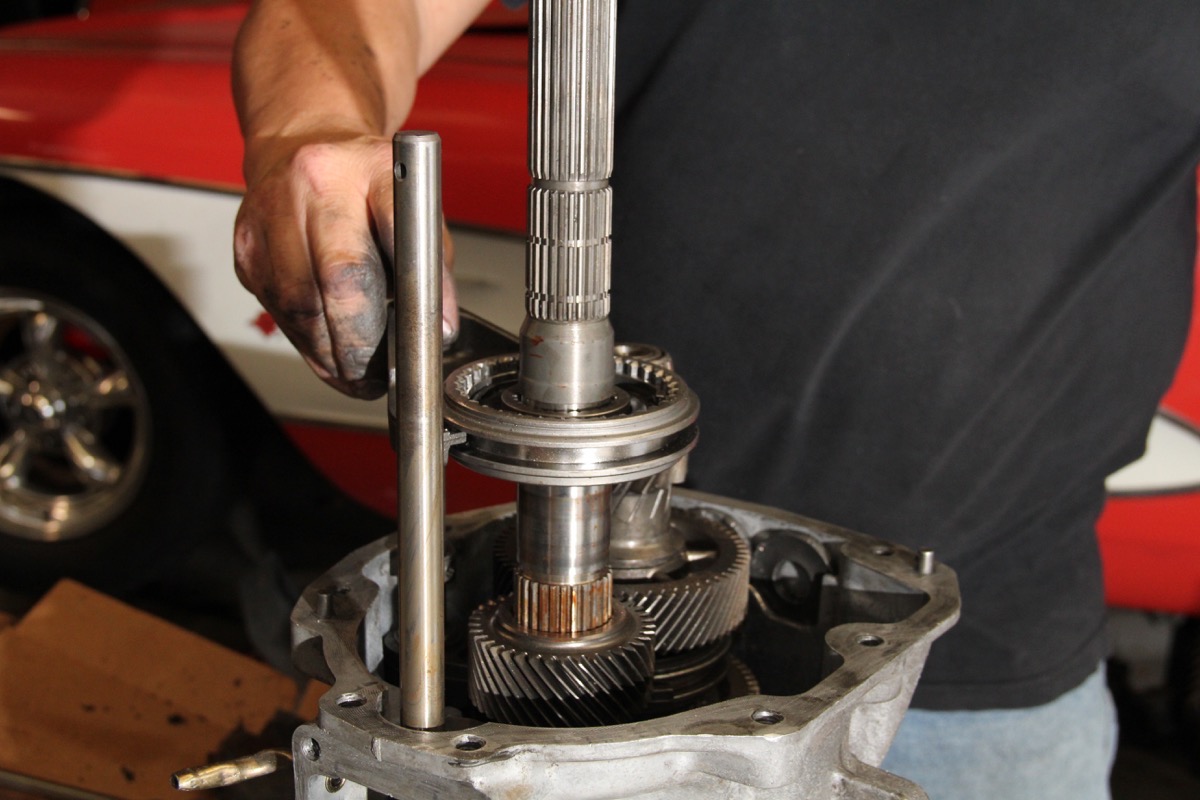
With the assembled synchronizer on the end of the main shaft, it is ready to meet the input shaft.

For fitment, Greg put the countershaft and assembled cluster gear in place, but that will soon be removed.

This is something else to look out for – galling on the 5th/6th shift rail. Into the scrap pile!

The shift fork pads are another wear item as you can see. These are stock replacement, but bronze is typically better for higher-powered applications. Billet synchronizer keys (not pictured) are also highly recommended for any rebuild.
Greg simply presses the new fork pads onto the shift forks by hand. We stuck with the OEM aluminum shift forks, but the steel 3-4 shift fork will run about $30.
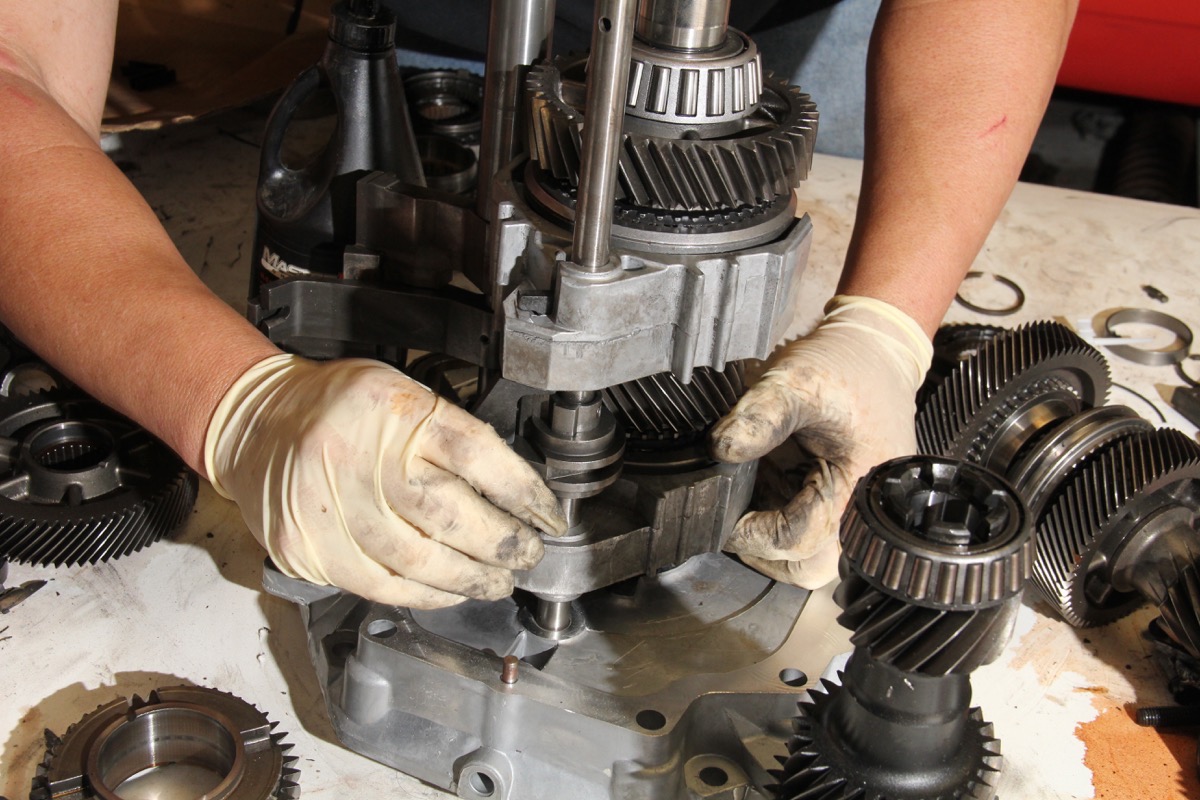
After installing the shift rail into the mid-plate, we were nearly ready to button up the bottom end.
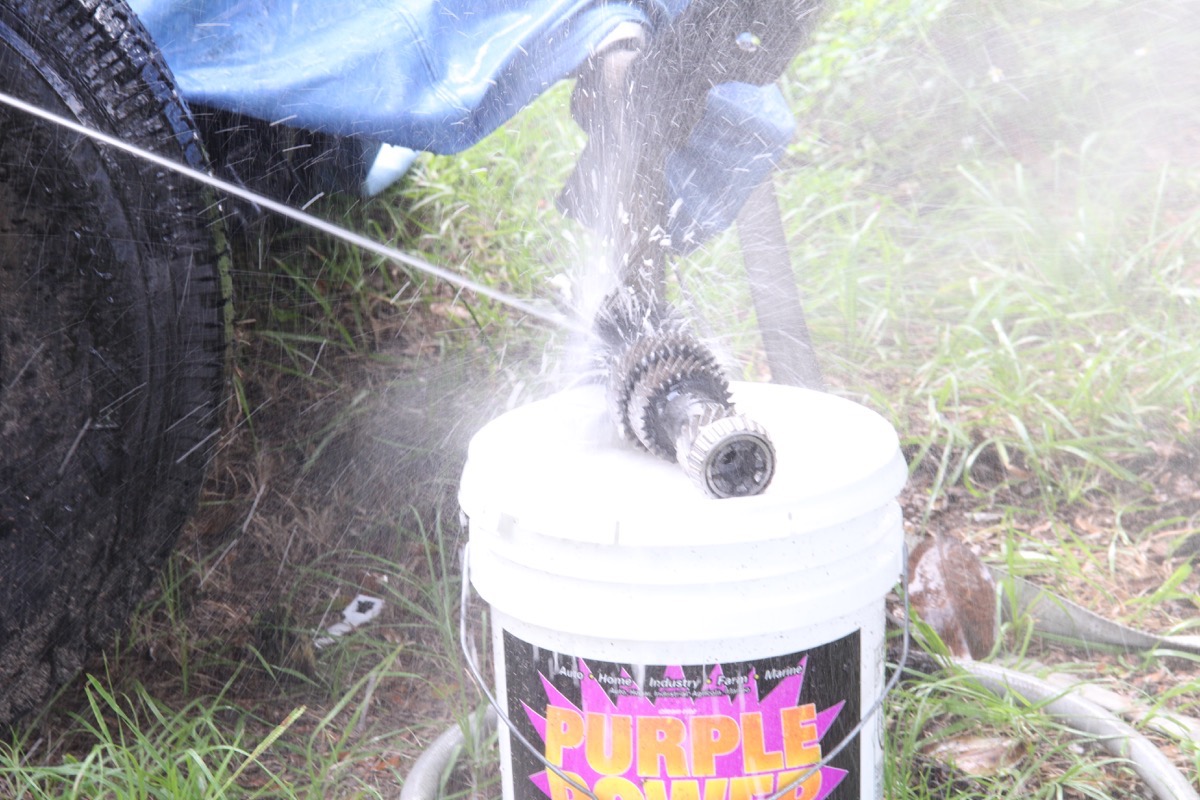
Greg gave the cluster gear and countershaft a healthy dose of Purple Power before drying it off and installing it.
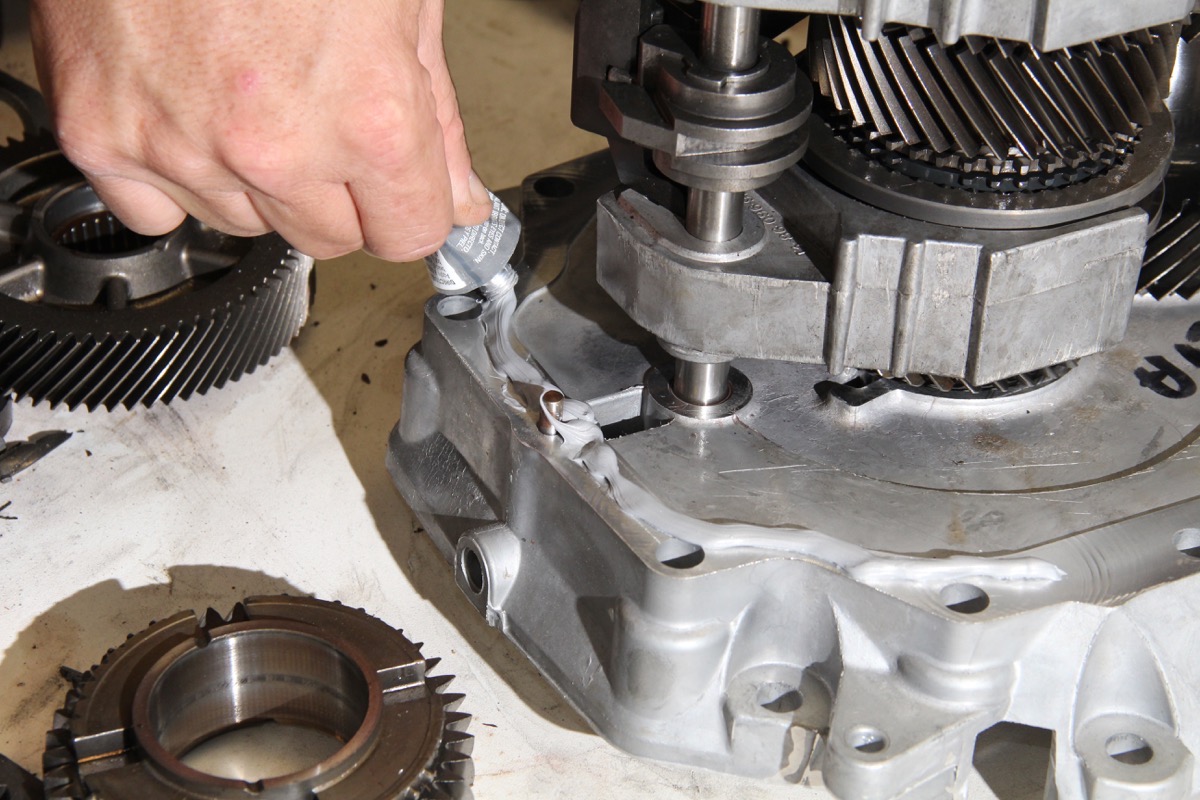
RTV Ultra Gray is the sealant of choice for the mid-plate-to-case, as well as the tailhousing-to-case. You can easily go through a whole tube of this stuff since you’ll need to reapply if the case has to come back off.

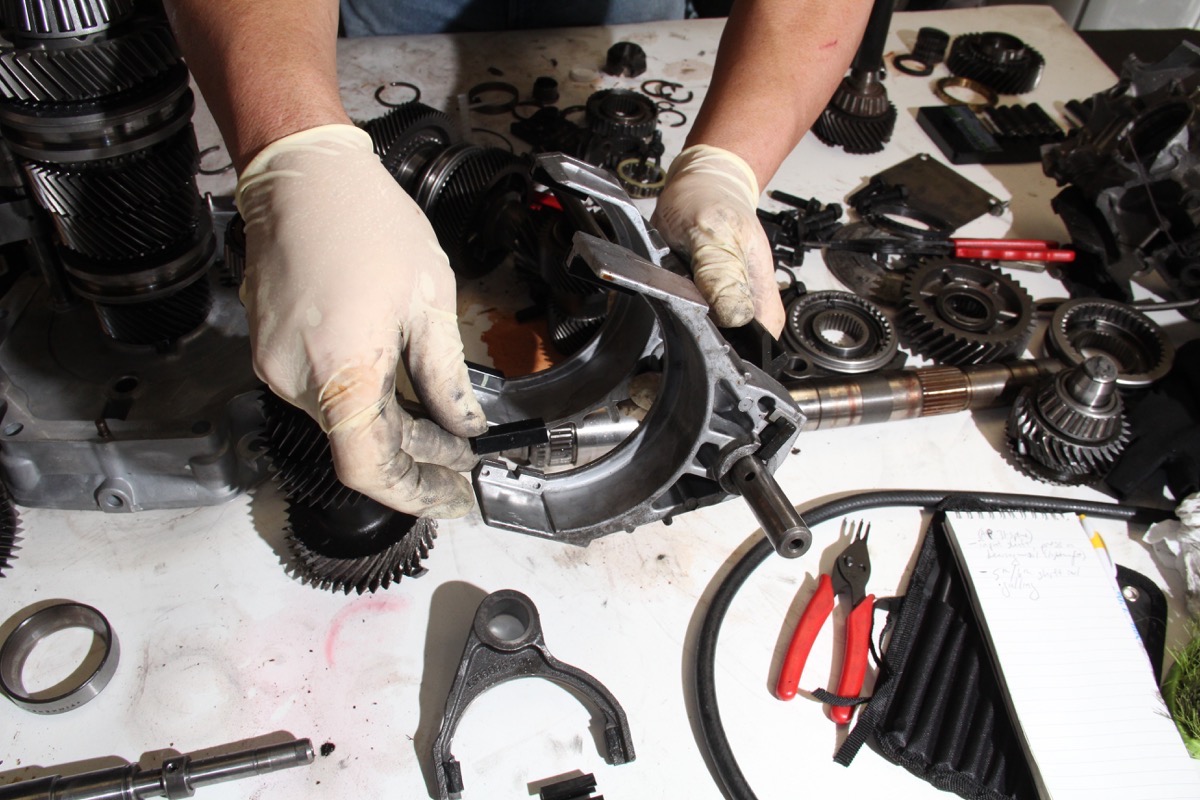
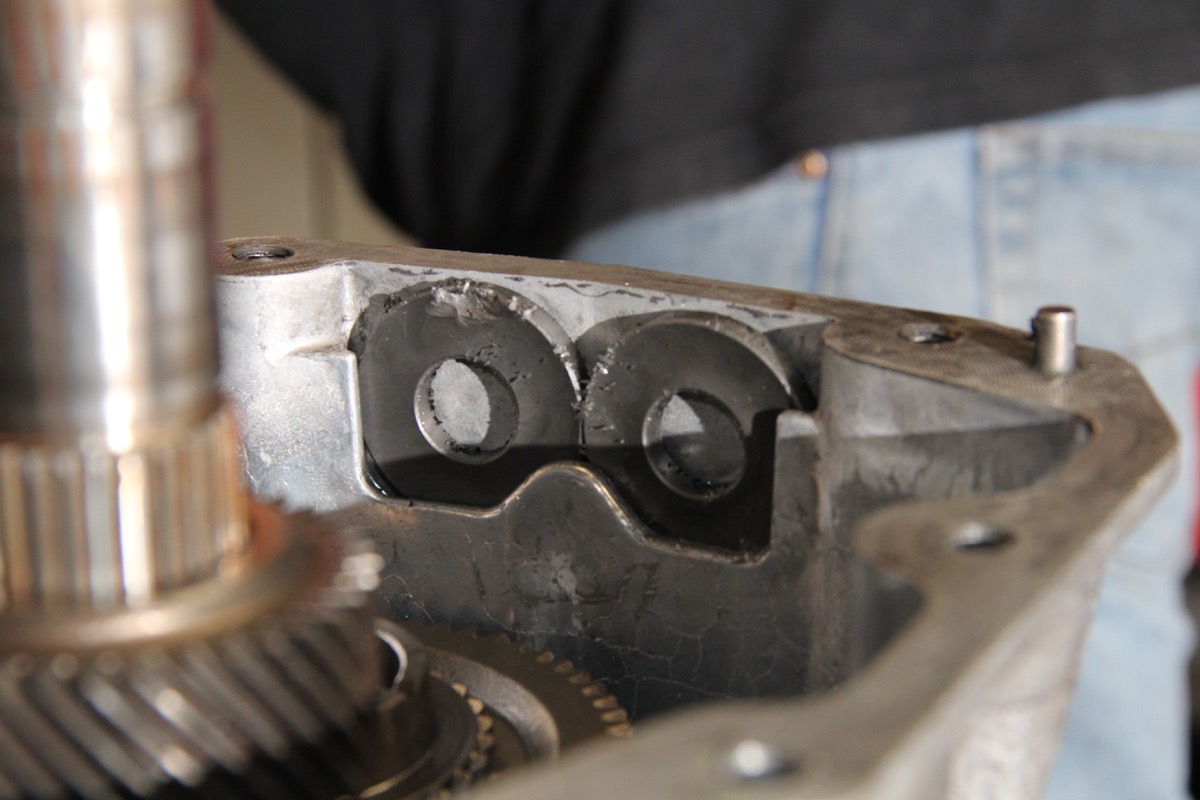
The reason the case may need to come back off is that these guide pins needs to slide through the case to hold it in place (shown with the case off to demonstrate positioning). However, when lowering the case, they can easily fall out of alignment.

With the guide pins in place, you can bolt the mid-plate and call it a day. Well, almost.
Moving back up top, you need to make sure the magnets are still in the case and clear of debris. These grab any metal shavings to keep them away from moving parts.
After dropping the 5th/6th cluster onto the counter shaft, the reverse synchro is lined up with the shift rail and shift fork as it’s slid into place.
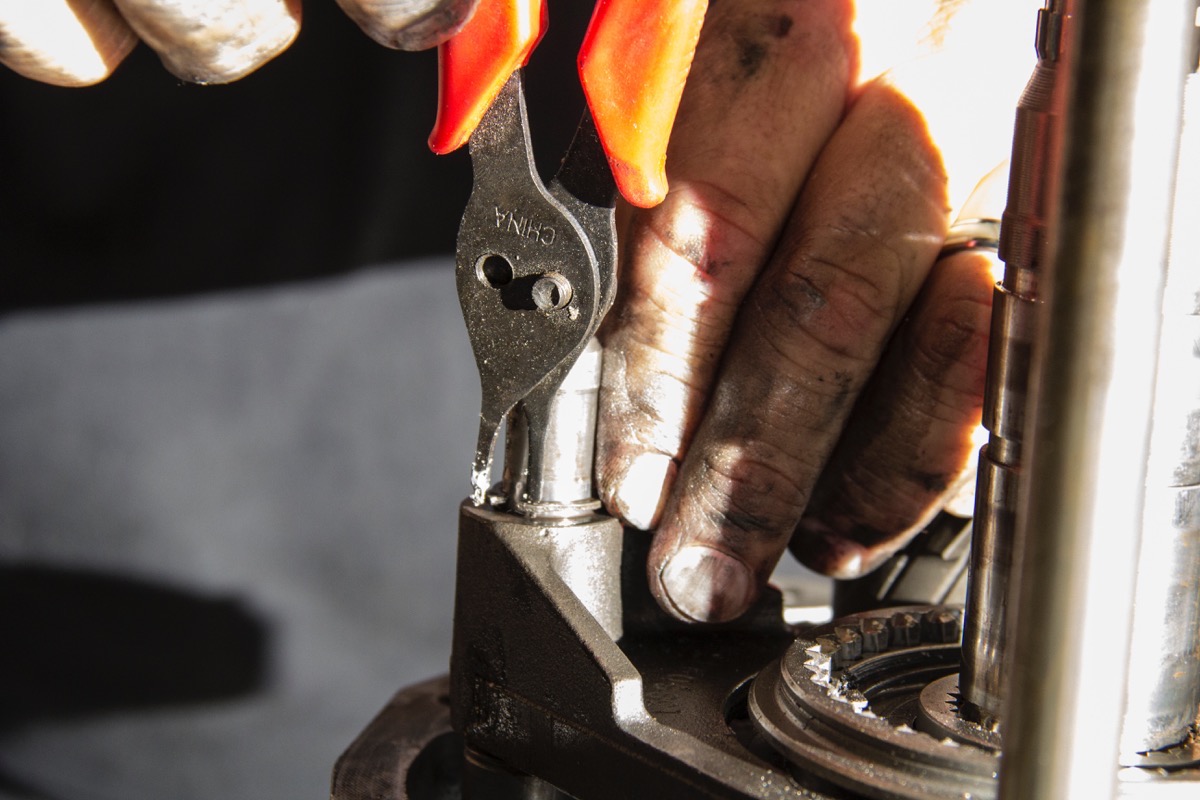
The shift fork is locked into place with the snap ring.
Greg turns his attention back to the main shaft, where he first installs the brass Reverse blocking ring before the Bellville spring, Reverse gear and bearing.
After installing the locking ring, the speedometer ring slips over the mainshaft.

The Reverse idler gear was transferred over from the broken tailhousing to the intact one.

With a good bead of RTV on the case, the tailhousing was lowered down and bolted up.
Greg sealed up the trans with all sensors and plugs.
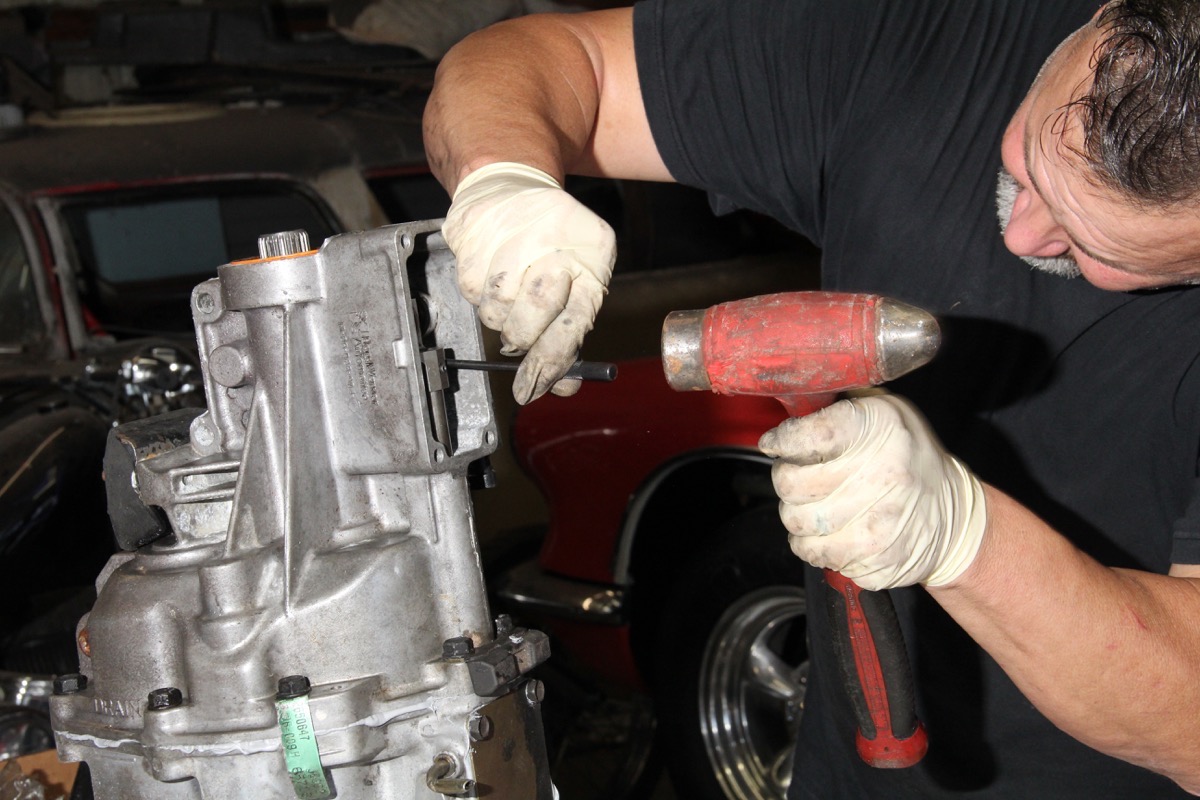
And last but not least, Greg installed the shift guide pin with the roll pin punch.

The finished product is a magnificent example of what you can do with a pile of parts and the will to make it work.
Sources:
American Powertrain
931-646-4836
AntiVenom
813-381-3995
BONUS! HERE’S THE COMPLETE T56 SERVICE MANUAL – READ IT!
Resource
T56 Service Manual
http://www.thirdshiftstudios.com/T56manual.pdf


Going into this I was thinking “Car Craft just did this…” a few months ago, but this article is way better from the rebuild point of view and showing exactly how tore up a junkyard transmission can be and still be brought back to life, even though some parts are hard to find.
Same guy and background corvette =P
Yeah, with the Car Craft. This was a great piece though, interesting stuff that makes a re-build look pretty do-able. Looking forward to seeing the install.