


We’re back with an update on the father/son BangShift go kart build that we’re calling Project Cellar Dweller. To catch you back up to speed in case you missed the introduction to this fun and educational experience , my son Tom had been packing his allowance and extra money away for the better part of a year in order to buy his own go kart. An offer came across the table for a free chassis that a friend was getting rid of so rather than buying someone else’s Craigslist debacle we’re making our own in the basement starting with the chassis and whatever bits we can save off of it.
In the first story we told you about the kart which is from the manufacturer “Pro-Kart” and we’re guessing that it dates from the 1970s or early 1980s. We showed photos of blowing the whole thing apart and then left you hanging from there. To pick it back up in the subterranean lair where this creating is being built, after disassembling the ket we commenced assessing the components that were present to see what we’d be able to keep and what we’d be able to reuse. This is where my son’s first lesson in economics and decision making came into play.

After taking the whole thing apart and looking over the chassis we discovered that there was some surface rust but other than that the kart was in great shape. I offered him a couple of directions on what to do. First was the pro route. We could call around and see how much it would cost to have the chassis sand blasted and powder coated. I told him that he’d get the best results from this and it would be the toughest and strongest finish he could put on the chassis. I then told him option two which was that for a smaller investment we could buy sand paper, spray primer, and spray paint and do it ourselves. When the costs of blasting and coating were coming back at a few hundred bucks and the paint/paper route was coming back at about $20.00 he went with the $20.00. This is legitimately his money that we’re spending here and I think it is a really interesting way to teach him how far a buck goes.
We sanded for a couple hours a few times a week and did our best to scuff everything, clean everything and work through scale and rust in the most thorough way we could. Is it pro level? Nope but it showed what kind of elbow grease is needed and he was more than eager to get down there and work at the slightest provocation which was great.

Here’s another in-progress look at the chassis, this time upside down. The thing is remarkably solid, even the floor board which is just a reasonably thin piece of sheetmetal. It is stitch welded to the chassis and it is in really solid shape. I was thinking that it would have to go but as it turns out there is really no major rot on it other than some surface corrosion. During our time sanding the talk turned to what was going to power this thing.
The kart arrived to us with a 3.5hp Briggs and Stratton on the back of it. Stuck and full of stuff, it seemed like woodland creatures had been living in it for some time. I had an ace up my sleeve at this point but did not let on to Tom. Instead I presented him with options and he wanted to see if we could save the little Briggs engine. So, we tore that baby down.

100% intact and filled with gasoline that had the horrid toxic grape juice smell that bad gas gets, I was pretty sure that we’d find out that this engine’s rings were rusted to the bore and that’s why it was stuck. The first order of business was to take it apart and explore what was going on inside. This gave Tom a first hand look at how the tough little Briggs and Stratton engine operates.
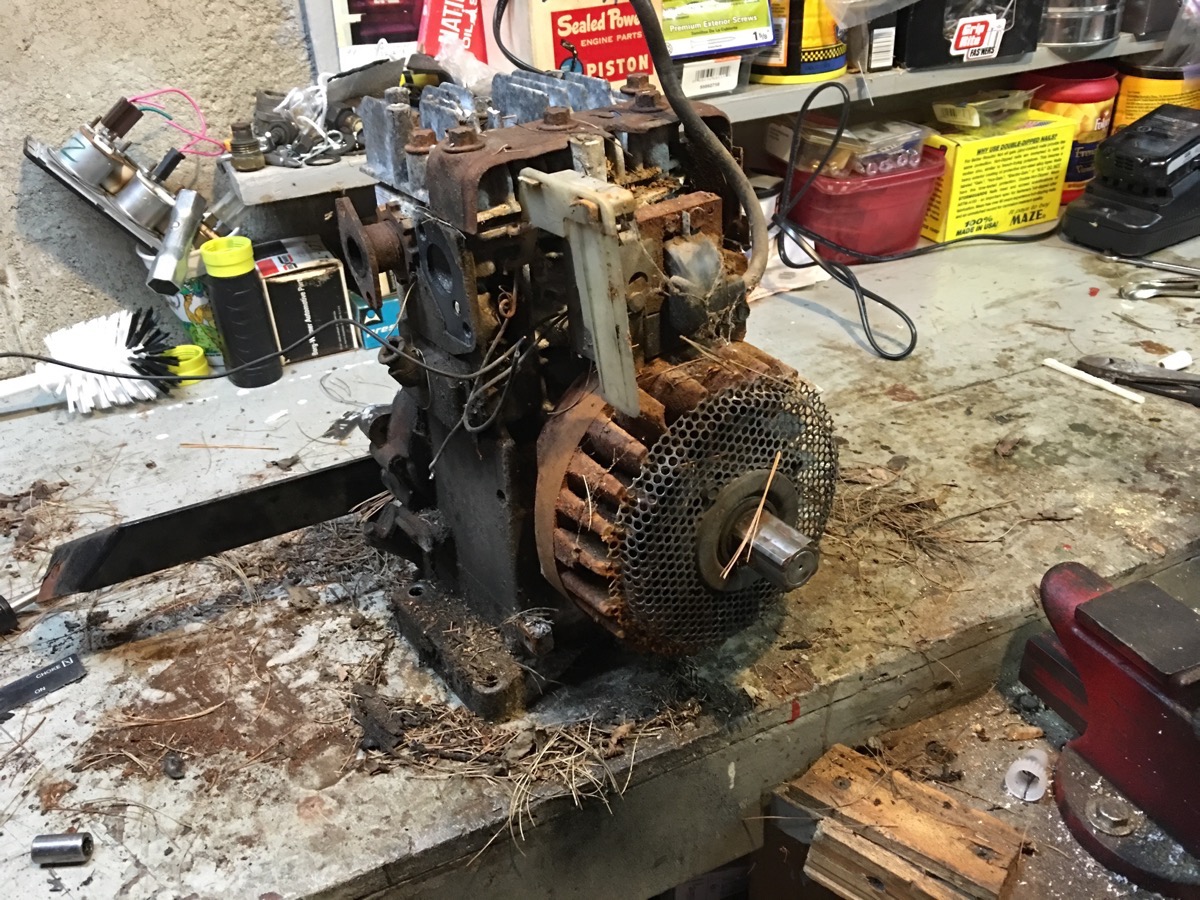
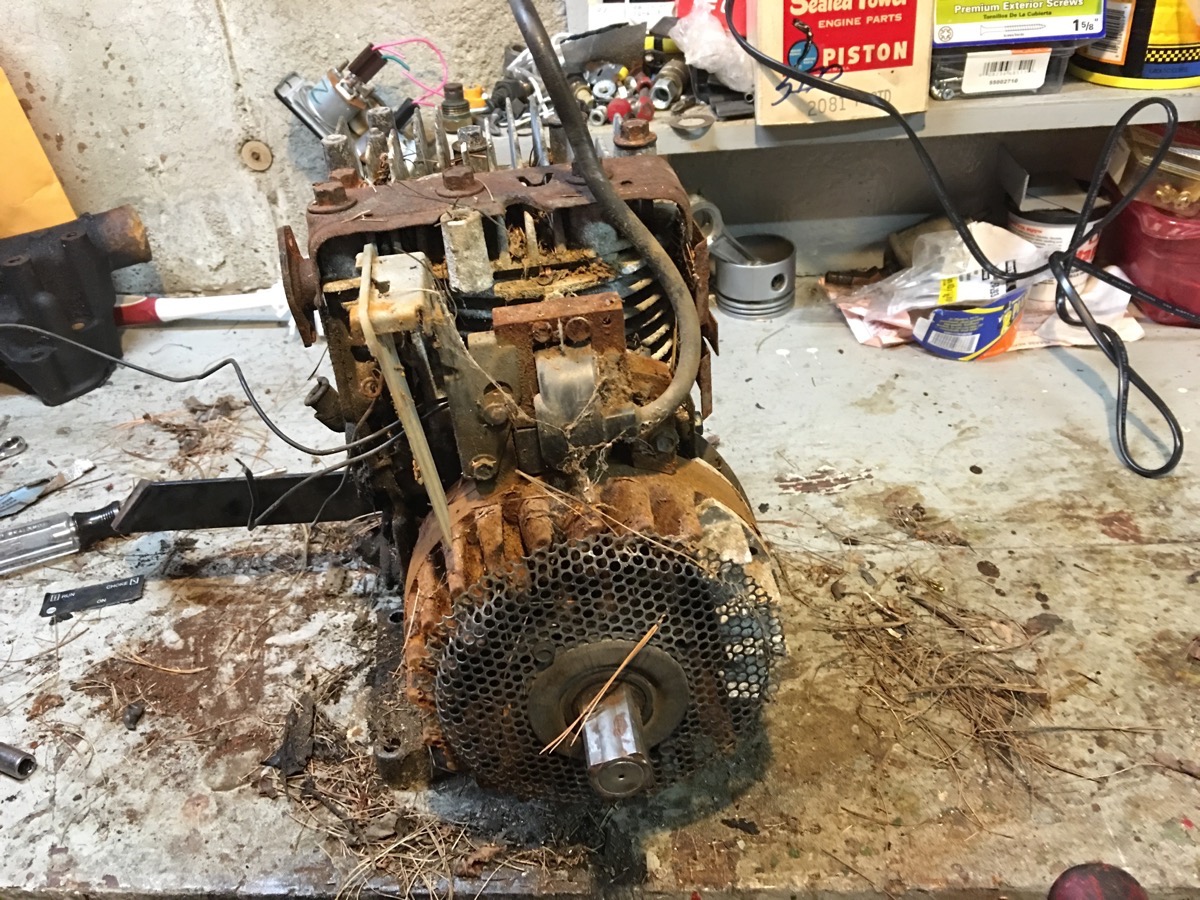
Yes, all of that crud was filling every nook and cranny of the engine. Dirt, weeds, acorns, straw, this thing was a squirrel condo during its time sitting in the woods. That being said, a funny thing happened when we got the rope pull off the engine. It spun. With all of the corrosion on the magneto and flywheel we were not going to attempt starting it but it gave some hope that the little engine would be saved.
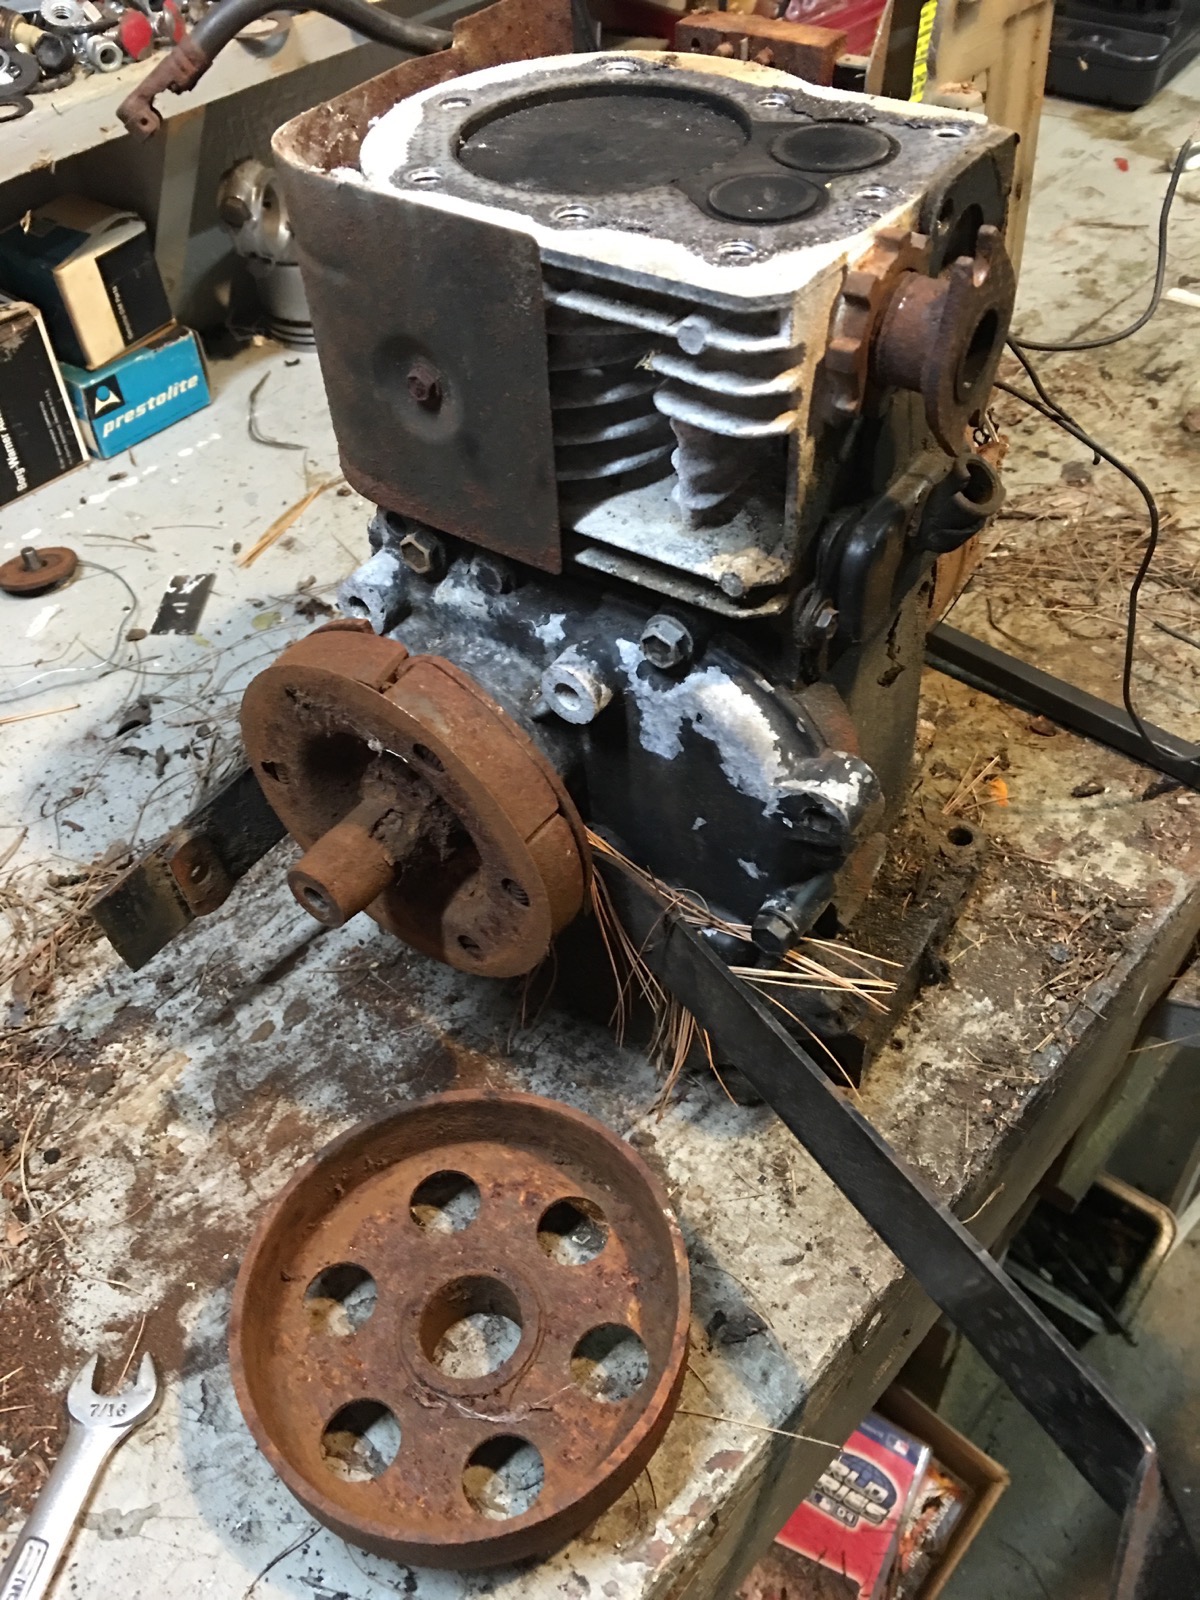
By the sounds of it, the engine had compression and the valves were opening and closing but to make sure we took the head off and sure enough, the little flathead was doing what it should have been. At that point I told Tom that we’d take it apart, re-ring it and it would be good to go back in the kart…and then I noticed what was left of the old clutch.

This is where the simplicity of saving the 3.5hp engine stopped. See how just completely rusted and buggered the old centrifugal clutch was to the crankshaft of the engine? Soaking it in oil, heating it, and using a three jaw puller ended up with the clutch folding up like it was made of puddy and the center of it not budging one millimeter. It was at this point that Tom got sad because he thought his budget was busted with the loss of this engine. No so fast, kid. Dad’s got an idea!
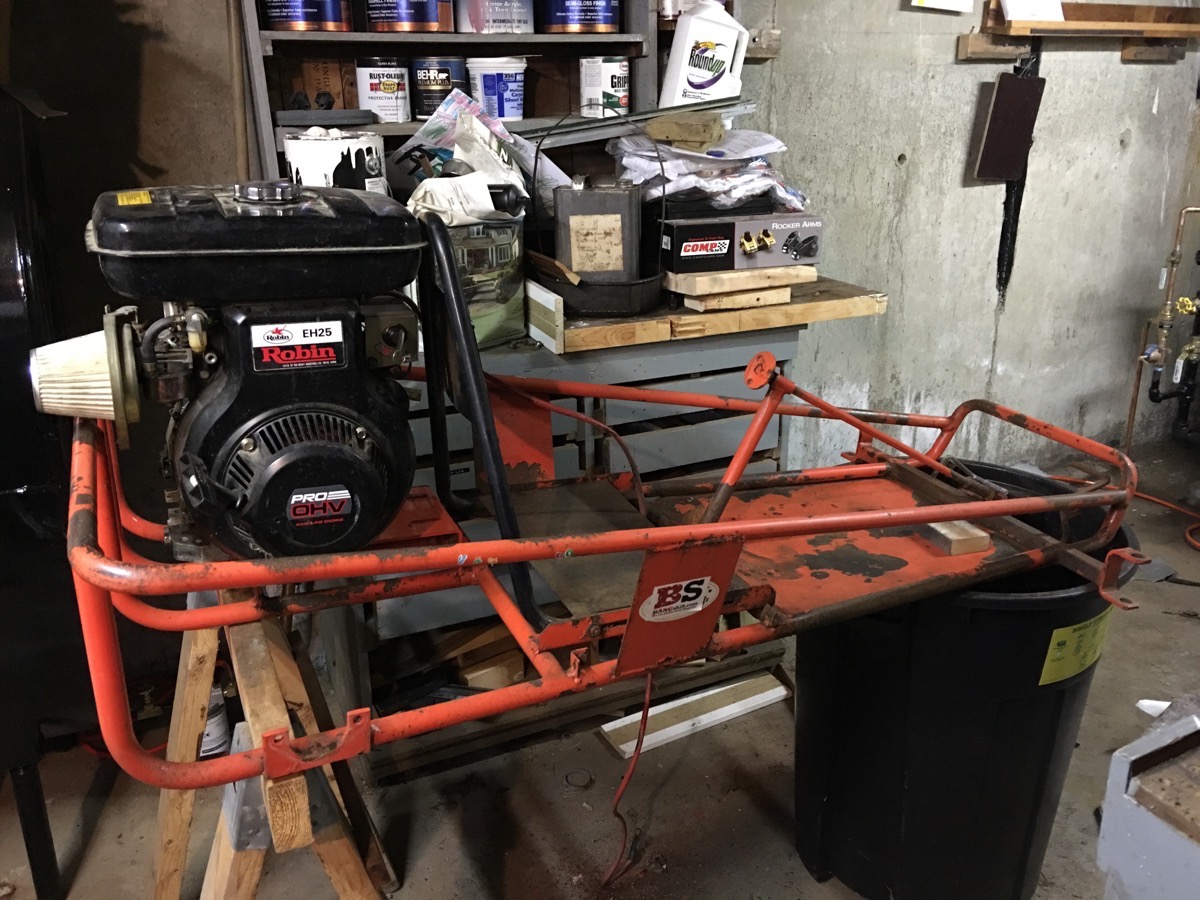
A few years ago at an office job far, far away I was ordered to throw out a lot of good stuff and among the things I heaved into a dumpster was this Robin OHV EH25 engine. That’s an 8 horse job sitting on there with literally zero hours on it. I threw it away as instructed and then after I got off work I climbed in the dumpster, took it out, and brought it home waiting for a day like this. I never had an idea about what I was going to do with it until this whole thing got rolling. I know that this is a TON of power for a kid go-kart and I will throttle stop it appropriately for Tom. I will also have that stop as being adjustable so when I get on it, all 8 ponies can come out to play!
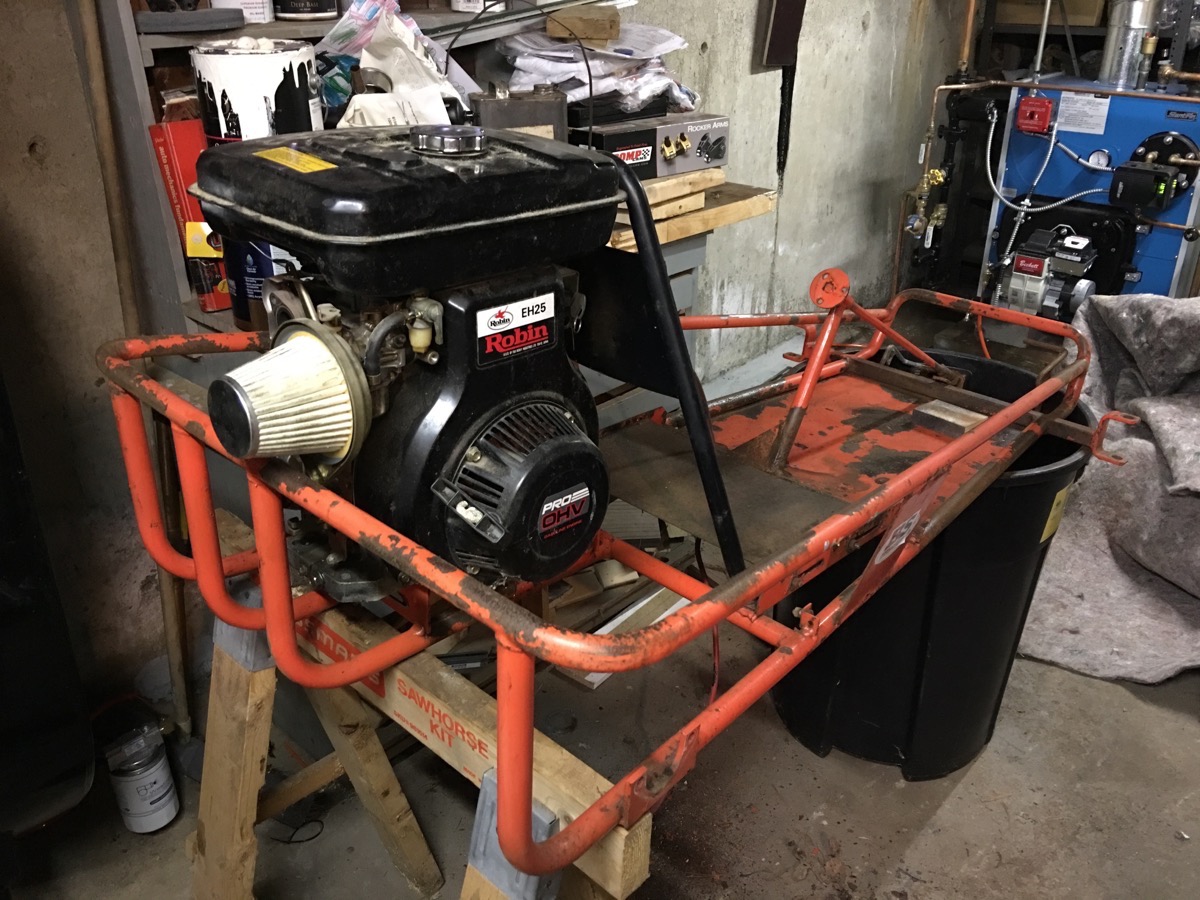

The Robin is not a perfect fit but it is close enough and with a little magic we can make it work. I had to remove the muffler and the housing for the air cleaner to get it to drop into the chassis and while you cannot quite see it here, the rearward motor mount bolts do not land on the existing motor mounting pad. We’re going to remedy that by welding a piece of steel between the rear two frame rails and the existing motor mount pad that will carry those two bolts. The exhaust will have to be fabricated as well and I have some ideas on that. Tom will buy the materials and I will poorly MIG it together. I think the thing looks totally bad ass tucked in back there and it should go like the wind for me and go like a nice breeze for the throttle stop hampered kids.
Because of impending weather (I am writing this as a blizzard rages outside) we put the paint work ahead of the fab work. Yes, we’ll have to grind some of our sweet color off to weld stuff but that is not the end of the world, right? Progress can’t stop!
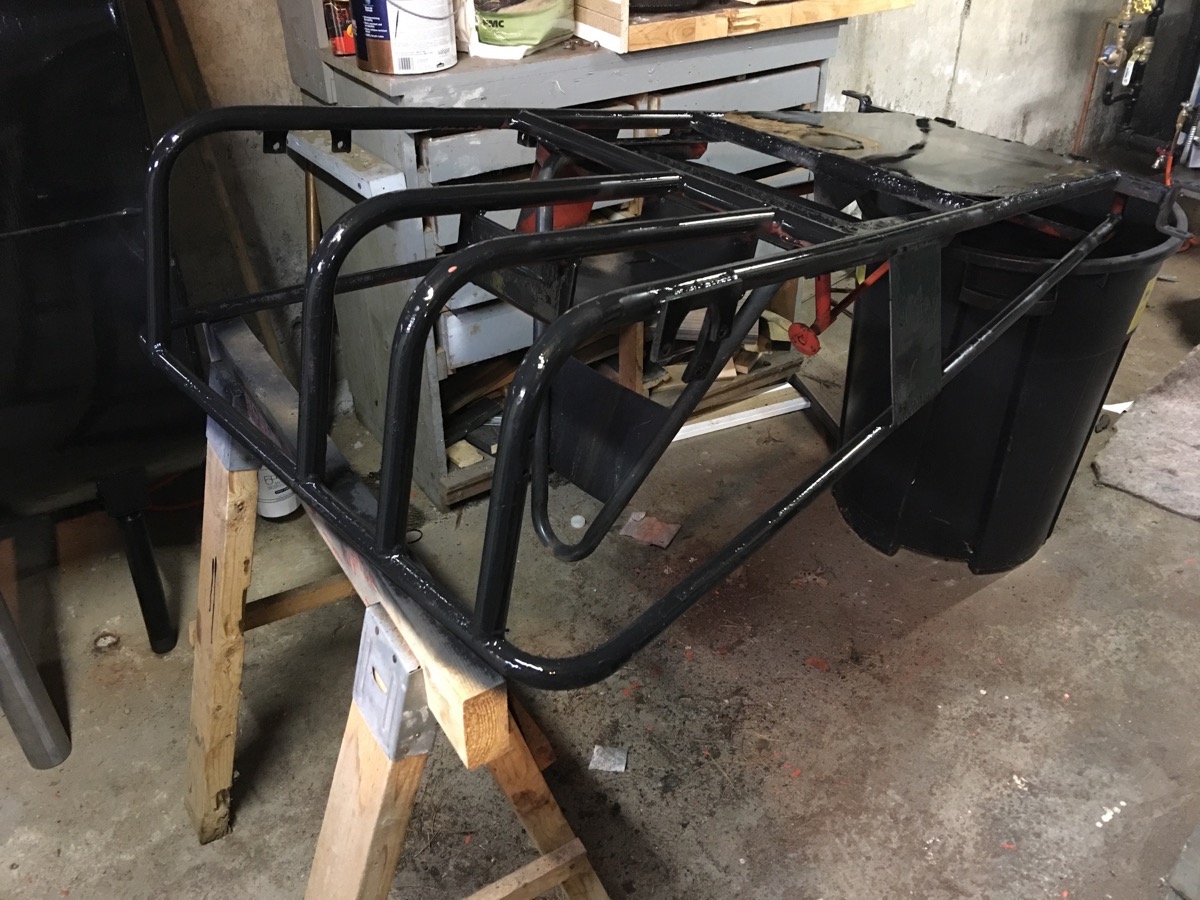
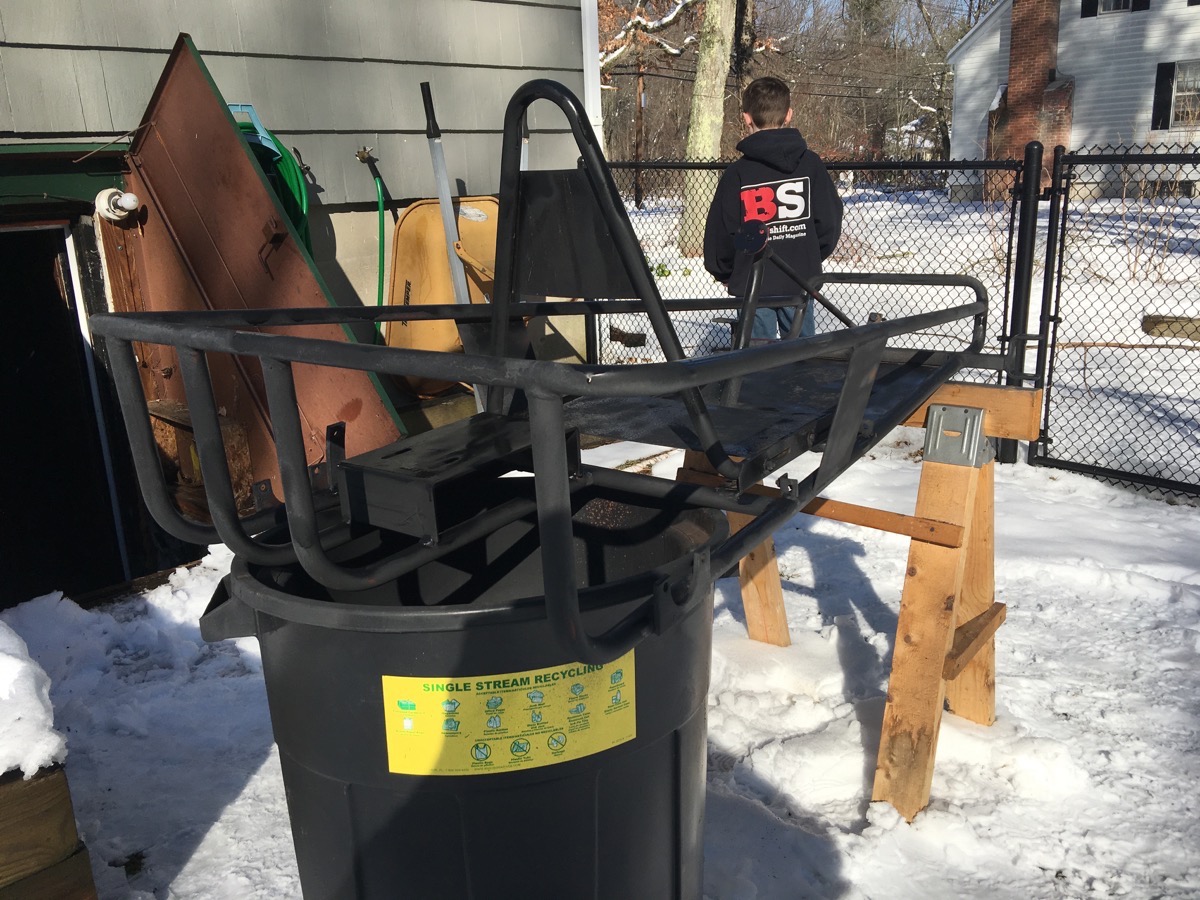
While Tom and Jack took care of some religious education on Sunday morning, I sprung into action and hit the bottom the chassis with some Rustoleum primer. I minimized brain cell death with good ventilation. I also waited a little while and when it was dry to the touch, I lugged the whole works outside so that the boys could get into the priming and painting program when they got back.

Here’s the chassis looking tough in the drying flat black primer. We threw a couple coats down on the chassis in hopes that we could do the best job possible protecting the metal from the elements as it will live outside come the Spring (no garage at the Lohnes manse).

Thanks to unseasonably warm weather the stuff dried in a decent amount of time and we were able to move to laying some color onto these pipes. Originally Tom had wanted to paint the whole thing silver and since he’s steering this ship, I was on board. When it came time to actually pull the trigger on the paint he went bright orange which is like silver only completely freaking different. Either way, the overspray made the snow look nice.
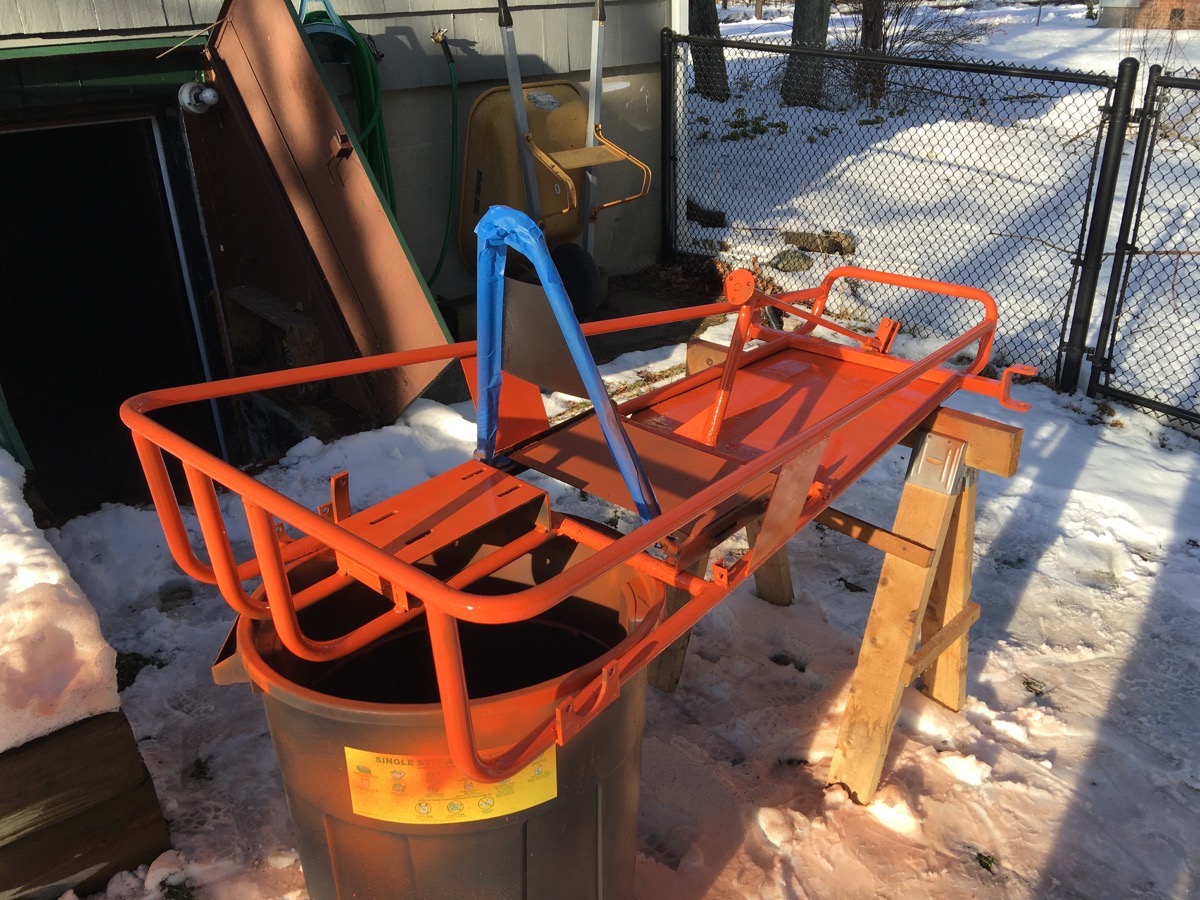


As the chassis sat outside and dried we made use of our time and appealing to Tom’s apparently frugal nature we were able to lubricate and basically recondition all of the front end parts including the hubs and tie rods so not a dime will be spent on that end of the machine. Watching the clock, were able to get another coat on it and dried before we hauled the whole works back into its parking spot in the basement.
After it was set back up on the “lift” we went upstairs and started shopping for parts.
So that’s that for episode two of Project Cellar Dweller – We’ll be back with parts and some fabrication next time! Stay tuned!


for what it’s worth, the way a governor works in one of those, it will go full throttle until the set RPM is reached when you trow it wide open. There should be a set screw on the throttle plate with a spring on it, pretty obvious from what I remember. Point being, you can RPM limit it but he’s still gonna get all the torque it will make up until the limiter pulls it back, and you can still tell the missus that you governed it. He may need to know that before whacking the loud pedal though. 🙂 🙂
Oh hey – for Shitzengiggles, put some ming pool (muriatic) acid in a plastic bowl deep enough for the clutch to submerge in. I’d mix it 50/50 with water and support the engine case with some 2×4’s or something to where just the clutch remains and crank will be submerged and let it soak for 3 or 4 hours. That stuff eats rust, might get between the crank and the clutch hub.
Did the set screw holding the hub on come out? I’d pull it all the way out first. Not that any of this really matters, I’d never pull the 8 hp back off of it, but you can let them take it all the way apart and see how it works and goes back together even if you have to hack saw the crank snout off… as long as the bore isn’t completely trashed, you probably don’t even need new rings and it will maybe still run. I just grease the head gaskets and re-use them as long as it isn’t torn. The sump gasket almost always needs to be replaced, and usually the breather, intake, and carb base to gas tank gasket too. As a 50 year old, there is STILL a great thrill in making a dead old thing come back to life one more time. I imagine it may hold some hidden joy for the boys??
Kudos for your son choosing to go back the orange. When he chosed silver, I thought ugh too bland! Cart is looking good already!
Grab a dremel tool with a bunch of cut off disks and slowly cut through the old clutch housing parallel and on center with the engine\’s output shaft. Open up a nice grove wide enough to get a good cold chisel in there… Grind the clutch hub as deep as you dare without hitting the shaft… Support the bottom of the output shaft and give the clutch hub a couple good wacks with the chisel and hammer.. It will crack and slide right off.. just be patient…
Kudos on the father/son project! This is what its all about!!
I’ve seen you work, “springing” into action might not be the best description.
Hey, helpful winter outdoor painting tip: a hairdryer helps things dry way quicker so that you can put on a second coat, or be able to handle it way sooner than you think. Also, Krylon seems to dry quicker than Rust-o-leum in a snowstorm. Ask me how I know!
Awesome, awesome father/son project! I think that might be next for us after my oldest and I finish his r/c rock crawler kit.
As far as the ehaust goes, don’t break out the MIG just yet. We successfully threded pipe parts eons ago on a hot-rodded Briggs engine on a mini-bike. It’s not perfect, but the reverse baffle we ended up with, made the high-conpression, big cam sound like half a Harley and it ran well, too.