


Welcome back to our coverage of Project Power Laggin’! Follow along as we take a tired 1979 Dodge W150 Power Wagon we found in Central Maine and transform it from a derelict roadside attraction to a dependable, powerful weekend workhorse that lives up to it’s given name! In this installment, we try salvaging our hurt LA 318ci V8 before sending it off for scrap. Can we save it? Read on and find out!
Last we left ol’ Power Laggin, the original 318 V8 decided to throw us a curve ball when the OEM timing chain hopped off the cam gear, causing FIVE pushrods to bend and a valve to make contact with a piston. Somehow, beyond all comprehension, valves didn’t bend, so we concocted a hair-brained idea to attempt to make it run again. Most people toss out engines for less, but since we are idiots, we’re going to try and make this thing run again! At best, we’ll have a running engine with minimal work. At worst, we can use the parts we grabbed to resurrect another engine. Let’s jump right into it!
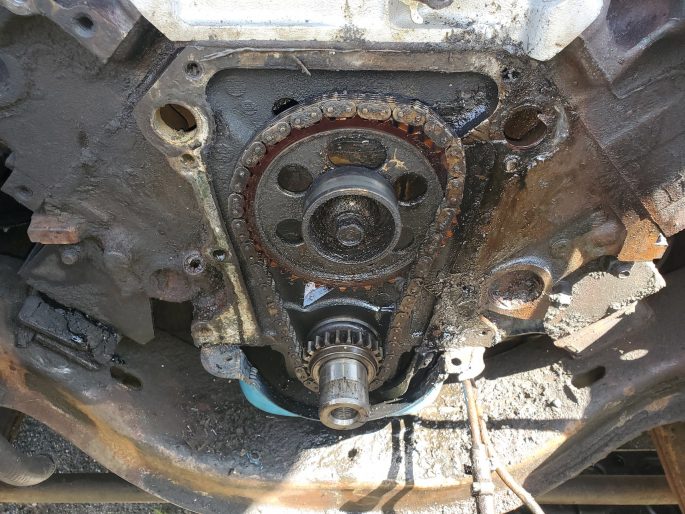
First, let’s talk about what happened and why. Back in the 70’s, car manufacturers went to great lengths to get cars quieter and lighter to help with fuel economy and comfort. Some of these methods were successful, like downsizing the giant full size land yachts to smaller, lighter platforms while maintaining (and sometimes increasing) passenger volume and storage thanks to repackaging and modern design aid. Then, there’s the other stuff they did, like windowed main webbing on engines (I’m looking at you, Oldsmobile) and nylon gears on cam teeth like we have here. This was supposed to cut a few ounces of weight and reduce harsh noise from these old engines, which was out of favor by that time with many consumers. Seemed like a good idea on paper to the bean counters, but in practice, the nylon gear teeth get brittle over time and wear down or crack apart. Pair that with a notoriously stretchy timing chain, and you have a recipe for disaster. Honestly, I’m surprised this engine made it past 1985 with this setup intact. Let this be a warning: if you have an original LA small block in something, swap this out for a steel setup ASAP!
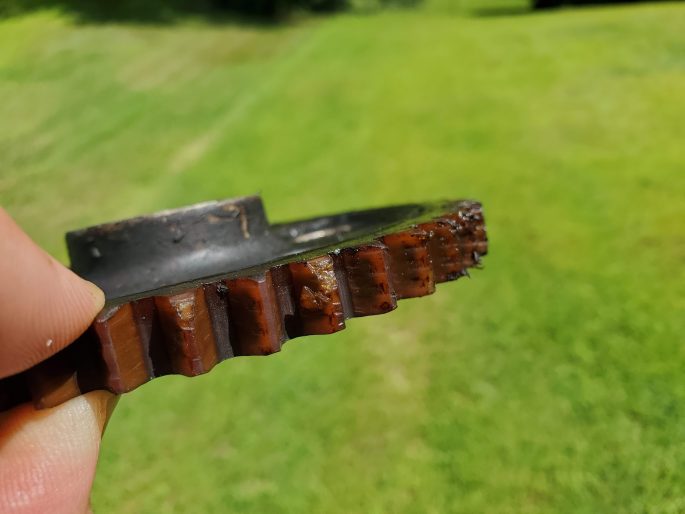
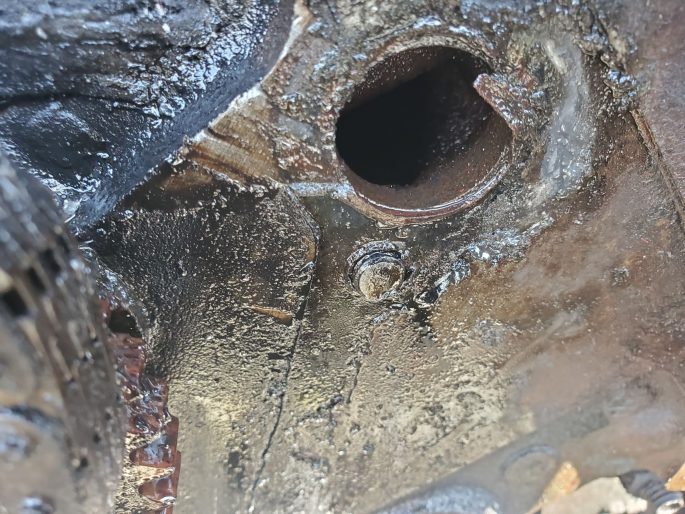
Here’s a closer look at that cam gear and some of the damage. Many of the teeth were chunked, and the nylon itself was cracked in many places. Couple that with a stretched chain and you have a recipe for disaster.
When working on old stuff like Power Laggin’, always factor in some time to deal with stuff that goes sideways. While pulling the timing cover, we ran into a few other snafus. First, we broke the oil dipstick tube. Just looking at it the wrong way snapped it flush with the block. Great! We would have to extract this and install a new tube.
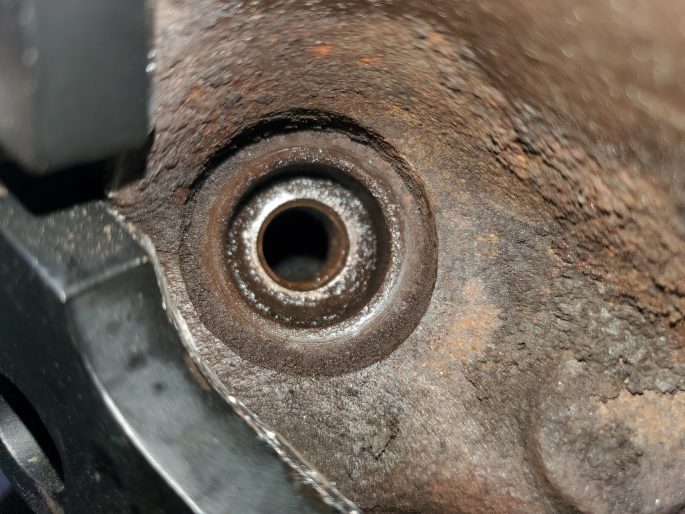
As mentioned in the previous installment, we also snapped two bolts while removing the timing cover and water pump. Adding to a bolt was snapped by a previous owner, we had a total of three snapped bolts to deal with. One was snapped off in the timing cover itself (as seen here), while the other two were stuck in the block. The power steering adjustment bolt, broken by a previous owner, snapped the head clean off.
Another snapped extremely close to the block, which was not ideal. Things like this can turn into a real time waster, and sometimes results in pulling the engine to extract.

After marinating the broken bolt stump in a variety of penetrating oils, we got VERY lucky and removed it with some needle nose locking pliers. Phew!
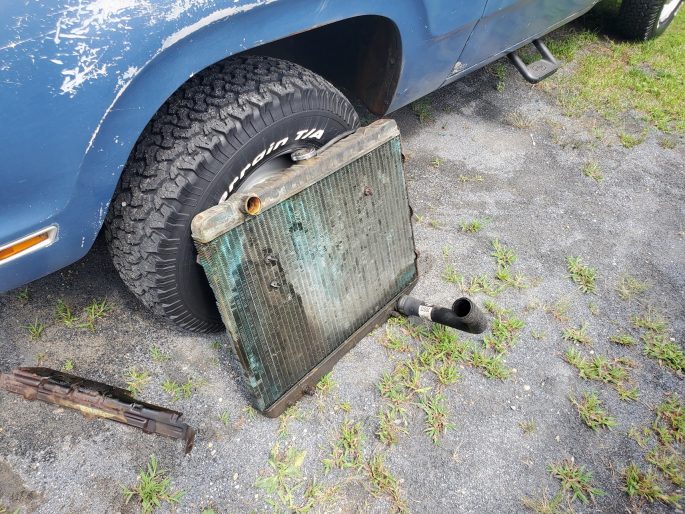
On the way out of the engine bay, the ancient, original radiator literally fell apart. This thing had been patched and cobbled together over the years, and someone broke the transmission cooler lines off and strapped an aftermarket external cooler to the front of the thing long ago. This was also bent and not looking so great. We’ll deal with this later.
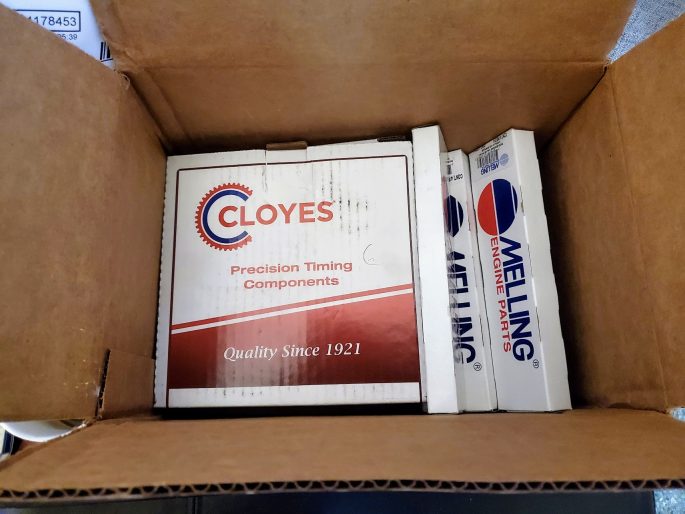
While we got to work removing all of the broken bits, a pile of parts showed up, including a new timing set, push rods, gaskets, and a water pump. The timing cover had cracked on the way out as well, so that was dropped off at a friend’s place for a TIG welding session. They still offer these new, but they would have taken a week or more to get. This was fixed much faster.
After removing everything from the front of the engine, all the small parts, pulleys, and brackets received a bath in a concoction of various degreasers and soaps and soaked overnight. 40+ years of disgusting needed to be cleaned off those parts in order to put everything back together nicely.
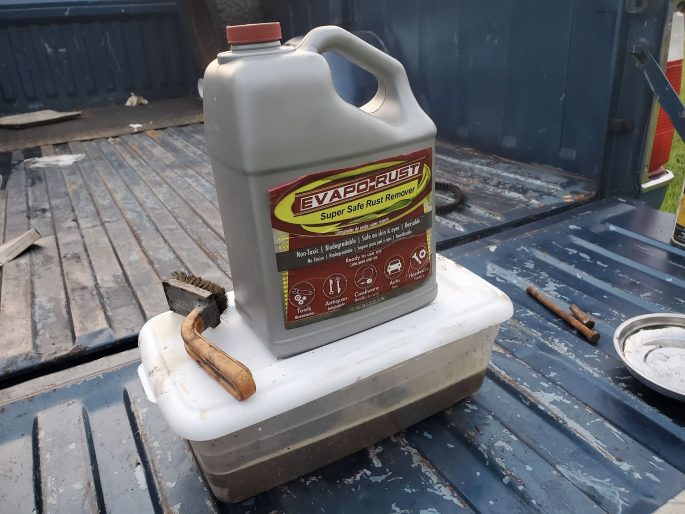
All of the small parts marinated in Evapo-Rust after the degreaser bath. We love this stuff. It works wonders on rusty bits, and you can re-use it over and over until it doesn’t work. This gallon has been removing rust on various projects for almost a year now!
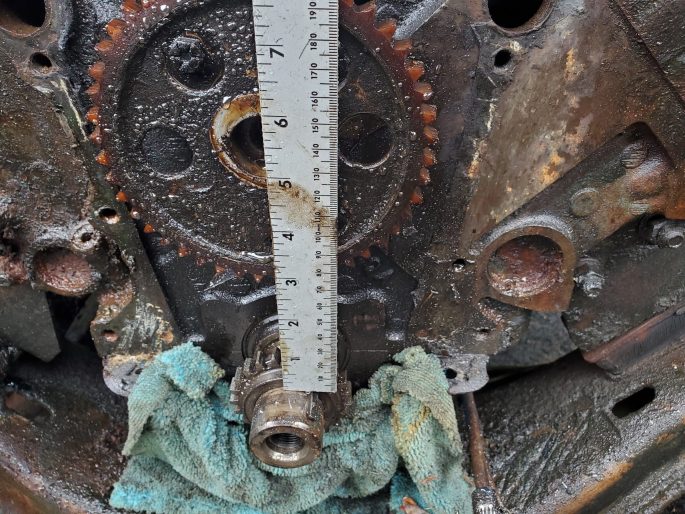
Next, was removing the old timing gears. Before that, it’s important to line up the dots on the cam and crank gears in order for the new ones install properly. While it’s tough to see here, the cam dot is lined up at the 6-o’clock position, and the crank is lined up at the 12-o’clock. This will ensure that timing is correct when you install the new timing set.

Next, we installed the new double roller set, making sure those dots still line up. We also removed the rocker shafts and installed the new push rods, torquing everything to spec according to the factory service manual.
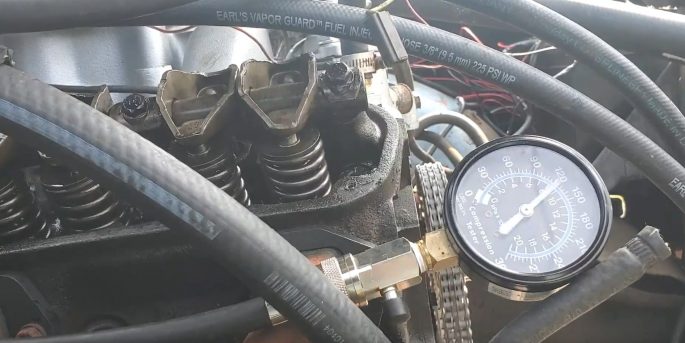
Here comes the moment of truth. With the new push rods and timing set installed, it was time to check compression. This would tell us right here if we could keep wrenching or start pulling out the 318. After checking all eight cylinders, we had compression of about 120PSI or above in every hole! The factory service manual says anything over 105PSI is good, so this 318 would live to see another day! Remember, this thing bent FIVE pushrods and a valve kissed a piston. Frankly, we are as shocked as you are. We can’t believe it!
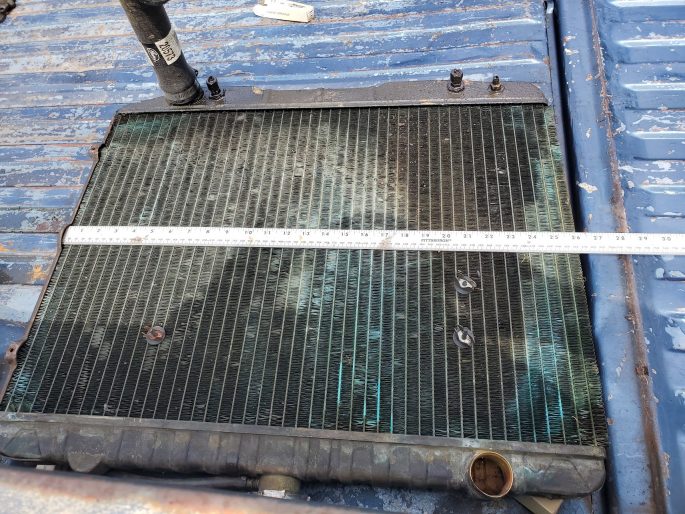
Now that we know it will run, it was time to backtrack and figure out a cooling system solution. Usually, getting a new radiator is as easy as calling up your favorite parts store and ordering one up. But for ol’ Power Laggin’, things can’t be that easy. These trucks could have been delivered with one of two radiators: a 22” wide core model for trucks with the dual round headlights, or a 26” wide model for trucks with the fancy quad 4×6 headlight setup, like ours. I could find the 22” wide model all day long, but the 26” model was long discontinued and out of stock everywhere. I then checked out aftermarket upgraded aluminum models, and it was the same deal: plenty of 22” wide models and zero 26” wide models. After doing some thinking (and lots of research), I remembered that Mother Mopar likes to share parts across model lines a lot. I ran into this in the past with the speedometer cable and found that an early 70’s Charger with a 727 had the correct cable for my ‘79 Power Wagon, despite what the catalogs list. Well, how about a radiator?
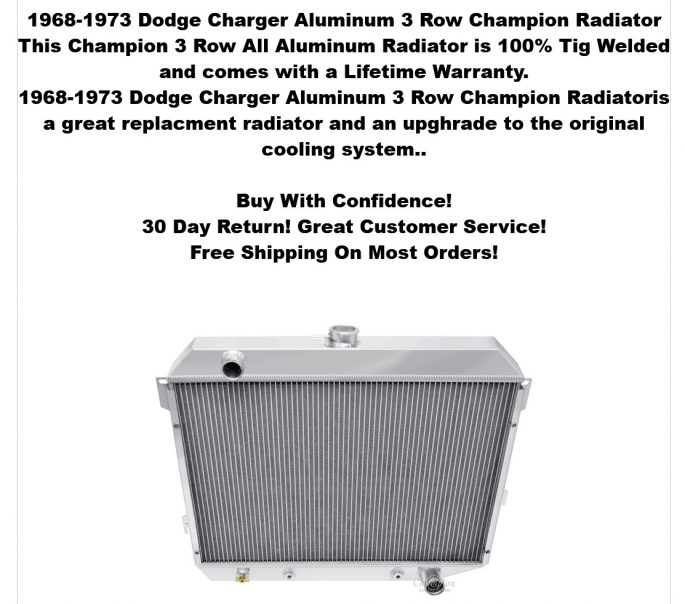
Yup, Mopar B-Body small block cars used a 26” wide radiator that’s close to the same overall height, with the inlet and outlet on the correct sides! Only difference was the lower mounting tab holes; the top holes were identical. Only one I could find that was in stock was this fancy Champion Cooling Systems “3 row equivalent” for a 1968-73 Charger/Satellite, and it was the last one they had. I hit the Buy It Now button faster than I ever have before.
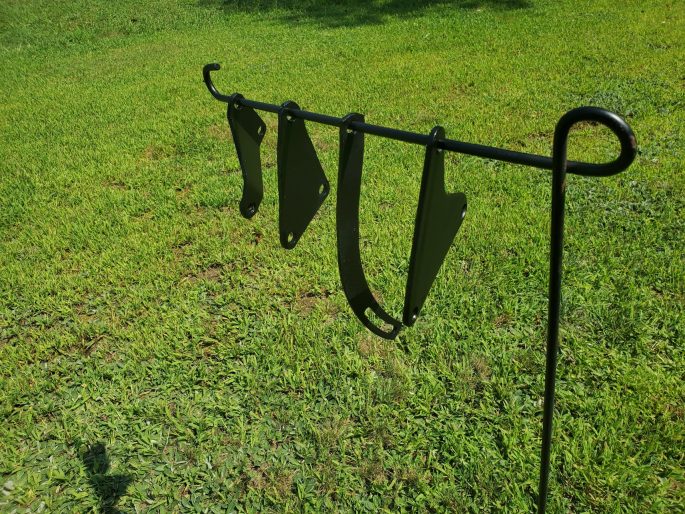
Knowing that this thing will run, we decided to spruce up the joint in celebration. All the brackets and pulleys got hosed down with engine paint, and things started looking nice. PRO TIP: That garden flag holder thingy your wife probably has on the front lawn works GREAT for a paint stand. Just remember to paint it black again after you’re done, and she’ll never know!
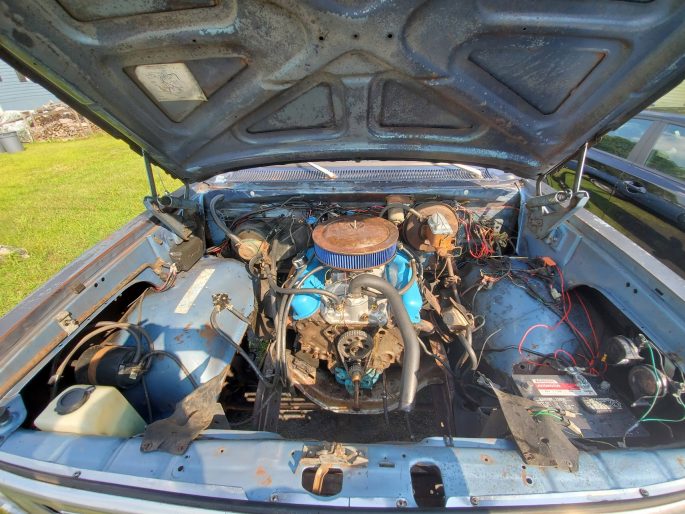
With the front of the engine and all the accessories out of the truck, we took some extra time to clean up the engine bay. After scraping decades of gunk off of the engine, cross members, and core support, we wrapped the open parts of the engine up, sprayed a few gallons of degreaser in there, and blasted it with the pressure washer. The results speak for themselves.
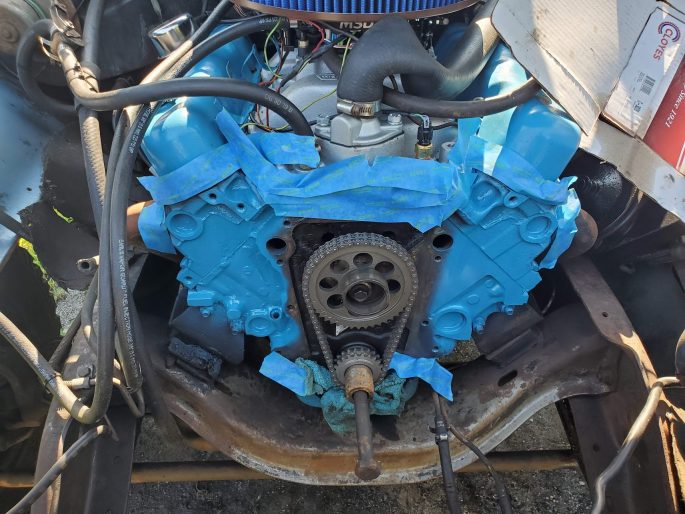
Then, we got a little crazy with the paint. Since everything else was looking pretty on the front and top of the engine, we decided to hose down the front of the block in Chrysler Corporate Blue as well. Truth be told, the light blue color will help us locate any fluid leaks easier than before. It was hard to tell where leaks were coming from when everything was encrusted in grease.

Once the new Champion Cooling radiator showed up, we immediately unboxed it and compared it to the OEM unit. The Champion is a little taller and the bottom mounting location is indeed different, and the original shroud will not fit. That said, it will do the job nicely with a little massaging.

Well, that’s looking A LOT better now! A little paint and elbow grease can work wonders. Without the shroud, that big, old clutchless fan is a bit more dangerous than we’d like, so we’ll look to address a solution here down the road. Now, begs the question: does it run?
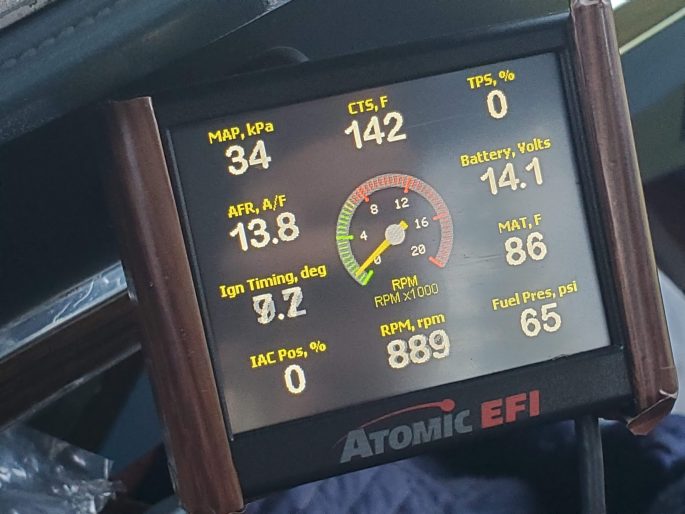
IT DOES! Not only does it run, it runs really well! Timing readings are now accurate on the screen, and the new radiator keeps things about 20 degrees cooler than it did with the decrepit OEM unit. It also drives better than before, with more power and less fuss than we’re used to.
Well, we can’t believe it. We saved the engine. One of the reasons we love old stuff like Project Power Laggin’ is the fact that everything is so simple, and even though we added modern EFI and ignition tech to the mix, that LA 318 is still an old push rod V8 that can be repaired with a simple set of hand tools and a few blunt objects. You have to love that!
While we did achieve our shocking goal of revival (we seriously cannot believe it runs, in case we haven’t mentioned that yet), the whole ordeal did get us thinking about future power plant plans. We were moments away from yanking the engine and seeking a replacement, which led us down the road of researching other engines that bolt in. After considering finding another LA-series small block, and fantasizing about 440ci big block power, the easy button is a Magnum swap. Magnum-series V8’s are still widely available in salvage yards, not to mention they offer roller internals paired with good flowing modern heads and can easily make double the power the current 318 makes with ease.
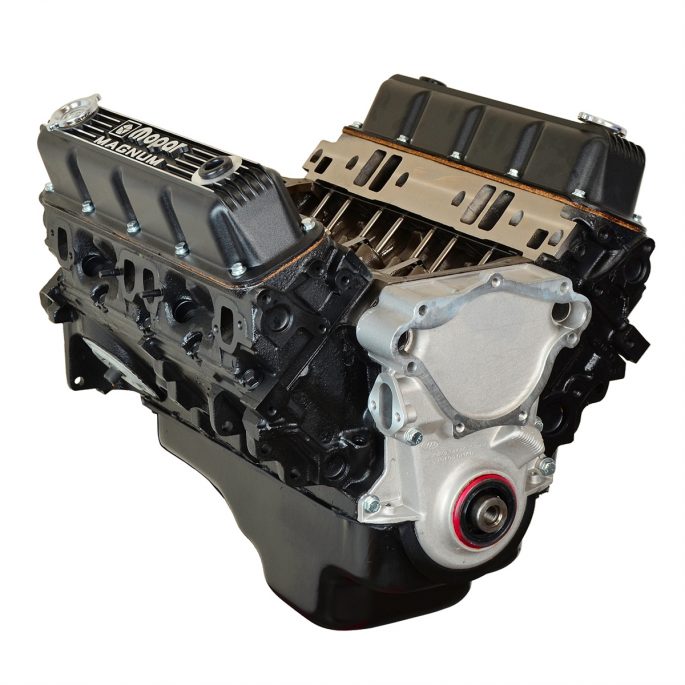
With minimal modification, a Magnum 5.9/360 will plop right between the spacious fenderwells of Project Power Laggin’. The big differences lie in the intake bolt pattern, the flexplate, and the accessory drive. These can be overcome by either choosing a different intake or drilling out the heads for the angle-pattern intake bolts, elongating a flexplate mounting hole to fit the old 727 converter, and choosing whether you want a serpentine drive or a v-belt drive for the accessories. The best part: pricing for these is still dirt cheap, and often cheaper than sourcing an old LA-series engine. For us, grabbing a 5.9/360, drilling the heads for our intake and keeping that serpentine setup seems like a great option. The Hooker Competition exhaust and Magnum-style mini-starter on the truck will bolt right up, too.
Eventually, we’ll pick up a new mill for Power Laggin’, but for now, we’re going to take a few victory laps with the now-running 318. Stay tuned for future installments, where we keep wrenching on the rig, tuning the MSD Atomic 2 EFI system, and making various improvements along the way. We still have a lot to do!


NICE!! I love this project!! So glad to hear its up and running again!
Although…I’d love to see how the engine/EFI would respond with a small cam.
I wonder if you may change your mind on needing a replacement engine, if you cammed the current one? The factory cam peaks at 3500rpm. A mild cam from Hughes Performance would be very interesting!
Glad you are enjoying the project! We’ve had a lot of requests for a cam install, but at this point, it’s probably best to start focusing on an eventual Magnum build. But things can change, so who knows!
I totally hear ya! But at this point, it will all come back apart easily(you’ve done the hard work) so a gasket set and even a cheapie summit cam would be a very interesting experiment.
1) Is there a noticeable seat of the pants improvement
2) How well does a “self learning” EFI handle changes from cam swaps
Not to mention you’ve shined up this old dog!
But I agree on a hard stop after a cam swap.
This is a really great story complete with all the warts and SNAFUs that inevitably happen working on old cars. Did you actually get all the broken bolts out?
The picture of the bolt with a hole drilled in it reminds me of having an old style front motor mount bolt break off in a small block Chevy just as we were installing it in a 56. I drilled out the bolt as it looks like you’ve done, inserted the handy dandy EZ Out (what a false promise THAT name is) and proceeded to snap the EZout off flush in the broken bolt.
I can attest to the fact that it’s impossible to drill out an “EZ out”.
Keep up the good work. How cool it is that this engine runs again!
I forgot to mention: yes, I was able to extract all of the broken bolts. All three came out after hosing them down in penetrating oil and a little persuasion with a blunt object. The two that were stuck in the block have coolant running on the other side of them, so decades of corrosion can lock them up.
And yes, I still can’t believe it runs. Usually when you bend stuff, it’s game over. Tough engines, these old 318’s are!
The reason for nylon gears on timing sets was to reduce mechanical noise.
While you’re working with accessory drive brackets, consider replacing the slotted alternator bracket with an adjustable rod assembly. Makes setting your alternator belt tension a lot less annoying.
I really thought this was going to be a how to go from a LA to and LS artical !