


Welcome back to our coverage of Project Power Laggin’! Follow along as we take a tired 1979 Dodge W150 Power Wagon we found in Central Maine and transform it from a derelict roadside attraction to a dependable, powerful weekend workhorse that lives up to it’s given name! In this installment, we ditch the ancient Mopar ignition system for a modern Holley HyperSpark control box, coil, and distributor!
During our last installment of our ongoing EFI conversion series, we bolted on a new Weiand Stealth intake manifold for the MSD Atomic EFI 2 throttle body to sit on. As part of the ensemble of parts we are throwing at the truck, we opted to grab a new Holley HyperSpark ignition box, distributor, and coil. But before we install those, let’s talk about the current ignition system a bit.

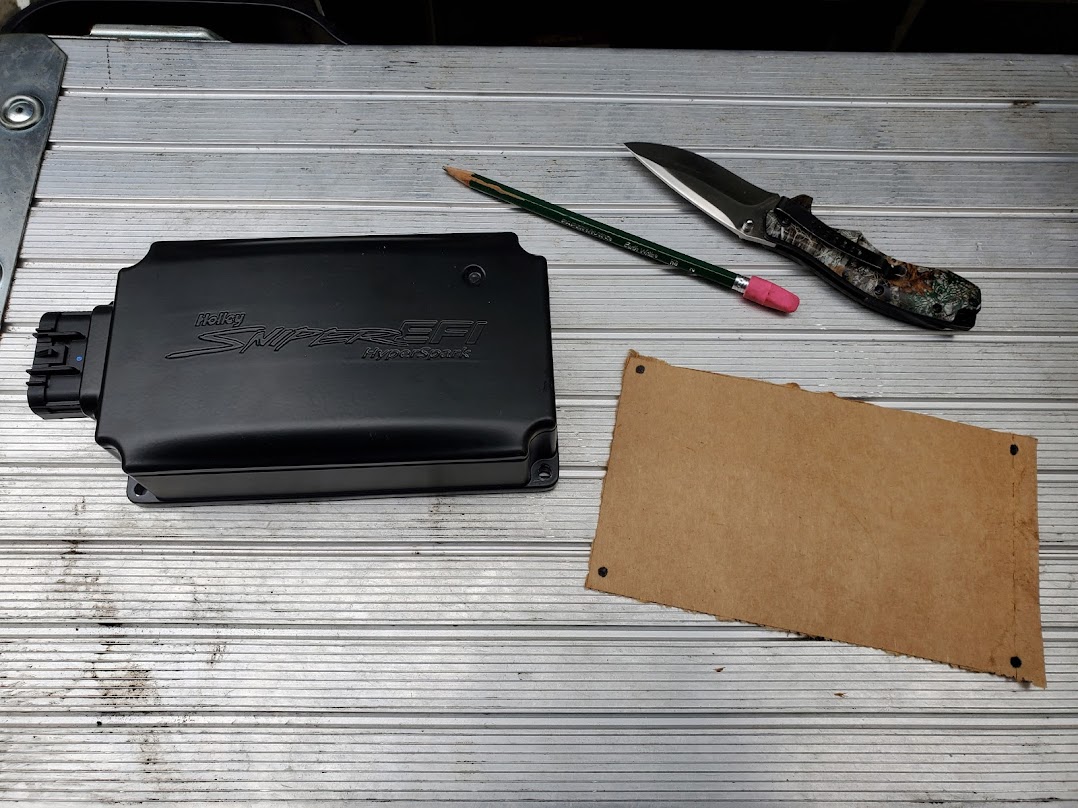
Since we dragged ol’ Power Laggin’ home, we’ve replaced the ignition box, coil, ballast resistor, and tune-up components (and some of those components, like the ignition box seen here, were replaced twice!), but we were never satisfied with the results. Although we were getting spark, it was weak and we had some wiring issues that led to part of the ignition circuit self-immolating a few months back. We had enough of this setup and were eager to throw it all in the trash and upgrade to something else. Although you can technically use this ignition system with the Atomic 2, we opted to start off with a clean slate and use the HyperSpark ignition control box, coil, and distributor to take any guesswork out of the process, as well as do a thorough inspection of the rest of our ignition wiring circuit. This system also plays nice with the EFI and allows for enhanced tuning capabilities via the interface screen. We like that.

After removing all of the old components, we started plotting where the new ones would go. We found that the ignition box would fit perfectly under the passenger side hood hinge, so we made a template…

…Taped it in place to drill our holes…

…And mounted the box. Super simple. Although we could have flipped it upside down to face the wiring toward the firewall, we wanted people to see the cool HyperSpark logo right side up. Plus, we could route the wiring right through the fenderwell. Another cool feature of the ignition box is the status light right on the face. It lights up different colors depending on operating conditions. If you’re having a no-start condition, a quick glance at that light will tell you if you’ve got spark before you need to reach for that spark tester. That’s cool.

Next, was the coil. While it’s possible that we could have used the stock coil, we figured we would go with the plug-and-play solution. And it really is plug-and-play; the ignition box wiring has a plug for it right on the harness! Even though this HyperSpark-branded unit is fancy looking, the coil itself is a modern-style Ford TFI coil that you can pretty much find at any parts store if it ever decides to fail.

Same deal, we found a spot we liked, made a template, and mounted it. Only issue was the best spot for it was where the external voltage regulator was mounted. We simply moved it down the firewall a bit.

Next, we installed the distributor. Now kids, remember one important fact: you need to make sure that the #1 piston is on the compression stroke at top dead center in order to set everything up correctly. Holley makes it easy to figure out where that is with this clear alignment cap they provide with the HyperSpark distributor. As you can see, I had stabbed it in 180 degrees out here. I was tired after thrashing on the truck for hours and tried confirming top dead center with the balancer timing marks only, which is never a good idea. First, that’s why Holley supplies this cap, and second, if you are getting fatigued while wrenching, quit while you’re ahead or take a break! An easy way to confirm TDC is to pull the spark plug, place a finger over the hole, and hand-crank over the engine with a breaker bar and socket until the finger gets pushed off the hole. You can also make a small device that goes in the hole and pushes out when it’s right at TDC, but the ol’ finger trick has always worked for me.

There, that’s better. As you can see, the cap fits on the distributor properly and the rotor is facing the right direction: pointing somewhere toward the #1 cylinder. This cap will also show you which wire is going to be the #1 cylinder wire. There’s a small cutout that serves to mark where that is. Just line that up with your distributor cap and you’re good to go! I will also say this: make absolutely sure that you not only make sure the distributor housing and block are completely free of debris and de-burred, but if your application has an o-ring, coat it with plenty of oil and then oil it more. Our distributor gave us fits and got stuck in the block during this process.

Another unexpected turn of events: The stock distributor cap has female terminals. Modern caps, like the one on the HyperSpark, have male terminals. That means we needed to replace the plug wires. While we could have made our own wire set, an off-the-shelf solution would be a real time-saver, not to mention offer serviceability down the road if we got stranded. Thinking back to previous Mopar ownership reminded us that the Magnum engines introduced in the 1990’s came with updated distributors that had caps with male terminals. Yeah, those would work!

And yet another fun fact: Magnum V8 wires could be had with either short plug boots or long plug boots. We didn’t know which ones would work, so we first tried the long boots. They were a bit too long and touched. Those had to go back.

We returned those and opted for the short boots this time. Much better. And of course, these ones are tougher to find and more expensive. They also fit nicely in the original wire holders, which is a plus.
Ditching the stock Mopar ignition box, distributor, coil, and ballast resistor may be a shock to the old school guys, but the reality is that the modern HyperSpark components are more reliable and provide cleaner, better spark to the engine. With EFI, this also helps increase efficiency and dependability. Not having to play the “Guess Which Old Ignition Part Failed This Time” game is something we were really looking forward to! Not only that, but paired with our new Atomic 2 fuel system, it’s a plug-and-play deal with some minimal wiring needed to make it all work together. And the consumables themselves, like the cap, rotor, wires, and coil can all be found at just about any auto parts store in every town in America. In fact, we’d be willing to bet that it’s even EASIER to find these parts in stock on a shelf than something for a 40+ year old Dodge pickup. Remember, it’s not 1987 anymore. You’d be surprised at how many parts for this old rig are either special order or the dreaded “No Longer Available” these days.
With that said, we still need to finish up wiring everything to the truck and install the rest of our fuel system components and see if all of this work results in a running truck. We’ll tackle that next time, so stay tuned!


