


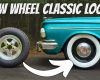


On the positive side, I’m finally seeing light at the end of the tunnel when it comes to the SN-95 five-lug conversion of the Great Pumpkin, our 1980 Ford Mustang Ghia. The rear axle is installed, and that went beautifully. The steering rack is in, but there was one little, teeny-tiny tidbit that I didn’t notice at first. Something I should’ve paid attention to when I disassembled the 1994 Mustang that I raided for the parts, something that was threatening to throw a huge wrench into my plans: the connection between the steering wheel and the input shaft of the rack and pinion. Doesn’t seem that problematic, does it? Just slide the steering shaft over the input shaft, tighten and move along. Not so fast, chief.

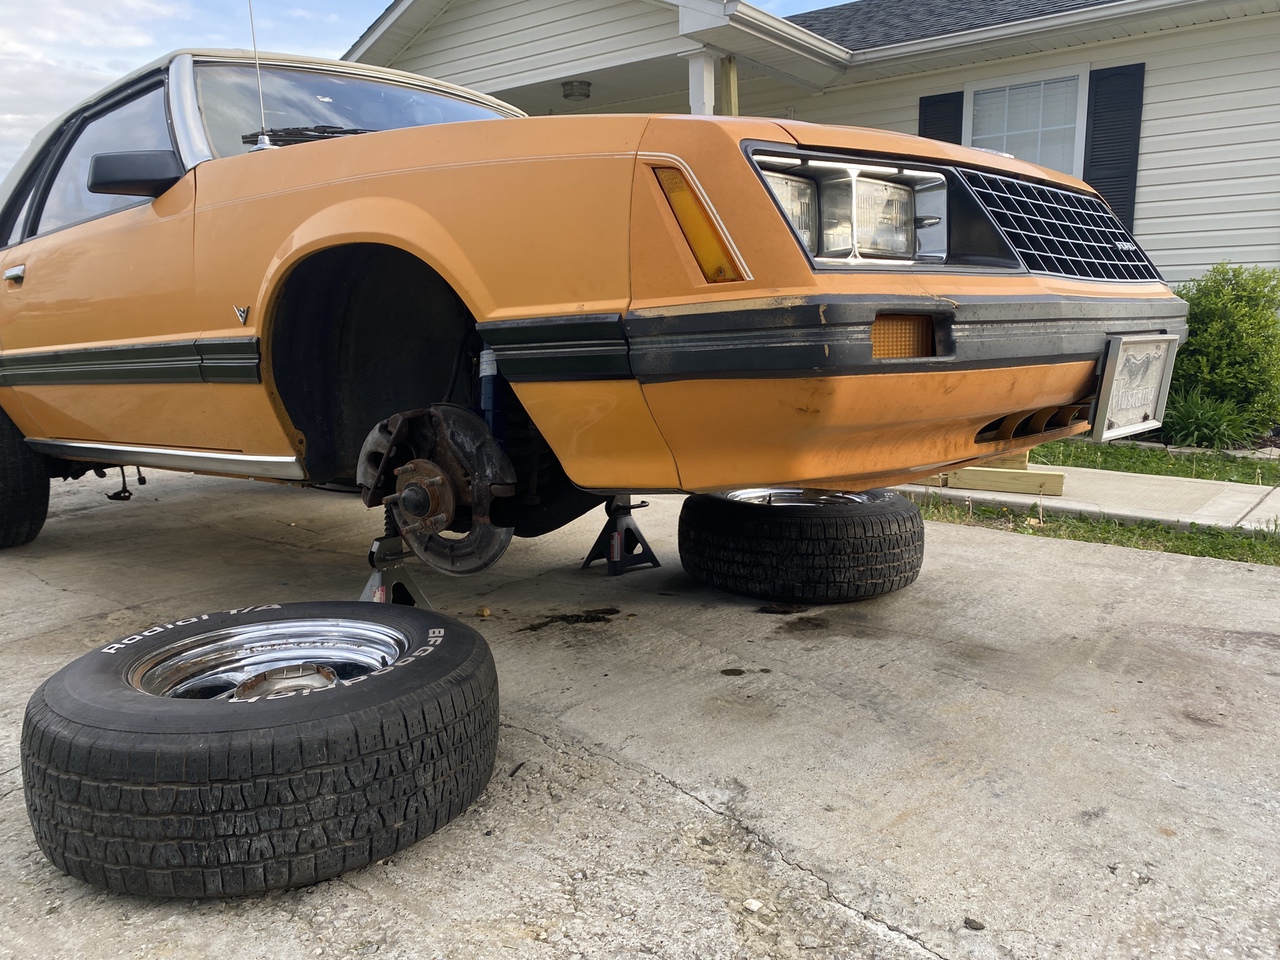
 The top photo represents the 1979-93 Fox Mustang rack and pinion. That setup is round and splined. The bottom picture is the SN-95/New Edge rack input shaft, which uses a “V”-like shape. Obviously, the Mustang’s steering shaft was not going to work as it was…and I didn’t keep the shaft from the 1994. Given that the Ghia will see an engine swap with headers in the future, putting a rag joint back into the car wasn’t that appealing either, and of course I find out all of this just as the whole world come screeching to a halt. Fun.
This is where working with good companies comes in handy. We reached out to Borgeson Universal Company to see if they had any ideas about mating Fox Body and SN-95 pieces together. Happily, they did…kind of. If you were just redoing the shaft in a Fox or SN, you’d order the proper shaft and it’d show up completed, u-joints at both ends, ready to install. Since I’m running a hybrid system. I would be building my steering shaft from pieces. It’s not that bad…in fact, if it wasn’t for needing a better cutting system than what I have in the shop, this would’ve been an in-home project that would’ve taken maybe a couple of hours total time. Follow along as I show you just how straightforward this is:

The combination of parts used included one 3/4DD x 3/4DD universal joint (P/N 014949), one 3/4DD x 3/4 Ford V (P/N 014955), one Ford stub shaft, and one 18″ long section of shaft that I would cut down to fit the length I needed. As you can see, one of those items didn’t make it when the box first appeared…
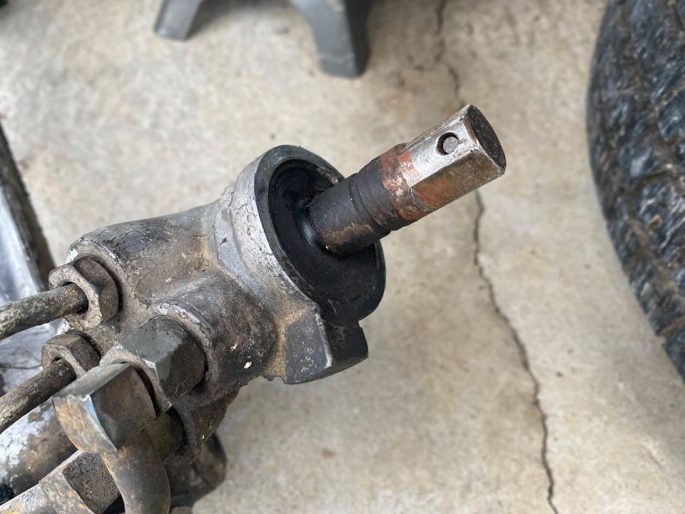
This is the Ford “V” shaft shape in a better picture. No amount of sledgehammering is going to drive a splined shaft onto one of these puppies without catastrophic damage.

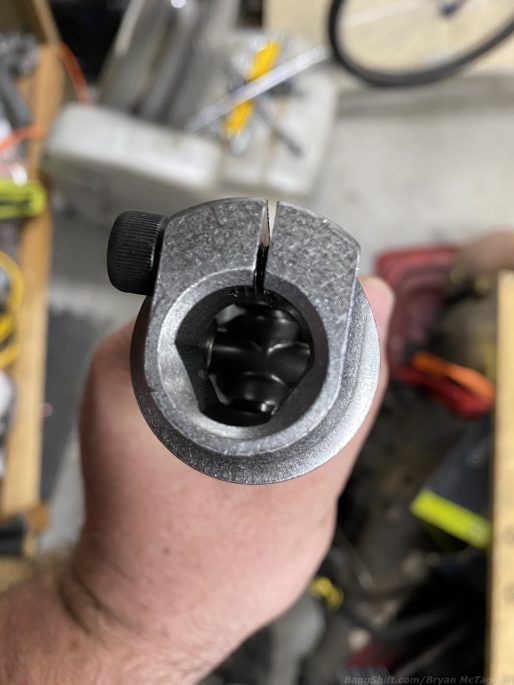
The stub shaft…small, but mighty important. Note the Allen screw/jam nut lock system. It’s simple and easy to lock a shaft into place and once it’s locked down, it’s not going anywhere.
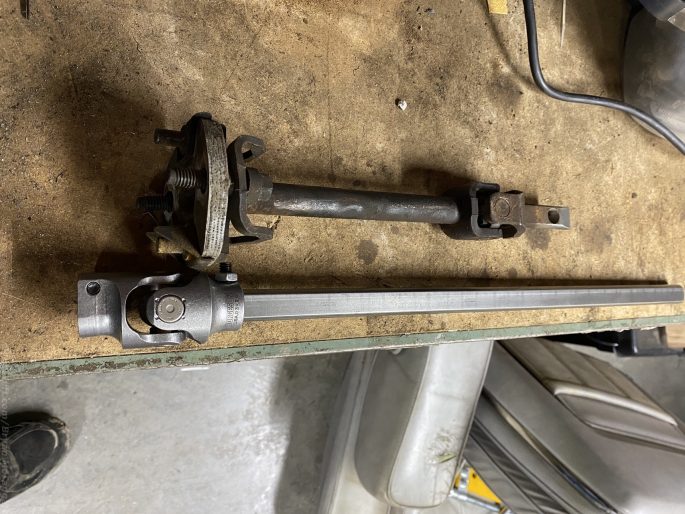
After realizing that the steering shaft itself somehow escaped the box during shipping, I contacted Jeff at Borgeson who got another length sent out to me. Thanks again, man! Here’s the comparison between the Pumpkin’s original shaft and the 18″ unit that we got to work with. After taking some measurements, I had Wimpee’s Welding in Bowling Green, Kentucky cut them cleanly. Frankly, what few cutting tools I’ve got wouldn’t have stood up to the steel that Borgeson uses.
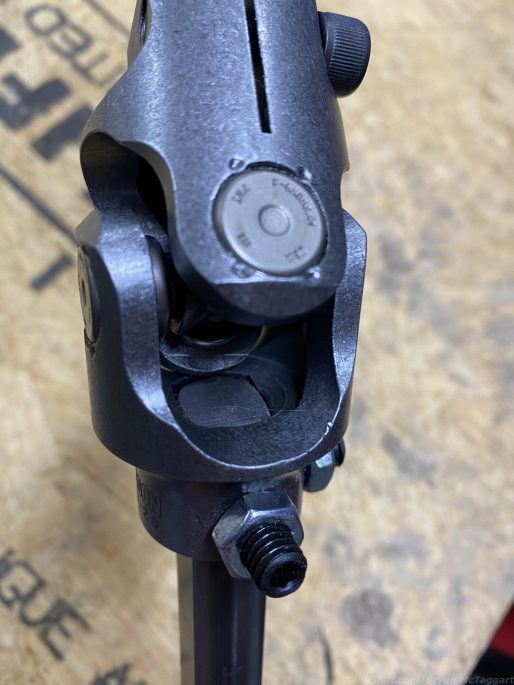
If there is nothing else you pay attention to when assembling the kit, it was this: see where the shaft comes into the U-joint? That’s right, it ends flush. The last thing you need is any part of that shaft sticking out into the area that the U-joint needs to move in. Bad things happen when you don’t pay attention.
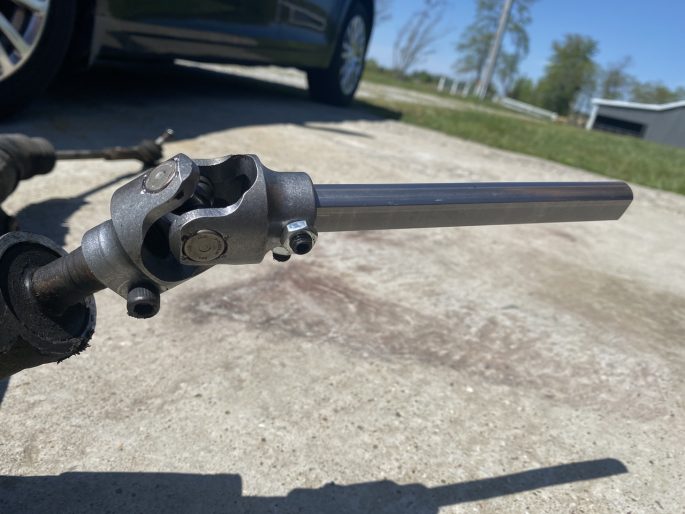
The plan of attack: install the V-joint and cut-down steering shaft onto the rack and pinion. I’ve Gunk’d the hell out of the incoming rack so there isn’t a ton of grease, and it didn’t matter…bright shiny parts are always going to make everything else look bad by comparison.
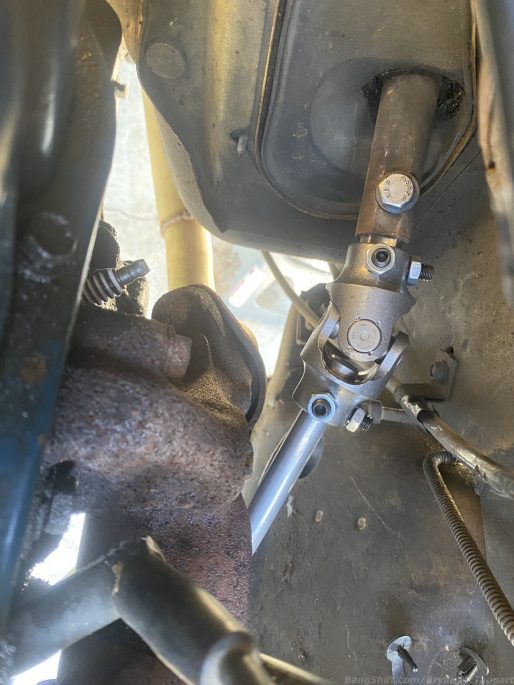
Part two was to marry up the steering shaft into the pre-installed stub and U-joint assembly, already bolted into the car. Now, in this picture you can see plainly what not to do with the steering shaft. See how much it’s poking into the U-joint swing area? This is a test fit photo…I had to trim down that much from the first cut before everything fit together right. Get it right, and your steering shaft can go back to being one of the least thought-about parts of the car. Other than checking the hardware’s tightness once we start driving it and about 500 miles later just to be sure, we’re done here. Next project, please!


