


Cover photo by Rob Hentschel
Welcome back to our coverage of Project Power Laggin’! Follow along as we take a tired 1979 Dodge W150 Power Wagon we found in Central Maine and transform it from a derelict roadside attraction to a dependable, powerful weekend workhorse that lives up to it’s given name! In this installment, we continue to discover and fix even more previous-owner hackery, while taking the time to install some accessories and upgrades!
Man, it’s been a while since we took a look at what’s going on with the ol’ Wagon of Laggin’. Since the last installment of this series, the world has changed quite a bit. While we are all coping with the “new normal” and many people are spending more time at home, we’ve kept busy (and sane!) by turning wrenches on all sorts of stuff, including Project Power Laggin’. I’ve been driving it more than ever, since most trips are for local provisions around the area. It’s also been a trusty steed for trips to the hardware and home improvement store for picking up supplies for house projects. In other words, we’ve been putting Project Power Laggin’ to work! And with more seat time, it became apparent that there was still more previous owner “fixes” that needed attention. And while we were in there, we added some welcome creature comforts and styling upgrades along the way. This is a big update with lots to cover, so let’s dive right in!
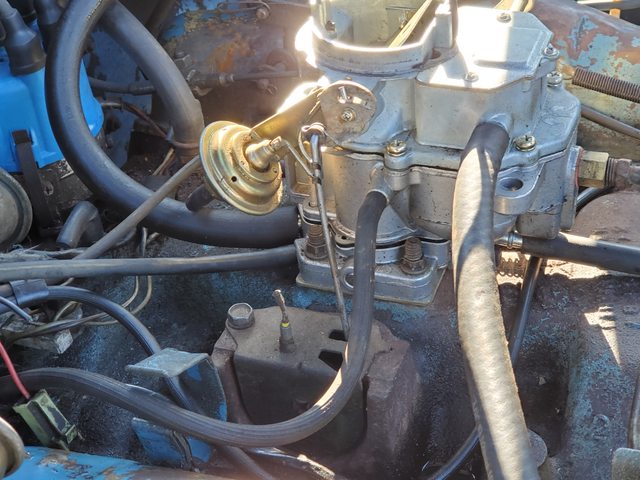
When we left off with the Power Laggin’, it was starting to get colder out, and starting up the truck was becoming troublesome. Turns out the Choke Thermostat was completely FUBAR. Since we were still running the stock 2BBL Carter BBD, we sorta needed that.
We ordered up a new one, which is obviously the shiny one on the left with the not-broken wire. Install was super simple: undo two bolts and a clip, remove the old one, plop the new one on there, put the clip on, and bolt it back down. Easy peasy.The carb does chokey things on its own now.

Since it was cold, it helps to have a a working heater. The heater and fan were fine, but the 41 year old duct work on the passenger side for the defroster was not. Since I was looking for function over originality (and because I’m cheap), I ran to the hardware store and picked up a dryer vent to cut up. Deflecto Ducto, cuz!

The dryer duct is a bit larger in diameter, so I cut it down and duct taped it to fit the outlet for the defroster vent.

It’s not pretty, but it works great! It’s tucked behind the dash, so you don’t see it anyway.

Spending more time behind the wheel meant that I wanted some better, louder tunes to drown out the rattles, so in went this JVC X360BTS head unit. It has a shallow depth due to being a digital-only receiver, it has Bluetooth hands-free phone connectivity and audio streaming, and it was cheap. The display buttons also change color to match whatever car you have it in, which made it easier on the eyes when driving at night compared to the bright neon blue illumination the previous Kenwood stereo’s buttons had. Also, I dig the big volume knob and easy controls.

While I was in there, I decided that I wanted some front sound staging to compliment the 6×9’s we previously installed in truck wedge boxes. When the Power Laggin’ left the factory, this single dash speaker was all it had, paired with an AM radio. That’s not gonna cut the mustard.

Not only was this thing incompatible with our modern head unit, it was positively SMOKED. The paper cone was skeletal, the surround was missing, and the voice coil was in multiple pieces!

Years ago when I was installing a stereo in my 1979 Trans Am, I hacked up the chassis of the single dash speaker and mounted two 3.5″ speakers to it. That was 18 years ago, and they now make brackets like this one from American International that will do the job instead of cutting up and bending an old speaker basket. This one was meant for GM 1973-87 Squarebody trucks, but was easy to modify for installation in the Dodge. We paired the bracket with some Kicker CS-Series 3.5″ speakers, which is an immense upgrade from whatever that carcass we pulled out of there was.

After mounting these speakers on the bracket, we just had to slightly enlarge some of the existing holes on the bracket to fit onto the dash mounting studs.

After about 45 minutes of swearing and contorting my body in unnatural ways, the speakers were in there and hooked up. These little guys are powerful! It’s not a glamorous upgrade, but being able to hear music over the gurgly 318 and all of the various rattles does wonders in the creature comforts category.
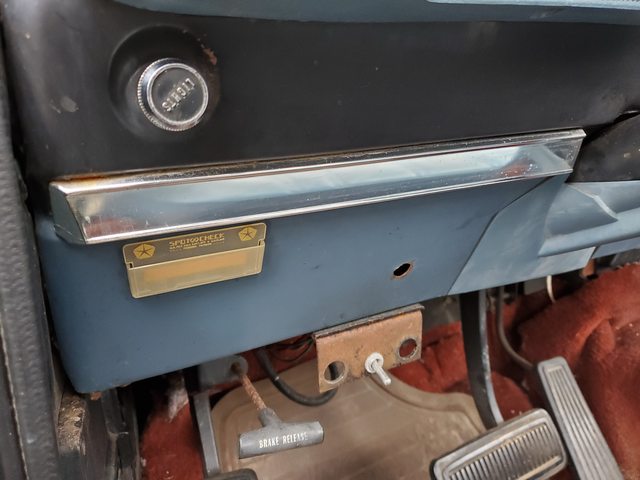
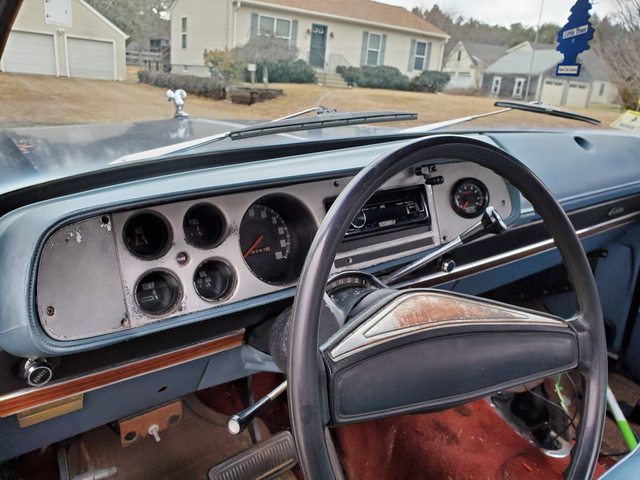
Another small, easy fix: this piece of dash trim has bothered me since day one. It’s supposed to have rich 70’s woodgrain, and it’s clearly missing. Something had to be done about that.
The truck is equipped with the Adventurer package, which means the original owner plunked down good money to add an air of late 70’s opulence in the cabin in the form of the finest faux wood this side of your parents’ basement walls. The package included that wood trim as part of a number of other styling options, like front bumperettes, side trim, and the quad-headlight grille.

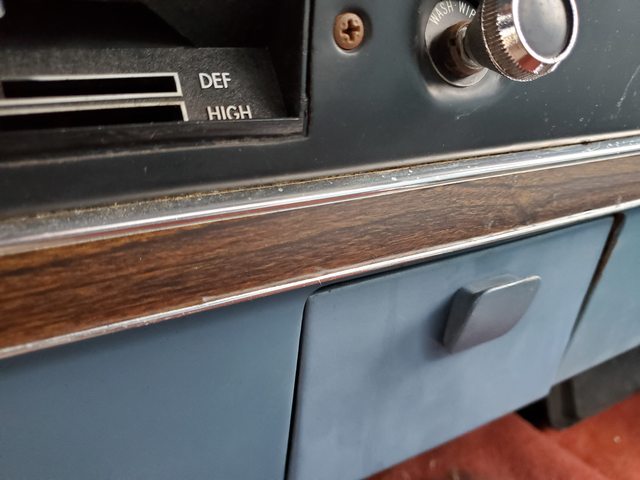
While poking around a home improvement store, I found this shelf liner made by Duck that was a close match.

After cutting a piece off the roll…
We were back in business! The wood film might be malleable enough to “restore” some other trim as well, but we’ll do that later when we tackle the rest of the interior.

One morning, I got into the truck and pointed it toward its favorite place: the gas station. When I pulled in, the truck was running rough and stalled out right at the pump. After fueling up, I nursed it home, wondering what was going on. Before I popped the hood, I could smell it: fuel was leaking somewhere. This time, it was the pump itself. Fuel was gushing out multiple cracks on the top of the pump. Not ideal.
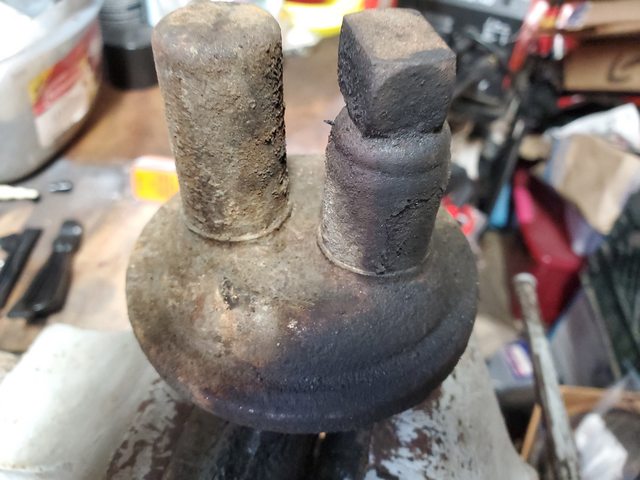
This old pump was original, and it made it 41 years, so I can’t fault it. It was cracked in two spots, and I think the only thing holding it together was oily sludge.
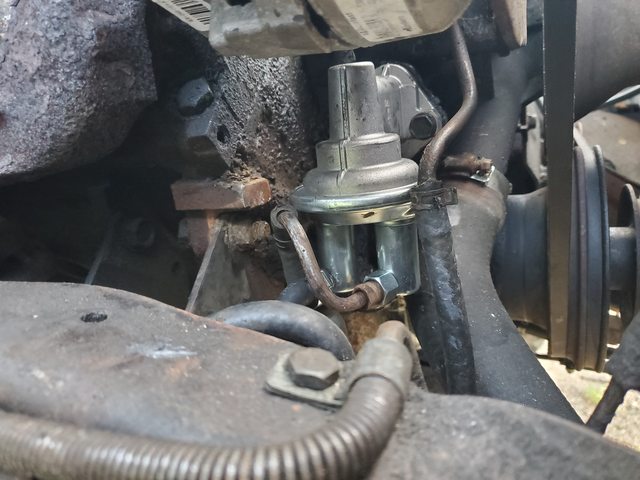
A quick trip to the parts store and we were back in business. No more leaks, and no Power Laggin’ Flambé! The truck ran better, but not perfect (more on that later).

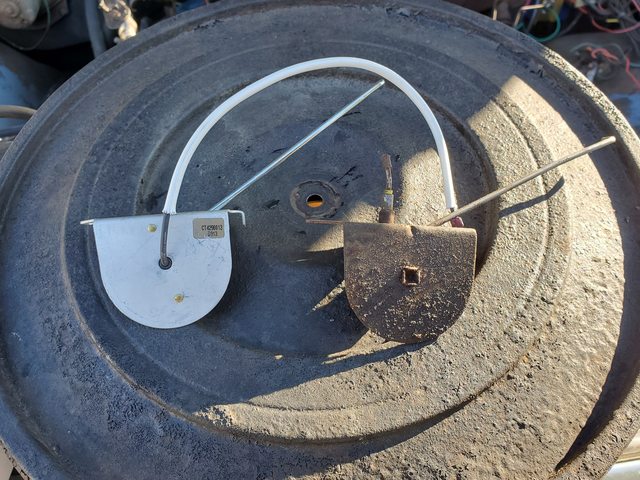
Let’s see… what else did we do between the last installment? Oh yeah, we played Gauge Cluster Bingo! Among the problems we faced, the speedometer has never worked right in the truck. The one that came in the truck was not original, and it had an extreme case of the bouncies due to a worn out clock spring. When we removed it to swap in another speedometer, we snapped the needle on BOTH the original AND the replacement! D’OH!!!

Yeah, that’s not going to work.
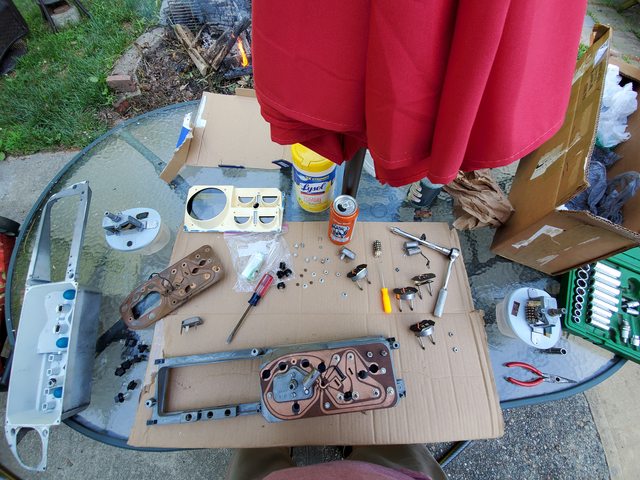
I did the right thing and ordered another used speedometer AND another entire cluster up. The first speedometer broke before the guy could ship it out, but I took it anyway for parts. The cluster, however, showed up intact and in fantastic shape. This time, to avoid breaking the needle, I used a small food container to hold the speedometer until the cluster could be swapped. The cluster I purchased was from an earlier truck, and at some point mid-run, they changed the dash layout, so the cluster “cage” changed shape. The gauges and printed circuit remained the same, so you can mix and match the guts to your preference. The speedometer did change to an 85mph gauge in 1979 (and 1980), but I prefer the looks of the more-common 100mph gauge instead. I looked for months for an 85mph speedometer, but I am pretty sure they have all returned to the Earth by now.

Finally, everything in the gauge cluster works! The new (to us) speedometer works as it should, although it is off by about 3mph according to my GPS. Eh, close enough. The one thing we have left to do for a future installment is swapping out the stock Ammeter for a Voltmeter. All of the alternator voltage flows through that gauge, and they are prone to failure, so replacing it with a modern Voltmeter is a safer option.

Speaking of safety, being able to stop is kinda important. Ever since we replaced the front brakes in the Great Brake/Hub/Bearing Fiasco of 2019, the brake pedal never felt 100%. I picked up a fancy air bleeding contraption for another job, so I decided to give that a try to pull any existing air out of the system. It also works great for flushing out old brake fluid, and who knows what is even in this thing at this point. No matter how much I tried, I couldn’t get the pedal to come back 100%, so I started inspecting the brake system components, starting with the rear, since everything up front is newer.
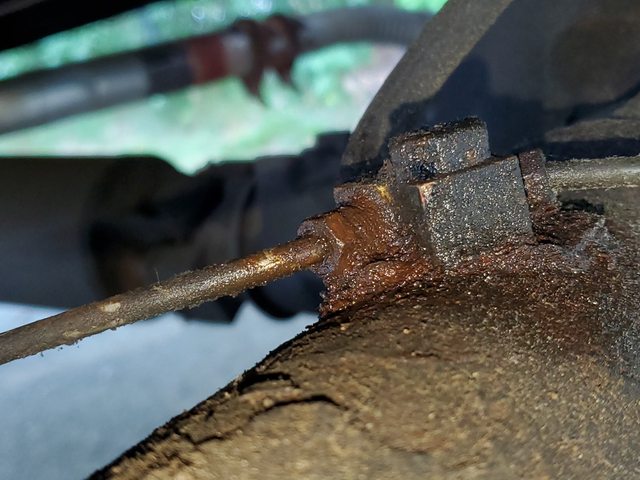
Well, that explains a lot. This is the rear rubber line’s block that splits to the two hard lines that go to the rear wheel cylinders. When I hooked up the air bleeder, fluid would easily flow past the line. No wonder why it wasn’t stopping well.

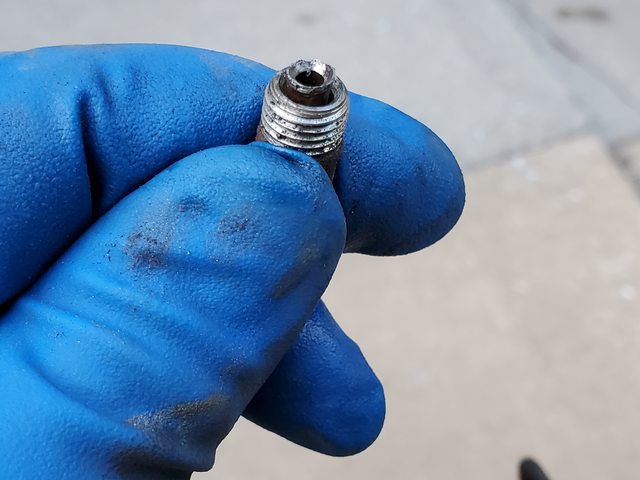
Just for the record, this is what a proper double flare should look like.

This, however, is NOT what a proper double flare (or any line flare, to be honest) should look like.
This sad excuse for a double flare looks like it was made by cutting the line and smashing it with a rock and calling it good. It’s laughably bad.

As an added bonus, not only would a proper flare not seat correctly due to the jagged bits of that line ruining the junction block, the rubber line itself was showing signs of imminent failure. Into the trash you go!
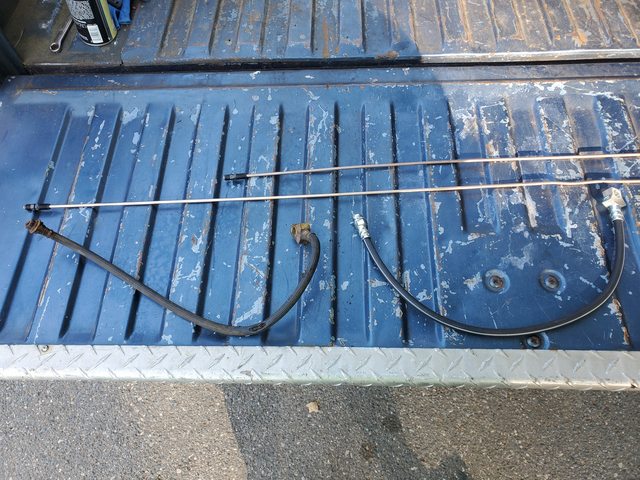
I ordered up a new rear brake hose and picked up some new axle lines to replace the old, “Rock Flare” ones. I picked up some lines made of that new Ni-Copp material, mainly because I wanted to try them out after hearing good things about them. Plus, that’s all they had in stock with American fittings and double flares. Fancy lines it was, then!

Everything installed easily and I was finally able to get decent pedal feel for the first time since we brought this thing home. Nice. The Ni-Copp is extremely easy to work with, looks great, and it’s resistant to rust. Having had vehicles with replacement lines that have also rotted in the rough New England environment, I really like the prospect of not replacing these again in 5 years.
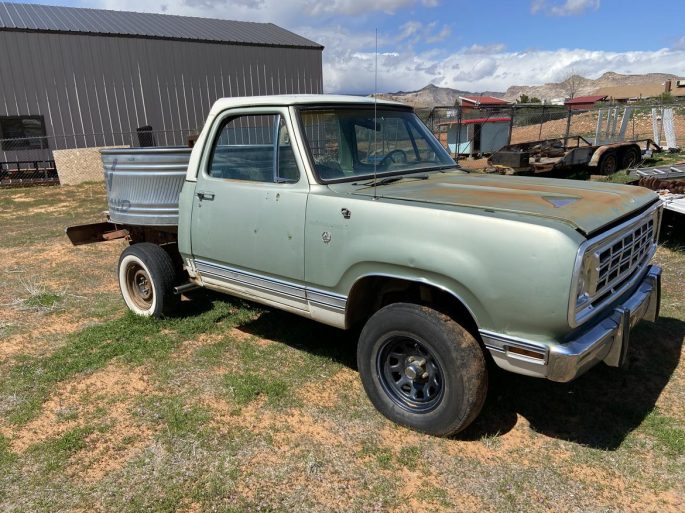
A guy named Shaun on the Grassroots Motorsports forum messaged me a few months back about picking up a parts truck. He and his dad acquired this poor Ramcharger that was turned into a mobile cement mixer on someone’s farm in Utah. This truck was a fully loaded Ramcharger SE, complete with a running 440, and someone cut it up. It wasn’t even rusty; such a shame. He was keeping the 440 and some other parts, but he asked if I needed anything from the rest of the carcass. I was able to get some parts that I have been looking for since day one for Project Power Laggin’.
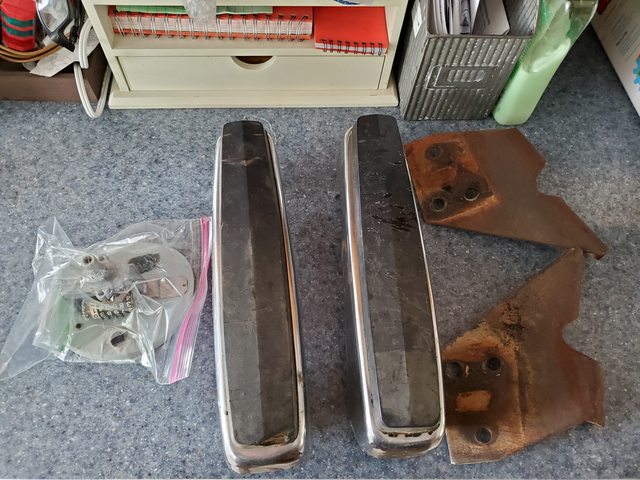
Among the harvest from the Ramcharger carcass: another parts speedometer, a pair of bumperettes, and most importantly, rust-free front bumper brackets. Thanks again Shaun!
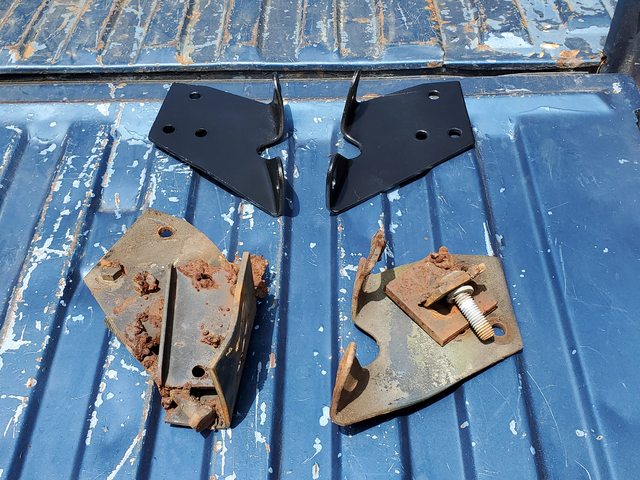
Here, you can see the newly freshened bumper brackets I picked up along with whatever the heck those are that were on the truck on the bottom. The mounting bolts were no less than 5 different sizes (both Standard and Metric sizes), and the one on the right came off in multiple chunks. And somehow, the left one was even worse.

Speaking of bolts, I think someone forgot one in there when they welded this bracket back together. These are definitely going up on the Booger Welder Wall of Shame.
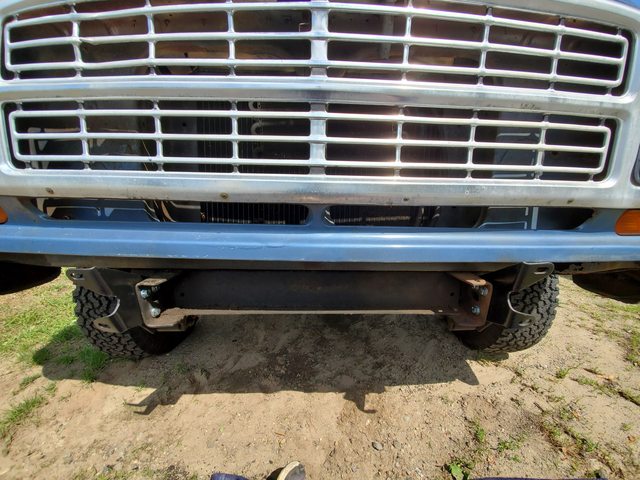
The new brackets went on without a hitch. All of the hardware was replaced as well, so one socket fits all just in case I need to remove it down the road.

This time, instead of random carriage bolts rattling around sort of holding things together, the bumperettes and proper hardware hold the bumper to the brackets. Since the truck came with the previously mentioned Adventurer package, these were likely on there when it rolled off the line back in December of 1978.
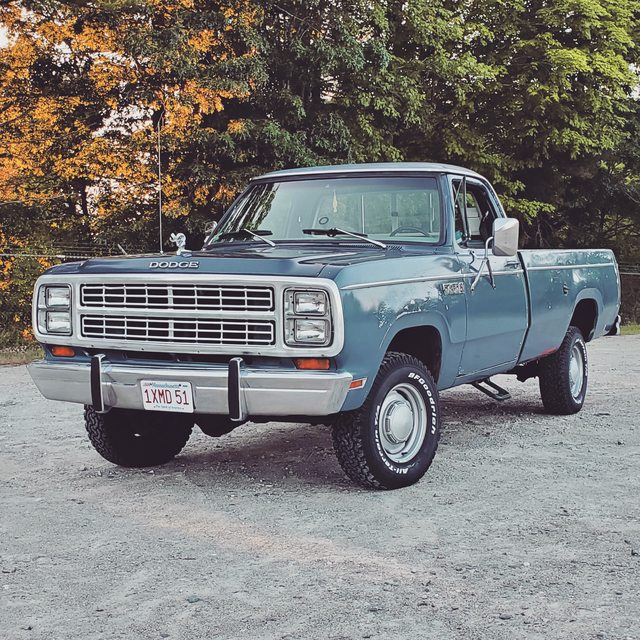
That looks so, so much better now, artsy photo filter or not. As an added bonus, the bumper is no longer a pothole away from ending up on the ground and under the BFG All Terrains.
As you can see, Project Power Laggin’ has kept us plenty busy since that last update. So, where do we go from here? Well, for one, that “Laggin'” nickname is still as relevant as ever. Even though the truck is running better with its new fuel pump and choke thermostat, it’s still exhibiting a troubling, intermittent problem. Sometimes, it will settle into a very low, barely running idle to the point of almost stalling. It will do this at random, and to be honest, I’m not sure what’s causing it. Shutting it down and restarting it seems to help most of the time. The Carter BBD 2BBL carb was rebuilt 3 years ago, but I’m not ruling it out. I’ve gone through and adjusted the idle circuit and timing, and it runs nice when it’s not exhibiting the issue. It could also be due to an intermittent vacuum leak, a bad EGR valve (yes, it’s still on there), or some other mystery malady. It really has us stumped. It would also make for an excuse to swap on some new performance induction bits. Hopefully, we’ll have a positive update on this soon. Feel free to comment below if you have an idea of what could be causing this.
Other than that, Project Power Laggin’ is slated for some rust repair, some suspension work, and some more reliability and convenience fixes. It’s still putting in work and earning its keep, even if it’s been a little temperamental lately. Hell, it’s 41 years old; that’s about 246 years old in work truck years! It’s earned the right to be a jerk sometimes, but we’ll keep wrenching on it to make it better.


Nice job on the Dodge. Enjoyed reading about the repairs and updates.
The only body style Dodge truck I ever liked, although I prefer the round head light ones. Rock on.
Love this truck!! So good to see you slowly work through the issues that everyone else would ignore…or obviously cobble together!
If the motor passes a compression test and seems healthy, I’d love to see it with a small torque cam + 4 barrel intake & carb. (is the oil pressure sTill reading low?)
A recurve on the distributor would be cheap & easy and good idea at any time! Those 70’s advance curves were abysmal!
Also, next time you’re taking beauty shots, do me a favor and pop the caps off and snap a couple.
I love the vintage look with the dog dishes…but they take away from the nice dish those stock steelies have. I honestly like the look either way, capped or bare!
Hi Andy, check out this previous installment if you want to see the truck sans dog dishes:https://bangshift.com/general-news/bangshift-power-laggin-project-truck-update-lets-fix-some-really-questionable-stuff/
We ran it that way for a while, but we’re digging the dishes big time.
As far as the power situation, we are planning on doing something about that in the future. We have a few leads on why it’s running intermittently weird that we are investigating. Once that’s sorted out, the fun stuff will commence!
Hi all
I’ve been looking at digital nomading a while and how to get started with my internet business before travelling.
AWESOME site here for digital nomads! this is what I used to get online and enter the community!!
I got the courses to build my business and never looked back (except when I think about home loool)
All the best,
hello all
I’ve been looking at digital nomading a while and how to get started with my internet business before travelling.
AWESOME site here for digital nomads! this is what I used to get online and enter the community!!
http://www.startupbeachshack.com
I got the courses to build my business and never looked back (except when I think about home loool)
All the best,
Hey
I’ve been looking at digital nomading a while and how to get started with my internet business before travelling.
AWESOME site here for digital nomads! this is what I used to get online and enter the community!!
http://www.startupbeachshack.com
I got the courses to build my business and never looked back (except when I think about home loool)
All the best,
great blog!
i got deja vu cause i have a 77 trailduster on 35s that has been my ‘rona project… changed the dash, painted the dashpad, installed a stereo, 4 speakers, got the a/c controls working (if only for the heater), wiper motor and hardware, air horn install, heater blower motor, nondescript aluminum radiator to replace the nissan unit!, water pump… ditched the mopar electronic ignition in favor of a Toyota unit (sorry) with a vaccum advance delete distribuitor that makes a ton of power out of my 2bbl 318 all the way up to about 3000 rpm… keep em coming!