


(Words and Photos by Scott Liggett) – The proof is in the numbers. In our first part to this article we followed Yannick Sire of Sire Custom Performance take an old crusty GM HEI and do a little magic to it to find a few more horsepower. With nothing more than a little time, a bit of welding, a recurve kit from Moroso; we changed the spark curve of that crappy junkyard HEI with the hopes of gaining a few ponies in our engine.
–
–
After we had Yannick do the same mod on our HEI that was in our ’65 Impala SS; our butt dyno was telling us there was a definite improvement across the rpm range. As accurate we claim our butt dyno is, we wanted proof that was a bit more scientific. We needed a real dyno, specifically a chassis dyno, to borrow for an afternoon to prove the numbers our hairy keester was feeling wasn’t a figment of our imagination.
–
For our genuine science experiment, we enlisted our buddy Mike Haddad, owner and master tuner at Haddad Motorsports. Mike is a fan of modern muscle cars and knows how to get major horsepower from the newest offerings from GM. He has a Dynopack chassis dyno and offered up to help us with our crazy idea. He wasn’t even offended when we showed up with our beat up Impala with a carburator.
–
When it comes to dyno time. Time is money. In order not to take up the dyno for any longer than necessary. We had to come up with a plan for our science experiment in order to keep costs down. This is a good idea for anyone wanting to put their car on a chassis dyno. Taking the time before your dyno appointment to make sure everything on your car is in proper operating condition is very important. You wouldn’t want to have your dyno day ruined because that noisy bearing in your water pump you’ve been ignoring decides to seize up and puke its guts everywhere. Remember, running a car to redline on a chassis dyno is as hard on the drive train as it is doing it on the track.
–
The most obvious plan to prove our theory would’ve been to put a stock HEI distributor in the car, set the total timing, and get horsepower numbers. Then, pull the distributor out, have Yannick Sire do his magic on it, then put it back in the car. Finally, get new horsepower numbers with the recurved distributor. That would’ve taken a lot of time and expense on our part. We were only interested in seeing if there is power in changing the ignition curve and nothing else. In the end, we came up with a plan that would get us as fair comparison as possible.
–
The first thing we needed for this test was a totally stock HEI. We ran down to the local salvage yard and found one lying on the floor of a 78 Chevy van. It looked in really good shape, so we snatched it up. It appeared to be a rebuilt unit that had never been installed in an engine.

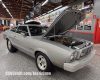
Our 65 Impala’s engine ignition system is run by a MSD 6AL box, MSD coil, cap and rotor. The MSD box replaces the module inside the distributor. The rest of the 383 specs are as follows: the block is a ’69 vintage 350 four bolt main with a cast crank, stock rods, and TRW cast 11 cc dished pistons that are .024 below deck. That gives it 9.87:1 compression with the 64cc chambered Victor Jr heads, Comp XE288HR hyd roller cam with .230/236 duration @.050 and .520/.540 lift with 110* lobe separation, Comp pushrods and Magnum roller rockers. Up top is an Edelbrock RPM intake and a Holley 750 double pumper. The exhaust starts with custom made 1 3/4″ headers dumping into 2 1/2″ exhaust with Flowtech Terminator mufflers. The transmission is a New Process A833OD four speed (We’ll let you ponder that one for awhile.) backed by 10 bolt differential with GM posi and 3.36 gears.


The second part, was to install the stock HEI we got in the car. We removed the module and it’s harness. Then removed the plastic plug on the two wires from the magnetic pickup. We did this so both distributors in the test would be identical with the only exception being the mechanical ignition curve.

After the stock distributor was installed and running good, we needed to repeat total timing for both distributors. They needed to have identical total timing. The 383 had a stock type sbc 400 balancer with only a timing mark. Our poor butts couldn’t afford a fancy dial back timing light, so we added a timing tape. Or actually, we added two timing tapes because we realized after looking at the picture below, we noticed we put the timing tape on backwards. There is nothing quite like going to your local speed shop and buying the same thing twice in the same day. We used Mr Gasket’s part #1591 timing tape.


Now, we were ready for the dyno. We ended driving the car with that stock distributor for nearly a month until Mike Haddad and us could get our schedules to match. It ran and drove just fine. We really weren’t hot rodding around at all, so we didn’t get the butt dyno working before the trip to the actual chassis dyno. Finally, we made it in. Haddad uses a Dynopack Chassis Dynamometers made by International Dynamometers down in New Zealand. Yes, New Zealand. The neat thing about this set up is it’s small size and ability to be moved out of the way when not being used. Haddad has his set up on a Bendpack lift so the car could be worked on without removing the car from the dyno.


When we built our headers, we got a set of collectors with O2 sensor bungs from Speedway Motors just in case this day ever came when we would thrashing our car on a dyno. We connected a wide band O2 sensor from the dyno to our bung. This was so we could be sure our tune on the Holley wasn’t way off killing power. For most of the tests, it was a bit on the rich side running about 13.0:1. It wasn’t optimum, but it was close enough. Besides, being a bit rich is safer for the engine under full throttle.

We set the total timing at 38* while leaving the vacuum advance disconnected and hammered the gas. Haddad set the dyno to start the pull at a low 1500 rpm. Our engine’s set up didn’t like low rpm with that stock distributor’s curve. It bogged badly and pulled 297 hp at 5000 rpm and 330 ft lbs of torque at 4200 rpm.We ended the pull at 5000 rpm on that first pull just to be safe. Haddad reset the dyno to start the pull at 2000 rpm which the engine liked much better. The second and third pulls on the dyno the engine made 303 hp at 5500 rpm and 335 ft lbs of torque.

Satisfied that we got a good baseline run with the stock distributor, we swapped back in our original HEI that Yannick recurved for us. Now, it was time to see if our butt dyno was lying, or delusional. With our original, recurved distributor back in the car, it started right up and much easier than the stocker. The throttle even felt snappier to Haddad when matted the big pedal. We set the total timing once again at 38* just like the first distributor. The first pull netted us 320 hp at 5500 rpm and 350 ft lbs of torque at 4500 rpm. Holy Schnykies!! The second pull felt even better. The car put down 322 hp and 350 ft lbs of torque. The third and fourth pulls both hit right at 324.9 hp and 354 ft lbs of torque.
We can’t claim all of the peak horsepower improvement was just from the distributor changes. Even though we did our best to eliminate unwanted variables there could be other factors involved that helped boost that number. Common belief is that total timing is total timing and both distributors should have been making nearly identical horsepower numbers at full advance. But, internal combustion engines can’t read text books and don’t always follow the rules. What is important is the big improvement in torque from 2500 to 4500 rpm. That’s power you can feel in the seat of your pants, that ole butt dyno.
Haddad believed there was more in the motor if the carb was leaned out a bit. We brought our own tools and a bunch of other junk, but forgot our Holley tuning kits. So, we had to be satisfied with these results. We were.

For those of you with lousy math skills, that’s a 22 hp and 19 ft lbs of torque improvement over the stock curved distributor. That was7% improvement on a worn out 300 hp motor. The increase in power was all across the rpm range as well, not just at peak rpm. Check out the results from the scans below. The thicker lines are from the second series of runs after the distributor switch. For the amount of time and money spent, the cost vs. power improvement is well worth it.


Great story Scott, I’m still running points in the Olds and the Firebird has an old Mallory. I’ll be looking for one of those distributors at the swapmeet to rework.
If the points dist is working well and the isnt old and dying, you may not see a hp increase. Not messing with points anymore is a definite plus. If you do get an HEI the factory coils work great, but a quality module is very important. If you have an ignition box like our MSD 6AL, it replaces the module.
Wow, just think how much more horespower you could have made with a magneto, or even some of those 25 dollar spark plugs. Personally, I’m calling B.S. on this one…..
What were you running for initial timing? I’ve got to assume it was different for the two distributors since you had tightened up the ‘curved’ distributor.
k, I reread the distributor article, and you welded the slot to get 18 degrees of total advance, and I’m guessing those were the medium springs? Which puts total advance in by 3000 rpm, so you are running initial at 20 degrees? That seems awful high at start-up and idle. Without shortening the shaft you could have potentially had initial timing of 15 degrees and total of 38 (going by Moroso’s average) with the unmodded distributor, put in the lightest springs and had your full timing by 2500 rpm, probably making very similar power to your shortened, ‘pre-advanced’ distributor. Or am I missing something huge here?