


In our last update on my Charger, I had just dragged my heat-soaked hind end from a 1,500-plus mile roadtrip to the Chrysler Carlisle Nats and back home again, with not one hint of trouble from our big B-body Mopar. It didn’t overheat, it didn’t ping in the mountains, it didn’t cough or bitch the whole way there and back. Other than a non-functional air conditioning unit that could’ve really come in clutch, there was nothing to complain about. Well…I say that, but there was one major factor that I really didn’t bring up about that trip that did bother me. Except for speed and a rough guess at fuel, I didn’t have a clue what was going on with the car. Aside from the NOS replacement speedometer I put into the car shortly after buying it, the fuel gauge that was inaccurate but in the acceptable way (in short, if I found a gas station the second I hit “Empty”, I would only have used about eight gallons of fuel instead of about 17 gallons), nothing worked. I had no tachometer to show me how hard I was spinning the unopened 360. I had no oil pressure gauge. The only time I’d ever seen the temperature gauge wake up was when the upper radiator hose popped off and the car steamed out, never in normal conditions, and the ammeter was a constant concern for the possibility of an electrical fire.
I hinted about what I was up to in Part 7, but didn’t go deep into details, so here’s what happened: after PRI 2022, I left the show and went to buy a Rallye gauge cluster from a 1978 Dodge Magnum. Ordinarily, this should’ve been enough…I had a full gauge cluster, complete with tach, that should just bolt straight in. But…well, let the photos tell you the rest of the story:
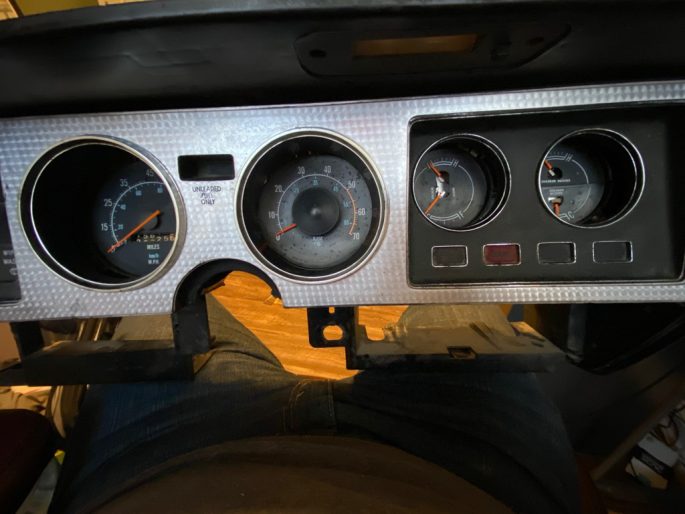
This is the Magnum cluster as I bought it. Other than a missing lens, it was intact. But it looked like hell, had an 85-MPH speedometer, and still had an ammeter.

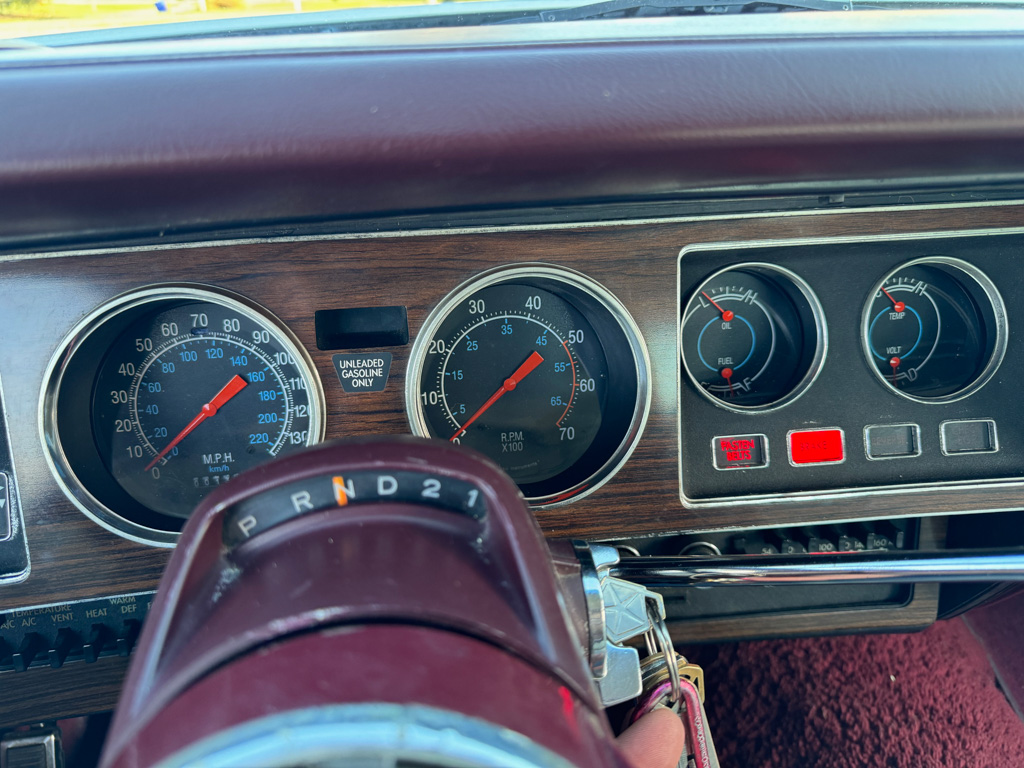
After some discussions, I sent the Magnum cluster, the 1979 300 face (turned silver) and the Charger’s face to Classic Instruments for a Customized cluster service. The goal? 140-MPH speedometer, voltmeter conversion, stock appearance, and one trick little mod to the face plate.
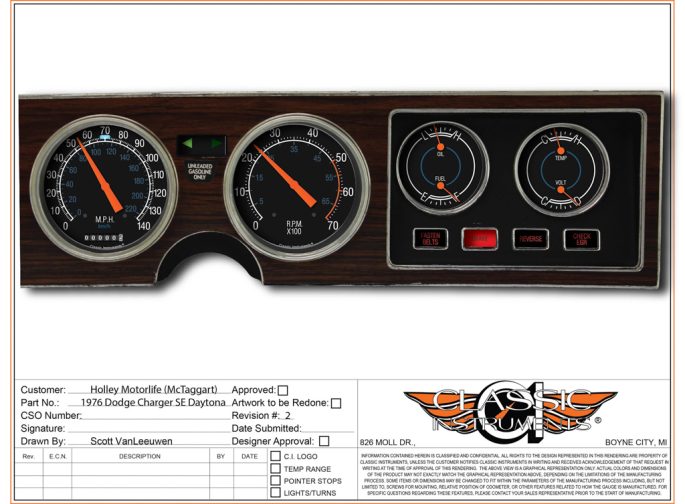
Once you put your initial request in and ship the cluster to Classic Instruments, they will photograph and disassemble your cluster to see just what they have to work with. This is why you don’t get a quote ahead of time. This is the actual artwork I approved…if you want to make changes before those changes cost you, do it before you give them the go-ahead to build. Note the idiot lights: I had the light that used to say “CATALYST” modified to read “REVERSE”, so there is now a light that will come on when the reverse lights come on. IYKYK.
Most any other car, removing the cluster is a simple, straightforward affair. My car? Oh, hell naw, we can’t be simple and straightforward. Everything but the main dash structure comes out of this baroque bitch, including the metal top plate…you know, the one I had to bend a cheap screwdriver just to remove? Yep. This ate a few hours’ worth of work by itself.
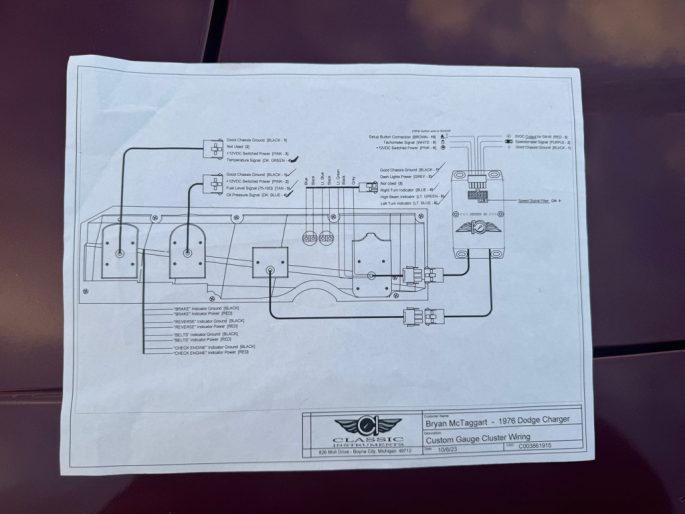
When your cluster is dropped off at your door, you’ll find that the team at Classic Instruments doesn’t leave you wanting for anything…except maybe someone to do the hard part for you. This schematic is bulletproof. All you need to do is figure out which wire from your car connects to the cluster’s connectors and you’re golden. This is Electrical 101 stuff here, folks.
If you don’t freak out at the thought of doing some wiring, then take our advice and get some good schematics. I own the full FSM set for the Charger, which proved beyond invaluable. A quality Chilton’s or Haynes manual wouldn’t hurt either. And when in doubt, a multimeter and test light are your friends.

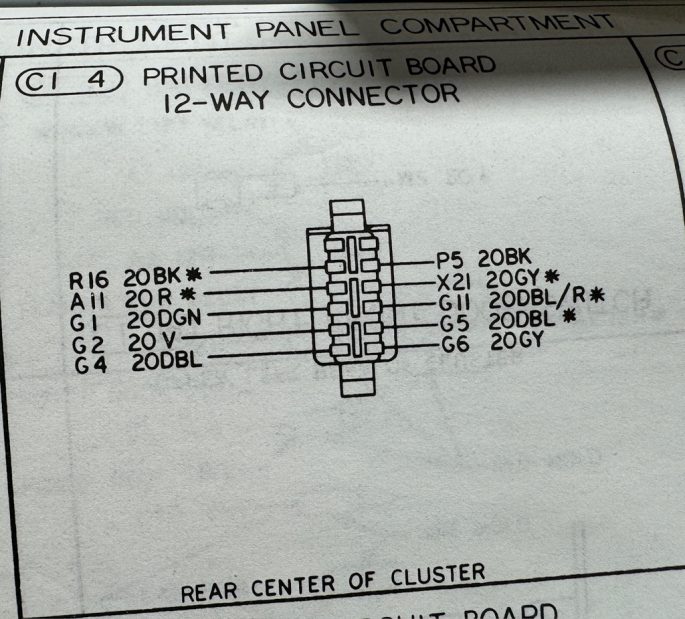
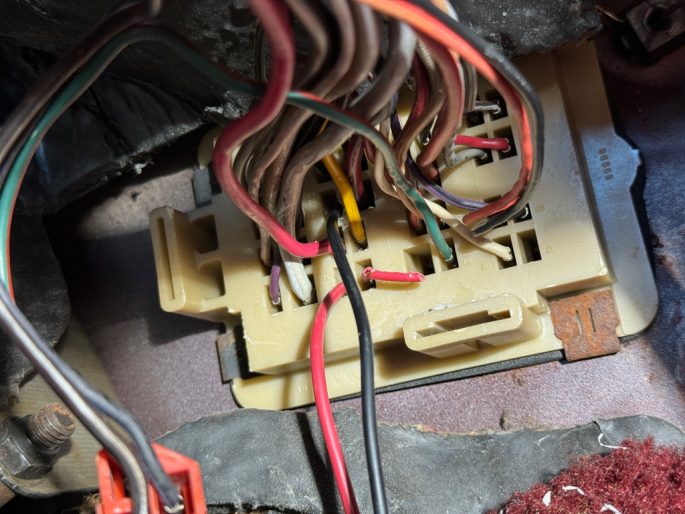
The Charger’s gauge functions are isolated down to two brick-style connectors that sit in a well in the gauge cluster, allowing the circuit panel to make contact with the leads.
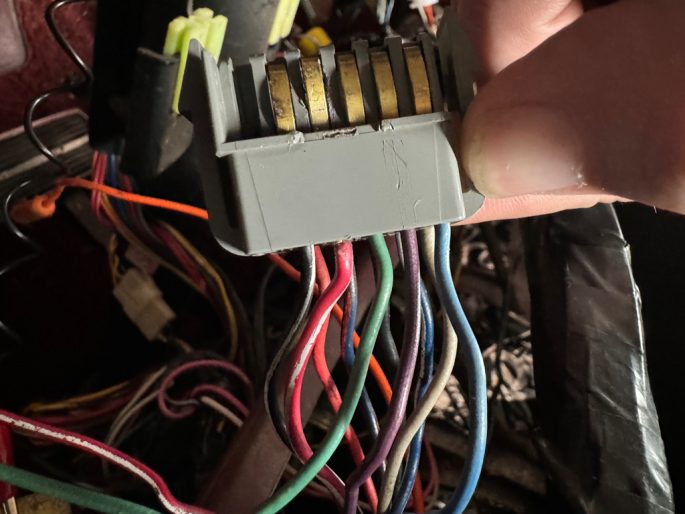
On inspection, the concern regarding the ammeter was validated. Note the black/white and red/white wires. Those are the ammeter feed wires, and both are constant 12 volts. See the scorching? I don’t know what caused that.
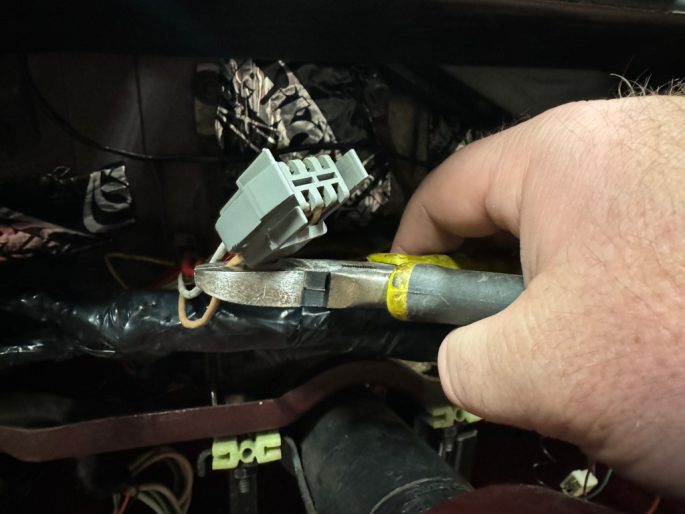
I said it once before and I’ll say it again: the best way to learn is to just roll your sleeves up and get to it. Luckily, after wiring helicopters for ten years, the first wire cut (here, the fuel level signal wire) didn’t bother me a bit. Snip, snip! One at a time until the connector was disconnected from the main wiring bundle.
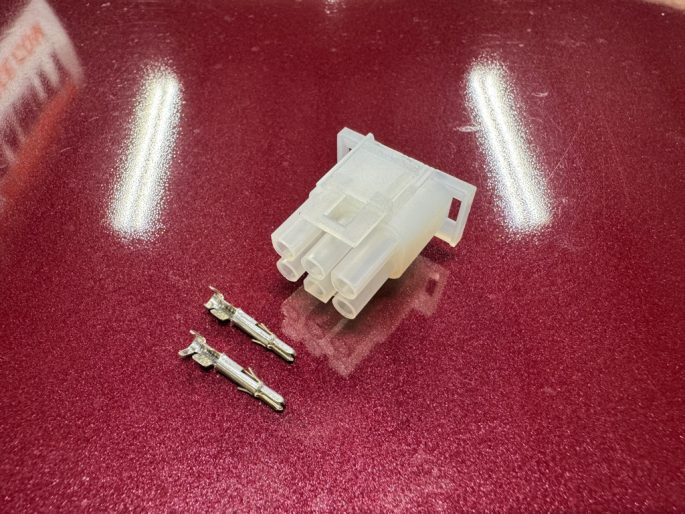
The female connectors are already incorporated into the cluster connections that Classic Instruments made for you. Just take the wire you cut, terminate the wires using the provided pins, then slide the pin into the correct position on the male terminal block. That’s it.
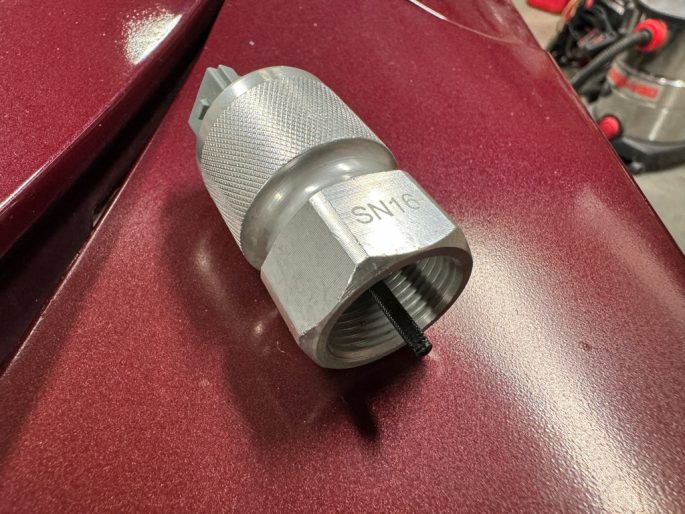
Even the new-to-the-car speedometer bounced like I was driving in an earthquake. No longer, as the Classic Instruments cluster uses a speedometer driven by an electronic signal. The SN16 signal generator goes into the transmission where the cable used to be. After that, it is just a matter of a few electrical connections and your speedometer will be as smooth as any vehicle off of the new car lot.
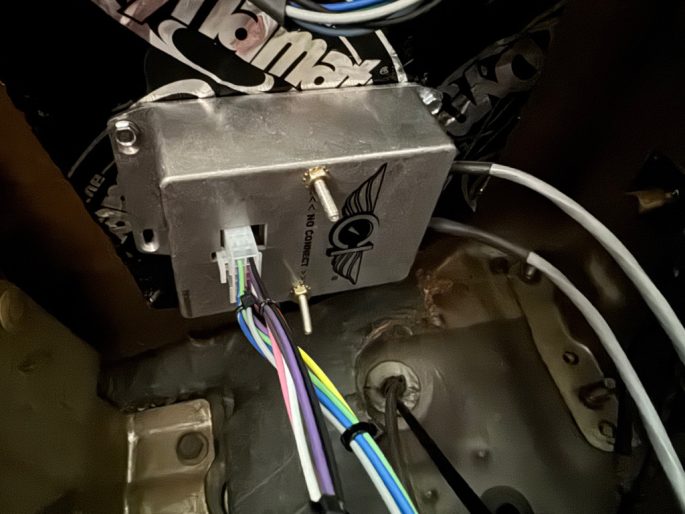
It isn’t so much a computer brain as it is a translation service. This is the signal filter that takes in the speedometer signal and the tachometer readings and sends them to the cluster (note the two gray bundles to the right). This was mounted underneath the cowl, well away from where my feet occupy space and nowhere near any kind of weather.
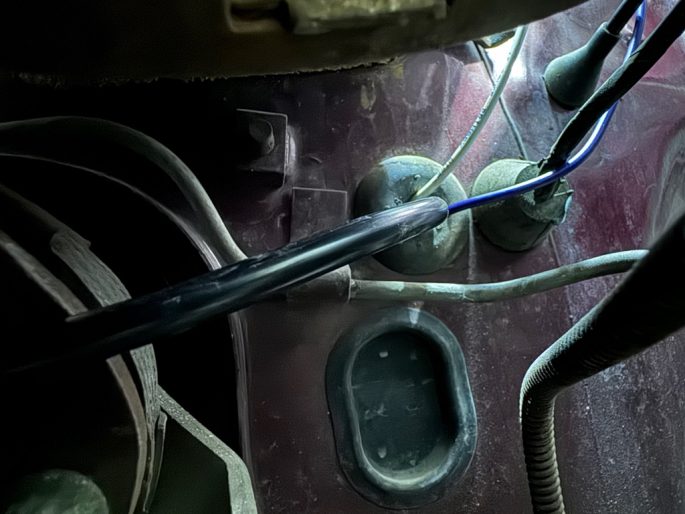
Since the speedometer cable was deleted, the grommet in the firewall became a useful port for wiring. The speedometer signal bundle and tachometer signal wire were routed through here. I also ran new feed wires for the oil pressure and temperature senders, bypassing the notoriously troublesome Chrysler firewall bulkhead connector. Provided temperature and oil pressure sending units were installed into the engine block.
Each and every car is going to have some kind of quirk to deal with if you are exchanging clusters. In the Charger’s case, we had to perform a full ammeter delete rewiring to make the car charge right and to keep the electrical system happy. I used the MAD Enterprises deletion system. Just be sure you understand what you are doing and make sure your modifications are electrically sound.
As connections were made and systems came online, I would periodically connect power and test systems out. Knowing how much work it took to rip the dash apart, I didn’t want to have anything wrong before I put it back together again.
On my first engine-on test, everything checked out just as I’d hoped. The voltmeter showed a slight charge (13.9 volts at the battery), the temp gauge came alive quickly, the oil pressure twitches at the slightest rev and the fuel gauge showed over 3/4 full, as expected.
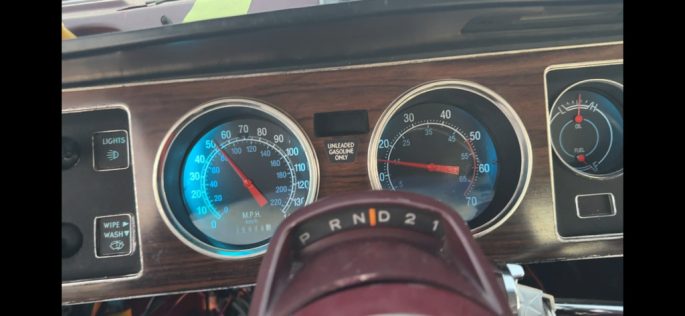
The last thing to do was to go for a drive. If the speedometer or tachometer need to be calibrated, a button that connects to the signal filter can be used to make those changes. Happily, everything was on point and the speedometer readings matched perfectly to the GPS speedometer we own.
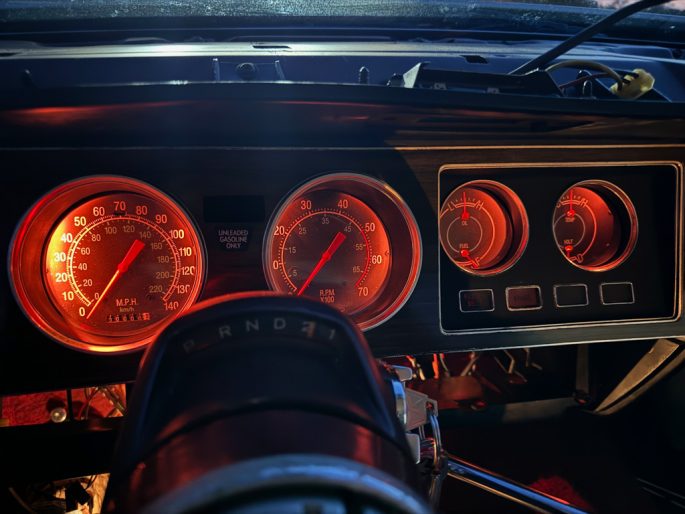
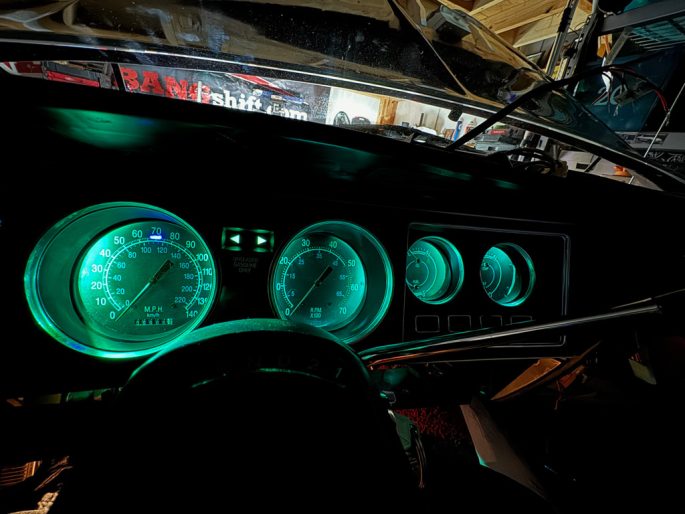
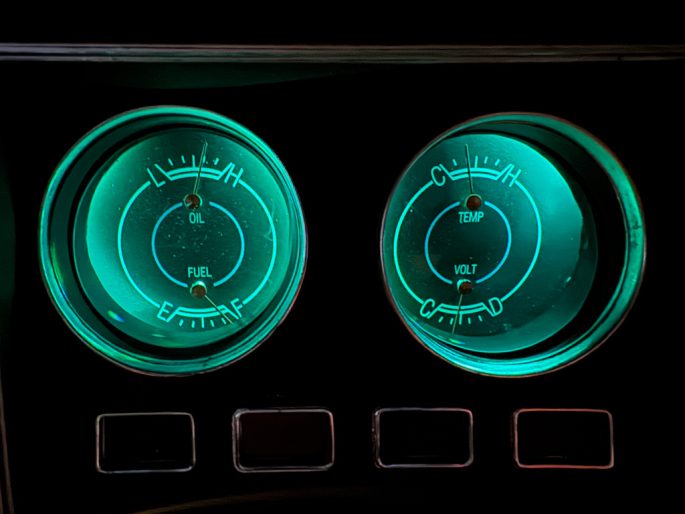
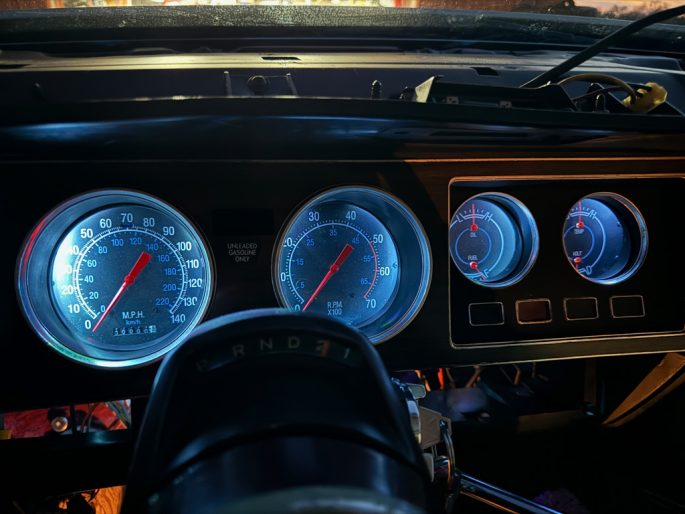
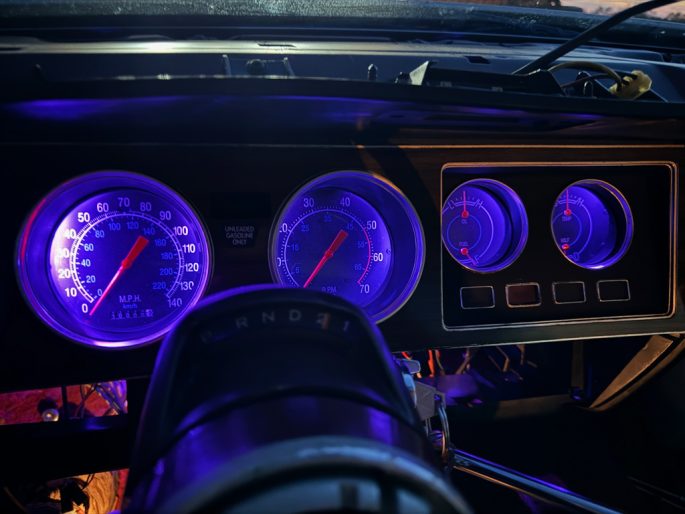
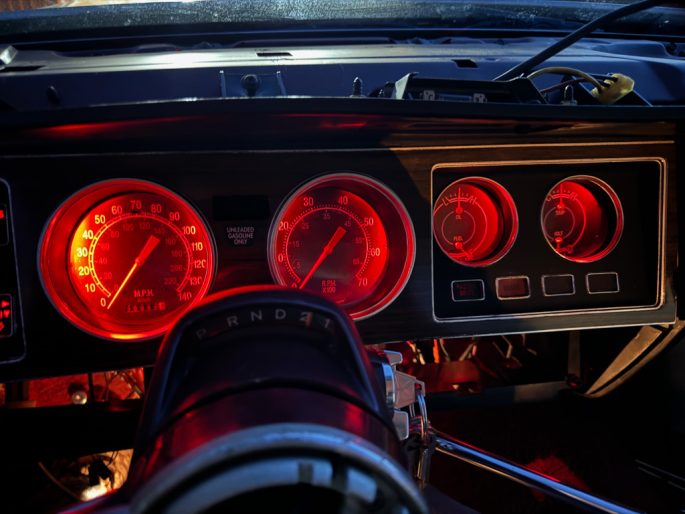
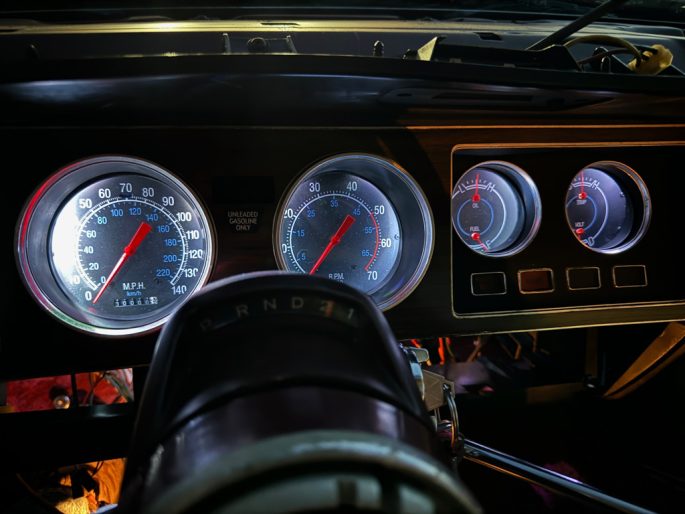
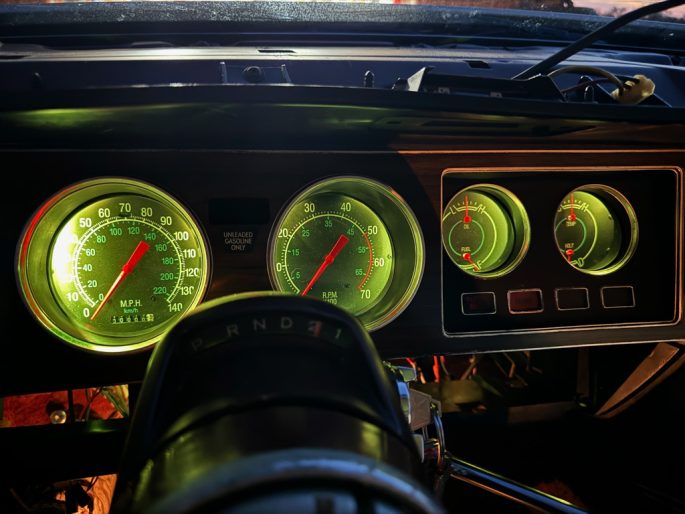
One final thing: Originally, I just wanted to have a “Chrysler Green” (the aqua green color) for a gauge color, but at the last minute the call was made to backlight the gauges with an RGB LED system that can be adjusted with a remote control. These are just a few of the color options available. I loved changing gauge colors on the 2005 Mustang I used to own and I love it here, too.
That’s one major project wrapped up. But winter has just started, and we have more things to get done before next year. Stay tuned, the next update will arrive sooner than later…
Need to catch up?
Part One: The First Assessment
Part Two: Trunk Paint, Instrument Cluster Work
Part Three: Deeper Instrument Panel Work and the EFI-Ready Fuel Tank
Part Four: The Heater Core Job We Should Have Been Worried About
Part Five: New Wheels, Wiring Fixes, Fuel Pump Troubleshooting, First Dragstrip Pass
Part Six: MSD Distributor, Coil, and Solid-State Relay, RetroBright Headlights, And More
Part Seven: Brake Repair, Winter Projects, Subframe Bushing Replacement, Firm Feel Upper A-Arms


