(Words and Photos by Scott Liggett) – There are three things gearheads and even people with a mild interest in cars look at. The paint, the interior, and under the hood. The paint is obvious. The interior too. But, for some, the engine is left in the grease and untouched. On the other end of the stick, if your ride is still a project and not yet coated in glorious paint; you can gain a ton of respect at the cruise in for having a clean engine compartment. Besides, no one ever got to work because of the car’s pretty paint, the motor is doing all the work. What’s the first step in turning a blob of grease under the hood into something not embarrassing that you can show others with pride? We’ll show you two different cars we worked on for this article that both cost us less than $100 to transform the engine bay into something cool to look at.
First, is our friend Gregg Dryden’s Nash Metropolitan convertible. He has owned this car since 1978 and recently changed it’s color from turquoise and white to red and white. The body shop didn’t paint under the hood, but managed to dust everything in gray primer. Gregg isn’t a car show goer, or event someone whoopens his hood every week either but he drives all nine of his classics like daily drivers. He’s also been drinking our Kool-Aid about having a clean engine compartment. I think seeing the turquoise under the hood was annoying him so he asked us if we would make it better.
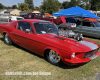
This is Gregg’s little ’57 Nash Met Convertible. It’s cute as a button and gets a ton of “how cutes” from the ladies. We couldn’t help but smile when we drove it over to our work area; except when we hit the non existant brakes. It’s not as sexy as a big block powered muscle car, but it will show you how to clean up under the hood so you won’t be embarrassed at the next cruise in.


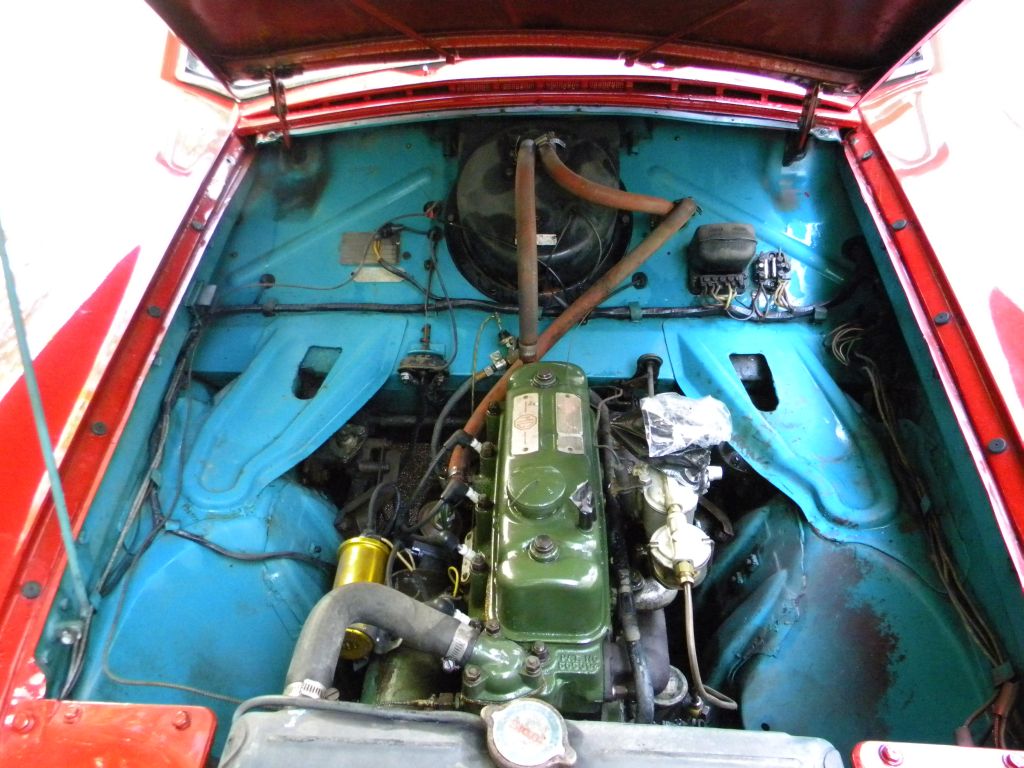
Under the hood, you can see the old turquoise paint. It appeared to be the original factory paint which is a good thing. There is also a dusting of gray primer overspray on everything too, which is completely annoying. A good tip here if you getting your hot rod repainted, or after you have already installed a super sano engine with a bunch of shiny parts. Make sure the body shop manager knows you won’t put up with over spray of any kind under there. Gregg took off his newly restored air cleaner before handing us the keys. He also recently rebuilt the cylinder head and carb, so they stick out as shiny and ungreasy.
If you have an air cleaner, keep it on the carb for the first steps. Look closely on the valve cover, you will see a vent. These both will need to be covered before we get our pressure washer. You don’t a bunch of water in the engine. We duct taped a plastic bag over the carb top and taped up the vent tube.
We bought this cheap, electric Simoniz pressure washer from Pep Boys several years ago for about $80.00 and it does the car cleanup job nicely. We first sprayed down the grease ball engine and transmission with full strength Simple Green first and let it sit a for a while before getting busy with the pressure washer. We like Simple Green because it works well and is biodegradable unlike the engine degreasers in aerosol cans. It also washes off without residue. That spray can stuff makes your car smell like a chemical dump for a month.
One other note before going nutso spraying water at near 1000 psi . Electrical things do not like to be drowned in water. Besides the obvious of spraying directly at your distributor and generator; these british built cars (Yes, these Nash’s were built by Austin in England.) have an external regulator on the firewall right next to it’s fuse block with two whole fuses. Don’t spray these either.
This is what the engine looked like afterwards. The primer overspray was all but gone and the original turquoise looked darn nice.
Next, you need to be able to get the paint to stick to the surface you are painting. As best we could tell, that is the original factory paint still under the hood. There is nothing better for a base of paint than what the factory originally did. But, you need to scuff things up a bit to get the new paint to stick. We used 3M’s red Scotch-Brite Pads for this part of the job.

The next step is when you slow down and get your patience up and running. Anything you don’t want covered in the new paint needs to get taped up. Take your time here. The payoff is less clean up, less unwanted overspray and a better finished product. We spent more than two hours taping up just the wiring harness. We couldn’t remove it all together, but we were able to remove it from the metal tabs that hold it in place and remove the the grounds. We also used newspaper folded over to cover the fenders, cowl, windshield and grille. We know that newspaper can bleed paint, but were not planning on painting over the newspaper. It’s just there just in case we slip. Besides, we are too cheap to buy the proper paper. We tossed an old towel over the engine block to protect and save a bunch of time.

Gregg really wanted to paint under the hood red to match the rest of the car, but getting the proper paint mix from the body shop, then having the body shop supply store fill up aerosol cans with the paint would be too costly and take too much time. So, we went with his second choice, a satin black paint. We chose VHT’s Rollcage Paint because it covers easily, doesn’t run too much, and it’s an epoxy paint which also seals. We forgoed a primer coat for this job. A major improvement over what we started with.
The other car we wanted to show you was our old ’73 Monte Carlo. It had a stock, low mileage 350 four barrel. Just because it was low mileage doesn’t mean it was well maintenanced. It was a total greasy blob with a pair of valve covers on top. On this engine, it was cleaned up over a period of time. When we replaced the alternator, we degreased and repainted the brackets. When the water pump got replaced, we painted up the new one and every other part we took off to fix it.
This is how we got the Monte Carlo’s engine. This pic is after we did some degreasing of the engine. We had to scrub the block with wire brushes and degreaser to get it to look this good.
We wanted to clean up the engine a bit and make improvements as well so we bought a few things at the swap meet. The Edelbrock carb was used for $75, the HEI was $60, valve covers $10, and all the Spectre stuff scored for less than $25. Swap meets are great.
After removing the old Q Jet carb and points distriburtor, we taped up and paint the iron intake and a few brackets.
We then tossed the original valve covers for the nice chrome ones, added the Edelbrock carb and the billet HEI distributor.
With the new Accel wires, the engine looked half way decent.
We drove he car like that for a couple of years until the original timing chain took a dump and we noticed the camshaft wasn’t far behind.
While we had the front of the engine torn we took the time to repaint the fan and clean up the clutch. Also, cleaned up the fuel pump and power steering pump. You see, you don’t have to spend a bunch of money at once, or do it all at once.
After about a year or so, we decided to get some rebuilt heads and an Edelbrock Performer intake. Of course, the new heads got a shiny coat of Chevy orange engine paint.
We got this used Edelbrock Performer intake from a friend for $75. It looked like it was never on an engine that ran.
Since we had the exhaust manifolds off for the cylinder head swap, we thought they could use some cleaning up and painting. A can of high heat flat black paint and they were looking pretty sporty.
This is how everything looked when we got it back together and running. The chromed air cleaner we had sitting in our shed forever. It had some pitting, but it will do until we get a new one.
We didn’t buy a bunch of billet do-dads or spend a bunch of money; but it looks much better. There isn’t much chrome either. Getting rid of the globs of grease and a few cans of paint can do wonders for your engine area. Mostly, all you need is a weekend and cleaning in order to get an engine that is not totally embarrassing at the cruise ins.


Gee, I’da thought you’d use Buford T. Justice for the article…
Brian will have it easy. He’s going to remove that old dirty engine and replace it with a shiny new one. He can clean and paint the engine bay in between.
very nice work Scott, and good writing as well.
I usually use aluminum foil to wrap difficult items like a wiring harness. Very easy to do and a lot quicker than trying to tape.
I’ll have to try that next time.
forwent
Great post. I was checking constantly this blog and I am impressed! Extremely helpful information specifically the last part 🙂 I handle such information a lot. I used to be looking for this certain info for a long time. Thank you and good luck.