(Photos by Dave Nutting) – Lots of BangShifters own late model trucks. They daily drive them, tow with them, haul the family around in them, and maybe even beat on them a little from time to time. With gas prices headed toward $4.00 and diesel cresting $4.00 per gallon in some places, we wanted to look at and test some of the easiest upgrades you can make to your late model truck to improve both performance and economy. In terms of “bang for the buck” response, there is no better place to start than upgrades to the intake tract. Knowing this, we contacted the guys at aFe (Advanced Flow Engineering) and K&N, two of the best known manufacturers of cold air intakes in the world. We then grabbed two trucks, a 2007 Ford F250 powered by a 6.0L Powerstroke diesel and a 2007 Toyota Tundra with the 5.7L gas V8.
This installment will go through the installation of an aFe Stage 2 intake system for the gas truck along with an aFe throttle body spacer and a Jet Performance re-calibrated mass air flow sensor. The total investment in these parts would be about $600 from one of the big catalog companies and probably about the same at your local speed shop. Lots of guys are leery about working on their late model stuff for fear of screwing something up or just out of ignorance about how newer cars and trucks are put together. These parts are some of the easiest intalls known to man, so ditch that fear and come along with us as we show you how to bolt on some truly easy horsepower. While you may not drive the particular vehicle shown here, the results of installing these parts on your rig should be similar to our findings.
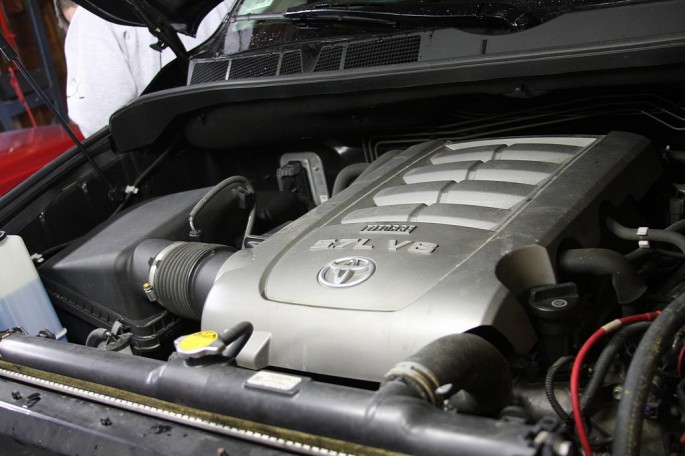
Here is our patient, a 2007 Tundra with a 5.7L V8. This truck has a 380hp rating from the factory so it already moves out pretty well. The owner was getting mixed economy in the 13-14mpg range.

From there we began removing the factory air cleaner assembly and removing the factory air intake tubing.

One thing that you need to be careful of is electrical connections and plastic fittings. On this truck, the mass air flow sensor needed to be unplugged before we removed the top of the air box.

In looking at the pieces of the factory intake system, it is easy to see where improvements can be made. Increasing the surface area of the filer and creating a smoother and more direct path for air to enter the engine without the factory chambers and baffling are two of the most obvious places to look.

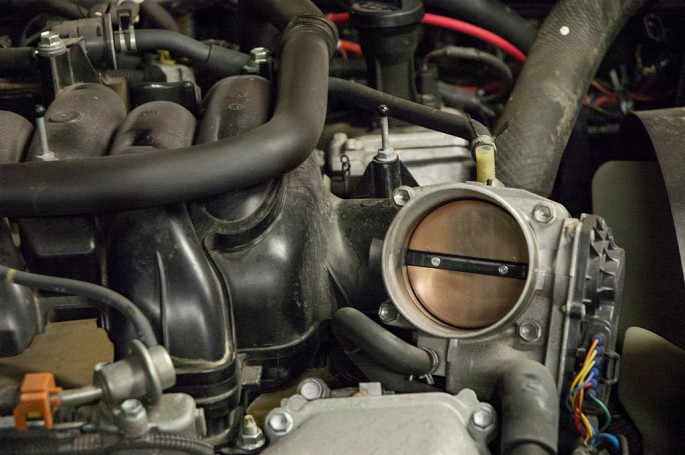
We had a couple of parts to bolt on this truck, so we started with the install of the throttle body spacer. The aim of the throttle body spacer is to add power, improve throttle response, and optimize the increased airflow we would be getting from the rest of the system. The install starts by removing the four bolts that hold the throttle body on and freeing the throttle body from the intake manifold.

The next step is to remove the mesh screen and gasket from the slot in the throat of the intake manifold. A replacement gasket is provided by aFe in the Silver Bullet throttle body install kit.

The aFe throttle body spacer is a nice piece that is machined from billet aluminum and comes with all the necessary hardware.

The rifling and machined ridges in the spacer are designed to tumble the air, increasing fuel atomization.

The install of the spacer is extremely easy. You simply drop the piece in between the throttle body and intake manifold and line up the holes.
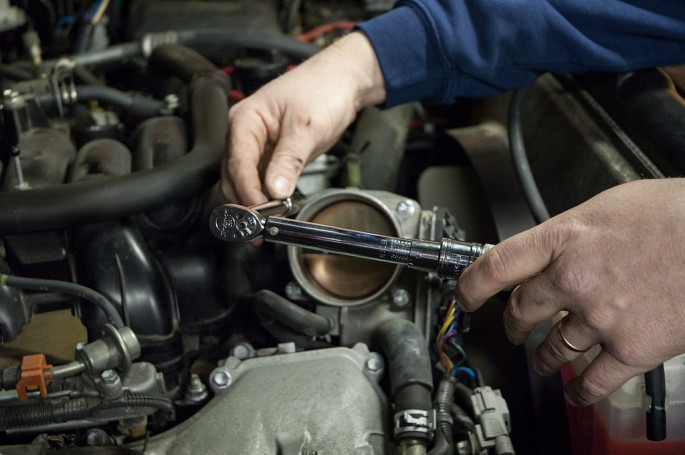
Finally, we used our small torque wrench to snug the bolts down to the specified 8 ft/lbs of torque. That's not a lot and we'd stress following this portion of the install closely as to avoid vacuum leaks and sealing issues down the road.
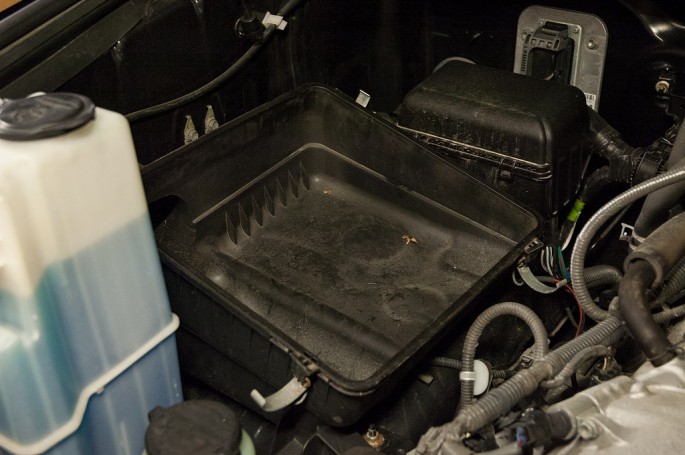
Next up we set our sights on completing the install of the new aFe airbox and associated tubing. The first step was to remove the base of the factory airbox.

This process was quick. It required the removal of only four bolts and then we lifted it right out of the engine bay.

In this photo, you can see the weenie sized opening on the factory air box. The 350ci engine was sucking all the atmosphere it could through this small hole. No good!

Here is the nice aFe airbox. There is a significantly larger opening in the fender area as well as an additional opening at the front of the box that collects cool air rushing into the engine bay while you drive down the road.

Here's a look at all the associated pieces that come with the Stage 2 aFe kit. Since we have yanked all the factory stuff out, it is time to put the good stuff in!

Step one is taking the supplied sealing gasket and installing it around the outside of the opening in the fender where the snorkel from the airbox will pass through.

The aFe kit has the installer re-use some of the hardware from the factory air box like these grommets and bolts.

One thing not noted in the directions is the need to pop the center inserts out of the grommets before installing them into the aFe air box. This didn't slow us down long, but it warranted a mention.

Next up was popping the new air box in. This is a reverse process of the removal and is as easy as snugging down a couple of bolts.

Once the box was snugged down we bolted in the aFe power ring adapter that transitions the air out of the box and into the inlet tube. There are several angles formed into the ring to help the air make a smooth transition. That 5-angle valve job you had done? Yeah, this works on the same air flow principles.

We then loosely fitted the silicone adapters to the ends of the inlet tube and slid it into place. Note that the inlet tube was ready to receive all of the factory plumbing and sensors.

aFe supplied a longer rubber hose for the PCV system of the truck and we secured it using a supplied hose clamp on one end and then reusing the factory clamp on the other end.

At this point we installed a Jet Performance Power-Flo Mass Airflow Sensor. The guys at Jet told us that these sensors have some tweaked calibration that allows the engine to make the most of the increased airflow it is getting from the new air intake. This was also a very simple install.

Pulling the old sensor out required the removal of two screws. Once they were out the sensor simply slid out of the slot.

Here's the new JET Power-Flo MAF. It installs as a reverse operation of pulling the OEM sensor. Two screws and you are done and plugged in.

Moving right along, we installed the new aFe air filter into the air box. This is a 5-layer dry filter and it is a big boy. There is a ton of surface area here, especially when you consider all of the pleats in the filter. It outflows the stock unit by a TON.

The business end of the filter has an opening that is about six inches across. No restrictions whatsoever!

The last step in the process is adding the nice stainless steel lid and aFe decal to the top of the air box with the supplied screws.

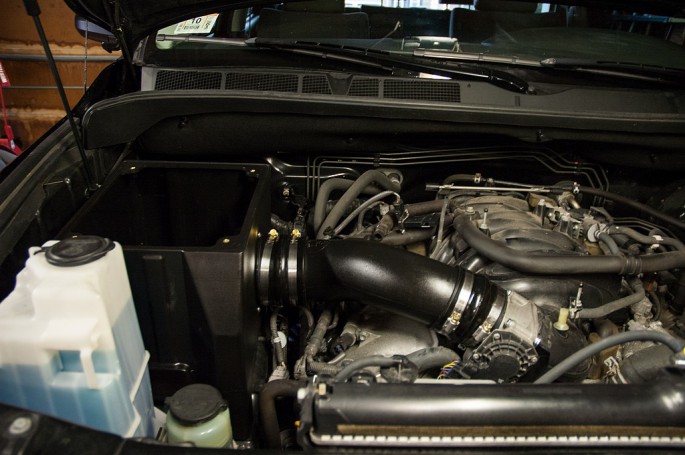
The finished product looks great and performed great as well. There was a very noticeable performance improvement on our "butt dyno" and the owner of the truck was amazed at the different he felt from throttle tip in all the way through full throttle blasts. After he stopped blasting away from every traffic light and highway on ramp, we saw a mileage increase of 2mpg per tank with the components used in this install. He went from a 13mpg average to a 15mpg average and at four bucks a pop, that adds up quick. Overall we were very impressed with the quality and ease of install that the aFe kit provided. The truck performs better and gets better mileage. That is a win-win. We have no problem recommending this system and giving to BS thumbs up!


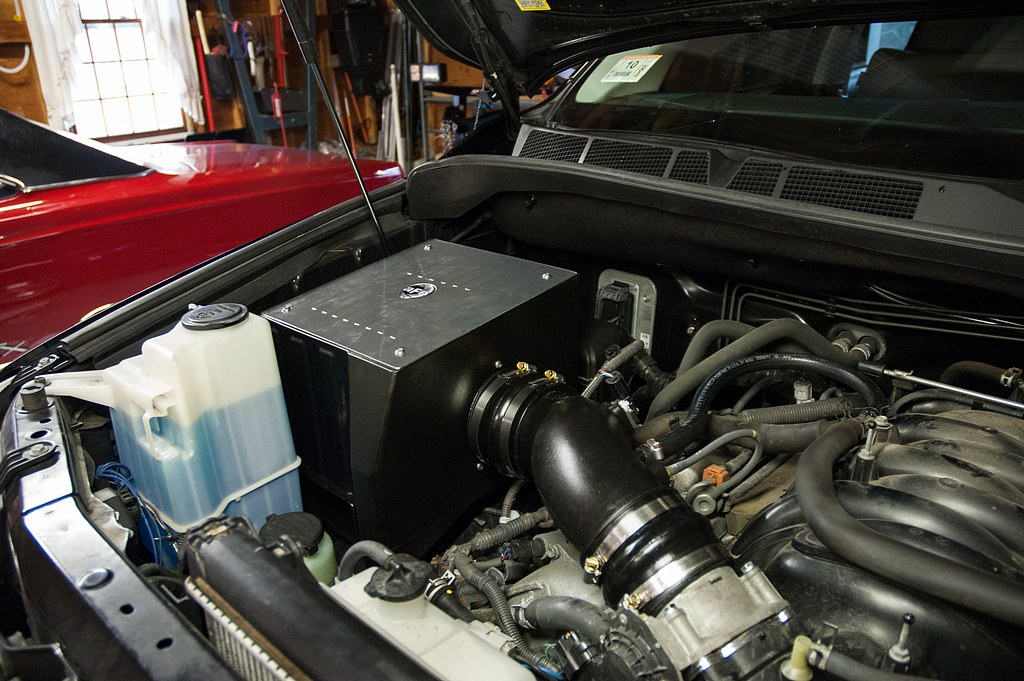





Looks good. I might consider that for my 5.4 Super Crew. It’s got a pretty teenie intake tube. However, I call BS on the spacer. After that air makes a 90 into the intake, another 90 in to the runners and another 90 sweep into the head, whatever the spacer might have done is long since changed.