(Words and photos by Scott Liggett) – In this episode, we’ll show you how stupid easy it is to take a $30 junkyard hydroboost and transplant it into your classic Chevy’s brake setup. What the hell is hydroboost? Simply put, it’s using hydraulic pressure from the power steering pump as a power assist for the brakes. Most cars use a vacuum assist type of power brake booster to make it easier to push the brake pedal. But, if your engine doesn’t produce at the very least 13 in hg of vacuum at idle, you may not have enough to have any power assist. Then it’s all leg power. GM used its hydroboost power assist on gas engined heavy duty trucks that were under a lot of load nearly all the time. They also used it on heavy cars, diesel powered vehicles, and on vehicles where there isn’t enough room for a vacuum booster. We’ve seen them on diesel pickups, medium duty trucks with gas engines, big Cadillac’s of the 70’s and 80’s, that disaster idea of diesel Oldsmobiles of the 80’s, and for some bizarre reason, millions of Astro vans. We hit up the local self service salvage yards to find us a hydroboost system. We found a nice looking one in, you guessed it, an Astro Van. There are still thousands of them cruising Southern California and there were several to choose from at the yard. We even grabbed a second one for a friend.
The car getting the hydroboost is our trusty, slow ass ’65 Impala SS. We installed a disc brake kit from CPP, Classic Performance Products, several years ago. It has served us very well. CPP even rebuilt our chromed booster no charge back in November when if failed. But, we want to go racing with our giant muscle car and need all the help we can get to slow it down. We are also poor, so buying a kit was out of our price range. That means we had to get ingenious and inventive. We already had our Astro Van hydroboost unit. Now, we just needed to get to making a mess.
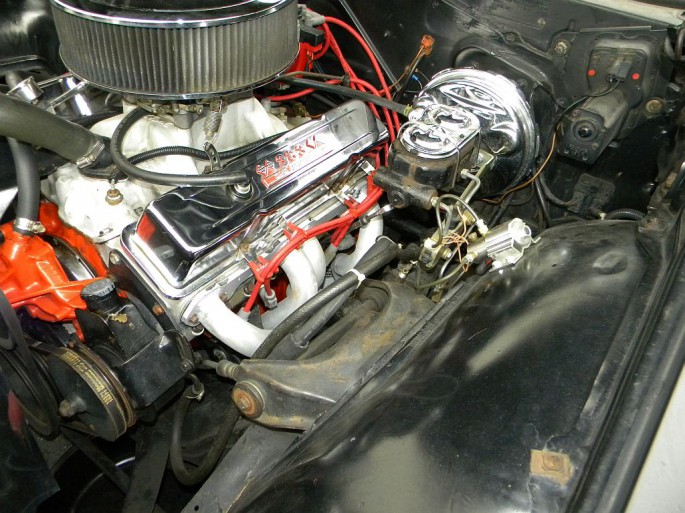
This is how things looked before we took the tools to our perfectly functioning car. The power steering unit is not 65 Impala. Our engine’s water pump and accessory drive were all from a ’73 Impala’s 350. The master cylinder and booster are from the CPP disc brake kit.
The first thing to do is unbolt the master cylinder from the booster, then move it out of the way. Be careful not to kink your brake lines as you will need them later. Then, unbolt the booster from the firewall. Don’t forget to disconnect the rod from the booster to the brake pedal. Now, you can remove the old booster and set it aside for a moment.
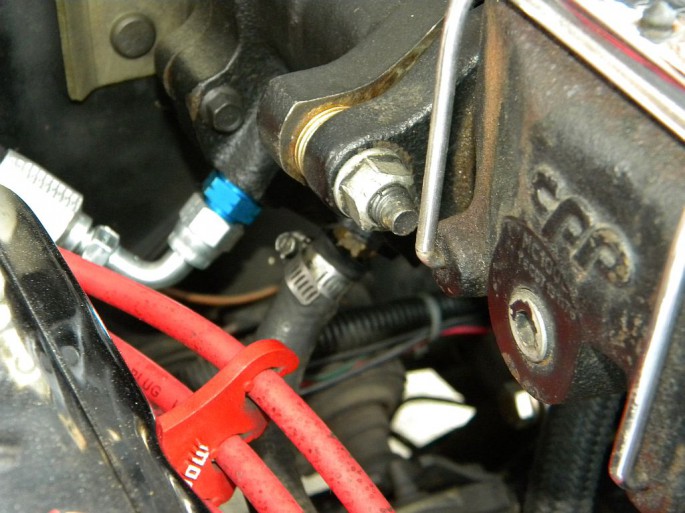
This is what the firewall looks like when you remove the booster from a ’65 Impala. Other GM’s, use brackets on the back of the booster to lift the booster up and away from the engine. The good news is that many of the GM’s use the same bolt pattern on the boosters over the years so your don’t have to do any drilling on the firewall.
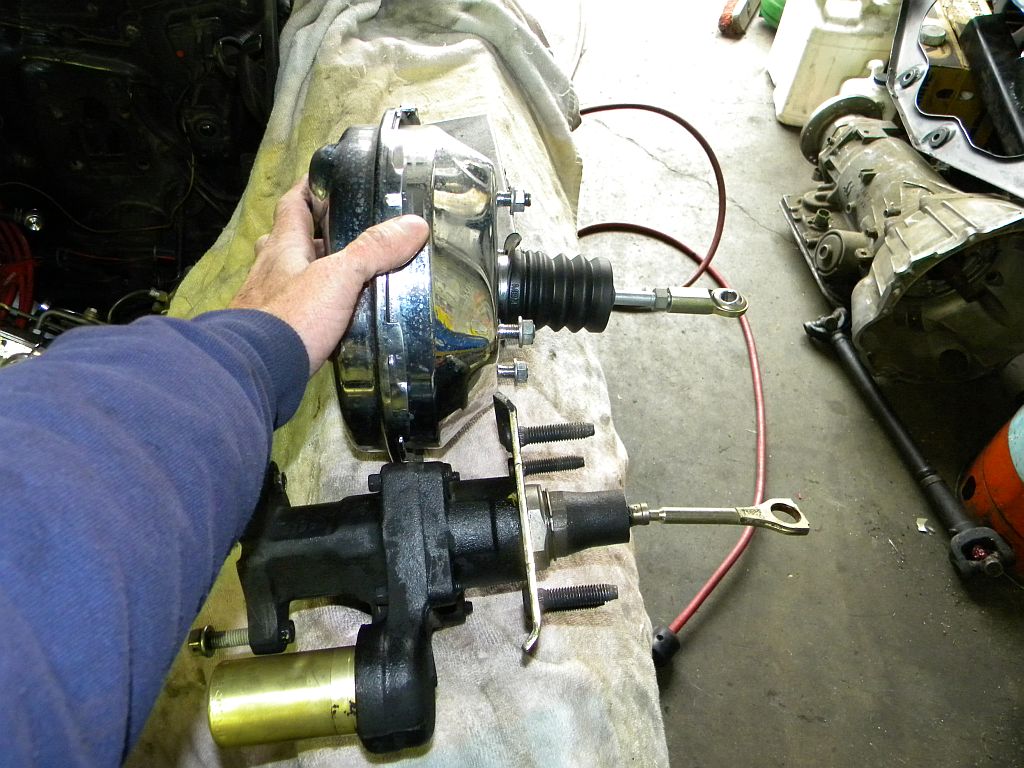
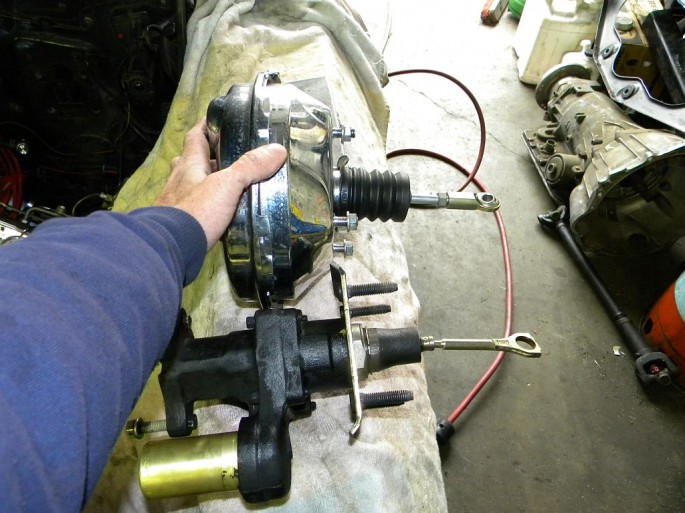
Now, some comparisons of size. First, notice that the hydroboost is longer than the standard vacuum booster. That is a consideration in your installation. You may have to make some adjustments to your brake’s hard lines. Also, important is the measurement between the firewall mounting surface to end of the pushrod. If the two are different by more than a half inch, you will probably have to do some modifying on the pushrod. Ours measured up within an 1/8th of an inch. In the second picture, the bolt pattern on the mounting flange of the Astro van’s hydroboost is 3 1/2x 3 1/2 inches, nearly identical to our CPP booster. A little work with the die grinder and a carbide bit opened up the holes in the firewall just a bit to let the studs of the hydroboost slide right in. One last thing to note. Because the hydroboost came from a late 80’s GM product, the bolts and nuts are metric. Make sure you get the nuts for the studs on the mounting flange and the master cylinder side when you rip it off from that Astro van.
Next, you need to mock up the set up to see if everything fits. We noticed that the hydroboost didn’t cover all of the hole left by the old vacuum booster. A piece of metal, a bit of trimming, and a minute with the mig welder and you have the extra hole plugged up. We ended up flipping the hydroboost upside down for clearance with the valve covers. They work any which way up.
Next up, we totally disassembled the power steering pump so we could modify it. The hydro boost has a return line just like the power steering box. We’ve seen installs where they just tee’d the two return lines together. Another option is to buy a power steering pump with a tank for a sbc with hydroboost. But, we didn’t want to spend the $90 at that time and all you get is another nipple on the tank. We drilled a hole in ours and welded in a steel AN fitting. We ended up having to buy a new power steering pump because ours howled badly. It always made noise, but adding the hydroboost made it really loud. We got a new pump, minus the tank, for $30 at Autozone.
This is where our cheap hydroboost install went off the rails in the cheap department. We went down to the local Earl’s store and bought $200 in fitting and high pressure hose. The car’s owner is well known for being anal and uptight about keeping his engine compartment clean and neat, so we’re not surprised he wanted fancy, schmancy fittings and braided high pressure hoses. You can save money by remembering to get those high pressure lines off the donor car at the salvage yard. A few adapter fittings from the late model high pressure lines to the old car power steering pumps and boxes and your set. You can also use the old pressure hose fittings and the new fittings off the hydroboost and then have custom high pressure hoses made for a more factory look.
Setting up the hoses is quite easy. The high pressure outlet from the power steering pump goes to the larger of the two pressure fittings on the hydroboost. Then the smaller high pressure fitting gets a hose going to the high pressure side of the steering box. Then connect the two return lines to the return fittings on the pump. Simple. No rocket scientist needed here. Just remember to get those fittings tight, or you’ll have a big mess on the floor.
The braided high pressure line doesn’t flex too much so we had to loop it up and over the hydroboost and then down to the steering box.
We added a couple rubber coated hose clamps to the looped hose for finished look.
One last thing. Our CPP master cylinder was a type with a deep plunger. Our hydroboost needed a master with a shallow type plunger. This is why we had no brakes at first. We really need to get the correct type of master cylinder, but ran out of time. So, we fabbed up a another push rod to make up the difference, but added a few washers to space out the master cylinder from the booster to fine tune it. It’s not correct, but it works fine. We’ll get the correct type of master cylinder ASAP.


Good article Scott
awesome
Nice article.
Another way to do the hose/pump thing – on my ’80 formerly Diesel pickup I simply retained the factory PS pump and transferred it to the BBB (yep, that’s Big Block Buick) using the BBB pump mounts. Most GM/Saginaw PS pumps will physically interchange so you should be able to snatch the pump & hoses along with the Hydroboost unit and you’re home free. I don’t think the yard would hit you too hard for the pump.
Dan
Yes, Saginaw pumps of the 70’s and 80’s are generally interchangeable. The only difference was the mounting brackets and pulleys. Though, sometime in there, pulleys went to press on style and that can get you in trouble.
Here in SoCal, the local self service yards have been getting pricey lately.
Yeah, nice article.
Great stroy Scott. I’ve been debating the hydroboost thing for some time and this si reall motivation to jump in. Oddly enough my 71 Ford uses the Saginaw 800 steering box just like your Impala. The folks at DSE told me the litle type II saginaw PS pumps will also work well with a hydroboost.
Did you gather any information on what has to be check on the units if anything while your at the boneyard.