


(Words and photos by Scott Liggett) – If you have ever tuned a car with EFI, one of your basic tools used is an AFR gauge. Did you know you could use the same AFR gauge to tune a car with a carburetor? We have seen a few hot rodders with them in their cars and read a couple articles on the subject; but not much else. We wanted to try it ourselves and Scott Liggett’s ’65 Impala SS was going to be the guinea pig. We borrowed a well used AFR set up from our friend, EFI tuning guru Scott Clark (Dieselgeek on the forums).
An AFR gauge, which AFR stands for Air/Fuel Ratio, uses an O2 sensor at he beginning of the exhaust pipe to read the ratio of air to fuel as it is being expended through the exhaust. It is a very useful tool for determining if your engine is running too rich, too lean, or just right. Many from the carburetor faithful will tell you that you only need to read the spark plugs to know if you are running too rich, or too lean, or spot on. While this is very true, and has been for near 100 years, the AFR gauge is easier and more accurate for the non-experts out in the gearhead ranks. Even though our car ran fine and didn’t foul out the spark plugs, we were prompted to start asking questions last winter when our ’65 Impala would start up and idle with very little effort and absolutely no choke when the temps were way below freezing. When summer came with its warmer temperatures and our car seemed sluggish, down on power, and was getting crappy gas mileage, we knew it was running rich. Scott Clark immediately started pestering us to put EFI on our Impala’s 383. We do have future plans for fuel injection, but right now, our meager budget meant staying with carburation for the time being. We decided to use what we have and make it run it’s best.
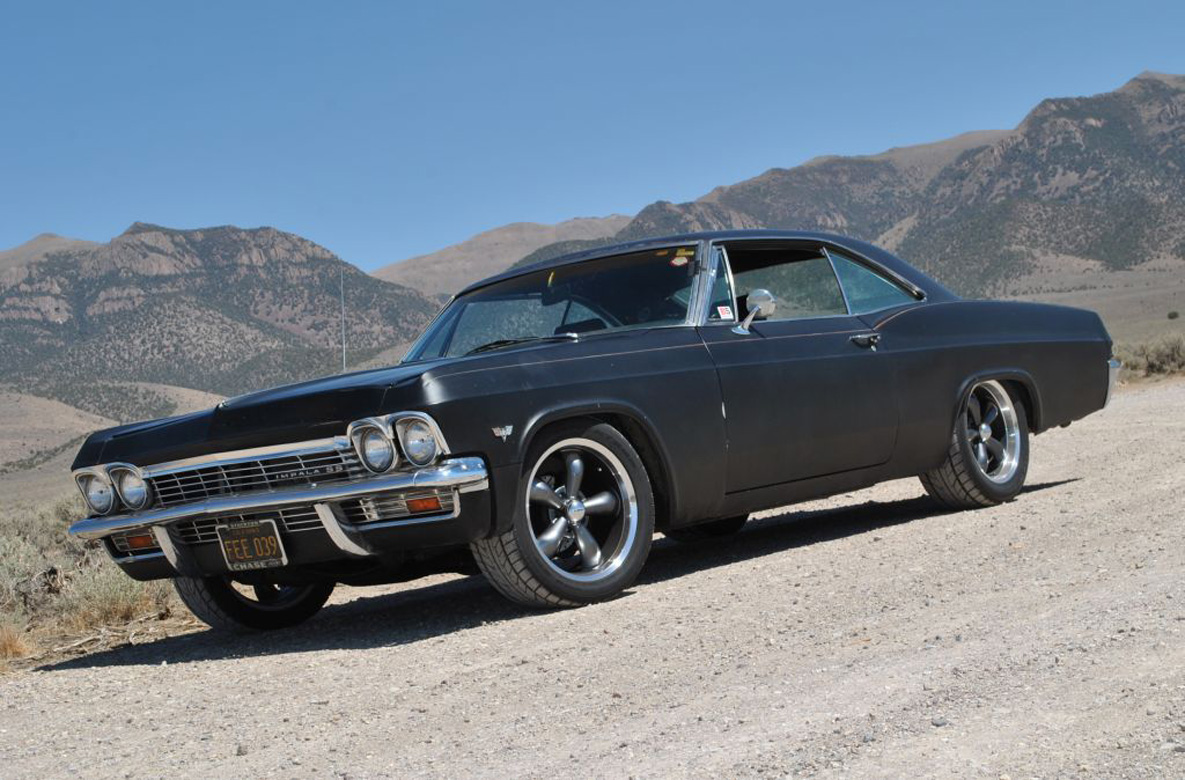
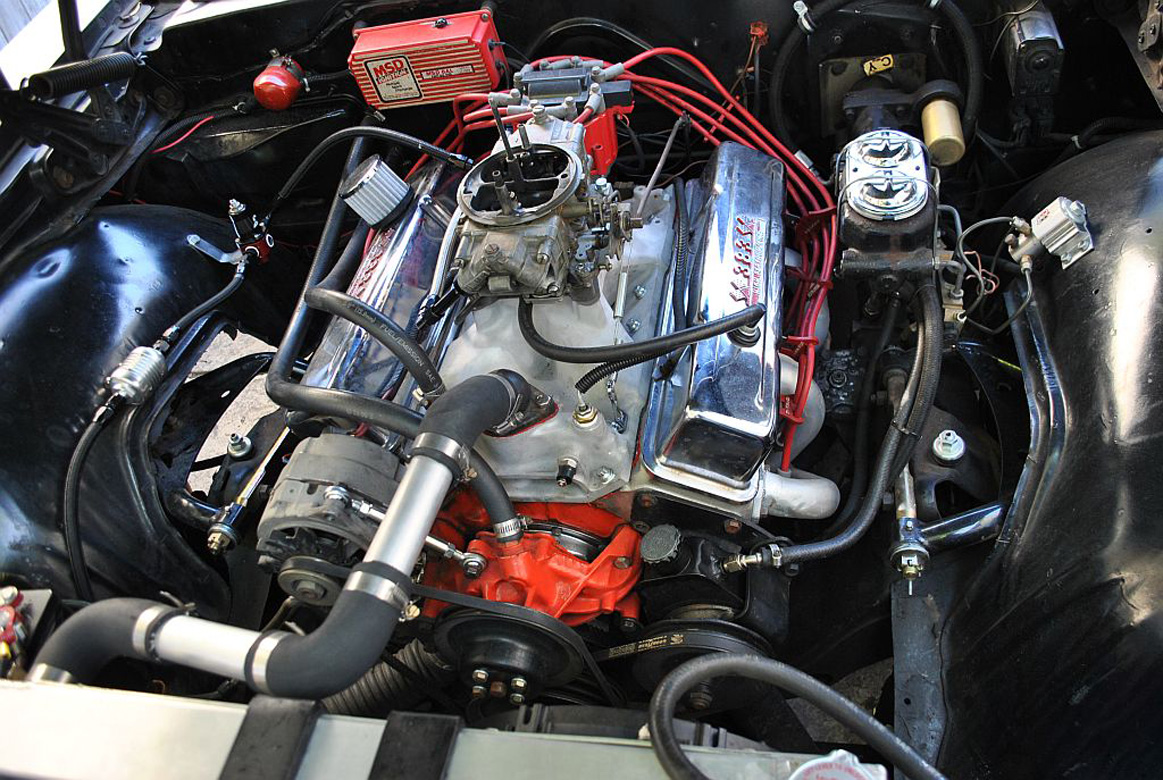
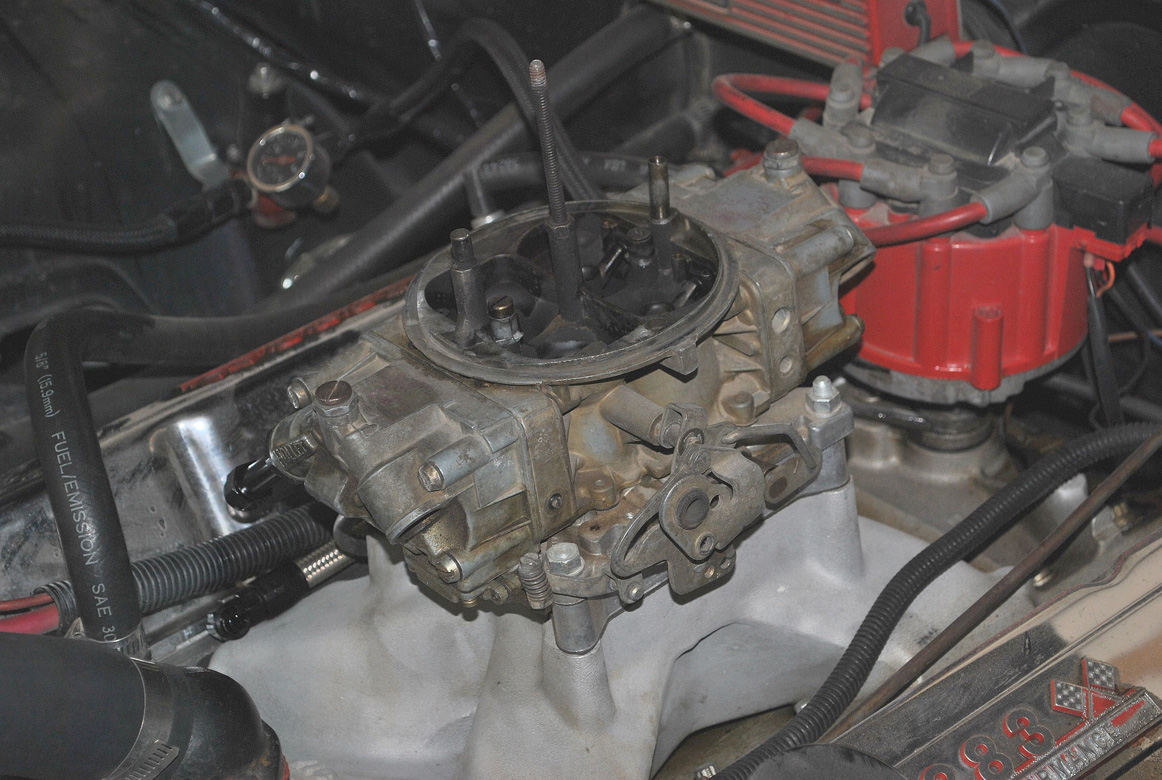
This is our test subject, Liggett’s 1965 Impala SS he bought in 1996 and drives non-stop. The 383 under the hood has had near 20 years of his abuse. Liggett has commuted in L.A. traffic in it, road tripped to NorCal dozens of times, drag raced it, autocrossed it, even taken it on Car Craft Magazine’s Anti-Tour five times. It’s our kind of muscle car, kind of beat up, but gets used and abused every day. There is a running joke among Liggett’s friends about how many carbs have been across this engine in 20 years. Somewhere in the neighborhood of 700. He used to part time rebuilding carbs for a speed shop in Sacramento and used his car and the 383 as a test stand. He has had everything from 390’s to 1050 Dominators on this thing. At one point, Liggett had five times as many carbs to cars to put them on. He has whittled that collection down to a total five carbs between his three vehicles.

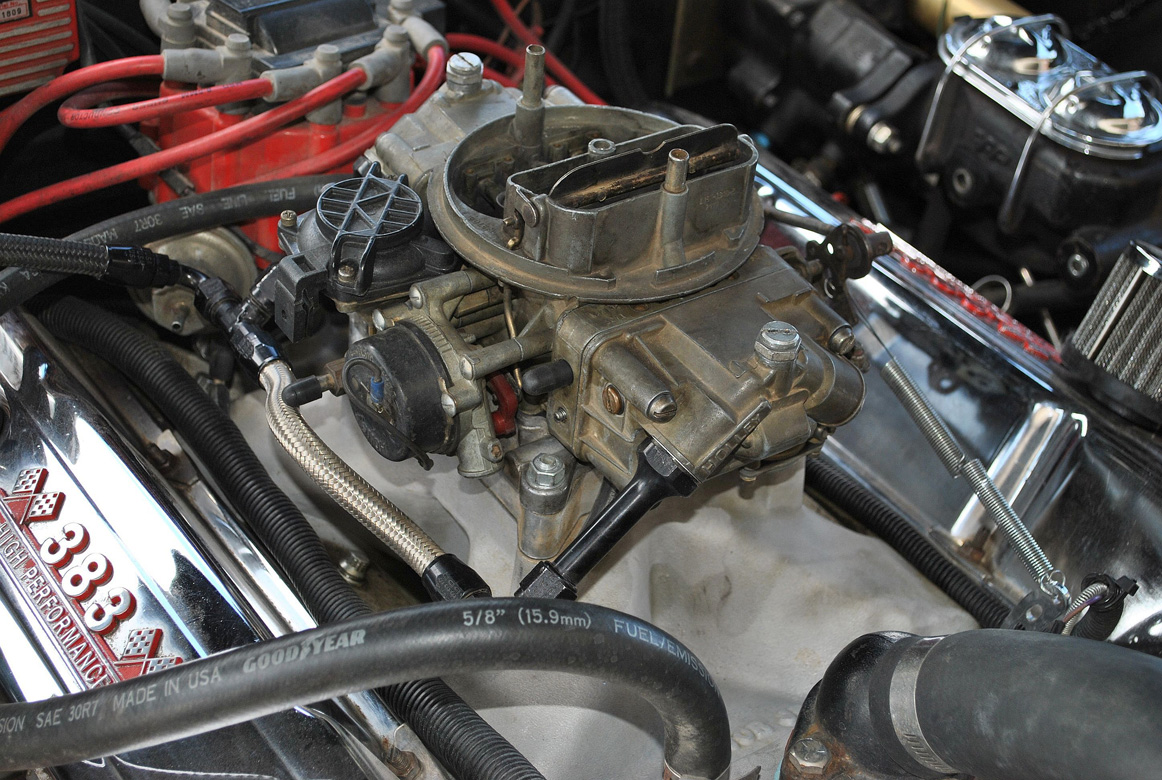
The 383 was built on the cheap and changed several times over the years. The rotating assembly is made up of a GM cast crank, GM 5.700” rods and TRW cast pistons. The heads are Edelbrock Victor Jr’s with a Comp Cam’s Xtreme Energy hydraulic roller camshaft XR288HR with .520/.540 lift, 236/242 duration @ .050 with 110* LSA. The intake is a Edelbrock Victor Jr. Ignition is handled by a MSD 6AL box, an old Accel HEI distributor that has a MSD cap, coil, wires, etc. Exhaust is exited by custom made 1 ¾” primary headers to 2 ½” pipes to Flowtech Terminator mufflers. Liggett had been driving on this old Holley 750 double pumper for quite some time and 36* total timing. It has been on the chassis dyno twice and made 325 hp/360 tq to the wheels.
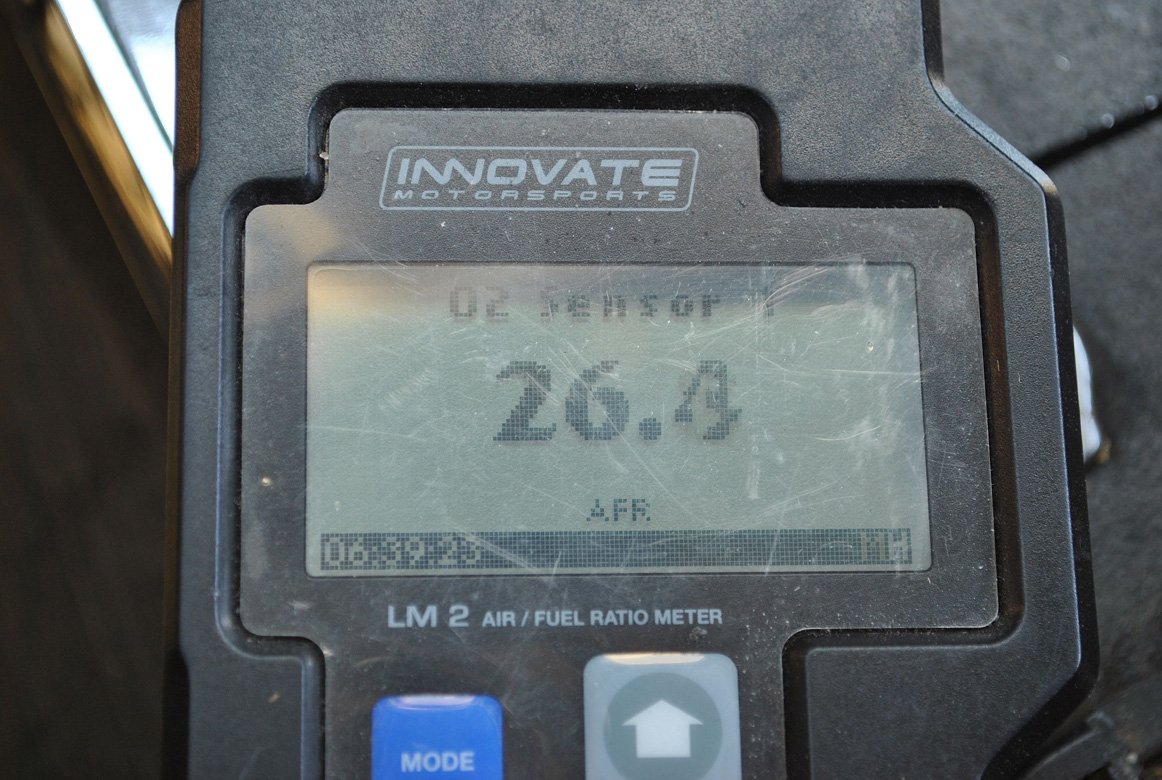
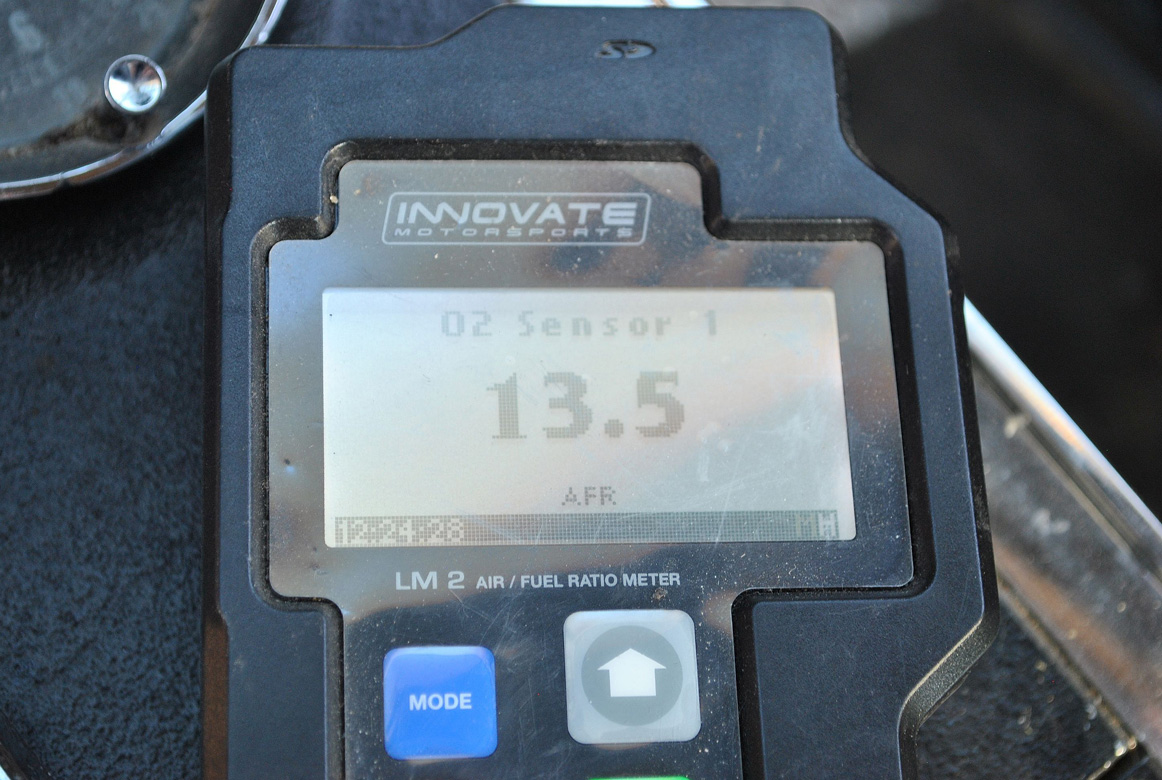
This is the borrowed Innovate Motorsports LM2. As you can see, it has gotten a lot of use. It also shows how useful this tool is for tuning your hot rod. As you can see, there are several ways of connecting to power on a car so it can be used on many different set ups.


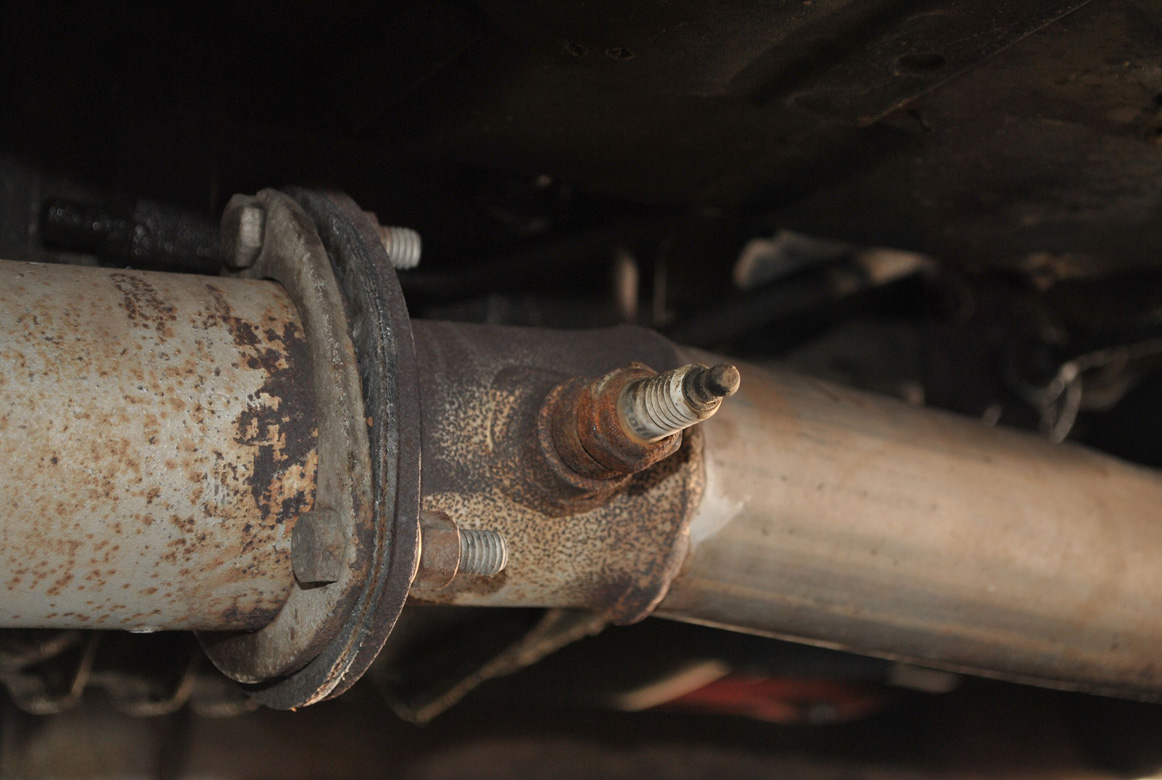
First thing to do is getting it connected to your car and power it. Liggett bought header collectors that had an O2 bung already welded in when he was building his headers. If you don’t have this set up in your exhaust, welding in an O2 bung is relatively easy and straight forward. Liggett used a spare spark plug to plug his O2 bung when not in use.
The wideband O2 sensor that is included is screwed into the bung.
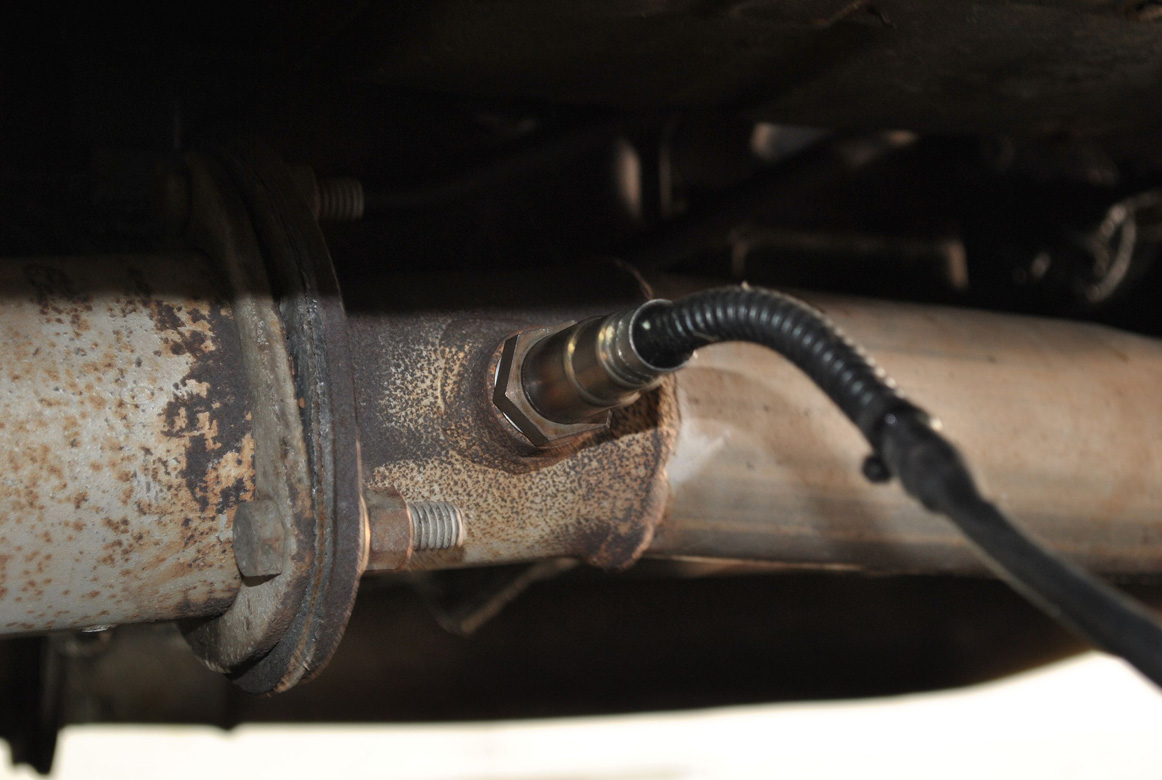
The O2 sensor’s wire lead is nice and long, so it will need to be tucked up out of the way. Since we were going to be testing on the road, we zip tied the wire lead and the wire plug that goes to the handheld to his transmission crossmember.


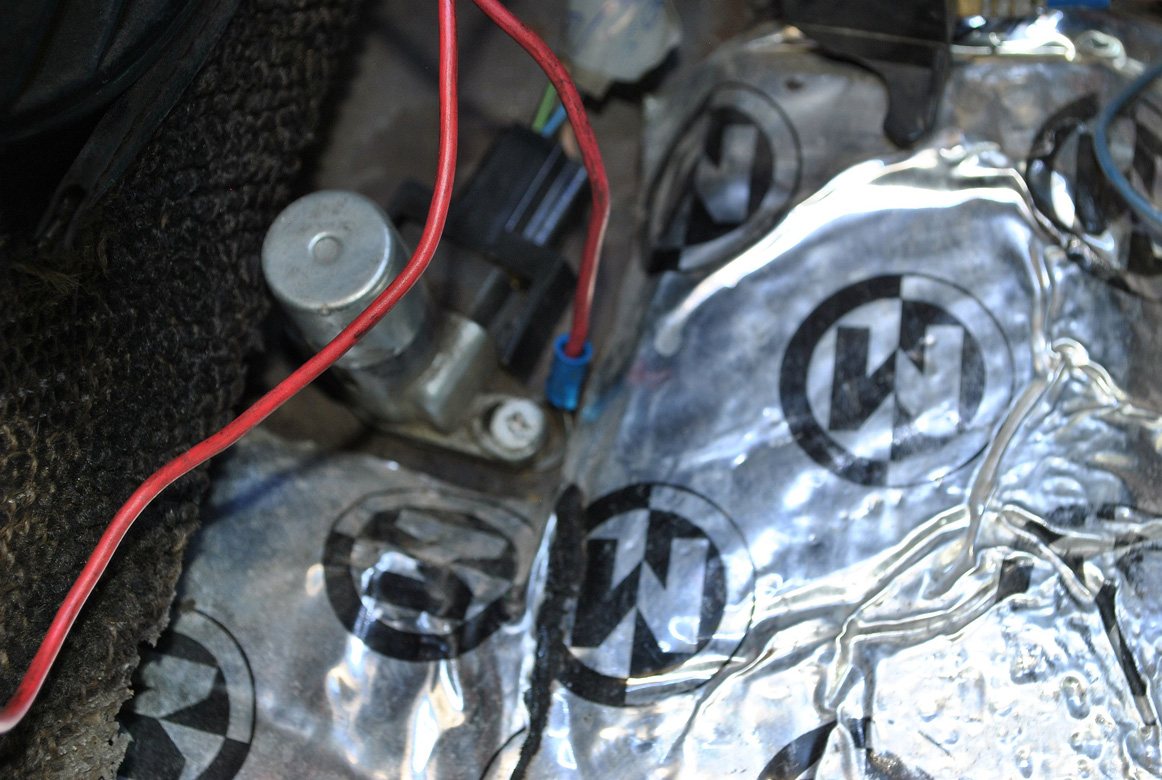
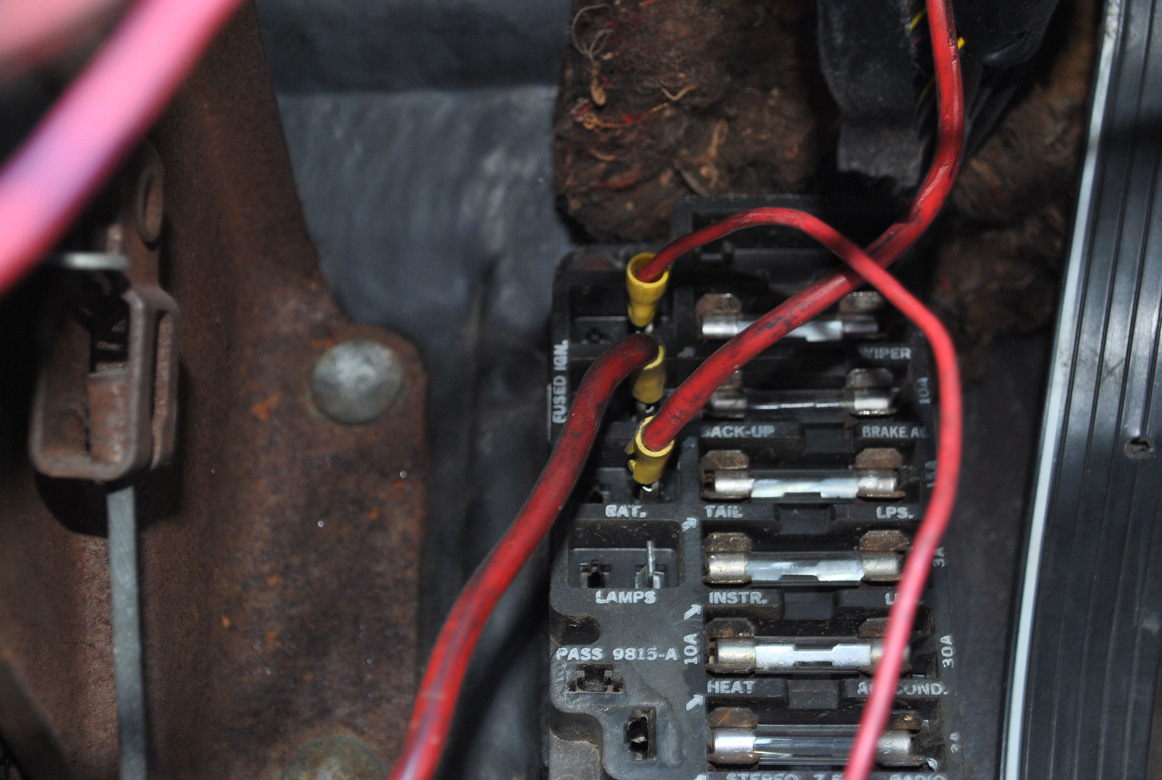
Next, you need to power the handheld. We connected the negative wire under the bright light switch on the floor. Then we used the auxiliary terminal on the fuse block. The top red wire in this picture. It has fused power when the key is in the on position. This way the AFR’s handheld has power when the key is on. We left it plugged in like this for near two months while testing and driving. We ran the wires up over the steering column behind the dashboard and over to his console where he kept the handheld.
Turning the key to the ‘on’ position, the O2 sensor will start warming up. It should read around 26 on the gauge. You are now ready to fire the engine.
Firing up the car, the gauge settled into a 9.5-10.0 readings at idle, which is ridiculously rich. The ideal AFR readings at idle should be between 13-14:1. No wonder it would idle in freezing temps with no problem. Driving didn’t change the readings much. You should test the car’s AFR readings at idle, cruising speed, and at wide open throttle. Liggett lives in a small town, so finding a place to mat the gas pedal is no problem for him. His old 383 got wound out to 5500 rpm a couple dozen times during this testing. Full throttle runs at the drag strip are a better and safer place to do this kind of testing.

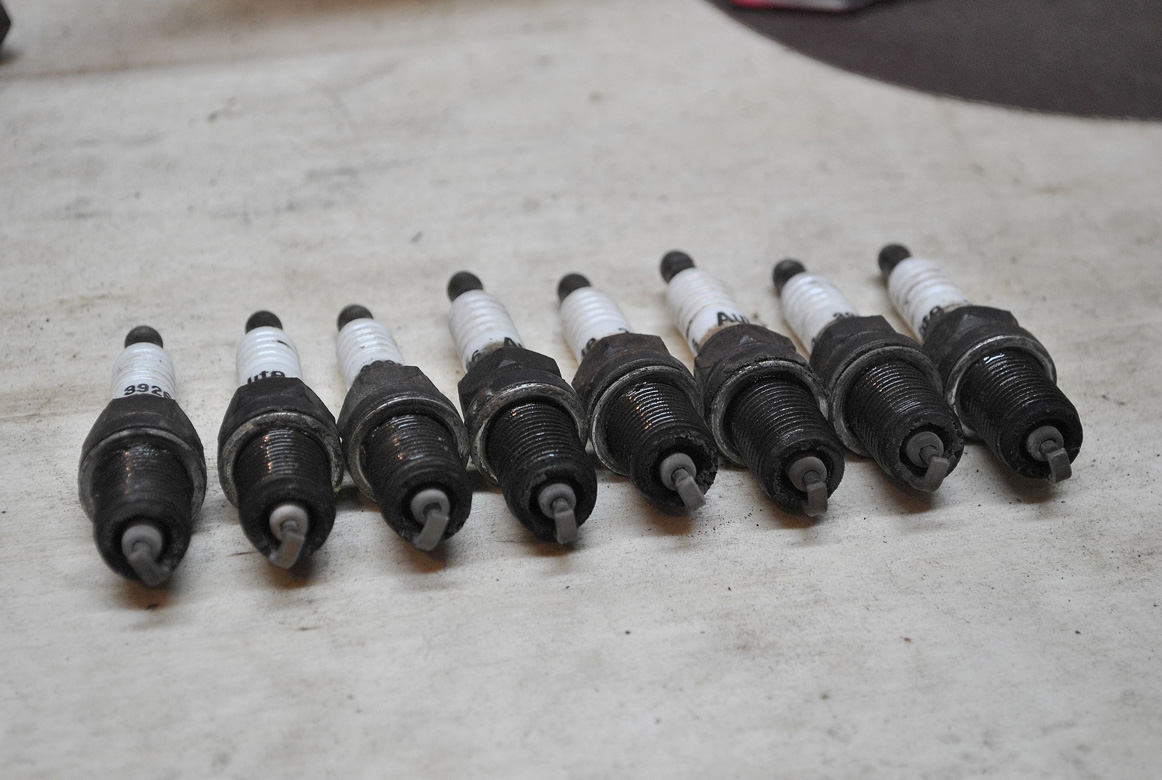
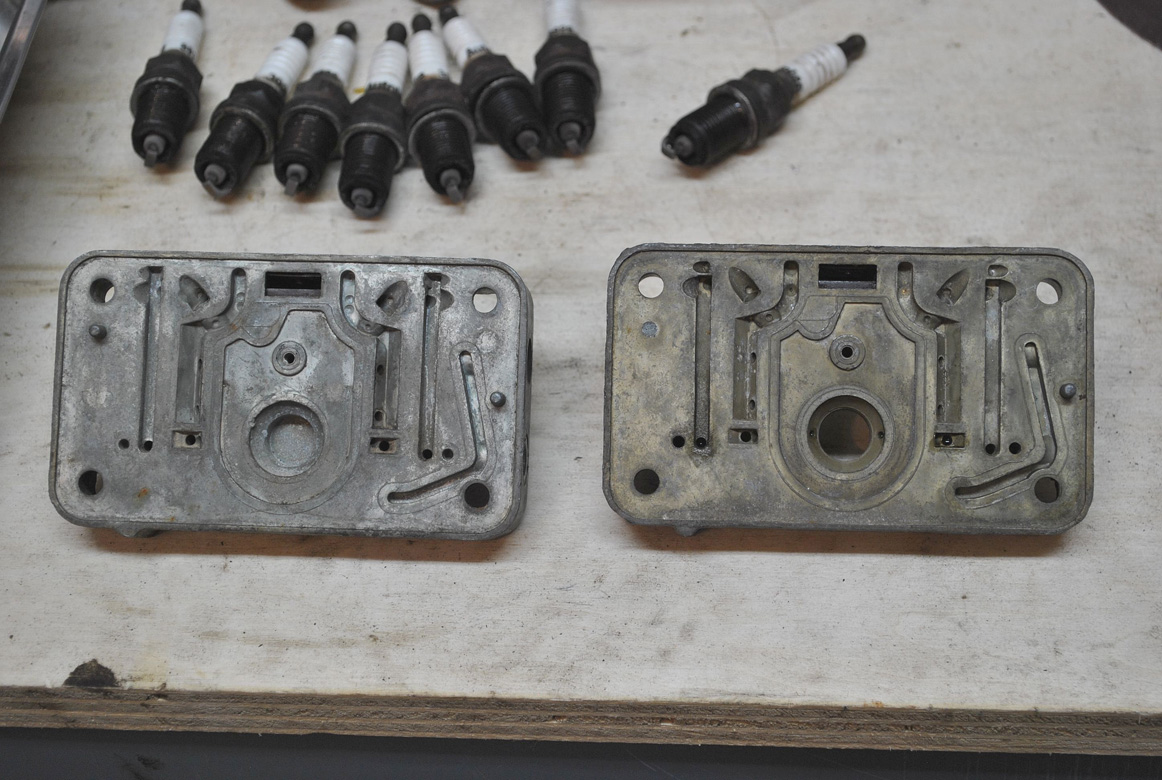
When pulling the spark plugs, we could see that they also showed the engine was running rich, but they weren’t gas fouled that we were expecting with the readings I was getting on the AFR gauge. With 10:1 readings instead of the ideal 13.5-14.0 readings, I was looking for the plugs to be drowning in gas.
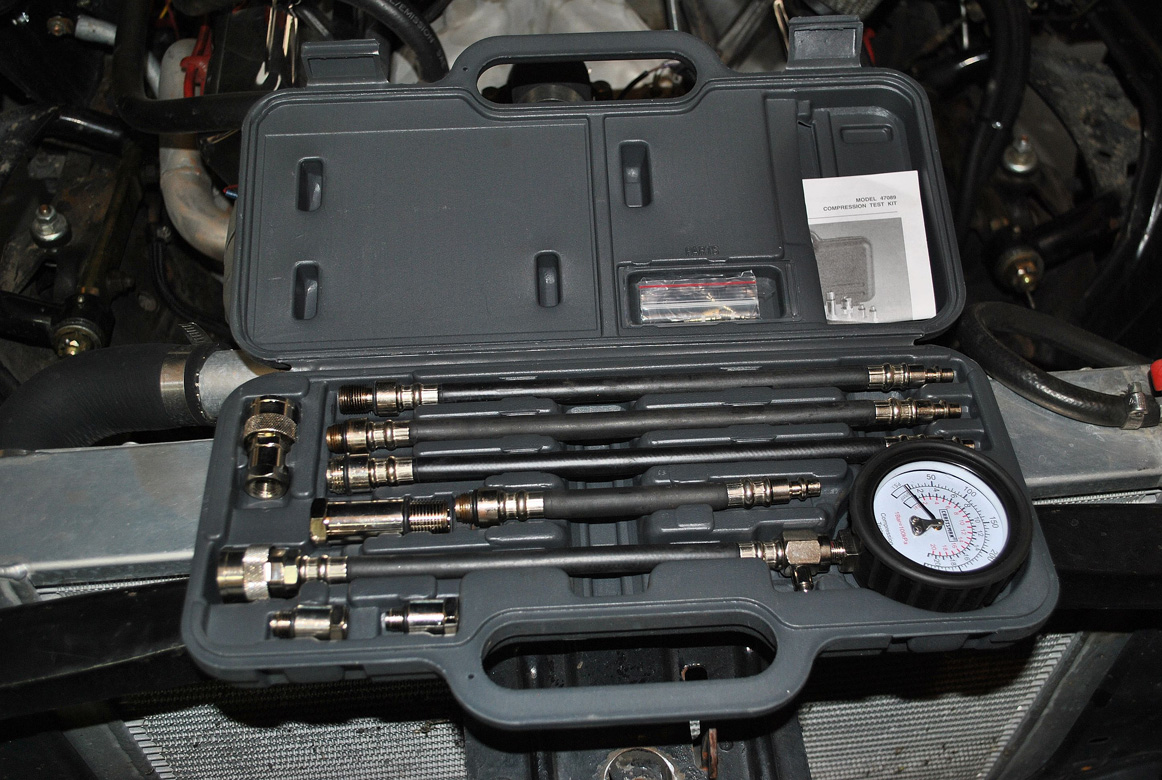
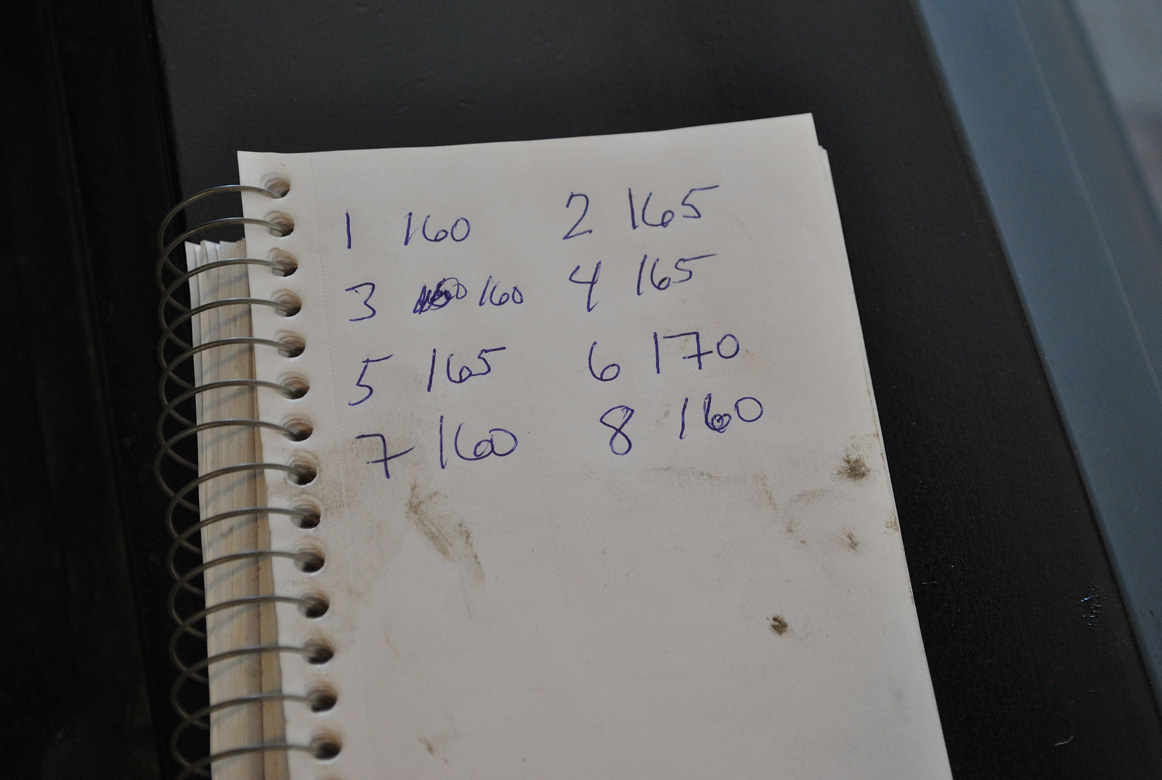
At this point, we decided to take a step back. My 383 has near 100,000 miles on it. Even though it still runs strong, We thought we had better see if still has any compression. So, we got out a Craftsman Compression Testing tools. The testing showed the 383 still has decent compression with all the cylinders between 160-170 psi.

Back to fixing this ancient, over rich Holley 750 double pumper.
The first place to look on any old Holley is the power valve. If it’s bad, the car will run pig rich. The power valve is behind the front the metering block. An easy tell is the well behind the power valve all full of fuel. It was dry, meaning the power valve wasn’t blown or leaking.
We then went to tackling the idle circuit. The idle circuit moves fuel all the time the engine is running. If the idle circuit is running rich, then the carb will never be right. Turning in the idle mixture screws did not affect the AFR readings hardly at all even screwing them in would stall the engine. This means engine needs less fuel or more air in the idle circuit. You have a couple choices here. One is to drill out the low speed air bleeds, or reduce the fuel flow in the emulsion tubes. I didn’t feel like drilling out the carb’s air bleeds, so I did the crutch repair by using .022″ thick wire in the lower emulsion holes in the metering block. This cut off some of the fuel to the idle circuit and I was able to get an AFR reading at idle to 11.5. Not great, but an improvement.


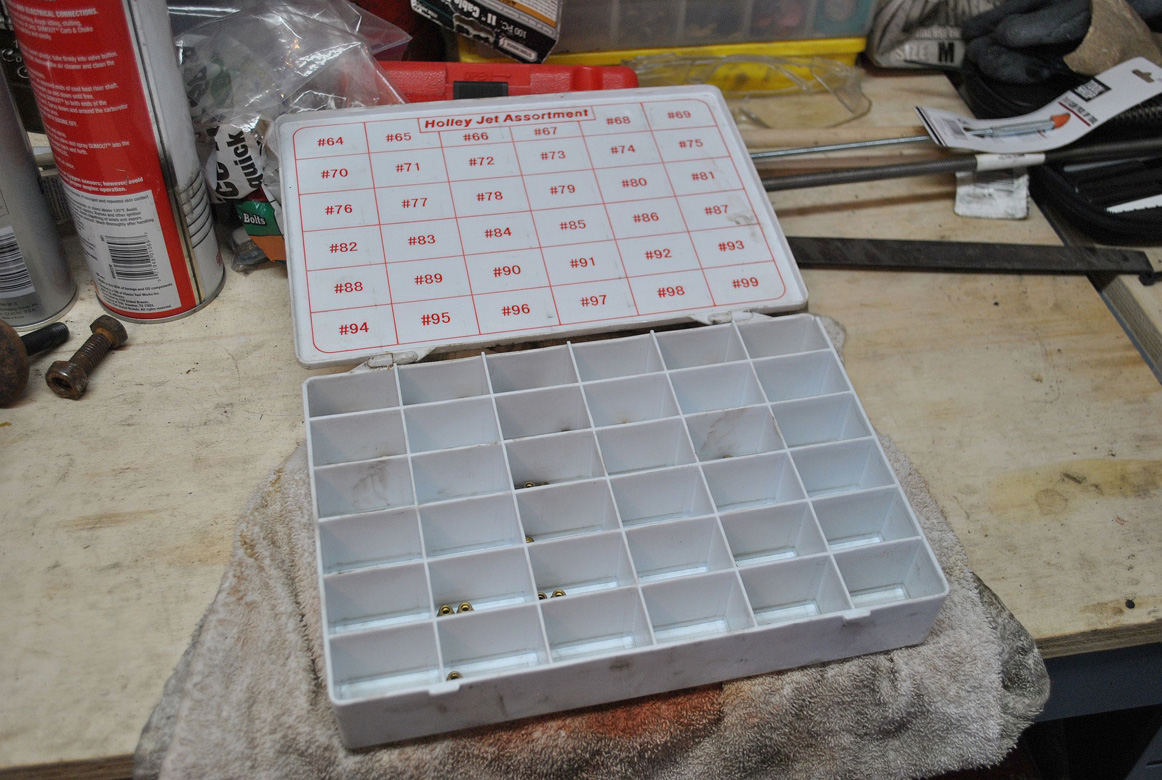
We dug out the spare parts box I have and the jet assortment kit and down jetted the carb from 76/80 to 70/76. That is a huge drop, but it showed how over jetted the carb was all this time. But, the readings didn’t change. They bounced around 11-12:1. Something else was wrong with that old 750.

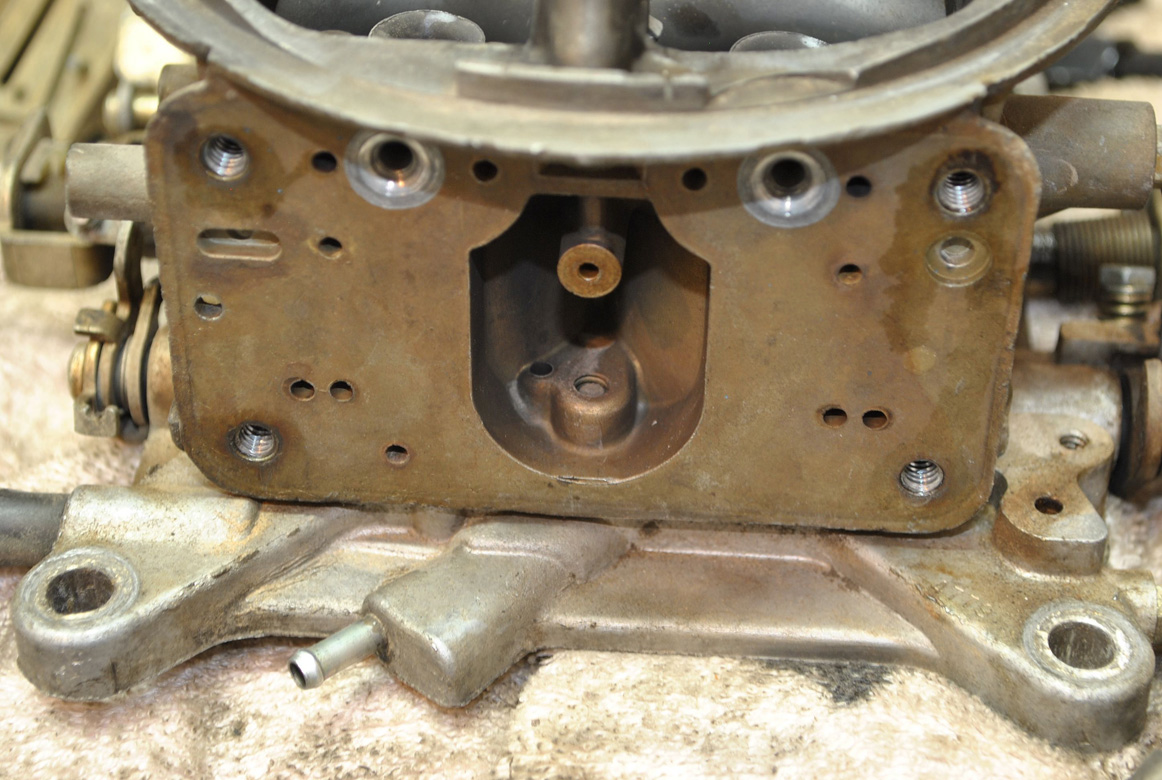
This 750 double pumper had provisions for a rear power valve in the metering block. I was using a plug because this engine is snotty enough to need that kind of enrichment under hard acceleration. Power valves opening up is the equivalent of 9 jet sizes more fuel. We suspected my problem was the rear power valve plug was leaking fuel. Pulling the rear metering block off showed fuel getting behind it; but I also noticed the main body was drilled for the fuel to pass through.

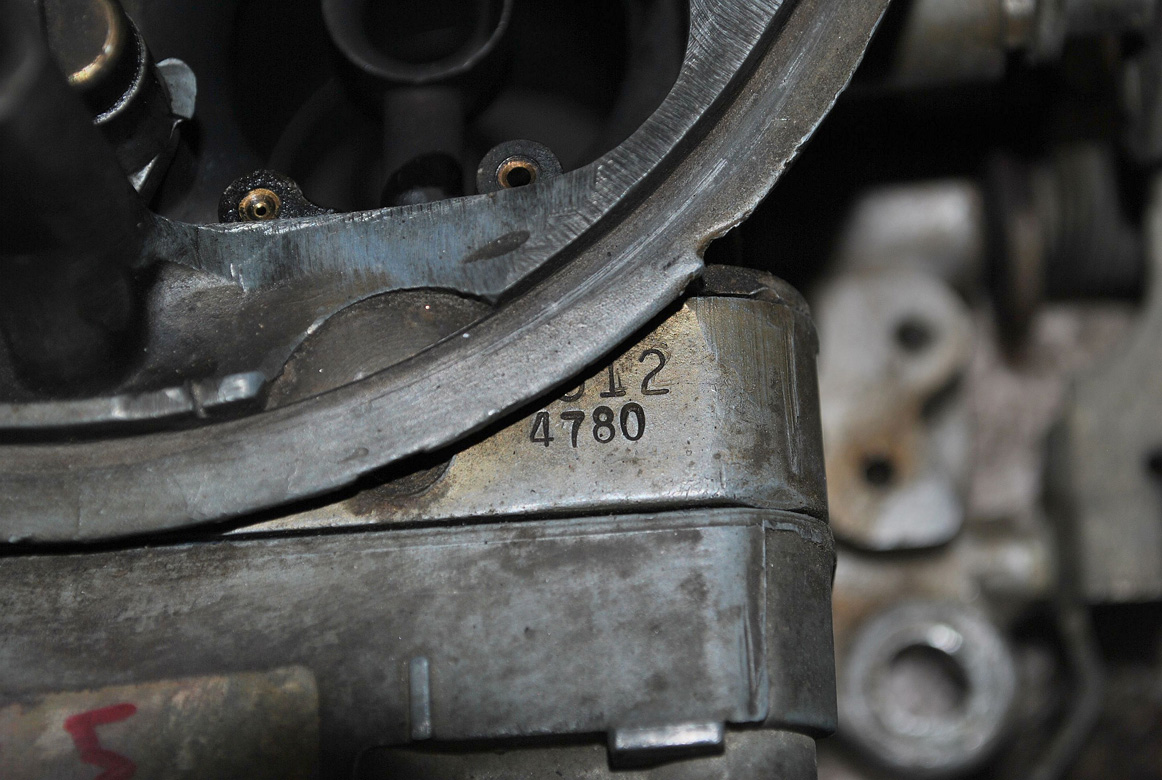
Old carbs bought at swap meets are always a gamble. I got this one from a friend. It had a choke horn on it when he got it, but it was cracked and bent from someone dropping the carb at one point. So, he removed the choke horn. It list number was 4779-2. But, we noticed the metering blocks were stamped 4780. They were for a 800 double pumper. That explains the rear power valve. It also shows that a previous owner did some parts swapping to get a carb that works. The carb’s base plate was stamped 4779. These stamped numbers are not always gospel for correct carb identification, but the throttle blades measured correctly for a 750. Holley carbs are often not stamped at all.

I dug into my spare Holley parts pile and found he had a pair of matched metering blocks for a 700 double pumper, list 4778. More importantly, the rear metering block doesn’t have power valve provisions to match the main body of his 750. The results were that we got our AFR’s up to 12.5:1. We kept trying to improve it by dropping the main jets all the way down to 68’s, but at freeway speeds, the readings were getting into the 16’s. That’s a recipe for detonation from a lean condition. The results could be destroying your pistons. Not good. So, we settled for the 12.5:1 readings is about as good as it will get with this old double pumper. Still much better than where we started.


Even though we had made great improvements on our Holley 750 double pumper and the ’65 Impala had much crisper throttle response, especially in hotter temperatures there was still work to be done. So, we dug into his carb collection and found a 750 with vacuum secondaries. We rejetted with size 70’s. Since the Impala is portly, we got out the supply of secondary springs and used the heaviest one. Even though we were able to get the AFR’s in the 13’s at idle and high 12’s while cruising, full throttle was still a bit on the rich side with low 12 AFR’s.


We didn’t stop there. Liggett borrowed a brand new 750 vacuum secondary, Holley part number 0-3310S. All we did is put 70 jets in it and bolted it on his 383. Out of the box we were rewarded 13.5 readings across the board, idle, cruise, and full throttle.

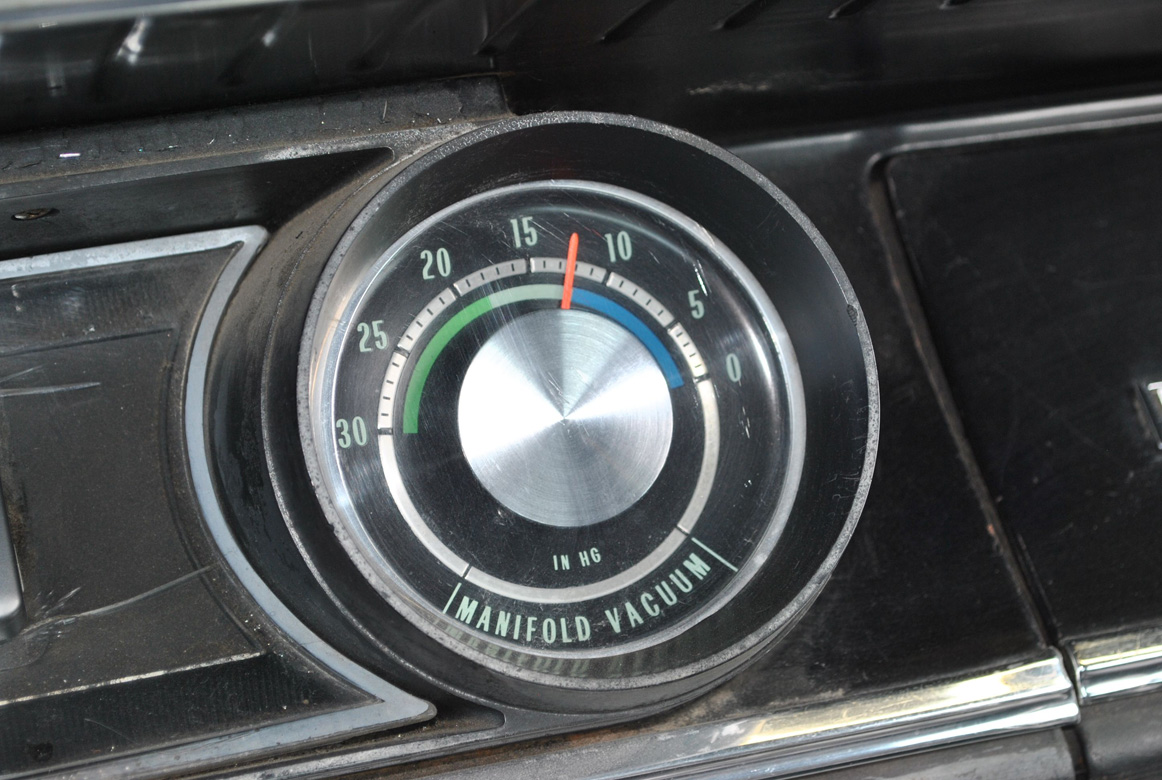
Throughout testing we kept the idle speed right at 1000 rpm. Even when we started and the car was running super rich, idle vacuum was right at 13″ hg vacuum. The old way of setting idle mixture by the highest vacuum reading doesn’t mean it’s running at the right air/fuel mixture.

What did we learn? Largely that the car can be running fairly decently and the air/fuel mixture be far from ideal. The 10 mpg average we had all summer increased to near 15 after these changes.


Great write up!
So are you saying I should stop buying carburetors at swap meets?
I think I have an addiction.
I can’t pass up a good deal on a reasonably fresh looking carb. I do try to stay away from the really crusty ones.
Did you ever find a solution for the double pumper?
I would be a hypocrite to tell you to stop buying carbs at swap meets as I am totally guilty of that. Being careful of what you are buying it a good solution. I got that one for free from a friend. Not everyone has the dough to buy brand new carbs, but with a little work an old can work great. That crusty old 3310 works fantastic. I have it on four cars.
I got the idle circuit really good on it and the full throttle was right at 12.8:1 to 13:1, but the cruise circuit was still a bit rich in the low 12’s, 1500 rpm, on city streets, but leans out at freeway speeds, 2200 rpm. The cause is most likely my crutch fix on the idle circuit which I need to solve correctly.
For V-8 engines with dual exhausts and no H- or X-pipe, do you recommend installing two bungs (one on each side) & measuring AFR on both sides? Or just one bung on one side and assume AFR on the unmeasured bank is similar?
If I have an H- or X-pipe, should I install just one bung on the H crossover where both sides’ exhaust gasses mix together?
Maybe I’m overthinking this?
The basic premise is you are assuming the engine is healthy and running fairly balanced bank to bank, so it shouldn’t matter which side you install it on.
Randall is correct. Only one O2 sensor is necessary for this kind of testing. Working on an unknown engine, a compression and leakdown test should be done first in order to determine if the engine is healthy. That way you are not getting weird readings.
Nearly all the aftermarket AFR testing and kits for mounting a permanent gauge only use one O2 sensor. Everything I have read says to mount as close to the header collector as possible whether or not you are running an X or H pipe.
If you have 2 carbs, it depends how far apart the carbs are from each other…
In my case it’s about 3 ft, so dual AFR gauges were much more helpful;
https://www.youtube.com/watch?v=Zexa9vfAm2M
😉
BBM, your engine big block Mopar with a separate four barrel for each bank of the engine on that long ram intake manifold would require two AFR meters…… Unless you had single exhaust. HA!
Good interesting write up.
You do tend to jump between writing 1st and 3rd person.
Sorry about that. My copy editor quit on me.
You just had to show off that car. 65 was my first car and I’ce regretted selling it ever since. Nice write-up, especially for those of us who learned to tune via tail pipe. Love that car,man. Just love it. The only Chevy I’d be proud to own.
Where did you get the reference for the number on the metering block. Im going to try the wire trick. I know mine is rich at idle.
The list number is sometimes stamped on the top right of metering blocks along with a manufacture date. I have found they are not always stamped with the list number, just the date. See the pictures above for what they look like. If replacement metering blocks were ordered from Holley, they will not be stamped for sure. I replaced a few over the years when they were so corroded, they could not be used.
Scott,
Sure ive seen the numbers but can you get the info from the Holley catalog or is there a chart on the net someplace?
The back of Holley’ printed catalog has all the list numbers in the back that shows the stock jetting, power valves, etc.
It’s on their website as well. I can’t post links here. But, go to the support tab, then down to Technical Support, then Resource & Documents, the Carb Numerical Listing.
get yourself a 6-32 tap,some pin drills and a bunch of brass 6-32 set screws, its way cheaper than a billet block. you can add a couple emulsion holes and fine tune the ifr and power valve circuit for razor sharp throttle response and damn good mileage.
this was extremely informative.
think I need to go pick up an Air/fuel gauge and weld an O2 bung to the exhaust
Great read guys! I learned something today. I really had no idea what emultion tubes did. I’m a VW guy and had a set of dual Webers on my bug in college and it ran great under full load plug check but would always load up at idle. Maybe that was the problem. Once again good article.
Very timely article… I’m in the process of pulling the CCC system off my Monte and putting a mechanical Quadrajet in it’s place as well as a programmable MSD box and distributor. I just picked up an Innovative LM1 AFR as well and am installing it permanently to help tune the Q-jet to perfection. With a box that lets me put whatever timing curve I want into it along with a AFR gauge to dial the carb in, it should be every bit as much tunable as the $3,000 EFI setup I originally wanted to use to replace the CCC setup. Thanks for posting.
Nice article. I’d like to see something similar for a Q-Jet. I’ve had the bushings redone. But still doesn’t run quite right. Not sure if the plugs under the fuel well leak. I remember reading an article Jb weld is the fix for that. But not a firm believer in JB weld. Thanks again though for the write up
The carb basics are the same for any carb whether it’s a Holley, Q Jet, Edelbrock or just a 1 bbl on a six cylinder. Start with the idle circuit because it runs continuously. If it is running rich, then all other fixes are just crutch fixes around that problem. Then cruise jetting, then full throttle, then solve any hesitation off idle. There are plenty books out there to how to solve these issues on a Quadrajet.
Where do I start?
Some interesting information and observations, and you doubtless improved the car you were working on. But there are huge assumptions made here that might send folks off in the wrong direction.
First is the relationship between cruise mixture and WOT mixture. You can often run far leaner than you are at cruise, but not much on WOT.
The relationship between the two is largely the result of the power valve channel restrictions (aka PVCR) that are drilled behind the power valve. They are NOT all the same, do not all relate to 9 or 10 jet sizes in all (or even most) carbs. As an extreme example, the ones used on an earlier Dominator were .093 diameter and accounted for nearly 50% of the WOT fuel load, and required a special gold colored high flow power valve. While these can be a PITA to make smaller, they can be drilled to add WOT fuel, allowing a smaller jet for leaner cruise – kinda what you are trying to accomplish.
I have installed an AEM UEGO setup on my 1972 c10. It helps out so much you wouldnt believe, the gauge is digital and very easy to read. It has made diagnosing mixture issues incredibly simple.
Scott,I have a question.Wouldn’t the wire go into the little brass Idle feed restriction in the bottom of the metering block instead of where they are in your pictures? Does it matter? A friend of mine says it should go there (Idle feed restriction) in a U bend under the gasket.