This update is all about the motor. Last fall, as you’ll remember we had the stock iron 083 heads worked on at the machine shop with a valve job, some mild port and bowl work, and a slight cut to try and eek more compression out of the engine. The car certainly grew some hair on its chin when we re-installed those heads and we flogged on it all summer with that setup, largely unchanged from when they were bolted on as the snow was starting to fall around Thanksgiving. After consistent beatings on the street, attacking the autocross, hitting the drag strip a couple of times, and generally driving the car all over the place, it was time for a change. For starters we wanted to take some weight off the nose of the 4,000lb (with driver) car to help improve handling and we wanted to add more performance and horsepower because we’re us. Additionally, we wanted to spruce up the engine some because we’ve always thought it was kind of cool to have a haggard looking car with a tidy and nice looking engine. A call to our pals at Trans Dapt netted us the pieces to help that end of things improve. We turned to Trick Flow and Trans Dapt to help us on both of these fronts.
In typical fashion the install of the heads had a couple of small twists and turns because we’re ham fisted, but overall they went on fine. Not to spoil the ending, but boy is there a significant difference between the “before” and “after” feel of the car! This story will strictly cover the install of the heads and the cosmetic pieces. The next installment will include a trip to the drag strip to test the performance of these new heads over the iron pieces that we removed. We think that so long as we’re able to get the car to hook, a significant improvement in elapsed times will be our ultimate reward from these changes. It is exceptionally more fun to drive on the street with huge gains in power all over the place, especially in the mid range.
So, as we like to around here, we’re going to tell you the story through photos and captions. Scroll down to see how our Trick Flow Super 23 175 heads and Street Burner intake manifold cranked up our performance and how the Perfect Match parts from Trans Dapt made it the prettiest belle at the ball.
Check out Trans Dapt products by clicking here
Check out Trick Flow’s products by clicking here
SCROLL DOWN TO READ ON! IT IS TIME TO RIP THIS SUCKER APART YET AGAIN!

So here’s our patient. Most of this you already know but here goes. The engine is 355ci and in this photo wears a Weiand Street Warrior intake, 083 heads with a valve job and some port work, .015 shim head gaskets, and a Holley 650 mechanical secondary carb (double pumper). It has been like this all summer and run like a top. Best pass at the drags was 14.66 in the mid 90-mph range.

I have had this engine apart multiple times for stuff like this so breaking the motor down, or at least the top end of it was no biggie. The engine bay may be ugly but there is plenty of room in there and virtually all of the extraneous junk has been eliminated.
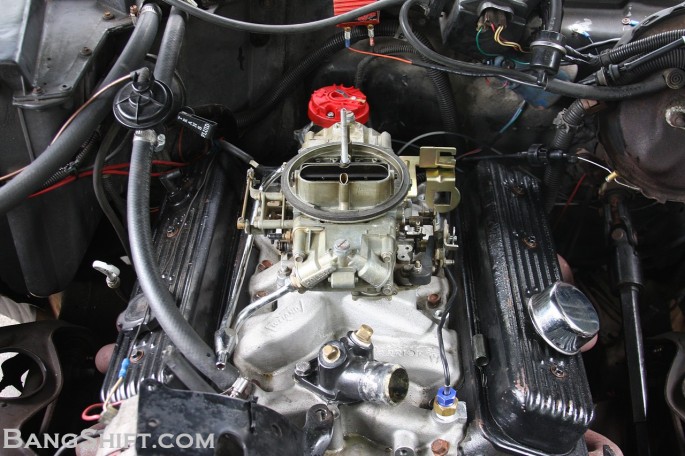
Not just concerned with the output of the engine, we were also concerned with making it look better. While the valve covers we resprayed black looked OK, the thing really doesn’t have a lot of personality here.

In order to head off the email stream at the pass, those plastic trays in the valley are LS lifter retainers. They can be bought at any Chevy dealer for like 20 bucks a piece and they allow you to perform a cam swap on a traditional small block without removing the intake. We’ll be stabbing some different cams in here next Spring for fun, hence the reason for their use.

Not like we have driven 50,000 miles since bolting these heads on, but it was cool to see everything all clean, nice, and happy in there. We kept the rockers and reused them with the new heads.

The COMP Magnum roller tip rockers will re-appear down the page, but the beehive springs will not. They are staying with these heads and we have another engine build idea that these would be great on. Stay tuned for that this winter.

Here’s the scene with the pistons which were still looking like their lame dished selves. Remember, this engine was rebuilt at some point and the 40-over rebuilder pistons aren’t exactly performance pieces. That’s where the Trick Flow heads come into play. They have smaller chambers that will give us more compression…which we really need. Why? Because we do.

The first thing we did after cleaning the deck off as best we could was to chase all of the head bolt holds with a tap. We wanted to make sure all of the old gasket sealer and gunk were out of the threads before torquing the new heads down. Stuff like this is important to take the time and do. Why? Because these new parts are valuable and if you want them to do their job correctly, you have to set them up for success. Trust us, this is worth the extra time it takes.
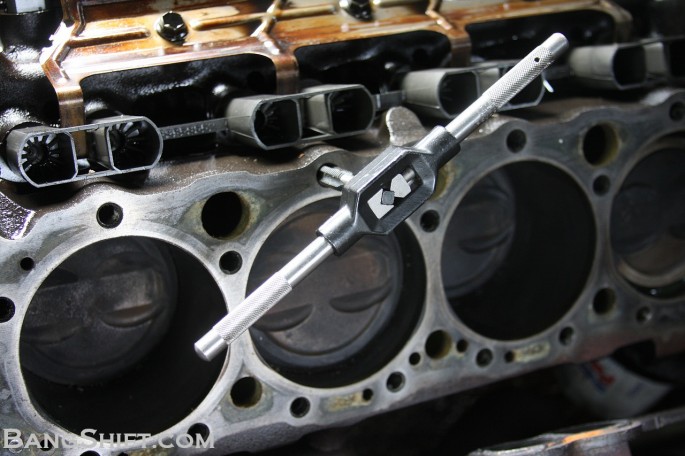
We were able to extract some gunk and grime from the threads. Is that to say we wouldn’t have gotten a good seal? Maybe…maybe not. We’re just glad to be eliminating the chance element in the equation.

Here’s the new stuff! When we talked to Mike Downs at Trick Flow about our combo and what we were doing, he recommended the Super 23 175 head. This is a very basic performance head and is certainly something that would be considered “entry level” performance-wise. It is the smallest head in Trick Flow’s Chevy line up but for our application which is relatively low RPM and needing torque in the all important low and mid-range, this head is just right for what we need. We’ll get into some specifics as we head down the page, but just the weight reduction over the iron pieces is significant.

Even with the work done to the stock 083 heads, we didn’t have near the compression we (or the camshaft) wanted. One of the reasons the 175 head was a good choice for us was its small 56cc combustion chambers. There are few aluminum heads on the market with less than 60cc so this was a positive development for us. With the dish in the piston, combined with its depth in the hole, the car had just over 9:1 with the iron heads. With these smaller heart shaped chambers, we jumped significantly right up to the 10:1 neighborhood.
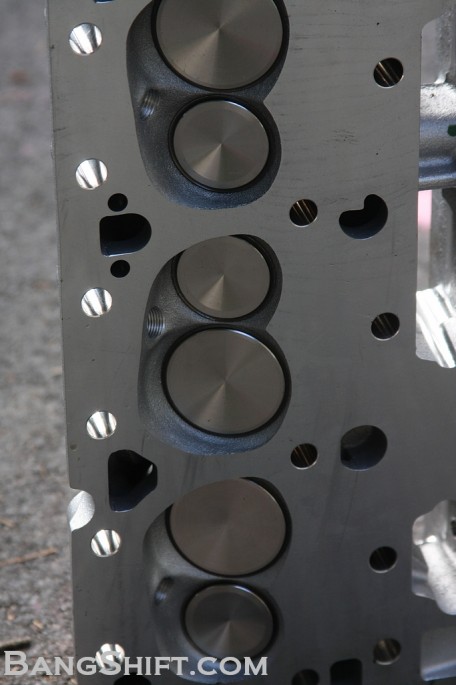
Intake valve size is 1.94″ and exhaust is 1.5″ and the valve angles as you would guess are 23 degrees. The valves are stainless steel and we received these heads fully assembled with the 1.46″ OD dual valve springs with a dampener. We can go up to .600 lift with the springs that are on it right now.

One last up close look at the combustion chamber. Note that these are angle plug heads as well. We had no trouble with spark plug fitment or anything of that nature. We were very happy with the quality of these heads as we looked them over.

The exhaust ports on the heads measure out to 67cc and utilize Trick Flow’s “fast as cast” technology. Port location is stock and obviously from the photo you can see that they are of a D shape.
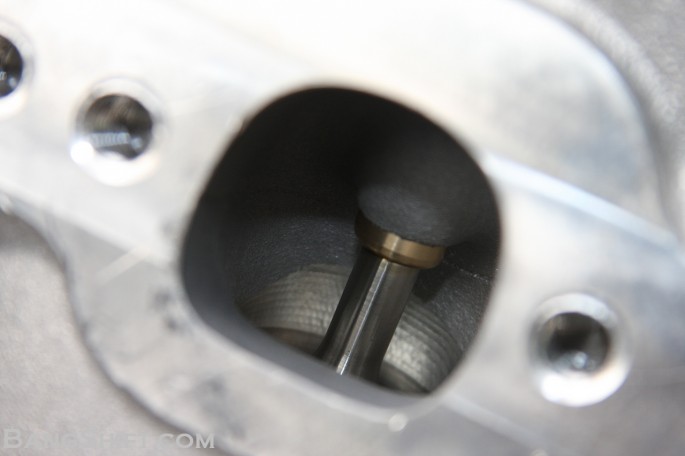
Here’s a look down inside the exhaust port and you can see where the machining operation and valve job was done in there. Present are the bronze alloy valve guides that are standard equipment for Trick Flow pieces.

Here’s a look at the top side of the head. Again, we looked these over very close and were impressed with the quality of the castings, machine work, etc.
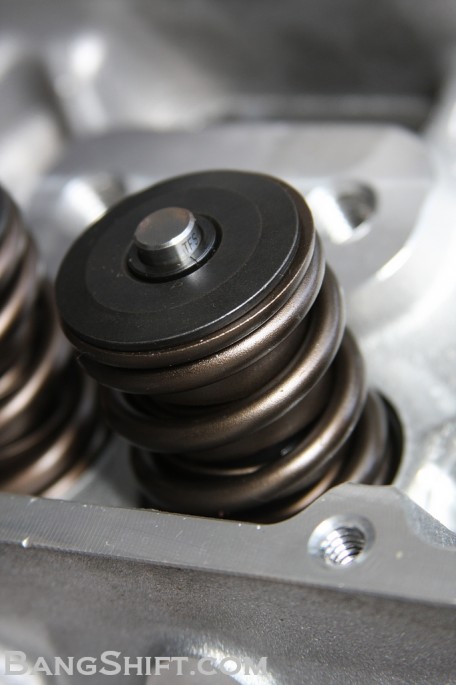
There are multiple spring options a consumer can choose with these heads. From a 1.25″ OD single spring that will support up to .480 lift to the 1.470 single spring that will handle up to .540, to what we have here which is the .146 OD dual spring with dampener that will support up to .600 inch of lift. The open pressure on these springs that we have is 376lbs.

On the intake side, these babies will move up to 245CFM according to Trick Flow at .600 lift. While we know that the CFM number is not the end all, be all, it does provide a reference point most can understand. The intake ports measure 1.23″x 1.99″ and 175cc. These also have the unique “fast as cast” technology as do all Trick Flow heads.

As a point of reference, here is the combustion chamber on the 083 heads we removed from the car. The differences could not be more stark.
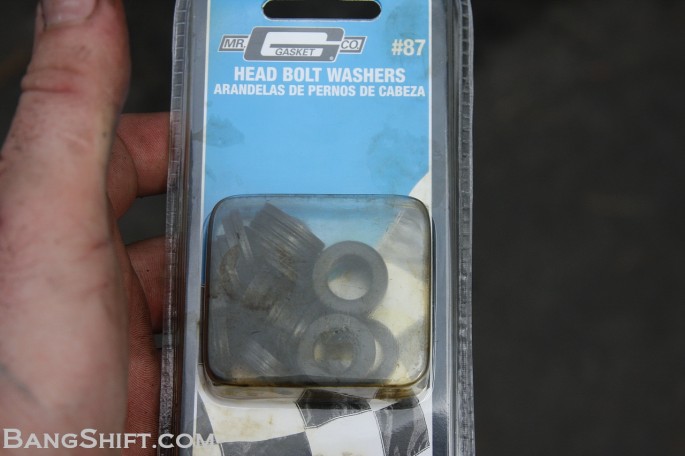
Installing the heads required a couple of additional items not in the Trick Flow boxes, There were the head bolt washers you see pictured here. We scored these off the shelf at the local Advanced Auto Parts. Additionally, we put a new set of head gaskets on the car, which were identical to the ones that came off (Fel-Pro 1094). The .015 thickness rubber coated gaskets that were on the car looked OK but we didn’t want to chance anything with our nice new parts. You’ll also need RTV for the intake and some nice anti-seize for bolts that will be run into the new heads like for your headers and the rocker studs.

Slinging the aluminum heads back on was a far less taxing affair than the iron jobs. Following the recommended torque sequence in the directions we ran the bolts in at the prescribed torque levels. Next we reattached the header.

The push rod guide plates supplied by Trick Flow with the heads are clearly labeled as to which side is UP. If you screw this part of the operation up….bless your soul.

We laid our plates on and then laid the COMP Magnum push rods right back into their respective resting places.

Installing the rocker studs was straight forward. We used some anti-seize on the threads as directed and then finger tightened the studs before attacking them with the torque wrench to the spec’d amount of twisting force!

The other side went on the same exact way. Putting together small block Chevy engines is an almost zen like activity. Hell, this one practically takes itself apart and back together for the numbers of times the insides have seen daylight!

Here’s a close up look at the rocker studs. They’re high quality and as we expected have been holding up fine since they were installed. How high quality are they?

With both heads and headers on, it was time to drop the intake into the picture. To best match the heads we went with Trick Flow’s “Street Burner” intake. This air gap style dual plane is a street/strip piece that best operates in the 1,500-6,500 RPM range where our engine spends all of its time. There is lots of material to remove if you wanted to work the ports, there are bosses ready to be drilled for nitrous nozzles and as expected it fit great.

Because we’re running a Holley carb we had to source a plug for the vacuum port directly behind the carb mounting pad. With a Holley, this ends up under the fuel bowl. It would be totally accessible if you were running an Edelbrock style carb.

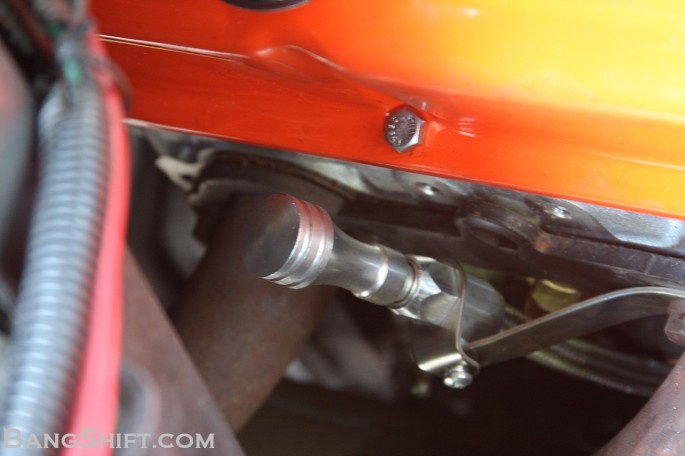
Here’s where the “we suck” part comes into play. While working the stock dip stick back into place we managed to snap it off right at the place where it pinches to mate up with the pad on the block. DOH!

We called the guys at Trans Dapt and had them send a flexible dip stick on over. We were able to get a better looking piece on the motor and one that didn’t interfere with spark plug wires or anything else. This is a quality piece that we’d recommend to anyone in the market for a flexible dipstick.
- It looks mighty fine tucked in there.
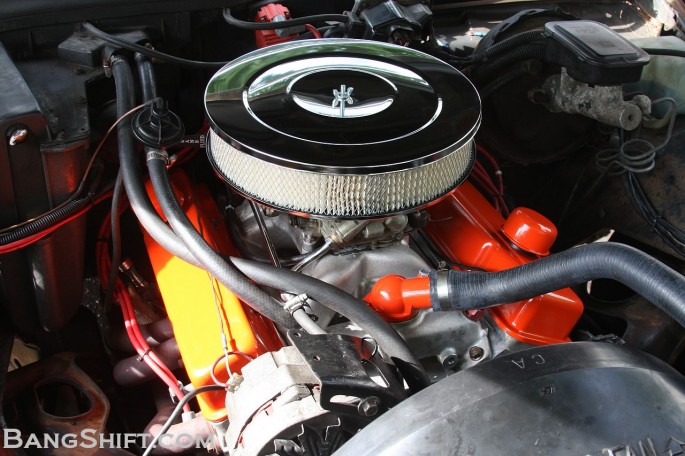
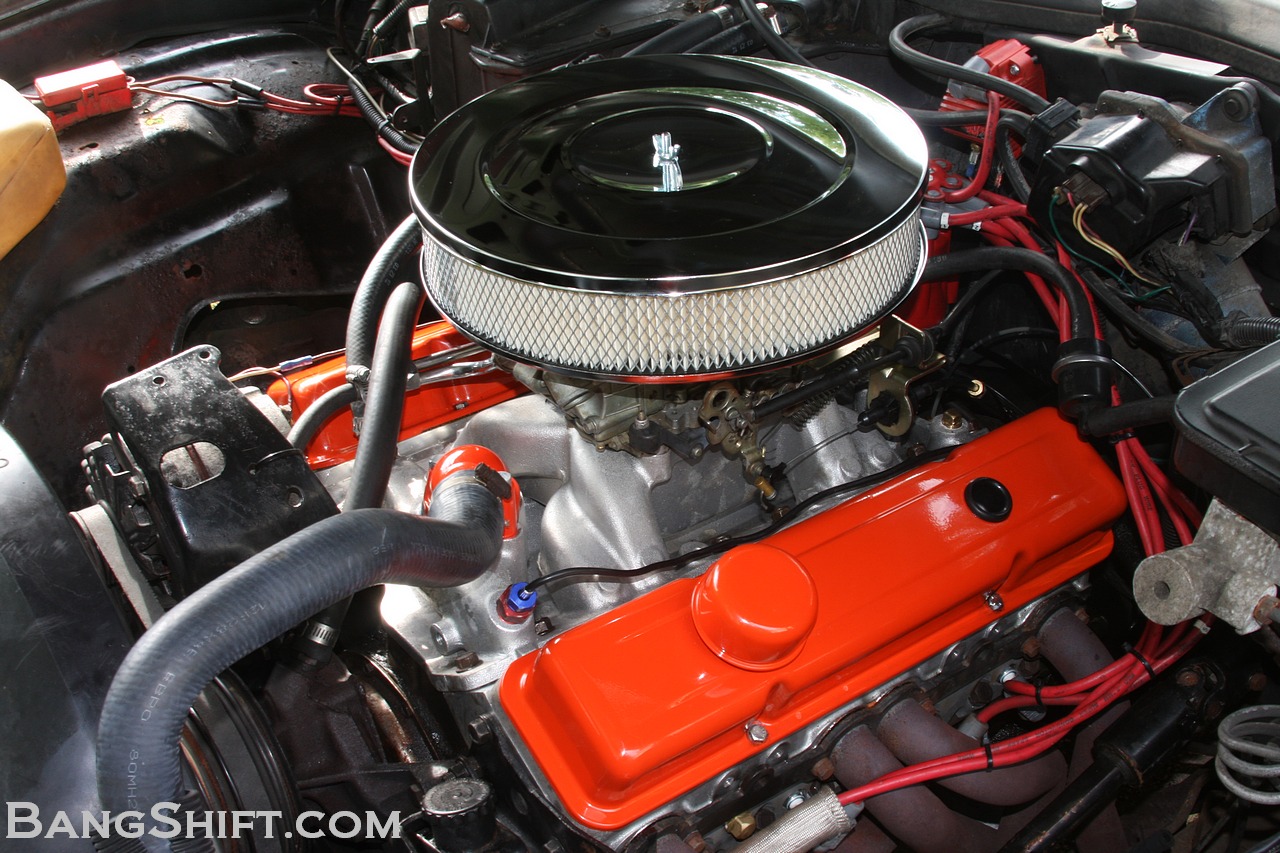
With the hard parts installed, the valve lash adjusted, and everything as pre-oiled as we could get, it was time to reassemble the rest of the engine and the accessories. Not wanted to keep things drab and sad sack looking, we perused the Trans Dapt catalog and looked at their powder coated “perfect match” dress up parts. We’re suckers for Chevy orange and think it looks especially good set against aluminum so we went for Chevy orange breathers, water neck, and valve covers. The beauty of the powder coated stuff is that it won’t chip and fade like paint, it is vibrant, and you don’t have to worry about your rattle can skills making one thing look different than the other.

The new air cleaner is also a Trans Dapt unit and it looks great atop the fresh new motor. As we said earlier, there is something we have always loved about a beater looking car with a beaming clean and nice engine. Admittedly we need to swap the inner fenders out and do some more cleaning, but we have additional engine bay work coming. Stay tuned.

All said and done, the cylinder head swap DRASTICALLY improved the power of the car in the low and mid-range. We honestly have not had the room to really wind it up but we can tell that it pulls harder through all points in the power band thus far. The car feels as though it picked up a ton of torque from around 2,000 RPM up. We have driven the car about 100 miles since bolting the heads on and we’re excited to get it back to the strip. We know that we’re going to destroy the current best ET. The big question is whether or not this large barge will go 13s without a gear swap yet. We know that the 3.08s have to go and they will soon enough…but not before we get back to the strip and report the results of this new combo.
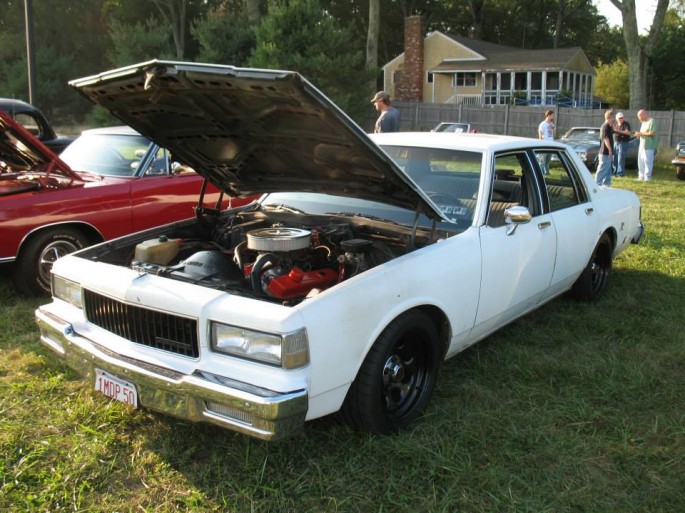
(Rory Noumi photo) — So here’s the car at a cruise night last weekend. People were giving it a lot of looks and then smiling when they saw the engine. It sounds pretty gnarly with the cam and some more compression now. It’ll be a couple weeks until the next update runs. The plan is to get back to New England Dragway and run on our 14.66 pass to see how much we can beat it by. We’re happy to report that both the Trick Flow heads and the Trans Dapt engine pieces have exceeded our expectations. Life is good and we’re burning tires again! Stay tuned…this is just starting to get interesting.
- Introducing Project Buford T Justice – Our 1987 9C1 Chevy Caprice – The Adventure Begins!
- Project Buford T Justice: Our Cop Car Cruises Home and Then We Beat on It!
- Driveway Tech: Bodywork on Buford T Justice – We Close Our Roof Hole For Fun and (NO) Profit!
- Project Buford T Justice Hits the Strip with Some Pretty Shocking Results!
- Project Buford T Justice Hits the Dyno and Goes KABLOOEY! CARNAGE VIDEO INSIDE!
- Project Buford T Justice Will Be Saved For About A 100 Bucks With a 15 Year Old Transmission
- Project Buford T Justice Update: The Trans Thrash is ON!
- Buford T Justice Update: It Lives Again Thanks to a Down and Dirty Driveway Thrash and Junkyard Parts
- Buford T Justice, Our 1987 9C1 Chevy Caprice Goes Through Final Testing Before the Upgrades Begin!
- Buford T Justice 9C1 Update: The Parts From Hotchkis, Cragar, AFCO, and Mickey Thompson
- Update: Hotchkis Suspension & AFCO Bushings Transform Our 9C1 Caprice
- Buford Update: Our 9C1 Caprice Gets Real With Mickey Thompson Tires and Cragar Wheels
- Driveway Tech: How To Swap A Jeep Steering Shaft Into Your GM B-Body or G-Body Car With A Trashed Rag Joint
- Buford Update: We Flog The Suspension, Unveil a Mountain of Speed Parts, Spill Our Wild Drag Strip Plan
- Project Buford T Justice Update: Drag Strip Thrash Squashed By Ma Nature – We Learn Stuff – Plan B!
- Project Buford T Justice Quick Update: Where The Hell Has Our 9C1 Caprice Been?!
- Project Buford T Justice: We Go On Hot Pursuit Of Horsepower-Our 9C1 Caprice’s 350 Gets A Slap!
- Buford T Justice 9C1 Caprice Update: Metal Fab,Head Work, A Good Surprise, An Awful One
- Buford T Justice Update: Headers, Cheap LS Technology, New Valvetrain Parts, More Compression, Fun!
- Buford T Justice Update: A TCI 700R4 And Breakaway Torque Converter Get Our 9C1 Caprice Shifty!
- Buford T Justice Update: A Very Frustrating Day On The Dyno And How We’re Planning To Fix It
- Project Buford T Justice Update: Where Has Our 9C1 Caprice Been Hiding?
- Buford T Justice Update: We Install A First Gen Chevelle Flowmaster Kit On Our 9C1 Caprice!
- Project Buford T Justice: Our Caprice 9C1 Gets The Shaft! A Dynotech Drive Shaft That Is!
- Project Buford T Justice Our 1987 9C1 Caprice Hits The SCCA Autocross – Photos And Video!
- Project Buford T Justice Update: We Finally Give Our 1987 9C1 Caprice A Cheapo Nose Job!
- Project Buford T Justice Update: We Hit The Strip Again With More Power! (W/Video)
- Buford T Justice Update: We Bolt On Power From Trick Flow And Snappy Looks From Trans Dapt!
- Project Buford T Justice Update: Where The Heck It’s Been And Where The Hell It is Going –
- Place Your Bets For A BangShift Shirt! Buford T Justice Is Hitting The Dyno With This Engine One Last Time – Guess The Power And Win
- Project Buford T Justice: The Long Arm Of The Law Gets Longer With A Stroker Build – 388ci Of Budget Fun






AWESOME!! Great to hear it works!! NOW that cam is happier!! Can’t wait to see what it does on the strip! Although…traction may be interesting?
Once you get the gears swapped, you could call this thing DONE and just have fun! (But we know you won’t and we love you for it!!)
Sure wish the state of Kalifornia would allow me to do this sort of thing with my 88 wagon.
I think my OHC L6 has bigger valves than the Trickflow heads =P Stink’in Chevy, lol.
Thanks for the chamber shots comparing the two heads for us non-Chevy folk.
Looks like it is almost ready to be in high speed pusuit for over 700 miles ! after that maniac in the black trans am !
Your going to need that lower gear to see some improvement with the engine mods. Wind 1st and 2nd as far as it will go. A lower gear will get the 60′ down a bunch. Good luck.
can’t wait to hear how it does!
Great writeup!! Can’t wait to see the results of this. Love the way that engine looks in there.
is it o.k. to run self-aligning rockers with guideplates? i thought that was a no-no?
its good to see the project progressing.
Looks like they changed out the rockers to non self aligning ones.
Or maybe not…..
Are you getting rid of the old heads? I know a caprice that needs them!
Trans is good, engine has more suds…I predict the infamous c clip axle slide out will come next. If it was me, I’d go c clip eliminators next, and a mini spool, driveshaft loops and slicks.
Great article on the new heads.
Liking the all new stuff on top of the motor…….new valve covers look
awesome.
I’m lovin the build man! I’m a member of the above listed site (BBody.com). I have a few of my projects on there, one just happens to be a 87 Caprice similar to yours but it’s mainly stock. I love these cars they ride so well and simple to work on. Please check the site out, it needs more new members. I also live on the eastern side, just a bit south of you in Tennessee. Hope you have a great time with the build. I’ll keep checking your progress as time goes on. I would like to insall a 454 BBC or a 6.0 LS swap in mine eventually,too many projects in my yard and no garage I feel your pain.
Throw a 125 shot on it and raise your shift points Brian. We need to see that boat in the mid twelves or better.
Absolutely love reading this progress blog. Can’t wait for more updates. Wish we had cheap V8 Barges in the UK!
that’s it. i’m buying a caprice. you know, after i pay some of my truck off, and build the bike, and get back into a place with a driveway/garage/carport.
I did this car back in the mid 90’s with, 345HP ZZ crate motor, 4.10 gearing ( gives you 3.08 overall in OD) BM shift kit in a 140K Cop car trans and a 2000 stall factory converter. Was a fun car and surprised a ton of people, ran 14 flat quarters at 100 and would pull 6500 in overdrive approx 145 mph (calculated) still one of my favorites.